Lowel Fren-L 650TM Instructions
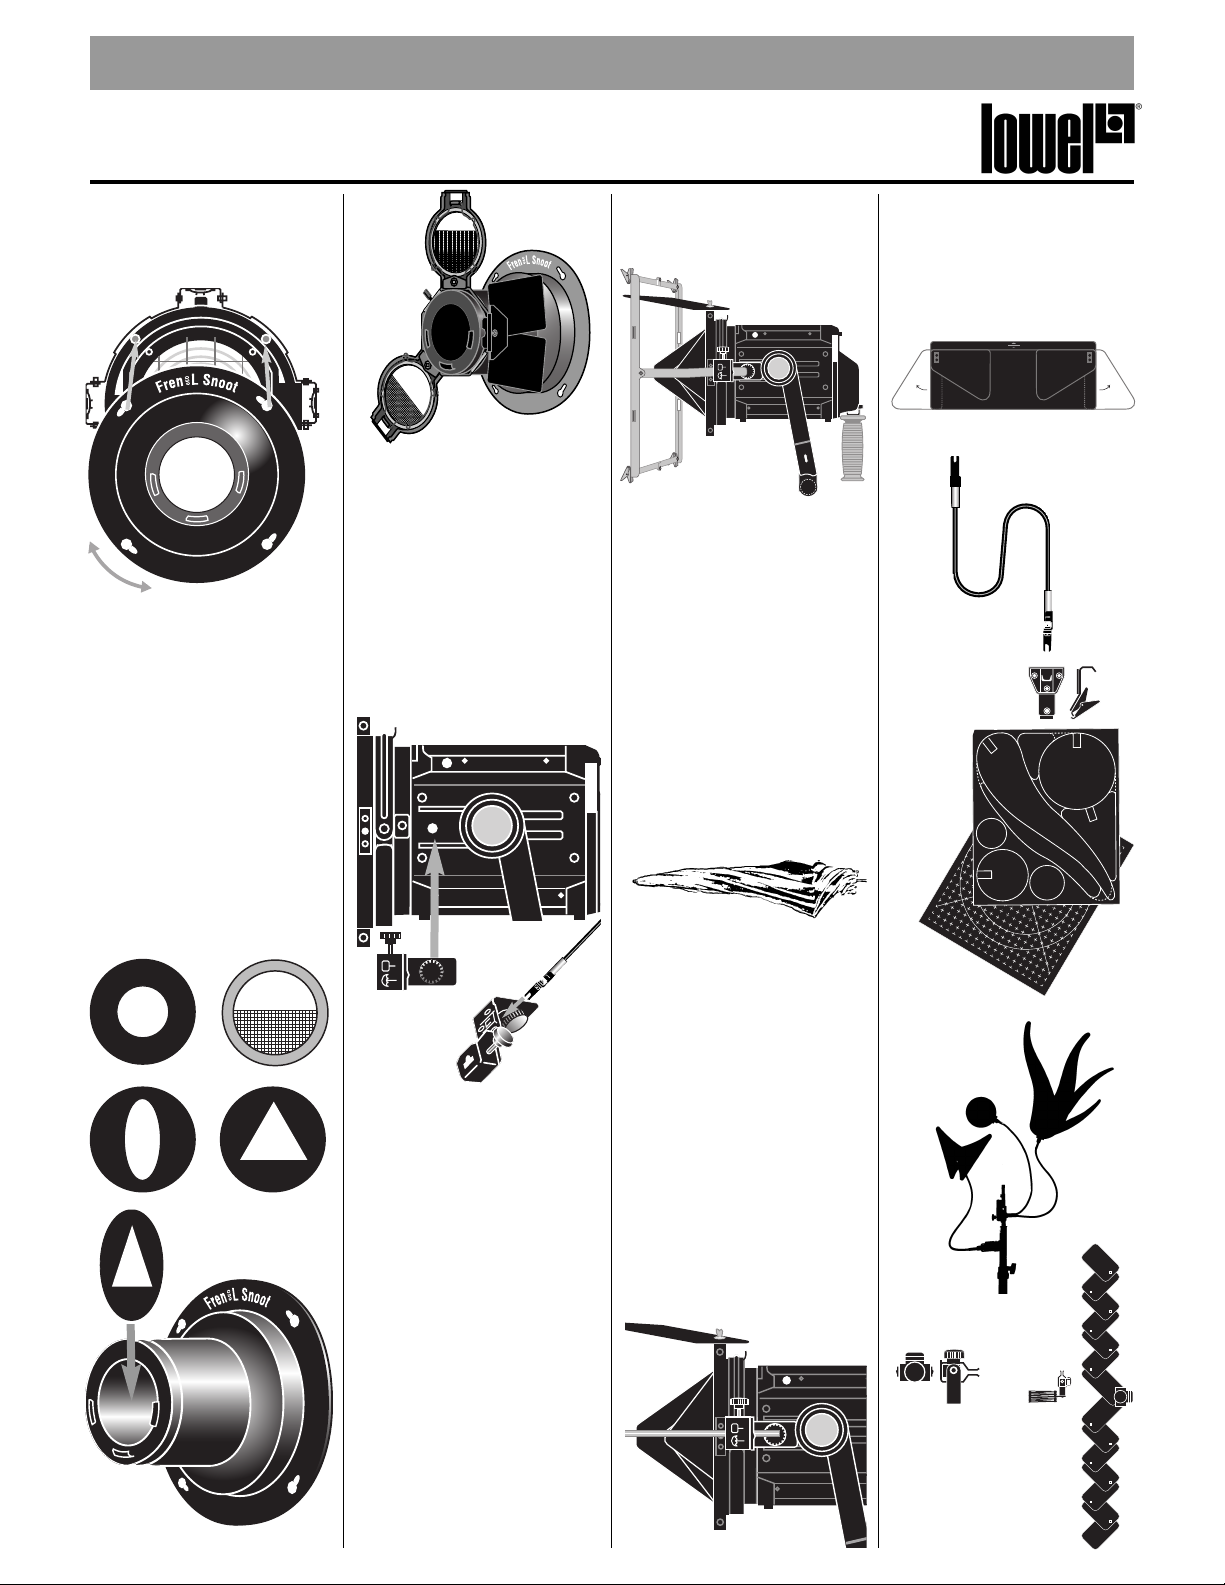
Snoot & Cut-outs
To attach snoot:
Orient the up arrow
straight up; slip the keyholes over all 4
Barndoor Frame pins and turn clockwise.
Warning:
Do not touch the snoot with
bare hands until it has cooled.
Cut-out shapes:
Accessory Cut-outs
slip into the front of the snoot and cast
soft edged, geometric patterns (not sharp
optical projections) on the background or
subject. The Snoot also accepts a Pro
& i Scrim. The Half and Graduated Scrims
can be rotated.
For sharpest shadow edges:
Set the
focus on full flood and place the Fren-L
close to the surface being illuminated.
For softer edged shadows and larg-
er pattern:
Move the fixture farther away.
Pro & i-light System
Snoot Barndoors, Dichroic Filter,
Diffuser, Scrims
The Lowel Pro and i-light Barndoor Frame
can be attached to the Snoot groove and
rotated. One or more doors can be clipped
onto the Frame to modify the beam shape.
A Pro and i-light Swing-in Accessory
Holder can be mounted on the Frame, and
a Diffused Glass, Dichroic Filter or Scrim
can be inserted. Gel-Jawz added to the
edges of the door will hold Gels .
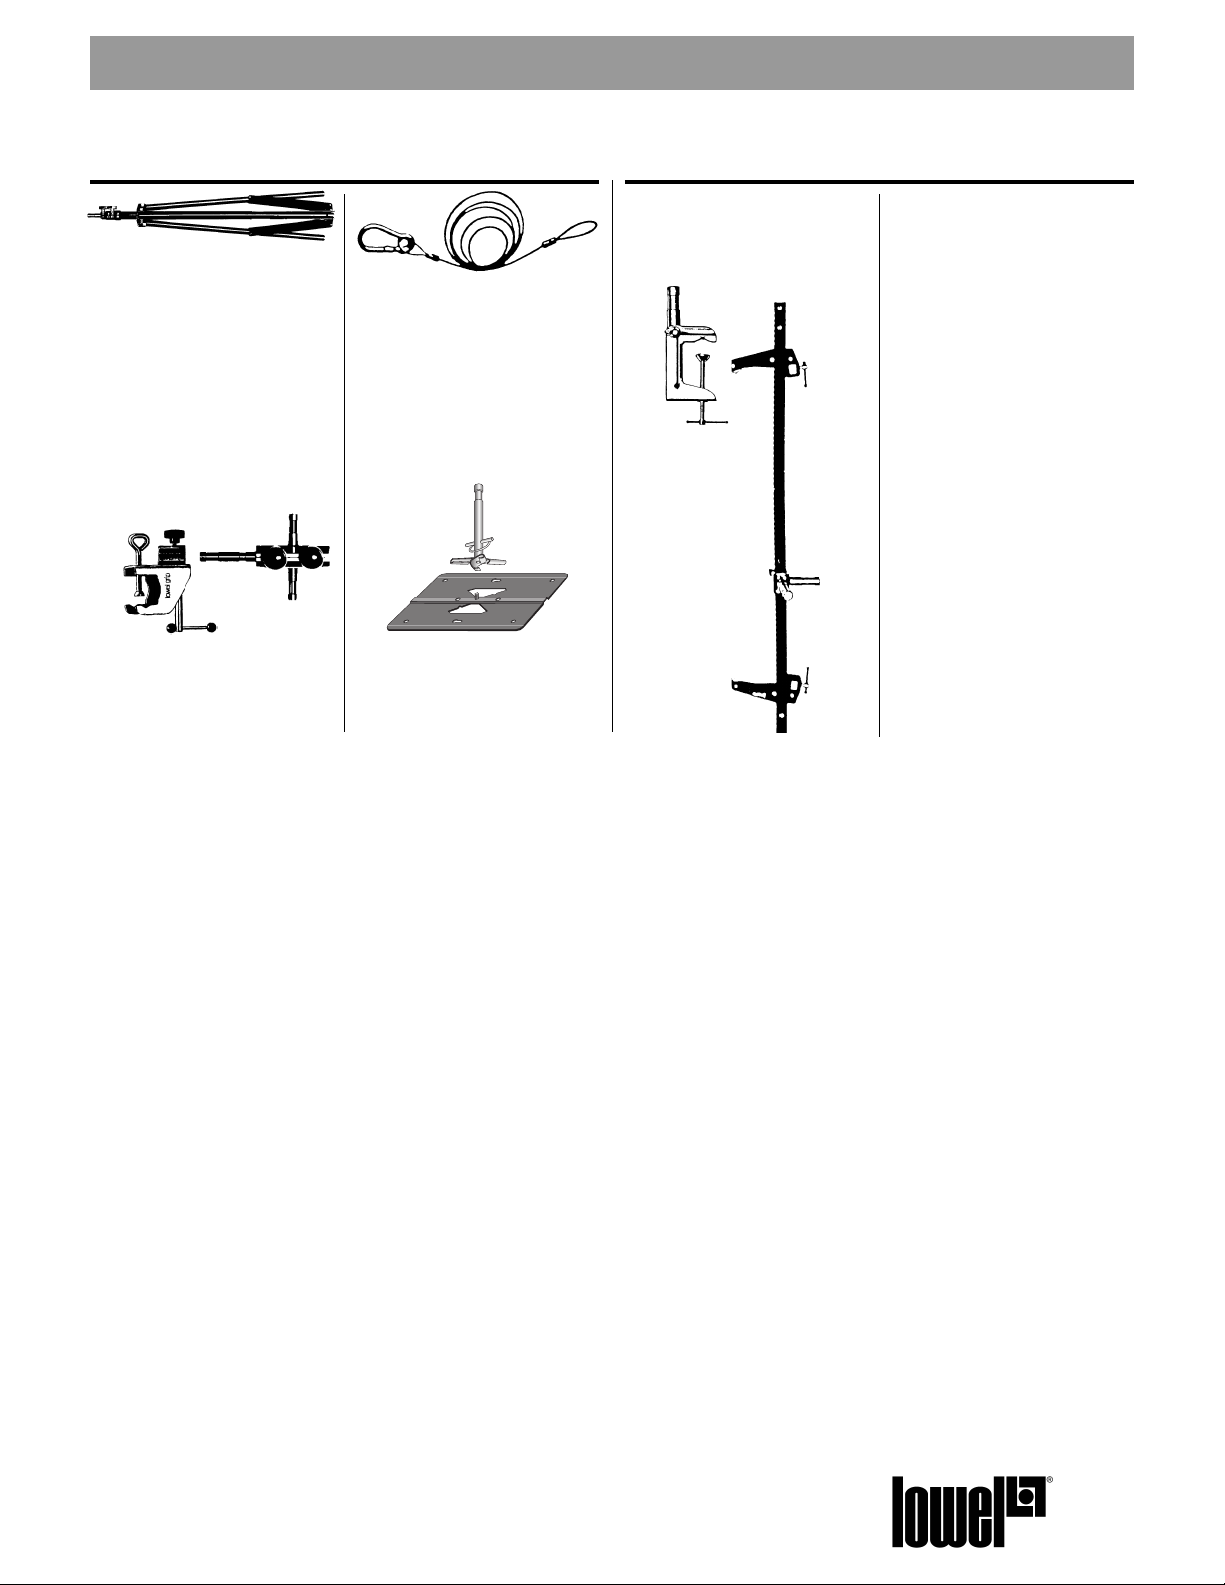
Gel-brella
Bracket
The Fren-L Gel-brella Bracket
accessory
enables you to attach a Gel-frame or an
Umbrella and one Flexi-shaft. Slide the
bracket into the slot in the Yoke pivot ring
until it stops, then screw the spring-loaded
knob in with fingers, a coin or screwdriver.
Gel, Dichroic, Diffusion
Choices
Daylight correction, diffusion and color
exaggeration or distortion can be achieved
with appropriate gel material attached in
various ways: A) mounted on a Lowel Tota
Gel Frame; B) attached to the extended
Barndoor Panels with Lowel Gel-jawz;
or a similar device. Daylight correction,
Dichroic and Diffusion Glass Filters from
the Lowel DP System can be used with the
DP Barndoor Frame (see above) and simi-
lar accessories from the Lowel Pro and i-
light System can be used with the
Barndoors from those Systems when
attached to the Fren-L Snoot.
Gel Frame (to hold Gels)
(From Tota/Omni-Light System)
Open the Gel-Frame and swing out the
mounting bar which is then locked into
the Gel-Brella Bracket (above). Pivot the 4
corner clips in and use them to attach a
single 10x12” gel. The Barndoor Panels
can be set to avoid spill. Some deep color
gels, especially blue ones, may fade in
time (they’ll fade faster if the light is often
operated in near-spot setting). Also see
Gel-Jawz (earlier) for alternate method.
DP Barndoor flaps can also be
used, however gel frame can not
be used at the same time.
Umbrellas
(From Tota & DP-Light Systems)
The Gel-brella Bracket (above) will sup-
port either the Tota-brella or the larger
DP-brella; both are available in Standard
Silver and Special White. The larger the
reflecting surface, the softer the reflected
light (with some loss of intensity).
Caution:
Use a stand with a sufficiently
wide base or a weight; centering the
Brella over a stand leg also increases sta-
bility.
Tips:
Removing the four Barndoor
Panels will result in more reflected light
reaching the subject. Open faced
units, such as the Tota or DP-
lights, are more efficient in such
umbrella/bounce situations.
Fin-S (with Piv-it)
Lowel’s Fin-S and Piv-it can be attached
to the front edge of a Barndoor Panel to
increase the effectiveness of subject or
background shadowing and camera lens
flare control.
Light Control Accessories