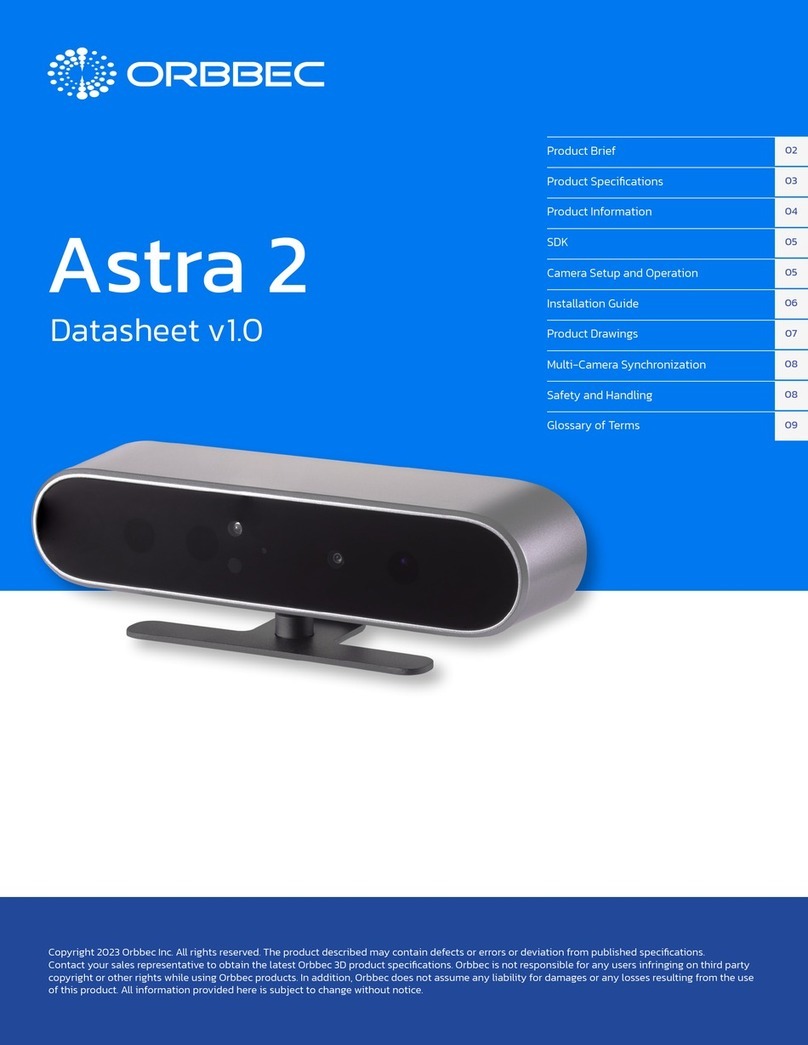
Lucid Helios Flex User manual

Helios Flex Technical Manual
V1.0.2
Revised on February 17, 2020

LUCID Helios Flex Camera Technical Manual 2
Contents
Product Specification .................................................................................................................................... 4
Welcome ....................................................................................................................................................... 6
Safety and Precautions ................................................................................................................................. 6
Definitions and Symbols ........................................................................................................................... 6
General Safety Notices.............................................................................................................................. 6
Laser Radiation.......................................................................................................................................... 7
Service and Maintenance.............................................................................................................................. 9
Service....................................................................................................................................................... 9
Maintenance ............................................................................................................................................. 9
Contact Us..................................................................................................................................................... 9
Contact Sales............................................................................................................................................. 9
Contact Support ........................................................................................................................................ 9
Installing the Camera Hardware .................................................................................................................10
Mounting.................................................................................................................................................10
FFC Cable................................................................................................................................................. 10
JST Power Cable ......................................................................................................................................11
Lens ......................................................................................................................................................... 11
Helios Flex Camera Adapter Board ......................................................................................................... 11
Configuring the Jetson TX2 .........................................................................................................................12
Flashing the custom LUCID Linux4Tegra Image...................................................................................... 12
Install CUDA on the Jetson TX2............................................................................................................... 14
Install OpenCV on the Jetson TX2 ...........................................................................................................16
Setting up FlexView.....................................................................................................................................17
Initial Setup ............................................................................................................................................. 17
Running FlexView....................................................................................................................................18
FlexView Window Controls..................................................................................................................... 19
Helios Flex Information........................................................................................................................... 19
Helios Flex Settings ................................................................................................................................. 20
Using Arena Flex SDK ..............................................................................................................................20
Camera Features......................................................................................................................................... 21

Image Processing Controls...................................................................................................................... 21

LUCID Helios Flex Camera Technical Manual 3
Operating Mode..................................................................................................................................21
Exposure Time..................................................................................................................................... 22
Gain .....................................................................................................................................................22
Image Accumulation ...........................................................................................................................23
Confidence Threshold .........................................................................................................................23
Pixel Formats...........................................................................................................................................24
Range Data.......................................................................................................................................... 24
Amplitude Image (Intensity Image) ....................................................................................................25
Confidence Data.................................................................................................................................. 25
Time of Flight Invalidation ......................................................................................................................26
Multipath ............................................................................................................................................ 26
High Reflectivity ..................................................................................................................................26
Low Reflectivity................................................................................................................................... 26
Aliasing/Ambiguity..............................................................................................................................26
Veiling Glare........................................................................................................................................26
Camera Specifications................................................................................................................................. 27
Power ......................................................................................................................................................27
Temperature ...........................................................................................................................................27
Revision History .......................................................................................................................................... 28

LUCID Helios Flex Camera Technical Manual 4
Product Specification
Basic Information
Model
HLF003S-001
Resolution
0.3MP (640 x 480 px)
Framerate
30fps
Sensor
Sony DepthSense™ IMX556PLR CMOS
Optical Format
½”
Pixel Size
10um
Physical, Interface and Power Information
Interface
4-Lane MIPI D-PHY CSI-2 (FFC)
Dimension
55 x 55 x 43.7 mm
Lens Mount
Integrated S-mount lens (not user changeable)
Weight
107 g
Power Consumption
<15W
Imaging Properties
Working Range
Near Mode: up to 1.5m; Far Mode: up to 6m
Lens Field of View
59⁰x 45⁰(nominal)
Illumination
4 x VCSEL laser diodes @ 850nm
Camera Features
Exposure Control
Manual with 2 modes
Output Formats
3D Point Cloud, Intensity and Confidence
Platform Support
NVIDIA Jetson TX2

LUCID Helios Flex Camera Technical Manual 5
Standard and Certification
Compliance
RoHS, REACH, WEEE, Eye Safety IEC 60825-1:2014
Operating Case Temperature
-10⁰C to 60⁰C (case temperature)
Accuracy & Precision
Accuracy
+/- 5mm over range 0.3-1.5m (1.5m mode)
+/- 10mm over range 0.3-6.0m (6m mode)
Precision
Distance (m)
1.5m Mode (mm)
6m Mode (mm)
0.5
0.69
0.53
1
1.6
1.25
1.5
3.11
2.24
2
-
3.17
3
-
6.81
4
-
10.8
5
-
16.8
6
-
25.4

LUCID Helios Flex Camera Technical Manual 6
Welcome
HLF003S is a Time of Flight camera module featuring Sony’s DepthSense ToF sensor, along with 4 VCSEL
laser diodes operating at 850nm. The camera module along with the Jetson TX2 platform is capable of
computing depth data by measuring the time it takes for light emitted from the diodes to reflect off
objects in the scene and return to the sensor for each point of the image. HLF003S along with the Jetson
TX2 platform can produce 3D point cloud data, confidence value as well as raw intensity image data.
Safety and Precautions
Follow these guidelines carefully before using your Helios Flex camera.
Definitions and Symbols
Below is some warning, safety, and/or tips icons used in this document.
The Warning icon indicates a potentially hazardous situation. If not avoided, the
situation can result in damage to the product.
The ESD icon indicates a situation involving electrostatic discharge. If not avoided, the
situation can result in damage to the product.
This symbol is used in this manual to indicate a procedure that may cause hazardous
exposure to laser radiation.
The Help icon indicates important instructions and steps to follow.
The Light Bulb icon indicates useful hints for understanding the operation of the
camera.
The Computer icon represents useful resources found outside of this documentation.
General Safety Notices
Powering the Camera
The camera may not work, may be damaged, or may exhibit unintended behavior if
powered outside of the specified power range.
The supplied power must be within the stated voltage range.
See the Power section for further information.
Operating Temperature
The camera may not work, may be damaged, or may exhibit unintended behavior if
operated outside of the specified temperature range.
See the Temperature section for further information.

LUCID Helios Flex Camera Technical Manual 7
•Caution, use of controls or adjustments or performance of procedures other
than those specified herein may result in hazardous radiation exposure.
•Do not open the Helios camera housing.
•Do not contact the laser apertures with any objects. Damage to the laser
modules could produce hazardous radiation levels.
Electrostatic Discharge
Ensure proper precautions are implemented to prevent damage from an electrostatic
discharge.
Image Quality
Dust or fingerprints on the sensor may result in a loss of image quality.
Work in a clean and dust-free environment.
Use only compressed ionized air or an optics cleaner to clean the surface of the sensor
window. Pleaser refer to the Maintenance section for details.
Laser Radiation
The Helios Flex camera emits infrared radiation that is invisible to the human eye. Helios has been
tested to IEC / EN 60825-1: 2014 and classified as Class 1 (eye safe). The location and a sample of the
laser safety classification label are shown in Figure 1. The location and a sample of the product label are
shown in Figure 2.
Emission is produced by 4 VCSEL (Lasers) with integrated diffusers that illuminate the field of view. The
laser apertures are shown in Figure 3.
The diffusers are integral to the eye safety classification and must not be damaged or
removed. The emission characteristics are as follows:
•Wavelength: 850 nm +/- 10 nm
•Divergence (FWHM): 60°×45°
•Maximum average power: 2.2 mW (through IEC / EN 60825-1: 2014 limiting
aperture)
Figure 1. Location and Sample of Laser Safety Classification Label

LUCID Helios Flex Camera Technical Manual 8
Figure 2. Location and Sample of Product Label
Figure 3 Locations of 4 Laser Apertures

LUCID Helios Flex Camera Technical Manual 9
Service and Maintenance
Service
Helios is a precision optical instrument and contains no user serviceable parts.
If the unit sustains any damage or ceases to function as expected please contact Lucid
Vision Labs, Inc. to begin the RMA process.
Maintenance
Ensure the Helios Flex is unpowered during inspection and cleaning.
The laser apertures should be kept clear and clean.
The laser apertures should only be cleaned with a gentle dust blower such as a hand-
squeeze type lens blower. Do not contact the laser apertures during cleaning or any
other process. Do not use solvents to clean the laser apertures. If a laser aperture
becomes contaminated, e.g., splattered with paint, oils or other hard to remove
sources, contact LUCID Vision Labs, Inc. to begin the RMA process.
To achieve the specified accuracy of the Helios, the lens (see Figure 3) must be kept clean. Avoid
touching the lens – fingerprints will significantly degrade performance. Dust should be blown off with a
gentle clean air source (do not use aerosol cans) and or lens brush if necessary. Any smudges on the
glass should subsequently be removed by applying a very small amount of optical grade lens cleaning
solution or isopropanol to an optical grade swab and gently removed.
Contact Us
Think LUCID. Go LUCID.
Contact Sales
https://www.thinklucid.com/contact-us/
Contact Support
https://thinklucid.com/support/

LUCID Helios Flex Camera Technical Manual 10
Installing the Camera Hardware
Camera Installation
•Systems must be installed and operated by trained personnel.
•
Safety warnings and procedures specified in this user manual must be observed.
Mounting
The camera is equipped with four pairs of M4 mounting holes. Each of the 4 side walls of Helios Flex is
equipped with a pair of M4 holes.
FFC Cable
•The Helios Flex camera interfaces with the Jetson TX2 board via the 4-Lane MIPI D-PHY CSI-2
interface via an FFC cable
•The manufacturer part number of the FFC cable that is included in the Helios Flex kit is 15021-
1233.
When using the included FFC cable, make sure the blue side is facing toward the locking
tab. Engage the FFC connector’s locking tab to its horizontal position to lock it.

LUCID Helios Flex Camera Technical Manual 11
JST Power Cable
The Helios Flex camera is powered via the interface PCB through a 4 pin JST cable
•The manufacturer part number of the JST connector used is PAP-04V-S.
•The manufacturer part number of the 4 wires are JST APAPA22K305.
Lens
The M12 integrated lens is designed specifically for the Helios camera. The lens is 6mm in focal length
and has a nominal field of view of 59° x 45° (nominal).
To get the best performance, the lens needs to be perfectly clean. The slightest smudge
or fingerprint on the glass vastly more inaccurate depth data.
Helios Flex Camera Adapter Board
The Helios Flex adapter board must be installed to the Jetson TX2 development board’s Camera
Expansion Connector.

LUCID Helios Flex Camera Technical Manual 12
Configuring the Jetson TX2
Flashing the custom LUCID Linux4Tegra Image
This method will install a new Linux4Tegra image on your TX2 board with LUCID’s custom kernel.
Note
All data existing data on your TX2 will be lost in this flashing process. Back up any important
items before proceeding.
Requirements
•Ubuntu Linux x64 18.04 host PC with at least 40GB of free space
•USB Micro-B to Female USB A cable
•Jetson TX2 carrier board (revisions B02, B04, or C02)
The following steps are performed from the Ubuntu Linux x64 16.04 or 18.04 host PC.
1. Untar the custom LUCID Linux4Tegra tarball
sudo tar -xvpf L4T_R32_2_LUCID.tar.gz -C ~
The above command will untar the LUCID Linux4Tegra tarball to your home directory.

LUCID Helios Flex Camera Technical Manual 13
2. Flash the Jetson TX2 board
To flash the TX2 board, you will need to connect the board to the host PC using the USB Micro-B
port to Female USB A cable.
Once the TX2 board is connected to the host PC, put the board into recovery mode. From power
off state:
•Hold the Recovery button
•Press the Power button
•Release the Recovery button after 3 seconds
To confirm your TX2 is in recovery mode, you can use the lsusb command on your host PC and
find your board in the output, for example:
Bus 001 Device 008: ID 0955:7c18 NVidia Corp.

LUCID Helios Flex Camera Technical Manual 14
After confirming your board is in recovery mode, go to your host PC’s Linux_for_Tegra
folder.
cd ~/Linux_for_Tegra
In this directory, there is a script named flash.sh which will be used to flash the board:
sudo ./flash.sh jetson-tx2 mmcblk0p1
It will take a few minutes to flash the board. When the board is finished flashing, you should see
output similar to the following to the following to indicate a successful flash.
[ 235.4658 ] Flashing completed
[ 235.4660 ] Coldbooting the device
[ 235.4685 ] tegradevflash_v2 --reboot coldboot
[ 235.4706 ] Bootloader version 01.00.0000
[ 235.4776 ]
*** The target t186ref has been flashed successfully. ***
Reset the board to boot from internal eMMC.
Please reboot the TX2 and follow your TX2’s on-screen setup to configure your new Ubuntu
setup on your TX2.
Install CUDA on the Jetson TX2
Note
These steps assume the TX2 has a valid network address.
Please go to https://developer.nvidia.com/nvidia-sdk-manager and install the NVIDIA SDK Manager tool
on your Ubuntu host PC. You will need NVIDIA Developer Account to use this tool to install the Vision
Tools package.
Install the NVIDIA SDK Manager with a command similar to the following:
sudo dpkg -i sdkmanager_1.0.0-5517_amd64.deb
where 1.0.0-5517_amd64 is the version of NVIDIA SDK Manager to be installed
Once the NVIDIA SDK Manager tool is installed, you can launch it with the terminal command:
sdkmanager
Fill in your NVIDIA Developer Account credentials to log in.

LUCID Helios Flex Camera Technical Manual 15
In Step 01 of the NVIDIA SDK Manager, choose the following:
•Target Hardware: Jetson TX2
•Target Operating System: JetPack 4.2.2 (rev 1)
In Step 02 of the NVIDIA SDK Manager, we will select only the Jetson SDK Components. It is important to
uncheck Jetson OS option because we do not want to replace the custom LUCID kernel that was just
flashed to your Jetson TX2 board.
Click Continue to begin downloading the Jetson SDK Components. You will be asked for your sudo
password. After the package has been downloaded, you will be asked to input your Jetson TX2’s IP
address and credentials to install the components onto the Jetson TX2.
Note
You can find out your Jetson TX2’s IP address with the ifconfig command

LUCID Helios Flex Camera Technical Manual 16
Install OpenCV on the Jetson TX2
LUCID’s ArenaFlex software uses a custom version of OpenCV, so we will need to purge the pre-installed
OpenCV installation from your Jetson TX2.
On your Jetson TX2, run sudo apt-get update first to make sure your board has the latest
repositories cached.
Remove the existing OpenCV version from your Jetson TX2 with the following command:
sudo apt-get purge libopencv*
Download LUCID’s OpenCV deb files:
•OpenCV-3.4.1-9-gec0bb66e5e-dirty-aarch64-libs.deb
Required runtime libraries, used by ArenaFlex
•OpenCV-3.4.1-9-gec0bb66e5e-dirty-aarch64-dev.deb
Optional development files, if you need to link your own software against this library
•OpenCV-3.4.1-9-gec0bb66e5e-dirty-aarch64-python.deb
Optional Python bindings, if you need to use OpenCV with Python
Install LUCID’s OpenCV deb files:
sudo dpkg -i OpenCV-3.4.1-9-gec0bb66e5e-dirty-aarch64-libs.deb
sudo dpkg -i OpenCV-3.4.1-9-gec0bb66e5e-dirty-aarch64-dev.deb
sudo dpkg -i OpenCV-3.4.1-9-gec0bb66e5e-dirty-aarch64-python.deb

LUCID Helios Flex Camera Technical Manual 17
Setting up FlexView
Initial Setup
The following steps will set up FlexView, the viewer software used by the Helios Flex, on your Jetson
TX2.
1. On your Jetson TX2, install the dependencies used by FlexView:
sudo apt-get install libglfw3 libglew2.0
2. Untar the ArenaFlex tarball:
tar -xvpf ArenaFlexSDK_v0.1.0_Tx2.tar.gz -C ~
The above command will untar the ArenaFlex tarball to your home directory.
The following commands will enable you to use your Helios Flex via I2C without using sudo.
1. Create new user group called i2c:
sudo groupadd i2c
2. Change the group ownership of /dev/i2c-2 to i2c:
sudo chown :i2c /dev/i2c-2
3. Change the file permissions of the device /dev/i2c-2 so users of the i2c group can read and
write to the device
sudo chmod g+rw /dev/i2c-2
4. Add your username to the group i2c
sudo usermod -aG i2c <username>

LUCID Helios Flex Camera Technical Manual 18
5. Change to root user
sudo -i
6. Set udev rules to apply the settings to the i2c busses on boot
echo 'KERNEL=="i2c-[0-9]*", GROUP="i2c"' >> \
/etc/udev/rules.d/10-local_i2c_group.rules
7. Reboot your tx2
sudo reboot
Running FlexView
1. Navigate to your ArenaFlex SDK folder
cd ~/ArenaFlexSDK_Tx2
Note
These instructions assume ArenaFlex SDK is installed into the home directory.
2. Add the following to ~/.bashrc to ensure ArenaFlex can find the ArenaFlex libraries and run
the functions in ~/.bashrc to apply the changes for the current terminal session
export LD_LIBRARY_PATH=~/ArenaFlexSDK_Tx2/lib:$LD_LIBRARY_PATH
source ~/.bashrc
3. Run FlexView by navigating to the ArenaFlexSDK_Tx2/flexview/output directory
cd ~/ArenaFlexSDK_Tx2/flexview/output
./flexview

LUCID Helios Flex Camera Technical Manual 19
FlexView Window Controls
FlexView allows the user to display various output types from the captured image under Display
Settings.
Display Option
Description
Amplitude Window
Shows/Hides the 2-dimensional amplitude image (intensity image).
Depth Window
Shows/Hides the 2-dimensional colorized depth image.
Point Cloud Window
Shows/Hides the 3-dimensional colorized depth data visualized as a point cloud.
Rotate the point cloud data by clicking and dragging your mouse in the window.
Heat Map
Enables/Disables point cloud colorization.
Stream
Enables/Disables live streaming view for all display windows.
Zoom
Zoom in and out of the point cloud data. You can also zoom with your mouse wheel
if present.
Point Size
Increase or decrease the point cloud point size
Helios Flex Information
Information about the connected Helios Flex is presented in the Helios Flex Info section.

LUCID Helios Flex Camera Technical Manual 20
Helios Flex Settings
Controls for Helios Flex Settings are presented in the Helios Flex Settings section.
Using Arena Flex SDK
The Arena Flex Software Development Kit (SDK) is designed from the ground up to provide customers
with access to the latest in computer technology. The SDK supports the LUCID Helios Flex camera on the
Jetson TX2 ARM platform.
This manual suits for next models
1
Table of contents