SICK Ranger E User manual

REFERENCE MANUAL
Ranger E/D
MultiScan 3D camera with Gigabit Ethernet (E)
3D camera with Gigabit Ethernet (D)

© SICK AG 2011-06-17
All rights reserved
Subject to change without prior notice.
Please read the complete manual before attempting to operate your Ranger.
WARNING
Turn off power before connecting
Never connect any signals while the Ranger unit is powered.
Never connect a powered Ranger E/D Power-I/O terminal or powered I/O signals to a
Ranger.
Do not open the Ranger
The Ranger unit should not be opened. The Ranger contains no user serviceable parts
inside.
Safety hints if used with laser equipment
Ranger is often supposed to be used in combination with laser products.
The user is responsible to comply with all laser safety requirements according to the laser
safety standards IEC 60825 – 1 and 21 CFR 1040.10/11 (CDRH) respectively.
Please read the chapter Laser Safety in Appendix B carefully.
Turn off the laser power before maintenance
If the Ranger is used with a laser (accessory), the power to the laser must be turned off
before any maintenance is performed. Failure to turn this power off when maintaining the
unit may result in hazardous radiation exposure.
ISM Radio Frequency Classification - EN55011 - Group1, Class A
Class A equipment is intended for use in an industrial environment. There may be potential
difficulties in ensuring electromagnetic compatibility in other environments, due to con-
ducted as well as radiated disturbances.
Explanations:
Group1 – ISM equipment (ISM = Industrial, Scientific and Medical)
Group 1 contains all ISM equipment in which there is intentionally generated and/or used
conductively coupled radio-frequency energy which is necessary for the internal function-
ing of the equipment itself.
Class A equipment is equipment suitable for use in all establishments other than domestic
and those directly connected to a low voltage power supply network which supplies build-
ings used for domestic purposes.
Class A equipment shall meet class A limits.
Note: Although class A limits have been derived for industrial and commercial establish-
ments, administrations may allow, with whatever additional measures are necessary, the
installation and use of class A ISM equipment in a domestic establishment or in an estab-
lishment connected directly to domestic electricity power supplies.
Please read and follow ALL Warning statements throughout this manual.
Windows and Visual Studio are registered trademarks of Microsoft Corporation.
All other mentioned trademarks or registered trademarks are the trademarks or registered trademarks of their
respective owner.
SICK uses standard IP technology for its products, e.g. IO Link, industrial PCs. The focus here is on providing
availability of products and services. SICK always assumes that the integrity and confidentiality of data and rights
involved in the use of the above-mentioned products are ensured by customers themselves. In all cases, the
appropriate security measures, e.g. network separation, firewalls, antivirus protection, patch management, etc.,
are always implemented by customers themselves, according to the situation.
a

Reference Manual
Ranger E/D
©SICK AG • Advanced Industrial Sensors • www.sick.com • All rights reserved 3
Contents
Contents
1Introduction ................................................................................................................................... 6
2Overview......................................................................................................................................... 8
2.1 Measuring with the Ranger ..................................................................................................... 8
2.2 Mounting the Ranger............................................................................................................... 9
2.3 Configuring the Ranger..........................................................................................................10
2.3.1 Ranger Studio ..........................................................................................................10
2.3.2 Measurement Methods ...........................................................................................11
2.4 Developing Applications ........................................................................................................17
2.5 Triggering ...............................................................................................................................18
3Mounting Rangers and Lightings...............................................................................................19
3.1 Range (3D) Measurement..................................................................................................... 20
3.1.1 Occlusion..................................................................................................................21
3.1.2 Height Range and Resolution.................................................................................. 21
3.1.3 Main Geometries......................................................................................................22
3.2 Intensity and Scatter Measurements ...................................................................................23
3.3 MultiScan ...............................................................................................................................23
3.4 Color Measurements .............................................................................................................24
3.5 Light sources for Color and Gray Measurements ................................................................25
3.5.1 Incandescent lamps.................................................................................................25
3.5.2 Halogen lamps .........................................................................................................25
3.5.3 Fluorescent tubes ....................................................................................................26
3.5.4 White LEDs ...............................................................................................................26
3.5.5 Colored LEDs............................................................................................................27
4Ranger Studio..............................................................................................................................28
4.1 Ranger Studio Main Window................................................................................................. 28
4.1.1 Visualization Tabs ....................................................................................................29
4.2 Zoom Windows ......................................................................................................................31
4.3 Parameter Editor ...................................................................................................................32
4.3.1 Flash retrieve and store of parameters ..................................................................33
4.4 Using Ranger Studio ..............................................................................................................33
4.4.1 Connect and Get an Image...................................................................................... 33
4.4.2 Adjust Exposure Time ..............................................................................................35
4.4.3 Set Region-of-Interest ..............................................................................................35
4.4.4 Collection of 3D Data............................................................................................... 36
4.4.5 Getting a Complete Object in One Image................................................................37
4.4.6 White Balancing the Color Data ..............................................................................37
4.4.7 Visualizing Color Images..........................................................................................39
4.4.8 Save Visualization Windows ....................................................................................39
4.4.9 Save and Load Measurement Data ........................................................................40
5Configuring Ranger E and D .......................................................................................................41
5.1 Selecting Configurations and Components..........................................................................41
5.2 Setting Region-of-Interest......................................................................................................42
5.3 Different Triggering Concepts ...............................................................................................43
5.4 Enable Triggering...................................................................................................................43
5.5 Pulse Triggering Using an Encoder .......................................................................................45
5.5.1 Triggering Scans.......................................................................................................45
5.5.2 Embedding Mark Data.............................................................................................46

Reference Manual
Ranger E/D
4©SICK AG • Advanced Industrial Sensors • www.sick.com • All rights reserved
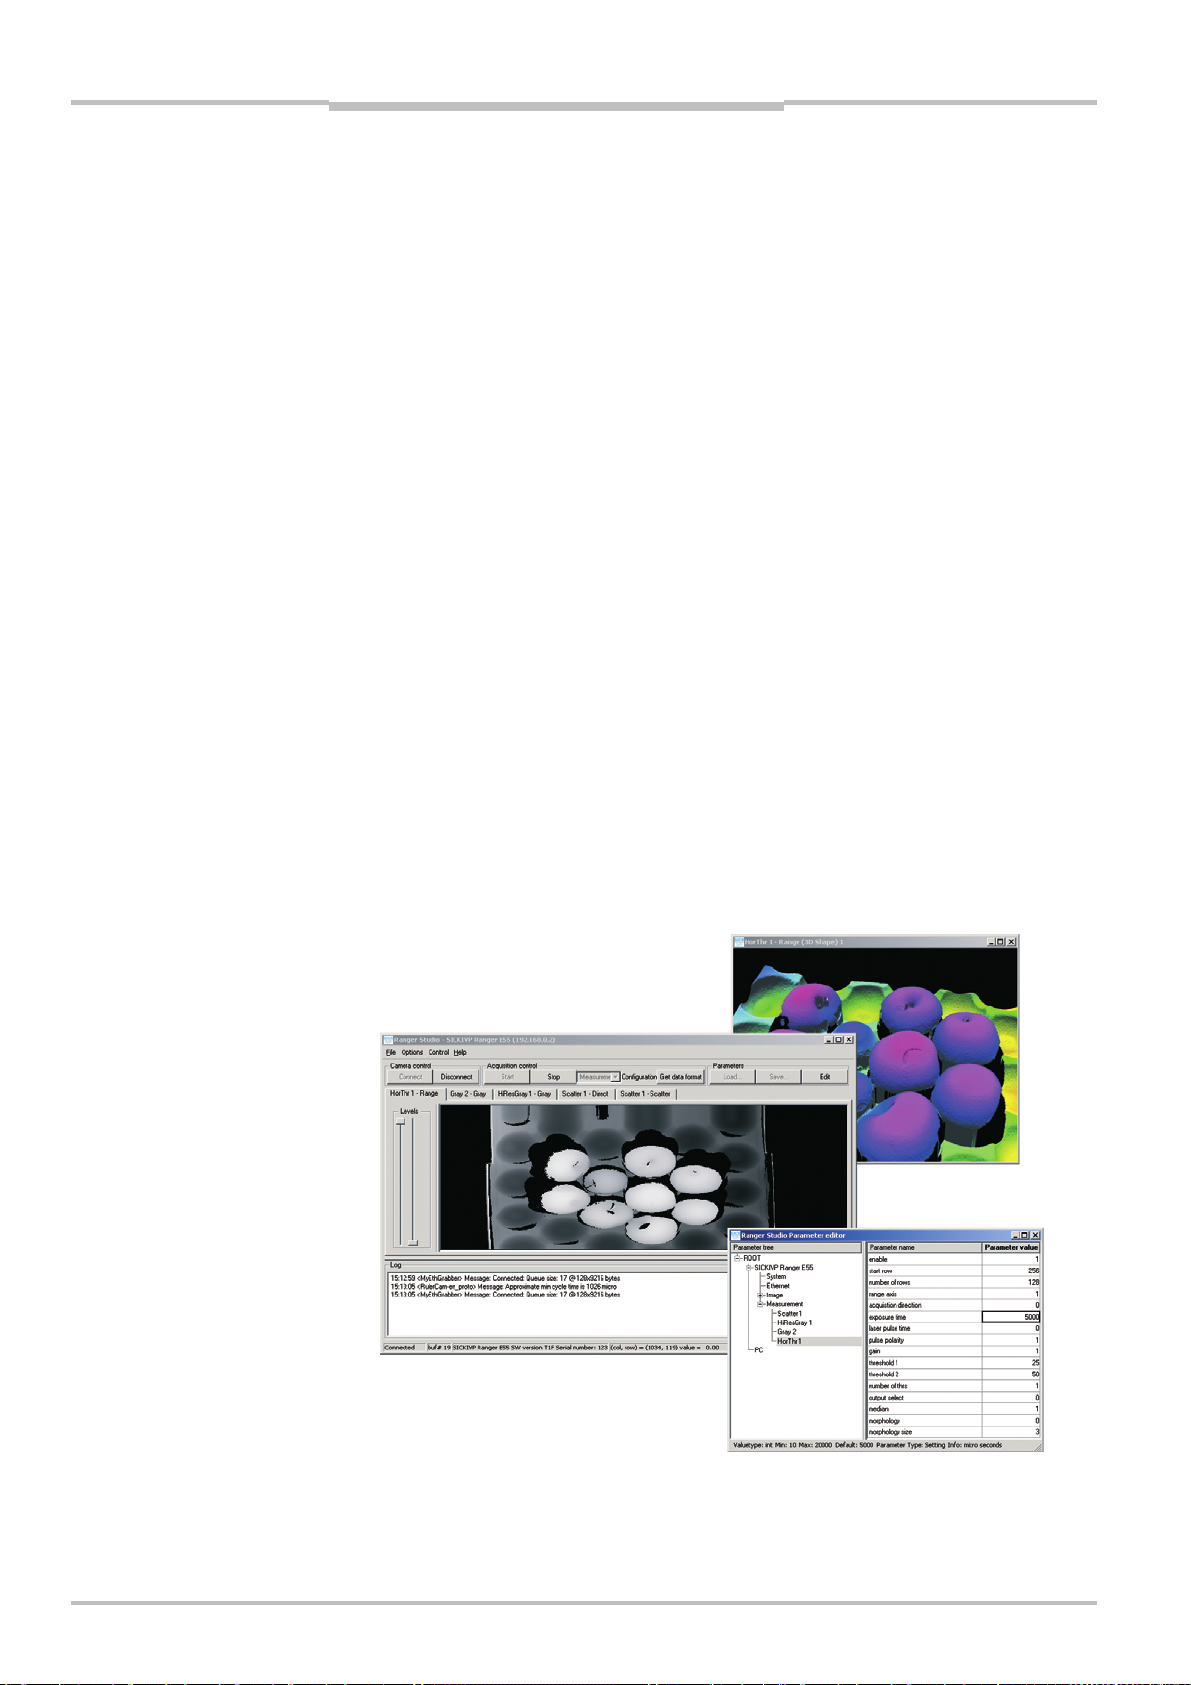
Contents
5.6 Setting Exposure Time...........................................................................................................47
5.7 Range Measurement Settings ..............................................................................................49
5.8 Details on 3D Profiling Algorithms........................................................................................ 50
5.9 Color Data Acquisition ...........................................................................................................54
5.9.1 White Balancing .......................................................................................................54
5.9.2 Color Channel Registration...................................................................................... 55
5.10 Calibration.............................................................................................................................. 56
5.10.1 Calibrated Data ........................................................................................................57
5.10.2 Rectified Images ...................................................................................................... 57
5.10.3 Physical Setup.......................................................................................................... 58
5.10.4 Calibration and 3D Cameras ...................................................................................59
6Ranger D Parameters .................................................................................................................61
6.1 System settings .....................................................................................................................61
6.2 Ethernet Settings...................................................................................................................61
6.3 Image Configuration ..............................................................................................................62
6.4 Measurement Configuration .................................................................................................63
7Ranger E Parameters..................................................................................................................67
7.1 System settings .....................................................................................................................67
7.2 Ethernet Settings...................................................................................................................67
7.3 Image Configuration ..............................................................................................................68
7.4 Measurement Configuration .................................................................................................70
7.5 Measurement Components ..................................................................................................72
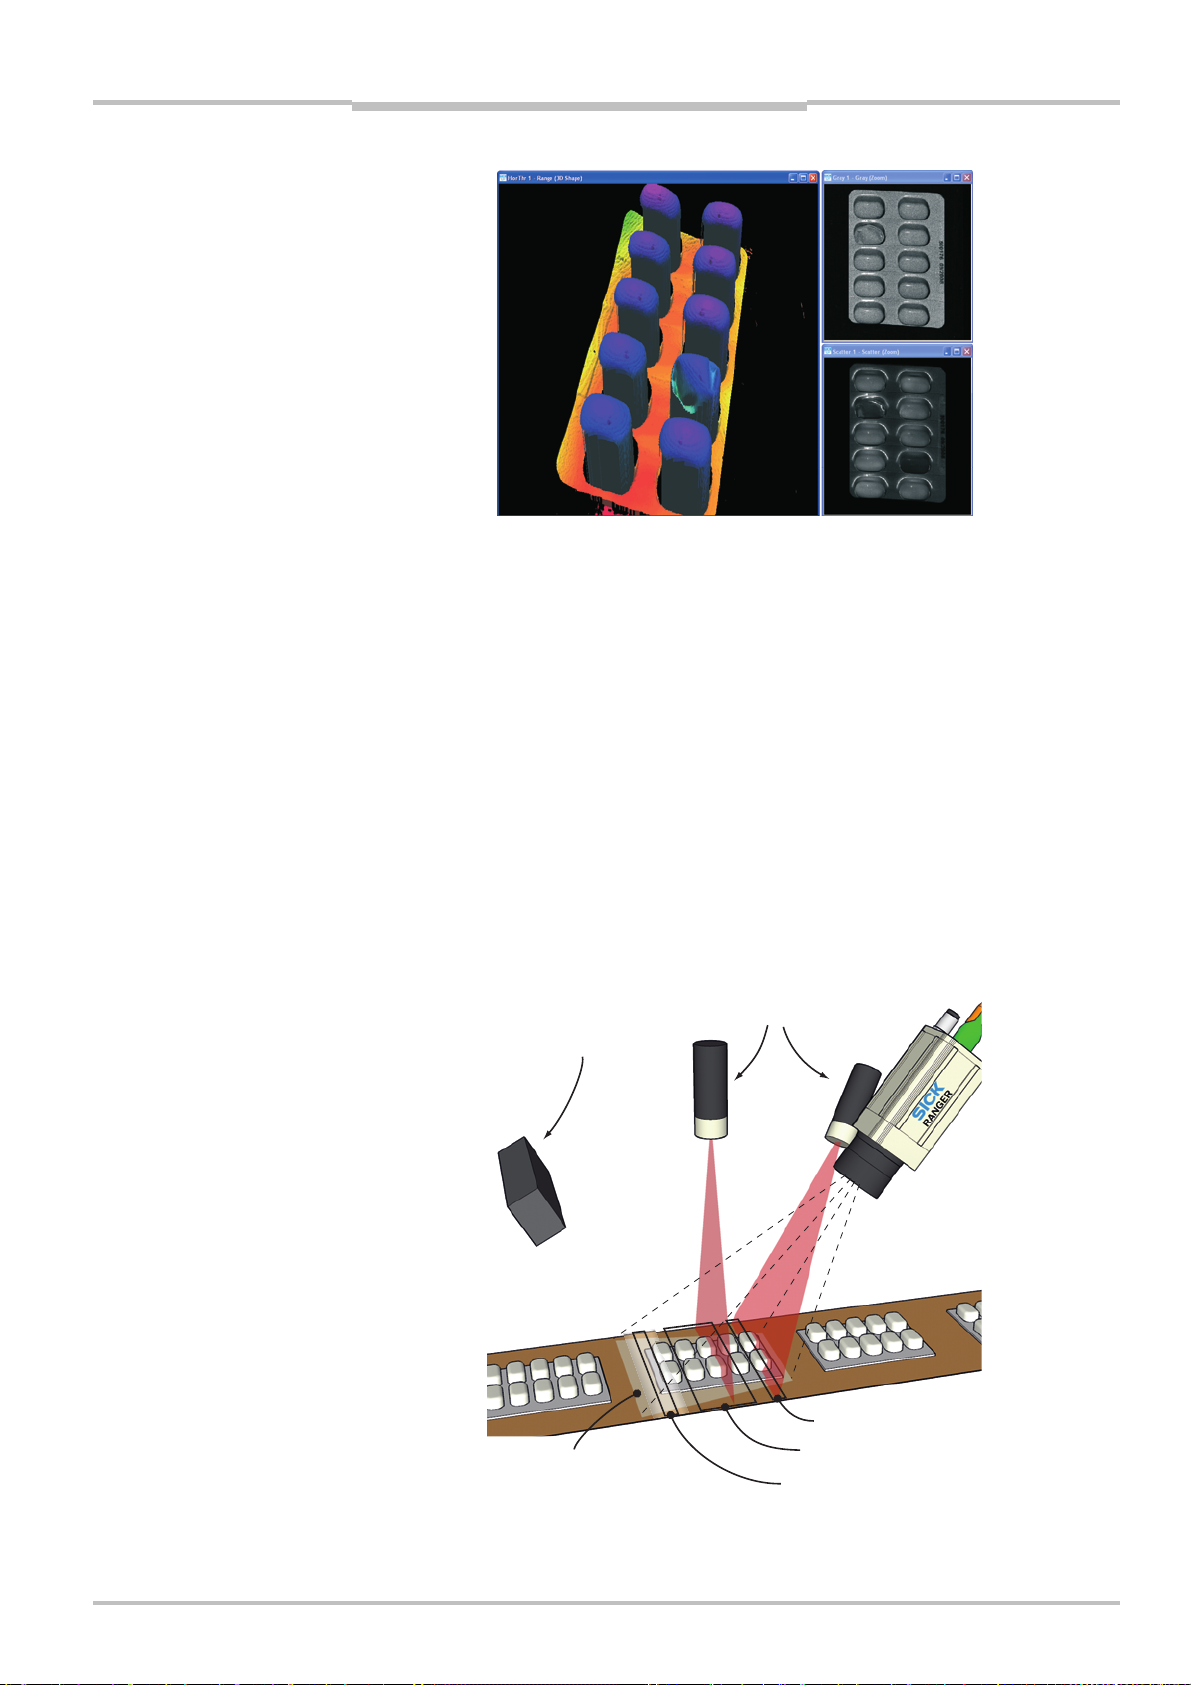
7.5.1 Horizontal Threshold (HorThr) .................................................................................72
7.5.2 Horizontal Max (HorMax) .........................................................................................76
7.5.3 Horizontal Max and Threshold (HorMaxThr) ...........................................................77
7.5.4 High-resolution 3D (Hi3D)........................................................................................79
7.5.5 High-resolution 3D (Hi3D COG) ...............................................................................80
7.5.6 Gray ..........................................................................................................................83
7.5.7 HiRes Gray................................................................................................................ 84
7.5.8 Scatter ......................................................................................................................85
7.5.9 Color and HiRes color ..............................................................................................86
8iCon API ....................................................................................................................................... 89
8.1 Connecting to an Ethernet Camera ......................................................................................90
8.2 Retrieving Measurement Data.............................................................................................. 92
8.2.1 IconBuffers, Scans, Profiles and Data Format .......................................................92
8.2.2 Accessing the Measurement Data ..........................................................................93
8.2.3 Polling and Call-back ...............................................................................................95
8.2.4 Handling Buffers ......................................................................................................95
8.2.5 Mark Data.................................................................................................................96
8.3 Changing Camera Configuration...........................................................................................97
8.3.1 Using Parameter Files.............................................................................................. 97
8.3.2 Setting Single Parameter Values.............................................................................97
8.4 Error Handling........................................................................................................................98
8.5 Calibration and Post Processing of Buffers.......................................................................... 99
8.5.1 Filter Classes............................................................................................................99
8.5.2 Extraction Filter ......................................................................................................100
8.5.3 Calibration Filter.....................................................................................................100
8.5.4 Rectification Filter..................................................................................................101
8.5.5 Color Registration filter..........................................................................................101
8.5.6 Color Generation Filter...........................................................................................103

Reference Manual
Ranger E/D
©SICK AG • Advanced Industrial Sensors • www.sick.com • All rights reserved 5
Contents
9Hardware Description .............................................................................................................. 105
9.1 Sensor ..................................................................................................................................105
9.1.1 Light Sensitivity ......................................................................................................105
9.1.2 Color Filter Layout ..................................................................................................106
9.1.3 High-resolution Rows .............................................................................................107
9.1.4 Color response .......................................................................................................107
9.1.5 Standard and high-resolution color differences ...................................................109
9.2 Electrical Connections.........................................................................................................110
9.3 Technical Data .....................................................................................................................112
9.4 Dimensional Drawing ..........................................................................................................114
Appendix............................................................................................................................................ 115
ARanger E and D Models.......................................................................................................115
BLaser Safety .........................................................................................................................116
CRecommended Network Card Settings ..............................................................................117
DRecommended Switches.....................................................................................................118
EiCon Device Configuration...................................................................................................118
FConnecting Encoders...........................................................................................................119
GRanger E/D Power-I/O terminal ..........................................................................................121
HLaser Safety Key Box (ICT-B) ...............................................................................................123

Chapter 1 Reference Manual
Ranger E/D
6©SICK AG • Advanced Industrial Sensors • www.sick.com • All rights reserved
Introduction
1Introduction
The Ranger is a high-speed 3D camera intended to be the vision component in a machine
vision system. The Ranger makes measurements on the objects that passes in front of the
camera, and sends the measurement results to a PC for further processing. The meas-
urements can be started and stopped from the PC, and triggered by encoders and photo-
electric switches in the vision system.
Figure 1.1 – The Ranger as the vision component in a machine vision system.
The main function of the Ranger is to measure 3D shape of objects. Depending on model
and configuration, the Ranger can measure up to 35 000 profiles per second.
In addition to measure 3D – or range – the Ranger can also measure color, intensity and
scatter:
Range measures the 3D shape of the object by the use of laser triangulation. This can
be used for example for generating 3D images of the object, for size rejection
or volume measurement, or for finding shape defects.
Intensity measures the amount of light that is reflected by the object. This can for
example be used for identifying text on objects or detecting defects on the ob-
jects’ surface.
Color measures the red, green, and blue wavelength content of the light that is
reflected by the object. This can be used to verify the color of objects or to get
increased contrast for more robust defect detection.
Scatter measures how the incoming light is distributed beneath the object’s surface.
This is for example useful for finding the fiber direction in wood or detecting
delamination defects.

Reference Manual Chapter 1
Ranger E/D
©SICK AG • Advanced Industrial Sensors • www.sick.com • All rights reserved 7
Introduction
Figure 1.2 – 3D (left), intensity (top right), and scatter (bottom right) images of a blister
pack with one damaged blister and two empty blisters.
There are four different models of the Ranger available:
Ranger C Connects to the PC via CameraLink.
Ranger E Connects to the PC through a Gigabit Ethernet network.
ColorRanger E Combines the function of a Ranger E camera and a three-color line scan
camera.
Ranger D A low-cost, mid-performance version of the Ranger E, suitable for meas-
uring 3D only in applications without high-speed requirements. The
Ranger D can measure up to 1000 profiles per second.
The Ranger C, E and ColorRanger E models are MultiScan cameras, which mean that they
can make several types of measurements on the object in parallel. This is achieved by
applying different measurement methods to different parts of the sensor.
By selecting appropriate illuminations for the different areas of the measurement scene,
the Ranger can be used for measuring several features of the objects at the very same
time.
Figure 1.3 – Measuring several properties of the objects at once with MultiScan, using
multiple light sources.
Field-of-vie
w
Scatte
r
3D measurement
Grayscale
White light
Lasers

Chapter 2 Reference Manual
Ranger E/D
8©SICK AG • Advanced Industrial Sensors • www.sick.com • All rights reserved
Overview
2Overview
2.1 Measuring with the Ranger
Each time the Ranger makes a measurement, it measures along a cross-section of the
object in front of it. The result of a measurement is a profile, containing one value for each
measured point along the cross-section – for example the height of the object along its
width.
For the Ranger to measure an entire object, the object (or the Ranger and illumination)
must be moved so that the Ranger can make a series of measurements along the object.
The result of such a measurement is a collection of profiles, where each profile contains
the measurement of a cross-section at a certain location along the transportation direc-
tion.
Figure 2.1 – Measuring the range of a cross-section of an object.
For some types of measurements, the Ranger will produce more than one profile when
measuring one cross-section. For example, certain types of range measurements will
result in one range profile and one intensity profile, where the intensity profile contains the
reflected intensity at each measured point.
In addition, the Ranger C, Ranger E and ColorRanger E models – being MultiScan cameras
–can also make parallel measurements on the object. This could for example be used for
measuring surface properties of the objects at the same time as the shape. If the Ranger
is configured for MulitScan measurements, the Ranger may produce a number of profiles
each time it makes one measurement – including multiple profiles from one cross-section
of the object, as well as profiles from parallel cross-sections.
In this manual, the term scan is used for the collection of measurements made by the
Ranger at one point in time.
Note that the range measurement values from the Ranger are not calibrated by default –
that is:
Range values (z coordinates) are given as row – or pixel – locations on the sensor.
The location of a point along the cross-section (x coordinate) is given as a number
representing the column on the sensor in which the point was measured.
The location of a point along the transport direction (y coordinate) is represented by for
example the sequence number of the measurement, or the encoder value for when the
scan was made.
Profiles
z
(range)
x
(width)
Transportation
y

Reference Manual Chapter 2
Ranger E/D
©SICK AG • Advanced Industrial Sensors • www.sick.com • All rights reserved 9
Overview
To get calibrated measurements – for example coordinates and heights in millimeters –
you need to transform the sensor coordinates (row, column, profile id) into world coordi-
nates (x, y, z). This transformation depends on a number of factors, for example the dis-
tance between the Ranger and the object, the angle between the Ranger and the laser,
and properties of the lens. You can do the transformation yourself, or you can use the
3D Camera Coordinator – a tool that performs the transformation from sensor coordinates
(row, column) to world coordinates (x, z). The world coordinate in the movement direction
(y) is obtained by the use of an encoder. For more information about the Coordinator tool,
see the 3D Camera Coordinator Reference Manual.
In a machine vision system, the Ranger acts as a data streamer. It is connected to a PC
through either a CameraLink connection (Ranger C) or a Gigabit Ethernet network (Ran-
ger D & E). The Ranger sends the profiles to the computer, and the computer runs a
custom application that retrieves the profiles and processes the measurement data in
them. This application can for example analyze the data to find defects in the objects and
control a lever that pushes faulty objects to the side.
Before the Ranger can be used in a machine vision system, the following needs to be
done:
Find the right way to mount the Ranger and light sources.
Configure the Ranger to make the proper measurements.
Write the application that retrieves and processes the profiles sent from the Ranger.
The application is developed in for example Microsoft Visual Studio, using the APIs that
are installed with the Ranger development software.
Figure 2.2 – Profiles are sent from the Ranger to a PC, where they are analyzed by a
custom application.
2.2 Mounting the Ranger
Selecting the right way of illuminating the objects to measure, and finding the right way in
which to mount the Ranger and lightings are usually critical factors for building a vision
system that is efficient and robust.

Chapter 2 Reference Manual
Ranger E/D
10 ©SICK AG • Advanced Industrial Sensors • www.sick.com • All rights reserved
Overview
The Ranger must be able to capture images with good quality of the objects in order to
make proper measurements. Good quality in vision applications usually means that there
is a high contrast between the features that are interesting and those that are not, and
that the exposure of the images does not vary too much over time.
A basic recommendation is therefore to always eliminate ambient light – for example by
using a cover – and instead use illumination specifically selected for the measurements to
be made.
The geometries of the set-up – that is the placement of the Ranger, the lightings and the
objects in relation to each other – are also important for the quality of the measurement
result. The angles between the Ranger and the lights will affect the type and amount of
light that is measured, and the resolution in range measurements.
Chapter 3'Mounting Rangers and Lightings' contains an introduction to factors to con-
sider when mounting the Ranger and lightings.
2.3 Configuring the Ranger
Before the Ranger can be used in a machine vision application, the Ranger has to be
configured to make the proper measurements, and to deliver the profiles with sufficient
quality and speed. This is usually done by setting up the camera in a production-like
environment and evaluating different ways of mounting, measurement methods and
parameter settings until the result is satisfactory.
2.3.1 Ranger Studio
The Ranger Studio application – which is a part of the Ranger development software – can
be used for evaluating different set-ups of the camera, and for visualizing the measure-
ments. With Ranger Studio, you can change the settings for the camera and instantly see
how the changes affect the measurement result.
Once the Ranger has been set up to deliver measurement data that meets the require-
ments, the settings can be saved in a parameter file from the Ranger Studio. This parame-
ter file is later used when connecting to the Ranger from the machine vision application.
Figure 2.3 – Configuring the Ranger with Ranger Studio.

Reference Manual Chapter 2
Ranger E/D
©SICK AG • Advanced Industrial Sensors • www.sick.com • All rights reserved 11
Overview
2.3.2 Measurement Methods
One part of configuring the Ranger is selecting which measurement method to use for
measuring. The Ranger has a number of built-in measurement methods – or components
– to choose from.
Which component to use is of course depending on what to measure – range, intensity,
color, or scatter – but also on the following factors:
Required speed and resolution of the measurements
Characteristics of the objects to measure
Conditions in the environment
The MultiScan feature of the Ranger C, Ranger E and ColorRanger E models means that
different components can be applied on different areas of the sensor. These components
will then be measuring simultaneously.
For each component there are a number of settings – parameters – that can be used for
fine-tuning the quality and performance of the measurements. These parameters specify
for example exposure time and which part of the sensor to use (Region-of-interest, ROI).
Range Components
The Range components are used for making 3D measurement of objects.
The Ranger uses laser triangulation when measuring range, which means that the object is
illuminated with a laser line from one direction, and the Ranger is viewing the object from
another direction. The laser line shows up as a cross-section of the object on Ranger’s
sensor, and the Ranger determines the height of each point of the cross-section by locat-
ing the vertical location of the laser line.
The Ranger and the laser line should be oriented so that the laser line is parallel to the
rows on the Ranger’s sensor. The Ranger E and D have a laser line indicator on the back
plate, indicating in which direction it expects the laser line to be oriented.
FIgure 2.4 – Laser triangulation.
Sensor image
Laser line
Laser line indicator
(Ranger E and D only)

Chapter 2 Reference Manual
Ranger E/D
12 ©SICK AG • Advanced Industrial Sensors • www.sick.com • All rights reserved
Overview
The Ranger E and ColorRanger E models have five different components for measuring
range, the Ranger C has three components, and the Ranger D has one component. They
differ in which method is used for locating the laser line:
Range component Model
E C D
Horizontal threshold X X Fast method, using one or two intensity
thresholds.
Horizontal max X X Uses the maximum intensity.
Horizontal max and
threshold
X Uses one intensity threshold.
High-resolution 3D
(Hi3D)
X X Measures with higher resolution, using an
algorithm similar to calculating the center-
of-gravity of the intensity.
The algorithm used by the Hi3D component
differs between Ranger E and Ranger D, as
does the format of the output.
High-resolution 3D
(Hi3D COG)
X X Measures with higher resolution, using a
true center-of-gravity algorithm.
For each measured point, the Ranger returns a range value that represents the number of
rows – or vertical pixels – from the bottom or top of the ROI to where it detected the laser
line.
Figure 2.5 – Different methods for determining the range by analyzing the light intensity
in each column of the sensor image:
Threshold determines the range by locating intensities above a certain level,
while Max locates the maximum intensity in each column.
Rows
Columns
Intensity
Threshold
S
ensor image
Rows
Intensity
Ma
x
Columns
Rows
Threshold Ma
x
Columns
Projected
laser line

Reference Manual Chapter 2
Ranger E/D
©SICK AG • Advanced Industrial Sensors • www.sick.com • All rights reserved 13
Overview
If the Ranger was unable to locate the laser line for a point – for example due to insuffi-
cient exposure, that the laser line was hidden from view, or that the laser line appeared
outside of the ROI – the Ranger will return the value 0. This is usually referred to as miss-
ing data.
In addition to the range values, the Horizontal max, Horizontal threshold and max, and
Hi3D for Ranger E/C and ColorRanger E also deliver intensity values for the measured
points along the laser line. The intensity values are the maximum intensity in each column
of the sensor, which – in the normal case – is the intensity of the reflected laser line.(1)
The resolution in the measurements depends on which component that is used. For
example the Horizontal max and threshold method returns the location of the laser line
with ½ pixel resolution, while the Hi3D method has a resolution of 1
/16th of a pixel.
Note that the Ranger delivers the measured range values as integer values, which repre-
sent the number of “sub-pixels” from the bottom or top of the ROI. For example, if the
Ranger is configured to measure with ½ pixel resolution, a measured range of 14,5 pixels
is delivered from the Ranger as the integer value 29.
Besides the measurement method, the resolution in the measurements depends on how
the Ranger and the laser are mounted, as well as the distance to the object. For more
information on how the resolution is affected by how the Ranger is mounted, see chapter
3'Mounting Rangers and Lightings'.
The performance of the Ranger – that is, the maximum number of profiles it can deliver
each second – depends on the chosen measurement method, but also on the height of
the ROI in which to search for the profile. The more rows in the ROI, the longer it takes to
search.
Therefore, one way of increasing the performance of the Ranger is to use a smaller ROI.
Figure 2.6 – A ROI with few rows will be faster to analyze than a ROI with many rows.
Note that the maximum usable profile rate can be limited by the characteristics of the
object’s surface and conditions in the environment.
(1) The intensity value from Ranger C’s Hi3D component is the accumulated intensity in
each column, which in the normal case still can be used as a measurement of the intensity
of the reflected laser line.

Chapter 2 Reference Manual
Ranger E/D
14 ©SICK AG • Advanced Industrial Sensors • www.sick.com • All rights reserved
Overview
Intensity Components
The Intensity components are used for measuring light reflected from the object. They can
be used for example for measuring gloss, inspecting the structure of the object surface, or
inspecting print properties. They can also be used for measuring how objects respond to
light of different wavelengths, by using for example colored or IR lightings.
There are two different intensity components:
Gray Measures reflected light along one or several rows on the sensor.
HiRes Gray Available in Ranger models C55 and E55. Uses a special row on the
sensor that contains twice as many pixels as the rest of the sensor
(3072 pixels versus 1536 pixels). The profiles delivered by the HiRes
Gray component therefore have twice the resolution compared with the
ordinary Gray component.
Figure 2.7 – Grayscale (left) and gloss (right) images of a CD. Both the text and the crack
are present in both images, but the text is easier to detect in the left image
while the crack is easier to detect in the right.
Some of the range components also deliver intensity measurements. The difference
between using these components and using the Gray or HiRes Gray component is that the
Gray and HiRes Gray components measure the intensity on the same rows for every col-
umn on the sensor, whereas the range components measure the intensity along the
triangulation laser line, which may be located on different sensor rows for each column.

Reference Manual Chapter 2
Ranger E/D
©SICK AG • Advanced Industrial Sensors • www.sick.com • All rights reserved 15
Overview
Color Components
The Color components are used for measuring the red, green and blue wavelength content
of the light reflected from the object. They can be used for inspecting color properties, for
example to detect discolorations or to sort colored objects.
The Color components are only available on the ColorRanger models, which are equipped
with a sensor where some of the rows are coated with a red, green, or blue filter. The filter
layout is described in 9“Hardware Description”.
There are two different color components:
Color Measures reflected light along three color filtered rows on the sensor.
HiRes Color Available in the ColorRanger E55. Uses special rows on the sensor that
contains twice as many pixels as the rest of the sensor (3072 pixels
versus 1536 pixels). The profiles delivered by the HiRes Color compo-
nent therefore have twice the resolution compared with the ordinary
Color component.
Figure 2.8 – Grayscale (left) and color (right) images of candy. The color image makes it
possible to differentiate between the colors, for example for counting or sort-
ing.
The Color components make measurements in three different regions on the sensor
simultaneously. The data is delivered as separate color channels – one channel for each
sensor area. The color channels can then be merged into high quality color images on the
PC by using the APIs in the Ranger development software.

Chapter 2 Reference Manual
Ranger E/D
16 ©SICK AG • Advanced Industrial Sensors • www.sick.com • All rights reserved
Overview
Scatter Component
The Scatter component is used for measuring how the light is distributed just below the
surface of the object. This can be used for emphasizing properties that can be hard to
detect in ordinary grayscale images, and is useful for example for detecting knots in wood,
finding delamination defects, or detecting what is just below a semi-transparent surface.
Figure 2.9 – Grayscale (left) and scatter (right) images of wood. The two knots are easy to
detect in the scatter image.
The scatter component measures the intensity along two rows on the sensor, and the
result is two intensity profiles – one that should be the center of the laser line (direct), and
one row a number of rows away from the first row (scatter).
The scatter profile can be used as it is as a measurement on the distribution of the light,
but the result will usually be better if the scatter profile is normalized with the direct inten-
sity profile.
Figure 2.10 –Using scatter to detect delamination defects. Where there are no defects,
very little light is reflected below the surface, resulting in a sharp reflex and
low scatter response. Where there is a defect, the light is scattered in the
gap between the layers, resulting in a wider reflection and thus high scatter
response.
Bubble
Ranger
Laser

Reference Manual Chapter 2
Ranger E/D
©SICK AG • Advanced Industrial Sensors • www.sick.com • All rights reserved 17
Overview
2.4 Developing Applications
Once the Ranger has been configured to deliver the measurement data of the right type
and quality, you need to write an application that takes care of and uses the data. This
application is developed in for example Visual Studio, using one of the APIs that are deliv-
ered with the Ranger.
There are two APIs included with the development software for Ranger: iCon C++ for use
with C++ in Visual Studio 2005/2008/2010, and iCon C for use with C. Both APIs contain
the same functions but differ in the syntax.
The APIs handle all of the communication with the Ranger, and contain functions for:
Starting and stopping the Ranger
Retrieving profiles from the Ranger (2)
Changing Ranger configuration
Most of these functions are encapsulated in two classes:
Camera Used for controlling the Ranger.
FrameGrabber Collects the measurement data from the Ranger.
Your application establishes contact with the Ranger camera by creating a Camera object.
It then creates a FrameGrabber object to set up the PC for collecting the measurement
data sent from the Ranger. When your application needs measurement data, it retrieves it
from the FrameGrabber object.
Figure 2.11 – All communication with the Ranger is handled by the API.
When the Ranger is measuring, it will send a profile to the PC as soon as it has finished
measuring a cross-section. The FrameGrabber object collects the profiles and puts them in
buffers – buffers that your application then retrieves from the FrameGrabber. Your applica-
tion can specify the number of profiles in each buffer, and it is possible to set it to 1 in
order to receive one profile at a time. However, this will also add overhead to the applica-
tion and put extra load on the CPU.
(2) For Ranger C, this requires that the Ranger is connected to a frame grabber board that
is supported by the Ranger APIs. If a different frame grabber is used, the measurement
data is retrieved using the APIs for that frame grabber.
Profiles
Control
iCon API
Application
Request
Buffers
Control
Camera
Frame
Grabber

Chapter 2 Reference Manual
Ranger E/D
18 ©SICK AG • Advanced Industrial Sensors • www.sick.com • All rights reserved
Overview
2.5 Triggering
There are two different ways in which external signals can be used for triggering the Ran-
ger to make measurements:
Enable Triggers the Ranger to start making a series of scans. When the
Enable signal goes high, the Ranger will start measuring a specified
number of scans. If the signal is low after that, the Ranger will pause
and wait for the Enable signal to go high again; otherwise it will con-
tinue making another series of scans.
The Enable signal could for example come from a photoelectric switch
located along the conveyor belt. It is also useful for synchronizing two
or more Rangers.
Pulse triggering Triggers the Ranger to make one scan. This signal could for example
come from an encoder on the conveyor belt. The Ranger C can also be
triggered by the CC1 signal on the CameraLink interface.
Figure 2.12 – Triggering the Ranger with Enable and Pulse triggering signals.
If pulse triggering is not used, the Ranger will measure in free-running mode – that is,
make measurements with a regular time interval determined by the Ranger’s cycle time.
The actual distance on the object between two profiles is then determined by the speed of
the object – that is, how far the object has moved during that time.
When measuring the true shape of an object, you should always use an encoder with the
Ranger. With the signals from the encoder as pulse triggering signals, it is guaranteed that
the distance that the object has moved between two profiles is well known.
You can find the actual distance between two profiles even if the Ranger is measuring in
free-running mode, as long as you have an encoder connected to the Ranger. The encoder
information can then be embedded with the profiles sent to the PC as mark data. Your
application can then use this information to calculate the distance between the profiles.
Enable
Profiles
Pulse
triggering
Number of scans
(Scan height)

Reference Manual Chapter 3
Ranger E/D
©SICK AG • Advanced Industrial Sensors • www.sick.com • All rights reserved 19
Mounting Rangers and Lightings
3Mounting Rangers and Lightings
Choosing the right way of mounting the Ranger and illuminating the objects to be meas-
ured is often crucial for the result of the measurement. Which method to use depends on
a number of factors, for example:
What is going to be measured (range, gloss, grayscale, scatter, etc.)
Characteristics of the surface of the objects (glossy, matte, transparent)
Variations in the shape of the objects (flat or varying height)
Requirements on resolution in the measurement results
Measuring with the Ranger means measuring light that is reflected by objects, and from
these measurement draw conclusions of certain properties of the objects.
For a machine vision application to be efficient and robust, it is therefore important to
measure the right type of light.
Reflections
An illuminated object reflects the light in different directions. On glossy surfaces, all light is
reflected with the same angle as the incoming light, measured from the normal of the
surface. This is called the specular or direct reflection.
Matte surfaces reflect the light in many different directions. Light reflected in any other
direction than the specular reflection is called diffuse reflection.
Light that is not reflected is absorbed by or transmitted through the object. Objects absorb
light with different wavelengths differently. This can for instance be used for measuring
color or IR properties of object.
The amount of light that is absorbed usually decreases as the incoming light becomes
parallel with the surface. For certain angles, almost all light will be reflected regardless of
wavelength. This phenomenon is used when measuring gloss, which can be used for
example for detecting surface scratches (see the example on page 26).
On some materials, the light may also penetrate the surface and travel into the object, and
then emerges out of the object again some distance away from where it entered. If such a
surface is illuminated for example with a laser, it appears as if the object “glows” around
the laser spot. This phenomenon is used when measuring scatter. The amount and direc-
tion of the scattered light depends on the material of the object.
Figure 3.1 – Direct and diffuse reflections on opaque and semi-transparent objects.
The Ranger measures one cross-section of the object at a time. The most useful illumina-
tion for this type of measurements is usually a line light, such as a line-projecting laser or a
bar light.
Specular reflection
Diffuse reflections
Scattered light
A
bsorbed lightTransmitted light

Chapter 3 Reference Manual
Ranger E/D
20 ©SICK AG • Advanced Industrial Sensors • www.sick.com • All rights reserved
Mounting Rangers and Lightings
3.1 Range (3D) Measurement
The Ranger measures range by using triangulation, which means that the object is illumi-
nated with a line light from one direction, and the Ranger is measuring the object from
another direction. The most common light source used when measuring range is a line
projecting laser.
The Ranger analyzes the sensor images to locate the laser line in them. The higher up the
laser line is found for a point along the x axis (the width of the object), the higher up is that
point on the object.
Figure 3.2 – Coordinate system when measuring range.
When measuring range, there are two angles that are interesting:
The angle at which the Ranger is mounted
The angle of the incoming light (incidence)
Both angles are measured from the normal of the transport direction. The angle of the
Ranger is measured to the optical axis of the Ranger – that is, the axis through the center
of the lens.
Figure 3.3 – Angles and optical axis.
The following is important to get correct measurement results:
The laser line is aligned properly with the sensor rows in the Ranger.
The lens is focused so that the images contain a sharp laser line.
The laser is focused so that there is a sharp line on the objects, and that the laser line
covers a few rows on the sensor.
Optical axis
Incidence angle
x
(width)
z
(range)
y
(transport)
This manual suits for next models
1
Table of contents
Other SICK 3D Camera manuals