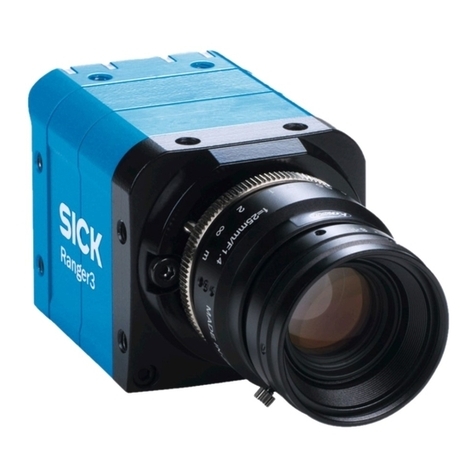
KANDA Obsidian GO User manual

3D Virtual Reality Camera

1
3
4
5
7
Name of Parts
Specification Parameters
Package Contents
Using the Camera
Operate with Remote
ENContents

1
Introduction to camera parts
Name of Parts
Micro USB
Port
Zoom Audio
Port
12V External
Power
Supply Terminal
Microphone
Tripod Mount:
3/8“UNC
Tripod Mount:
1/4“UNC
Tripod Mount:
Anti-Rotation Pin
Power Button
Power
Indicator
Micro SD
Card Slot
Working Mode
Indicators
Lens
Battery Cover
Hot/Cold-Shoe
Mount
Time-lapse Photo
Capture Button Video Record
Button

2
Introduction to camera remote control parts
Buzzer
Battery Cover
Photograph Indicator
Power Indicator
Video Indicator
Power Button
Video Record Button
Time-lapse Photo
Capture Button

3
Model
Obsidian GO
Video
Video Resolution Single-lens Resolution
Frame Rate (fps)
1728 x 1728
3840 x 3840 30
Photo
4608 x 3456Obsidian GO
Model Photo Resolution Single-lens Resolution
7680 x 7680
Specification Parameters
Micro SD Card (Maximum 128G)
H.264
30 fps
-10 ~ 40 °C
10~90% RH
-40 ~ 80 °C
Weight (Camera+Battery)
Video Coding Format
Battery 7.4V, Adapter 12V
Working Voltage
10.5W
Power
Video Format
Working Temperature
Working Humidity
Storage Temperature
Storage Humidity
Frequency Range
Max Output Power
Software Version
Hardware Version
Frame Rate
MOV
1015 g
5~90% RH
Model Obsidian GO
Recording Media
2404MHz-2476MHz
3.5dBm for Remote Control
0.2dBm for Camera
Mainboard: KSA_6_S206_V1.2
Power Strip: KSA_6_S206_POWER_V1.3
MP_VER.01.00.13_20170830
Importers
Company Name: Vrperception
Address: VR Perception Rebenstrasse 338307 Effretikon Switzerland

4
Remote Control Remote Control
Batteries
i
Adapter
( Optional )
Lens Cleaning PenBatteries LP-E6 Card Reader USB 3.0
Sync Control Cable
for Zoom H2n Handy
Recorder(spatial sound)
Lens Cleaning
Cloths
Manual
Carrying CaseObsidian GO
Camera
Shoulder Strap
Package Contents

5
12V external
power supply
2 X Canon LP-E6
or compatible
batteries
Using the Camera
1
2
Power the Camera using one of the following ways

Power on: Press the [Power Button], if the
camera turns on normally, the power indi-
cator lamp emits red, and the six [Working
Mode Indicators] emit blue.
Video-record: Press the [Video Record Button]
to record video. Press the button again to
stop recording. All [Working Mode Indicators]
will flash for 4 seconds before the recording
starts. During the recording process, [Working
Mode Indicators] will flash slowly.
Power off: Press and hold [Power Button]
until all [Working Mode Indicators] turn off,
then the camera is powered off.
66
Insert Micro SD cards
Insert all six Micro SD cards into the slots. U3 (USH-I) cards are required.
Power
on / off
Photograph & Video-record
Photograph: Press the [Time-lapse Photo
Capture Button] to capture a photo. And the
default mode is 10-second time-lapse, press
[Time-lapse Photo Capture Button] again to stop.
The blue [Working Mode Indicators] will flash
one time in the process.

Install the battery
:Open the battery door and insert 2 AAA batteries.
Photograph & Video-record by remote control
Install the battery & connect with camera
Connect with camera:
Switch on camera first, then press
any button on the remote control to start connecting,
during this process Power Indicator will flash slowly, and
then go off after the connection is done.
7
Photograph: Press the [Time-lapse Photo Capture Button] on
remote control, the [Buzzer] will respond and [Power Indicator] will
flash once. After that, the camera comes into 10-second time-lapse
mode, [Photograph Indicator] on remote control will flash slowly, press
[Time-lapse Photo Capture Button] again to stop shooting.
Video-record: Press the [Video Record Button] on the remote
control, the [Buzzer] will respond and [Power Indicator] will flash
once. During the recording process, [Video Indicator] on the remote
control will flash slowly. Press [Video Record Button] again to end
recording.
Operate with Remote Control
Power off by remote control
Press and hold [Power Button] on remote control to switch off the
camera, the remote control is dormant and all lights would turn off.
Press any button can turn it on again.
batteries
Indicator lamp description
Camera is in dormancy
Camera is on but
disconnected with remote
control
Taking a photograph
Recording a video
An error has occurred
during taking a photograph
An error has occurred
during recording a video
Low power/ camera is
on abnormal status
Reminder:
1. In a normal working status, once a button is pressed on remote
control, [Power Indicator] and [Buzzer] will both respond.
2. If the camera is in abnormal status, all indicator lamps on the
remote control will flash quickly.
8
Slow flash Quick flash

Safe Handling Precautions
Avoid condensation and freeze -- When moving the camera from
one extreme temperature to another, keep your camera in sealed
plastic bags to prevent condensation. Allow time for equipment to
adjust to temperature change before removing from the plastic
bag.
Avoid snow -- Be careful that snowflakes can easily scratch the lens.
To prevent camera circuits from being damaged by melting snow,
please turn off the camera and pull out the battery immediately.
Avoid dust -- Please use and store the camera in a clean
environment. When using the camera outdoors, be careful not to
allow dust or sand scratch the camera. Please use blower brush, or
lens tissue to remove dust from the lens. Never use alcohol or any
volatile liquid to clean the camera.
Avoid moisture -- Avoid using the camera in high humidity
conditions. Remove and store the battery in a dry box when not
using the camera.
Avoid shake -- Do not bang or subject the camera to strong
impacts. Do not put the extra objects attached with the camera
into the package (for example, forget to remove the quick release
plate), which will increase the possibility of lens damage when
shaking and vibration.
Never place the camera close to magnets,motors or other devices
that generate strong electromagnetic fields. Exposure to strong
magnetic fields may cause malfunctions or corrupt image data.
Memory cards are small, thin and easy to break, so keep them in a
special box when not using and make sure the metal contacts are
clean and shiny. Avoid storing the cards with data in areas exposed
to strong magnetic fields or electromagnetic radiation or high
temperature.
Don’t charge the battery inside the camera for a long time, unplug
the external power cable when not using the camera.
Do not bump or rub the lens.
Do not use camera beyond the normal power supply range.
Do not take the camera apart or try to repair any of the electronics
yourself.
Avoid foreign objects or liquids inside the camera.
1.
2.
3.
4.
5.
6.
7.
8.
9.
10.
11.
12.

FCC Regulatory Information
RF Exposure
Warning:
Changes or modifications not expressly approved by the party responsible
for compliance could void the user’s authority to operate the equipment.
Note:
This equipment has been tested and found to comply with the limits for a
Class B digital device, pursuant to Part 15 of the FCC Rules. These limits are
designed to provide reasonable protection against harmful interference in a
residential installation.This equipment generates, uses and can radiate radio
frequency energy and, if not installed and used in accordance with the
instructions, may cause harmful interference to radio communications. However,
there is no guarantee that interference will not occur in a particular installation.
If this equipment does cause harmful interference to radio or television reception,
which can be determined by turning the equipment off and on, the user is
encouraged to try to correct the interference by one or more of the following
measures:
-- Reorient or relocate the receiving antenna.
-- Increase the separation between the equipment and receiver.
-- Connect the equipment into an outlet on a circuit different from that to which
the receiver is connected.
-- Consult the dealer or an experienced radio/TV technician for help.
This equipment complies with FCC radiation exposure limits set forth for an
uncontrolled environment. This equipment should be installed and operated with
minimum distance 20cm between the radiator and your body. This transmitter must
not be co-located or operating in conjunction with any other antenna or transmitter.
FCC Special Statement

Kandao is a high tech company committed to virtual reality with a strong mixed of
mission and passion to build the best VR camera for the mass. The co-founders and core
team members of Kandao graduated from top universities and have either/both
technical and/or commercial backgrounds in leading technology organization such as
Tencent, Huawei, Philips, Sharp and other well-known enterprises. With strong research,
development, and operational capabilities, Kandao builds the word’s first portable high
quality 3D 360 camera and are creating more fascinating VR technologies.
www.kandaovr.com
+86-400-832-1900
Unit 5D, Block M7, SinoSteel Building, Nanshan, Shenzhen, China
service@kandaovr.com
This device complies with Part 15 of the FCC Rules. Operation is subject to the following two
conditions: (1) this device may not cause harmful interference, and (2) this device must accept
any interference received, including interference that may cause undesired operation.
Table of contents
Other KANDA 3D Camera manuals