manuals.online logo
Brands
  1. Home
  2. •
  3. Brands
  4. •
  5. Luiton
  6. •
  7. Radio
  8. •
  9. Luiton LT-198 User manual

Luiton LT-198 User manual

1
Contents
1. Introduction............................................................................................................... 10
2. Installation................................................................................................................. 10
Power Supply............................................................................................................ 10
Antenna Connection ................................................................................................. 10
3. Controls .....................................................................................................................11
4. Operation...................................................................................................................11
Power On/O󰀨 the radio ..............................................................................................11
Volume control...........................................................................................................11
Channel Selection......................................................................................................11
Squelch level control (28 level and o󰀨)..................................................................... 12
ASQ control (9 levels)............................................................................................... 12
Modulation Type........................................................................................................ 12
RF Gain control......................................................................................................... 12
Emergency Channel ................................................................................................. 12
Key Lock................................................................................................................... 13
Scan function............................................................................................................ 13
Changing the CB-Standard....................................................................................... 13
External Speaker ...................................................................................................... 13
Restore factory default.............................................................................................. 13
5. Disposal and Recycling ............................................................................................ 13
6. Specication ............................................................................................................. 14
TALK TO THE FUTURE
User’s Manual
CB Radio |LT-198
23
Note: The radio antenna is to be mounted from other antennas and interference
sources as much as possible. CB antennas must be mounted usually in or on metal
surfaces. A su󰀩ciently large metal surface is essential for the function of the anten-
na. For installation on a berglass cabs or plastic wind deectors, special ground
less antennas (eg GL 27) can be used.
3. Controls
Front View
Squelch Control
SQ and ASQ
RX-LED TX-LED
Power On/Off
Volume
AM/FM Switch
CH9/CH19 Keylock
RF Gain
4. Operation
DPower On/O󰀨 the radio
1. Turn VOL switch clockwise to power on the radio, the LCD displays the CB stan-
dard followed by the channel number.
2. Turn the VOL knob counterclockwise, until it clicks. The radio is powered o󰀨.
DVolume control
Turn clockwise to increase volume and turn counterclockwise to decrease volume.
DChannel Selection
1. Shortly press microphone [UP] or [DN] to change working channel.
2. Hold microphone [UP] or [DN] to change the working channel fast.
1. Introduction
The LT-198 can be operated as a mobile station in a car or with a suitable DC power
supply as a base station. This device complies with the latest European CB stan-
dards. Due to its selectable CB standards it can be used throughout Europe. Please
select only a CB standard that is allowed in the country of use.
Features:
• Multi-standard device
•
Up/ASQ/Down keys on the microphone
• Channel Scan
• LCD display, S-Meter
• ASQ Automatic squelch, adjustable
• RF Gain
• Socket for external loudspeaker
2. Installation
Select the mounting location so that road safety is not a󰀨ected by the device, or ad-
ditional risk of injury in an accident arises. Check that the display can be seen, and
the controls can easily accessed.
DPower Supply
Fuse
A fuse in the power cable protects against damage caused by technical defects or
incorrect polarity. If this fuse is blown, rst eliminate the error and then replace the
blown fuse with a similar spare fuse (5 AF). If the fuse burns several times, please
send the radio to our service.
Car Operation
The red wire of the power cable must be connected to the positive terminal (+12 V),
the black wire to the negative terminal. If possible the radio should be connected di-
rectly to the vehicle battery, because this is the point with the least interference from
the car’s electrical system. The device can also be connected behind the ignition
switch. All settings of the LT-198 are stored in a nonvolatile memory.
Operation with AC Adapter
Operate your radio only at a stabilized radio power supply, which is capable to pro-
vide at least 2A at 12 -13.8V DC. Unregulated power supplies or battery chargers are
unsuitable and can cause damage. Connect the red lead to the positive (+) terminal
of the power supply, the black wire to the negative (-) terminal of the power supply.
DAntenna Connection
Connect the CB antenna to the ANT socket on the back of your LT-198. The antenna
must be tuned to the CB radio band. For this use a SWR meter. For a good radio
range, the SWR should not exceed a value of 2. A high SWR also points to defects
in antenna, cable, or a short circuit in the antenna line. Never transmit without con-
nected antenna!
4 5
DKey Lock
1. Hold [EMG] key for over 2 seconds to lock the keys, LCD displays "LC".
2. Hold [EMG] key for over 2 seconds again to unlock the keys, LCD displays OF.
Note: In lock Mode, all keys except PTT are valid.
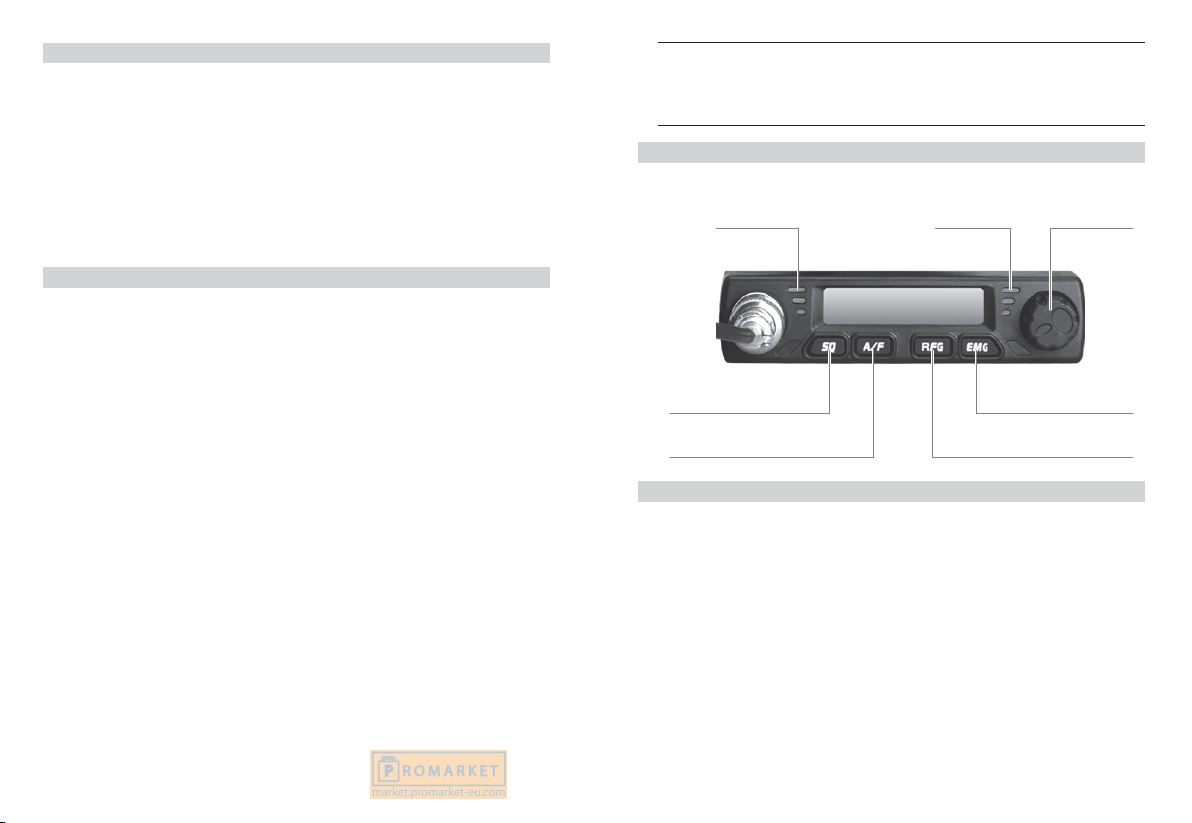
DScan function
1. Hold [A/F] to start scan function, “SC” ashes in the LCD.
2. Press microphone [UP] or [DN] to change scan direction during scan.
3. Press [A/F] or [PTT] key to exit scan function.
DChanging the CB-Standard
1. Hold [A/F] while powering the radio on, until LCD displays the norms.
2. Press microphone [UP] or [DN] to choose wanted norms.
3. Power o󰀨 and power on again
Standard Channels Frequency Range
EU 40 FM/40 AM 26.965-27.405MHz
CE 40 FM 26.965-27.405MHz
UK 40 CH FM 27.60125-27.99125MHz
PL 40 FM/40 AM 26.960-27.400MHz
I2 36 FM/36 AM 26.965-26.865MHz
DE 40 FM/40 AM 26.965-27.405MHz
80 FM 26.565-26.955MHz
IN 27 FM/27 AM 26.965-27.275MHz
DExternal Speaker
An external speaker (8 Ohm) can be connected to the 3.5mm mono socket on the
back of the radio. The built-in speaker automatically turns o󰀨 when a plug is inserted
into this jack.
DRestore factory default
1. Hold [SQ] key while powering the radio on, until the LCD displays “rt”.
2. All channel and function setting will resume factory default after above operation.
5. Disposal and Recycling
This radio was manufactured low-emission according to the European
WEEE directive. Please note that electronic and electric devices are
not to be disposed of with the household waste; return these devices to
collection points. Returning devices is free of charge for end users, since
the industry is covering the disposal costs. By returning the device to a
collection point you contribute to the recycling of valuable raw materials.
DSquelch level control (28 level and o󰀨)
1. Shortly press [SQ], until LCD shortly displays “SQ” and then displays X.X, X.X
stands for the SQ level.
0.F Squelch o󰀨
0.1 lowest Squelch level
.. ..
2.8 highest Squelch level
2. Press microphone [UP] or [DN] shortly to change SQ level
3. Hold microphone [UP] or [DN] to change the SQ level fast.
4. Hold [SQ] or wait for 3 seconds to store and exit.
Note: Higher SQ level require a stronger signal to open the speaker and hear the
calling.
DASQ control (9 levels)
1. Hold [SQ] key, until LCD displays AQ, the ASQ function is turned on. The LCD will
display “A.X”, X stands for the ASQ level.
A.1 lowest ASQ level
.. ..
A.9 highest ASQ level
2. Shortly press microphone [UP] or [DN] to change ASQ level
3. Hold microphone [UP] or [DN] to change the ASQ level fast fast.
4. Hold [SQ] or wait for 3 seconds to store and exit.
Note: Higher ASQ level require a stronger signal to open the speaker and hear the
calling.
DModulation Type
1. Shortly press [A/F] key to switch between AM /FM mode.
2. The LCD displays the selected mode.
DRF Gain control
1. Shortly press [RFG] key, LCD displays R and the present RF gain level ashes.
2. Shortly press microphone [UP] or [DN] to change the level of attenuation.
3. Shortly press [RFG] key to exit RF gain level control.
Note: When RFG function is on, the LCD displays “R”, if RFG level 6 is selected it
means the attenuation is 6 dB
DEmergency Channel
1. Shortly press [EMG] key to choose CH9, the channel number ashes.
2. Shortly press [EMG] key again to choose CH19, the channel number ashes.
3. Shortly press [EMG] key third time to return to last normal channel.
6
6. Specication
Dimensions 102 x 100 x 25 mm³
Weight 450 gr
Supply Voltage 13,2 V
Current Consumption 2 A max
Operating Temperature Range -20 to +50°C
Antenna Socket UHF, SO-239
Frequency Error < +/- 300 Hz
TX Power 4 Watt
Spurious Transmissions < 4 nW (-54 dBm)
Adjacent Channel Power < 20 μW
FM Deviation 1.9 kHz
AM Modulation Index 85-90%
RX Sensitivity better than 1 μV
Image Rejection 70dB
Adjacent Channel Rejection 60dB
Audio Output 1 Watt into 8 Ohm
Frequency Response 300-3000Hz

Other Luiton Radio manuals

Luiton LT-308 User manual

Luiton

Luiton LT-308 User manual

Luiton LT-298 User manual

Luiton

Luiton LT-298 User manual

Luiton LT-298 User manual

Luiton

Luiton LT-298 User manual

Popular Radio manuals by other brands

Ritron RCCR owner's manual

Ritron

Ritron RCCR owner's manual

Yaesu FTDX101MP Operation Refence Manual

Yaesu

Yaesu FTDX101MP Operation Refence Manual

Meteorcomm 63010 User manual and installation instructions

Meteorcomm

Meteorcomm 63010 User manual and installation instructions

C. Crane CC Solar Observer instruction manual

C. Crane

C. Crane CC Solar Observer instruction manual

ALAN Electronics HP 68 L user manual

ALAN Electronics

ALAN Electronics HP 68 L user manual

AnyTone AT- 778UV instruction manual

AnyTone

AnyTone AT- 778UV instruction manual

AMTC SiriusXM Installation and operation manual

AMTC

AMTC SiriusXM Installation and operation manual

Sangean SIR-300 manual

Sangean

Sangean SIR-300 manual

Bush TR82DAB Instruction book

Bush

Bush TR82DAB Instruction book

Retevis RB66 user manual

Retevis

Retevis RB66 user manual

Cobra 19 Ultra III owner's manual

Cobra

Cobra 19 Ultra III owner's manual

Blaupunkt IR 18E instruction manual

Blaupunkt

Blaupunkt IR 18E instruction manual

Motorola LM100 - SOUTHERNLINC user guide

Motorola

Motorola LM100 - SOUTHERNLINC user guide

Thales AN/PRC-148 Operation and Maintenance Instructions with Illustrated Parts Breakdown

Thales

Thales AN/PRC-148 Operation and Maintenance Instructions with Illustrated Parts Breakdown

Tivoli Audio ONE+ owner's manual

Tivoli Audio

Tivoli Audio ONE+ owner's manual

VDigi DD3.0 Operation manual

VDigi

VDigi DD3.0 Operation manual

FRIENDCOM FC-302V user manual

FRIENDCOM

FRIENDCOM FC-302V user manual

Retekess TR626 user manual

Retekess

Retekess TR626 user manual

manuals.online logo
manuals.online logoBrands
  • About & Mission
  • Contact us
  • Privacy Policy
  • Terms and Conditions

Copyright 2025 Manuals.Online. All Rights Reserved.