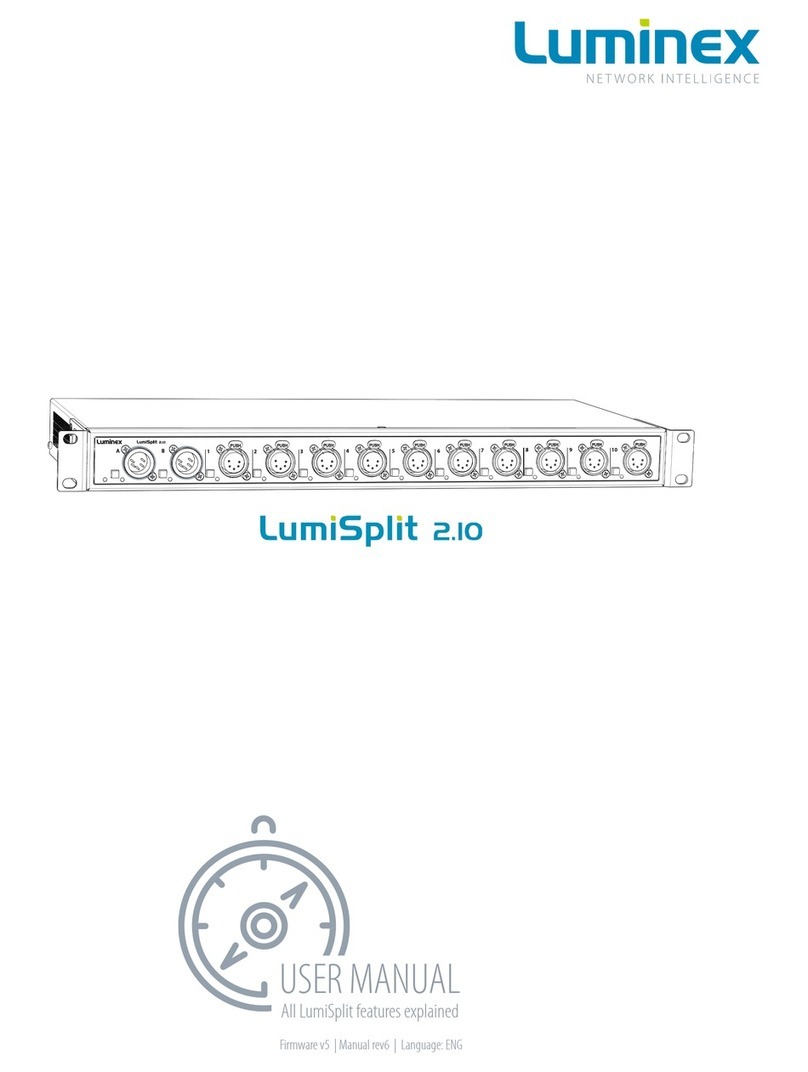
Luminex LUMISPLIT Series User manual

USER MANUAL
LUMISPLIT PRODUCT FAMILY
LumiSplit 2.10
THANKS FOR CHOOSING LUMINEX
Description: User Manual LumiSplit 2.10.
REVISION: 20200820-REV 6.0.0

2

CONTENTS
1. INSTALLATION.................................................................... 4
1.1 Mounting the device / Rack mount ..............................4
1.2 Power up the device ...............................................................4
1.3 Description....................................................................................5
1.4 LED Indicators..............................................................................6
2. LUMISPLIT FEATURES AND MODE SELECTION.......... 7
2.1 Zone selection per port ........................................................7
2.2 RDM Filtering ...............................................................................7
2.3 Mode Selection ..........................................................................7
2.4 Modes in detail...........................................................................8
2.5 Front Panel Lock.........................................................................8
2.6 Factory Reset................................................................................8
3. THE NEW RDM EXPERIENCE...........................................9
3.1 Discovery........................................................................................9
3.2 Identify a LumiSplit...................................................................9
3.3 Lock / Unlock the Front Panel ........................................10
3.4 Dark Mode.................................................................................. 10
3.5 Mode Selection ....................................................................... 10
3.6 Monitoring..................................................................................11
3.7 Endpoint View.......................................................................... 11
3.8 Custom .........................................................................................13
3.9 Snapshot......................................................................................14
3.10 DMX Fail Mode.........................................................................14
3.11 DMX Startup Mode...............................................................14
3.12 Messages.....................................................................................15
3.13 Factory reset.............................................................................. 15
3.14 Firmware upgrade .................................................................15
4. TECHNICAL SUPPORT....................................................16
3

1. INSTALLATION
1.1 Mounting the device
RACK MOUNT
In case you want to mount your LumiSplit 2.10 in a standard 19-
inch rack, you need 4 rack screws (A) to mount the device.
A
WIRE* CONNECTION
Green/Yellow AC Ground
Blue AC Neutral
Brown AC Line
* International (Harmonised) Standard
1.2 Power up the device
Power-up the device with a power cable with Neutrik powerCON
TRUE1 connection (J) (please contact your local dealer if you don’t
have a suitable power cable on hand). The device will automatically
switch on. To shut it down after use, just un-plug the power cable
again. After connecting the power cable correctly, by default the
power LED indicator on the front panel will light up in green.
The LumiSplit requires standard AC power distribution from 100-
240VAC, 50/60Hz.
The mating Neutrik® powerCON® TRUE1 connector is supplied;
however, you will need to purchase or construct a cable appropriate
for your application.
When installing a new connector please refer to the following wire
colour code reference:
J
4

1.3 Description
1.3.1 Front Panel
A POWER LED:
Indicates the general status of the splitter.
B INPUT BUTTON:
Enable / disable RDM filtering per input, mode selector.
C INPUT LED:
Indicates the input status and the selected mode.
D OUTPUT BUTTON:
Output selector, enable / disable RDM filtering per output.
E OUTPUT LED:
Indicates the output status and the selected mode.
1.3.2 Rear Panel
F POWER:
1x Neutrik powerCON TRUE1 inlet.
1x Neutrik powerCON TRUE1 outlet.
G DMX INPUT:
2x Neutrik XLR input A and B ports. When the front panel inputs
are used these can be used as DMX thru.
FG
C D EA
B B
5
1 | INSTALLATION / 1.3 DESCRIPTION

1.4 LED indicators:
The LED indicators of the LumiSplit show the following statuses:
POWER LED COLOUR DESCRIPTION
Power (General status
LED)
Dimmed Dark Mode
Green Normal, unlocked (default)
or upgrading
White Identify
Orange Locked Front Panel
Red Port error
Red blink Factory Reset
Blue DMX fail mode or
Startup mode
configured
PORT LED STATUS DESCRIPTION
Input A (front panel) Blue DMX + RDM
Cyan DMX Only
White blink RDM activity
Input B (front panel) Red DMX + RDM
Orange DMX Only
White blink RDM activity
Output ports Blue Connected to Input A,
DMX + RDM
Cyan Connected to Input A,
DMX Only
Red Connected to Input B,
DMX + RDM
Orange Connected to Input B,
DMX Only
White blink RDM activity
6
1 | INSTALLATION / 1.4 LED INDICATORS

After the device has been powered-up correctly, you can start
changing the different operating modes and port features through
the front panel or via RDM. To change the settings by using the
front panel, follow these instructions.
Through the front panel, you can connect 2 inputs (A and B) and
10 outputs (1 to 10). Each output has a LED indicator and a push
button. These are used to change and display the port status. The
input buttons are used to change the operating mode of the split-
ter.
2.1 Zone selection per port
By default, every output is linked to input / zone A. To toggle be-
tween zone A and B, shortly press the A / B button next to the
specific output. The output LED indicator colour will change ac-
cordingly. Press the button again to toggle between A and B once
more.
2.2 RDM Filtering
The LumiSplit supports RDM filtering to prevent lighting fixtures
from being flooded by undesired RDM packets. You can enable or
disable RDM filtering per input (zone A / B) or per output.
RDM FILTERING PER INPUT:
Press the input button shortly to enable or disable RDM filtering
per zone (A / B). The input LED indicator colour will change,
together with all associated output LED indicators.
RDM FILTERING PER OUTPUT:
Press the input button together with the desired output
button (shortly) to enable or disable RDM filtering on that output.
The output LED indicator colour will change accordingly.
2.3 Mode Selection
The LumiSplit 2.10 has different operating modes. To change the
mode, hold both input buttons (A and B) together for 2 seconds.
The LEDs from both ports will start blinking blue. Then release the
two buttons and press the desired output button to select the
mode. Each output button represents another mode.
Step 1: hold the A + B button until the port LEDs change colour.
Step 2: Press the output button corresponding to the desired
mode. A list of the different modes can be found on the label on
the rear of the device.
BUTTON COLOUR MODE SELECTION
Output 1 Blue Splitter
Output 2 Blue Backup
Output 3 Blue HTP Merging
Output 4 Blue LTP Merging
Output 5 Blue Regeneration Zone A
Output 6 Blue Regeneration Zone B
Output 7 Blue Regeneration Zone A + B
Output 8 Green Dark Mode
Output 9 Orange User Preset 1
Output 10 Orange User Preset 2
7
2.LUMISPLIT FEATURES AND MODE SELECTION

2.4 Modes in detail
2.4.1 Splitter mode (1) A: B:
The LumiSplit now runs in A / B splitter mode. This is the default
mode.
2.4.2 Backup mode (1) A: B:
Zone A becomes the main input, Zone B the backup input. In
the unlikely event of DMX loss on Zone A, the splitter will switch
automatically to zone B.
This mode can be used to create a backup situation for two
network converters. In case of failure of the first device, the
LumiSplit will automatically switch to the other device.
When the DMX signal is lost on input A, the A LED turns red, and all
output LEDs turn red. This provides the user with a clear indication
that the LumiSplit has switched to the secondary input.
When the DMX signal is back available on input A, the A LED will
turn blue again but unless auto recovery has been enabled, the
LumiSplit will NOT switch back to input A.
When the LumiSplit has recovered to Input A, all output LEDs will
turn Blue/Cyan again.
When the DMX signal on input B is NOT present both LEDs turn
red.
To give back control to input A, you need to press the A input
button or use the control panel through LumiNet Monitor.
Alternatively, from firmware version 6 onwards, it is possible to
enable Auto recovery via RDM. (see paragraph 3.8)
2.4.2 HTP merging mode (3) A: B:
The LumiSplit will merge the two DMX inputs according to the
Highest Takes Precedence policy. RDM communication with
connected endpoints is no longer active.
2.4.4 LTP merging mode (4) A: B:
The LumiSplit will merge the two DMX inputs according to the
Latest Takes Precedence policy.
RDM communication with connected endpoints is no longer
active.
2.4.5 Regeneration Zone A (5) A: B:
The LumiSplit will re-generate the incoming DMX signal on input
A with some new parameters. These parameters can be selected
through LumiNet monitor. (for more information, see 3.7.4)
RDM communication with connected endpoints is no longer
active.
2.4.6 Regeneration Zone B (6) A: B:
The LumiSplit will re-generate the incoming DMX signal on input
B with some new parameters. These parameters can be selected
through LumiNet monitor. (for more information, see 3.7.4)
RDM communication with connected endpoints is no longer
active.
2.4.7 Regeneration Zone A + B (7) A: B:
This mode allows you to quickly select regeneration mode for both
inputs. The timing for each input will be set as described above.
RDM communication with connected end points is no longer
active on both zones.
2.4.8 Dark Mode (8)
Dark mode set the brightness of all LEDs to a low value. This avoids
the LumiSplit generating too much light from its LEDs, where
darkness is a must have. Once you press one of the buttons on the
front panel, the brightness will go back to full for a few seconds.
Select the dark mode again from the selection menu to disable it.
Dark mode can be set from LumiNet Monitor as well.
2.4.9 User Preset 1 (9) and 2 (10)
Two user Presets can be stored on outlet 9 & 10. This allows you to
easily recall your favourite configuration or alternate between two
configurations for different applications. To record a preset, and
once in the selection mode, simply hold one of the two buttons
to store your configuration. Once the output LED start blinking on
its own, you can release the button. To recall the profile, once in
selection mode, press once on the output button to reload the
preset. These actions can be performed through LumiNet Monitor
as well.
2.5 Front Panel Lock
For reliability reasons you can lock the front panel. In this way, no-
body can accidentally change the settings of the splitter during a
live event for example. To lock and un-lock the front panel, press
and hold the input A button for 4 seconds. Once the power LED
indicator blinks orange, release the button and the power LED in-
dicator will turn orange. The front panel is now successfully locked.
Execute the same procedure to unlock the front panel again.
The front panel can be locked/unlocked from LumiNet Monitor
as well.
2.6 Factory Reset
Sometimes it can come in handy to reset the entire device. To do
that, press and hold the input A button for 10 seconds. Once the
power LED indicator blinks red, release the button. This will reset
all settings to default. Please keep in mind that also all user presets
will be deleted after this procedure.
The LumiSplit can be remotely reset from LumiNet Monitor as well.
8
2 LUMISPLIT FEATURES AND MODE SELECTION / 2.4 MODES IN DETAIL / 2.5 FRONT PANEL LOCK / 2.6 FACTORY RESET

3.THE NEW RDM EXPERIENCE
Not only can the LumiSplit provide you with some great features
directly from its front panel, the unit can also be remotely
configured and monitored, all through RDM connectivity.
Once LumiNet Monitor is connected to a Luminex LumiNode
or Ethernet-DMX converter with RDM enabled, the software will
provide you with a comprehensive set of tools to monitor and
configure your LumiSplit 2.10.
The LumiSplit 2.10 can be monitored and configured through
LumiNet Monitor.
Luminex recommends the use of a Luminex converter and
LumiNet Monitor to enter a new RDM experience.
LumiNet Monitor 2.1.6 or higher and LumiSplit firmware v5 or
higher are necessary to take full benefit of all the features listed
below.
3.1 Discovery
Wrong text. Should be: The LumiSplit 2.10 comes with two RDM
responders (A & B). In the RDM panel, two responders will appear
per splitter, if both are connected to the RDM controller.
If you hover your mouse over the responder, additional information
will be available.
3.2 Identify a LumiSplit
If you have many LumiSplit devices, it can come in handy to identi-
fy a unit. Right click on one of the responders and select Identify ->
On. All LEDs will turn white and start flashing, to identify the unit.
To stop the identification, repeat the same procedure and select
“Off”, or click on the “Identify OFF” button on the top right-hand
side of the RDM panel.
9

3.3 Lock / Unlock the Front Panel
To lock the device, right click on one of the responders and select Lock
state > Front Panel Locked. To unlock the device, repeat the same
operation, and select Lock state > unlocked.
When you select“Front panel locked”a popup window appears to en-
ter a 4-digit pin code. This window shows four dots to indicate the pin
code needs to be 4 digits.
3.4 Dark Mode
The LumiSplit offers you to lower down the brightness of the LEDs.
Right click on one of the responders and select display level. Here you
can set the brightness either to low or full.
There is no intermediate value available for the brightness of the LEDs.
3.5 Mode Selection
You can remotely select one of the modes the splitter offers. Right click
on one of the responders and select the desired mode. Regeneration
mode is available for both responders. You need to select the right re-
sponder (A or B) to assign the regeneration mode to it.
From here, you can reload presets stored on outlet 9 and 10 as well.
More details about each available mode can be found in paragraph
2.4 of this manual.
10
3 | THE NEW RDM EXPERIENCE / 3.3 LOCK / UNLOCK THE FRONT PANEL / 3.4 DARK MODE / 3.5 MODE SELECTION

3.6 Monitoring
The RDM control panel enables you to monitor the status of all sensors
embedded in the LumiSplit. The splitter comes with one temperature
sensor, and one sensor per DC/DC converter (input and output).
3.7 Endpoint View
The LumiSplit 2.10 is the world’s first splitter to offer the endpoint view.
Endpoints are any RDM compliant devices such as lighting fixtures,
smoke machines, lasers, or any remotely managed devices.
If RDM devices are connected to the ports of the LumiSplit, you’ll be
able to know which port they are connected to.
By default, any RDM device will be listed in the RDM panel as follows:
In this example, the RDM test device is connected to port 1 of the
converter using 2.0.0.12 as an IP address.
To see which port of the LumiSplit the device is connected to,
right click on one of the responders of the LumiSplit 2.10 and se-
lect Control.
In the control panel, click on the endpoint tab:
If RDM devices are connected to the splitter, they will appear on
each port marked with a white triangle on the left-hand side. Ex-
pand these lists, and discover the devices connected to the select-
ed port. This feature makes your life easier when troubleshooting
an installation, to follow the complete signal path. Hover your
mouse over the discovered RDM device to get some more info
about it.
The temperature sensor will indicate the actual inner temperature of
the LumiSplit. The contact sensors will display the status of all DC/DC
converters. A DC/DC converter’s sensor with a value of 1 means the
DC/DC converter is working correctly.
To monitor the status of these sensors, right click on one of the re-
sponders, select Control, and then, click on the Sensor tab.
11
3 | THE NEW RDM EXPERIENCE / 3.6 MONITORING / 3.7 ENDPOINT VIEW

3.7.1 Zone assignation
In the endpoint view, you can also modify the zone assignment
per port (1 or 2). Input A is universe 1, input B is universe 2. To
assign an
output to one of these zones, click on the universe number of the
selected output, and change the number, according to your need.
3.7.3 Identify a port
If needed you can identify a port. To do so, tick the corresponding
Identify check box, and the LED of the selected port will blink
white. This can come in handy when you need to indicate the port
to use.
3.7.2 RDM ltering
From this menu, you can enable / disable RDM filtering per port
and per zone as well. Tick the corresponding filter check box to
enable RDM filtering. A filtered output will display a light colour on
its LED (cyan or orange).
12
3 | THE NEW RDM EXPERIENCE / 3.7 ENDPOINT VIEW

3.7.4 Regeneration
When in regeneration mode, click on the timing field of the
selected input(s) to assign the desired regenerating timing.
Three different timings are available (Break Time, Framerate):
Slow (200μs/25FPS)
Medium (184μs/36FPS)
Fast (176μs/40FPS)
The timing set here will be available for all outputs linked to the
selected input
3.8 Custom
3.8.1 Backup
Once the splitter is in backup mode, and in the unlikely event
you lose DMX on input A, the splitter will automatically switch to
input B. If input A is back online, the splitter will, depending on
the configuration, not automatically give back control to input A.
To give back control to input A, press the input A input button.
Alternatively, you could right click on one of the online responders
in Luminet Monitor and select Control. Click on the Custom tab.
To give back control to input A, go to the Backup: Recover main
option, and click on the Set button. All output LEDs will turn blue
again.
3.8.2 Backup Auto Recovery
The LumiSplit (firmware version 6 onwards) offers the option to
automatically recover when input A becomes active again.
To enable auto recovery please follow the following steps:
Select the desired responder in the RDM devices list.
Right click and select Control.
Browse to the Custom tab.
In the“Backup: AutoRecover” field enter the value“1” (one).
Click the set button. Auto recovery is now enabled.
3.8.3 Backup TimeOut
With the backup timeout function, you can set a time, in
milliseconds, that no frames are being received on input A before
the LumiSplit switches to input B.
3.8.4 Store preset
The LumiSplit 2.10 offers you to remotely store a configuration on
outlet 9 and 10. In the “Store User Preset” field, enter “1” (one) if
you wish to record your first preset on outlet 9, enter “2: (two) if
you wish to record your second preset on outlet 10. Press the Set
button to record your preset.
13
3 | THE NEW RDM EXPERIENCE / 3.8 CUSTOM

3.9 Snapshot
From firmware version 6 onwards the LumiSplit offers the option to
record a DMX snapshot per input. This snapshot can later be used for
the DMX fail mode or Startup mode.
To use this new feature, the user will need LumiNet Monitor v2.3.2 or
higher.
3.9.1 Capture Snapshot
To capture the snapshot, an active lighting state needs to be present.
To capture the snapshot please perform the following steps:
Open LumiNet Monitor and locate the responder of the desired
device(s) in the RDM devices list.
Select the desired responder(s) and right click.
From the pop-up window, choose Capture Snapshot
(option 3 from the bottom)
The snapshot has now successfully been made.
3.10 DMX Fail Mode
In DMX Fail mode, the LumiSplit offers 3 options as output in the un-
likely event that something happens to the DMX input signal.
The three options available are:
Do Nothing (default), There will be NO DMX signal forwarded to
the outputs of the respected input, until valid DMX signal arrives
at the input.
Resend last frame, will keep repeating the last received DMX frame
on all outputs of the respective input (zone). As soon as the DMX
input receives valid DMX again, the output will follow that new in-
put again. The frame rate used for resending the last frame is the
same as set for the regeneration mode (default: 36 FPS with a break
time of 184 μs).
Send snapshot, makes it possible to send out the captured snap
shot as lighting state with defined timings. In this way the snap-
shot will be send to all concerned outputs until valid DMX input
signal is received or until the hold time expires. When a valid DMX
input signal is received again, the outputs will follow the input data.
When the DMX Fail mode is active all the output port LEDs will blink
slowly in sync.
3.10.1 Congure DMX Fail mode
To set the DMX Fail mode, use the following steps:
Select the desired responder in the RDM devices list.
Right click and select DMX Fail mode.
Choose the option you want to use.
3.11 DMX Startup Mode
With the DMX Startup mode , you can define the behaviour of the Lu-
miSplit at Startup for each input. If no DMX signal is present, you may
choose the following 2 options:
Do Nothing (default), There will be NO DMX signal forwarded to
the outputs of the respected input, until valid DMX signal arrives
at the input.
Send snapshot, makes it possible to send out the captured snap-
shot as lighting state with defined timings. In this way the snapshot
will be send to all concerned outputs until valid DMX input signal is
received or until the hold time expires.When valid DMX input signal
is received, the outputs will follow the input data.
14
3 | THE NEW RDM EXPERIENCE / 3.9 SNAPSHOT / 3.10 DMX FAIL MODE / 3.11 DMX STARTUP MODE

3.11.1 Congure DMX Startup mode
In order to set the DMX Startup mode, use the following steps:
Select the desired responder in the RDM devices list.
Right click and select DMX Startup mode.
Choose the option you want to use.
3.11.2 DMX Fail and Startup detailed timing
The Startup and DMX Fail features in LumiSplit are based on
standard RDM PIDs. These PIDs can be generically controlled in
detail via the RDM control panel.
DMX Fail mode and DMX Startup mode both make use of
preset info in case available via RDM. The preset info will set the
configurable boundaries for setting the details of these modes.
The following attributes can be adjusted:
DELAY: Number of 0.1 seconds delay before the preset gets ac-
tive. 65535 (0xffff) represents infinite time. Mind that LumiSplit already
takes 800ms (or 0.8 seconds) before detecting DMX signal fail. So, by
setting the Delay at 1, you set a time out of: 0.8 + 0.1 = 0.9 seconds.
HOLD:The hold time defines how long the mode stays active. After
the amount of x times 0.1 seconds, the mode will go back to default
behavior. In case of LumiSplit the minimum hold time is 0.1 second
and the maximum is infinite (65535 or 0xffff). When the hold time has
elapsed, the input (zone) of the LumiSplit will go back to“Do nothing”.
Or as soon the DMX signal has recovered the outputs will follow the
incoming DMX again.
LEVEL: The level is a value that acts as a master level on the cap-
tured preset. LumiSplit only supports 255 (full) as level.
3.12 Messages
The LumiSplit can send messages over RDM. You can then be notified
about any change on the LumiSplit. To display the message window,
right click on one of the responders, and select Messages.
You can save the messages to review later or print them for record
keeping.
3.13 Factory reset
The unit can be reset via RDM. To proceed, right click on one of the
responders, and select Factory Default.
3.14 Firmware upgrade
The LumiSplit 2.10 is the first splitter to be upgradable through RDM.
To upgrade the unit, you will need a Luminex LumiNode (firmware
1.1.0 or higher) or Ethernet-DMX converter (firmware 4.2.0 or higher),
and LumiNet Monitor 2.1.6 or higher.
Please bear in mind only one instance of LumiNet Monitor should be
running on the network during the firmware upgrade.
Download the latest LumiSplit firmware on our web site and
extract the archive. Connect your computer to the node and
enable RDM on one port.
Connect this port to one of the two inputs of the splitter.
In LumiNet Monitor RDM panel, right click on one of the
responders, and select Upgrade Firmware.
Click on Select file and select the extracted file (.bin).
Click on the Upgrade button, and the upgrade procedure will
start.
The procedure ends once the progression bar reaches 100%.
15
3 | THE NEW RDM EXPERIENCE / 3.12 MESSAGES / 3.13 FACTORY RESET / 3.14 FIRMWARE UPGRADE

4.TECHNICAL SUPPORT
Sometimes it is required to get more help with your device or applica-
tion. There is a knowledge base available online that gets updated on
a regular basis at: https://support.luminex.be
If you need to ask our team for more help or you need to return a de-
vice to Luminex for diagnostics or repair, you can also find the option
on this page to request an RMA or start a support ticket.
16

EFFECTIVE, RELIABLE, ACCESSIBLE
YOUR NETWORK SOLUTION FOR
AUDIO, VIDEO AND LIGHTING
17

Slamstraat 13 | 3600 Genk | Belgium | T +32 11 812 189 | info@luminex.be | www.luminex.world
This manual suits for next models
1
Table of contents
Other Luminex Media Converter manuals