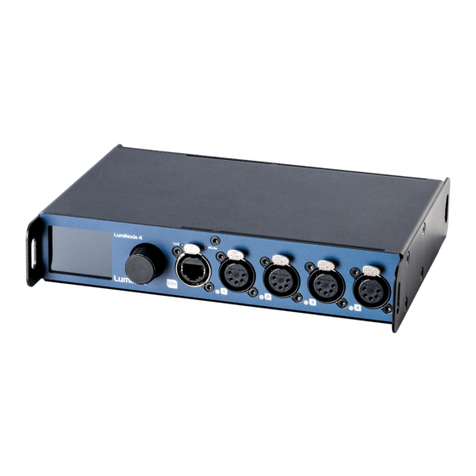
Luminex LumiNode 4DIN User manual

USER MANUAL
LUMINODE PRODUCT FAMILY
LumiNode 4DIN
THANKS FOR CHOOSING LUMINEX
Description: User Manual LumiNode 4DIN.
REVISION: 20220629-REV 2.4.1

General information
The lightning ash with arrowhead symbol, within an equilateral triangle, is intended to alert the user to
the presence of uninsulated “dangerous voltage” within the product’s enclosure that may be of sucient
magnitude to constitute a risk of electric shock to persons.
L’éclair avec une èche à l’intérieur d’un triangle équilatéral est destiné à attirer l’attention de l’utilisateur
sur la présence d’une « tension dangereuse » non isolée à l’intérieur de l’appareil, pouvant être
susamment élevée pour constituer un risqué d’électrocution.
The exclamation point within an equilateral triangle is intended to alert the user to the presence of
important operating and maintenance (servicing) instructions in the literature accompanying the
appliance.
Le point d’exclamation à l’intérieur d’un triangle équilatéral est destiné à attire l’attention de l’utilisateur
sur la présence d’instructions importantes sur l’emploi ou la maintenance (réparation) de l’appareil dans la
documentation fournie.
CAUTION
TO REDUCE THE RISK OF FIRE OR ELECTRIC SHOCK, DO NOT EXPOSE THIS APPARATUS TO RAIN OR
MOISTURE.
AVERTISSEMENT
POUR RÉDUIRE LES RISQUES D’INCENDIE OU DE DÉCHARGE ÉLECTRIQUE, N’ EPOSEZ PAS CET APPAREIL À
LA PLUIE OU À L’ HUMIDITÉ.
CAUTION
NO USER SERVICEABLE PARTS INSIDE. REFER SERVICING TO QUALIFIED SERVICE PERSONEL.
AVERTISSEMENT
AUCUNE PIÈCE CONTENUE À L’ INTÉRIEUR NE PEUT ETRE RÉPARÉE PAR L’ UTILISATEUR, VEUILLEZ
CONFIER TOUTE RÉPARATION À UN PERSONNEL QUALIFIÉ.
FCC Compliance Statement:
This device complies with Part 15 of the FCC Rules. Operation is subject to the following two conditions: (1)
this device may not cause harmful interference, and (2) this device must accept any interference received;
including interference that may cause undesired operation.
IMPORTANT NOTICE: DO NOT MODIFY THIS UNIT!
This product, when installed as indicated in the instructions contained in this manual, meets FCC
requirements. Modications not expressly approved by Luminex Lighting Control Equipment nv may void
your authority, granted by the FCC, to use the product.
This Equipment has been tested and found to comply with the limits for a Class A digital device, pursuant
to Part 15 of the FCC rules. These limits are designed to provide reasonable protection against harmful
interference when the equipment is operated in a commercial environment.
This equipment generates, uses and can radiate radio frequency energy and, if not installed and used in
accordance with the instructions, may cause harmful interference to radio communications. Operation of
this equipment in a residential area is likely to cause harmful interference in which case the user will be
required to correct the interference at his own expense.
2

Industry Canada compliance statement
This Class A digital apparatus complies with Canadian ICES-003. Cet appareil numérique de la classe A est
conforme à la norme NMB-003 du Canada.
European Community Compliance Statement
This is a class A product. In a domestic environment, this product may cause radio interference in which
case the user may be required to take adequate
measures.
Disposal of Waste Equipment by users in the European Union
Information for Users on Collection and Disposal of Old Equipment.
This symbol on the products, packaging, and/or accompanying documents means that used electrical and
electronic products should not be mixed with general household waste.
For proper treatment, recovery, and recycling of old products, please take them to applicable collection
points, in accordance with your national legislation and the Directives 2002/96/EC. By disposing of these
products correctly, you will help to save valuable resources and prevent any potential negative eects on
human health and the environment which could otherwise arise from inappropriate waste handling. For
more information about collection and recycling of old products, please contact your local municipality,
your waste disposal service, or the point of sale where you purchased the items.
[For business users in the European Union]
If you wish to discard electrical and electronic equipment, please contact your dealer or supplier for further
information.
[Information on Disposal in other Countries outside the European Union]
This symbol is only valid in the European Union. If you wish to discard these items, please contact your
local authorities or dealer and ask for the correct method of disposal.
Warranty information
Limited warranty
Unless otherwise stated, your product is covered by a two (2) years parts and labour limited warranty. It
is the owner’s responsibility to furnish receipts or invoices for verication of purchase, date, and dealer or
distributor. If purchase date cannot be provided, date of manufacture will be used to determine warranty
period.
Returning under warranty
Any product unit or parts returned to Luminex LCE must be packaged in a suitable manner to ensure the
protection of such product unit or parts, and such package shall be clearly and prominently marked to
indicate that the package contains returned product units or parts.
Accompany all returned product units or parts with a written explanation of the alleged problem or
malfunction.
Freight
All shipping will be paid by the purchaser. Items under warranty shall have return shipping paid by the
manufacturer only in the European Union. Under no circumstances will freight collect shipments be
acepted.
Prepaid shipping does not include rush expediting such as air freight. Air freight can be sent customer
collect in the European Union. Warranty is void if the product is misused, damaged, modied in any way, or
for unauthorized repairs or parts.
3

4
Table of Contents
GENERAL INFORMATION . . . . . . . . . . . . . . . . . . . . . . . . . . . . . . 2
WARRANTY INFORMATION . . . . . . . . . . . . . . . . . . . . . . . . . . . . . 3
1. APPLICATIONS . . . . . . . . . . . . . . . . . . . . . . . . . . . . . . . . . 6
2. INSTALLATION . . . . . . . . . . . . . . . . . . . . . . . . . . . . . . . . . 7
2.1 Mounting the device . . . . . . . . . . . . . . . . . . . . . . . . . . . . . . 7
2.2 Power up the device . . . . . . . . . . . . . . . . . . . . . . . . . . . . . . 7
2.3 Connection to the network . . . . . . . . . . . . . . . . . . . . . . . . . . . . 8
2.4 LED indicators. . . . . . . . . . . . . . . . . . . . . . . . . . . . . . . . . 8
2.5 Connection to the web interface . . . . . . . . . . . . . . . . . . . . . . . . . . 9
2.6 Reset . . . . . . . . . . . . . . . . . . . . . . . . . . . . . . . . . . . . 9
Reset via LumiNet Monitor: . . . . . . . . . . . . . . . . . . . . . . . . . . . 9
Reset via Araneo: . . . . . . . . . . . . . . . . . . . . . . . . . . . . . . . 9
3. CONFIGURATION . . . . . . . . . . . . . . . . . . . . . . . . . . . . . . . 10
Web interface Presentation . . . . . . . . . . . . . . . . . . . . . . . . . . 10
3.1 Node Page . . . . . . . . . . . . . . . . . . . . . . . . . . . . . . . . . 10
How to reset a process engine . . . . . . . . . . . . . . . . . . . . . . . . . 11
How to congure a process engine . . . . . . . . . . . . . . . . . . . . . . . 11
How to copy a process engine . . . . . . . . . . . . . . . . . . . . . . . . . 12
3.2 DMX/RDM page . . . . . . . . . . . . . . . . . . . . . . . . . . . . . . . 12
Port Settings . . . . . . . . . . . . . . . . . . . . . . . . . . . . . . . . 12
DMX Settings . . . . . . . . . . . . . . . . . . . . . . . . . . . . . . . . 13
DMX redundancy . . . . . . . . . . . . . . . . . . . . . . . . . . . . . . 13
3.3 Play page . . . . . . . . . . . . . . . . . . . . . . . . . . . . . . . . . 14
Show . . . . . . . . . . . . . . . . . . . . . . . . . . . . . . . . . . . 14
Record Trigger . . . . . . . . . . . . . . . . . . . . . . . . . . . . . . . 14
3.4 Global Settings . . . . . . . . . . . . . . . . . . . . . . . . . . . . . . . 15
Control source . . . . . . . . . . . . . . . . . . . . . . . . . . . . . . . 15
Device settings . . . . . . . . . . . . . . . . . . . . . . . . . . . . . . . 15
Device info . . . . . . . . . . . . . . . . . . . . . . . . . . . . . . . . . 15
Contact closure . . . . . . . . . . . . . . . . . . . . . . . . . . . . . . . 15
Miscellaneous . . . . . . . . . . . . . . . . . . . . . . . . . . . . . . . 16
3.5 Network . . . . . . . . . . . . . . . . . . . . . . . . . . . . . . . . . . 17
Scenario 1(A): (default) . . . . . . . . . . . . . . . . . . . . . . . . . . . . 17
Scenario 2(B): (advanced) . . . . . . . . . . . . . . . . . . . . . . . . . . . 17
Group/VLAN advanced settings . . . . . . . . . . . . . . . . . . . . . . . . . 19
Add or Edit a Trunk . . . . . . . . . . . . . . . . . . . . . . . . . . . . . 19

5
3.6 Toolbox page . . . . . . . . . . . . . . . . . . . . . . . . . . . . . . . . 20
Prole manager . . . . . . . . . . . . . . . . . . . . . . . . . . . . . . . 20
Firmware . . . . . . . . . . . . . . . . . . . . . . . . . . . . . . . . . 20
Reset . . . . . . . . . . . . . . . . . . . . . . . . . . . . . . . . . . . 21
4. WEB API . . . . . . . . . . . . . . . . . . . . . . . . . . . . . . . . . . 22
5. LUMINODE IN DETAIL . . . . . . . . . . . . . . . . . . . . . . . . . . . . . 23
5.1 What is a process engine? . . . . . . . . . . . . . . . . . . . . . . . . . . . 23
input . . . . . . . . . . . . . . . . . . . . . . . . . . . . . . . . . . . 24
Output . . . . . . . . . . . . . . . . . . . . . . . . . . . . . . . . . . 27
Mode Denition . . . . . . . . . . . . . . . . . . . . . . . . . . . . . . . 28
patch option . . . . . . . . . . . . . . . . . . . . . . . . . . . . . . . . 31
Patch Import/Export . . . . . . . . . . . . . . . . . . . . . . . . . . . . . 31
Master/Limit option . . . . . . . . . . . . . . . . . . . . . . . . . . . . . 31
master/limit explained: . . . . . . . . . . . . . . . . . . . . . . . . . . . . 32
startup buer: . . . . . . . . . . . . . . . . . . . . . . . . . . . . . . . 32
6. TECHNICAL SUPPORT . . . . . . . . . . . . . . . . . . . . . . . . . . . . . 33
7. CREDITS . . . . . . . . . . . . . . . . . . . . . . . . . . . . . . . . . . 34
8. TECHNICAL SPECIFICATIONS . . . . . . . . . . . . . . . . . . . . . . . . . . 35
RJ45 Pin-out . . . . . . . . . . . . . . . . . . . . . . . . . . . . . . . . 37
Terminal Block Pin-out . . . . . . . . . . . . . . . . . . . . . . . . . . . . 37
Disclamer . . . . . . . . . . . . . . . . . . . . . . . . . . . . . . . . . 38

A few examples of applications where the LumiNode4DIN can be used:
Touring & Live events
Studio’s
Cruise ships/Yachts
Theatres
Arena/Stadium lighting
Architainment lighting
Theme parks
Campuses
Houses of Worship
....
Typical Applications:
6
1. Applications1. Applications

LumiNode 4DIN is designed to be mounted directly onto a standard DIN (IEC/EN 60715) rail. Before tting the
device, please make a note of the IP address as this is located at the bottom of the device.
The device clips onto the rail.
Insert the LumiNode 4 DIN from the top to the bottom until you hear the bottom clip connection. It is
recommended to relief strain from the bottom clip by gently using a sharp tool as a leaver.
To remove the unit from the rail, use a sharp tool and insert it in the hole of the bottom clip. Slightly push
the clip to the bottom to release the LumiNode 4DIN from the rail.
Since the unit requires no user intervention once installed, they are suitable for remote installation with all
conguration and management taking place over an Ethernet network.
However, it is recommended that access can be gained in the unlikely event of a hardware failure.
The LumiNode 4DIN can be powered with a 12-24V DC power supply (M). The device will automatically
switch on. To shut it down after use, just un-plug the power cable again. The LumiNode 4DIN can also be
powered with Power over Ethernet (PoE) (N).
7
2. Installation2. Installation

Alternatively, the LumiNode series are 802.3af compliant (PoE), so that each LumiNode will act as a
PD (Powered Device) and can be powered by any compliant PSE (Power Sourcing Equipment) such as
Ethernet switch, midspan and PoE injector. All models can only be powered with PoE via ETH2!
To get the LumiNode 4DIN online in your system, connect either port ETH1 or ETH2 to a computer, or to a
port of an Ethernet switch.
Only port ETH2 on the rear of the unit can be used to power the unit through PoE. Check the port labelling
for a better identication.
There are various LEDs on the LumiNode 4DIN. Here is a list of the LEDs, the possible colours, and the
meaning of each colour:
DMX PORT STATUS MEANING
DMX Input Green Input idle
Green ashing Input active
DMX only (output mode) Cyan Output idle
Cyan ashing DMX activity
DMX + RDM (output mode) Blue Output idle
Blue ashing DMX activity
Stream loss Red Source stream lost
Red ashing Source stream lost but still outputting the last received packets
Orange ashing Source stream recovered
DMX redundancy Magenta Output idle
Magenta ashing Output active
NETWORK PORT
Bottom LED (Link) Green Gigabit connection (ashing: Ethernet trac)
Orange 100Mbit connection (ashing: Ethernet trac)
Top LED (Mode) Blue Default colour
Green ashing Device booting
Orange ashing Firmware upgrade in progress
Green blinking Identify in progress
Group colour Corresponding to assigned group/VLAN
POWER
Power/OK LED Red Device booting
Green Device booted and online
8

The LumiNode 4DIN IP address can be found on the bottom of the device.
Set your computer with a compliant IP address (do not use the same IP address!).
Connect your computer to the LumiNode with a network cable.
Launch your favourite web browser.
Type the IP address of the LumiNode in the address eld followed by enter.
RESET VIA LUMINET MONITOR:
LumiNet Monitor is available for Windows and MacOS and can be found in the download section of our
website: http://www.luminex.be/support-2/product-downloads/
How to reset your LumiNode through LumiNet Monitor:
With a computer connected to the device, open LumiNet Monitor (version 2.3.3 or above).
Under Tools in the menu bar you nd Reset LumiNode.
Enter the MAC address of the device you want to reset. This can be found on the label with the IP
address or via the web-UI.
Choose if you want to keep the IP settings.
Choose if you want to keep the proles.
Click reset.
RESET VIA ARANEO:
Araneo is available for Windows and MacOS and can be found in the download section of our website:
https://www.luminex.be/download-araneo/
How to reset your LumiNode through Araneo:
With a computer connected to the device, open Araneo (version 1.4.0 or above).
Select the LumiNode you wish to reset.
The Reset option becomes available on the Utilities section of the system tray at the bottom of your
screen in Araneo:
Choose if you want to keep the IP settings.
Choose if you want to keep the proles.
Click reset.
9

WEB INTERFACE PRESENTATION
Launch your favourite web browser and type the IP address of your LumiNode. Press enter to validate.
3.1 Node Page
(A) Identify: Clicking on the Luminex logo will identify your LumiNode in the network. The Mode LED will
ash green for 5 seconds. In the web-UI you get the text “Identied” under the logo.
(B) Drawing of your LumiNode: This product image shows the conguration of each DMX port. The
centre icon within each DMX port represents an input or an output. On the top of each port, you can
see the mode of the process engine linked to that port.
(C) Navigation menu
(D) Input: According to the mode set on the process engine, the input block will display all relevant
information, such as the type of incoming protocol, the universe number, the source IP address, or the
DMX input port.
(E) Process engine: By default, the LumiNode comes with Forward mode activated on as many process
engines as DMX port(s). The block displays the mode currently set on the process engine. For ease of
identication, you can change the name of the process engine. On the left and on the right-hand side
of the process engine, are respectively the patch, master/limiter and startup buer icons. The colour
of the icon will change if any parameters of these menus are modied. For more details about the
process engines and how to congure them please see chapter 6 of this manual.
(F) Output: The output block will display all relevant information, such as the type of outgoing protocol,
the universe number, the destination IP address, or the DMX output port.
(G) Increment/Decrement: Use these shortcuts to quickly increase or decrease the value of a universe.
Select the process engine rst, after which the increment/decrement tool becomes available.
(H) Reset tool and padlock: Use this tool to reset one or several process engines. First select the process
engine(s) by clicking on the top left corner of the input block followed by the trashcan icon. The
padlock allows you to lock the LumiNode conguration page to prevent unsolicited action on the web
page. This is an ideal tool for show time.
(I) Clear Warnings: Clear all stream loss indications.
(J) Active Prole: In this area the current active prole of the LumiNode is being displayed.
(K) Theme and language: Select here if you want to use the dark theme or light theme. Interface
supported languages are English, Japanese and Chinese for now.
(L) Help: In case you need help, here you nd an onboard helple.
10
3. Conguration

HOW TO RESET A PROCESS ENGINE
To reset a process engine, follow the following steps:
Hover your mouse over the top left corner of the process engine and select the tick box.
Click on the trash can icon at the top right corner above the rst process engine.
A blank process engine appears as follows:
If you want to reset all the process engines at once, navigate to the top left above the rst process engine
and select the tick box “Select all Process Engines”
HOW TO CONFIGURE A PROCESS ENGINE
To congure a process engine, rst click on the SELECT MODE label (the centre block of the process
engine), the process engine panel appears.
Click on the icon to select the mode you wish to use. Modes are described in chapter 5 of
this manual.
Forward, an input is send to an output.
LTP merge, Latest Takes Precendence with up to four inputs.
HTP merge, Highest Takes Precedence with up to four inputs.
Backup, Input 2 becomes active if input 1 is not available.
X-Fade, Cross-fade between input 1 and input 2.
Switch, with the use of a control source choose which of the up to four inputs is active.
Custom, any of the other modes, or combination of, on a channel level.
At any time, you can click on the Patch button , the Master/Limit button , or the Startup Buer
button to open the relevant conguration panel.
Next, click on the left-hand block, to select your input . According to the selected mode, the number of
inputs may vary. A process engine supports up to four inputs.
Input options are:
DMX, physical input on the XLRs.
Art-Net: Select the Art-Net universe to use. You can enter a numeric value between 0 and 32767.
sACN: Select the sACN universe to use. You can enter a numeric value between 1 and 63999.
KiNET: KiNETv2, the port number is automatically matched to the number of the process engine.
RTTrPL, BlackTrax: Select the RTTrPL universe to use. You can enter a numeric value between 0 and
63999.
Internal, the result of another process engine.
Play, one of the recorded shows.
You can give your input a name for easy identication.
Next, select your output by clicking on the output block, located on the right-hand side.
Here, you can choose between DMX, Art-Net, sACN, KiNET or any combination of the four to send data
coming from the process engine. The four types of output can be used at the same time, providing you
with great exibility.
Once selected, click on the Save button to store the parameters of your process engine. Your engine is
ready to go!
11

HOW TO COPY A PROCESS ENGINE
Once you have created your rst process engine, select it by clicking on the tick box in the top left corner. A
handle appears at the bottom centre of the process engine.
Click and drag the handle down, to select other process engines.
The LumiNode will automatically increase the universe number, and the DMX port, for each following
process engine. This allows you to create a complete conguration in a snap!
The DMX/RDM page is divided in two sub menus:
PORT SETTINGS
The port settings oer you to:
Add a legend to a port to easily identify what is connected to it. This will also update the tooltip on the
conguration page of the process engine.
Enable Sync mode: when enabled the DMX output framerate is matched to the input framerate. If the
source used for this port is capable to send an Art-Net or sACN sync packet this will be used.
Redundant Slave: when enabled the DMX port listens to incoming DMX from another port or another
node and will start outputting if no DMX input is detected. When DMX redundant slave is enabled RDM is
automatically disabled. See the chapter about DMX redundancy further on in the manual.
Enable RDM, enabling RDM allows RDM trac to be transported to or from an outlet over the network
and back.
xAdaptive discovery. When RDM is enabled, it is possible to enable adaptive d iscovery. This will
continuously check for new and disappeared RDM devices on the output.
xInterweaving. Interweaving is enabled by default. Interweaving is only available when the FPS is set
lower or equal to 34 FPS. Interweaving makes that RDM messages are interweaved with DMX. If your
xture does not support interweaving or the RDM packets you are sending are too large you would
disable RDM interweaving. For example, with a RDM based follow-spot system interweaving needs to
be disabled.
xArtRDM universe. The ArtRDM universe is the universe which is used for ArtTOD and ArtRDM packets.
By default, this will be matched to the Art-Net universe of the rst Art-Net input of your process
engine.
Scroll down and click Save to save your settings.
At the bottom of the DMX/RDM page, you can nd a button to force an RDM discovery in case this is
required.
12

DMX SETTINGS
On the DMX/RDM page, at the bottom of the page, you nd the DMX settings.
DMX Framerate in Frames Per Second.
Breaktime in microseconds.
DMX output time continuous by default is enabled and the LumiNode will keep outputting the last
received stream packages on the DMX. When you disable the continuous output time you can choose a
time the LumiNode will keep outputting the data with a minimum time of 1 second.
RDM Controller IP is the only device in the network that can make changes via RDM. When 0.0.0.0 every
device in the network can make changes but if you want to have a dedicated device to manage the RDM
you can dene the IP here.
Press Save to apply your settings.
DMX REDUNDANCY
The LumiNode range supports DMX redundancy from rmware 2.1.0 onwards. What does DMX redundancy
mean and how does it work?
DMX redundancy means that you can run a DMX cable from one LumiNode to your lights and then from the
output of the last light back to the same LumiNode or to a dierent LumiNode.
(If the redundant port is on the same LumiNode, only one process engine is required to congure both
ports).
The redundant port will not output DMX until it is no longer receiving DMX.
Once a link in the DMX chain gets broken or disconnected the slave port will start outputting DMX and the
lights will continue to operate as expected.
As soon as the broken link is restored the redundant port will go back to an idle state.
NOTE: For this system to work between dierent LumiNodes, it is important that the conguration of both
process engines and the settings for sync and DMX framerate are identical!
When the redundant port is in idle state, the port LED is solid magenta and the LCD display on the
LumiNode 4DIN will show the outline of the output symbol in magenta.
As soon as the port becomes active the port LED will turn to ashing magenta and the LCD display will
show a magenta lled output symbol.
Redundant port IDLE:
Redundant port ACTIVE:
13

SHOW
Here you select in which show you want to record cues, which cue number and the fade time in seconds.
Other options here are:
Import a show that you have available oine.
Export the show you have selected to your computer.
Delete the selected show.
Cue is the cue number that will be stored next.
Fade(s) is the fade time in seconds assigned to the cue when recorded in the web interface.
Rec records a new cue. Each cue is a snapshot of the output of all process engines.
RECORD TRIGGER
When you scroll down on the play page you will nd the Record Trigger settings.
Here you can set the record channel, this is the channel you will be sending from your control device, the
control source protocol and universe. This can also be assigned to a specic source IP address if required.
The following options with corresponding values are available for the record trigger:
101 - record next cue in show 1
102 - record next cue in show 2
103 - record next cue in show 3
-
-
139 - record next cue in show 39
140 - record next cue in show 40
The play page is devided in two sub menus:
14

The global settings page is divided in ve sub menus:
CONTROL SOURCE
Here, you can set the type of protocol, the universe number, and the controller IP address for each control
source. If the IP address 0.0.0.0 is used all devices in the network generating the assigned control protocol
and universe can be the control source. The LumiNode will use an LTP merging policy between the rst
four sources that become available. When using sACN the priority is also important to consider.
Each control source can be a dierent protocol, universe, and controller IP.
Press Save to apply your settings.
DEVICE SETTINGS
In this menu, you can set:
Short name. Enter a name of maximum 17 characters to indicate the node on Art-Net. The following
characters cannot be used: ^[ -~]*$.
Long name. Enter a name of maximum 63 characters to indicate the node on Art-Net. The following
characters cannot be used: ^[ -~]*$.
ID number of the LumiNode. The ID number is used for indication only.
Press Save to apply your settings.
DEVICE INFO
The device info window shows the MAC address and serial number of your device.
CONTACT CLOSURE
In this menu you can setup the details for the contact closure.
Protocol can be Art-Net or sACN.
Universe is the universe created by the contact closure.
Destination IP/Priority allows you to broadcast or unicast the contact closure’s universe when using
Art-Net. If no IP is entered the broadcast address will be auto lled. When sACN is chosen as protocol this
becomes the priority.
Channel is the control channel created by the contact closure.
Open is the value (0-255) of the control channel when the contact is open.
Closed is the value (0-255) of the control channel when the contact is closed.
Press Save to apply your settings.
The following values are linked to the options Switch, Play and Backup: (these can be found under the
question mark symbol on the Global Settings page/Contact Closure)
General
xDo Nothing: 0 - 7
Switch
x8 - 15: Input 1
x16 - 23: Input 2
15

x24 - 31: Input 3
x32 - 39: Input 4
Play
x8 - 15: Go
x16 - 23: Forward
x24 - 31: Back
x32 - 39: Reset
x101 - 140: Record
Backup
x8 - 15: Recovery
MISCELLANEOUS
Web auth, for security reasons, a password can be enabled on the LumiNode’s web interface.
Click on the slider to enable web authentication, and type in your password.
Led slider allows you to change the brightness of the LEDs on the LumiNode.
Press Save to apply your settings.
16

The network page is devided in two scenarios.
SCENARIO 1(A): (DEFAULT)
The Lighting data input/output and the management of the LumiNode are all assigned to the same
network group and share a single IP address.
In the IP address section (C):
Enter the IP address you wish to use.
Enter the subnet.
Enter a gateway IP address if required.
Click Save (J) to apply the changes.
Enter the new IP address in your web browser to refresh the page.
SCENARIO 2(B): (ADVANCED)
Groups/VLANs including an ISL group (Trunk) can be assigned to ports and interfaces.
This can be useful when data from dierent applications, in coexistence with the lighting data, needs to be
transported over the same network.
The Lighting data input/output and the management of the LumiNode can be separated in dierent
network groups and can each have a unique IP address.
17

In the Input/Output interface:
Enter the IP address you wish to use (C).
Enter the subnet you wish to use.
Enter a gateway IP address if required.
Enable/Disable Allow cong (D). When disabled, users will not be able to reach the web-UI on this IP
address.
In the Group/Trunks window (E) select the group for the lighting data you wish to use.
With the group selected, click the group assignment on the input/output interface (F).
In the System interface:
At the bottom-right of the System interface, use the slider to enable the interface.
Enter the IP address you wish to use (G).
Enter the subnet you wish to use.
Enter a gateway IP address if required.
Enable/Disable Allow cong (H). When disabled, users will not be able to reach the web-UI on this IP
address.
In the Group/Trunks window (E) select the group for the system interface you wish to use.
With the group selected, click the group assignment on the system interface (I).
Network ports:
Depending on the conguration chosen for the interfaces we now need to assign the correct groups/trunks
to the Ethernet ports of the LumiNode.
Select the group or trunk you wish to assign in the Group/Trunks window (E).
With the group selected, click the Ethernet port you wish to assign this group to.
Repeat these steps for the second Ethernet port if required.
In the image above, the example shows that we have assigned an ISL to ETH2, we used the management
group for the system interface, and we used group 4 for the input/output interface. Finally, we assigned
group 2 to ETH1 to give the user access to this group on the front of the LumiNode.
When all the settings are done, click Save (J) to apply the conguration.
Enter the new IP address in your web browser to refresh the page.
18

GROUP/VLAN ADVANCED SETTINGS
To change the settings for a group, click on the Edit group option in the Group/Trunks section.
With a group selected you can:
Change the VLAN ID.
Change the name for ease of identication.
ADD OR EDIT A TRUNK
To Add or Edit a Trunk, click the Edit Trunk option in the top right of the Group/Trunks section.
To Add a custom Trunk:
Click the + to add a trunk.
Give the new trunk a name in the name eld.
Assign a colour to the trunk by clicking on the coloured square.
After selecting the colour, click anywhere outside the colour picker
window to close it.
Click on all the groups/VLANs you wish to include in this trunk.
If needed, use the dropdown menu for Untagged to select which
group should be untagged on the trunk. An untagged port connects
to hosts. The host is unaware of any VLAN conguration.
Your custom trunk is now available in the Assign group tab to be
assigned to ETH1 or ETH2.
19

The toolbox page is divided in three sub menus:
PROFILE MANAGER
Here, you can recall, save, import, export or delete a prole. Select the prole with the drop-down menu
located on the left hand-side. The LumiNode comes with default proles that can be used or modied, for
a fast setup time. Up to 40 proles can be stored in a unit.
Once a prole is selected, a preview of the conguration is shown below the dropdown in graphic form and
the conguration of each process engine.
When a prole has been selected the user can scroll down to the bottom of the prole preview to see the IP
settings in this prole. By default, the LumiNode will NOT load the IP settings that are stored in the prole.
If you want to load the IP settings saved in the prole, slide the Preserve IP settings to OFF.
FIRMWARE
In the rmware section, you can see two versions of rmware:
Active rmware is the one currently running on the unit.
Alternate rmware is the previously installed rmware.
If you would like to downgrade the unit to the previously installed rmware, click on the Activate button.
The unit will reboot in this rmware.
There is only ONE rmware version for the entire range. This can be installed on all dierent models in the
range.
You can upgrade the LumiNode with our latest rmware. To upgrade the unit, please apply the following
procedure:
Download the latest rmware from the support section of our web site, https://www.luminex.be/
support-2/product-downloads/
Extract the downloaded archive and have a look at the release notes included.
Click on the rmware upgrade button in the web-UI of your device.
20
This manual suits for next models
3
Table of contents
Other Luminex Media Converter manuals