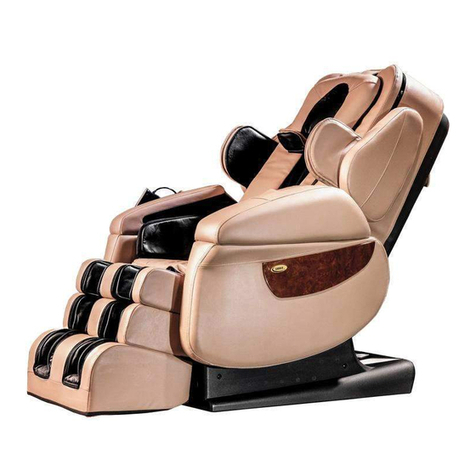
Luraco iROBOTICS 7 PLUS User manual


1
Congratulations on your purchase of a new
Luraco Medical Massage Chair!
We are pleased that you have chosen Luraco Health & Beauty,
LLC for your massage chair purchase. We hope you will enjoy
the quality, convenience, and excellent performance of your
new Luraco iRobotics 7 PLUS Medical Massage Chair. We
know from experience that you will soon be telling your friends
and family about the health benefits of using a massage chair
at home, and howenjoyable and easy it is to operate the Luraco
i7 PLUS massage chair.
Customer Assistance
For assistance with this product, please visit:
www.luracochair.com
Or call Luraco Health & Beauty Customer Care toll-free at
1-800-483-9930 Monday –Friday 8:30 am to 6 pm
To save time, please note your serial number and date of purchase
before calling.
© All Rights Reserved. Luraco Health & Beauty LLC. Aug 2018.
www.luracochair.com

2
TABLE OF CONTENTS
Page #
I. INTRODUCTION 3
II. IMPORTANT SAFETY INSTRUCTIONS 4
1. When using any electrical mechanism, basic precautions
should always be followed. Read all instructions before
using 4
2. Grounding Instructions 6
Medical Warnings 7
Emergency Stop 7
Caution for User 7
III. INSTALLATION INSTRUCTIONS 10
1. Step 1: Unpack the two large packages 11
2. Step 2: Assemble the armrests 11
3. Step 3: Back cushion assembly 12
4. Step 4: Seat cushion and pillow assembly 12
5. Step 5: Connect remote control and other electrical
accessory devices 15
IV. UNDERSTANDING REMOTE CONTROL FEATURES 16
1. Quick Instruction for Remote Main Screen 16
2. Start/Stop the Chair 17
3. Automatic Massage Modes 17
4. Manual Massage Modes 18
5. System Settings 19
6. Bluetooth - Enabled Speaker 21
7. Chair Adjustments 22
8. Health Information 23
V. HEALTHCARE DEVICE (Optional) 24
1. About the Device 24
2. Taking a Measurement 25
VI. TROUBLESHOOTING THE MASSAGE CHAIR 27
VII. WARRANTY INFORMATION 29
1. For Home Use 30
2. For Commercial Use 30
VIII. DISCLAIMERS 33
IX. EXTENDED WARRANTY REGISTRATION 34

3
I. INTRODUCTION
iRobotics 7 PLUS: The 7th Generation of The World’s #1 Massage
Chair®by Luraco Health & Beauty, LLC.
INNOVATION + QUALITY + LUXURY
In an effort to revolutionize the massage experience, Luraco Health &
Beauty LLC, an industry leader in massage chair manufacturing has
successfully developed a new model (i7 PLUS) of The World's #1
Massage Chair product line. Bringing together all aspects of innovative
technologies, massage therapy techniques, healthcare and
entertainment features into one ingenious and comprehensive machine,
the iRobotics i7 PLUS
is truly the Industry's Best Massage Chair.
Outstanding Features and Patented Technologies:
Luraco Health & Beauty, LLC introduces the next generation of
iRobotics, the i7 PLUS as the newest member of the Luraco Family of
quality medical massage chairs.
•The Only Massage Chair Line that is Researched, Developed and
Assembled in USA. All other massage chairs are imported from Asia.
•FDA, CE, and UL listed. Built for safety and medicinal benefits.
•Most technically up-to-date, fast-responding, heavy-duty, and smart
handheld touch-screen control. Same platform as in Smartphones -
patent granted..
•Unique features for up to 5 personal user memory settings so the whole
family can enjoy.
•6 Sections for Multi-Intensity Massage Controls (Neck, Upper Back,
Lower Back, Arms, Calves, and Feet).
•5 Levels of Intensity Controls –true 3D –from super soft to super hard.
•Independent Rhythm and Speed Controls for Kneading and Tapping
massages.
•Pause and Resume buttons (for when the user needs to pause their
massage).
•High-Quality and powerful Bluetooth Speaker (10 W).
•Seven Human-voice command system (English, Vietnamese, Spanish,
German, French, Japanese, and Korean). This chair confirms the
commands you give it!

4
•User height recommendations of 4’7” to 6’7” and weight up to 300
pounds. Accommodates large bodies better than any other chair on the
market!
•Integrated Blood Pressure and Heart Rate Monitor (optional) –patent
pending.
Relax and enjoy an accurate automatic body shape detection which
prepares you for the most advanced 3D robotic massage on the
market and provides outstanding neck, back and lower body massage
techniques. Experience the 3-layer foot and calf massage, full body
heat (back, seat and feet), advanced sole massagers with double
rollers and removable foot pads, and body swivel with twist
stretching not found on any other massage chair. Comforting
acupressure point arm massages and unique stretch program with
genuine leather at all massage touch surfaces (Head, Arms,
Shoulders, and Feet). Nine automatic and limitless customizable
programs including True Zero Gravity. The Luraco iRobotics 7 PLUS
is the most unique chair on the market and the only one made in the
USA!
Built for those that expect Luxury, Reliability, Comfort
and Relief
II. IMPORTANT SAFETY INSTRUCTIONS
1. When using an electrical mechanism, basic precautions should
always be followed, including the following: Read all
instructions before using.
WARNING –To reduce the risk of burns, fire, electric shock,
or injury to persons:
1. The main power switch is marked with international symbols “O”
and “I”. The switch in position “I”
means that system is on, and the switch in position “O” means
that system is off.

5
2. The chair should never be left unattended when plugged in.
Unplug from outlet when not in use and before putting on or
taking off parts.
3. DO NOT wear shoes, jewelry, glasses, or watches of any kind.
4. Close supervision is necessary when this appliance is used
near children, invalids, or disabled persons. Keep children away
from extended foot support (or other similar parts).
5. Use the chair only for its intended use as described in this
manual. Do not use attachments not recommended by the
manufacturer.
6. Never operate the chair if it has a damaged cord or plug, if it is
not working properly, if it has been dropped, damaged, or
dropped into water. Return the appliance to an authorized
service center for examination and repair.
7. Keep the cord away from heated surfaces.
8. Do not use outdoors.
9. Do not operate where aerosol (spray) products are being used
or where oxygen is being administered.
10. To disconnect, turn power switch to the off position, then
remove plug from outlet.
11. Connect this chair to a properly grounded outlet only. See
Grounding Instructions.
12. Do not remove the back cushion and do not play with roller
mechanism.
13. Do not remove the bottom seat and do not play with actuators.
14. Keep the cord out of heavy traffic areas. To avoid fire hazard,
NEVER put the cord under rugs or near heat generating
devices.
15. Always unplug the power cord from the electrical outlet
immediately after use and before cleaning.
16. Always check the volume before using headphones.
17. Do not operate any chair with damaged parts.
18. Any other use not recommended by the manufacturer may
cause electrical shock or injury to persons.
19. Do not touch or re-wire the connectors to the master-box.
20. Do not attempt to repair or adjust any electrical or mechanical
functions on this unit. Doing so will void
the warranty.
21. Please be aware that some household PESTS like to get into
electronics. Rodent and bug damages are not the responsibility
of Luraco Health & Beauty, LLC. Keep the back cover of the
chair free from dirt, dust and household pests.
6
After reading this user’s guide, if you have any questions or
comments, please call 1-800-483-9930
or visit our website at
www.LuracoChair.com for more information.
2. Grounding Instructions
This product must be grounded. If there is a malfunction or
breakdown, the grounding provides a path of
least resistance for electric current to flow, thus reducing the risk of
electric shock. This product is equipped with a cord having an
equipment-grounding conductor and a grounding plug. The plug
must be plugged into an appropriate outlet that is properly grounded
in accordance with all local codes and ordinances.
DANGER - Improper connection of the equipment-grounding
conductor can result in a risk of electric shock. Check with a
qualified electrician or serviceman if you are in doubt as to whether
the product is properly grounded. Do not modify the plug provided
with the product, if it does not fit the outlet; have a proper outlet
installed by a qualified electrician.
Followed by either instruction a) or b) below:
a) This product is for use on a normal power circuit, and has a
grounding plug that looks like the plug illustrated in sketch A in
Figure 1 below. A temporary adapter that looks like the adapter
illustrated in sketches B and C may be used to connect this plug
to a 2-pole receptacle as shown in sketch B if a properly
grounded outlet is not available. The temporary adapter
should be used only until a properly grounded outlet
(sketch A) can be installed by a qualified electrician. The
green colored rigid ear, lug, or the like extending from the
adapter must be connected to a permanent ground such as a
properly grounded outlet box cover. Whenever the adapter is
used, it must be held in place by a metal screw.
b) This product is for use on a normal power circuit, and has a
grounding plug that looks like the plug illustrated in sketch A in
Figure 1 below. Make sure that the product is connected to an
outlet having the same configuration as the plug.

7
c) No adapter should be used with this product.
Fig.1: Grounding Instruction
MEDICAL WARNINGS –NOT RECOMMENDED FOR:
•Pregnant women
•People with distorted joints, broken bones, skin infection or
injury
•Children under 12 years of age
If you have any of the above medical issues or any other
concerns, please consult your doctor before using the massage
chair.
DO NOT:
•Allow children or pets to play near the chair, especially during
operation.
•Use any massage function on the head.
•Massage abdominal area or knee cap region.
•Leave mobility impaired or speech impaired persons alone in
chair.
•Wear shoes, jewelry, glasses, or watches of any kind.
EMERGENCY STOP
In case of emergency, press the stop button on the remote to
stop the system.

8
Additional Safety Precautions
•Do not use more than 30 minutes per session.
•Do not operate near young children or pets.
•Do not move the machine during operation.
•Do not place or store the chair near damp places such as
swimming pools or bathrooms.
•Do not forcibly press on the massage rollers.
•Do not stand on the chair or store heavy items on the chair.
•Do not use in an environment which is dusty, greasy or lacking
oxygen.
•Do not place near steam, oven, open fire, or heat.
•Do not place directly in the sun.
•Do not use electric blanket while using the massage chair.
•Do not use outdoors.
•Do not use while smoking.
•Do not eat or drink in chair when operating.
•Do place this chair horizontally with space over 81 inches,
enough for full recline mode.
•Do place on level floor.
•Do wear suitable clothing at all times while using.
Note: Do not use the chair as a bed or to sleep on over a long period of
time. The recommended time of use is
20 minutes. Prolonged massaging may cause aches, muscle or nerve
issues. (The preferred total duration of massaging within the day should be
30 minutes total or less).
CAUTION FOR USER
•This device should not be used until grounded.
•In the course of normal use, lift the back cushion regularly to check
for any damage or cracks in the fabric
of the cushion. Please stop using immediately even if there is
minor damage and turn the power switch off. Send the cushion in
for repair to avoid possible electric shock.
•Do not move the chair while in use.
•Do not place heavy objects on the armrest, footrest or back of the
chair to avoid overturning or damaging the chair.

9
•Do not pull the fabric forcefully or stab it with sharp objects which
can result in injury or damage to the chair.
•Do not move the chair on wooden floor, carpet or other easily
damaged flooring.
•Children and pets should not be allowed to play around chair.
•Please be sure that no people, pets, or other objects are behind the
chair or under the legs before reclining
or lowering the leg massager.
•Do not put your hands or head under the chair.
•When using the massage chair, ascertain that the footrest is in the
lowest position.
•Do not use immediately after meals.
•Do not sit on the back cushions, armrest, or legs.
•Do not use the massage chair when your body is wet or moist as it
can result in electrical shock.
•Do not operate with more than one person.
•Do not use when wearing head ornamentation as it can result in
injury.
•Do not stumble over electrical wires or connections
•Do not touch the inner parts of the chair as this can cause damage
and electrical shock.
•Do not dismantle and remove inner parts, or repair the massage
chair.
Do Not Use the Chair under the Following Conditions
•When the chair has been exposed to water or fails to operate.
•If power cable is damaged.
•Please stop using the massage chair immediately and consult a
doctor if you feel abnormal or extremely
achy during the course of the massage.
•If power failure occurs.
•When the massage chair malfunctions during the course of
operation.
•Do not operate during a thunderstorm.
Methods of Storage
•Do not dismantle the back of the chair.
•Keep the massage chair free of dust.
•Cover the chair with dust-free cloth to prevent dust from collecting.

10
•Do not store in a hot, humid, damp place nor in direct sunlight or
heat.
Cleaning Methods
•Before cleaning unplug from electrical source to avoid shock.
•Clean the chair surface with neutral or mild detergent.
•Use leather cleaner and leather conditioner.
•Dust can be cleaned off with a damp cloth using mild detergent and
let air dry.
•Do not spray pesticide on device.
•Do not use a damp cloth on the electronic components, which can
cause shock and damage.
Fig.2: Space Requirement
III. INSTALLATION INSTRUCTIONS
PLACEMENT
There must be enough space around the chair for proper operation.
There is a required minimum clearance of 32 inches (81cm) from the
front of the chair to the wall, and 27 inches (68cm) from the wall to the
backrest.
47in(119cm),Max
81in
(205cm),
Max
38in
(96cm),
Max
Smartphone
Pouch

11
Step 1: Unpack the two large packages
Carefully take out the main body, back cushion, seat cushion, pillow,
remote control, and armrests from the boxes.
Note: i7 PLUS requires at least two people to assist with
assembly.
Step 2: Assemble the Armrests
Please refer to Fig.3 and Fig.4 and follow the steps (1-5) below to
install the armrests.
1. Assemble armrest air tubes (Fig.3). Make sure the color
marks/numbers are matched.
2. Fix air tubes. Make sure air tubes are not bent (Fig.3).
3. Insert the axle into the located slot on the seat frame (Fig.3 and
Fig.4).
Fig.3: Armrest Installation
ATTENTION:
Be sure no children, pets, or objects
are around chair. Allow enough
space for installation.

12
Fig.4: Armrest Installation
4. Install 2 black head screws to secure the armrest metal plate on to
the seat frame (Fig.3).
5. Repeat steps 1 thru 4 for the second armrest assembly.
ATTENTION!
•Be sure no objects are behind the chair before reclining
•For a higher intensity foot massage, you can remove the
gentle pads located on top of the foot rollers (Fig.7)
•For a higher intensity neck and shoulder massage, you can
flip the pillow to the back of the chair

13
Step 3: Back Cushion Assembly
Assemble the back cushion as shown in Fig. 5 below. Be sure to
connect the heat connector with matched wire color.
Fig.5: Back Cushion Installation
Step 4: Pillow and Foot Roller Gentle Pad Assembly
Connect the air pipe on the pillow to the pipe on the back of the
chair as shown in Fig.6 below.
Be sure to install the clamps to secure the air pipes (Use the
pliers provided).
Fig.6: Pillow Assembly

14
If you wish to have a stronger foot massage, simply remove the gentle
pads on top of the rollers as shown in Fig.7 below. Note: The gentle pads
are already installed in the chair.
Fig.7: Adding/Removing Foot Roller Gentle Pads and Remote
Controller Installation
Adding
GentlePad
Removing
GentlePad
Inserttheremote
cablethrough
theseleather
loops

15
Step 5: Connect Remote Control and other Electrical Accessory
Devices
1. Please refer to Fig.7&8 for remote control and other accessory
devices connections. Be sure the remote
cable is inserted through the leather loop located on the remote
pouch. This will prevent remote damage from dropping on the
floor. Note: This panel is located on the right side of the chair
slightly below the armrest
Fig.8: Side Panel
2. Plug the power cord to the back of the chair.
3. Power is turned on/off by a switch on the back (Switch to position “I”
to turn on and position “0”to turn off).
4. Use the remote to choose the massage functions.
5. For Bluetooth music streaming, please follow the instructions (see
Page. 16).
6. If you use headphones, please insert the connector to the audio out
port as indicated on the side panel of
the chair. (Fig. 8)
RemoteControl
Port
ReservedForServiceTech
BloodPressureMonitorPort
RemoteControlErrorIndicator(needareboot)
PowerIndicator
AudioOutput

16
IV. UNDERSTANDING THE CONTROL FEATURES
Fig.9: Control Instructions and Button Description
1. Quick Instructions for Control Main Screen
•Auto:
Allows user to select one of the 9 automatic massage programs.
•Manual:
Allows user to customize a massage profile that best fits the
body needs for optimal results. After an optimized profile is
created, user can save it under “Users Profile”. User can then
recall the saved profile next time chair is used.
Start/Stop
AutoModes
ManualModes ChairSettings
HealthInfo
UserMassage
ProfileSave/Open
Massage
IntensityControl
ChairPosition
Adjustment
HeatControl
Pause/Resume
MassageCycle
NineAuto
Modes

17
•Settings:
Allows user to setup system preferences and passcode
protection.
•Bluetooth Music Streaming:
Allows user to play or stream music to the chair’s high quality
speaker system (P. 16).
•Health Info:
Displays health information related to the human body
acupressure and reflexology points. It’s designed to help the
user to understand and customize a massage profile that is best
suited for them.
•Heat:
Allows user to turn on/off the heat and to adjust the heat level.
•Adjustments:
Allows user to adjust the chair to their preferred position. The
chair position will be stored in user profile when saved.
•Intensity:
Unlike many other chairs on the market, the i7 gives the user
control of the massage intensity for
different parts of your body. Intensity levels are also stored in
user profile when saved.
•Users:
Allows user to save customized massage profile, chair position,
and intensity levels.
2. Start/Stop the chair
Starts or Stops the massage chair. The default timer for each
massage session is 20 minutes. Pressing this button a second
time will put the chair back to its initial position automatically.
When time is up, if the sleep setting is checked, the chair
maintains its position to avoid sleep disruption.
3. Automatic Massage Modes
•Health Massage Mode:
Specifically designed for health enhancement that mainly
focuses on health aspects like to release muscle strain, improve
blood flow, soothe anxiety and help to relieve depression. This
mode is the default massage mode when you start the chair.

18
•Soft Massage Mode:
Applies a very soft and gentle massage throughout the body.
This mode is good for relieving headaches, muscle strains and
helps to improve sleep.
•Quick Massage Mode:
Provides a quick 10-minute full body massage. It combines the
best features of all massage modes into a short cycle.
•Morning Massage Mode:
Designed specifically for morning use, focusing on energizing
the body by providing stretching, mobilizing joints and promoting
flexibility with some muscle exercise.
•Night Massage Mode:
Designed specifically for evening/night use to enhance sleep,
focusing on relieving postural stress after a day’s work. It also
helps relieve anxiety, depression and headaches.
•Sport Massage Mode:
Geared towards people involved in sporting activities to help
prevent or treat injuries. It focuses on areas of the body that are
overused and stressed from repetitive and aggressive
movements. It promotes flexibility, reduces fatigue, improves
endurance, and reduces muscle soreness.
•Shiatsu Massage Mode:
Provides a high intensity and point based massage with varied
and rhythmic pressure on different parts
of the body. It helps relieve severe tension in muscles and
connecting tissues, relieves blockages and rejuvenates the
body.
•Stretch Massage Mode:
Provides stretching and promotes mobility throughout the body.
It relaxes muscles, enhances muscular coordination, helps
improve posture/flexibility and provides a greater sense of well-
being.
•TV Mode:
Puts the chair into a comfortable position for watching TV.

19
4. Manual Massage Modes
The i7 PLUS allows users to easily customize the massage profile
and save them under 5 different user profiles. Touch a button on
the body diagram screen to add or remove the massage for
specific parts of the body. For back massage, first select a back
area, then press more for massage options. The selected massage
profiles will be highlighted in a green color on the buttons (Fig.10).
Fig.10: Manual Mode Descriptions
Program is active Program is inactive
SpotBackMassage
Pressandrelease
Donotholdthebuttons
BicepMassage
Hand&Arm
Massage
CalfMassage
FootMassage
FootRoller
Leg&Buttock
Massage SeatSwing
LowerBackMassage
MidBackMassage
Neck&Shoulder
Massage
MoreOptions
This manual suits for next models
1
Table of contents
Other Luraco Massager manuals

Luraco
Luraco iRobotics User manual

Luraco
Luraco iRobotics 7 series User manual

Luraco
Luraco iRobotics 7 series User manual

Luraco
Luraco LEGEND Series User manual

Luraco
Luraco iRobotics 6 User manual

Luraco
Luraco iRobotics 6 User manual

Luraco
Luraco iROBOTICS 9 MAX Series User manual

Luraco
Luraco iROBOTICS 5 User manual

Luraco
Luraco SOFY series User manual

Luraco
Luraco iROBOTICS 9 Series User manual