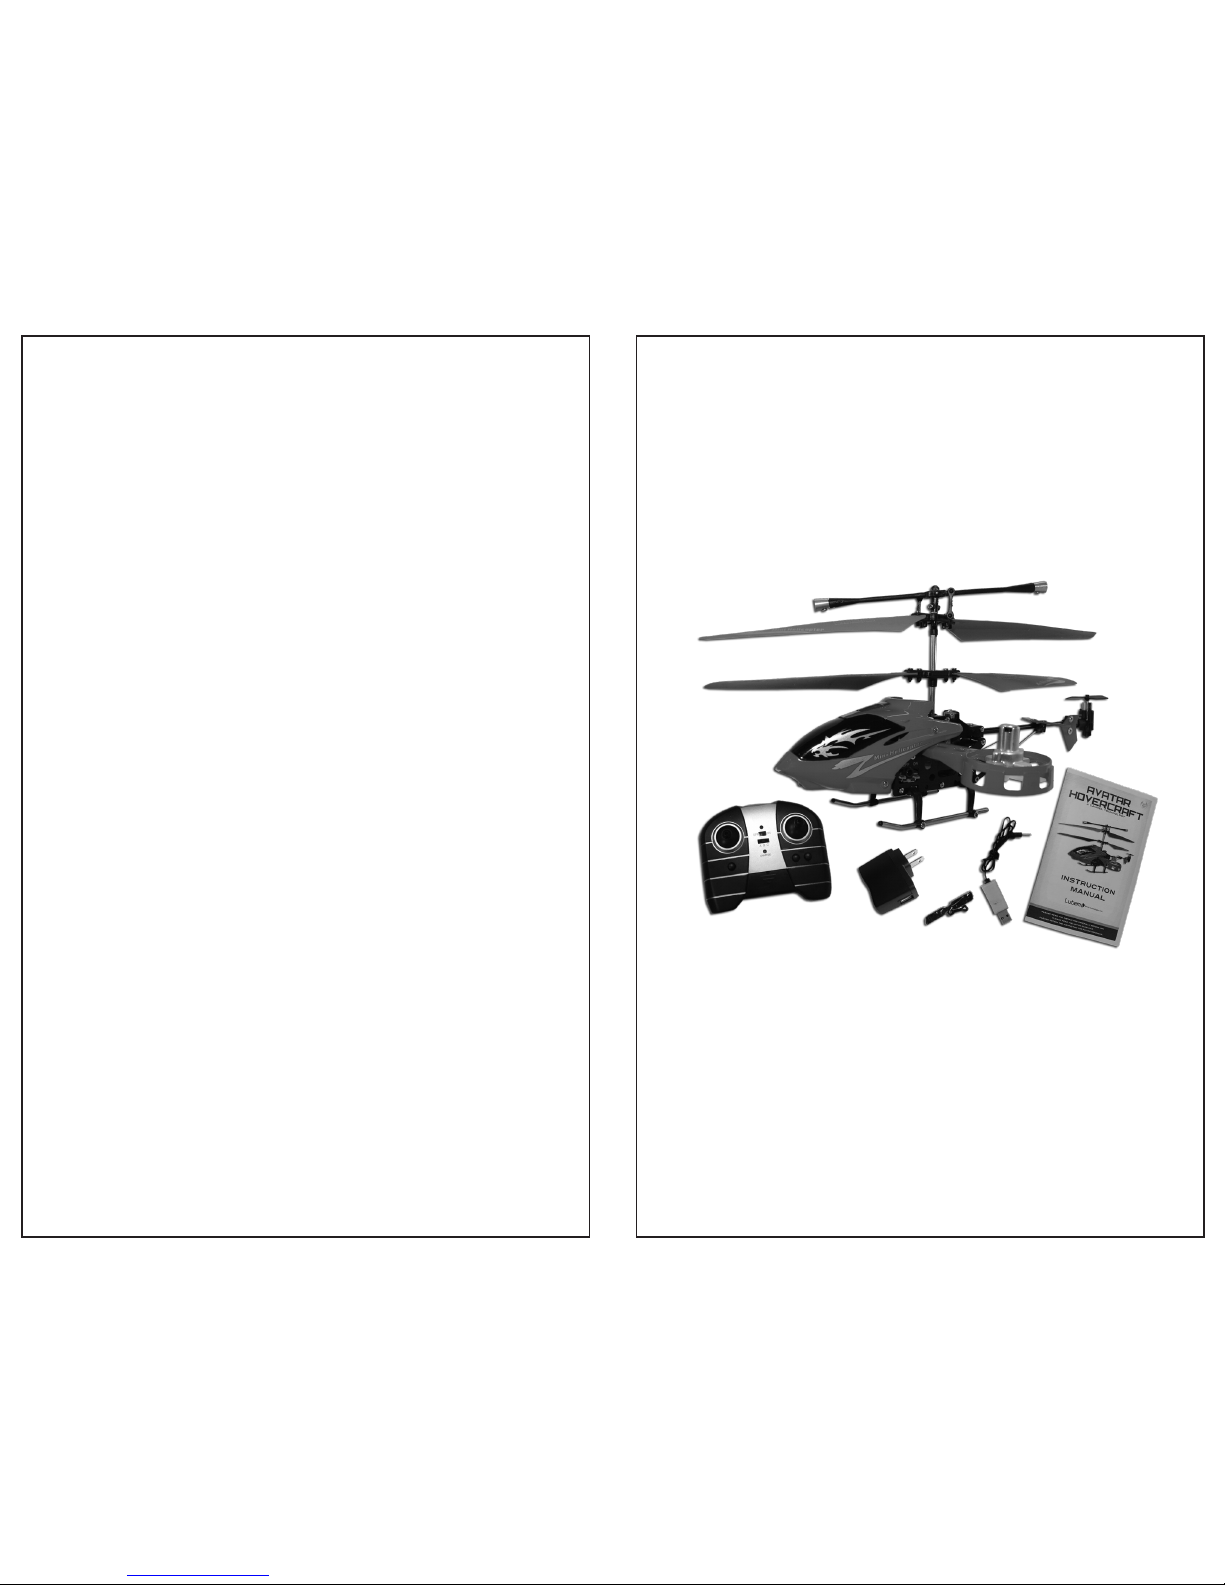
Lutema MIT4CAVHB User manual

Caution
Warning
Attention
Mit4cavhb/mit4cavhr

Flying Practice
Caution
Warning
Attention
1. This helicopter is operated by infrared technology. It is important to make sure you always use
new or fully charged batteries. Do NOT allow the batteries to run low, or you could lose control
of the helicopter.
2. Do NOT allow any of the electronic components to get wet as this may lead to electrical damage.
3. You should complete a successful range check of your radio equipment prior to flying the helicopter.
4. Do NOT use any solvents to clean the helicopter. Solvents will damage the plastic and
composite parts.
5. Always turn on the transmitter before turning on the helicopter and be sure to turn off the unit
before charging.
1. Check your surroundings before flying the helicopter.
2. Do NOT allow the helicopter to fly out of sight when operating.
3. Do NOT allow children under the recommended age to operate the helicopter.
4. Make other helicopters in the area are not on the same frequency channel.
Do NOT use an adapter other than those supplied in the box to charge the unit.
Using non-certified third party adapters to charge the internal battery may damage the
battery and potentially cause fire.
Do not operate the helicopter in below settings
22

Remote Control Features
Remote Control Synchronization
23
**Remote Control Uses 6 x AA Batteries (Not Included)
Step 1–Turn on the remote control transmitter and select your channel. You should see a
blinking red light on the remote control.
Step 2– Turn on the helicopter using the power switch on the side.
Step 3 – Stand 3 to 5 feet back. Move the throttle stick to 100% throttle level and then back down to 0%
throttle level within 2 seconds.
Step 4– Repeat Step 3 above and the light on the remote control should now stop blinking and show
a solid red. This means the helicopter is synchronized and ready to fly.
1. The red indicator light will stay solid when the remote control has syncronized with the helicopter.
The indicator light will flash when the controller is out of sync or if the helicopter or remote control
are low on battery.
2. The green indicator light will illuminate when the helicopter is fully charged using the remote
controls charging cable. Charging the helicopter using the remote control may take up to 20 minutes.
Do NOT use any other remote controls with charging features other than the one supplied
in the box to charge the unit. Using non-certified third party devices to charge the
internal battery may damage the battery and potentially cause fire.
11
9
8
7
6
5
4
3
2
1
10
12
Hover Left
Power Switch
Sync Indicator
Horizontal Lever
Frequency Number
Charging Indicator
Acceleration Mode
Compartment
Steering Trim
Steering Lever
Hover Right
Infrared Transmitter

42
Troubleshooting
1. Gently push the throttle up to raise the helicopter about 5 to 7 feet off of the ground.
Step 4 – Landing Practice
Step 1 – Yaw Practice
Slowly raise the throttle/yaw stick until the helicopter hovers about 2 feet in the air. Next, slowly move the
throttle/yaw stick to the left and observe how the helicopter rotates to the left. Repeat this procedure, but
rotate the helicopter to the right. If at any time the helicopter shows signs of tipping or you become
disoriented, quickly lower the throttle/yaw stick to off. Crashing the helicopter straight down without power
from this height is safer than crashing it while the engine is on and blades are still spinning.
Step 2 – Hovering Practice
Now that you have learned some of the basics, draw a circle on the ground and practice hovering within
the circle. Repeat this exercise while standing beside the helicopter, and then in front of it. If at any time
the helicopter shows signs of tipping or you become disoriented, quickly lower the throttle/yaw stick to off.
Step 3 – Practice Patterns
Now that you’ve succeeded in hovering, try practicing flying in patterns. Start with a square pattern.
Next, try a circular pattern, and finally, try a figure eight pattern. If at any time the helicopter shows
signs of tipping or you become disoriented, quickly lower the throttle to off.
Elevate
Rotate
Forward
Backward
Left
Rotation
Up
Down
Right
Rotation
BackwardForward
2. If the helicopter spirals clockwise (Pic 4), or keeps turning clockwise (Pic 5), push and release the left
trim button repeatedly until the turning stops and the helicopter flies straight (Pic 6).
3. If the helicopter spirals counter-clockwise (Pic 7), or keeps turning counter-clockwise (Pic 8), push and
release the right trim repeatedly until the turning stops and the helicopter flies straight (Pic 6)
(Pic4) (Pic5)
(Pic8)
(Pic6)
(Pic7)
Spiral
Clockwise
Spiral
Counter-Clockwise
Looping
Counter-Clockwise
Left Trim Right Trim
Looping
Clockwise

Flying Practice
25
After practicing the previous procedures, you can attempt to follow the below flying patterns.
Revolve the helicopter around
a fixed point.
Go forward and turn left until you
complete a rectangle.
Fly in a figure 8 pattern.Landing at a fixed point.

62
Troubleshooting
Owners Responsibilities
1. Please play responsibly. As the owner of this helicopter, you have the responsibility to make
sure that you do not cause injury to any person or property using this device.
2. When you adjust, assemble, and fly the helicopter, you must strictly operate it according to the
instructions in this manual. Make sure your fingers and other parts of the body are away from
the moving parts on the helicopter.
3. The user of this helicopter is completely responsible for the correct operation and usage of this
product. The manufacturer and dealer of this product accept no liability for injury of any person,
or damage to this product due to incorrect usage and operation.
4. Do NOT allow children under 14 years of age to operate this product.
1. The control distance and elevation will be limited when the helicopter is not fully charged.
2. Be sure to repair the helicopter if the unit is damaged before attempting to fly again. Do NOT fly the
helicopter if the rotor or blades are damaged in order to prevent injury.
3. Remove all batteries from the transmitter if you plan to not fly the helicopter for an extended
period of time. This will prevent battery leakage and damage to the product.
4. Do NOT drop the helicopter from high altitudes, or cause serious impacts as these actions
will damage the helicopter and shorten the usage time.
PROBLEM
Remote control
does not power on
The indicator
of transmitter
does not turn on
Can not control
the unit
PROBABLE CAUSE SOLUTION
Batteries are not installed properly
on the remote control
Batteries are drained or are not
installed properly
Helicopter is not receiving the
transmitters’ signal
Rotor speed is too slow
Helicopter is not fully charged Fully charge your helicopter
Pushing up the left stick
(throttle stick)
Infrared transmitter is not pointed
to the unit or there is an obstruction
in the way of the transmitter
Clear all obstructions and/or point
the transmitter to the helicopter
Install new batteries
Make sure the batteries
polarity is correct
Helicopter is
not flying
high enough

27
Visit:
www.lutema.com
THANK YOU FOR CHOOSING LUTEMA PRODUCTS
Replacement Parts
Sold Separately
*Internal Battery: Li-Poly 3.7V 200mAh
This manual suits for next models
1
Table of contents
Other Lutema Toy manuals
Popular Toy manuals by other brands

HobbyZone
HobbyZone Mega Hauler instruction manual

THUNDER TIGER
THUNDER TIGER RAPTOR 2.4G SC - ADDITIONAL INSTRUCTION- 3D SUITE... Instruction

KidKraft
KidKraft 53112A Assembly instructions

Mega Bloks
Mega Bloks Halo Cauldron Clash 97118 instructions

Techno Source
Techno Source Clickables Fairy Charms IM-21300B user manual

LEGO
LEGO 42056 Assembly manual

Canon
Canon CREATIVE PARK Five-storied pagoda of Horvuji Temple,... Assembly instructions

WowWee
WowWee Noomie user manual

Eduard
Eduard ZOOM FE260 quick start guide

Glow Bricks
Glow Bricks Harry Potter Lego 76408 installation guide

JP
JP F38 HORNET Assembly & operating manual

makerzoid
makerzoid Superbot manual