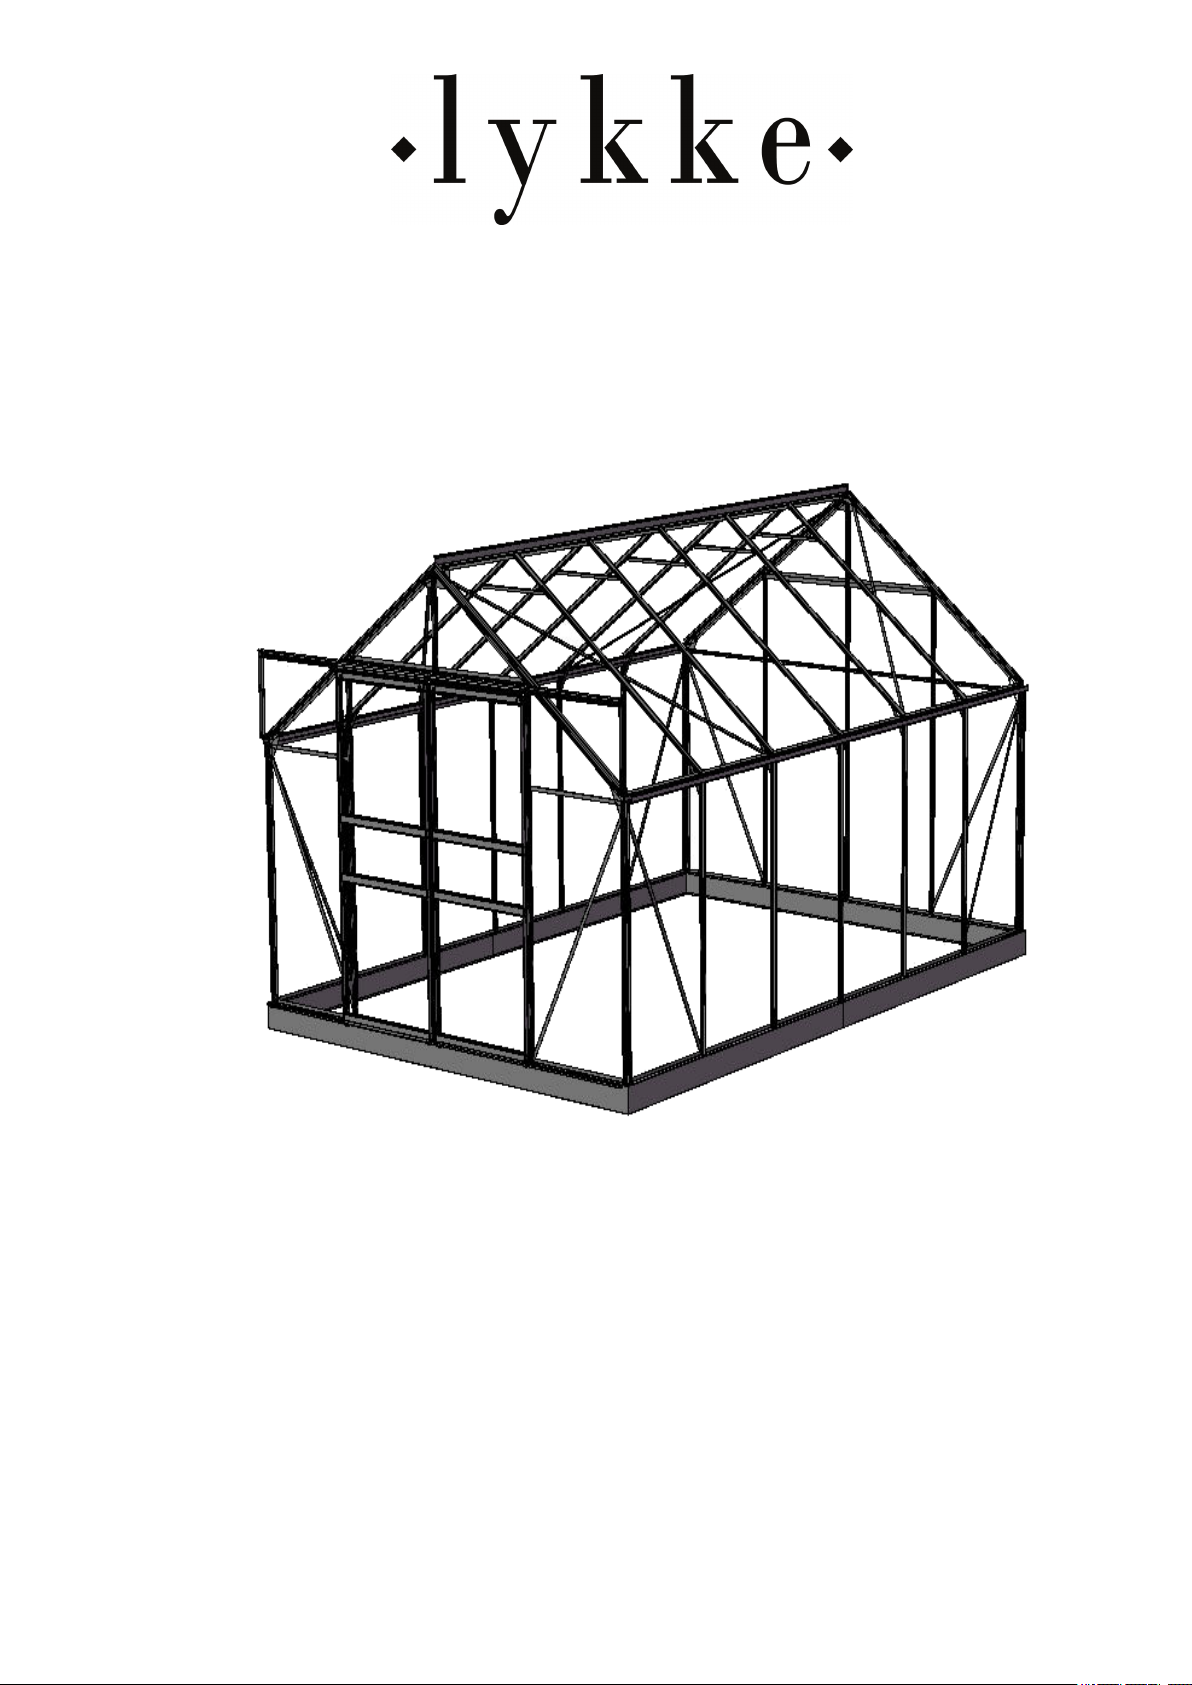
Dear Customer!
The assembly of your new greenhouse
requires no technical knowledge. Ho-
wever, it is important that the assembly
instructions are strictly followed.
The assembly instruction is a combina-
tion of text and illustrations. The profiles
are packed seperatly in numbered packs
corresponding to the order in the assem-
bly instruction. Erect one pack at a time.
All nuts and bolts and fi ttings are found
in the bag. Each pack is specified in
separate lists of components.
All detailed illustrations are marked with
symbols:
seen from inside seen from outside
Precautions
• Assembly must only be carried out in
dry and calm weather.
• Always use working gloves while
glazing. Greenhouse glass has sharp
edges, especially if the glass breaks.
• Assistants and especially children
must be warned that broken glass is an
element of danger. Pick up broken glass
at once and remove it with care.
• We recommend to use protective glas-
ses while fi xing the spring wire clips.
• Place the ladder on a level support.
• It is essential to have an assistant.
Page 2
Foundation
The base is not included in this delivery.
However, an optional base can be
bought separately. It ensures you have a
stable and easy to build base.
If you make your own base the measu-
rements indicated must be external
measurements.
If you buy an optional base you further-
more need about 75 litres of concrete
and 6 plastic-/concrete pipes of about
800 mm which are placed in a nonfree-
zing depth for the fastening of the corner
and middle anchors.
The base must be 100% level and
square; the latter is ensured by checking
that the two diagonal measurements are
equal.
Tools
The mounting of the greenhouse requi-
res the tools shown on page 1.
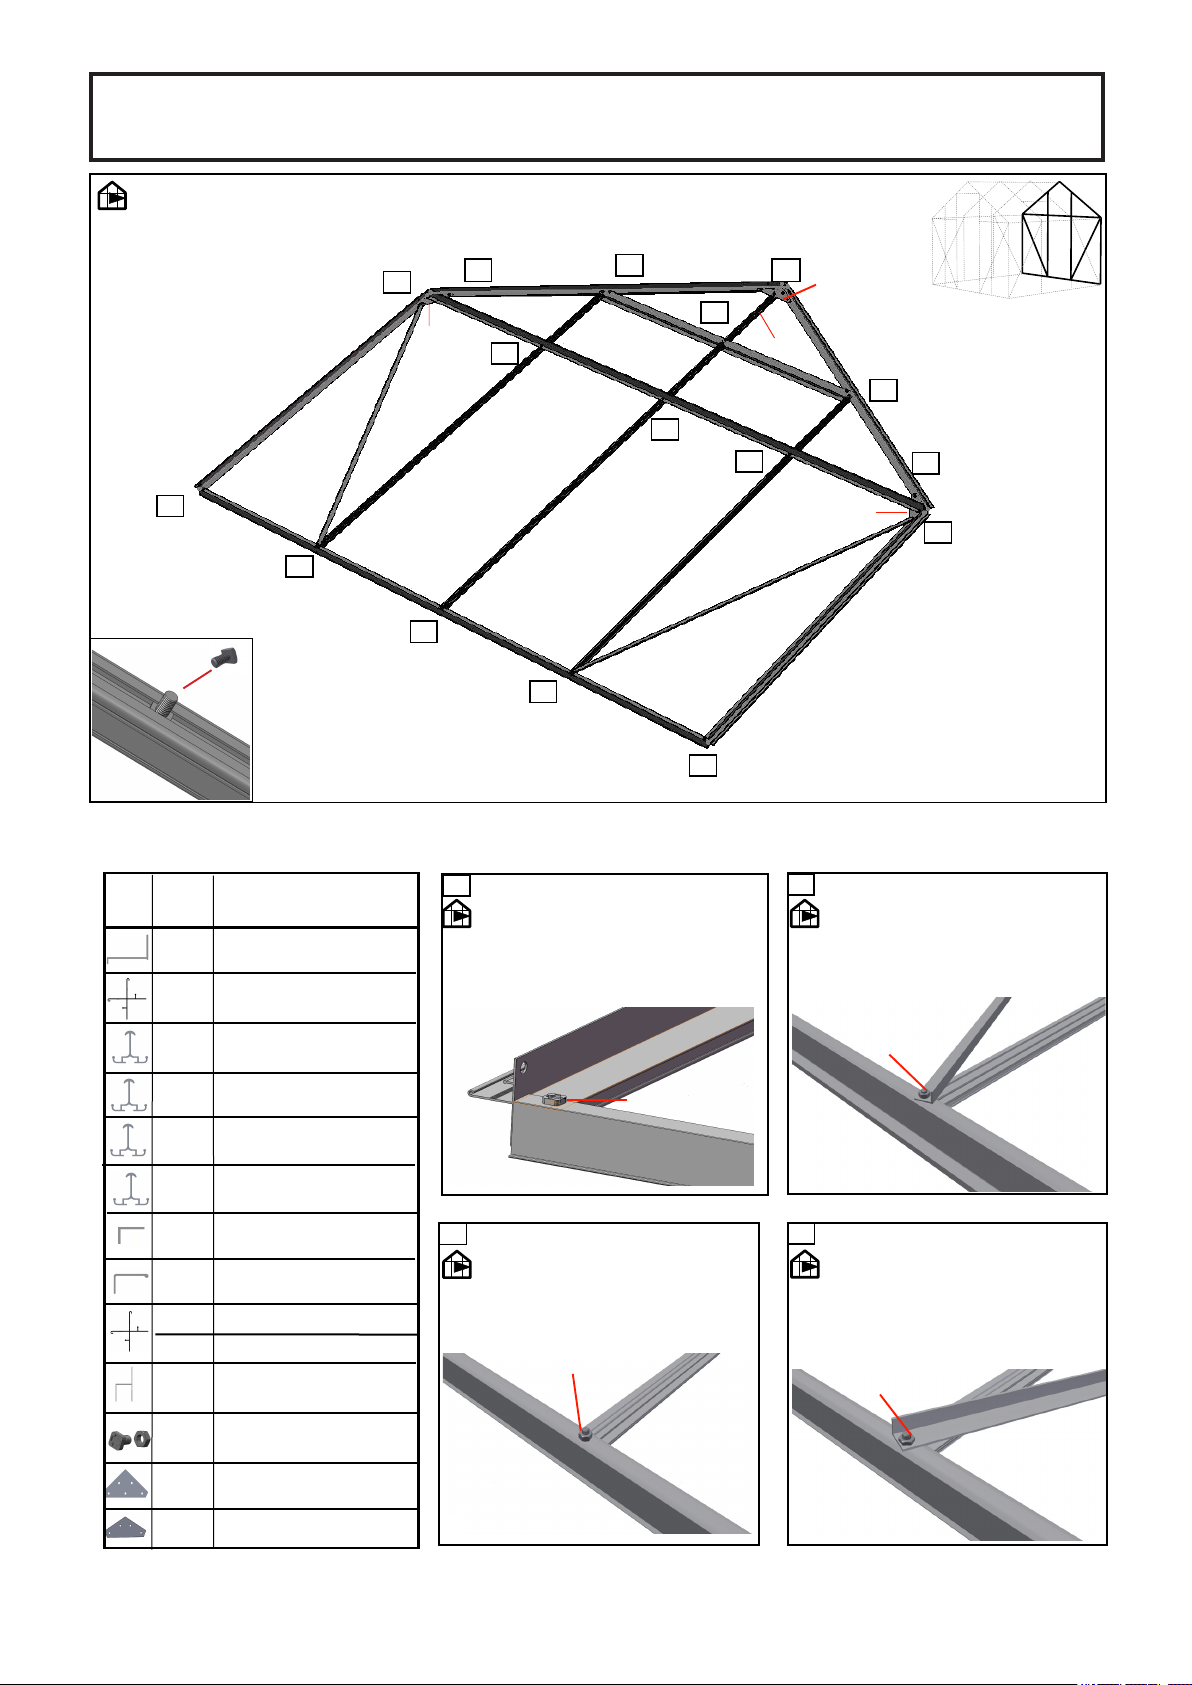
Page 3-14
Place the components as shown on the
illustration and assemble in the order
shown in the pictures.
Do not tighten the nuts completely until
the front gable construction has been
assembled.
Page 2:
Fastening to the base
When constructing your own base you
have to drill holes (7 mm) in the ground
frame between all the vertical frames,
the greenhouse is then fastened to
the base with screws (A).
Using an optional base the greenhouse
is fastened to each vertical bar as shown
on drawing B.
Fitting of glass/polycarbonate
Important before glazing!
Make sure that gables and sides are
level and square, and that door(s) and
window(s) are functioning perfectly.
Best order of assembly:
1) Rear gable – 2) Front gable –
3) Sides –4) Frame assembly – 5) Roof
and bracing - 6) Doors – 7) Vents –
8) Glazing
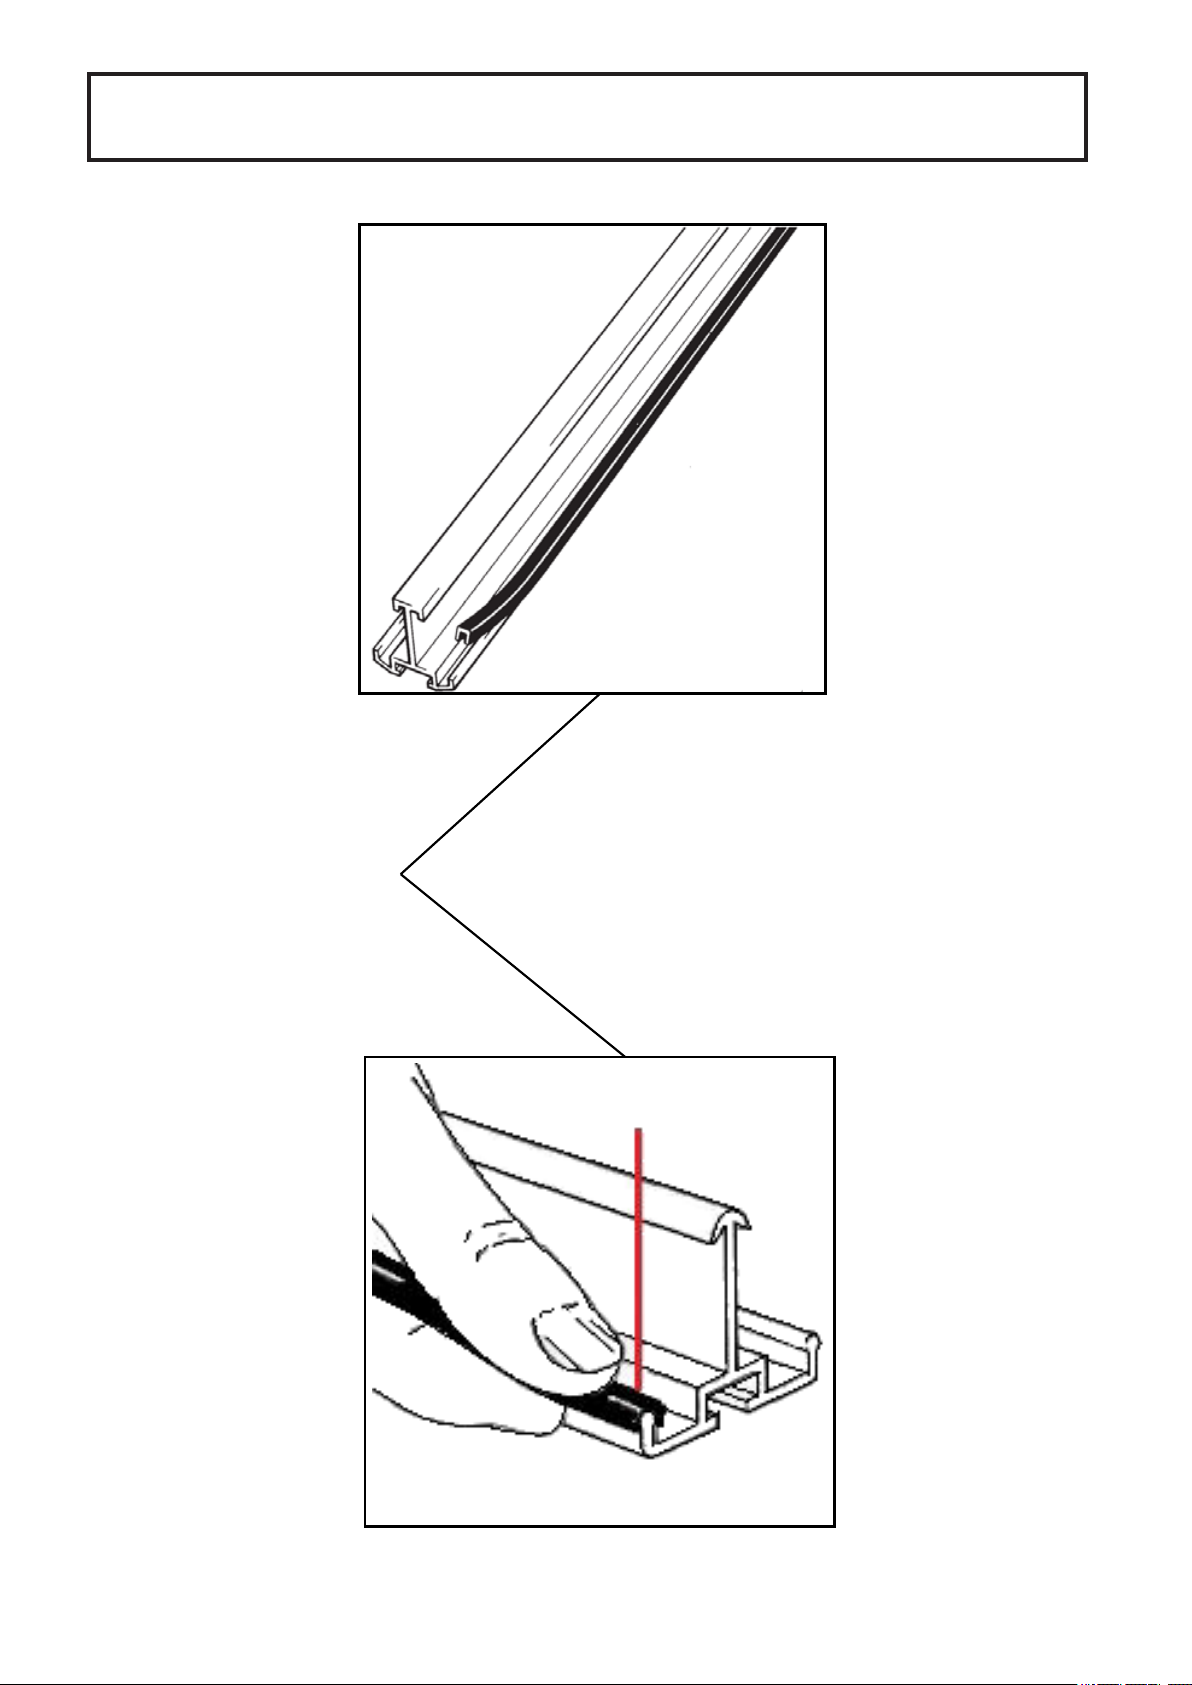
Glazing
Degrease the sheets and frames with
spirit. Start glazing from below, one
glass at a time. Fit glazing strip 1054)
to all glazing bars, gable bars and corner
posts before you begin to glaze the
greenhouse.
Spring wire clips and glassholders are to
be fi tted as shown.
X = Spring wire clips, H = H-Strip
Now your greenhouse is completely
assembled.
However, please notice the following:
Maintenance
• Grease doors (hinges and lock or
doortrack).
• Clean the gutter for leaves, etc.
• Adjustment of windows.
• Replacement of broken glass.
• Clean the greenhouse with disinfectant
before and after the growing season.
Winter Protection
In areas with occurrence of snow we
recommend the following winter protec-
tion:
• Support the roof ridge at the centre of
the greenhouse.
Beste klant!
handleiding nauwkeurig volgt.
van tekst en tekeningen. De profi
genummerde verpakkingen die overeenkomen met de
ficatie op blz. 12). Elke
gespecificeerd.
Alle detailtekeningen zijn voorzien van een van deze twee
symbolen:
V
van glas.
vooral als het stukgaat.
verpak het goed voordat u het weggooit.
• Gebruik eventueel een veiligheidsbril terwijl u de
glasklemmen aanbrengt.
• Als u een ladder gebruikt, moet deze op een
egale onderlaag staan
• Het is vereist om hulp te hebben.
Blz. 13:
Fundering
énvoudig te monteren is.
Indien u uw eigen fundering maakt, gelden de
kunt u controleren door te meten of de diagonale
afstanden gelijk zijn.
Gereedschap
Blz. 14-30:
Blz. 13:
fielen,
Voordat u begint!
Controleer eerst dat de gevels en zijkanten loodrecht
en haaks staan en dat deur(en) en ra(a)m(en) feilloos
werken.
fi
Beste montagevolgorde:
1) Achtergevel – 2) Voorgevel – 3) Zijkanten – 4) Frame –
5) Dak – 6) Deuren – 7)
fiel nr. 08615 en 12237.
Blz. 26-29:
Glasmontage Begin van onderen en monteer het glas
aangegeven.
De typeaanduiding geeft de lengte in mm aan. Evt.
fijn getande zaag.
K,L,M-profielen zoals op blz. 30.
zelfzaken).
Onderhoud
• Vervang kapot glas.
volgende aan:
• Neem voorzorgsmaatregelen tegen neer-stortend
sneeuw van bomen of huisdaken.
• Demonteer cilinders van eventuele auto-matische
raamopeners (optioneel).
Denk eraan dat niet alle verzekeringsmaat-
schappijen kassen automatisch verzekeren. Vraag uw
verzekeringsmaatschappij of uw kas gedekt is.
Garantie
Er wordt 12 jaar garantie verleend die omruiling of
reparatie van defecte delen dekt. De garantie omvat niet:
Gefeliciteerd met uw nieuwe kas
• Remove greater snow loads from the
roof.
• Take precautions against snow falling
down from for instance a tree or a roof.
• Dismount the cylinders for the auto-
matic window openers, if any (optional
extras).
• Secure door(s) and window(s) preven-
ting wind damage to the greenhouse.
May we congratulate you on your new Greenhouse
EN IP-Agency Finland Oy - All rights reserved. Product and instructions for use are subject to change. Technical
information is subject to change without notice.