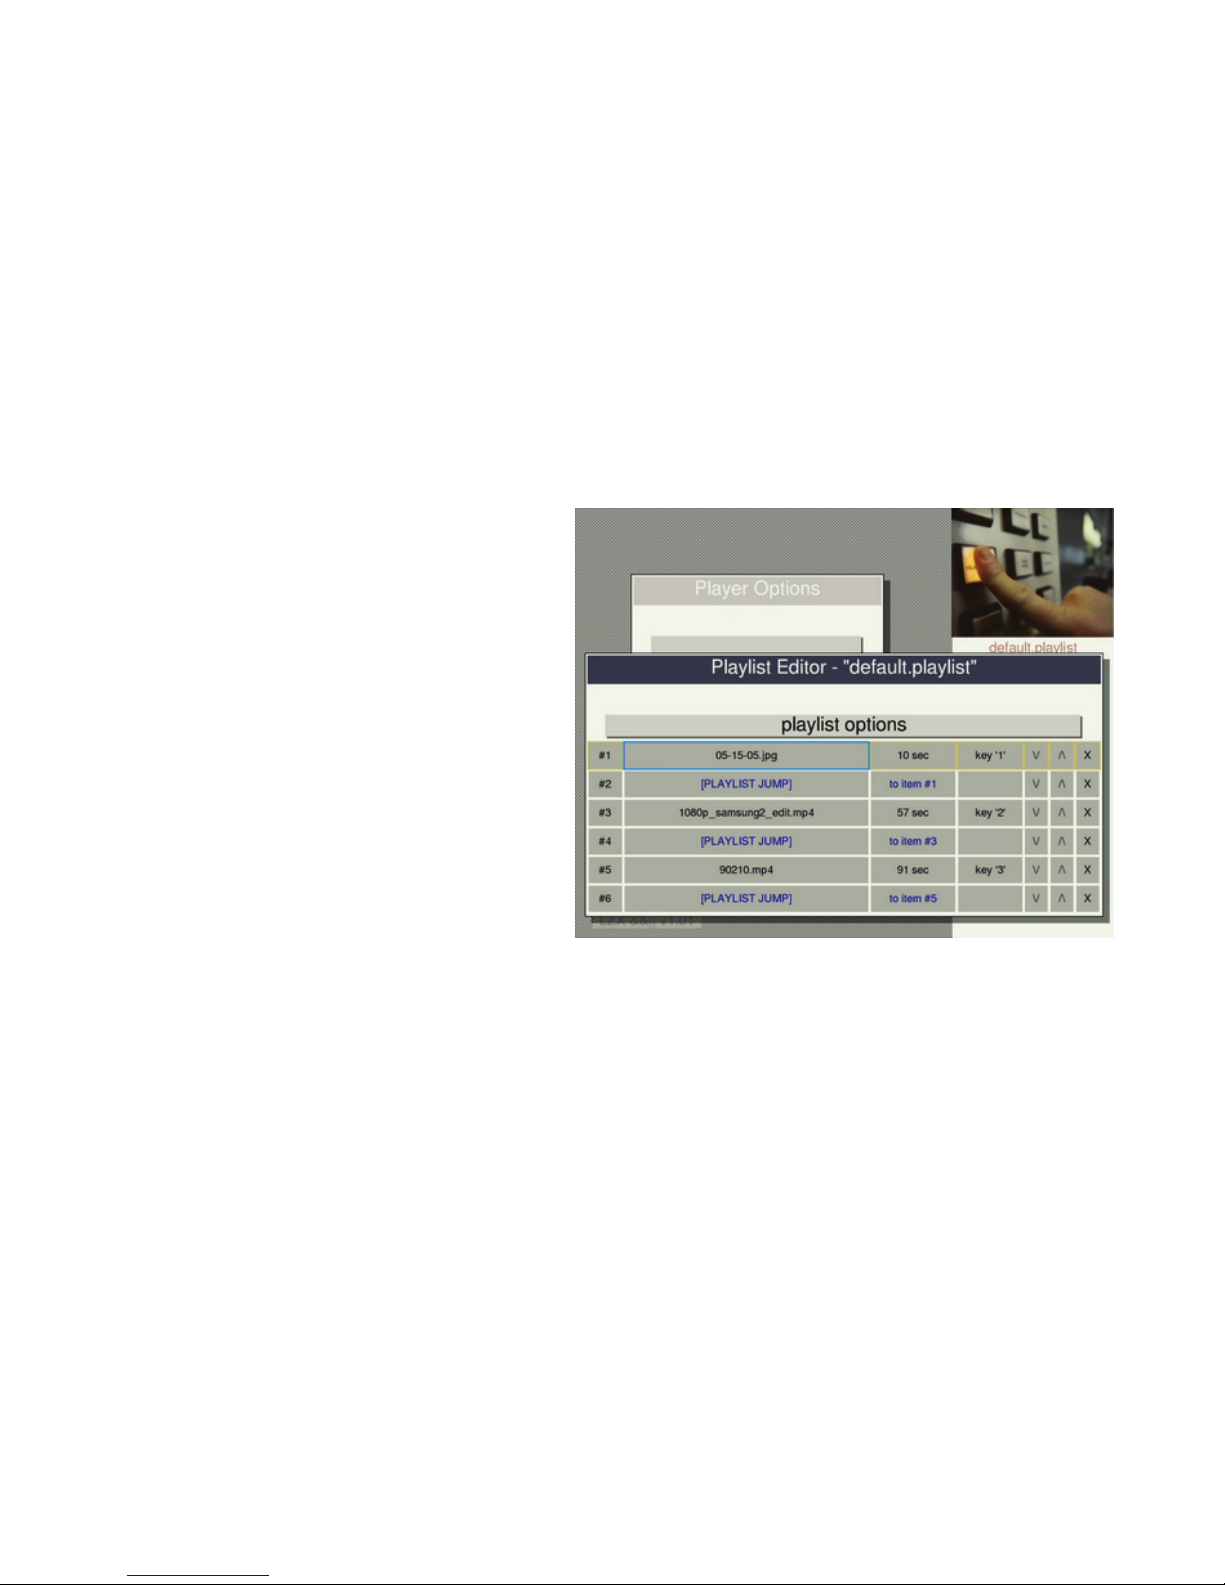
To add playlist items - posion the cursor on the second-from-le column at the vercal
posion where you want to insert, and then press OK/ENTER. To add an item at the end of
the playlist, posion the cursor in the "<empty>" slot and press OK/ENTER. A list will pop up
showing the available media files and items that can be inserted.
To delete playlist items - click the 'X' in the far right column to delete an item.
To rearrange playlist items - use the '/\' and '\/' buons to move playlist items up and down in
the list.
To change the duraon of an image or delay item - posion the cursor in the third column and
press OK/ENTER
To assign a key trigger - posion the cursor over the trigger value, and press OK/ENTER to
bring up a menu, or just press the key or MIDI note that you'd like to assign.
SYNCHRONIZED REMOTE CONTROL COMMANDS
When operang synchronized players, remote control and keyboard commands that affect
playback are retransmied to all synchronized players. These command include the pause/play
toggle (OK/ENTER), skipping forward and back (arrow buons), and playlist triggers. Note that
when playlist triggers are transmied to the other synchronized players, the actual key or
MIDI note is not transmied. Instead, it sends the playlist index of the trigger.
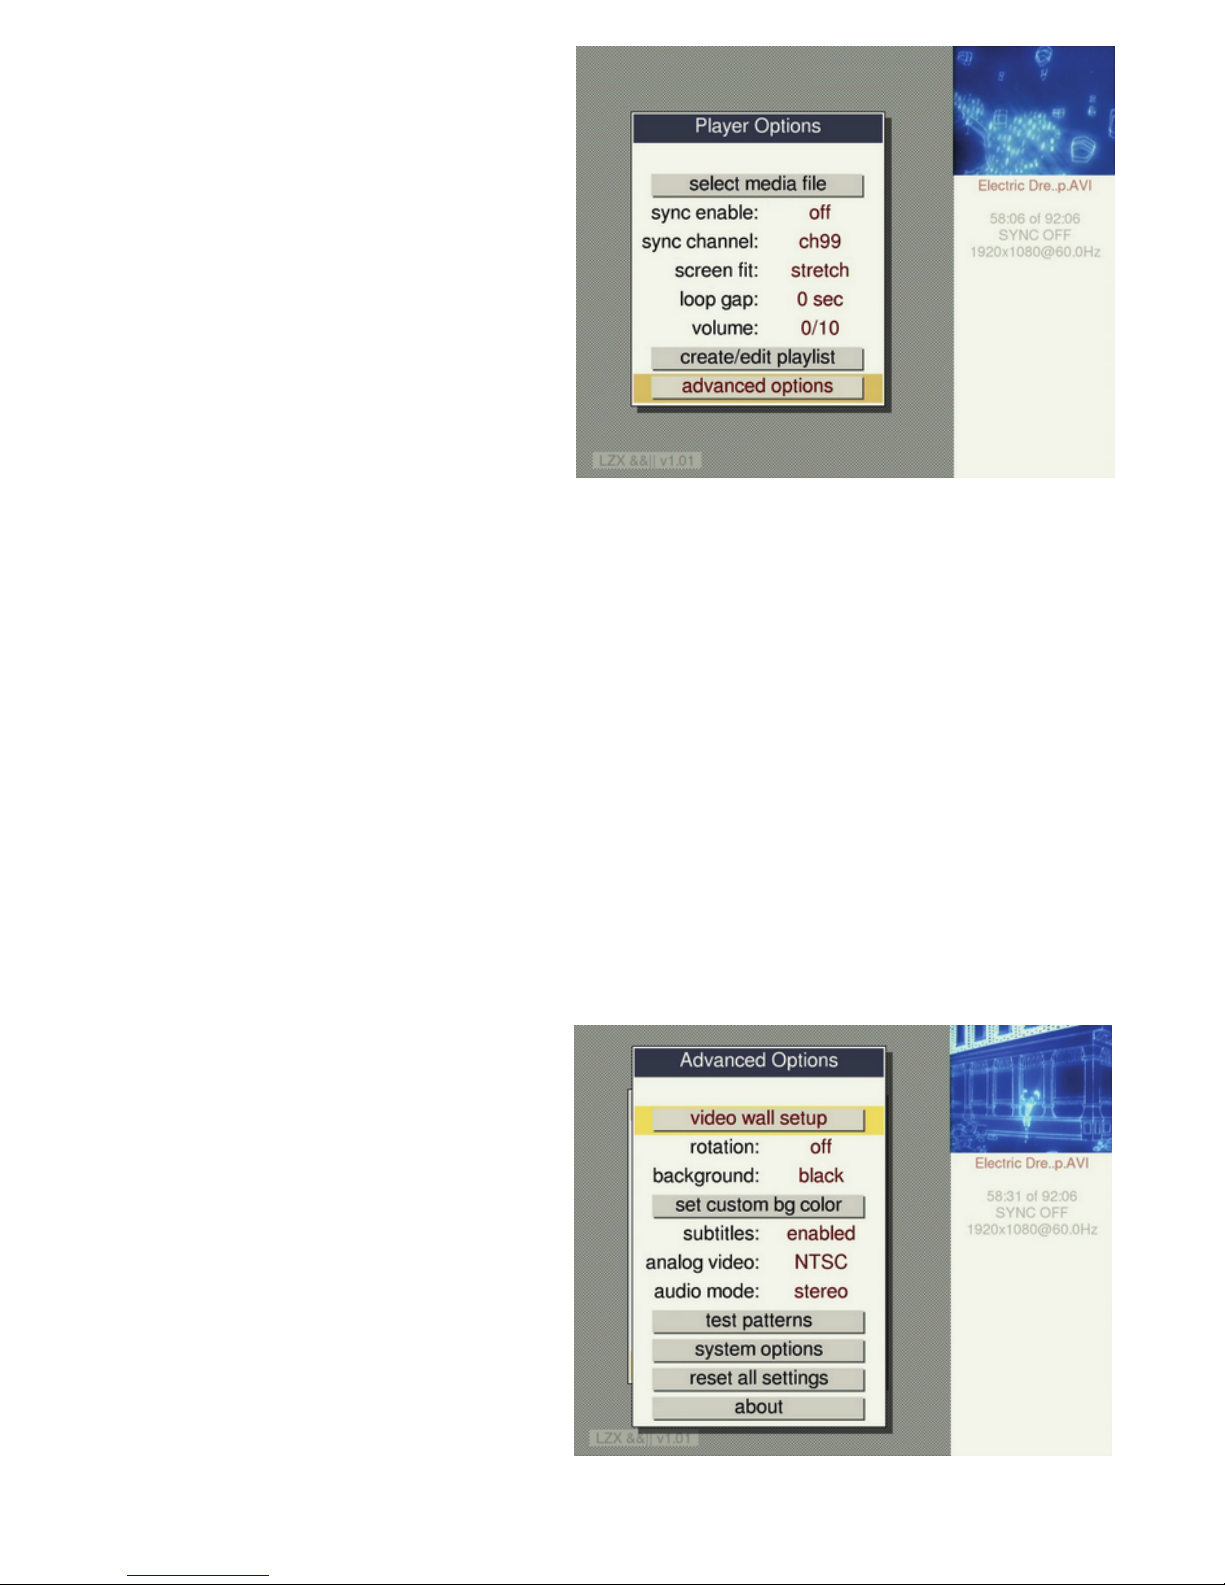
THE SYSTEM OPTIONS MENU
This menu is for fine tuning and troubleshoong and probably should not need to be adjusted.
Sync ming - offset for sync ming, typically used when playing synchronized video across
different kinds of monitors that have varied display lag. The default value is zero.
Sync trigger delay - this controls the delay when triggering playlist items with synchronizaon.
Because it takes an unpredictable amount of me to communicate with the other players and
load the videos, it is necessary to have some delay. The default value is 2 seconds, but it can
be set longer if your videos are not loading fast enough. It is also possible to set the delay to 1
second, but it may be less reliable. When sync is off, this value will not be used and media will
be loaded as fast as possible. [NOTE: that last part is not yet true, but "faster triggering when
sync is off" will be completed soon and acvated in an upcoming soware update.]
Vsync lock - this seng determines how vercal sync ming is adjusted. Some monitors don't
respond well to video ming adjustments and lose sync, in which case you may set this value
to off or to the gentle mode which reduces the severity of ming adjustments. With vsync lock
turned off, the sync accuracy will be plus or minus half the duraon of a frame (+/- 8.3ms at
60hz), which is sll accurate enough for many applicaons. It is rare though that this seng
will need to be changed. There is also aggressive vsync mode which synchronizes vercal sync
faster but is more likely to cause visual distoron when it is first locking.
Refresh rate - normally the player will synchronize to your monitor's default refresh rate, but
this control makes it possible to automacally change the monitor refresh rate to match the
playing video. In most cases it will probably be preferable to have this off since it will cause the
monitor to resync when new videos are loaded, but it may be useful for playing back some
kinds of videos with great accuracy at legacy framerates like 29.97fps and 24fps. [NOTE: this
feature is not yet completed but will be acvated in an upcoming soware update.]
VIDEO WALL MODE
Video wall mode makes it possible play a single video spread out across mulple screens
without having to edit the video into cropped segments for each screen. To use this feature,
put the same video on the USB sck of each player and turn on video wall mode in its menu,
which is available through a buon in the Advanced Opons Menu.