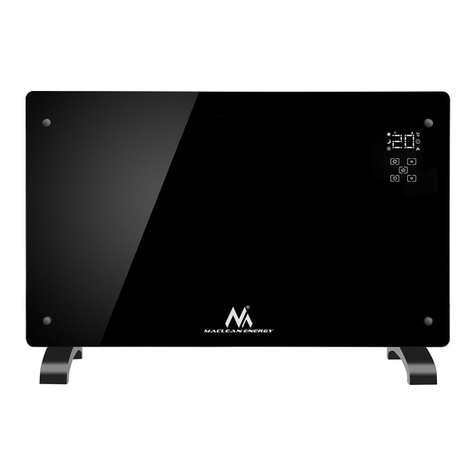
Maclean Energy MCE504 Operator's manual

USER INSTRUCTION MANUAL
EN I Wall Panel Heater
Model: MCE504
READ INSTRUCTIONS CAREFULLY: Read and follow all instructions. Place
instructions in a safe place for future reference. Do not allow an one who has
not read these instructions to assemble, light, adjust or operate the heater.

IMPORTANT INSTRUCTIONS
PLEASE READ AND SAVE THESE IMPORTANT SAFETY INSTRUCTIONS
When u ing electrical appliance , ba ic precaution hould alway be
followed to reduce the ri k of fire, electric hock, and injury to per on ,
including the following:
READ ALL INSTRUCTIONS BEFORE USING THIS HEATER.
DO NOT USE THIS HEATER IN THE IMMEDIATE SURROUNDINGS OF
A BATH, A SHOWER OR A SWIMMING POOL.
WARNING: THIS HEATER IS NOT EQUIPPED WITH A DEVICE TO
CONTROL THE ROOM TEMPERATURE.
DO NOT USE THIS HEATER IN SMALL ROOMS WHEN THEY ARE
OCCUPIED BY PERSONS NOT CAPABLE OF LEAVING THE ROOM ON
THEIR OWN, UNLESS CONSTANT SUPERVISION IS PROVIDED.
CHILDREN OF LESS THAN 3 YEARS SHOULD BE KEPT AWAY
UNLESS CONTINUOUSLY SUPERVISED.
CHILDREN AGED FROM 3 YEARS AND LESS THAN 8 YEARS SHALL
ONLY SWITCH ON/OFF THE APPLIANCE PROVIDED THAT IT HAS
BEEN PLACED OR INSTALLED IN ITS INTENDED NORMAL
OPERATING POSITION AND THEY HAVE BEEN GIVEN SUPERVISION
OR INSTRUCTION CONCERNING USE OF THE APPLIANCE IN A SAFE
WAY AND UNDERSTAND THE HAZARDS INVOLVED. CHILDREN AGED
FROM 3 YEARS AND LESS THAN 8 YEARS SHALL NOT PLUG IN,
REGULATE AND CLEAN THE APPLIANCE OR PERFORM USER
MAINTENANCE.
THIS APPLIANCE CAN BE USED BY CHILDREN AGED FROM 8 YEARS
AND ABOVE AND PERSONS WITH REDUCED PHYSICAL, SENSORY
OR MENTAL CAPABILITIES OR LACK OF EXPERIENCE AND
KNOWLEDGE IF THEY HAVE BEEN GIVEN SUPERVISION OR
INSTRUCTION CONCERNING USE OF THE APPLIANCE IN A SAFE
WAY AND UNDERSTAND THE HAZARDS INVOLVED. CHILDREN
SHALL NOT PLAY WITH THE APPLIANCE. CLEANING AND USER
MAINTENANCE SHALL NOT BE MADE BY CHILDREN WITHOUT
SUPERVISION.
IF THE SUPPLY CORD IS DAMAGED, IT MUST BE REPLACED BY THE
MANUFACTURER, ITS SERVICE AGENT OR SIMILARLY QUALIFIED
PERSONS IN ORDER TO AVOID A HAZARD.
CAUTION —SOME PARTS OF THIS PRODUCT CAN BECOME VERY
HOT AND CAUSE BURNS. PARTICULAR ATTENTION HAS TO BE
GIVEN WHERE CHILDREN AND VULNERABLE PEOPLE ARE
PRESENT.
IN ORDER TO AVOID OVERHEATING, DO NOT COVER THE HEATER
THE HEATER MUST NOT BE USED IF THE GLASS (PLASTER) PANELS

ARE DAMAGED
THE APPLIANCE IS NOT TO BE USED BY PERSONS (INCLUDING
CHILDREN) WITH REDUCED PHYSICAL, SENSORY OR MENTAL
CAPABILITIES, OR LACK OF EXPERIENCE AND KNOWLEDGE,
UNLESS THEY HAVE BEEN GIVEN SUPERVISION OR INSTRUCTION
Heater is hot when in use. To avoid burned, do not let bare skin touch hot surfaces.
Keep combustible materials, such as furniture, pillows, bedding, papers, clothes, and
curtains at least 3 feet (0.9m) from the front of the heater and keep them awa from
the sides and rear.
Extreme caution is necessar when this heater is used b or near children or invalids
and whenever the heater is left operating and unattended. This appliance is not
intended for using b persons (including children) with reduced ph sical, sensor or
mental capabilities, or lack of experience and knowledge, unless the have been
given supervision or instruction concerning use of the appliance b a person
responsible for their safet . Children should be supervised to ensure that the do not
pla with the appliance. Alwa s unplug heater when not in use.
Do not operate the heater with a damaged cord or plug or after the heater
malfunctions, has been dropped or damaged in an manner. Return it to authorized
service facilit for examination, electrical or mechanical adjustment, or repair.
Indoor use onl , wall mounted use onl . Do not use outdoors. (Omitted if the heater is
intended for outdoor use.)
This heater is not intended for using in bathrooms, laundr areas and similar indoor
locations. Never locate heater where it ma fall into bathtub or other water container.
Do not run cord under material. Do not cover cord with throw rugs, runners, or similar
coverings. Do not operate an heater after it malfunctions. Do not operate the heater
with the alarm sounding (or illuminating). Disconnect power at service panel and have
heater inspected b a reputable electrician before reusing.
To prevent a possible fire, do not block the space between the heater and the wall
which is for air intake or exhaust in an manner.
A heater has hot and arcing or sparking parts inside. Do not use it in the areas where
gasoline, paint, or flammable liquids are used or stored.
Use this heater onl as described in this manual. An other use not recommended b
the manufacturer ma cause fire, electric shock, or injur to persons.
Avoid the use of an extension cord because the extension cord ma overheat and
cause a risk of fire.
To prevent overloading a circuit, do not plug the heater into a circuit that alread has
other appliances working. Do not install the heater under the wall socket.
It is normal for the plug to feel warm to the touch; however, a loose fit between the AC
outlet (receptacle) and plug ma cause overheating and distortion of the plug.
Contact a qualified electrician to replace loose or worn outlet.
The output of this heater ma var and its temperature ma become intense enough
to burn exposed skin. Use of this heater is not recommended for persons with
reduced sensitivit to heat or an inabilit to react to avoid burns.
Do not cover the heater under no circumstance.

SAVE THESE INSTRUCTIONS
Unpack our package and find the heater together with the wall mounting
accessories pack.
1 Mark the positions of the four holes to be drilled on the wall. (Better install
the heater 20cm to 100cm height from the floor to get best performance.)
2 Drill the holes with the drill bit from the accessories pack.
3 Insert the plastic rails fitting into the holes.
4 Install the panel heater onto the four rails fittings matching the four holes in
the heater.
5 Screw the four fasten bolts into the plastic rails fitting.
6 Put the caps onto the fasten bolts. It is recommended to use some normal
glue to stick the caps onto the bolts steadil .
7 To know down the unit from the wall, just open the bolt caps and unscrew the
bolts with a screw driver and then take the heater down.
8 Make sure the distance between the bottom of the heater and the floor is no
less than 20cm when the heater is installed

-Heater: 1 piece
-Accessories pack 1 set:
1xdrill bit (8mm)
4xrails fitting
4xscrew bolts
4xcaps for bolts
1xInstruction manual
FREE STANDING INSTRUCTIONS
1. Place the free standing feet on the ground, keep the slots of both foot inline, distance
the foot which is on the switch side at least 12cm and similar distance the other, and insert
the panel into the slots lightl .
2. Screw the two bolts into the holes on the feet.

OPERATING INSTRUCTIONS
To begin to use the heater, please follow these instructions:
1. Check the heater to be sure it is not damaged.
2. Connect the power and turn on the switch on the side of product. The OF
indicator on the lower left corner of the LCD screen will be lit to enter standb
mode, and the LCD screen's default setting temperature will be ST25 while ℃
the ECO indicator will be lit, displa ing the current ambient temperature.
3. Press the power button once and the "ON" indicator of the LCD screen is lit,
showing that the product is in the power-on state. At this time, if the ambient
temperature is below RT25 , the product will begin to work; if the ambient ℃
temperature is higher than RT25 , it is required to set the temperature for ℃
the product before the product can start work.
4. Temperature setting:
①Turn on the switch on the side of the product, and the OF on the LCD
screen will be lit, showing that the product enters the standb state;
②Press the power button, and the ON indicator on the LCD screen will be lit,
showing that the product enters the power-on state;
③Press the SET button and the temperature setting indicator flashes, then
press "+" or "-" button to set the temperature;
④After 10 seconds of setting the temperature, the product will automaticall
save the temperature and start to work.
(Note: When the et temperature i higher than the ambient temperature,
the product begin to work; when the et temperature i lower than the
ambient temperature, the product will top working.)
6.Power-on reservation:
①Turn on the switch on the side of the product, and the OF on the LCD
screen will be lit, showing that the product enters the standb state;
②Press the power button once, and the "ON" indicator on the LCD screen will
be lit, showing that the product enters power-on state;
③Continuousl press the SET button twice and the power-on reservation
indicator "ON" will be lit. the reservation timing indicator flashes and enters the
power-on reservation status;
④Press "+" or "-" button to set the power-on reservation time;
⑤Ten seconds after the completion of the startup reservation setting, the
startup reservation time will be automaticall saved;
7. Shutdown reservation:
①Turn on the switch on the side of the product, and the OF on the LCD
screen will be lit, showing that the product enters the standb state;
②Press the power button once, and the "ON" indicator on the LCD screen will
be lit, showing that the product enters power-on state;
③Continuousl press the SET button twice and the shutdown reservation
indicator "OF" will be lit. the reservation timing indicator flashes and enters the
shutdown reservation status;

④Press "+" or "-" button to set the shutdown reservation time;
⑤Three seconds after the shutdown reservation setup is complete, the
shutdown reservation time will be automaticall saved;
8. Child lock button
①when the product is set up, press the child lock button for 3 seconds, and
the "Child Lock Icon" on the LCD screen will be lit, and the product operation
button will be latched;
②When the product needs to be re-set, press again the child lock button for 3
seconds, and the "Child Lock Icon" on the LCD screen will be off, indicating
that the unlock is successful. Then ou can re-set the product;
9. Intelligent graffiti control oftware download method
Method A:Internet APP downloads
①Open the "APP Store" on the mobile phone
②Enter "tu a smart" and click Search;
③Click to get and begin to download and install;
Method B:Scan the qr code
①Open the phone and scan the qr code below
②Click open from the browser;
③Click to download and install;
8. WIFI connection
A: Faster flash state:
①Turn on the switch on the side of the product, and the LCD screen will
displa OF, indicating that the device enters standb mode;
②press the power button, and the "ON" indicator on the LCD screen will be lit,
indicating that the device enters the power-on state;
③Press SET button for 5 seconds, the WIFI indicator on the LCD screen will
be lit and enter the faster flash state;
④Open the "Smart life" software on the mobile phone to enter the phone
number to get verification code;
⑤Enter the verification code and click login;
⑥Click Add Device to select the wireless LAN, and enter the WIFI password
and click OK to connect the device;
⑦When the phone interface shows the addition is successful, and the WIFI

indicator on the device stops flashing and turns into being long lit, then it
means that the addition is complete.
B:If there showed connect failed on the screen of phone,then need change to
slowl flash state.
①On the faster flash state, press SET button for 5 seconds, the WIFI indicator
on the LCD screen will be lit and enter the slowl flash state;
②open the phone, connect the WIFI named “Smartlife” (without passpord).
③Open the "Smart life" software on the mobile phone to connect the device.
④When the phone interface shows the addition is successful, and the WIFI
indicator on the device stops flashing and turns into being long lit, then it
means that the addition is complete.
10. Mobile phone remote operation (connect device power and turn on the side
switch, so that the device is in standb mode)
⑴Temperature setting:
①Open the "tu a smart" software to select device (when using one mobile
phone to control more than two devices, ou need to select the device to be
operated);
②Click the device to be operated and enter the device operation interface,
then the power button on lower left corner of the mobile phone interface will
displa OFF and the phone interface color is dark red, indicating that the
device is turned off.
③Click on the switch and power button on the lower left of the phone interface
will displa ON and the phone interface color is bright red, indicating that the
device enters power-on state;
④Press "+" or "-" button to set the temperature; when the set temperature is
25 , the ECO indicator will be lit;℃
⑤When the setting temperature is higher than the ambient temperature, the
device begins to heat; otherwise the device is in the to-be-heated state.
⑵Power-on reservation:
①Open the "tu a smart" software to select the operating device;
②Click the device to be operated and enter the device operation interface,
while the power button on lower left corner of the mobile phone interface will
displa OFF and the device is turned off;
③Click on timing, timing into the interface, click on add timing, choose the
time clock, minutes, weekl status, adjust the switch state to open, click ok
button to return to add timing interface, click on the temperature, the
temperature set into the interface, set the boot temperature (the temperature is
expected to achieve the temperature of the room, generall choose the highest
setting temperature of 37 ), click ok to return to add timing operation ℃
interface, click the "save" to save Settings interface right corner to return to the
interface of timing, "please" to return to the top left hand corner click on timing
interface equipment operation interface, timing boot set to complete the
booking.
⑶Shutdown reservation:
①Open the "tu a smart" software to select the operating device;

②Click the device to be operated and enter the device operation interface;
③Click the power button which will displa ON and enter the power-on state;
④Click on timing, timing in to the interface, click on add timing, choose the
time clock, minutes, weekl status, adjust the switch state to close, click ok
button to return to add timing interface, click the "save" to save Settings
interface right corner to return to the interface of timing, "please" to return to
the top left hand corner click on timing interface equipment operation interface,
timing boot set to complete the booking.
⑷Child Lock:
①Open the "tu a smart" software to select the operating device;
②Click the device to be operated to enter the device operation interface;
③Complete the timer setting or temperature setting, and click the child lock
button to displa the child lock latch icon and ON, indicating that the child lock
button latch is completed;
④To re-adjust the settings, the mobile phone interface can be set directl
without operation unlock, but if ou manuall operate the device settings, ou
must first press the device's child lock button for 3 seconds or click the child
lock button on the operation interface. When the operation interface displa s
the unlock icon and OFF, it means that the unlock is successful and ou can
reset the device.
11. Device sharing:
①Open the "tu a smart" software and enter the "Personal Center" to click
Device Sharing;
②Click "Add Sharing" to enter a new member's phone number or click phone
contacts to select new member's phone number. Then click OK to complete
the addition.
12. Cancellation of device sharing:
①Open the "tu a smart" software and enter the "Personal Center" to click
Device Sharing;
②Delete the phone numbers of shared members to cancel the device sharing.
13. WIFI address replacement:
⑴Remove the device on mobile phone:
①Open the "tu a smart" software to enter m device;
②Click the device that needs to replace WIFI address to enter the device
operation interface;
③Click the "..." on top right of the operation interface;
④Click Remove Device and click OK to remove the device;
⑤Manuall remove device: Press SET button for 5 seconds to remove the
device directl ;
⑵Add Device:
①Place the device into a new wireless LAN environment;
②Turn on the switch on the side of the product, and the OF indicator on the
LCD screen will be lit, while the device enters standb mode;
③Press the power button and the "ON" indicator on the LCD screen will be lit,
and the device enters power-on state;

④Press SET button for 5 seconds, and WIFI indicator on the LCD screen will
be lit and enter the flash state;
⑤Open the "tu a smart" software on the mobile phone. Enter the phone
number to get verification code;
⑥Enter the verification code and click Login;
⑦Click Add Device and select the wireless LAN to enter the WIFI password.
Then click OK to connect the device;
⑧When the mobile phone interface shows the addition is successful, and the
WIFI indicator on the device stops flashing and turns into being long lit, then it
means that the addition is complete. Otherwise it needs to redo the above
steps and until the addition is successful.④ ⑦
14. Modif device name
①Click the device to be modified and enter the device operation interface.
②Click the "..." on the upper right corner of the operation interface, and then
click Modif Device Name.
③Click Modif Device Name, and input the location to distinguish the devices
or other name. Click Save, and then the modification is successful.
15. If ou want to leave it not working for a long time, please unplug the heater.
CONTROL PANEL FUNCTIONS

ELECTRIC DIAGRAM
TROUBLE SHOOTING
If our heater fails to operate, please follow these instructions:
Ensure that our circuit breaker or fuse is working properl .
Be sure the heater is plugged in and that the electrical outlet is working properl .
If the ON/OFF switch is not illuminated at ON position, send it to a service center for
reparation directl .
NOTE: IF YOU EXPERIENCE A PROBLEM WITH YOUR HEATER, PLEASE SEE THE
WARRANTY INFORMATION FOR INSTRUCTIONS. PLEASE DO NOT ATTEMPT TO OPEN OR
REPAIR THE HEATER YOURSELF. DOING SO MAY VOID THE WARRANTY AND COULD
CAUSE DAMAGE OR PERSONAL INJURY. IF THE PROBLEM STILL PERSISTS, PLEASE
CONTACT THE DISTRIBUTOR.
CLEANING AND STORAGE
Before cleaning our heater, switch off the heater and allow it to cool.
Disconnect the electricit suppl to the appliance. The outside can be cleaned
b wiping it over with a soft damp cloth and then dried. Do not use abrasive
cleaning powders or furniture polish, as this can damage the surface finish. To
release the heater from the wall, for cleaning or redecoration, just open the

screw bolt cap and unscrew the bolts to take off from the wall.
For short term storage, just unplug the heater and leave it; for long term
storage, ou can dismantle from the wall or cover it with some material.
SPECIFICATIONS
Model No.: MCE204
Voltage: 220-240V, 50-60Hz
Power: 425 Watts
Tolerances on all specifications: Approximatel +5%, -10%.
Places with normal winter: 12m2 room (425W),
Places with cold winter: 9m2 room (425W),
LIMITED WARRANY & SERVICE
Correct Disposal of this product
This marking indicates that this product should not be disposed with other
household wastes throughout the EU. To prevent possible harm to the
environment or human health from uncontrolled waste disposal, rec cle it
responsibl to promote the sustainable reuse of material resources. To
return our used device, please use the return and collection s stems or
contact the retailer where the product was purchased. The can take this
product for environmental safe rec cling.
Table of contents
Other Maclean Energy Heater manuals
Popular Heater manuals by other brands

MO-EL
MO-EL SHARKLITE 712N-712NED Use and maintenance

MO-EL
MO-EL LUCCIOLA Use and maintenance

System air
System air Topvex RB-CEM15 installation instructions

VOGEL&NOOT
VOGEL&NOOT BAWA Assembly and operating manual

Heatwagon
Heatwagon VG400 Installation and maintenance manual

Ambirad
Ambirad QUARTZ GLOW instruction manual

Myson
Myson RIO Series Installation operating and maintenance istructions

Euromate
Euromate 107438 Original instructions

EUROM
EUROM WALL DESIGNHEAT 2000 WIFI Instruction booklet

Riello
Riello DESIGN WALL Series Instructions for the installer and the technical service centre

AEG
AEG WKL 502 Operating and installation instructions

NOMA
NOMA 043-5997-6 instruction manual