manuals.online logo
Brands
  1. Home
  2. •
  3. Brands
  4. •
  5. MadBoy
  6. •
  7. Karaoke System
  8. •
  9. MadBoy Boomer User manual

MadBoy Boomer User manual

MULTI-FORMAT KARAOKE SYSTEM
BOOMER
USER MANUAL
BOOMER
www.karaoke.at
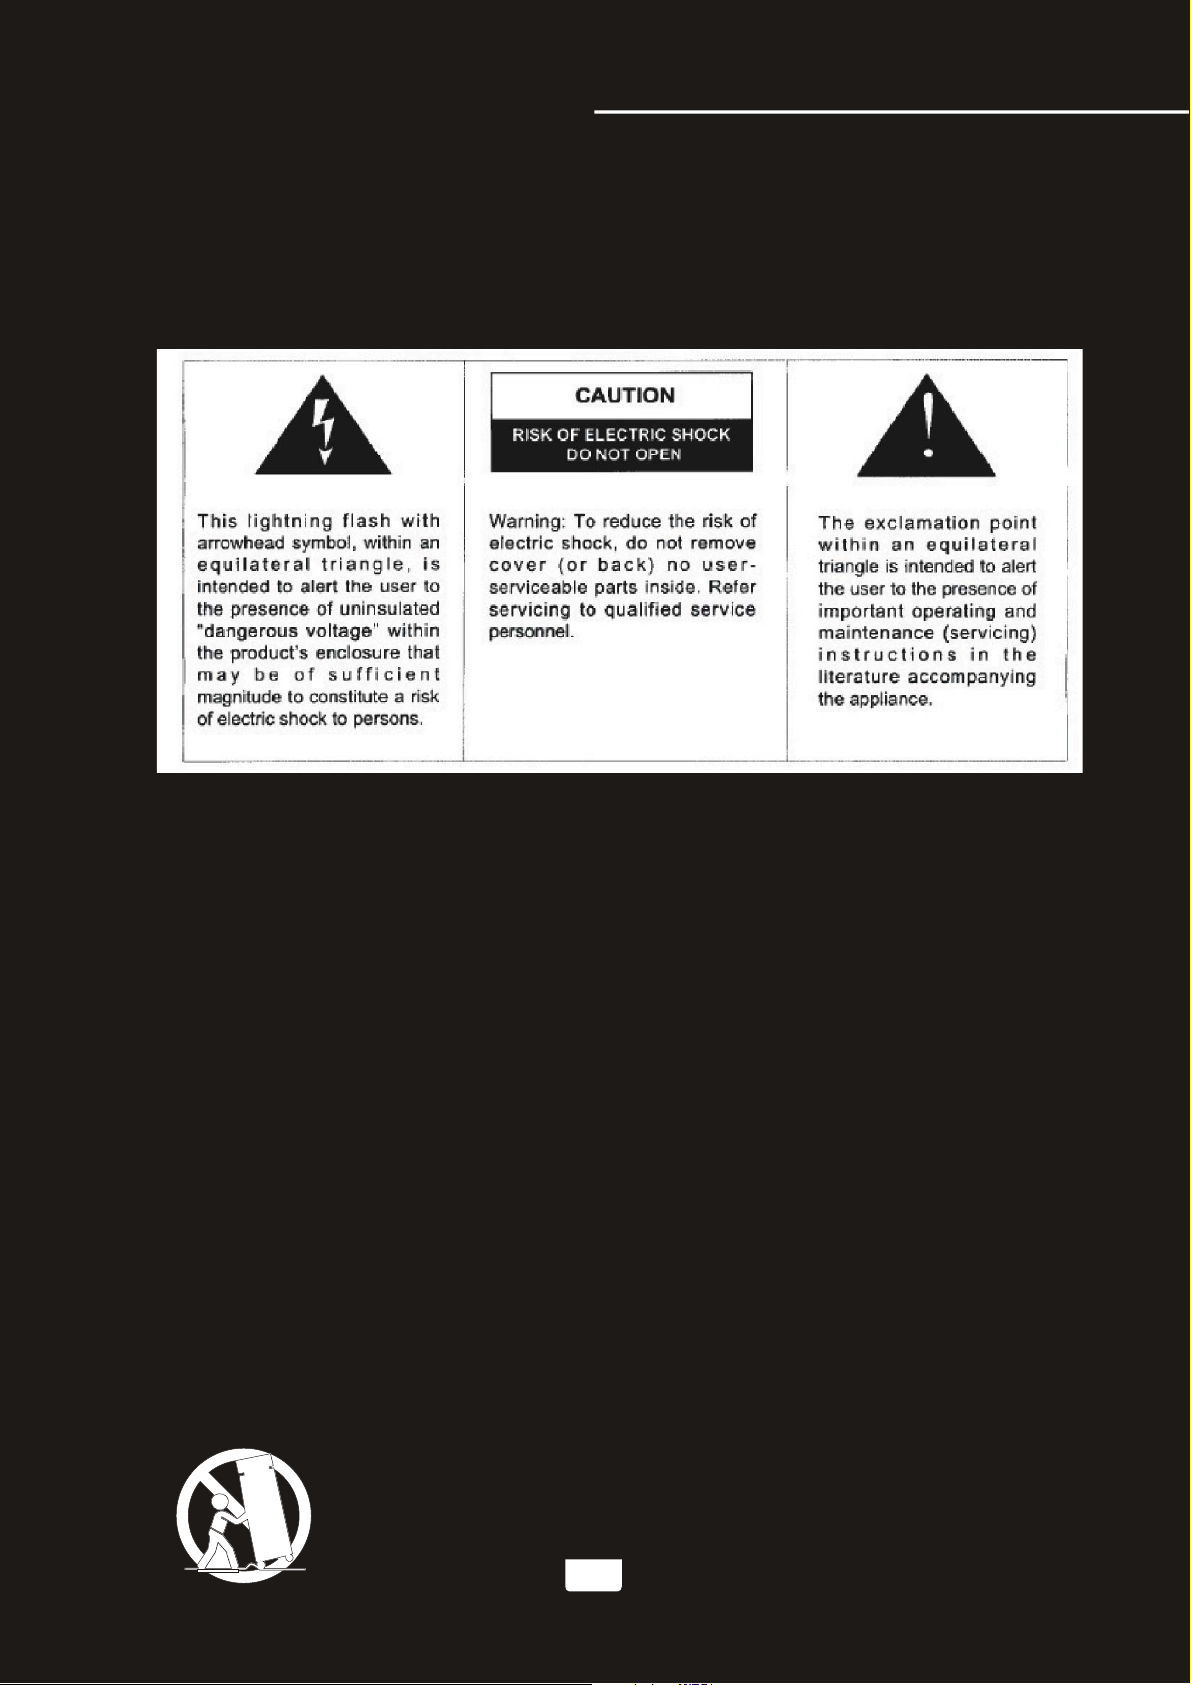
Safety instructions ...................................................................................................
Features .................................................................................................................
Specifications .........................................................................................................
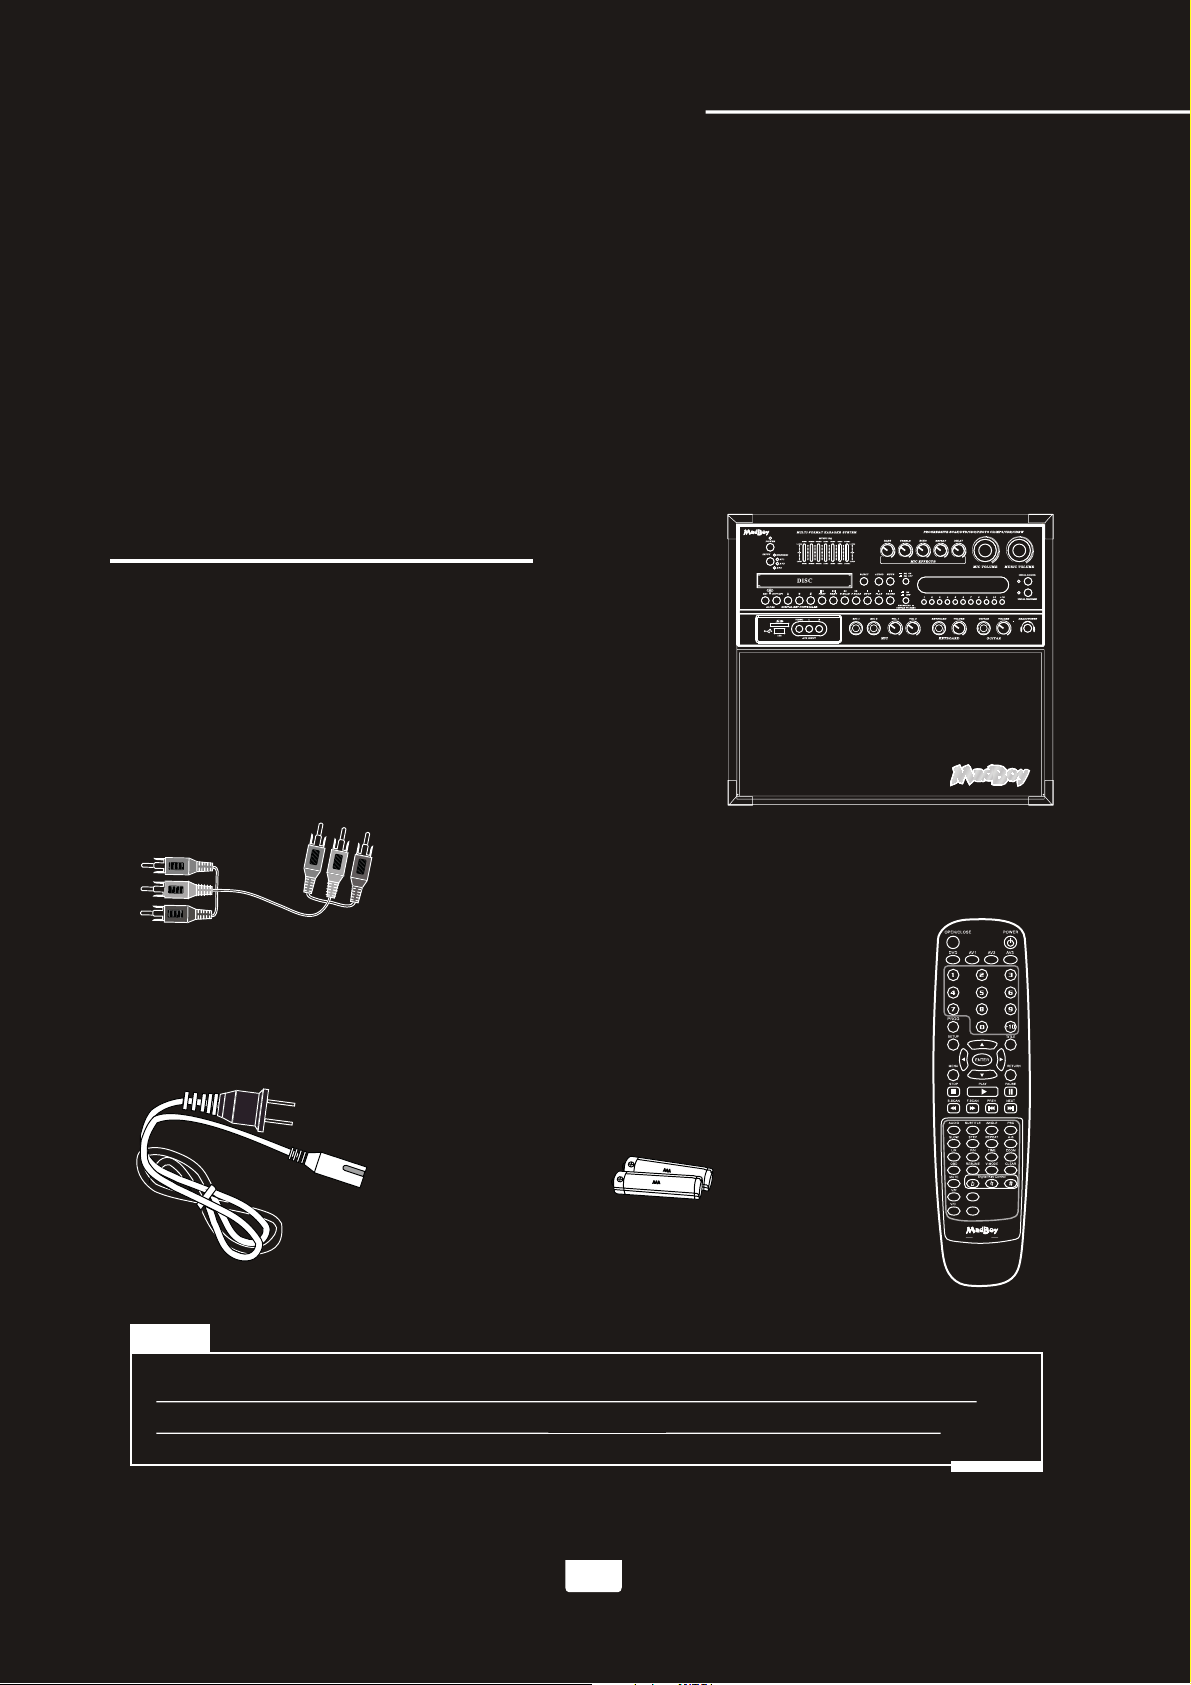
Package contents....................................................................................................
Basic Connections:
●Connecting Power ................................................................................................
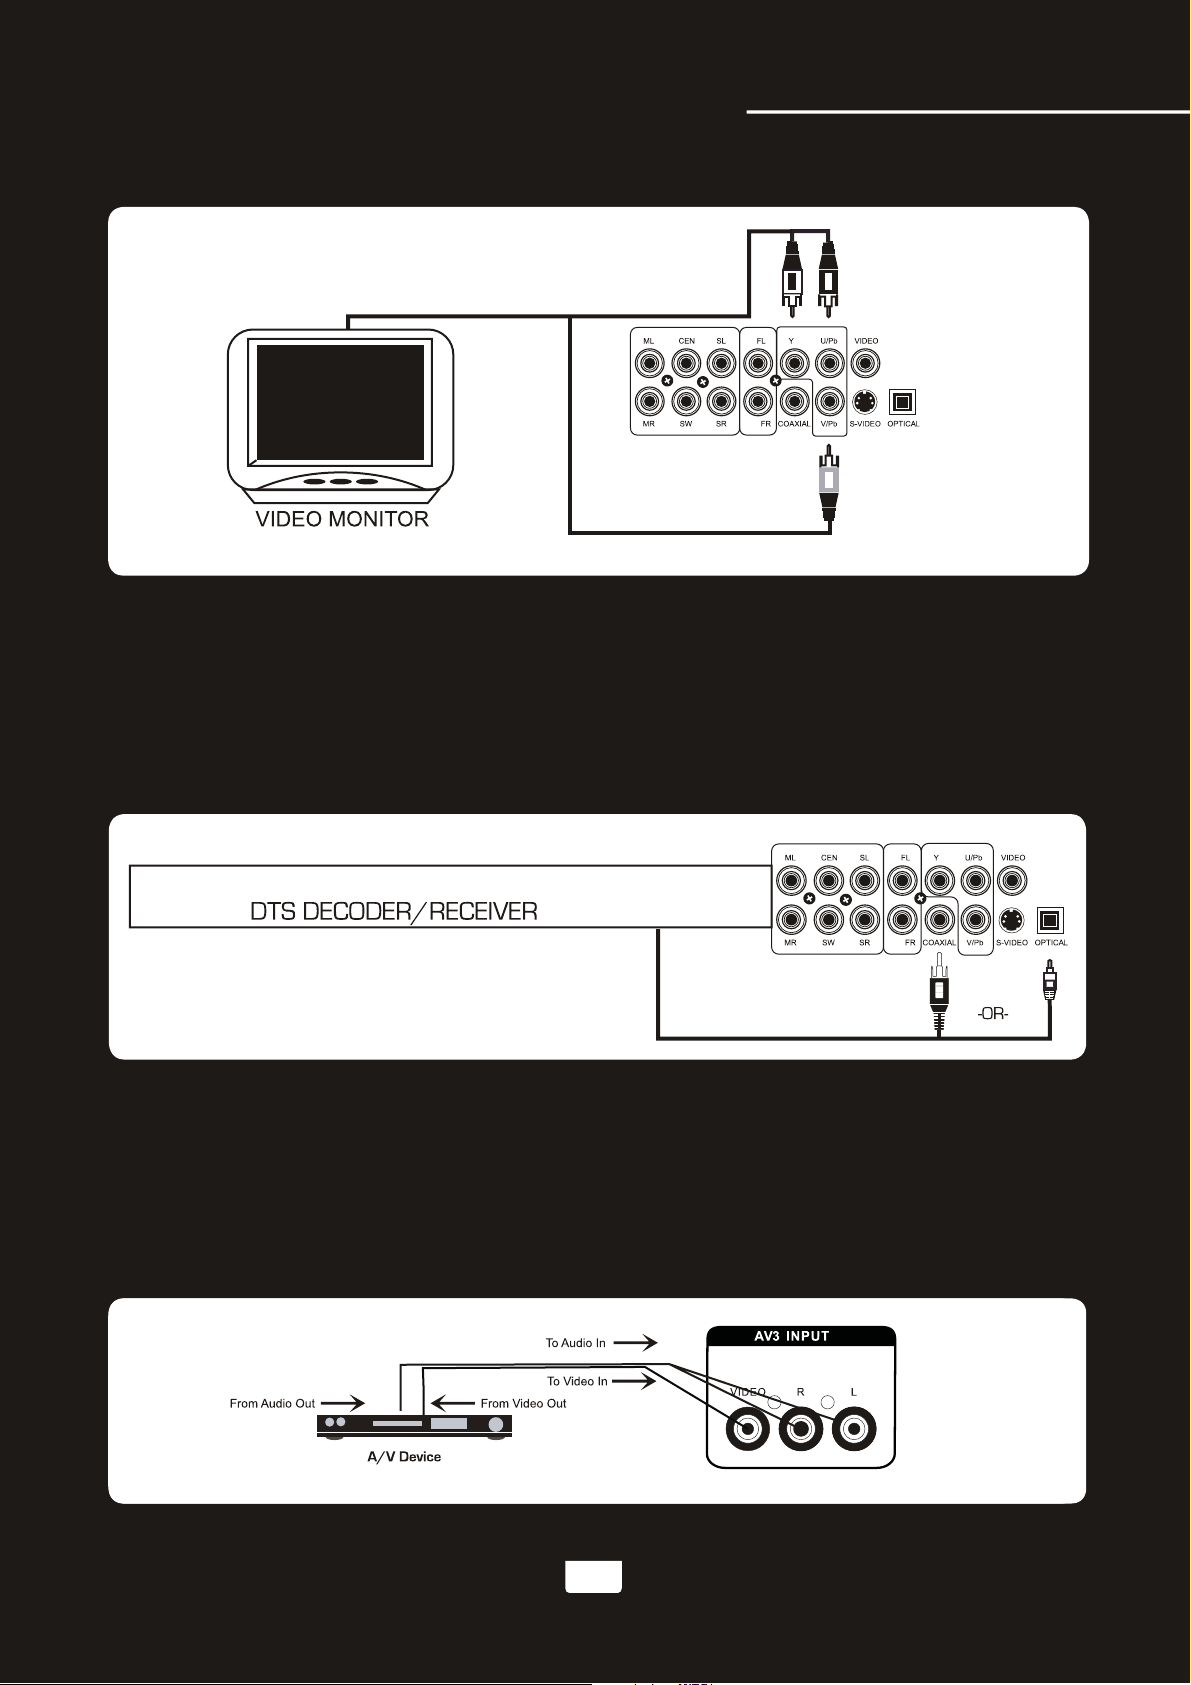
●Connecting to a TV / Video Monitor with a RCA input ...............................................
●Connecting to an audio mixer or TV with RCA audio inputs .......................................
DVD Output Connections:
●Connecting to a Dolby Pro logic amplifier................................................................
●Connecting to a TV with component video................................................................
●Connecting to a DTS receiver/decoder....................................................................
General Connections:
●AV input connections ............................................................................................
●Headphones connections ......................................................................................
●Microphone/instrument input connections ...............................................................
General Operations:
●Turning the BOOMER On, Off and to Standby .........................................................
●Input channels ....................................................................................................
●Adjusting the master Music volume .......................................................................
●Adjusting the master Microphone volume ...............................................................
●Adjusting the master MUSIC EQ ............................................................................
●Changing the video mode (PAL / NTSC) .................................................................
Operations (Disc Mode):
●Loading a disc .....................................................................................................
●Playing a disc ......................................................................................................
●Stopping a disc ...................................................................................................
●Pausing a disc ....................................................................................................
●Skipping tracks/chapters ......................................................................................
●Searching through a track/chapter ........................................................................
●Subtitles .............................................................................................................
●Viewing multiple angles ........................................................................................
●Slow-motion playback using the SLOW button .......................................................
●Viewing one frame at a time using the STEP button .................................................
●Selecting Repeat Options .....................................................................................
●Creating a loop using the A-B button ......................................................................
●Canceling vocals using the L/R button ...................................................................
●Zooming in and Out ..............................................................................................
●Jumping to specific time on a disc ........................................................................
●Viewing and setting the On Screen Display (OSD) ..................................................
●Turning on the last memory function......................................................................
1
2
3
3
4
4
5
6
6
7
7
8
8
9
9
9
9
10
10
10
10
10
10
10
10
10
10
10
11
11
11
11
11
11
12
12
Table of Contents
www.karaoke.at
Operations (Mp3 and AVI/DivX):
●To play a file .........................................................................................................
●Direct track access ...............................................................................................
●Repeat options ...................................................................................................
USB and SD card operations (disc mode)
●Using the USB input .............................................................................................
●Using the SD card slot ...........................................................................................
12
12
13
13
13
16
16
16
16
17
17
17
Table of Contents
Descriptions and Functions:
●Front Panel ..........................................................................................................
●Rear Panel ..........................................................................................................
●Remote Control ....................................................................................................
DVD System Setup Menu:
●System Setup ......................................................................................................
●Language Setup.. ................................................................................................
●Αudio Setup........ .................................................................................................
●Video Setup....... ..................................................................................................
●Speaker Setup .....................................................................................................
●Digital Setup .......................................................................................................
Troubleshooting ...................................................................................................
18
21
23
26
27
27
27
28
28
29
Microphone Operations :
●Turning on the Microphones ..................................................................................
●Adjusting the master Microphone volume ...............................................................
●Adjusting the individual Microphone volume controls ..............................................
●Adjusting the Microphone tone ..............................................................................
●Using digital Echo ................................................................................................
●Adjusting the KEYBOARD volume .........................................................................
●Adjusting the GUITAR volume ...............................................................................
14
14
15
USB and SD Card REC Operartions:
Record ..............................
Download the MP3 format songs from CD,CDG discs .
Copy songs in MP3 discs to USB or SD card .............
● ..................................................................................
● ...... .......................................
● .. ............................................
www.karaoke.at
* TO PREVENT FIRE OR SHOCK HAZARD. DO NOT EXPOSE THIS APPLIANCE TO RAINOR MOISTURE.
*THIS APPLIANCE SHALL NOT BE EXPOSED TO DRIPPING OR SPLASHING WATER AND THAT NO
OBJECT FILLED WITH LIQUIDS SUCH AS VASES SHALL BE PLACED ON APPARATUS.
IMPORTANT SAFETY INSTRUCTIONS
1) Read these instructions.
2) Keep these instructions.
3) Heed all warnings.
4) Follow all instructions.
5) Do not use this apparatus near water.
6) Clean only with dry cloth.
7) Do not block any ventilation openings. Install in accordance with the manufacturer's instructions.
8) Do not install near any heat sources such as radiators, heat registers, stoves, or other apparatus
(including amplifiers) that produce heat.
9) Do not defeat the safety purpose of the polarized or grounding-type plug. A polarized plug has two
blades with one wider than the other. A grounding type plug has two blades and a third grounding
prong. The wide blade or the third prong are provided for your safety. If the provided plug does not
fit into your outlet, consult an electrician for replacement of the obsolete outlet.
10) Protect the power cord from being walked on or pinched particularly at plugs, convenience
receptacles, and the point where they exit from the apparatus.
11) Only use attachments/accessories specified by the manufacturer.
12) Use only with the cart, stand, tripod, bracket, or table specified by the manufacturer, or sold with the
apparatus. When a cart is used, use caution when moving the cart/apparatus combination to avoid
injury from tip-over.
13 ) Unplug this apparatus during lightning storms or when unused for long periods of time.
14 ) Refer all servicing to qualified service personnel. Servicing is required when the apparatus has been
damaged in any way, such as power-supply cord or plug is damaged, liquid has been spilled or objects
have fallen into the apparatus, the apparatus has been exposed to rain or moisture, does not operate
normally, or has been dropped.
WARNING
S3125A 1
Safety instructions
www.karaoke.at
Class 1 Laser Product
CAUTION: USE OF ANY CONTROLS, ADJUSTMENTS, OR PROCEDURES OTHER THAN
THOSE SPECIFIED HEREIN MAY RESULT IN HAZARDOUS RADIATION EXPOSURE.
PRODUCT COMPLIES WITH DHHS RULE 21 CFR SUBCHAPTER J IN EFFECT AT DATE
OF MANUFACTURE.
CAUTION: INVISIBLE LASER RADIATION WHEN OPEN. DO NOT STARE INTO BEAM.
15) Grounding or Polarization This product may be equipped with a polarized alternating current line plug
(a plug having one blade wider than the other). This plug will fit into the power outlet only one way.
This is a safety feature. If you are unable to insert the plug fully into the outlet, try reversing the plug.
If the plug should still fail to fit, contact your electrician to replace your obsolete outlet. Do not defeat
the safety purpose of the polarized plug.
16) Ventilation Slots and openings in the cabinet are provided for ventilation and to ensure reliable
operation of the product and to protect it from overheating, and these openings must not be blocked
or covered. The openings should never be blocked by placing the product on a bed, sofa, rug, or other
similar surface. This product should not be placed in a built-in installation such as a bookcase or rack
unless proper ventilation is provided or the manufacturer's instructions have been adhered to.
17) The MAINS plug or an appliance coupler is used as the disconnect device, the disconnect device shall
remain readily operable.
Class II equipment symbol
This symbol indicates that the unit has
a double insulation system
2
Safety instructions/Features
Features
-Complete karaoke system supports DVD,DVD-R,
DVD-RW,VCD,CDG,MP3,MP4,PHOTO-CD,CD,CD-R and CD-RW
-Support USB/SD Card,MP3 record function to let you record
your own vocal to the USB/SD Card(USB/SD Card not included)
-Inputs:Guitar and Keyboard inputs/two MIC inputs/three RCA A/V inputs
-Outputs:Two RCA A/V /Balanced audio
one stereo 1/4 inch audio pre-out /5.1CH audio out
-7-band equalizer
-Digital echo with repeat and delay controls
-Digital key control
-Remote control
-50W+50W music power(peak to peak)
-AC 115V/230V and PAL/NTSC compatible for worldwide use
www.karaoke.at
Specifications
AAA Batteries (2)
A/V RCA Cable (1)
AC Power Cord (1) Remote Control (1)
Package Contents
Items Quantities
If you find that any of the items mentioned above are missing
from the box, please contact MadBoy before proceeding.
Note
BOOMER Unit (1)
3
BOOMER Unit (1)
A/V RCA Cable (1)
Remote Control (1)
AC Power Cord (1)
AAA Batteries (2)
● AC Input Voltage
● Audio Output Power
● AV1 audio input sensitivity
● Video input sensitivity
● Microphone Input Sensitivity
● Keyboard/Guitar Input Sensitivity
● Video Output Level
● Audio Output Level
● S/N Ratio
● Dimension
● Weight
AC 115V 60Hz/AC 230V 50Hz
100 W (peak to peak)
500 mV
1 V (peak to peak)
8 mV
8 mV
1 V (peak to peak)
1000 mV
90 dB
18.3" x 12.8" x 16.5" (L x W x H)
35.4 lbs
Specifications and package Contents
COPY MP3
REC
BOOM ER
BOOM ER
www.karaoke.at
Connecting to the AC outlet
To power the BOOMER
What you will need
●AC power cord (included)
●Surge-protector (recommended) or a power outlet
Note: Before turning on the power make sure the red voltage selector [Fig. A] under
the AC input is set to the proper voltage. It should be set to 115V for North America
and 230V for most European countries. Make sure you know the proper voltage for
your region before turning on the BOOMER.
1.Connect the AC end of the power cord into the AC input on the rear panel of the BOOMER
2.Connect the other end to a surge-protector or available power outlet
Connecting to a TV / video monitor with a RCA input
What you will need
●1 RCA-style video cable (included)
●TV / video monitor with a RCA video input
1.Connect one end of the RCA video cable to the yellow Video Out on the rear panel of the BOOMER.
2.The BOOMER has two RCA-type VIDEO OUTPUT jacks for connecting to TVs or monitor devices.
Both VIDEO OUTPUTS can be connected simultaneously.
3.Connect the other end of the RCA video cable to the Video Input on a TV / video monitor
4
[Fig. A]
Basic Connections
Since the BOOMER contains built-in power amplifiers, speakers, DVD/CDG/CD player, USB player, and SD
card player, the BOOMER can be used as a self-contained sound system. However, the BOOMER contains
various audio video outputs to allow the BOOMER to be connected to multiple TV sets, external sound
systems, and/or multiple sound effect devices. The following content demonstrates the procedures for
connecting the BOOMER to the AC outlet and other audio video devices.
230
VOLTAGE SELECTOR
TV
TV
www.karaoke.at
2.BALANCED AUDIO OUTPUT CONNECTIONS:
●Connect one end of the XLR cables to the left and right BALANCED AUDIO OUTPUT jacks on the BOOMER.
●Connect one end of the XLR cables to the left and right AUDIO/LINE/AUX INPUT jacks on the external device.
4.CONNECTING EFFECTS USING THE EFFECT INSERT:
Connecting to an audio mixer or TV with RCA audio inputs
What you will need
●using 1 RCA L/R (red & white) stereo RCA cable (included)
●using two XLR-type audio cables(not included)
●using two ¼-inch audio cables (not included).
●using three ¼-inch stereo audio cables (not included).
●using one audio amplifier with XLR audio inputs.
●using one audio amplifier with ¼-inch audio inputs.
●using 1 audio mixer or TV with RCA audio inputs
1.AUDIO OUTPUT 1 & 2 CONNECTIONS:
●Connect one end of the L/R (red & white) RCA cable to the red
and white audio outputs labeled
AUDIO OUTPUT 1 & 2 on the rear panel of the BOOMER.
●Connect the other end of the L/R (red & white) RCA cable to
the audio input on an audio mixer or TV.
1.Connect one end of the ¼ inch stereo audio cables to the GUITAR EFFECT, KEYBOARD EFFECT, or
MIC EFFECT inserts on the rear panel of the BOOMER.
2.Connect the other end of the ¼ inch stereo audio cables to the sound effect device.
3.By using the built-in EFFECT INSERT you can add external effects to vocals and/or guitar or keyboard or
microphone without compromising the quality of the original signal.
5
Basic Connections
3.¼ INCH PRE-OUT CONNECTIONS:
●Connect one end of the ¼ inch audio cables to the left and right PRE-OUT jacks on the BOOMER.
●Connect one end of the ¼ inch audio cables to the left and right AUDIO/LINE/AUX INPUT jacks on
the external device.
PRE-OUT
www.karaoke.at
The insert is a break point in the input channel signal path, It allows the signal to be taken out from this BOOMER,
through an external equipment such as a Limiter,Compressor,Equalizer, Effector,and then back to the BOOMER,
the input jack can be used with ¼ inch phone jack,the signal will be send out through TIP of the ¼ inch phone
jack and back to the BOOMER through RING of the ¼ inch phone jack.
DVD OUTPUT CONNECTIONS
1.Connecting to a Dolby Pro logic amplifier
The BOOMER allows DVD audio output for 5.1 or 7.1 configurations.
With a 5.1 amplifier, you will need six RCA patch cables. Connect the plug from one side of each cable to the
ML, CEN, SL, MR, SW and SR outputs on the BOOMER. Connect the plug from the other side of each cable to
the corresponding ML, CEN, SL, MR, SW and SR inputs on your 5.1 amplifier.
A 7.1 Pro Logic configuration requires 2 additional RCA cables to be connected from the FL and FR outputs of
the BOOMER to your 7.1 Amplifier.
2.Connecting to a TV with component video
Using 3 appropriate component video cables (usually color coded red, blue and green), connect a set of plugs
to the COMPONENT VIDEO OUT jacks (Y-U/Pb-V/Pr) on the BOOMER and plug the other set of plugs to the
COMPONENT VIDEO IN jacks (Y-U/Pb-V/Pr) on your television. On some TVs, the component video input
jacks may be labeled differently (i.e. Pr/Pb/Y or Cr/Cb/Y or R-Y/B-Y/Y etc.). You will need to press the MODE
button on the remote control to toggle between YUV for Component Video, and S-Video. You can only use the
MODE button when there is no disc inserted in the disc tray.
6
DVD Output Connections
www.karaoke.at
3.Connecting to a DTS receiver/decoder
Using either a RCA-ended COAXIAL cable suited for digital audio use or an OPTICAL cable, connect one
end to the appropriate jack on the BOOMER (COAXIAL or OPTICAL) and the other end to the appropriate jack
(COAXIAL or OPTICAL). If you have both coaxial and optical inputs on your DTS decoder/receiver, it is
recommended to use an optical connection as those cables eliminate the possibility of EMI (electromagnetic
interference). has 5.1 or 7.1 channel RCA inputs, you can use the 5.1 or 7.1 channel output jacks on
the BOOMER.
AV input connections
What you will need
●3 RCA-style A/V cable (included)
●2 A/V output Device
1.Connect one end of the 3 RCA-style A/V cable to the A/V VIDEO/L/R input labeled AV1/AV2/AV3 on the front
panel of the BOOMER.
2.Connect the other end of the 3 RCA-style A/V cable to the A/V VIDEO/L/R output on an A/V output Device.
7
DVD Output Connections
www.karaoke.at
Microphone/instrument input connections
After completing your main system connections, it is time to get your microphones and instruments connected
and ready for performing. Before you get started with your connections we recommend that you take the
following tips into consideration:
●When connecting instruments, refrain from using low quality or worn cables as they can cause significant
noise and loud pops, posing a threat to the system's speakers.
●Use caution when connecting a chain of multiple effects pedals, as the output voltage may change and
possibly overload the BOOMER input channel.
The BOOMER has one guitar (¼ inch), one keyboard (¼ inch) and two microphone (¼ inch/XLR) inputs.
1.To connect MICROPHONES via ¼ inch mic cables, connect the XLR-end of the cable into the MICROPHONE
until it locks into place and connect the ¼ inch plug into either the MIC 1 or 2 jack on the BOOMER.
2.To connect MICROPHONES via XLR mic cables, attach the XLR “female” end of the cable into the
“male” three prong jack located at the base of your handheld MICROPHONE until it locks into place.
Then connect the XLR “male” jack at the other end of the cable into either of the BALANCED MIC 1 or 2
inputs on the BOOMER rear panel. It should be obvious which sides of your XLR cable are male and
female as there is only one possible connection.
3.To connect a GUITAR, connect a ¼ inch instrument cable from the GUITAR's ¼ inch output to the BOOMER
¼ inch
GUITAR input.
4.To connect a KEYBOARD, connect a ¼ inch instrument cable from the KEYBOARD's ¼ inch output to the
AKJ7809 ¼ inch KEYBOARD input.
Headphones connections
What you will need
General Connections
●Headphones with a ¼-inch connector at the
other end of the cable (not included).
1.Connect the connector of the headphones
to the ¼ inch HEADPHONES output on
the front panel of the BOOMER.
VCD L R
BOOMER
To KEYBOARD
To GUITAR
8
www.karaoke.at
Turning the BOOMER On, Off and to Standby
Press the power button on the BOOMER to turn the unit on or off.
Input Channels
The BOOMER has 4 available input channels:
●Disc/USB/SD: Turns on the BOOMER’s disc player for playing DVD, CD, CDG,and other discs
●AV1/AV2/AV3:For playing a device that is connected to the AV1/AV2/AV3 RCA audio/video inputs
on the front panel
Selecting an input channel
1. Use the input select buttons on the remote control (DVD,AV1,AV2, and AV3) to directly select the
desired input channel or use the SELECT button on the front panel to cycle through the input channels
2. Once the desired input channel is selected,playback can begin
Adjusting the master Music volume
The master Music Volume for the disc player, and AV input channels can be adjusted using
the front panel control .
●Front Panel:Turn the MUSIC VOLUME control clockwise to raise the volume and counter-clockwise
to lower the volume.
Adjusting the master Microphone volume
The master Microphone Volume can be adjusted using the front panel control
●Front Panel:Turn the MIC VOLUME control clockwise to raise the volume and counter-clockwise
to lower the volume
9
General Operations
BOOMER
BOOMER
www.karaoke.at
Adjusting the master MUSIC EQ
The master MUSIC EQ for the disc player,DISC/USB/SD/ AV1/AV2/AV3
input channels can be adjusted using the front panel control
Front Panel
Turn the MUSIC EQ control slider up to raise the EQ for
10dB and down to lower the EQ for 10dB.
Changing the video mode (PAL / NTSC)
Use the P/N button on the remote control to switch between the regional PAL and NTSC video modes.
Access DISC mode by either pressing DVD on the remote control or by pressing the DISC/USB/SD
button on the front panel until the display screen says disc.
Loading a disc
1.Press the OPEN/CLOSE button on the remote control or the EJECT button on the front panel of
the BOOMER to open the disc tray
2.Insert a disc
3.Press the OPEN/CLOSE button on the remote control or the EJECT button on the front panel of
the BOOMER to close the disc tray
Playing a disc
1.Load a disc
2.Press PLAY on the remote control or on the front panel
Stopping a disc
1.Press the STOP button on the remote control or front panel once to enter pause mode
2.Press the STOP button again to completely stop the disc
Pausing a disc
1.Press the PAUSE button on the remote control or front panel
Skipping tracks/chapters
1. Use the PREV and NEXT buttons on the remote control or front panel to skip tracks/chapters
2. Press the PREV button to skip to the previous track/chapter
3. Press the NEXT button to skip to the next track/chapter
Searching through a track/chapter
1. Use the B.SCAN and F. SCAN buttons on the remote control or front panel to search through tracks/chapters
2. Press the B.SCAN button to search forwards through the current track/chapter
3. Press the F.SCAN button to search backwards through the current track/chapter
Note:It will not work while playing CDG format disc
Subtitles
Some DVDs have subtitles available and some also include multiple languages. If you are using a DVD with
subtitles available, simply press the SUBTITLE button on the remote control to cycle through the available
subtitles
Viewing multiple angles
Some DVDs have multiple viewing angles available. Press the ANGLE button on the remote control to
change the viewing angle and cycle through the available angles.
Slow-motion playback using the SLOW button
Use the SLOW button on the remote control to cycle between 4 slow-forward modes :
●SLOW 1/2 - Forwards at 1/2 the actual time
●SLOW 1/4 - Forwards at 1/4 the actual time
●SLOW 1/8 - Forwards at 1/8 the actual time
●SLOW 1/16 - Forwards at 1/16 the actual time .
Operations (Disc Mode)
10
General Operations
www.karaoke.at
Viewing one frame at a time using the STEP button
1.Press the STEP button on the remote control to enter Step mode
2.Every time the STEP button is pressed, when in Step mode, the movie will advance one frame
3.Press the PLAY button on the remote control or front panel to exit Step mode and return to normal playback
Selecting repeat options
Press the REPEAT button on the remote control to cycle through the available repeat modes:
1.Track - Repeats the current track
2.Chapter - Repeats the current chapter on a DVD
3.Title - Repeats the current title on a DVD
4.All - Repeats the entire disc once it has played through
5.Repeat off- Repeats the entire off
Creating a loop using the A-B button
The A-B feature allows you to loop a certain part of a disc.
While the disc is playing:
1.Press the A-B button once at the desired starting point for the loop
2.Press it again at the desired ending point for the loop
3.Press it a third time to end the loop and return to normal playback
Note:It will not work while playing CDG format disc
Canceling vocals using the L/R button
Multiplex CDG discs are designed to have vocals on one side and music on the other. The L/R button
allows you to play only one of these sides and cancel out the other in order to have music-only or
vocals-only.Press the L/R button to cycle through the available settings:
●Mono Left - Left channel only (no vocals)
●Mono Right - Right channel only (no music)
●Mix-Mono - Virtual stereo
●Stereo - Left and Right in true stereo
Note: This feature is only for use with specifically Multiplex formatted CDG discs.
Zooming in and out
The BOOMER lets you zoom in and out on the video screen.
Press the ZOOM button on the remote control to cycle through the available zoom settings.
Zoom in
●2X - Zooms in 2X the original size
●3X - Zooms in 3X the original size
●4X - Zooms in 4X the original size
Note:when you try to play MPG and JPG file(include the MPG and JPG file on DISC,USB,SD):
1. Press the ZOOM button on the remote control to enter ZOOM mode;
2. Use the F.SCAN and B.SCAN button to control zoom in and zoom out function;
Jumping to specific time on a disc
Press the TIME button on the remote control to cycle through the available jump-to options:
CD/CDG disc
●Disc Go To (CD/CDG only) - Jump to a specific time on the current disc
●Track Go To (CD/CDG only) - Jump to a specific time on the current track
●Select Track (CD/CDG only) - Jump directly to a specific track
Note:It will not work while playing CDG format disc
Example:
Jumping to 1:35 in the current track
1.Press the TIME button until “TRACK GO TO - - | - -” appears on the TV screen
2.Press 0, 1, 3, 5
3.Playback will begin at 1:35 on the current track
Programming a Playback Sequence
Press the PROGRAM button to enter PROGRAM mode. When in PROGRAM mode the screen will display a list of
the tracks on the disc. Next to each track number there is a space to enter the order in which you want each track
to play. This allows you to customize the order in which the tracks on the disc will be played back. For example: if
you want Track 1 to play second, you would navigate to track 1 using the DIRECTIONAL buttons (< ^ > v) and
when track 1 is highlighted, press the ENTER button. Then you would enter “2” using the number buttons
(0-9, +10) and then press enter again. Press the PLAY button to begin playback of the programmed sequence.
NOTE: Program mode cannot be entered while a disc is playing.
DVD disc
Note: Not all discs have multiple titles. A title refers to the different sections including the movie,
special features,etc.
●Title / Chapter (DVD only) - Select the title and then jump to a chapter within that title
●Title / Time (DVD only) - Select a title and then jump to a specific time within that title
●Chapter / Time (DVD only) - Select a chapter and then jump to a specific time within that chapter
Operations(Disc Mode)
11
www.karaoke.at
Example:
Selecting a Title and Chapter
Jumping to title 2 and chapter 2
1.Press the TIME button until TITLE “__ / __ CHAPTER __ / __ “ appears on the top of the TV screen
2.Press 2 on the number pad to select Title 1. Now chapter will be highlighted
3.Press 2 on the number pad to select Chapter 2
4.Playback will begin at that on Title 2 and Chapter 2
Viewing and setting the On Screen Display (OSD)
Press the OSD button on the remote control to cycle through the available OSD viewing options.
CD/CDG discs
●Single Remain - The time remaining on the current track
●Single Elapsed - The time elapsed on the current track
●Total Remain - The time remaining on the entire disc
●Total Elapsed - The time elapsed on the entire disc
●Display Off - Turns the OSD off
DVD discs
●Title Remain - The time remaining on the current title
●Title Elapsed - The time elapsed on the current title
●Chapter Remain - The time remaining on current chapter
●Chapter Elapsed - The time elapsed on the entire chapter
Turning on the last memory function:
1.Press SETUP on the remote control. The General Setup page will show.
2.Use the down arrow button on the remote control to scroll down to Last Memory
3.If Last Memory is set to off, press enter when Last Memory is highlighted and press up so that On is
highlighted
4.Press ENTER on the remote control to confirm the selection
5.Press SETUP again on the remote control to close the Setup menu
12
Operations(Disc Mode)
Direct track access:
When playing MP3 or AVI/DivX files,to skip to the desired track directly using the number buttons,
see the following operations section for detailed instruction:
1.For example:to go directly to track 142 of Mp3 /AVI/DivX:you would press 1 and 4 and 2,then press
ENTER button on remote control for playing your desired track.
2.For example:to go directly to track 36 of Mp3 AVI/DivX,you would press 0 and 3 and 6, then press
ENTER button on remote control for playing your desired track.
Note:The desired track you selected must be less than the total tracks on the AVI/DivX;
Operations (Mp3 and AVI / DivX)
When playing and DivX files, the BOOMER must be
connected to a TV in order to see and navigate through the
file menu. Use the arrow buttons on the remote control to
navigate through the file menu and the ENTER button to
select a file to play.
To play a file
1.Use the arrow buttons on the remote control to scroll to the
desired file
2.Press ENTER on the remote control to begin playing the file
3.The file will begin playing
or
1.Use the number buttons on the remote control and enter the file number
2.Press ENTER
3.The file will begin playing
www.karaoke.at
Repeat options
There are six repeat options when playing Divx Files. Use the REPEAT button on the
remote control to cycle through these repeat options:
●Random - Plays songs randomly from the entire disc
●Single - Playback stops after a single track finishes playing
●Repeat One - Repeats the current song continuously
●Repeat Folder - Repeats the entire folder after it has played through
●Folder - Playback stops after all of the songs in the current folder have played
●Shuffle - Plays songs randomly within the current folder
USB and SD CARD operations (Disc Mode)
Use the DISC select button on the front panel or DVD select button on the remote control to
directly select the desired DISC MODE,do not put DISC into the tray,when the graphic display
on the front panel display”NO DISC”,and then insert USB and SD CARD to the USB and SD CARD
jacks,then begin to load the media sources from USB or SD CARD.
1.Using the USB Input
●Plug a USB thumb drive into the USB Input.
●Use the directional buttons to select videos, music, or images. Press the Enter button to play a
selected video, music, or image.
Note:The unit will play your VCD, WMA, AVI, MP4, DAT, MPG and JPG files. The different
file types must be separated into folders for the unit to read them.
2.Using the SD card slot
●Plug an SD card into the SD memory card slot.
●Use the directional buttons to select videos, music, or images. Press the Enter Button to play a
selected video, music, or image.
Note: The unit will play your VCD, WMA, AVI, MP4, DAT, MPG and JPG files. The different
file types must be separated into folders for the unit to read them.
13
USB and SD Card Operations (Disc Mode)
BOOMER
www.karaoke.at
USB and SD Card REC Operartions
The BOOMER can record music in the discs and vocal from Mic into the USB/SD card,the operations details
as bellows:
1. RECORD :
● Insert a disc(CD,CDG,MP3,MP4,DIVX,VCD format) into the disc tray. Press PLAY on the remote control or
on the front panel to start play the disc.
● Insert USB or SD card and press REC button,when start to record,it will appears a 0-100% in the screen for
display the record schedule(Fig A),at this time,the BOOMER will automatically set-up a new file folder
"MUSIC" in the USB/SD card.and compress the recorded songs as MP3 format and storage it to the “MUSIC”
file folder.
(Fig A) (Fig B) (Fig C)
● When finish the record,Press the DVD button on the remote control,it will apprears the a frame(Fig B),and
use the Directional buttons on the remote control to select USB or SD card,and then press ENTER button to
enter USB or SD card mode.
● Press the Directional buttons on the remote control to select “MUSIC” file folder,press ENTER button and
open the “MUSIC” file folder(Fig C),Select the lastest record song and press play button to play it.(The song
list is arranged in record time order).
Remarks: The BOOMER can not support DVD format record.
2. Download the MP3 format songs from CD,CDG discs:
● Insert a disc(CD,CDG format) into the disc tray. Press PLAY on the remote control or on the front panel to
start play the disc.
● Insert USB or SD card and press MP3 COPY button to start download the MP3 songs,it will appears a frame
just as Fig D:
(Fig D) (Fig E) (Fig F)
(Fig G)
14
www.karaoke.at
● Press the Directional buttons on the remote control and select “TRACK” to enter the song lists,and then
select the songs you desired download in the “TRACK” file folder (Fig E),return back to press START for starting
MP3 songs download(as Fig F),When download the MP3 songs,the BOOMER will automatically set-up a
new file folder”UNKNO”,and compress the downloaded songs as MP3 format and storage it to the “UNKNO”
file folder.
● When finish the record,Press the DVD button on the remote control,it will apprears the a frame(Fig B),and
use the Directional buttons on the remote control to select USB or SD card,and then press ENTER button
to enter USB or SD card mode.
● Press the Directional buttons on the remote control to select “UNKNO” file folder,press ENTER button and
open the “UNKNO” file folder(Fig G),Select the lastest record song and press play button to play it.
(The song list is arranged in download time order).
Remarks: The BOOMER only support CD,CDG format discs download
USB and SD Card REC Operartions
3. Copy songs in MP3 discs to USB or SD card:
● Insert a MP3 disc into the disc tray. Press PLAY on the remote control or on the front panel to start play the disc.
● Insert USB or SD card and press MP3 COPY button,when start to copy,it will appears a 0-100% in the screen
for display the copy schedule(Fig H),During copy,the BOOMER will automatically set-up a new file folder
"CDROM" in the USB/SD card.and storage the copied songs in the “CDROM” file folder.
(Fig H) (Fig I)
● When finish the record,Press the DVD button on the remote control,it will apprears the a frame(Fig B),and
use the Directional buttons on the remote control to select USB or SD card,and then press ENTER button to
enter USB or SD card mode.
● Press the Directional buttons on the remote control to select “CDROM” file folder,press ENTER button and
open the “CDROM” file folder(Fig I),Select the lastest copy songs and press play button to play it.(The song
list is arranged in copy time order).
Remarks: The BOOMER only support MP3 format discs copy.
Remarks: When there is no space for the USB/SD card.you can select the songs and press "ANGELE" button
to delete the songs for get more spaces.
15
www.karaoke.at
Adjusting the master Microphone volume
The master Microphone Volume can be adjusted using the front panel control
Front Panel
Turn the MIC VOLUME control clockwise to raise the volume and counter-clockwise to lower the volume
Note: There is no correct tone setting. There are many factors that affect the tone including the
singer's own vocal tone, the room, etc. Adjust the HI and LOW controls until you are pleased with
the sound.
Note
Adjusting the individual Microphone volume controls
1.Each microphone channel has its own volume control located on the front panel of the BOOMER. Each
one can be adjusted separately, providing a great sounding vocal mix.
2.Turn the MIC 1 VOL and/or MIC 2 VOL control clockwise to raise the volume and counter-clockwise to
lower the volume.
Adjusting the Microphone tone
The BOOMER has microphone tone controls on the front panel,
allowing you to create clearer and more professional vocals.
●MIC TREBLE- Try increasing the TREBLE tone if the sound is tobassy or muddy and decreasing it
if it is too hi-pitched or if there is a lot of feedback.
●MIC BASS - Try increasing the BASS if the sound is not deep enough and decreasing it if the
sound is too muddy or muffled.
16
Microphone Operations
www.karaoke.at
Using digital Echo
Digital Echo gives vocals a more professional, studio-produced sound and is a great way to make any singer
sound like a seasoned professional. There are three controls, located on the front panel, for adjusting the
Echo effect:
●ECHO - This controls the amount of Echo effect that will be heard. Turn clockwise to increase the amount
of echo and counter-clockwise to decrease it. Turn the ECHO control fully counter-clockwise to turn the
echo effect off.
●REPEAT- Use this control to adjust the REPEAT setting of the ECHO effect. As REPEAT adjusts the total
number of echo intervals prior to fade-out, the more REPEAT that is applied, the more ECHO intervals will
occur prior to fade-out. Turn control clockwise to INCREASE and counter-clockwise to DECREASE level.
●DELAY - This control adjusts the amount of time between each echo repeat. Turn clockwise to make the
time shorter and counter-clockwise to make the time longer
Adjusting the KEYBOARD volume
1.The master KEYBOARD Volume can be adjusted using the front panel control
2.Turn the KEYBOARD VOLUME control clockwise to raise the volume and counter-clockwise to lower the
volume
Adjusting the GUITAR volume
1.The master GUITAR Volume can be adjusted using the front panel control
2.Turn the GUITAR VOLUME control clockwise to raise the volume and counter-clockwise to lower the
volume
Note
17
Microphone Operations
Note: KEYBOARD & GUITAR TO ECHO ON/OFF button - This button is used to turn on or turn
off the connection between the Keyboard / guitar inputs and the digtal ECHO circuitry. Depress
this button to activate the digital ECHO. Release this button to the UP position to disconnect the
digital ECHO.
www.karaoke.at

Other MadBoy Karaoke System manuals

MadBoy MFP-1500 User manual

MadBoy

MadBoy MFP-1500 User manual

MadBoy Thunder User manual

MadBoy

MadBoy Thunder User manual

MadBoy MFP-1000X User manual

MadBoy

MadBoy MFP-1000X User manual

MadBoy REMIX-31 User manual

MadBoy

MadBoy REMIX-31 User manual

MadBoy U-REMIX 2 User manual

MadBoy

MadBoy U-REMIX 2 User manual

MadBoy U-REMIX 3 User manual

MadBoy

MadBoy U-REMIX 3 User manual

MadBoy MFP-1500 User manual

MadBoy

MadBoy MFP-1500 User manual

MadBoy TOTAL User manual

MadBoy

MadBoy TOTAL User manual

MadBoy Boost-202 User manual

MadBoy

MadBoy Boost-202 User manual

Popular Karaoke System manuals by other brands

Memorex MKS8582 - MKS 8582 Karaoke System Specifications

Memorex

Memorex MKS8582 - MKS 8582 Karaoke System Specifications

GPX K2805 instruction manual

GPX

GPX K2805 instruction manual

Acesonic DGX-211 user manual

Acesonic

Acesonic DGX-211 user manual

sky-tec TEC 070 instruction manual

sky-tec

sky-tec TEC 070 instruction manual

Magic Sing ET25K user manual

Magic Sing

Magic Sing ET25K user manual

The Singing Machine SML-387 instruction manual

The Singing Machine

The Singing Machine SML-387 instruction manual

TJ TEF-10 user manual

TJ

TJ TEF-10 user manual

The Singing Machine SMK470 instruction manual

The Singing Machine

The Singing Machine SMK470 instruction manual

Radio Shack CDG Karaoke System owner's manual

Radio Shack

Radio Shack CDG Karaoke System owner's manual

Audio2000's AVC7504 owner's manual

Audio2000's

Audio2000's AVC7504 owner's manual

Samsung HT-KX30 instruction manual

Samsung

Samsung HT-KX30 instruction manual

The Singing Machine STVG-519 instruction manual

The Singing Machine

The Singing Machine STVG-519 instruction manual

Memorex MKS2430 user guide

Memorex

Memorex MKS2430 user guide

Karma KSTATION instruction manual

Karma

Karma KSTATION instruction manual

Acesonic KOD-6000 user manual

Acesonic

Acesonic KOD-6000 user manual

RockJam RJPS200 user guide

RockJam

RockJam RJPS200 user guide

Karaoke USA GF829 user guide

Karaoke USA

Karaoke USA GF829 user guide

Radio Shack 14-868 owner's manual

Radio Shack

Radio Shack 14-868 owner's manual

manuals.online logo
manuals.online logoBrands
  • About & Mission
  • Contact us
  • Privacy Policy
  • Terms and Conditions

Copyright 2025 Manuals.Online. All Rights Reserved.