MadBoy MFP-1000X User manual

OWNER’S MANUAL
MULTI-FORMAT KARAOKE PLAYER
MFP-1000X
WWW.MADBOY-AUDIO.COM
ENGLISH
b

TABLE OF CONTENTS
Safety Instructions ......................................................................................................
Getting Started
Features ..................................................................................................................
Connectors...............................................................................................................
What’s in the Box ....................................................................................................
Remote Control ...........................................................................................................
Front Panel .................................................................................................................
Back Panel ..................................................................................................................
Setting Up the Player for Karaoke
Read Before Use .....................................................................................................
General Connection Instructions .............................................................................
Connecting a Microphone ........................................................................................
How to Mix a Microphone Sound .............................................................................
Connection Examples ..............................................................................................
Basic Functions
DVD Playback .........................................................................................................
External Memories ...................................................................................................
Copying a CD ..........................................................................................................
Advanced Functions
Programming a Playlist ........................................................................................
Repeat Play .............................................................................................................
A-B Repeat Play ......................................................................................................
Settings .......................................................................................................................
Technical Specifications ..............................................................................................
3
4
4
5
6-7
8
9
10
11
11
11
12-14
15
16
17
18
18
18
19-20
21
WWW.MADBOY-AUDIO.COM

WWW.MADBOY-AUDIO.COM
3
Safety Instructions
Explanation of graphical symbols
1. Read instructions: All safety and operating instructions should be read before installation.
2. Keep instructions: Safety and operating instruction should be retained for future reference.
3. Heed warnings: Warnings on the apparatus and in the operating instruction should be adhered to.
4. Follow instructions: All operating instructions should be followed.
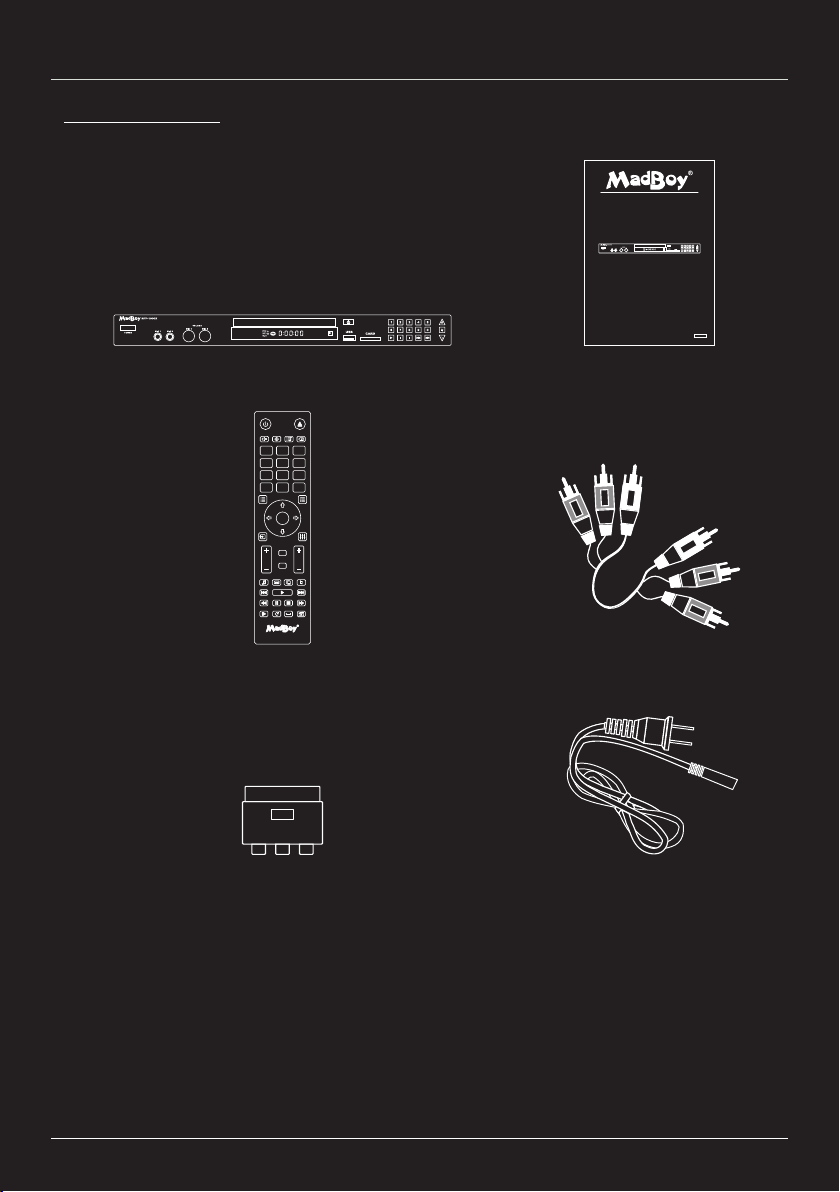
5. Accessories: Only use accessories specified by the manufacturer.
6. Water and moisture: Do not use this apparatus near water.
7. Ventilation: Do not block any ventilation openings.
8. Heat: Do not install near heat sources such as radiators or other apparatus that produces heat.
9. Protect power cord: Power cord should be placed so that it is not likely to be walked on or pinched
by items placed upon it. Do not use the apparatus if power cord is damaged.
10. Cleaning: Unplug power cord before cleaning. Do not use liquid cleaners or aerosol cleaners. Use
a damp cloth for cleaning.
11. Nonuse periods: Unplug the power cord if apparatus is left unused for a long period of time.
12. Objects and liquids: Care should be taken so that object do not fall and liquids are not spilled into
the enclosure through the openings.
13. Damage requiring service: The apparatus should be serviced by qualified service personnel
when:
A. Objects has fallen inside enclosure.
B. The apparatus has exposed to rain or moisture.
C. The apparatus has been dropped or enclosure is damaged.
D. The apparatus do not operate normally.
14. Servicing: Refer all servicing to the qualified service personnel.
15. Warranty: Warranty service should be done by qualified service personnel authorized by Madboy
Audio International Oy. Warranty is invalidated if a warranty seal has been altered, removed or
defaced.
Warning!
This DVD player is class 1 laser product. Use of controls, adjustments or performance of procedures
other than those specified herein may result in hazardous radiation exposure. Avoid direct exposure to
the beam.
To reduce the risk of fire or electric shock, do not expose this apparatus to rain or moisture.
CAUTION: To reduce the risk of electric shock, do not
remove cover. No user-serviceable parts inside. Only refer
servicing to qualified service personnel.
The lightning flash with arrowhead symbol
within an equilateral triangle is intended to
alert the user to the presence of danger.
The exclamation point within an equilateral
triangle is intended to alert the user to the
presence of important operating and
servicing instructions.

Getting Started
Features:
ŸTwo microphone inputs with individual volume controls
ŸDigital Echo with volume control
ŸDigital Key Control, +/-6 semitones
ŸInternal equalizator for music
ŸUSB connector and SD card reader for external memories
ŸCopy function for copying CD to MP3 and CD+G to MP3+G
ŸDirect access to main functions in the front panel
ŸEasy to use graphical user interface
ŸSmart upgradeable firmware - support future new formats when upgrades are available
ŸHDMI connector with 1080p output
ŸSimultaneous multi-screen output: Component video, HDMI, CVBS, SCART, S-video
ŸSupported disc formats: CD, CD+G, VCD, CD-R, CD-RW, DVD, DVD+R/RW, DVD-
R/RW, Dual Layer DVD+R/RW, Dual Layer DVD-R/RW
ŸSupported audio formats: Audio-CD, CD+G, VCD, MP3, PCM, DTS
ŸSupported video formats: DVD, VDC, CD+G, MP3+G, AVI (XVID+MP3), MP4
ŸRegion free
WWW.MADBOY-AUDIO.COM
4
Connectors:
ŸVideo
§HDMI
§CVBS (RCA)
§SCART
§Component video
§S-VIDEO
ŸAudio
§HDMI (microphones and music)
§Stereo RCA output (microphones and music)
§5.1 Surround sound RCA audio output (music)
§Coaxial output (microphones and music)
§Optical output (microphones and music)

What’s in the Box:
OWNER’S MANUAL(1)
POWER CABLE (1)
RCA CABLE (1)
MFP-1000X (1)
SCART ADAPTER (1)
REMOTE CONTROL (1)
Getting Started
WWW.MADBOY-AUDIO.COM
5
VIDE O L / MONO-AUD IO-R
IN
OWNER’S MANUAL
MULTI-F ORMAT KAR AOKE PLAYER
MFP-1000X
WWW.MADBOY-AUDIO.COM
ENGLISH
ENT ER
1 2 3
456
7 8 9
MEN U TIT LE
SET UP
VOL E CHO
EQ
SOU RCE
0OSD
AUD IO
KEY
REP EATSLO W
COP Y
RES UME
A-B
PRO G CLE AR
ANG LE
MUT E
SUB TIT LE
#
b
MF P-10 00X

Remote Control
WWW.MADBOY-AUDIO.COM
6
3
1 2
4
5
6
8 9
10 11
12
14 15
16
17
20
21
22
23
26
24
27
30
28
29
31
32
33
18
19
ENTER
1 2 3
456
78 9
MENU TITLE
SETUP
VOL ECHO
EQ
SOURCE
0OSD
AUDIO
KEY
REPEATSLOW
COPY
RESUME
A-B
PROG CLEAR
ANGLE
MUTE
SUBTITLE
#
b
MFP-1000X
7
13
25

WWW.MADBOY-AUDIO.COM
7
1. POWER ............................. Turn power on or off
2. EJECT .............................. Open or close the disc tray
3. MUTE ................................ Mute the audio
4. RESUME ........................... Resume playback from the point last time stopped
5. CLEAR .............................. Clear the programmed playlist
6. PROG ................................ Program a playlist
7. NUMERIC KEYS .............. 0-9 for direct track selection
8. SETUP............................... Go to the system setup
9. OSD ................................... Open On-Screen Display
10. MENU .............................. Go to the DVD main menu
11. TITLE ............................... Go to the DVD title menu
12. ENTER ............................ Confirm selection
13. NAVIGATION KEYS ...... Navigation keys for moving a cursor
14. SOURCE ......................... Source selection (DVD / USB / CARD)
15. EQ ................................... Activate equalizator for music
16. KEY ................................ Press # button to raise or b button to lower the key of music
17. VOL ................................. Increase (+) or decrease (-) music volume
18. ECHO .............................. Increase (+) or decrease (-) microphone echo level
19. SUBTITLE ...................... Select subtitle language for DVD
20. AUDIO ............................. Change audio track (DVD) or select L / R / Stereo channel (CD)
21. COPY .............................. Copy a CD to the external memory
22. ..................................... Set the key of music back to natural
23. PLAY ............................... Start the playback
24. NEXT ............................... Select next chapter
25. PREVIOUS ..................... Select previous chapter
26. REV ................................. Start to play backward
27. PAUSE ............................ Pause the playback
28. STOP ............................... Stop the playback
29. FWD ................................ Start to play fast forward
30. SLOW .............................. Start the slow motion playback
31. REPEAT .......................... Repeat one chapter or all
32. A-B ................................... Set up playback between two specific points
33. ANGLE ............................ Change angle (DVD)
Remote Control

WWW.MADBOY-AUDIO.COM
8
Front Panel
1. Power switch
2. Microphone inputs
3. Microphone volume controls
4. Eject
5. Numeric keys
6. Key control
7. USB connector
8. SD card reader
9. Play
10. Pause
11. Stop
12. Previous chapter
13. Next chapter
VFD Display:
Front Panel:
1. DVD playback
2. VCD playback
3. MP3 playback
4. Play
5. Pause
6. Playback status
7. Playing time
1 2 3
456
789
10
11
12
13
b
1
2
3
4
5
6 7

Back Panel
1. Component video (Y, Pb/Cb, Pr/Cr)
2. CVBS video output (RCA)
3. Stereo output (RCA)
4. Coaxial output (S/PDIF)
5. HDMI output
6. S-VIDEO output
7. Optical output (S/PDIF)
8. 5.1 Surround Sound: Front right (FR),
Front left (FL), Center (CEN),
Surround right (SR), Surround left
(SL) and Subwoofer (SW)
9. SCART output
10. Power input
WWW.MADBOY-AUDIO.COM
9
1 2
3
4
5
6
7 8 9 10

Setting Up the Player for Karaoke
WWW.MADBOY-AUDIO.COM
10
Microphone Sound Latency:
You may experience latency in microphone sound if the player is connected to AV receiver
or directly to the television. Check the settings of your AV receiver and disable all sound
enchancement technologies. Use Game mode in television to decreace latency. The player
never cause latency to the microphone sound.
It’s always recommended to use active speakers or amplifier designed for karaoke to
achieve the best karaoke exprerience.
Key Control:
In order to use Key Control adjust DOWNMIX setting to STEREO in setup.
How to change DOWNMIX setting:
1. Press Setup button on the remote control.
2. Use navigation buttons to select SPEAKER SETUP tab.
3. Go to DOWNMIX setting and select STEREO.
4. Confirm selection by pressing ENTER.
5. Close setup by pressing Setup button.
Equalizer:
In order to use music equalizer (EQ) set AUDIO OUT setting to SPDIF/OFF in setup.
How to change AUDIO OUT setting:
1. Press SETUP button on the remote control.
2. Use navigation buttons to select AUDIO SETUP tab.
3. Go to AUDIO OUT setting and select SPDIF/OFF.
4. Confirm selection by pressing ENTER.
5. Close Setup by pressing SETUP button.
Read Before Use:

Before connecting speakers, make sure that power is turned off from the player and other
devices (TV, active speakers, etc).
Audio can be connected using RCA cable, Optical cable*, Coaxial cable* (RCA) or
SCART cable*. RCA cables are color-coded (white, red, yellow) to make the installation
easier.
Video can be connected to the television using RCA cable (yellow), HDMI cable*, SCART
cable*, component cable* or S-VIDEO cable*.
Microphones must be connected to the front panel using unbalanced microphone cable
(1/4" TS plug - XLR) .
See detailed connection examples in page 12-14.
WWW.MADBOY-AUDIO.COM
11
UNBALANCED
MICROPHONE CABLE
(1/4" TS PLUG - XLR)
Connecting a Microphone:
How to Mix Microphone Sound:
1. Adjust music volume to level 2 from VOL- button on the remote control.
2. Connect microphone to the front panel.
3. Adjust microphone volume from front panel to the two o’clock position.
4. Turn on microphone.
5. Speak to the microphone and adjust the volume of your sound system (active speakers,
amplifier or television) until the microphone sounds good.
6. Play music and increase music volume from VOL+ button on the remote control until the
music volume is convenient.
Setting Up the Player for Karaoke
General Connection Instructions:
MFP-1000X FRONT PANEL
*cables sold separately

1. Connecting video (yellow) and audio (white, red) using RCA cable.
ACTIVE
SPEAKERS /
AMPLIFIER
TV
WWW.MADBOY-AUDIO.COM
V
LR
12
Setting Up the Player for Karaoke
L
R
AUDIO INPUT
R L
VIDEO INPUT
V
MFP-1000X BACK PANEL

2. Connecting audio using RCA cables and video using HDMI cable.
WWW.MADBOY-AUDIO.COM
13
Setting Up the Player for Karaoke
HDMI
HDMI CABLE*
HDMI
ACTIVE
SPEAKERS /
AMPLIFIER
TV
LR
L
R
AUDIO INPUT
R L
HDMI INPUT
MFP-1000X BACK PANEL
*cables sold separately

WWW.MADBOY-AUDIO.COM
14
Setting Up the Player for Karaoke
TV
VIDE OL / MONO-A UDIO-R
IN
SCART INPUT
MFP-1000X BACK PANEL
3. Connecting audio and video to the television using RCA cables and SCART adapter.
LR
R L
V
V
Notice!
It’s not recommended to sing karaoke using your TV speakers. TV speakers are not designed for
karaoke and can be broken easily.

WWW.MADBOY-AUDIO.COM
15
Basic Functions
DVD Playback:
1. Turn on the player by pressing power button on the front panel.
2. Open the disc tray by pressing EJECT button and set disc on the tray.
3. Press EJECT button again to close the disc tray.
4. DVD menu appears on your TV screen. Select track with navigation buttons and confirm
selection by pressing ENTER button.
5. You can return to DVD menu during playback by pressing MENU button on the remote
control.
Notice!
The player starts automatically play tracks if AUTOPLAY function is enabled. Disable
AUTOPLAY function if you want the player to go to the DVD menu. See detailed
instruction on the page 19.
Basic functions during playback:
Changing audio track: Press AUDIO button to change between karaoke track and lead
vocal guide track.
Stopping playback: Stop playback by pressing STOP button. If RESUME function is
enabled player starts from the point where you last time stopped the playback when
RESUME button is pressed.
Step forward: Move to the next chapter by pressing NEXT button.
Step backward: Move to the previous chapter by pressing PREV button.
Fast forward: Start fast forward playback by pressing FWD button. The speed changes
every time you press the button in order of 2x - 4x - 8x - 20x.
Fast reverse: Start fast reverse by pressing REV button. The speed changes every
time you press the button in order of 2x - 4x - 8x - 20x.
Slow forward: Start slow forward playback by pressing SLOW button. The speed
changes every time you press the button 1/2, 1/3, 1/4, 1/5, 1/6, 1/7. Return to the normal
playback speed by pressing PLAY button.

External Memories:
The player supports playback from SD memory cards, USB memory sticks and USB hard
drives. External drive must be formatted to FAT32 format. USB drives are supported up to
1024 GB and SD cards up to 512 GB. Check the list of supported file formats below this
page.
Notice! External hard drive must be equipped with external power supply.
Starting the Playback:
1. Insert USB memory or SD card to the reader on the front panel.
2. Press SOURCE button on the remote control and select USB or CARD according to the
media you are using. Tracks appears on the screen after a while.
4. Select the folder using navigation button and confirm by pressing ENTER.
5. Select the track using navigation buttons and start the playback by pressing ENTER.
If you want to return to the DVD playback, press SOURCE button on the remote control
and select DVD from the list using navigation buttons. Confirm the selection by pressing
ENTER.
Advanced Functions
WWW.MADBOY-AUDIO.COM
16
MFP-1000X – SUPPORTED FILE FORMATS
Media Container Format
Video Audio
Video
avi xvid mp3
mp4 mpeg4, xvid mp3
vob mpeg2 pcm
mpg, mpeg mpeg1, mpeg2 ac3, mp2
flv h263 mp3
Audio
mp3 - mp3, mp3+g
m4a - aac
aac - aac
Supported File Formats:

WWW.MADBOY-AUDIO.COM
17
Copying a CD:
The player enables copying of CD- and CD+G discs as well as data disc containing MP3
files to the external memory. External memory must be formatted to FAT32 format.
Notice! Copying of DVD disc is not supported.
How to copy audio CD:
1. Insert the CD to the player and wait until the playback starts.
2. Insert external memory to the reader on the front panel.
3. Press COPY button on the remote control during playback.
4. Copying menu appears on the screen.
5. Set desired copy settings on the OPTIONS menu. The following setting are found:
1. SPEED: Set copying speed (1x or 4x). If 1x is selected, the
player is playing the files during copying process.
2. BITRATE: Set quality of the files. Larger value improves quality
but file size will be larger.
3. CREATE ID3 TAG: Include metadata to the copied files. For example track
title, length, artist, album etc.
4. CREATE PLAYLIST: Create playlist.
6. Select track you want to copy from the TRACKS menu.
7. Press START button on the screen to start the copy.
8. Close copying menu by pressing QUIT on the screen.
Advanced Functions

WWW.MADBOY-AUDIO.COM
18
Advanced Functions
Programming a Playlist:
The player plays the tracks in selected order.
Adding tracks to the playlist:
1. Insert a DVD disc into the player.
2. Open playlist by pressing PROG button on the remote control.
3. Select memory location using navigation buttons.
4. Enter track number to the Title column and enter number 1 to the Chapter (C) column.
5. Repeat points 3 and 4 until you have added all desired track to the playlist.
6. Move the cursor on the PLAY button below the playlist using navigation buttons and
confirm the selection by pressing ENTER.
Stopping to play the playlist:
1. Open playlist by pressing PROG button on the remote control.
2. Move the cursor on the CLEAR button below the playlist using navigation buttons.
3. Confirm selection by pressing ENTER.
4. Close the playlist by pressing PROG button.
Repeat Play:
Enable Repeat function by pressing REPEAT button during playback. When function is
enabled the player repeats one chapter (REP 1) or all chapters (ALL).
Disable the function by pressing sequentially REPEAT button until the function is disabled
(OFF).
Repeat Play is only working with CD.
A-B Repeat Play:
The player repeats specific portion between two points.
1. During playback, press A-B button on the remote control to set the starting point.
2. Press A-B button again to set the ending point.
3. Now the player is playing this specific portion.
4. Press A-B button again if you want to return to normal playback.
A-B Repeat is only working with DVD.

General Instructions:
1. Press SETUP button on the remote control to open the Setup menu.
2. Select desired settings using navigation buttons on the remote control and confirm the
selection by pressing ENTER.
3. Close the Setup menu by pressing SETUP button.
System Setup:
TV SYSTEM: Select used TV system: PAL, NTSC or AUTO.
AUTO PLAY: If AUTO PLAY function is enabled, the player skips DVD menu
and starts to play tracks automatically.
VIDEO: Use video signal type. Select TV-RGB if SCART is used.
HD OUTPUT: Select resolution if HDMI output is used.
TV TYPE: Select picture aspect ratio.
PASSWORD: Set password for parental controls. Default password: 0000.
RATING: Select age rating for DVD playback.
DEFAULT: Restore default settings.
POWER RESUME: The player resumes the playback in the point where stopped
last time.
Language Setup:
1. OSD LANGUAGE: Select user interface language.
2. AUDIO LANG: Select audio language for DVD. The language can be changed
during playback by pressing AUDIO button on the remote
control.
3. SUBTITLE LANG: Select subtitle language for DVD. The language can be
changed during playback by pressing SUBTITLE button on the
remote control.
4. MENU LANG: Select menu language for DVD.
Audio Setup:
AUDIO OUT: Select SPDIF audio format (RAW or PCM) or disable output
(SPDIF/OFF).
HDMI AUDIO: Select HDMI audio format (AUTO or PCM).
MIC SETUP: Enable (AUTO) or disable (OFF) microphones.
MIC VOL: Adjust microphone volume.
ECHO: Adjust microphone echo level.
KEY: Change the key of music.
CUE: If CUE function is enabled, the player pauses the playback at
the beginning of every track.
WWW.MADBOY-AUDIO.COM
19
Settings

Video Setup:
1. BRIGHTNESS: Adjust brightness
2. CONTRAST: Adjust contrast
3. HUE: Adjust hue
4. SATURATION: Adjust saturation
5. SHARPNESS: Adjust sharpness
WWW.MADBOY-AUDIO.COM
20
Speaker Setup:
1. DOWNMIX: LT/RT: Mix surround channels to left and right channel.
STEREO: Downmix 5.1 to stereo. Use this setting for karaoke in order to
make Key Control to work.
VSS: Virtual Surround Sound
5.1 CH: 5.1 Surround Sound
2. FRONT: Adjust front speaker size. Use LARGE setting for speaker capable of
passing a full range of frequencies (lows, mids, highs). Use SMALL
setting for speaker which ability to pass a full range of frequencies (low)
is limited.
Digital Setup:
1. OP MODE: Use LINE OUT for wider dynamic range. RF REMOD setting
has reduced dynamic range.
2. DYNAMIC RANGE: Set dynamic range for the music.
3. DUAL MONO: STEREO: Send left channel to left and right channel to right.
MONO L: Mix left and right channel and send to left.
MONO R: Mix left and right channel and send to right.
MIX MONO: Mix left and right channel and send to left and
right.
Equalizer Function:
Press EQ button on the remote control to adjust music equalizer. There are five presets
available: standard, classic, rock, jazz and pop. Select USER setting if you want customize
the equalizer.
In order to use equalizer, set AUDIO OUT setting to SPDIF/OFF in setup.
Settings
Table of contents
Languages:
Other MadBoy Karaoke System manuals