Madrigal Audio Mark Levinson 39 User manual

Madrigal Audio Laboratories, Inc.
Operating Manual
Mark Levinson®
Nº39
CD Processor

CAUTION
RISK OF ELECTRIC SHOCK
DO NOT OPEN
CAUTION: TO REDUCE THE RISK OF ELECTRICAL SHOCK, DO
NOT REMOVE COVER. NO USER-SERVICEABLE PARTS INSIDE.
REFER SERVICING TO QUALIFIED PERSONNEL.
WARNING: TOREDUCETHERISKOFFIREORELECTRICSHOCK,DO
NOT EXPOSE THIS APPLIANCE TO RAIN OR MOISTURE.
NOTICE
This equipment has been tested and found to comply with the limits for a Class B digital device, pursuant to Part 15 of the
FCC Rules. These limits are designed to provide reasonable protection against harmful interference in a residential
installation. This equipment generates, uses and can radiate radio frequency energy and, if not installed and used in
accordance with the instructions, may cause harmful interference to radio communications. However, there is no guarantee
that interference will not occur in a particular installation. If this equipment does cause interference to radio or television
reception, which can be determined by turning the equipment on and off, the user is encouraged to try to correct the
interference by one or more of the following measures:
• Reorient or relocate the receiving antenna;
• Increase the separation between the equipment and the receiver;
• Connect the equipment into an outlet on a circuit different from that to which the receiver is connected;
• Consult the dealer or an experienced radio/TV technician for help.
CAUTION: Changes or modifications to this equipment not expressly approved by the manufacturer could void the user’s
authority to operate the equipment.
The information contained in the manual is subject to change without notice. The most current version of this manual will
be posted on our web site at http://www.madrigal.com.
The lightning flash with arrowhead symbol, within an equilateral triangle, is intended
to alert the user to the presence of uninsulated “dangerous voltage” within the
product’s enclosure that may be of sufficient magnitude to constitute a risk of electric
shock to persons.
The exclamation point within an equilateral triangle is intended to alert the user to the
presence of important operating and maintenance (servicing) instructions in the literature
accompanying the appliance.
Marking by the “CE” symbol (shown left) indicates compliance of this device with the EMC
(Electromagnetic Compatibility) and LVD (Low Voltage Directive) standards of the
European Community.

Important Safety Instructions
Please read all instructions and precautions carefully and completely before operating your Mark Levinson compo-
nent.
1. ALWAYS disconnect your entire system from the AC mains before connecting or disconnecting
any cables, or when cleaning any component.
2. This product is equipped with a three-conductor AC mains power cord which includes an earth
ground connection. To prevent shock hazard, all three connections must ALWAYS be used. If your
electrical outlets will not accept this type of plug, an adapter may be purchased. If an adapter is
necessary, be sure it is an approved type and is used properly, supplying an earth ground. If you
are not sure of the integrity of your home electrical system, contact a licensed electrician for assis-
tance.
3. ALWAYS keep electrical equipment out of the reach of children.
4. AC extension cords are not recommended for use with this product. If an extension cord must be
used, be sure it is an approved type and has sufficient current-carrying capacity to power this
product.
5. NEVER use flammable or combustible chemicals for cleaning audio components.
6. NEVER operate this product with any covers removed.
7. NEVER wet the inside of this product with any liquid.
8. NEVER pour or spill liquids directly onto this unit.
9. NEVER block air flow through ventilation slots or heatsinks.
10. NEVER bypass any fuse.
11. NEVER replace any fuse with a value or type other than those specified.
12. NEVER attempt to repair this product. If a problem occurs, contact your Mark Levinson®dealer.
13. NEVER expose this product to extremely high or low temperatures.
14. NEVER operate this product in an explosive atmosphere.
15. ALWAYS unplug sensitive electronic equipment during lightning storms.

4
Table of Contents
Unpacking and Placement ....................................................................... 6
Unpacking the Nº39 .......................................................................................... 6
Remove the Transport Screw ........................................................................... 6
Placement of the Nº39...................................................................................... 6
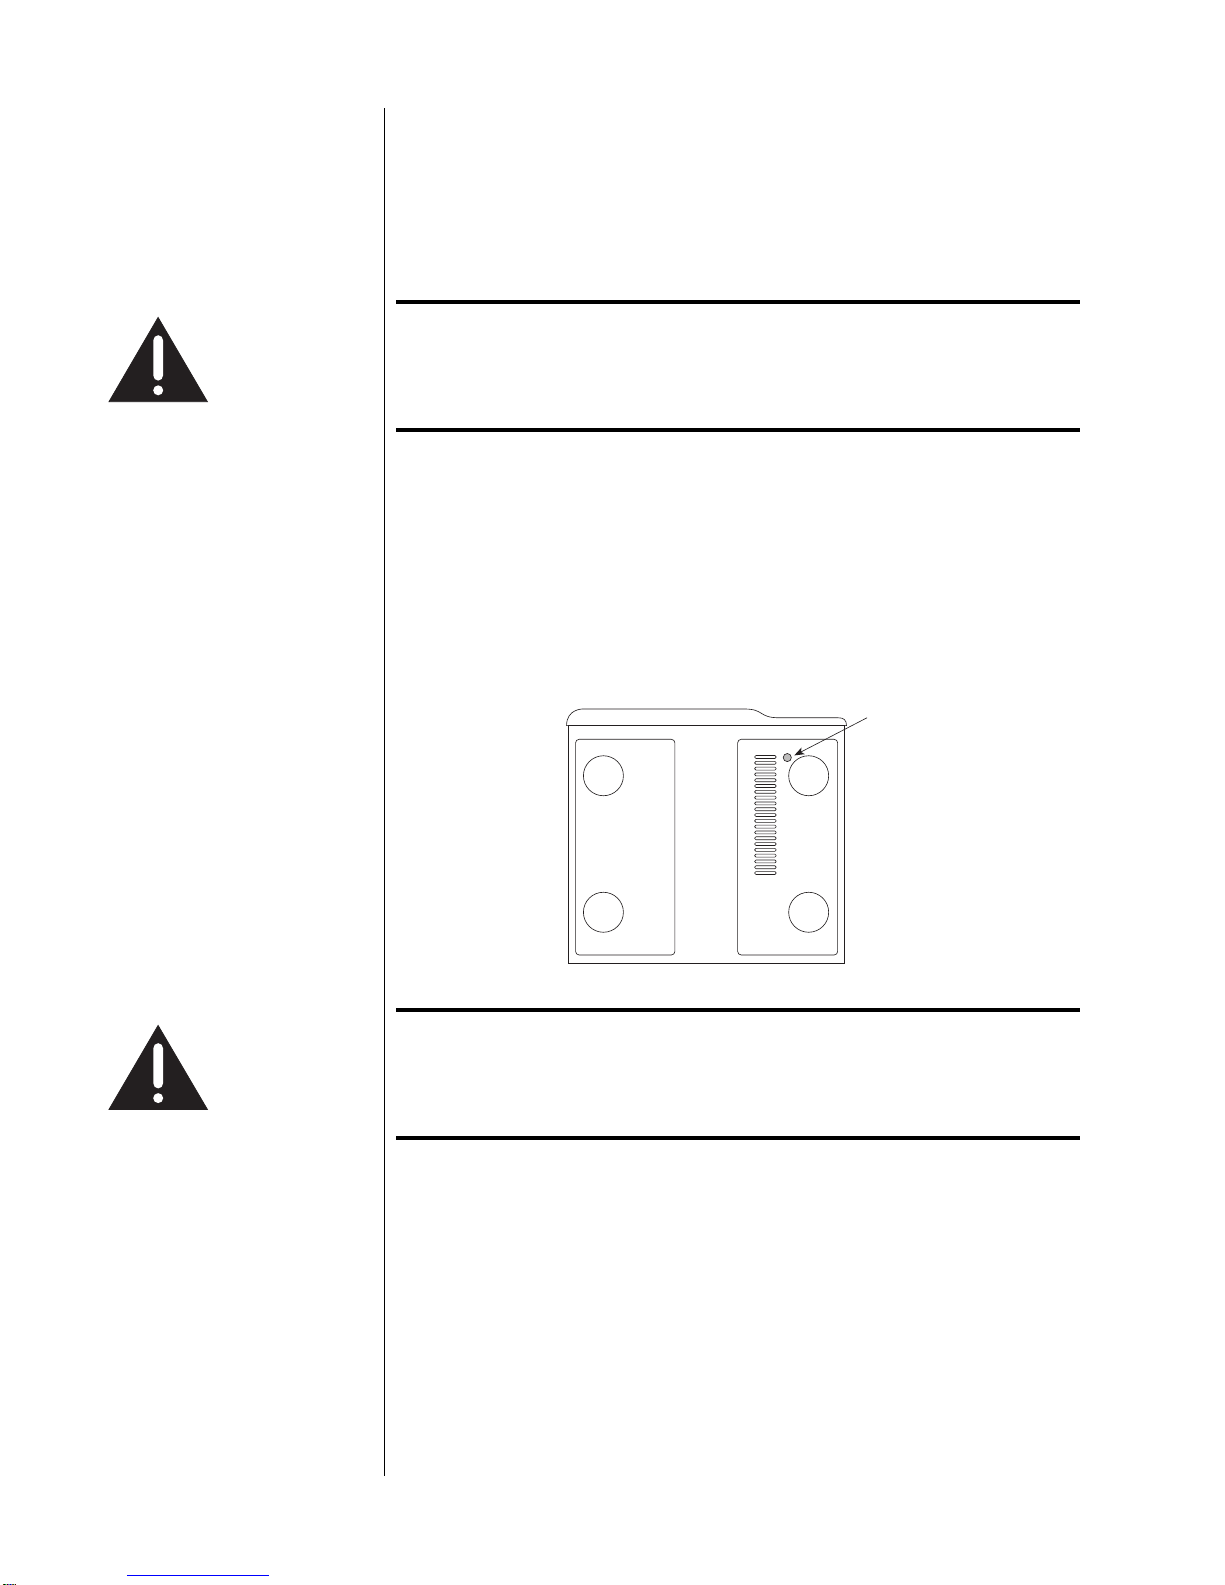
Operating Voltage & Frequency ............................................................... 7
Voltage label .............................................................................................. 7
A Quick Start…............................................................................................ 8
Warm up/break-in period................................................................................. 9
Special Design Features........................................................................... 10
A New Generation .......................................................................................... 10
Digital Servo Control........................................................................................ 10
Digital Input/Output Versatility ....................................................................... 10
Industrial Design ............................................................................................... 11
Convenience Features ................................................................................... 11
Communications Links .................................................................................... 11
24-bit digital architecture and HDCD® compatibility................................. 12
Fully balanced design..................................................................................... 12
Balanced volume control............................................................................... 12
Front Panel, Nº39 ....................................................................................... 13
the extended pause mode............................................................................ 18
sleep timer ........................................................................................................ 18
Rear Panel, Nº39 ....................................................................................... 20
AC power cord polarity........................................................................... 20
IR input tip polarity.................................................................................... 23
Linking connections ................................................................................. 23
standard link cables.................................................................................24
amplifier link cables.................................................................................. 24
Remote Control, Nº39............................................................................... 25
Random Play.................................................................................................... 26
Analog Input Switching................................................................................... 28
Conditions that Affect IR Performance ........................................................ 28
Optimum IR reception window ..............................................................29
Setup and Installation............................................................................... 30
Connecting AC Mains .................................................................................... 30
Connecting Digital Audio Sources ................................................................ 30
Connecting the Digital Audio Outputs ......................................................... 30
Making Link Connections ............................................................................... 31
Connecting Analog Outputs ......................................................................... 31
Basic Operation ........................................................................................ 32
Loading a CD................................................................................................... 32
Playing a CD .................................................................................................... 32
Random Play.................................................................................................... 32
Navigating the Disc......................................................................................... 32
Direct Time Access .......................................................................................... 33
Pause................................................................................................................. 33
Repeat Disc ...................................................................................................... 34
Repeat Track .................................................................................................... 34
A-B Repeat ....................................................................................................... 34
Polarity .............................................................................................................. 34

5
Programming the Nº39 ............................................................................. 35
Introduction to Playlists.................................................................................... 35
Assembling a Playlist........................................................................................ 36
Programming by Omission.............................................................................. 36
Saving a Playlist................................................................................................ 36
Reviewing a Playlist ......................................................................................... 36
Deleting a Track from a Playlist ...................................................................... 37
Adding a Track to a Playlist ............................................................................ 37
Overriding a Playlist .........................................................................................37
Erasing Playlists from Memory......................................................................... 38
Why Polarity Programming? ........................................................................... 38
Whole-Disc Polarity Programming ................................................................. 38
Track-by-Track Polarity Programming............................................................ 39
Overriding a Polarity Program........................................................................ 39
Special Functions...................................................................................... 40
SOUND Menu Items: ........................................................................................ 40
Fixed/Variable Volume.................................................................................... 40
Silent/Audible Cueing ..................................................................................... 41
Balance Control............................................................................................... 41
Mute Control .................................................................................................... 41
Locked Volume ................................................................................................ 41
LINK Menu items:.............................................................................................. 41
Standby link ...................................................................................................... 41
Name link.......................................................................................................... 42
Play link ............................................................................................................. 42
Display link ........................................................................................................ 42
AUX IN’s Menu items........................................................................................ 42
Changing Link Options.................................................................................... 43
Sleep Timer ....................................................................................................... 43
Using Learning Remote Controls ............................................................. 44
Teaching Nº39 Front Panel Commands........................................................ 44
Teaching Other Nº39 Commands .................................................................45
special commands table ........................................................................ 46
Troubleshooting......................................................................................... 47
Care and Maintenance ........................................................................... 49
U.S. and Canadian Warranty ................................................................... 50
Limited five year warranty ..............................................................................50
Obtaining Service ..................................................................................... 51
Specifications............................................................................................ 52
Dimensions ................................................................................................ 53
Installation Notes ...................................................................................... 54

6
Unpacking and Placement
Unpacking the Nº39 Unpack your Nº39 CD Processor and remove all accessories from the carton.
Important! Keep all packing materials for future transport of your Nº39.
Shipping your new component in anything other than its
purpose-designed packing material may result in damage
that is not covered by the warranty.
Included with your new Mark Levinson CD processor is a pair of knit, white
gloves designed to assist you in the initial unpacking and placement of your new
purchase. Please accept them as a token of our appreciation for having purchased
one of our products.
Remove the Transport Screw Place the Nº39 CD Processor upside-down on a soft, clean surface. Remove the
transport screw from the bottom of the unit and save it with the packing materi-
als for future use.
transport
screw
Warning! The transport screw must be removed before operating the
Nº39, since it immobilizes the transport mechanism during
shipping to prevent damage.This screw must also be
replaced before shipping the unit.
Placement of the Nº39 The Nº37 should be placed close to your digital audio processor, thus keeping
interconnect cabling reasonably short. It may be placed on a shelf or in a cabinet
where it is convenient to operate, but should not be rack mounted, so as to leave
access to the rear panel power switch.
The Nº37 is designed for continuous operation—hence the standby button on
the front panel rather than a power button. However, a rear-panel power switch is
provided for your convenience should you want to disconnect the unit from the
AC mains (as when taking a vacation, for example).
Drawings are included in this manual to facilitate special installations and custom
cabinetry (see Dimensions).

7
Operating Voltage
& Frequency
The Nº39 CD Processor is set at the factory (internally) for 1100V, 120V, 200V,
220V, or 240V AC mains operation as appropriate for the country in which it is to
be sold. Make sure that the label on the rear of the Nº39 (adjacent to the power
cord) indicates the correct AC operating voltage for your location, as attempting to
operate the Nº39 at an incorrect voltage can damage the unit.
The Nº39 CD Processor is also set at the factory for operation on either 50 or
60 Hz AC line frequencies, as appropriate for the country in which it is to be
sold. It will not operate if it senses an incorrect line frequency.
Warning! Neither the voltage nor the line frequency setting may be
changed by the user.There are no user serviceable parts
inside the Nº39. Only qualified, authorized service personnel
may open the Nº39 CD Processor, as hazardous voltages exist
within the unit.
If the AC mains voltage or frequency indicated on your Nº39 is incorrect, please
contact your local, authorized Mark Levinson dealer or distributor.
The Nº39 can easily be powered by a normal 15-ampere AC mains line. If other
devices are also powered from the same AC line, their additional power con-
sumption should be taken into account.

8
A Quick Start…
We recognize that many people are understandably eager to begin listening to
their new components, and that reading the manual is often done (if at all) at a
later time—perhaps while listening to music with the new product itself. We
strongly recommend that you read this manual thoroughly, as the Nº39 CD Pro-
cessor incorporates many unusual features that enhance its operation.
Fortunately, we can help you get some music up and running on your system
quickly, so that you may begin enjoying your new CD player while reading more
about it. The goal here is simply to make some music as quickly as possible. The
following procedure assumes that you have a relatively conventional system and it
is already connected with the exception of the Nº39 (e.g., preamplifier to power
amplifier, to speakers, etc.).
1 TURN OFF YOUR ASSOCIATED COMPONENTS
This minimizes the opportunity for a momentary electrical surge disturbing
your system while making connections. If you have a large power amplifier,
allow its power supply to fully discharge before proceeding (which may
take as long as several minutes, depending on its design).
2 REMOVE THE TRANSPORT SCREW FROM THE BOTTOM OF THE Nº39
If you have not done so already, remove the knurled transport screw from
the bottom of the Nº39 now. Be sure to save it and all packing material for
possible future use. (Shipping the Nº39 without proper packing material
and without the transport screw in its proper position may cause damage to
the unit that would not be covered by the warranty.)
3 CONNECT THE Nº39 TO AC POWER
Connect the AC cord to the Nº39 at the receptacle on the rear panel, and
then to your AC outlet. Then turn on the power switch just above the AC
power receptacle. (The international symbol for “on” is a single vertical line:
|. “Off” is symbolized by a circle: O.) The Nº39 will take a few moments to
initialize and will then be ready to use.
4 CONNECT EITHER THE XLR OR THE RCAANALOG OUTPUTS ON THE
Nº39 TO AN APPROPRIATE INPUT OF YOUR PREAMPLIFIER
When properly implemented, balanced interconnection via XLR connectors
and high quality balanced cables offers superior performance, and is pre-
ferred to single-ended RCA interconnection. Both sets of outputs on your
Nº39 have been optimized to ensure maximum compatibility in a wide
range of systems. (Note that you should never connect a line-level compo-
nent such as a CD player to a phono input on a preamplifier. Although no
damage is likely to result to either CD player or preamplifier, the sound will
be badly distorted and the volume may be much louder than you expect.)

9
5 POWER UP THE REST OF THE SYSTEM, LEAVING THE POWER AMPLIFIERS
FOR LAST
Always turn the power amplifer(s) off first, and on last. This good habit
minimizes the opportunity for unexpected transients to be passed to your
loudspeakers. Another good habit is to reduce the volume on your pream-
plifier to minimum value before you restore power to the system.
6 SELECTTHE INPUTYOU ARE USING ON YOUR PREAMPLIFIER
Take care that a Tape Monitor switch does not override your selection of
the CD player’s input on your preamplifier, or you will be struck by how
“quiet” your new digital source is.…
7 LOAD A DISC IN THE DRAWER AND PRESS PLAY; SLOWLY RAISE THE
VOLUME ON YOUR PREAMPLIFIER
Congratulations! You should now be able to enjoy your favorite music while
reading the rest of this manual. (Please, do read the rest of this manual.)
Warm up/break-in period Although your Mark Levinson Nº39 CD Processor delivers outstanding perfor-
mance straight out of the box, you should expect to hear it continue to improve
as it reaches its normal operating temperatures and its various components
“break-in.” It has been our experience that the greatest changes occur within the
first 300 hours, as the Nº39 reaches thermal equilibrium and capacitors become
fully formed. After this initial break-in, its performance will remain quite constant.
The only exception to this rule is if power is removed from the unit for more
than a few minutes, allowing it to cool down. Depending on the degree of cool-
ing involved, you should expect a brief warm-up period before the Nº39’s sound
quality is at its best. Unless your Nº39 was allowed to become quite chilled, sub-
sequent thermal re-stabilization should not take long.

10
Special Design Features
Congratulations on your purchase of the Nº39 CD Processor. The Madrigal design
team is confident you will enjoy the outstanding performance of the Nº39 for
many years. In case you are interested in technical details, what follows is a brief
outline of some of the key technologies in your new CD player.
A New Generation The task of a CD player is easy to define: it must recover the correct data from
the disc and convert that data to a series of analog voltages with neither ampli-
tude nor timing errors (sometimes called “jitter”). As simple as this sounds,
achieving it in reality has been extremely difficult—as evidenced by the signifi-
cant sonic differences between various CD players.
Conventional CD player design depends heavily on the quality of the oscillator
used to control the rate at which the disc spins. This oscillator exists in an ex-
tremely “noisy” electrical environment close to the motor that spins the disc. The
electrical noise introduces timing errors in the delivery of the digital signal that
have come to be known as “jitter.” Subsequent handling of the digital audio sig-
nal in traditional CD player designs cannot improve upon this “jittery” signal,
lacking a better reference. To the contrary, the various stages of signal processing
between the laser pickup and the actual conversion to analog can only contribute
additional jitter of their own.
The Mark Levinson Nº39 leaps beyond conventional digital audio technology by
employing a proprietary, closed-loop jitter-reduction system in conjunction with a
double speed CD-ROM drive. Using a custom-made crystal oscillator with better
than five part-per-million accuracy, the digital signal is reclocked immediately be-
fore its conversion to analog, eliminating transport-related jitter from the digital
audio signal. This same crystal oscillator controls the all-digital servo used to con-
trol the rate at which the disc spins, and the digital to analog conversion process.
In effect, the design of the Nº39 turns the accepted status quo on its head. By
placing the all-important reference clock immediately prior to digital to analog
conversion, and slaving all the mechanical subassemblies to it rather than the
other way around, the signal presented to the outputs of the Nº39 is uncontami-
nated by electrically- or mechanically-induced jitter. The sonic advantages of this
design are immediately apparent in the clarity, warmth and stunning dynamic
contrasts exhibited by the Nº39.
Digital Servo Control The laser mechanism used in the Nº39 uses all digital servo controls of its opera-
tions. Critical functions such as focus and tracking are handled completely in the
digital domain with mathematical precision. A digital servo remains stable over
time, never needing readjustment under normal conditions.
Digital Input/Output Versatility The Nº39 CD player incorporates two digital inputs, allowing two external digital
sources such as a laserdisc player and digital cable radio to benefit from the ex-
cellent digital processor incorporated within. The two most common digital inter-
faces are supported for the widest compatibility: EIAJ (sometimes called
“TosLink™”) and S/PDIF coaxial, via an RCA connector.

11
Two high quality digital output configurations are also supported in the Nº39. A
new complementary driver for the balanced AES/EBU electrical output delivers out-
standing performance to the high quality XLR connector. A single-ended S/PDIF
electrical output is also provided via an RCA connector. These digital outputs
may be used to feed the input of digital recorders or an outboard digital proces-
sor, and they both benefit from the closed-loop jitter reduction circuitry de-
scribed above. (In effect, they duplicate the functionality and performance of the
corresponding outputs on a Mark Levinson Nº37 CD transport.)
All digital interfaces have been carefully optimized to deliver the finest perfor-
mance each interface standard allows. As a direct result, the Nº39 performs opti-
mally with any digital processor, without having to resort to techniques which
would limit its compatibility with other products.
Industrial Design The Nº39 shares the handsome industrial design of other Mark Levinson compo-
nents such as the Nº38 preamplifier. The combination of the hand-brushed,
black-anodized aluminum faceplate and bead-blasted custom-machined buttons
make operating the Nº39 a tactile as well as a sonic pleasure.
A large, easily read display provides information as to the operational status of the
Nº39 from across the room, making the supplied remote control more genuinely
useful than on products lacking such a display.
In keeping with its sophisticated design, the Nº39 also incorporates a Madrigal-
designed loading mechanism. Contrasting strongly with the bulky, plastic drawers
commonly used, the slim 1⁄8inch drawer is machined from a solid piece of alumi-
num and rides on highly polished bearings. Its variable-speed design opens and
closes quickly, but without jarring the disc contained within, nor risking a jam
from dislodging it.
Convenience Features Too often, high performance CD players have eschewed convenience in the
hopes of seeming more “performance-oriented.” While there were good argu-
ments for such a “minimalist” design in the days of analog turntables, the time is
long gone when the audiophile needed to give up operational convenience for
musical performance. After all, convenience features in a digital product are
largely a matter of writing appropriate software, and have no affect on the quality
of the digital data itself.
The Nº39 supports a variety of custom programming options, including “delete
programming” wherein selected tracks are omitted from the playlist. This allows
the user to skip the one or two songs on an otherwise good disc that have been
overplayed ad nauseam. The Nº39 will remember such programs for thousands
of discs, should you want to save that many programs.
Communications Links As with all Mark Levinson 30-series components, the Nº39 incorporates a sophis-
ticated inter-component communications bus. Unique among high performance
audio systems, Mark Levinson 30-series components offer a degree of system in-
tegration that makes even complex systems a pleasure to use.
For example, bringing the Nº39 CD Processor out of standby will also bring the
Linked preamplifier and power amplifier(s) out of standby, and select the appro-
priate inputs on the preamplifier so that a CD can be enjoyed. Even a sophisti-
cated system with many components can thus offer one-button simplicity of op-
eration.

12
In short, the Mark Levinson Nº39 establishes a new standard for performance and
practicality among high end CD players and should be auditioned by anyone who
desires the finest in digital audio.
24-bit digital architecture
and HDCD®compatibility All digital filtering and processing maintains a true 24-bit throughput capability,
providing greater digital resolution than any existing source component. Even the
most stringent requirements of professionals can easily be met with this design.
In addition to true 20-bit capability (24 bits in the digital domain, filtered to the
20-bit resolution of the digital to analog conversion stages), the Nº39 also incor-
porates High Definition Compatible Digital®decoding to take full advantage of
the resolution available from HDCD encoded 16-bit CDs. The High Definition
Compatible Digital®format retains much of the resolution inherent in professional
twenty bit recordings by encoding this information more efficiently within the
sixteen bit space available in the Compact Disc format.
Fully balanced design The Nº39 is fully balanced in both the analog and digital domains. Information
from the disc and the single-ended digital inputs are immediately converted to
balanced signals before any further routing or processing of the signal. Conver-
sion to analog is accomplished in two opposing polarity 20-bit converters per
channel.
This approach maintains the integrity of the signal, reducing the opportunities for
music-destroying noise and digital artifacts to enter the signal path.
Balanced volume control The Nº39 incorporates a fully balanced analog volume control similar to the one
used in the Mark Levinson Nº38 and Nº38S preamplifiers. When activated (by
turning on the variable output function under setup: sound), the output of the
Nº39 may be attenuated in precise 0.1 dB steps through most of the range. Com-
bined with the low output impedance of the Nº39, it then becomes possible for
the CD player to drive a power amplifier directly from either its balanced or its
single-ended outputs. When the variable output function is turned off (as would
be the case if you had analog sources that required control as well, necessitating
a preamplifier), the volume control circuitry is removed from the signal path to
eliminate what would otherwise be a redundant volume control in the system.

13
standby
–
display
intensity
disc repeat
+prev/rew next/f.fwd stop/drawer play
Nº 39 CD PROCESSOR
mode
pause
repeat
MADRIGALAUDIO LABORATORIES
R
track repeat time on disc time remaing
mode
1 2 4 6 7 8
19181715141210 11 13 16
53
9
Front Panel, Nº39
1 DISPLAY INTENSITY
Pressing this button varies the brightness of the display. Four brightness lev-
els are available, including “display off.” All other front panel LEDs change
their brightness levels appropriately, except that they remain at the dimmest
level when the display itself is off.
When power is first applied to the Nº39 (or when power is restored after
an interruption), the display is automatically set to its “medium” level.
Pressing the display intensity button once dims the display one level; press-
ing it again turns the display off; pressing display intensity once more re-
turns the display to its brightest level; pressing it a fourth time will return it
to medium. (If other Mark Levinson components in the system are “Linked”
to the Nº39, all display intensities can change in unison. See Special Func-
tions for more information.)
If the display is set to “off,” pressing any key will cause it to light at medium
intensity for approximately four seconds in order to display the action of
the key press.
2 INFRARED TRANSCEIVER (WITHIN DISPLAY)
Infrared commands transmitted from the remote control are received by a
receiver behind this section of the display. Remote control of the Nº39 may
be unreliable if there is not a clear line of sight between the remote control
and the receiver (if the remote is far off-axis, or if the Nº39 is within a cabi-
net, for example). In such a case consider using a third-party IR repeater to
route the signal to the IR input jack on the rear panel (see Rear Panel,
Nº39).

14
In addition to receiving IR commands, the Nº39 has the ability to teach a
learning remote control its own commands from an IR transmitter located
in this same area. (See Using Learning Remote Controls for more informa-
tion.)
3 SPECIAL MODE INDICATOR
The first character in the display is reserved for indication of special modes
of operation. For example, a Pis displayed in this space to indicate a Pro-
gram (a special sequence of tracks) is being played: A and Balternate
while an A-B loop is being repeated. Similarly, an R is displayed to denote
random play, and || is displayed to denote pause.
4 TRACK INDICATOR
The next two characters are used to indicate the number of the track being
played. When a compact disc is loaded but the transport is in the stop
mode, this same space indicates the total number of tracks on the disc (or
in the program for the current disc, if programmed).
5 TIME INDICATOR
The time section of the display can be set to display any of the following
four indications of time in minutes and seconds:
•time elapsed in track (neither LED lit)
•time elapsed on disc (time on disc LED lit)
•time remaining on track (time remaining LED lit)
•time remaining on disc (time on disc and time remaining LEDs lit)
In effect, the Nº39 assumes you will be most interested seeing elapsed time
on the current track; only departures from that assumption are denoted by
LEDs. The Nº39 will remember the last display mode selected and continue
to display that information until you change it, except in stop (when it al-
ways defaults to showing the time remaining on disc, or in the disc’s playlist
if it has been programmed). Once in stop, the time indication may be
changed to show any of the other display modes (if desired).
These four options are accessed by pressing the mode button to the right
of the display until TIMES is shown in the display (see 6, below). Then, use
the mode + or mode – keys to cycle through the four modes of time dis-
play, using the time on disc and time remaining LEDs to indicate which
mode is chosen at any moment.
6 MODE BUTTON
The mode button beside the display cycles through the four functions that
can be controlled by the mode + and mode – buttons (either on the front
panel or the remote control). These four modes are:
•PROGRAM (for creating custom playlists)
•INPUTS (for selecting a digital source)
•TIMES (for selecting a time indication)
•VOLUME* (for controlling the volume of the Nº39*)

15
* (Note that the volume control is only made available if the Nº39’s
variable output mode is engaged; see Special Functions for more
information.)
Any of these four modes (three modes if using the fixed output) may be
accessed by repeatedly pressing the mode button, thereby cycling through
the options.
Once a particular mode is chosen, pressing the mode + and mode – but-
tons increments or decrements that particular function. For example,
mode + would either: add a track to a playlist; select the next digital input;
advance to the next time indication; or raise the volume.
Along with mode + and mode –, the mode button is also used to change
the option settings. (See Special Functions.)
7 REPEAT BUTTON
You may choose to either repeat the entire disc (including any programs
you might have entered for that particular disc) or an individual track by
pressing the repeat button. From normal operation, the first press of the
repeat button will light the disc repeat LED below the display (number 11
in the front panel illustration). Pressing the repeat button again will light
the track repeat LED (number 13 in the front panel illustration). Pressing it
a third time will cycle out of any repeating mode, as will pressing stop/
drawer at any time. In either case, both repeat LEDs will be extinguished to
indicate the absence of any repeat mode.
8 DRAWER
The Nº39 employs an elegant, slim drawer that is machined from a solid
piece of aluminum. It is normally opened and closed by pressing the
stop/drawer button (number 15 in the front panel illustration). If opened, it
may also be closed simply by gently pushing the front edge inward (as
though you were going to close it manually). The Nº39 will interpret this as
a request to close the drawer and take over for you, smoothly closing the
drawer.
If the Nº39 senses an obstruction during opening of the drawer mechanism,
it will attempt to re-close. If successful, it will read the disc’s table of con-
tents and display the disc’s number of tracks and total time (followed by
the playlist’s track and time information, if one exists). If for any reason the
drawer does not close fully, the display will show DRAWER to indicate the
problem. After removing the obstruction, press the stop/drawer button
again to close the drawer normally.
Similarly, if the Nº39 senses an obstruction during the closing of its drawer,
it is designed to stop immediately and will attempt to reopen. If the nature
of the obstruction prevents this also, it will stop where it is and wait for
your intervention, displaying STOPPED! to indicate the problem. After remov-
ing the obstruction, press the stop/drawer button again to close the drawer.
9HDCD
®
INDICATOR
This LED will illuminate when the Nº39 is playing HDCD-encoded material,
whether from the CD transport or from an external digital source.

16
10 MODE – AND MODE + BUTTONS
Using these two buttons in conjunction with the mode button, any of four
different Nº39 functions can be controlled from the front panel :
•PROGRAM (for creating custom playlists)
•INPUTS (for selecting a digital source)
•TIMES (for selecting a time indication)
•VOLUME* (for controlling the volume of the Nº39*)
* (Note that the volume control is only made available if the Nº39’s
variable output mode is engaged; see Special Functions for more
information.)
Any of these four modes (three modes if using the fixed output) may be
accessed by repeatedly pressing the mode button, thereby cycling through
the options.
Once a particular mode is chosen, pressing the mode + and mode – but-
tons increments or decrements that particular function. For example,
mode + would either: add a track to a playlist; select the next digital input;
advance to the next time indication; or raise the volume.
Along with mode + and mode –, the mode button is also used to change
the option settings. (See Special Functions.)
For detailed information on programming the Nº39, see Programming the
Nº39 later in this manual.
11 DISC REPEAT LED
This LED is lit when the Nº39 is set to repeat a disc (or a disc’s program, if
it has one) endlessly. This feature is accessed using the repeat button (see
number 7, above).
12 PREV/REW BUTTON
Pressing this button momentarily will return you to the beginning of the
previous track. Pressing and holding this button will instead perform a re-
verse scan of the music, reminiscent of the rewind function found on many
tape decks. This scanning mode may be either audible or silent (according
to your choice in the setup: sound menu; see Special Functions), and it al-
lows you to quickly find a particular point within a track. (Incidentally, if
you wish to listen to the current track over again from the beginning, sim-
ply press play while the track is playing.)
13 TRACK REPEAT LED
This LED is lit when the Nº39 is set to repeat a single track endlessly. This
feature is accessed using the repeat button (see number 7, above).

17
14 NEXT/F.FWD BUTTON
Pressing this button momentarily will advance the Nº39 to the beginning of
the next track. Pressing and holding this button will instead perform a fast
forward scan of the music, reminiscent of the fast forward function found
on many tape decks. This scanning mode may be either audible or silent
(according to your choice in the setup: sound menu; see Special Func-
tions), and it allows you to quickly find a particular point within a track.
15 STOP/DRAWER
Pressing this button once while a disc is playing will stop the disc, resulting
in the total number of tracks and the total time on the disc being displayed.
(Both the time on disc and the time remaining LEDs are lit to clarify the
meaning of the information being displayed at this point.)
Pressing this button once the disc has stopped, or if there is no disc in the
transport, will cause the drawer to open. If the disc is still playing, you may
press the button twice rapidly, to effect both the stop command and the
drawer open command; the Nº39 will remember the second button push
and execute it as soon as the disc has stopped spinning.
Pressing the stop/drawer button will cause an open drawer to close. If it
senses a disc in the drawer, the Nº39 will take a moment to read the disc’s
table of contents so that it may display the total number of tracks and the
total time on the disc for your information. If a custom playlist exists for the
disc, the total number of tracks and the total time of the playlist is displayed
instead.
16 TIME ON DISC AND TIME REMAINING LED INDICATORS
These LEDs are used to indicate which of the four available display modes
the Nº39 is in. The four indications of time that can be displayed are:
•time elapsed in track (neither LED lit)
•time elapsed on disc (time on disc LED lit)
•time remaining on track (time remaining LED lit)
•time remaining on disc (time on disc and time remaining LEDs lit)
These four options are accessed by selecting the TIMES mode (using the
mode button) and repeatedly pressing the mode + or mode – buttons,
which cycle forward or backward through the four modes, respectively.
17 PL AY BUT TO N
As you might guess, press this button in order to play a disc. If a pro-
grammed sequence of tracks exists for that particular disc, the program will
be played from its beginning. Also, as you might expect, you may press the
play button immediately after placing a disc in the Nº39’s drawer; the
drawer will close and the Nº39 will enter the play mode as soon as it has
read the disc’s table of contents and checked to see if a program exists that
ought to be played.
The play button has another important function: if you wish to return to
the beginning of the track currently playing, simply press play to restart at
the beginning of that same track. If the Nº39 is in pause, pressing play will
re-cue the disc at the beginning of the current track.

18
18 PAUSE BUTTON
Pressing this button once during play will pause the Nº39 at that point
within the track; the display will show double bars (|| ) as a reminder that
you are in the pause mode. Pressing the pause button a second time will
resume play.
the extended pause mode After two minutes in pause, the Nº39 will go into an “extended pause”
mode. Extended pause stops the disc and turns off the laser against the
possibility that you have been called away and may not return for some
time. The Nº39 will slowly flash the double bars (|| ) to indicate that you
are in the extended pause mode rather than normal pause.
You may force the Nº39 into extended pause mode by pressing and hold-
ing the pause button (on either the front panel or the remote control) until
the double bars begin to blink.
In effect, extended pause is much like stop, with the exception that press-
ing pause will return you to the point on the disc where you had left off
listening after only a momentary hesitation to spin the disc back up to
speed and scan to the appropriate point.
19 STANDBY & STANDBY LED
Assuming that the Nº39 is connected to AC power and the main power
switch on the rear panel is in the “|” position (see Rear Panel, Nº39),
pressing this button takes the Nº39 out of standby mode and enables the
front-panel controls.
When the Nº39’s main power switch is first turned on (or when power is
restored after an interruption), the Nº39 will go through a brief initialization
and then be ready to operate (that is, it won’t be in standby mode).
Pressing standby again places the Nº39 into standby mode, which turns the
display off, turns off all digital outputs, and disables the front-panel con-
trols. The internal circuitry remains powered up in order to maintain its
thermal stability and optimum performance at all times.
Pressing standby, drawer, or play will bring the Nº39 out of standby, en-
abling the front panel controls, and activating the display and outputs.
While the Nº39 is in standby, the LED above the standby button flashes ap-
proximately every five seconds. (When the Nº39 is Linked to other Mark
Levinson components, all their standby lights will blink in unison.) When
the Nº39 is ready to operate (that is, when it is not in standby mode), this
LED remains lit continuously.
sleep timer As shipped from the factory, the Nº39 will remain on until you deliberately
place it in standby. If you prefer for it to automatically enter standby after a
particular period of time, press and hold the standby button until the dis-
play reads MANUAL. Pressing the next/f.fwd button will advance it in one
minute increments to a maximum of 120 minutes. Pressing the
prev/rew button will decrement the sleep timer by one minute increments.
Reducing the timer setting below 1 minute will return it to normal, MANUAL
operation.

19
These options represent the length of time the Nº39 before it will automati-
cally go into standby. Having made your selection, simply allow the Nº39 to
timeout (when the display reverts to its normal operation, indicating disc
information). You may change your Nº39 back to manual standby mode
before it enters standby by reversing this process.
The sleep timer will automatically reset itself to MANUAL after having been
activated. In this fashion, you can set it and forget it without having a sub-
sequent listening session interrupted unexpectedly.

20
external
i.r.
master /
slave out
CD PLAYER Nº 39
designed and manufactured in U.S.A.
by
MADRIGAL S/N
aes / ebu
spdif
digital outputs
communications ports
and High Definition Compatible Digital® are
registered trademarks of Pacific Microsonics, Inc.
®
~ ac mains
eiaj spdif
digital inputs
analog outputs
right left
slave
in
12
67
354
CD Processor Nº39
Rear Panel, Nº39
1 AC POWER INPUTAND SWITCH
This input accepts AC power from the AC mains (via the supplied AC
cable).
Warning! The Nº39 is set internally for100,120, 200, 220, or 240VAC mains
operation at either 50 or 60Hz. Make sure that the label on the
bottom of the unit indicates the correct AC operating voltage
and frequency for your location before connecting it to AC
mains.
Connect the female end of this cable to the Nº39. Connect the male end of
this cable to wall outlet or to an “unswitched” convenience outlet like those
found on some audio components.
AC power cord polarity
To Nº39 To AC mains
1
3
212
3
1= Line (hot)
2 = Neutral
3 = Earth ground
Turn on the power by pressing the top of the power switch above the
power cord receptacle (it has a solid vertical line to indicate “on”: |).
Table of contents
Other Madrigal Audio Computer Hardware manuals