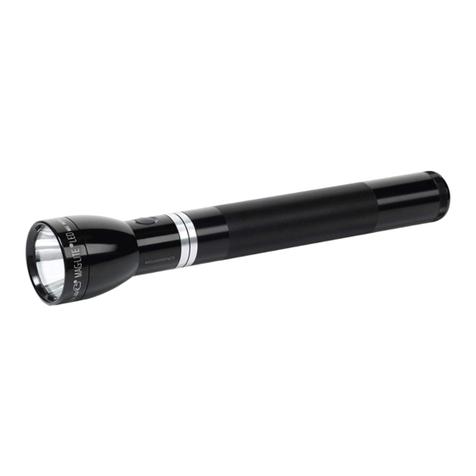
MAG CHARGER RE4016U User manual

u<0$)($*=agjdhB<v
Model Number:
RE4016U
P rt Number:
106-000-081
421-000-094 9/11
Mag Charger®
Rechargeable Flashlight
System
• Rugged, high c p city NiMH
rech rge ble b ttery
engineered for long service
life.
• H logen l mp produces one
of the brightest, whitest, f r-
re ching light be ms
v il ble.
• Quick focusing “continuous
c m- ction” spot-to-flood
be m. Oper tes with
simple qu rter turn of the
fl shlight he d ssembly.
• Includes New Multi-Mode
Electronic Switch.
PERSONALI E for QUICK
ACCESS to your
PREFERRED FUNCTIONS,
Full Power, Power Save,
Strobe, SOS, Momentary
On/Off. USER-
CONFIGURABLE for
CIVILIAN or LAW
ENFORCEMENT Duty.
• Highly polished, met llic
reflector, withst nds extreme
temper tures nd delivers
superior optic l perform nce.
• High qu lity tempered gl ss
lens.
• Precision m chined high-
strength luminum lloy
fl shlight c se.
H rd nodized inside nd out
for improved corrosion
resist nce nd dur bility.
• Fl shlight c n be ch rged in
ny position.
• Ch rging cr dle mounts
securely in ny position
within minim l sp ce
lloc tion.
• Individu lly seri l numbered
for identific tion.
• Ten ye r limited w rr nty
(det iled terms of w rr nty,
nd owner's m nu l,
enclosed).
• Rech rges on either AC or DC
current.
Mag Charger®
Rechargeable
zaklantaarnsysteem
• Robuuste opl db re NiMH-
b tterij met hoge c p citeit,
ontworpen om l ng mee te
g n.
• H logeenl mpje produceert een
v n de helderste, witste, verst
reikende lichtstr len.
• Snel scherpstellende “continu
c m- ctie” punt-n r-breed
str l. Te gebruiken door
eenvoudig een kw rtsl g te
dr ien n de z kl mpkop.
• Met nieuwe elektronische
multi-modus schakelaar.
PERSONALISEER voor
SNELLE TOEGANG TOT UW
VOORKEURSFUNCTIES, Vol
vermogen, Bespaarmodus,
Knipperen, SOS, Kortdurend
aan/uit. KAN DOOR DE
GEBRUIKER WORDEN
GECONFIGUREERD OM TE
VOLDOEN AAN DE
WETTELIJKE EISEN.
• Hooggepolijste met len
reflector is best nd tegen
extreme temper turen en levert
superieure optische prest tie.
• Lens v n kw lit tief hoogst nd
voorgesp nnen gl s.
• Precisieversp nde
z kl nt rntrommel v n
supersterke luminiumlegering.
H rde ge nodiseerde binnen-
en buitenk nt voor betere
corrosiebestendigheid en
duurz mheid.
• Flitslicht k n in lle posities
opgel den worden.
• L dvoet k n in elke positie
veilig gemonteerd worden en
neemt weinig pl ts in.
• Elke z kl nt rn heeft zijn eigen
serienummer ter identific tie.
• Tienj rige Beperkte G r ntie
(gedet illeerde
g r ntievoorw rden en
h ndleiding bijgesloten)
• K n op gelijksp nning of op
wisselsp nning gel den
worden.
Système de lampe-torche
Mag Charger®
Rechargeable
• Solide, b tterie rech rge ble
NiMH de gr nde c p cité,
conçue pour durer longtemps.
• L' mpoule à h logène produit
l'un des f isce ux bl ncs les
plus brill nts et les plus longs.
•
Régl ge foc l r pide pour
p sser d’un f isce u concentré
à un f isce u l rge en b l y ge
continu. Fonctionne p r
rot tion de l tête de l mpe sur
un qu rt de tour.
• Comprend le nouveau mode
électronique Multi-mode
Interrupteur.
PERSONNALISER pour UN
ACCÈS RAPIDE à vos
FONCTIONS PRÉFÉRÉES,
Pleine puissance, Économie
d'énergie, À éclair
électronique, SOS, Marche
momentanée On/Off.
UTILISATION
CONFIGURABLE pour un
usage CIVIL ou pour la
POLICE.
• Réflecteur mét llique de h ute
précision; supporte des
tempér tures extrêmes et offre
un rendement optique
supérieur.
• Lentille en verre trempé de
gr nde qu lité.
• Boîtier de l mpe usiné vec
précision, en lli ge
d' luminium très résist nt.
• Intérieur et extérieur nodisés
de gr nde dureté, pour une
meilleure résist nce à l
corrosion et pour une plus
gr nde dur bilité.
• Peut être ch rgée d ns
n’importe quelle position.
• Berce u de ch rge mont ble en
toute sécurité,d ns n'importe
quelle position et d ns un
minimum d'esp ce.
• Numéros de série individuels
pour identifier les modèles de
l mpes
• G r ntie limitée de dix ns
(mod lités de l g r ntie et
guide d’utilis tion inclus).
• L mpes rech rge bles p r
cour nt secteur ou cour nt
continu.
Mag Charger®
Rechargeable
Taschenlampensystem
•
Robuste wieder ufl db re
Hochleistungs-NiMH-B tterie
entworfen für l nge
Lebensd uer.
•
H logenglühbirne für einen
der hellsten, weißesten und
weitreichendsten
Lichtstr hlen.
•
Kontinuierlicher Nocken-
Fokussiermech nismus von
Punkt- zu Flutlicht. Benötigt
lediglich eine Vierteldrehung
des T schenl mpenkopfs.
•
Mit neuem elektronischen
Multi-Mode-Schalter.
PERSONALISIEREN für
SCHNELLEN UGRIFF auf
Ihre BEVOR UGTEN
FUNKTIONEN, Volle
Leistung, Sparmodus,
Blitzlicht, SOS, Kurz-
An/Aus-Modus.
NUT ERKONFIGURIERBA
R für IVILEINSAT oder
STRAFVERFOLGUNG.
•
Hochpolierter Met llreflektor
widersteht extremen
Temper turen und liefert
überr gende optische
Leistung.
•
Gehärtete Gl slinse hoher
Qu lität.
•
Präzisionsgefertigtes
T schenl mpengehäuse us
m ssiver
Aluminiumlegierung.
•
Innen und ußen eloxiert für
bessere
Korrosionsbeständigkeit und
Widerst ndsfähigkeit.
•
Die T schenl mpe k nn in
jeder Position gel den
werden.
•
L demodul ist in beliebiger
Position bei nur geringem
Pl tzbed rf sicher
inst llierb r.
•
Individuelle Seriennummer
zur einf chen Identifik tion.
•
Zehn-J hres-G r ntie
(det illierte Beschreibung der
G r ntie und H ndbuch für
den Eigentümer
eingeschlossen).
•
Sowohl n Wechselstrom ls
uch Gleichstrom ufl db r.
Mag Charger® Rechargable
Flashlight System (Sistema
de linterna recargable de
Mag Charger®)
• Resistente, con b terí rec rg ble
NiMH de lt c p cid d diseñ d
p r l rg dur ción.
• L bombill de h lógeno produce
uno de los h ces de luz más
brill ntes, más bl ncos y de más
lc nce que están disponibles.
• H z mplio “de cción continu ”,
foc liz ción rápid . Funcion
simplemente con un cu rto de
giro del conjunto de l p rte
del nter de l lintern .
• Incluye una nueva pieza
electrónica multimodo
Interruptor. PERSONALICE el
ACCESO RÁPIDO a sus
FUNCIONES PREFERIDAS,
Potencia máxima, Ahorro de
energía, Luz estroboscópica,
SOS, Encendido/Apagado
momentáneo.
CONFIGURABLE POR EL
USUARIO para uso CIVIL o
LEGAL.
• Reflector metálico lt mente
pulido que soport temper tur s
extrem s y brind un
rendimiento óptico superior.
• Lente de vidrio templ do de lt
c lid d.
• Estuche p r l lintern de
le ción de luminio de gr n
fort lez y m quin do
precisión. Con luminio duro
nodiz do por dentro y por fuer
p r un mejor resistenci l
corrosión y un m yor dur ción.
• L Lintern puede c rg rse en
cu lquier posición.
• L b se de c rg se mont con
segurid d en cu lquier posición
us ndo un mínimo de esp cio.
• Número de serie individu l p r
f cilit r l identific ción.
• G r ntí limit d de diez ños
(Se djunt n los términos
det ll dos de l g r ntí sí
como el m nu l de usu rio).
• Se rec rg y se en corriente
ltern o direct .
Owner’s Manual • Gebruiksaanwijzing • Guide d’Utilisation
Handbuch • Manual del Propietario
The distinctive shapes, styles and overall appearances of all Mag®
flashlights, and the circumferential inscriptions extending around the
heads of all Mag® flashlights are trademarks of Mag Instrument, Inc.
The circumferential inscription on the head of every flashlight signifies
that it is an original Mag® flashlight and part of the Mag® family of
flashlights. U.S. Trademark Registrations for the shape, style and
overall appearance trademarks of Mag® flashlights and for
circumferential inscription trademarks of Mag® flashlights include
Nos. 1,808,998; 2,074,795; 2,687,693; 2,745,460; 2,765,978 and 2,765,979.
The pair of bands encircling the barrel of the Mag Charger® flashlight
is a trademark of Mag Instrument, Inc.
CORPORATE OFFICE
MAG INSTRUMENT, INC.
2001 South Hellman Ave.
P.O. Box 50600
Ontario, California U.S.A.
91761-1083
Warranty: 01 (909) 947-1006
fax: 01 (909) 947-5041
e-mail: warranty@magmail. om
Sales & Parts: 01 (909) 947-1006
email: salesdesk@magmail. om
©2011 Mag Instrument, Inc.
www.maglite.com

Rechargeable System (Halogen / NiMH)
Oplaadbaar systeem (Halogen / NiMH)
Systéme Rechargeable (Halogen / NiMH)
Aufladbar (Halogen / NiMH)
Sistema Recargable (Halogen / NiMH)
Owner’s Manual • Gebruiksaanwijzing • Guide d’Utilisation
Handbuch • Manual del Propietario

For Your Safety Please Read
WARNING:
Always read and understand all of the warnings and safety instructions contained in this
manual before attempting to use the Mag Charger® Rechargeable Flashlight System to help
avoid potential hazards that could result in bodily injury or property damage.
Always keep this manual conveniently available for future reference, as it contains important
information that will help effect the safe operation and maintenance of this instrument.
Any battery may leak harmful chemicals which may damage skin, clothing, or the inside of the
flashlight. TO AVOID RISK OF INJURY, DO NOT LET ANY MATERIAL LEAKED FROM A
BATTERY COME IN CONTACT WITH EYES OR SKIN. Any battery may rupture or explode if put
in a fire or otherwise exposed to excessive heat. TO AVOID RISK OF INJURY, DO NOT EXPOSE
BATTERIES TO EXCESSIVE HEAT. To reduce the risk of personal injury or harm to your
flashlight, take the following precautions:
• Do not use non-rechargeable batteries in your Mag Charger® Rechargeable Flashlight System™
.
• Use only a MAG® rechargeable battery pack (Model No. ARXX235) with this flashlight.
• Always install the battery pack with the positive (+) end facing the head end of the
flashlight and the negative (-) end facing the tailcap end of the flashlight .
• When storing your flashlight for long periods of time, remove the battery pack and store
it separately.
• Carefully follow the steps listed under “Inspection and Maintenance” in this manual.
• This product is not recommended for use by children.
The safety instructions have been classified according to the seriousness of the risk,
as follows:
~DANGER:
“Danger” indicates the existence of a hazard that could result in death or catastrophic bodily
injury, if the safety instruction is not observed.
WARNING:
“Warning” indicates the existence of a hazard that could result in serious bodily injury, if the
safety instruction is not observed.
OCAUTION:
“Caution” indicates the existence of a hazard that could result in minor bodily injury or
property damage, if the safety instruction is not observed.
몇NOTICE:
“Notice” contains general information that relates to the safe operation of the flashlight
system.
PROTECTION OF CHILDREN:
• Never allow children to play with your flashlight, as they might hurt themselves or others.
• Always keep all accessories and components out of the reach of small children. Small parts,
in particular, might present a choking hazard to children.
• Do not allow children to handle or operate this flashlight.
BATTERY DISPOSAL:
• Never discard a used battery pack with ordinary solid wastes, since it contains toxic
substances.
• Always dispose of a used battery pack in accordance with prevailing community regulations
relating to the disposal of household toxic wastes.
• Always cover the metal terminals with insulating tape first, to prevent accidental
short-circuiting whenever transporting outside of flashlight.
• The sealed battery stick contains nickel metal hydride and must be recycled or disposed of
properly. Contact your local county solid waste authority for proper recycling or disposal
information.
• Mag Instrument, Inc. is a proud participant in the RBRC (Rechargeable Battery Recycling
Corporation). By recycling NiMH rechargeable batteries, you are helping to keep NiMH
batteries out of the solid waste stream. When you throw away a NiMH battery, it eventually
ends up in a landfill or municipal incinerator. By recycling your used NiMH batteries through
Mag Instrument’s Battery Recycling Program, you are helping to create a cleaner and safer
environment for generations to come. For more information about the RBRC visit
www.rbrc.com
~DANGER:
• To prevent serious damage to eyesight, never look into flashlight when light is on. Do not
shine light into the face of someone else.
• Never attempt to disassemble or repair the AC adapter or charging cradle as exposure to
electric shock hazards may result. Always contact a Mag Authorized Warranty Service
Center, if repair or replacement is required.
• Never alter the AC cord or plug on your AC adapter or charging cradle. If the plug will not fit
into the available outlet, have a proper outlet installed by a qualified electrician. Improper
connection can result in the risk of electric shock.
WARNING:
• Never attempt to disassemble the flashlight or any of its components and or accessories.
If service or repair is required, return the unit to a Mag Authorized Warranty Service Center.
• Always use genuine Mag Charger® replacement parts and accessories when operating this
flashlight system, as the use of incompatible auxiliary equipment could result in fire, electric
shock or other bodily injury. Never connect this flashlight to any unauthorized or incompatible
auxiliary product that has not been expressly approved by Mag Instrument, Inc. Use of an
2

unauthorized accessory that is not the technical equivalent of an authorized accessory may
damage the product and void your warranty.
• Never store or transport flammable liquids, gases or explosive materials in the same
compartment as the flashlight or any of its accessories, as possible sparking in the equipment
could ignite a fire or explosion.
• Always secure this flashlight in its charging cradle, when it is not in use. Never place
the flashlight on the passenger seat or anyplace else in the car where it can become a
projectile during a collision or sudden stop.
• Never short-circuit a battery pack by either accidentally or intentionally bringing the
terminals in contact with another metal object. That could result in burns, other bodily injury
or a fire, and could also damage the battery pack.
• Never expose the terminals of the battery pack to any other metal object. Always wrap
it or place it in a plastic bag, whenever transporting it.
• Never heat and never attempt to disassemble the battery pack, as that could cause leakage
of the caustic electrolyte. If the battery is accidentally broken, avoid skin contact with the
contents. In the event of skin contact, wash the affected area immediately and obtain prompt
medical attention.
• Never attempt to dispose of a battery pack by throwing it into a fire. That can cause the
battery pack to explode.
• In order to avoid any risk of bodily injury or property damage never attempt to use an
unauthorized battery pack with your flashlight.
• Never allow any liquids or water to spill on the AC adapter or charging cradle. There is a risk
of fire or electric shock.
• Always use the authorized Mag Charger® AC adapter and charging cradle to avoid any risk
of fire or damage to your flashlight or battery. Bodily injury or property damage may occur as
a result of the use of an unauthorized and incompatible AC adapter or charger.
• Never use an AC adapter or charging cradle if it has a damaged or worn power cord or plug.
The use of damaged or worn power cords or plugs could result in electric shock, burns or fire.
Contact a Mag authorized warranty service center immediately to obtain a suitable
replacement.
• Do not attempt to charge this flashlight if cords, adapters, battery, bulb or any part of the
flashlight or charger is damaged or corroded.
• Always unplug the AC adapter or charging cradle from the power source before attempting
any cleaning in order to avoid the risk of electric shock.
OCAUTION:
• Always confirm that the power cord is located so that it will not be stepped on, tripped over,
or otherwise subjected to damage or stress.
• Never place heavy objects on a power cord, as this could result in damage to the cord.
• Never bend or twist a power cord, and never pull on a power cord in a attempt to remove an
AC adapter or accessory plug from a socket. Always grasp the AC adapter or the accessory
plug directly when unplugging the device in order to avoid damaging the cord.
• Always disconnect the AC adapter or charging cradle from the power source when it
is not in use.
몇NOTICE:
• Do not use this product for other than its intended use.
• Do not use an outdoor AC outlet to recharge battery.
• Never expose this flashlight system to high temperatures, such as those found near a heater
or in a closed car parked in the sun. This can cause heat-damage to the plastic parts, the
electronic components and the battery.
• Dropping this flashlight or subjecting it to violent impact or shock can cause mechanical
damage.
• Do not charge or operate in close proximity of combustible or flammable materials.
• Do not charge battery in gas tight enclosures.
• Never store this flashlight in cold areas. When the flashlight warms up (to its normal
operating temperature), moisture can form inside the flashlight, which may damage the
flashlight’s electronic components.
• Never paint this flashlight. This can clog the moving parts.
• System 1, 3, and 6: The AC Adapter requires the use of a standard 120 V AC power source
for its operation. Or, 12 V DC with the optional Cigarette Lighter Adapter
• System 4, and 5: The AC Adapter requires the use of a standard 230 V AC power source for
its operation. Or, 12 V DC with the optional Cigarette Lighter Adapter
• Discontinue use immediately should you notice any changes in the battery, such as
discoloration or malformation
• Recharge the Battery at room temperatures: 68˚ƒ to 86°ƒ (20°c to 30°c) to prevent hazardous
gas venting from the battery cells and potentially reduced battery capacity
• After extended and /or high temperature storage, all NiMH batteries may only accept a
partial charge even with full recharging time. The capacity returns to normal after I to 3
charge/discharge cycles.
www.maglite.com
3

4
3
7 8
9
1
5
6
2
Rechargeable System (Halogen / NiMH)
1 Rechargeable Flashlight
2 Charging Cradle
3 Rechargeable Battery (NiMH)
4 Mounting Brackets (x2)
5 120 Volt Converter (US)
6 12 Volt Adapter (Automobile)
7 230 Volt Converter (Euro)
8 240 Volt Converter (UK)
9 12 Volt Straight Wire (Automobile)
RE1019 RE2019 RE3019 RE4019 RE5019 RE6019 RE7019
Contents
Getting St rted. . . . . . . . . . . . . . . . . . . . . 4
The Fl shlight. . . . . . . . . . . . . . . . . . . . . . 5
The Ch rging Cr dle. . . . . . . . . . . . . . . . . 6
Inst ll tion . . . . . . . . . . . . . . . . . . . . . . . . . 8
The B ttery . . . . . . . . . . . . . . . . . . . . . . . . 9
Oper tion - Getting the Most out of
Your Mag Charger® Rechargeable Flashlight
System . . . . . . . . . . . . . . . . . . . . . . . . . . . . . 10
Frequently Asked Questions. . . . . . . . . 12
Ch nging the L mp . . . . . . . . . . . . . . . . . . 13
Troubleshooting, Specific tions . . . . . . 14
Inspection nd M inten nce . . . . . . . . . 14
W rr nty . . . . . . . . . . . . . . . . . . . . . . . . . 15
Nederlands . . . . . . . . . . . . . . . . . . 16
Français . . . . . . . . . . . . . . . . . . . . 30
Deutsch . . . . . . . . . . . . . . . . . . . . 44
Español . . . . . . . . . . . . . . . . . . . . 58
Getting Started
Congratulations
You h ve just m de life-long investment in
one of the most highly- dv nced precision
instruments in illumin tion technology.
The M g Ch rger® Rech rge ble Fl shlight
System w s formul ted on precision nd qu lity
— derived from ”M g’s“ m ny ye rs
of experience in the precise world of fine m chine
tools, our fl shlights quickly
bec me recognized for form nd function
nd most import ntly, to you the consumer,
qu lity nd depend bility.
T king few moments to re d this
m nu l nd f mili rizing yourself with the
M g Ch rger® Rech rge ble Fl shlight System
will help to insure ye rs of superior service
nd s tisf ction. To help cqu int yourself with
your new fl shlight this m nu l is composed
of eight sections: Section 1) The Fl shlight,
Section 2) The Ch rging Cr dle, Section 3)
Inst ll tion, Section 4) The B ttery, Section 5)
Oper tion - Getting the Most out of Your
Mag Charger® Rechargeable Flashlight System,
Section 6) Ch nging the L mp, Section 7)
Trouble shooting, Specific tions, Accessories
Section 8) W rr nty Inform tion.
What this package contains:
(see chart for your system, 1-7)
Gre t c re h s been t ken in the design,
m nuf cturing nd p ck ging of your
M g Ch rger® Rech rge ble Fl shlight System.
1. Fl shlight 6. 12 Volt Ad pter (Automobile)
2. Ch rging Cr dle 7. 230 Volt Converter (Euro)
3. Rech rge ble B ttery (NiMH) 8. 240 Volt Converter (U.K.)
4. Mounting Br ckets (x2) 9. 12 Volt Str ight Wire (Automobile)
5. 120 Volt Converter (US)
Note: Item 8 is for UK specific only.
4

234
1
56
1. Face Cap Assembly (lens and
reflector) The F ce C p Assembly is remov ble for
repl cement of l mp only. The reflector ssembly is
f ctory se led nd should not be removed from f ce
c p (Fig. 1). Lens: The high-efficiency tempered gl ss
lens on the M g Ch rger® Rech rge ble Fl shlight
System is n integr l p rt of the optic l system. It is
precision cut, ground nd tempered for its pplic tion.
Besides its high tr nsmitt nce of light, the lens h s
gre ter resist nce to temper ture, cids nd solvents.
Reflector: Highly-polished, scientific lly-designed,
met llic reflector withst nds extreme temper tures.
Note: The he t tempered lens c n suffer bre k ge if misused. 1. DO NOT
USE AS AN IMPACT TOOL! 2. Do not oper te fl shlight with the f ce c p off
nd the l mp on nd exposed. Person l injury or d m ge to he t sensitive
m teri ls m y result, e.g. pl stics, rubber, cloth f brics, etc.
2. Head The he d is not remov ble; ny ttempt to
do so will only d m ge its function. The he d c n be
lowered to the Ch rging Ring Module for repl cement of
l mp (see p ge 13). Focusing Beam: Quick focusing
“continuous c m- ction” spot-to-flood be m. Oper tes
with simple qu rter turn of the fl shlight he d
ssembly. (Fig. 2)
3. Switch Se led, flush-with-the-b rrel electronic switch provides
ccess to five different functions – Full Power, PowerS ve (25%),
Strobe (5x/sec), SOS (Intern tion l Morse Code distress sign l), nd
Moment ry On/Off.
4. Serial Number Perm nently engr ved seri l number for
registr tion nd identific tion.
5. Durable Finish The b rrel, he d ssembly nd t il c p re of
H rd Type III nodized ircr ft luminum inside nd out. With minimum
c re, your fl shlight will m int in its rich bl ck ppe r nce indefinitely.
(Direct const nt exposure to sunlight will f de ny color.) The b rrel
fe tures the ultim te in di mond knurl design.
6. Spare Lamp in Tail Cap For your convenience sp re
h logen bulb resides in the t il c p should your l mp ever need
repl cing.
Fig. 2
Fig. 1
Section 1 The Flashlight
5

If you h ve received your system with the fl shlight mounted in the
Ch rging Cr dle (Fig. 3) the first thing to do is to remove the fl shlight.
Note A: Since the Ch rging Cr dle w s
designed to hold the fl shlight securely you’ll
find th t before the unit is mounted,
consider ble pressure is necess ry to rele se the
fl shlight from the cl mps. It is re lly quite
e sy: 1. Holding the Ch rging Cr dle firmly in
one h nd (Fig. 4), gr sp the fl shlight with the
other. 2. A firm downw rd pressure with the
thumb on one cl mp while pulling up on the
b rrel with the other four fingers will quickly
sn p it free.
Note B: By its unique design, returning the
fl shlight to the Ch rging Cr dle t kes less th n
1/10 the force of removing it. Little more th n
its own weight is sufficient. And, once it is
mounted to w ll or in vehicle, you’ll find th t
the designed lever ge t kes no effort t ll.
Charging Cradle
Constructed of super-strong, resilient m teri l, this Ch rging Cr dle unit
h s m ny fe tures. Solid-st te electronics provide const nt ch rge r te;
from n input from 12–14 volts ( utomotive inst ll tions) or 230 volts AC,
when used with converter, in-house. A unique cl mp design holds the
fl shlight securely in vehicle under rough conditions nd its quick rele se
mounting br cket llows e sy remov l of system.
Note: All electric l components re designed for 12–14 volts DC circuits.
DO NOT USE IN 24-VOLT DC CIRCUITS. Doing so cre tes excessive he t
nd m y result in fire or melted components.
Fig. 4
Section 2 The Charging Cradle
Ch rging Cr dle
Cl mps
Power Cord
Red
LED
Mounting
Br ckets Auto
Home
Fig. 3 Flashlight in the Charging Cradle
6

Fig. 6
The Charging Cradle’s Quick
Release Mounting Bracket
Turning the Ch rging Cr dle upside down, you will see rele se pin on the
s me side s the power cord (Fig. 5). Depressing this pin with the index
finger or (closed) b llpoint pen will rele se the mounting br cket for
inst ll tion. When loc ting nd mounting the br cket, be sure th t the
rele se pin (Fig. 6) f ces in the s me direction s you w nt the he d of the
fl shlight to be. Note: Bec use of the innumer ble pl ces th t c n be
chosen for mounting, there re no screws or f steners supplied. Be sure to
use f steners th t give m ximum holding power for repe ted use.
Two mounting brackets are included for location versatility.
Charging Cradle Clamp Arms
Note the difference, in the following illustr tions, between the “cl mps
open” position (Fig. 7) nd the “cl mps closed” position (Fig. 8).
Sometimes one or both cl mps (they work independently) will be
in dvertently pushed to the closed position, m king it very difficult to
return the fl shlight to the rech rger/cr dle. If this h ppens, simply t ke
thumb nd forefinger nd sn p it b ck to the open position (Fig. 9).
The Charging Cradle
Section 2
Fig. 9
Fig. 5
Fig. 8
Clamps
Closed
Fig. 7
Clamps
Open
7

Fig. 19
Bl ck (–) le d to ground
Positive (+) le d
(red)
Ignition-Switched Fuses
Ground Side of Fuse
Ch rging Cr dle Cord
R dio
He ter
Accessory
Note: For m ximum protection of rech rging
unit, it is recommended th t 1- mp fuse be
inst lled in the (+) red le d.
Ch rging Cr dle
Direct Wire–Vehicle Installation 12–14 Volt Only (Not for 24-Volt Systems)
A 4’ power ccessory cord is v il ble to f cilit te the direct-wiring of the rech rge ble system (Fig. 19). M g Instrument recommends
using only n ignition-switched (fused) circuit, nd prefer bly the lowest output v il ble (5 mps or less). This is most often the r dio
or ccessory fuse. The red (positive) le d is connected to the fuse output, nd the bl ck (neg tive) ground wire should be tt ched to
met l p rt of the ch ssis, which serves s b ttery ground return.
1 AMP
(See Note)
Fig. 10
Section 3 Installation
Fig. 11
A Typical Installation
1. Loc te nd mount the mounting br cket (Fig. 10) using ppropri te
screw nd nchors for th t loc tion nd m teri l.
2. With fl shlight out of the Ch rging Cr dle, eng ge the two prongs of
mounting br cket with m tching slots t b se of the Ch rging Cr dle … roll
it forw rd nd over the spring-lo ded pin lock (Fig. 11). M ke sure it h s
fully eng ged the pin. Remov l of the Ch rging Cr dle is chieved by
simply depressing this pin with the index finger or (closed) b llpoint pen
nd reversing the procedure.
3. Plug the Ch rging Cr dle's connector into the m tching end of the DC
power cord or AC converter.
Note: When disconnecting plugs, never pull on wires. The M g Ch rger®
Rech rge ble Fl shlight System det ch ble mounting br cket llows the
Ch rging Cr dle to be removed from the vehicle, t ken to the home, st tion
house or office for continued ch rging. One extr mounting br cket is
included for mounting in two different loc tions.
OCAUTION: Make sure ca le cannot e pinched. If c ble is pinched it c n
c use immedi te short nd wires will get hot nd melt pl stic.
8

Section 4 The Battery
Your Battery’s First Charge Is Important!
To ssure the freshness of your b ttery nd to void ny oper tion l
problems in shipping, it h s been p ck ged in n UNCHARGED st te.
For optimum oper tion of your fl shlight, it should be ch rged full
24 hours … before using for the first time.
Battery Installation
If the battery was shipped outside of the flashlight: After you h ve removed
the fl shlight from the Ch rging Cr dle unscrew the t il c p (Fig. 12) nd insert
b ttery p ck (Fig. 13) into the b rrel. The positive (+) end—this is the end with
button—goes into the b rrel first. Now screw on the t il c p nd m ke sure it’s tight.
NOTE: Large end of the attery spring must e snapped into the tailcap.
First Charge Procedure
1.
M ke sure t il c p is tight 2. Pl ce the fl shlight into the Ch rging Cr dle.
3. Connect the Ch rging Cr dle power cord into the AC converter or DC
cord, nd 4. Plug into power source. 5. M ke sure LED light is on.
WARNING:
Do not “short” or “ground out” b ttery p ck to “deeply
disch rge”. Doing so is h z rdous nd will d m ge the b ttery p ck.
Do Not Have Flashlight Switch in ”On“ Position While Charging
Fig. 12
Tailcap
Fig. 13
Battery SpringFlashlight Barrel
9

10
Section 5 Operation - Getting the most out of Your Mag Charger® Rechargeable Flashlight System
Switch Operation
Your Flashlight’s Function Sets and the Functions
Within Each Set
The M g Ch rger® fl shlight combines long-f mous MAG-LITE® be uty,
reli bility nd be m- djust bility with powerful new electronics,
providing stunning brightness, long b ttery life nd five different
functions to choose from. Bec use not ll functions re equ lly
import nt to ll users, the M g Ch rger® offers n rr y of USER-
CONFIGURABLE FUNCTION SETS th t LET YOU PERSONALIZE the
settings for QUICKEST ACCESS to the FUNCTIONS YOU USE MOST.
The four v il ble Function Sets re shown in the Function Sets Ch rt t
lower left.
As the Function Sets Ch rt shows, your M g Ch rger® fl shlight is c p ble of
five different functions – Full Power, PowerS ve (25% power), Strobe (fl shes
5 times per second), SOS Sign l (the Intern tion l Morse Code distress sign l)
nd Moment ry On/Off (st ys on only while the switch button is held down).
Not ll of these functions re equ lly import nt to every user. To police
officer, it m y be import nt to h ve inst nt ccess to the Moment ry ON/Off
function; bo ting enthusi st m y w nt to h ve the SOS Sign l function re dy
to use. Th t is why these functions re org nized into four different function
sets – so th t you c n person lize your fl shlight to suit your needs,
configuring it for quickest ccess to the functions th t best m tch your
preference.
How To Choose A Function Within a Set
The v il ble function sets, nd the functions within e ch one, re shown in
the Function Sets Ch rt.
As it comes out of the p ck ge, your M g Ch rger® fl shlight is set to the
“St nd rd” function set (Fun tion Set #1 in the ch rt). If you require only those
three functions (Full Power, PowerS ve nd Strobe), then you never h ve to
ch nge it. You c n select function within th t set by the “Quick Click”
method: Turn the fl shlight on with one Quick Click nd it is on t Full Power.
Turn it off, then turn it on with two Quick Clicks ( bout s f st s you would s y
“Click Click”) nd it turns on t 25% power – the PowerS ve function. Turn it
off, then turn it on with three Quick Clicks ( bout s f st s you would s y “Click
Click Click”) nd you h ve the Strobe function.
Selecting function within ny of the other function sets works the s me w y
–with one, two or three Quick Clicks, s the ch rt shows. For ex mple, if you
re in Fun tion Set #2 nd you w nt to select the SOS Sign l function, begin with
the fl shlight off, pply three Quick Clicks, nd your fl shlight will sign l SOS
(the f mili r three dots, three d shes nd three dots: . . . -- -- -- . . .)
Function Set 1
(standard)
Function Set 2Function Set 3Function Set 4
3 Clicks for 2 Clicks for 1 Click for
Full Power Full Power Momentary Momentary
Power Save Power Save Full Power Full Power
Strobe SOS Signal Power Save Strobe
Function Sets Chart

11
Operation - Getting the most out of Your Mag Charger® Rechargeable Flashlight System Section 5 Operation - Getting the most out of Your Mag Charger® Rechargeable Flashlight System
How To Go From One Function Set To Another
Your M g Ch rger® fl shlight’s “st nd rd” setting isFun tion Set #1. If you w nt
to keep th t setting you don’t h ve to do nything. Fun tion Set #1will lw ys be
in effect unless it is ch nged. If you w nt to choose different function set,
follow these steps:
1. Unscrew the t il c p,
b cking it out of the b rrel
f r enough th t the
fl shlight will not turn on.
(Note: This m y require
the t ilc p to be removed
from the b rrel entirely).
2. P use for 2 seconds.
3. Press the switch button
nd keep holding it down.
4. While still holding down the swit h button, screw the t il c p b ck in until it is tight.
5. Keep holding down the swit h button. Within bout 4 seconds the fl shlight will
st rt to blink.
6. The number of blinks indic tes the new selected Function Set.
7. To choose new Function Set, rele se the switch button fter the
corresponding number of blinks (rele sing fter 1 blink chooses Fun tion Set #1;
rele sing fter 2 blinks chooses Fun tion Set #2; rele se fter 3 blinks for Fun tion
Set #3, nd rele se fter 4 blinks to choose Fun tion Set #4.) Your choice of
Function Set rem ins in effect until you ch nge it by repe ting the bove
process. (See our Demo video t www.m glite.com)
몇NOTICE:
To void deeply disch rging the rech rge ble NiMH b ttery,
lw ys turn the fl shlight off when the fl shlight be m st rts to dim or
turn yellow. A dim or yellow be m is n indic tion th t the b ttery needs
to be fully rech rged. In this c se, llow the b ttery to ch rge for full 16
hours.
Spot-to-Flood Beam
Quick focusing “continuous c m- ction” spot-to-flood be m. Oper tes with
simple qu rter turn of the fl shlight he d ssembly.

Frequently Asked Questions
Q. How long can I leave the flashlight in the Charging Cradle (on charge)
without using?
A. Indefinitely … but beyond 30 d ys of non-use, no purpose is served. When not in use,
good pr ctice would dict te disconnecting the units power plug. B ttery self-disch rge
would be less th n 1% per d y.
Q. How long can I expect my lamp (bulb) to last?
A. 50*hours, not counting mech nic l shock buse. L mps become more fr gile tow rd
end of l mp life.
Q. Why is there a dark spot in the beam when light is adjusted to flood?
A. The M g Ch rger® Rech rge ble Fl shlight System reflector is designed for the best
spot possible. Wh t you see in the flood position of the reflector is redistribution of the
light to the widest p rt of the reflector.
Q. Can I touch the glass of the lamp with hands, and if so, will the oils cause
lamp damage?
A. You c n touch the gl ss when it’s off/cool without fe r of l mp d m ge. However,
it is lw ys good pr ctice to wipe l mp with soft cloth or tissue fter h ndling.
Q. If dust occurs inside my reflector, how do I clean it without damage to the
reflector?
A. Use c mel h ir brush lightly or blow with dry ir. Use the s me c re th t you would
give precision c mer lens.
Q. Can the lens break?
A. Yes; however, due to the type of composition nd se l, it is much stronger th n
regul r gl ss lens.
Q. How do I get a fingerprint off my reflector?
A. Use c mer lens cle ner nd lint-free cloth.
Q. If the small red light in the Charging Cradle does not light, how do I know
whether it’s the flashlight or the Charging Cradle that’s at fault?
A. With the Ch rging Cr dle plugged in nd the fl shlight not in the Ch rging Cr dle, pl ce
coin, p per clip or met l object cross the pins in the Ch rging Cr dle. If the red light
goes on, th t me ns the ch rging cr dle is functioning properly nd the f ult is in the
fl shlight. Otherwise, the problem is in the ch rging cr dle.
Optimizing Spot Beam with the Light off
To obt in the best “spot p ttern” nd be m focus it is import nt to center the
bulb in the bottom opening in the p r bolic reflector. The bulb h s two pins
which llow for this djustment. After inserting the bulb in the recept cle, pply
slight pressure on the bulb with your thumb nd index finger to obt in
lignment (Fig. 14). Pl ce the reflector over the bulb nd look through the cle r
lens to visu lly inspect for proper centering. Re- djust s required.
Gently wipe bulb surf ce with cle n, soft cloth to remove
fingerprints.
WARNING:
Do not look t l mp when fl shlight is
on. Do not touch the l mp until it h s cooled for t
le st two minutes.
Section 5 Operation - Getting the most out of Your Mag Charger®Rechargeable Flashlight System
Fig. 14
*L mp life m y v ry.
12

Changing the Lamp
The Halogen Lamp
For the ultim te in fl shlight power s well s pr ctic lity,
the M g Ch rger® Rech rge ble Fl shlight System fe tures
h logen, tungsten fil ment, pin-type repl ce ble l mp
(bulb). Though sm ll in size, its specific tions re l rge:
6 volts, 8.4 w tts nd r ting of 50 hours.
*
OCAUTION:
This bulb is pressurized nd CAN SHATTER OR EXPLODE,
c using PERSONAL INJURY. We r protective eyegl sses nd clothing
when h ndling; never scr tch bulb’s gl ss envelope; never spl sh bulb
with liquids. Bulb BURNS VERY HOT nd CAN CAUSE BURN INJURY
OR HEAT OR FIRE DAMAGE. Remove b ttery p ck nd let bulb cool t
le st two minutes before h ndling; void oper ting ne r m teri ls th t
re fl mm ble or prone to he t or drying d m ge. Dispose of l mp
with c re.
Removing the Lamp
1. Holding the l rgest p rt of the
fl shlight’s he d, unscrew the f ce
c p/reflector ssembly. It will come
out with the f ce c p. This is
f ctory ssembled nd should not
be t ken p rt (Fig. 15).
2. Holding the b rrel in one h nd
(Fig. 16), gently lower the he d.
This reve ls the l mp for
repl cement.
3. Gr sp the l mp firmly (Fig. 17) with thumb nd forefinger. Pull str ight
up until l mp’s pins re cle r of recept cle. Do not dispose of old l mp in
fire or tr sh comp ctor.
OCAUTION: L mp is pin-type; do not pply excessive pressure.
4. The New Lamp
Line up the new l mp’s pins (Fig. 17) with the 2 holes in recept cle nd
pply str ight downw rd pressure.
Note: The recept cle is spring-lo ded nd the entire unit (recept cle) will
move down bout 1/4 inch. When the gl ss of the l mp touches the
recept cle, rele se pressure nd let go. Gently wipe bulb surf ce with
cle n, soft cloth to remove fingerprints.
5. R ise the he d of the light (Fig. 15) to its full up position. Reinsert f ce
c p nd reflector ssembly nd screw on tightly.
Fig. 16 Fig. 17
*L mp life m y v ry.
Section 6
Fig. 15
Changing the Lamp
13

If you have questions or need assistance, please call our warranty/repair
facility at 01 (909) 947-1006.
Problem Cause/Correction
Flashlight:
Does not light 1. Tighten t il c p – m ke sure unpl ted re of t il c p nd b rrel
re cle n.
2. Check if b ttery is inst lled … see p ge 9.
3. Check if b ttery is inst lled with (+) positive end tow rd he d of
fl shlight.
4. M ke sure l rge end of b ttery spring is sn pped into t ilc p.
Battery charged? 1. Check b ttery ch rge: Pl ce fl shlight in rech rger/cr dle. M ke
sure LED lights up with fl shlight switch off (see p ge 9). Ch rge
for 15 minutes … check for light. If it lights (even moment rily)
ch rge it, if not, repl ce it (b ttery).
Switch sticks 1. Return fl shlight to M g Instrument (see w rr nty).
Works intermittently 1. Check for d m ge to b ttery c sing.
2. Foreign p rticles inside b rrel.
3. L mp not se ted properly.
Poor or no spot 1. L mp needs centering (see p ge 12).
2. D m ged l mp (fil ment off-center) — repl ce.
Recharger/Cradle:
LED indicator does 1. Tighten t il c p.
not light when 2. Check plug connection to converter.
flashlight switch is 3. Check plug to power source.
in off position. 4. M ke sure l rge end of b ttery spring is sn pped into t ilc p.
Inspection and Maintenance
Battery Pack – See W rnings Section for more inform tion. Periodic lly ( pproxim tely
every month) remove the b ttery p ck from the fl shlight nd visu lly inspect for signs
of g s or chemic l le k ge. Indic tions of le k ge re discolor tion of the pl stic sleeve
or white fuzzy m teri l ne r the top (positive side button) of e ch cell. Another
indic tion would be bulging deform tion of the bottom (neg tive fl t end) of the cell
c n. If these signs re observed the b ttery p ck should be removed from service to
prevent chemic l d m ge to the inside of the fl shlight. See One Year Battery Pack
Warranty for more information concerning warranty coverage.
Fully Charged Battery Storage – If you do not use your fl shlight for long periods of
time (four months or more) we suggest you remove the b ttery p ck from the fl shlight
to prevent chemic l d m ge ( cid le ks). Electrical Contacts – The b re (bright) met l
surf ces between the t ilc p nd b rrel must be cle ned periodic lly to ensure good
electric l cont ct. Also keep the t ilc p spring cle n. O-ring Seals and Screw Threads –
To keep se ls from drying out nd the thre ds oper ting smoothly, pply sever l drops
of cle n petroleum oil or jelly to these surf ces two or three times ye r. Anodized
Exterior Finish – The protective finish on the fl shlight is very dur ble; however,
const nt exposure to sunlight, w ter, chemic ls, g ses, etc., will dull, discolor nd
eventu lly destroy the protective finish. C re should be t ken to void ny h rsh
environment.
12 Volt Adapter (Automobile)
Plug the DC power cord’s d pter into the 12–14
volt cig rette lighter recept cle of the vehicle. DO
NOT le ve d pter plugged in for ny extended
period while the engine is “off” to void dr ining
vehicle b ttery.
230-Volt Converter
After mounting the Ch rging Cr dle in
proper loc tion, plug the speci l m tching electric l
connectors together t the wire ends of the Cr dle nd
Converter. Plug the Converter into n ppropri te 230 volt
w ll recept cle.
Note: Tot l us ble wire length is 8 feet.
Flashlight
• Tempered aluminum alloy external
components
• Finish: hard, type III, aircraft
anodized (inside and out)
• Length: 12-19/32" (319.79 mm)
• Weight, with battery pack: 32 oz.
(907.18 grams)
• Weight, without battery pack:
18 oz.(510.29 grams)
• Head diameter: 2-5/16" (58.72 mm)
• Barrel diameter: 1-9/16" (39.67 mm)
• Permanently engraved serial
number for registration and
identification
• O-ring sealed throughout
• H
igh intensity halogen lamp (50*
hour rating) Easy replaceable lamp
• 6.00 Volt NiMH Battery Pack
• High-Quality Tempered Glass Lens
• Highly-polished, scientifically-
designed, metallic reflector
withstands extreme temperatures
• Diamond knurl design
• Cam-action adjustable beam from
spot to flood with 1/4 turn of head
• Corrosion resistant metal
springs throughout
• Spare Halogen lamp included in
tailcap
Charging Cradle
• Accepts 12–14 volts DC
(not for use with 24-volt systems)
• Constant current solid-state
integrated circuit regulator
• Charge rate: 230 mA continuous
• Flashlight can be charged in any
position
• Reverse voltage protected
(batteries in backwards) Input and
Output
• Red light emitting diode (LED)
charge indicator
• Mounts in any position
• Includes (2) detachable mounting
bracket
Converter
• Input 230 volts AC 60Hz
• Output 12 volts DC
• Double insulated
Section 7 Troubleshooting Specifications and Accessories
*L mp life m y v ry.
14

Section 8 Warranty Information
TEN YEAR LIMITED WARRANTY ON FLASHLIGHT
SYSTEM / ONE YEAR LIMITED WARRANTY ON
BATTERY PACK
MAG INSTRUMENT, INC. (“M g”) w rr nts to the origin l owner th t this
MAG CHARGER® RECHARGEABLE FLASHLIGHT SYSTEM (the
“SYSTEM”) is free from defects in p rts nd workm nship. As to the
fl shlight nd other components of the SYSTEM, except the rech rge ble
NiMH b ttery supplied herewith, this w rr nty l sts for ten ye rs from the
d te of first ret il purch se. As to the NiMH b ttery, this w rr nty l sts for
one ye r from d te of purch se. Registr tion is not required for w rr nty
cover ge. M g or n uthorized M g W rr nty Service Center will rep ir the
fl shlight or other SYSTEM component or, t its option, repl ce defective
fl shlight or other SYSTEM component free of ch rge. This w rr nty is in
lieu of ll other w rr nties nd conditions, express or implied.
Exclusions: This w rr nty does not cover l mp burnout or d m ge to or
f ilure of the SYSTEM or ny component thereof due to lter tion, product
misuse, l ck of m inten nce, or le k ge of NiMH b ttery more th n one
ye r fter d te of purch se. (Product misuse includes, but is not limited to,
inst lling ny non-rech rge ble b ttery or ny rech rge ble b ttery p ck
other th n M g® b ttery p ck or its technic l equiv lent.)
Mag disclaims any responsi ility for incidental or consequential damages.
Some jurisdictions in C n d nd the United St tes do not llow exclusion
or limit tion of implied w rr nties, incident l or consequenti l d m ges
nd/or limit tions on tr nsfer bility, so the bove limit tions nd exclusions
m y not pply to you.
How and when to make a warranty claim: Before returning the fl shlight or
other SYSTEM component for service, be sure you h ve followed the steps
outlined in the Trou leshooting Guide section of your
MAG CHARGER® RECHARGEABLE FLASHLIGHT SYSTEM Owner’s
M nu l. If you h ve followed ll of these steps nd the fl shlight or other
SYSTEM component f ils to oper te properly, proceed s follows: 1. In c se
of bulb burnout, or in c se of NiMH rech rge ble b ttery f ilure more than
one year after purchase date, do not return the fl shlight or other SYSTEM
component to M g but repl ce the bulb or NiMH b ttery. You c n buy
repl cement bulbs nd NiMH b tteries directly from M g or from most ret il
outlets where M g fl shlights re sold. 2. For w rr nty returns: Send the
fl shlight or other SYSTEM component (post ge or shipping prep id) to
M g Instrument, 1721 E st Locust Street - 51453, Ont rio, C liforni , USA
91761-7769, Attention: W rr nty/Rep ir Dep rtment, or to n uthorized
M g W rr nty Service Center. For the loc tion of n uthorized M g
W rr nty Service Center in your re , consult the ret iler where you
purch sed the fl shlight. For your protection nd to expedite h ndling
nd/or post l cl ims, we recommend th t ll returns be insured nd sent
Certified nd/or Return Receipt Requested.
In Canada and the United States this warranty gives you specific legal
rights, and you may have other rights which vary from state to state and
from province to province. Where ny term of this w rr nty is prohibited by
the l w of ny jurisdiction, such term sh ll there
be null nd void, but the rem inder of this w rr nty sh ll rem in in full force
nd effect. To register your new Mag® flashlight visit our website t
www.m glite.com. From our home p ge just go to “Register
Your Fl shlight.“
15

Lees deze gebruiksaanwijzing voor uw veiligheid
WAARSCHUWING:
Zorg dat u alle waarschuwingen en veiligheidsinstructies in deze gebruiksaanwijzing gelezen
en begrepen hebt voordat u het Mag Charger® Rechargeable zaklantaarnsysteem gebruikt,
om mogelijke gevaren te vermijden die zouden kunnen resulteren in letsel of materiële
schade.
Houd deze gebruiksaanwijzing altijd binnen handbereik voor latere raadpleging, aangezien hij
belangrijke informatie bevat voor veilig gebruik en onderhoud van dit instrument.
Uit batterijen kunnen schadelijke chemicaliën lekken die de huid, kleding of de binnenkant van
de zaklantaarn kunnen aantasten. VOORKOM LETSEL: ZORG DAT UIT BATTERIJEN GELEKT
MATERIAAL NIET OP UW HUID OF IN UW OGEN TERECHTKOMT. Batterijen kunnen barsten
of ontploffen als ze in vuur gegooid worden of anderszins aan grote hitte worden blootgesteld.
VOORKOM LETSEL: STEL DE BATTERIJEN NIET BLOOT AAN GROTE HITTE. Neem de
volgende voorzorgsmaatregelen in acht om het risico van letsel of beschadiging van uw
zaklantaarn te verminderen:
• Gebruik geen niet-oplaadbare batterijen in uw Mag Charger® Rechargeable
zaklantaarnsysteem.
• Gebruik uitsluitend een MAG® oplaadbare batterij (modelnr. ARXX235) in deze zaklantaarn.
• Installeer de oplaadbare batterij altijd met de positieve pool (+) naar de kop van de
zaklantaarn gericht en de negatieve pool (–) naar de dop op de achterkant van de zaklantaarn
gericht.
• Verwijder de oplaadbare batterij en bewaar hem afzonderlijk als u de zaklantaarn voor lange
tijd wegbergt.
• Volg de procedures onder ‘Inspectie en onderhoud’ in deze gebruiksaanwijzing zorgvuldig.
• Dit product is niet bestemd voor gebruik door kinderen.
De veiligheidsinstructies zijn volgens de ernst van de risico’s onderverdeeld en wel als volgt:
~GEVAAR:
‘Gevaar’ duidt op de aanwezigheid van gevaren die kunnen resulteren in de dood of zwaar
lichamelijk letsel als de veiligheidsinstructie niet in acht wordt genomen.
WAARSCHUWING:
‘Waarschuwing’ duidt op de aanwezigheid van gevaren die kunnen resulteren in lichamelijk
letsel als de veiligheidsinstructie niet in acht wordt genomen.
OLET OP:
‘Let op’ duidt op de aanwezigheid van gevaren die kunnen resulteren in licht lichamelijk letsel
of materiële schade als de veiligheidsinstructie niet in acht wordt genomen.
몇NB:
‘NB’ wijst op algemene informatie in verband met veilig gebruik van het zaklantaarnsysteem.
BESCHERM KINDEREN:
• Sta nooit toe dat kinderen met de zaklantaarn spelen: ze kunnen zichzelf of anderen
verwonden.
• Houd alle accessoires en onderdelen altijd buiten bereik van kleine kinderen. Met name
kleine onderdelen kunnen gevaar van verstikking opleveren voor kinderen.
• Sta niet toe dat kinderen deze zaklantaarn hanteren of gebruiken.
AFVOER VAN BATTERIJEN:
• Gooi een oude oplaadbare batterij nooit weg met gewoon huisafval, omdat hij giftige stoffen
bevat.
• Gooi een oude oplaadbare batterij altijd weg volgens de geldende regels voor afvoer van
giftig huisafval.
• Dek de metalen polen altijd eerst af met isolatietape om kortsluiting van de batterij te
voorkomen als hij buiten de zaklantaarn vervoerd wordt.
• De verzegelde batterij bevat nickel metal hydride en moet op de juiste wijze gerecycled of
weggeworpen worden. Neem contact op met de plaatselijke gemeentereinigingsdienst voor
de juiste methode voor recycleren of wegwerpen.
• Mag Instrument, Inc. is er trots op deel uit te maken van de RBRC (Rechargeable Battery
Recycling Corporation). Door oplaadbare nickel metal hydride batterijen te recycleren, helpt u
voorkomen dat deze batterijen in het afvalverwerkingsproces terechtkomen. Als u een nickel
metal hydride batterij weggooit, komt hij uiteindelijk in een vuilverbrandingsoven of vuilstort
terecht. Door uw oude nickel metal hydride batterij te recyclen met het Mag Instrument
Battery Recycling Program helpt u een schoner en veiliger milieu te creëren voor de volgende
generatie. Bezoek www.rbrc.com voor nadere informatie over dit recyclingprogramma.
~GEVAAR:
• Voorkom ernstig oogletsel: kijk nooit in de zaklantaarn als hij brandt. Schijn met de
zaklantaarn niet in andermans ogen.
• Probeer niet om de netspanningsadapter of oplaadhouder te demonteren of te repareren:
dat kan leiden tot blootstelling aan het gevaar van elektrische schokken. Neem altijd contact
op met een erkend Mag servicecentrum als het product gerepareerd of vervangen moet
worden.
• Verander nooit -het netspanningssnoer of de stekker van de netspanningsadapter of
oplaadhouder. Als de stekker niet in het beschikbare stopcontact past, moet u door een
elektricien een geschikt stopcontact laten installeren. Onjuiste aansluiting kan leiden tot het
gevaar van elektrische schokken.
WAARSCHUWING:
• Probeer nooit om de zaklantaarn of een van de onderdelen of accessoires te demonteren.
Stuur de zaklantaarn terug aan een Mag servicecentrum als onderhoud of reparatie vereist is.
16

• Gebruik altijd officiële Mag Charger® reserveonderdelen en accessoires met dit
zaklantaarnsysteem; gebruik van ongeschikte aanvullende apparatuur kan brand, elektrische
schokken of ander letsel veroorzaken. Sluit deze zaklantaarn nooit aan op niet-erkende of
ongeschikte accessoires die niet uitdrukkelijk door Mag-Lite® zijn goedgekeurd. Gebruik van
een niet-goedgekeurde accessoire, wat geen technisch gelijkwaardig equivalent is van een
goedgekeurde accessoire, kan leiden tot beschadigingen aan het product en het vervallen
van de garantie.
• Bewaar en vervoer nooit brandgevaarlijke vloeistoffen, gassen of explosieve materialen in
dezelfde ruimte als de zaklantaarn of de accessoires ervan, aangezien vonken in de
apparatuur een brand of ontploffing kunnen veroorzaken.
• Zet deze zaklantaarn altijd in de toplaadhouder als u hem niet gebruikt. Leg de zaklantaarn
nooit op de passagiersstoel of elders in de auto waar hij in geval van een botsing of plotseling
remmen een projectiel kan worden.
• Sluit een oplaadbare batterij nooit kort door de polen per ongeluk of opzettelijk in contact te
brengen met een ander metalen voorwerp. Dat kan brandwonden, ander letsel of brand
veroorzaken en kan tevens de oplaadbare batterij beschadigen.
• Stel de polen van de oplaadbare batterij nooit bloot aan andere metalen voorwerpen.
Omwikkel de oplaadbare batterij of doe hem in een plastic zak als u hem vervoert.
• Verwarm de oplaadbare batterij niet en probeer niet om hem te demonteren: dat kan lekkage
van de bijtende elektrolyt veroorzaken. Als de batterij per ongeluk breekt, moet u huidcontact
met de inhoud vermijden. Was in geval van aanraking met de huid het betroffen gebied
onmiddellijk en roep meteen medische assistentie in.
• Gooi een oplaadbare batterij niet in het vuur: batterij kan ontploftfen.
• Vermijd risico van letsel of materiële schade: probeer nooit om een niet-geschikte
oplaadbare batterij in uw zaklantaarn te gebruiken.
• Voorkom dat er water of andere vloeistof op de netspanningsadapter of oplaadhouder
gemorst wordt. Dat levert gevaar voor brand of elektrische schokken op.
• Gebruik altijd de officiële Mag Charger® netspanningsadapter en oplaadhouder om het
risico van brand of beschadiging van de zaklantaarn of batterij te vermijden. Gebruik van een
onofficiële en ongeschikte netspanningsadapter of oplaadhouder kan letsel of materiële
schade veroorzaken.
• Gebruik de netspanningsadapter of de oplaadhouder niet als het snoer of de stekker
beschadigd of versleten is. Gebruik van beschadigde of versleten snoeren of stekkers kan
elektrische schokken, brandwonden of brand veroorzaken. Neem onmiddellijk contact op met
een officieel Mag servicecentrum voor een geschikte vervanging.
• Probeer niet om deze zaklantaarn op te laden als snoeren, adapters, de batterij, het lampje
of andere onderdelen van de zaklantaarn of het laadapparaat beschadigd of aangetast zijn.
• Trek de stekker van de netspanningsadapter of de oplaadhouder altijd uit het stopcontact
voordat u met schoonmaken begint: dat voorkomt het risico van elektrische schokken.
OLET OP:
• Zorg altijd dat het snoer op een plaats ligt waar niemand erop kan gaan staan, erover kan
struikelen of het snoer op een andere manier kan beschadigen of belasten.
• Zet nooit zware voorwerpen op het snoer: dat kan het snoer beschadigen.
• Buig en verdraai het snoer niet en trek niet aan het snoer om de stekker van de
netspanningsadapter of een accessoire uit het stopcontact te trekken. Pak de stekker van de
netspanningsadapter of het accessoire altijd direct beet om hem uit het stopcontact te
trekken, anders kan het snoer beschadigd raken.
• Trek de stekker van de netspanningsadapter of de oplaadhouder altijd uit het stopcontact als
u ze niet gebruikt.
몇NB:
• Gebruik dit product niet voor andere doeleinden dan die waarvoor het bestemd is.
• Gebruik geen buitenstopcontact om de batterij op te laden.
• Stel dit zaklantaarnsysteem nooit bloot aan hoge temperaturen zoals bij een verwarming of
in een gesloten auto die in de zon geparkeerd is. Dat kan hitteschade aan de kunststof
onderdelen, de elektronische onderdelen en de batterij veroorzaken.
• Het aten vallen van deze zaklantaarn, of blootstelling ervan aan harde stoten of schokken
kan mechanische schade veroorzaken.
• Niet opladen of gebruiken in de onmiddellijke nabijheid van brandbare of brandgevaarlijke
materialen.
• Laad deze batterij niet op in gasdichte ruimten.
• Bewaar deze zaklantaarn nooit op een koude plaats. Als de zaklantaarn warmer wordt (tot
de normale bedrijfstemperatuur), kan er zich vocht afzetten op de binnenkant van de
zaklantaarn, wat de elektronische onderdelen van de zaklantaarn kan beschadigen.
• Verf deze zaklantaarn niet. Dat kan de bewegende onderdelen verstoppen.
• Systeem 1, 3 en 6: De netspanningsadapter vereist een standaard netspanningsbron van 120
V voor een goede werking. Of 12 V g.s. met de optioneel verkrijgbare aanstekeradapter.
• Systeem 4 en 5: De netspanningsadapter vereist een standaard netspanningsbron van 230 V
voor een goede werking. Of 12 V g.s. met de optioneel verkrijgbare aanstekeradapter.
• Staak het gebruik onmiddellijk als u veranderingen in de batterij (zoals verkleuring of
vervorming) opmerkt.
• Opladen van de batterij op bij kamertemperatuur: 20 °C tot 30 °C om te voorkomen dat er
schadelijk gas uit de batterijcellen lekt en het batterijvermogen afneemt.
• Nadat nickel metal hydride batterijen lang en/of onder hoge temperaturen opgeslagen zijn
geweest, zullen ze zelfs na de volledige laadtijd soms slechts gedeeltelijk opgeladen worden.
Nadat de batterij 1 à 3 keer helemaal ontladen en weer opgeladen is, herstelt het volle
laadvermogen zich weer.
www.maglite.com
17

Oplaadbaar systeem (Halogen / NiMH)
Het markeringsteken duidt aan dat de component bij het systeem inbegrepen is.
Objectnr.
Systeemnr. 1 2 3 4 5 6 7
Modelnr. RE1019 RE2019 RE3019 RE4019 RE5019 RE6019 RE7019
1 Oplaadbare zaklantaarn
2 Oplaadhouder
3 Oplaadbare batterijen (NiMH)
4 Montagebeugels (2)
5 120 volt transformator (U.S.A.)
6 12-voltadapter (auto)
7
8
230 volt transformator (Europa)
240 volt transformator (UK)
912-volt rechte draad, (auto)
Inhoud
Om te beginnen . . . . . . . . . . . . . . . . . . . 18
De z kl nt rn . . . . . . . . . . . . . . . . . . . . 19
De opl dhouder . . . . . . . . . . . . . . . . . . 20
Inst ll tie . . . . . . . . . . . . . . . . . . . . . . . . . 22
De b tterij . . . . . . . . . . . . . . . . . . . . . . . . 23
Werking – Haal het Maximale uit
uw Mag Charger® Rechargeable
Flashlight System. . . . . . . . . . . . . . . . . . . . 24
Veel gestelde vr gen . . . . . . . . . . . . . . . 26
Verv ngen v n het l mpje . . . . . . . . . . . . 27
Inspectie en onderhoud . . . . . . . . . . . . . 28
Probleemoplossing, specific ties
en toebehoren . . . . . . . . . . . . . . . . . . . . 28
G r ntie-inform tie. . . . . . . . . . . . . . . . . 29
Om te beginnen
Gefeliciteerd
U hebt net een investering voor het leven ged n
met de nkoop v n een v n de meeste
ge v nceerde precisie-instrumenten op het gebied
v n de verlichtingstechnologie.
Het M g Ch rger® Rech rge ble Fl shlight
System is ontworpen met het oog op precisie en
kw liteit — op b sis v n de vele j ren erv ring v n
‘M g’ in de instrumentm kerswereld, w r onze
z kl nt rns snel v nwege hun vorm en werking en
n tuurlijk ook v nwege hun kw liteit en
betrouwb rheid erkenning verkregen.
Neem een moment de tijd om deze
gebruiks nwijzing door te lezen en vertrouwd te
r ken met het M g Ch rger® Rech rge ble
Fl shlight System; d t z l j ren v n uitstekende
werking en tevredenheid g r nderen. Om u te
helpen vertrouwd te r ken met uw nieuwe
z kl nt rn, is deze gebruiks nwijzing
s mengesteld uit cht delen: deel 1) De z kl nt rn;
deel 2) De opl dhouder; deel 3) Inst ll tie; deel 4)
De b tterij; deel 5) Werking – Haal het Maximale uit
uw Mag Charger® Rechargeable Flashlight System;
deel 6) Verv nging v n het l mpje; deel 7)
Probleemoplossing, specific ties en ccessoires;
deel 8) G r ntieinform tie.
Inhoud van de verpakking:
( ie tabel voor uw systeem, 1-7.)
Er is de grootste zorg betr cht met het ontwerp,
de f bric ge en het verp kken v n uw M g
Ch rger® Rech rge ble Fl shlight System.
1. Z kl nt rn 6. 12V- d pter ( uto)
2. Opl dhouder 7. 230V-omvormer (Europ )
3.
Opl db re b tterij (NiMH)
8. 240V-omvormer (UK)
4. Mont gebeugels (2 stuks) 9. 12 V directe verbinding ( uto)
5. 120V-omvormer (VS)
7 8
9
5
6
2
4
3
1
NB: Item 8 is uitsluitend en specifiek voor GB
18

234
1
56
1. Lensgedeelte (lens en reflector)
Het
lensgedeelte wordt lleen verwijderd ls het l mpje verv ngen
moet worden. Het reflectorgedeelte is in de f briek fgedicht en
m g niet v n de lensdop losgeh ld worden ( fb. 1). Lens: De
lens v n high-efficiency voorgesp nnen gl s op het M g
Ch rger® Rech rge ble z kl nt rnsysteem m kt integr l
deel uit v n het optisch systeem. Het gl s is fijngeslepen,
gepolijst en voorgesp nnen voor deze toep ssing. N st de
hoge lichtdoorl tendheid is de lens tevens beter best nd tegen
temper tuur, zuur en oplosmiddelen. Reflector: Hooggepolijste,
wetensch ppelijk ontworpen met len reflector die best nd is
tegen extreme temper turen.
NB:
De voorgesp nnen lens k n breken ls de z kl nt rn verkeerd gebruikt
wordt. 1. NIET ALS HAMER GEBRUIKEN! 2. Gebruik de z kl nt rn niet terwijl
de lensdop is verwijderd en het l mpje br ndt en blootligt. Letsel of sch de door
hittegevoeligheid v n kunststof, rubber, stoffen enz. k n het gevolg zijn.
2. Kop De kop is niet fneemb r: pogingen de kop te
verwijderen zullen de werking v n de kop nt sten. De
kop k n oml g gebr cht worden tot de l dringmodule
om het gloeil mpje te verwijderen (zie p. 27).
Focusseerstraal:
Snel scherpstellende “continu c m- ctie”
punt-n r-breed str l. ( fb. 2) Te gebruiken door
eenvoudig een kw rtsl g te dr ien n de z kl mpkop.
3. Verzegelde elektronische sch kel r, evenwijdig n de cilinder,
met vijf verschillende functies – Vol Vermogen, Besp rmodus (25%),
Knipperen (5x/sec), SOS (intern tion l noodsign l morsecode), en
Kortdurend A n/Uit .
4. Serienummer Perm nent gegr veerd serienummer voor
registr tie en identific tie.
5. Duurzame afwerking De trommel, kop en einddop zijn n
binnen- en buitenzijde v n H rd Type III ge nodiseerd
luchtv rt luminium. Ook met minim le verzorging z l uw z kl nt rn
zijn gl nzende zw rte oppervl k voor onbep lde tijd behouden. (Directe
const nte blootstelling n zonlicht doet elke kleur verbleken.) De
trommel is voorzien v n de ultieme di m nttexturering.
6. Reservelampje in einddop Voor groter gem k is er een
reserve h logeenl mpje in de einddop ngebr cht voor het gev l dit
l mpje verv ngen moet worden.
Fig. 2
Fig. 1
Deel 1 De zaklantaarn
19
Table of contents
Languages:
Other MAG Flashlight manuals