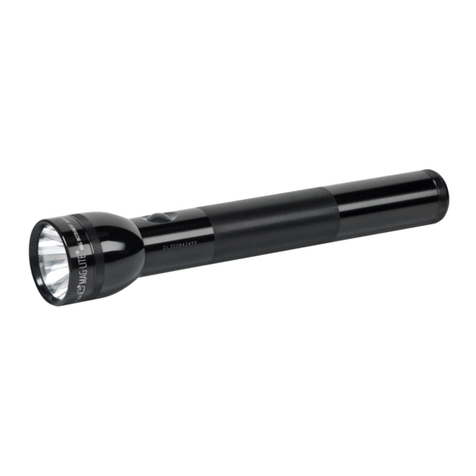
MAG RL1019 User manual

CORPORATE OFFICE
MAG INSTRUMENT, INC.
2001 South Hellman Ave.
P.O. Box 50600
Ontario, California U.S.A.
91761-1083
Warranty: (800) 283-5562 or
(909) 947-1006 fax: (909) 947-5041
e-mail: [email protected]
Sales & Parts: (800) 289-6241
or (909) 947-1006
email: sal sd [email protected]
©2020 Mag Instrument, Inc.
www.maglite.com
Model Number:
RL1019
Part Number:
165-000-017
421-000-493 3/20
Owner’s Manual • Guide d’Utilisation • Manual del Propietario
The MAG CHARGER® LED flashlight is covered by U.S. Patent Nos.
7,125,140; 7,566,149; and 8,482,209. Other patents pending. The charging
cradle is covered by U.S. Patent No. D526,959. The LED module is covered
by U.S. Patent No. D625,847.
Flashlight designed and manufactured in U.S.A.; flashlight includes some
imported components; battery pack made in China; charging cradle
assembled in U.S.A. of U.S. and imported parts; 12 volt power cord
assembled in U.S.A. of imported parts; 120 volt A/C converter made in China.
The distinctive shapes, styles and overall appearances of all Mag®
flashlights, and the circumferential inscriptions extending around the heads
of all Mag® flashlights are trademarks of Mag Instrument, Inc. The
circumferential inscription on the head of every flashlight signifies that it is
an original Mag® flashlight and part of the Mag® family of flashlights. U.S.
Trademark Registrations for the shape, style and overall appearance
trademarks of Mag® flashlights and for circumferential inscription
trademarks of Mag® flashlights include Nos. 1,808,998; 2,074,795; 2,687,693;
2,745,460; 2,765,978 and 2,765,979. The pair of bands encircling the barrel of
the Mag Charger® flashlight is a trademark of Mag Instrument, Inc.
Mag Charger®LED
Rechargeable Flashlight
System
• Lifetime Tough® Anodized
Aluminum Construction
• Fast Focusing – Spot to Flood
with ¼ turn of the head
• A unique “Quick Click” system to
access:
• High Power Mode
• Low Power Mode
• Eco Mode
• Momentary Mode
• Strobe Mode
• Multi-Mode Electronic Switch
• PERSONALI E for QUICK
ACCESS to your PREFERRED
FUNCTIONS.
• USER-CONFIGURABLE
for CIVILIAN, MILITARY
or LAW ENFORCEMENT Duty.
• Ten Year Limited Warranty -
Details inside.
Système de Torche
Rechargeable Mag Charger® LED
• Construction en aluminium
anodisé Lifetime Tough®
• Mise au point rapide – Large
faisceau à faisceau concentré en
tournant la tête de la lampe de ¼.
• Un système d’accès « clic rapide»
pour accéder au :
• Mode puissance élevée
• Mode faible puissance
• Mode économique
• Mode momentané
• Mode stroboscopique
• Interrupteur électronique
multi-mode
• PERSONNALISER pour un
ACCÈS RAPIDE à vos
RÉGLAGES DE PRÉFÉRENCE.
• CONFIGURABLE PAR LES
UTILISEURS pour, entre
autres, des fonctions CIVILES,
MILITAIRES ou POLICIÈRES
• Garantie limitée de dix ans –
détails à l’intérieur.
Sistema de Linterna Recargable
Mag Charger® LED
• Construcción en Aluminio
Anodizado Lifetime Tough®
• Enfoque r pido – con solo un ¼
de giro del cabezal
• Un original sistema de “Click
R pido” para acceder a:
• Modo Alta Potencia
• Modo Baja Potencia
• Modo Eco
• Modo Moment neo
• Modo Estroboscópico
• Conmutador Multi-Modo
Electrónico
• PERSONALI ABLE para un
RÁPIDO ACCESO a sus
FUNCIONES PREFERIDAS.
• CONFIGURABLE por
USUARIOS CIVILES,
MILITARES o POLICIALES.
• Diez Años de Garantía Limitada;
detalles en el interior.
Text MAGLITE to 88333
FOR SPECIAL DEALS & OFFERS
Consent not a requirement of purchase.
5 Msgs/Month. Reply STOP to cancel, HELP for help.
Msg&data rates may apply. Terms: slkt.io/2ZXM
421_493_Rech_Man_LED_WHS_0320.qxp_Layout 1 4/5/21 9:35 AM Page 1

Rechargeable System (LED / NiMH)
Systéme Rechargeable (LED / NiMH)
Sistema Recargable (LED / NiMH)
Owner’s Manual • Guide d’Utilisation • Manual del Propietario
421_493_Rech_Man_LED_WHS_0320.qxp_Layout 1 4/5/21 9:35 AM Page 2

For Your Safety Please Read
Read all safety instructions in this manual before attempting to use the Mag Charger®
LED Rechargeable Flashlight System. Keep this manual for future reference. It contains
important information about maintenance and safe operation of the product.
SAFETY INSTRUCTIONS:
The safety instructions in this manual have been classified according to the seriousness of
the risk, as follows:
~DANGER:
“Danger” indicates the existence of a hazard that could result in death or catastrophic
bodily injury, if the safety instruction is not observed.
WARNING:
“Warning” indicates the existence of a hazard that could result in serious bodily injury, if
the safety instruction is not observed.
OCAUTION:
“Caution” indicates the existence of a hazard that could result in minor bodily injury or
property damage, if the safety instruction is not observed.
몇NOTICE:
“Notice” contains general information that relates to the safe operation of the flashlight
system.
~
DANGER:
• To avoid risk of damage to eyesight, never look directly into the beam when the light is
on, nor shine it directly into another person’s eyes.
•Any battery may rupture or explode if put in a fire or otherwise exposed to excessive
heat. To avoid risk of injury, do not expose batteries to fire or excessive heat.
• Never short-circuit a battery pack by bringing the terminals in contact with a metal
object. Explosion, burns, other bodily injury or fire could result.
• Never try to disassemble or repair the AC adapter or charging cradle. Electric shock
may result. Contact a Mag Authorized Warranty Service Center for repairs.
• Never alter the plug on your AC adapter or charging cradle. If the plug will not fit into the
available outlet, have a proper outlet installed by a qualified electrician. Trying to plug into
an improper outlet can result in electric shock.
WARNING:
•Any battery may leak harmful chemicals which may damage skin, clothing, or the inside
of the flashlight. To avoid risk of injury, do not let any material leaked from a battery come
in contact with eyes or skin.
• Never heat and never attempt to disassemble the battery pack, as that could cause
leakage of caustic electrolyte. In the event of skin contact, wash the affected area
immediately and obtain prompt medical attention.
• Never allow liquids to spill on the AC adapter or charging cradle and do not charge
outdoors, as the unit is not waterproof. Exposure to rain or other liquid could result in fire
or electric shock.
OCAUTION:
• Never store or transport flammable liquids, gases or explosive materials in the same
compartment as the flashlight or its accessories, as possible sparking in the equipment
could ignite a fire or explosion.
• Always secure this flashlight in its charging cradle when not in use. Never place the
flashlight on the passenger seat or anyplace else in the car where it can become a
projectile during a collision or sudden stop.
• Never expose the terminals of the battery pack to any metal object. When transporting a
battery pack outside the flashlight, wrap it or place it in a plastic bag, or put insulating tape
over the terminals.
• Do not charge or operate the flashlight near flammable materials.
• Do not charge battery in gas-tight enclosures as hydrogen gas is emitted under certain
conditions and can explode if concentrated and confined.
• Do not operate flashlight with the face cap off and the LED on and exposed. Personal
injury or damage to heat sensitive materials may result, e.g. plastics, rubber, cloth
fabrics, etc.
몇NOTICE:
To reduce the risk of harm to your flashlight:
• Locate power cord away from foot traffic, heavy objects and other causes of abrasion or
stress.
• Never pull on the power cord when unplugging the AC adapter. Grasp the plug directly
to avoid damaging the cord.
• Between uses, disconnect AC adapter or charging cradle from power source.
• Do not use non-rechargeable batteries in your Rechargeable Flashlight System.
• Use only a MAG® rechargeable battery pack (Model No. ARXX235) or its technical
equivalent.
421_493_Rech_Man_LED_WHS_0320.qxp_Layout 1 4/5/21 9:35 AM Page 3

• Always install the battery pack with the positive (+) end facing the head end of the
flashlight and the negative (-) end facing the tailcap end.
• For prolonged storage, remove battery pack and store apart from flashlight.
• Carefully follow steps listed under “Inspection and Maintenance” in this manual.
• Never try to disassemble the flashlight, its components or accessories. For service,
return the unit to a Mag Authorized Warranty Service Center.
• Always use genuine Mag Charger® replacement parts and accessories. Never connect
the flashlight to any auxiliary product that has not been approved by Mag Instrument, Inc.
Use of an unauthorized accessory that is not the technical equivalent of an authorized
accessory may damage the product and void your warranty, and could possibly result in
fire, electric shock or other bodily injury.
• Exposure of the flashlight and accessories to excessively high temperatures above 122˚F
(50˚C) can heat-damage plastic parts, electronic components and the battery.
• Never store this flashlight in temperatures below -4˚F (-20˚C). Doing so may damage the
flashlight’s electronic components.
• System 1, 3, and 6: The AC Adapter requires the use of a standard 120 V AC power
source for its operation. Or, 12 V DC with the optional Cigarette Lighter Adapter.
• System 4, and 5: The AC Adapter requires the use of a standard 230 V AC power source
for its operation. Or, 12 V DC with the optional Cigarette Lighter Adapter.
• Discontinue use immediately if you notice changes in the battery such as discoloration or
malformation.
• Recharge the Battery at temperatures: 32˚F to 140°F (0°C to 60°C) to avoid hazardous gas
venting from the battery cells and potentially reduced battery capacity.
• After extended and /or high temperature storage, NiMH batteries may accept a less-
than-full charge even with full recharging time. Capacity returns to normal after 1 to 3
charge/discharge cycles.
• Never use an AC adapter or charging cradle with a damaged or worn power cord or
plug. This could result in electric shock, burns or fire. Contact a Mag authorized warranty
service center to obtain a replacement.
• Unplug the AC adapter or charging cradle from the power source before attempting any
cleaning in order to avoid the risk of electric shock.
PROTECTION OF CHILDREN
• This product is not designed, intended or recommended for children.
• Never allow children to play with, or otherwise handle or operate, the flashlight, its
battery or charging apparatus, as injury to themselves or others could result.
• Keep all accessories and components out of the reach of small children. Small parts, in
particular, might present a choking hazard to children.
BATTERY DISPOSAL
• Cover the metal terminals with insulating tape before disposal, to prevent accidental
short-circuiting.
• Never dispose of a battery pack by throwing it into a fire. Battery explosion could result.
• Never discard a used battery pack with ordinary solid wastes, since it contains toxic
substances.
• Always dispose of a used battery pack in accordance with prevailing Community
regulations relating to the disposal of household toxic wastes.
• The sealed battery stick contains nickel metal hydride and must be recycled or disposed
of properly. Contact your local county solid waste authority for proper recycling or
disposal information.
• Mag Instrument, Inc. is a proud participant in the RBRC (Rechargeable Battery Recycling
Corporation). By recycling NiMH rechargeable batteries, you are helping to keep NiMH
batteries out of the solid waste stream. When you throw away a NiMH battery, it
eventually ends up in a landfill or municipal incinerator. By recycling your used NiMH
batteries through Mag Instrument’s Battery Recycling Program, you are helping to create
a cleaner and safer environment for generations to come. For more information about the
RBRC visit www.rbrc.com
www.maglite.com
3
421_493_Rech_Man_LED_WHS_0320.qxp_Layout 1 4/5/21 9:35 AM Page 4

1 Rechargeable Flashlight
2 Charging Cradle
3 Rechargeable Battery (NiMH)
4 120 Volt Converter (US)
5 12 Volt Adapter (Automobile)
6 230 Volt Converter (Euro)
7 240 Volt Converter (UK)
8 12 Volt Straight Wire (Automobile)
RL1019 RL2019 RL3019 RL4019 RL5019
Getting Started
Congratulations
You have just made an investment in
one of the most highly-advanced precision
instruments in illumination technology.
The Mag Charger® LED Rechargeable
Flashlight System was formulated on precision
and quality. Derived from many years of
experience in the precise world of fine machine
tools, our flashlights quickly became recognized
for form and function and most importantly to
you, the consumer, for quality and dependability.
Taking a few moments to read this
manual and familiarizing yourself with the
Mag Charger® LED Rechargeable Flashlight
System will help to insure years of superior
service and satisfaction.
Consult the accompanying chart and o tain the
model num er from your package to see which
of the following 8 items your package contains:
Mag Instrument is a Founding Partner
of the National Law Enforcement Officers
Memorial Fund and The National Law
Enforcement Museum.
Learn more about The Campaign for the
National Law Enforcement Museum at
www.maglite.com
S
6 7
4
5
2
1
Note: Item 7 is for UK specific only.
1. Flashlight
2. Charging Cradle
3. Rechargeable Battery (NiMH)
4. 120 Volt Converter (US)
5. 12 Volt Adapter (Automobile)
6. 230 Volt Converter (Euro)
7. 240 Volt Converter (UK)
8. 12 Volt Straight Wire
(Automobile)
3
4
Contents
Getting Started. . . . . . . . . . . . . . . . . . . . . 4
The Flashlight. . . . . . . . . . . . . . . . . . . . . . 5
The Charging Cradle. . . . . . . . . . . . . . . . . 6
Installation . . . . . . . . . . . . . . . . . . . . . . . . . 7
The Battery . . . . . . . . . . . . . . . . . . . . . . . . 8
Operation - Getting the Most out o
Your Mag Charger® LED Rechargeable
Flashlight System. . . . . . . . . . . . . . . . . . . . 10
Frequently Asked Questions. . . . . . . . . 11
Troubleshooting, Specifications . . . . . . 12
Inspection and Maintenance . . . . . . . . . 12
Warranty . . . . . . . . . . . . . . . . . . . . . . . . . 13
Français . . . . . . . . . . . . . . . . . . . . 14
Español . . . . . . . . . . . . . . . . . . . . 26
Rechargeable System (LED / NiMH)
Systéme Rechargeable (LED / NiMH)
Sistema Recargable (LED / NiMH)
8
optional
421_493_Rech_Man_LED_WHS_0320.qxp_Layout 1 4/5/21 9:35 AM Page 5

23
4
1
5
Section 1 The Flashlight
5
1. Face Cap Assembly (lens and reflector)
The Face Cap Assembly is removable. The reflector
assembly is factory sealed and should not be removed from
face cap (Fig. 1). Lens: The polycarbonate lens on the Mag
Charger® LED Rechargeable Flashlight System is an
integral part of the optical system. Reflector: Scientifically-
designed metalized reflector.
2. Head The head is not removable; any attempt to do so
will only damage its function. Focusing Beam: Quick focusing
spot-to-flood beam. (Fig. 2) Operates with a simple quarter turn
of the flashlight head assembly.
3. Switch Sealed, flush-with-the-barrel electronic switch
provides access to five different functions – Full Power, Low
Power, Strobe (12x/sec), Eco, and Momentary On/Off.
4. Serial Number Permanently engraved serial number for
registration and identification. Please note your serial number for
future reference ____________________.
5. Durable Finish The barrel and head assembly are of Hard
Type III anodized aircraft aluminum inside and out. With minimum
care, your flashlight will help maintain its rich black appearance.
(Direct constant exposure to sunlight will fade any color.)
Fig. 2
Fig. 1
421_493_Rech_Man_LED_WHS_0320.qxp_Layout 1 4/5/21 9:35 AM Page 6

If you have received your system with the flashlight mounted in the
Charging Cradle (Fig. 3) remove the flashlight by following these steps:
1. Holding the Charging Cradle firmly in one hand (Fig. 4), grasp the
flashlight with the other. 2. A firm downward pressure with the thumb on
cradle while pulling up on the barrel with the other four fingers will quickly
snap it free.
Returning the flashlight into the Charging Cradle requires the
following steps: (Fig. 5) 1. Place the front end of the light into
the front end of Charging Cradle with a slight angle. 2. Hold the
Charging Cradle and front of light with one hand. 3. Apply
downward pressure on the barrel portion of the light until the
light snaps into place.
Once it is mounted to a wall or in a vehicle, you’ll find that the
technique for removing and returning the flashlight to the Charging
Cradle works with one motion.
Charging Cradle
Constructed of engineering grade thermoplastics, this Charging
Cradle unit has many features. Input can be from 12–14 volts
(automotive installations) or 120-240 volts AC, when used with a
converter for charging indoors.
Note: All electrical components are designed for 12–14 volt DC
circuits. DO NOT USE IN 24-VOLT DC CIRCUITS. Doing so
creates excessive heat and may result in a fire or melted
components.
Fig. 3 Flashlight in the Charging Cradle
Charging Cradle
Green/Red/Orange
LED Indicator
Section 2 The Charging Cradle S
6
Fig. 4
Fig. 5
421_493_Rech_Man_LED_WHS_0320.qxp_Layout 1 4/5/21 9:35 AM Page 7

S Section 3
7
Fig. 19
Ground (–) lead
(black)
Positive (+) lead
(red)
Ignition-Switched Fuses
Charging Cradle Cord
Radio
Heater
Accessory
Note: For maximum protection of recharging
unit, it is recommended that a 1-amp fuse be
installed in the (+) red lead.
Charging Cradle
Direct Wire–Vehicle Installation 12–14 Volt Only (Not for 24-Volt Systems)
A 4’ power accessory cord is available to facilitate the direct-wiring of the rechargeable system (Fig. 19). Mag Instrument recommends
using only an ignition-switched (fused) circuit, and preferably the lowest output available (5 amps or less). This is most often the radio
or accessory fuse. The red (positive) lead is connected to the fuse output, and the black (negative) ground wire should be attached to a
metal part of the chassis, which serves as a battery ground return.
Installation
1 AMP
(See Note)
A Typical Installation
1. Locate and mount the cradle using appropriate screw and anchors for
the location and material.
2. Attach end of DC power cord or AC converter to charging cradle by
inserting round plug into power connection port in the side of the
charging cradle.
Note: When disconnecting plugs, grasp the plug body itself; never pull
on cord.
OCAUTION: Make sure ca le cannot e pinched. If cable is pinched it can
cause immediate short and wires can get hot, melt plastic, and create a
fire hazard.
Fig. 11
Power connection port
421_493_Rech_Man_LED_WHS_0320.qxp_Layout 1 4/5/21 9:35 AM Page 8

Section 4 S
The Battery
Your Battery’s First Charge Is Important!
To assure the freshness of your battery and to avoid any operational
problems in shipping, it has been packaged in an UNCHARGED state.
For optimum operation of your flashlight, it should be charged a full
24 hours … before using for the first time.
Battery Installation
If the battery was shipped outside of the flashlight: After you have removed
the flashlight from the Charging Cradle unscrew the tail cap (Fig. 12) and insert
battery pack (Fig. 13) into the barrel. The positive (+) end—this is the end with a
button—goes into the barrel first. Now screw on the tail cap and make sure it’s tight.
NOTE: Large end of the attery spring must e snapped into the tailcap.
First Charge Procedure
1.
Connect charging cradle to the AC converter or DC accessory cord.
2. Plug into wall receptacle (AC) or DC power source cord.
3. Make sure charging cradle indicator LED is GREEN.
4. Make sure flashlight is OFF.
5. Make sure flashlight tailcap is tight.
6. Place flashlight into charging cradle.
WARNING:
Do not “short” or “ground out” battery pack to “deeply
discharge”. Doing so can create a burn or fire hazard and will damage the
battery pack.
Do Not Have Flashlight Switch in ”On“ Position While Charging
Tailcap
Battery Spring
Flashlight Barrel
Fig. 12
Fig. 13
8
+–
421_493_Rech_Man_LED_WHS_0320.qxp_Layout 1 4/5/21 9:35 AM Page 9

S Section 4 The Battery
9
After the first (24-hour) charge, the total time to fully charge a
fully discharged battery is approximately 10 hours.
The charging cradle is provided with an LED that indicates
battery charge status by blinking and changing color, as seen in
the accompanying chart.
Charger Mode Definitions:
Fault : Charger input or output is below the minimum threshold
for normal operation. Short circuit on charge terminals or
component failure is detected.
Pre-Conditioning : Battery is deeply depleted/discharged. Cradle
will charge battery at a reduced rate until battery reaches a level
that is safe for normal charging, it will then proceed to
Charging mode.
Charging : Cradle will charge the battery at normal charge rate,
for up to 10 hours.
Maintenance : Charge cycle is complete. The system may remain
in the Maintenance mode indefinitely (as long as the light is left in
the charging cradle). The charging cradle may return to Charging
mode (ORANGE) after several hours in order to maintain the
battery’s charge level while it sits in the cradle.
Cradle Empty: There is no flashlight detected in the
charging cradle.
MAG CHARGER®LED - CHARGING CRADLE FUNCTIONS
LED Indicator Charger Mode
Blinking RED Fault
RED Pre-Conditioning
ORANGE Charging
Blinking GREEN Maintenance
GREEN Cradle Empty
421_493_Rech_Man_LED_WHS_0320.qxp_Layout 1 4/5/21 9:35 AM Page 10

Section 5
10
S
Operation - Getting the most out of Your Mag Charger®LED Rechargeable Flashlight System
Switch Operation
Your Flashlight’s Function Sets and the Functions
Within Each Set
The Mag Charger® LED flashlight includes powerful new electronics,
providing five different functions to choose from. Because not all
functions are equally important to all users, the Mag Charger® LED
offers an array of USER-CONFIGURABLE FUNCTION SETS that LET YOU
PERSONALIZE the settings for QUICKEST ACCESS to the FUNCTIONS
YOU USE MOST. The four available Function Sets are shown in the
below Function Sets Chart.
The five different functions are: – Full Power, Low Power, Strobe (flashes 12
times per second), Eco and Momentary On/Off (stays on only while the switch
button is held down). Not all of these functions are equally important to every
user. That is why these functions are organized into four different function sets
– so that you can personalize your flashlight to suit your needs, configuring it
for quickest access to the functions that best match your preference.
How To Choose A Function Within a Set - “Quick Click”
The available function sets, and the functions within each one, are shown in
the Function Sets Chart.
As it comes out of the package, your Mag Charger® LED flashlight is set to the
“Standard” function set (Function S t #1 in the chart). If you require only those
three functions (Full Power, Low Power and Eco), then you never have to
change it. You can select a function within that set by the “Quick Click”
method: Turn the flashlight on with one Quick Click and it is on at Full Power.
Turn it off, then turn it on with two Quick Clicks (about as fast as you would say
“Click Click”) and it turns on at – the Low Power function. Turn it off, then turn
it on with three Quick Clicks (about as fast as you would say “Click Click Click”)
and you have the Eco function.
Selecting a function within any of the other function sets works the same way
– starting with the flashlight off, invoke the desired function by applying 1, 2 or
3 “Quick Clicks”, as the chart shows. For example, if you are in Function S t #2
and you want to select the Strobe function, begin with the flashlight off, apply
three Quick Clicks, and your flashlight will strobe.
1GENERAL 2OUTDOOR 3
LAW
ENFORCEMENT
4TACTICAL
(Default)
Function Set
Full Power
Low Power
Eco
Full Power
Low Power
Strobe
Momentary
Full Power
Eco
Momentary
Full Power
Strobe
Function Sets Chart
421_493_Rech_Man_LED_WHS_0320.qxp_Layout 1 4/5/21 9:35 AM Page 11

S
How To Go From One Function Set To Another
Your Mag Charger® LED flashlight’s “standard” setting is Function S t #1. If you
want to keep that setting you don’t have to do anything. Function S t #1 will
always be in effect unless it is changed. If you want to choose a different
function set, follow these steps:
1. Unscrew the tail cap, backing it out of the barrel far enough that the flashlight
will not turn on. (Note: This may require the tailcap to be removed from the
barrel entirely).
2. Pause for 2 seconds.
3. Press the switch button
and k p holding it down.
4. Whil still holding down th
switch button, screw the tail
cap back in until it is tight.
5. K p holding down th
switch button. Within about
4 seconds the flashlight
will start to blink.
6. The number of blinks indicates the new selected Function Set.
7. To choose a new Function Set, release the switch button after the
corresponding number of blinks (releasing after 1 blink chooses Function S t #1;
releasing after 2 blinks chooses Function S t #2; release after 3 blinks for Function
S t #3, and release after 4 blinks to choose Function S t #4.) Your choice of a
Function Set remains in effect until you change it by repeating the above
process. (See our Demo video at www.maglite.com)
몇NOTICE:
To avoid deeply discharging the rechargeable NiMH battery,
always turn the flashlight off when the flashlight beam starts to dim. A dim
beam is an indication that the battery needs to be recharged.
Spot-to-Flood Beam
The quick focusing spot-to-flood beam operates with a simple quarter turn
of the flashlight head assembly.
Frequently Asked Questions
Q. How long can I leave the flashlight in the Charging Cradle (on
charge) without using?
A. Indefinitely.
Q. If dust occurs inside my reflector, how do I clean it without damage
to the reflector?
A. Do not touch reflector. Use a camel hair brush lightly or blow with a
compressed air duster as used on computers and electronics. Use the same
care that you would give a precision camera lens.
Q. How do I get a fingerprint off my reflector?
A. Use a camera lens cleaner and a lint-free cloth.
11
Section 5 Operation - Getting the most out of Your Mag Charger®LED Rechargeable Flashlight System
421_493_Rech_Man_LED_WHS_0320.qxp_Layout 1 4/5/21 9:35 AM Page 12

Section 6 S
12
If you have questions or need assistance, please call our warranty/repair
facility at (800) 283-5562, in the U.S.A. only, or (909) 947-1006 outside the U.S.A.
Problem Cause/Correction
Flashlight:
Does not light 1. Tighten tail cap – make sure unplated area of tail cap and barrel
are clean. See fig. 14
2. Check if battery is installed … see page 8.
3. Check if battery is installed with (+) positive end toward head of
flashlight.
4. Make sure large end of battery spring is snapped into tailcap.
Battery charged? 1. Check battery charge: Place flashlight in recharger/cradle. Make
sure LED lights up with flashlight switch off (see page 8). Charge
for 15 minutes … check for light. If it lights (even momentarily)
charge it, if not, replace it (battery).
Switch sticks 1. Return flashlight to Mag Instrument (see warranty).
Works intermittently 1. Check for damage to battery casing.
2. Foreign particles inside barrel.
Poor or no spot 1. Damaged LED.
Recharger/Cradle:
LED indicator does 1. Tighten tail cap.
not light when 2. Check plug connection to converter.
lashlight switch is 3. Check plug to power source.
in o position. 4. Make sure large end of battery spring is snapped into tailcap.
Inspection and Maintenance
Battery Pack – See Warnings Section for more information. Periodically (approximately
every month) remove the battery pack from the flashlight and visually inspect for signs of
gas or chemical leakage. Indications of leakage are discoloration of the plastic sleeve or
white fuzzy material near the top (positive button) of each cell. Another indication would
be a bulging deformation of the bottom (negative flat end) of the cell can. If these signs
are observed the battery pack should be removed from service to prevent chemical
damage to the inside of the flashlight. See One Year Battery Pack Warranty for more
information concerning warranty coverage.
Fully Charged Battery Storage – If you do not use your flashlight for long periods of time
(four months or more) we suggest you remove the battery pack from the flashlight to
prevent chemical damage (acid leaks). Electrical Contacts – The bare (bright) metal
surfaces between the tailcap and barrel must be cleaned periodically to ensure a good
electrical contact. Also keep the tailcap spring clean. O-ring Seals and Screw Threads – To
keep seals from drying out and the threads operating smoothly, apply several drops of
clean petroleum oil or jelly to these surfaces two or three times a year. Anodized Exterior
Finish – The protective finish on the flashlight is very durable; however, constant exposure
to sunlight, water, chemicals, gases, etc., will dull, discolor and eventually destroy the
protective finish. Care should be taken to avoid any harsh environment.
12 Volt Adapter (Automobile)
Plug the DC power cord’s adapter into the 12–14
volt cigarette lighter receptacle of the vehicle.
DO NOT leave adapter plugged in for any
extended period while the engine is “off”
to avoid draining vehicle battery.
120-240 Volt Converter (Indoor)
After mounting the charging cradle in a
proper location, plug the converter into an
appropriate 120-240 volt wall receptacle.
Note: Total usable wire length is 6 feet.
Flashlight
• Tempered aluminum alloy external
components
• Finish: hard, type III, aircraft
anodized (inside and out)
• Length: 12-13/16" (325.42 mm)
• Weight, with battery pack: 28 oz.
(794 grams)
• Head diameter: 2-1/4" (57.15 mm)
• Barrel diameter: 1-1/2" (38.1 mm)
• Permanently engraved serial
number for registration and
identification
• O-ring sealed throughout
• 6.00 Volt NiMH Battery Pack
• Polycarbonate Lens
• Highly polished reflector delivers
superior optical performance.
• Diamond knurl design
• Adjustable beam from spot to flood
with 1/4 turn of head
• Corrosion resistant metal
springs throughout
Charging Cradl
• Accepts 12–14 volts DC
(not for use with 24-volt systems)
• Solid-state charging circuit
• Charge rate: 500 mA
• Flashlight can be charged in almost
any position
• Reverse voltage protected
(batteries in backwards)
Input and Output
• Multi-color LED charge indicator
• Mounts in almost any position
Conv rt r
• 120-240 volts AC 50/60Hz
• Output 12 volts DC
• Double insulated
Troubleshooting Specifications and Accessories
Fig. 14
Unplated Area
421_493_Rech_Man_LED_WHS_0320.qxp_Layout 1 4/5/21 9:35 AM Page 13

S Section 7
13
Warranty Information
TEN YEAR LIMITED WARRANTY ON FLASHLIGHT SYSTEM / ONE
YEAR LIMITED WARRANTY ON BATTERY PACK: Mag Instrument, Inc.,
2001 South Hellman Ave., Ontario, California, USA 91761, warrants to the first
retail purchaser of this Mag Charger® LED RECHARGEABLE FLASHLIGHT
SYSTEM that it is free from defects in parts and workmanship for ten years
from the date of first retail purchase. During warranty coverage, Mag or an
authorized Mag Warranty Service Center will repair the flashlight or, at its
option, replace a defective flashlight or component. (Mag does not warrant
the future availability of any particular colors, markings or decorations, and
may replace a custom flashlight with a standard flashlight.) Proof of purchase
is required for warranty service. This warranty is in lieu of all other warranties
and conditions express or implied. It does not, however, affect the statutory
rights of a consumer. Under EU law (where applicable), the seller of new
flashlights is liable for any lack of conformity that becomes apparent within
two years from delivery of the flashlight; national laws of specific
jurisdictions, including EU Member States, may give the consumer additional
rights.
EXCLUSIONS: This warranty does not cover any of the following: 1. The
rechargeable battery unless the claim is made within one year after the
documented date of first retail purchase; 2. Any accessory (including for
example the recharging apparatus) unless the claim is made within one year
after the documented date of first retail purchase; 3. Any electronic
component (including for example the LED and electronics involved in
switching, controlling or regulating the LED) unless the claim is made within
one year after the documented date of first retail purchase; or 4. Damage to
or failure of the flashlight or any component or accessory thereof, at any time,
due to alteration, misuse, or lack of maintenance.
Notwithstanding any statutory rights applicable in any jurisdiction in the
event of failure by Mag to fulfill this warranty, MAG DISCLAIMS ANY
RESPONSIBILITY FOR INCIDENTAL OR CONSEQUENTIAL DAMAGES. Some
jurisdictions (countries, provinces, and states) do not allow exclusion or
limitation of implied warranties, incidental or consequential damages and/or
limitations on transferability, so the above limitations and exclusions may not
apply to you.
HOW AND WHEN TO MAKE A WARRANTY CLAIM: To avoid expense
and delay for warranty work that might be unnecessary, we strongly
recommend that you first consult the “Troubleshooting” steps found in your
product manual or on Mag’s website www.maglite.com. If these do not
resolve the problem, we recommend that you call our Warranty/Repair
department at the number found in your manual and on Mag’s website, to
see if the problem can be resolved by phone. If not, and if a warranty
repair/replacement is necessary, then for warranty return of a flashlight
purchased in the USA or Canada, send the flashlight, battery or accessory in
question, along with proof of first retail purchase (postage or shipping
prepaid) to Mag Instrument, 2001 South Hellman Avenue, Ontario, California,
USA 91761, Attention: Warranty/Repair Department. For instructions on
warranty return of a flashlight purchased elsewhere than the USA or Canada,
consult the retailer where the flashlight was purchased, or visit Mag’s website
www.maglite.com, click on “Support,” select the country of purchase, and
find the name of an authorized Mag Warranty Service Center to which to send
the flashlight, battery or accessory in question, with proof of first retail
purchase (postage or shipping prepaid). For your protection and to expedite
handling, we recommend that all returns be insured and shipped by a carrier
that can track or trace the package. This warranty gives you specific legal
rights, and you may have other rights which vary from country to country,
province to province, and state to state. Where any term of this warranty is
prohibited by the law of any jurisdiction, such term shall there be null and
void, but the remainder of this warranty shall remain in full force and effect.
THESE STATEMENTS DO NOT AFFECT THE STATUTORY RIGHTS OF A
CONSUMER.
To obtain a copy of this warranty, please send an email with your request to
warranty@magmail.com; or send a written request by mail to Mag at the
Mag Warranty/Repair Department address noted above. In either case,
please be sure to specify the model (e.g., Mag Charger LED Rechargeable
Flashlight System) and serial number of your flashlight.
421_493_Rech_Man_LED_WHS_0320.qxp_Layout 1 4/5/21 9:35 AM Page 14

Pour votre sécurité, veuillez lire ce document
Lire toutes les consignes de sécurité contenues dans ce manuel avant d'utiliser la lampe
torche Mag Charger® LED rechargeable. Conserver ce manuel pour utilisation future. Il
contient des informations importantes sur l'entretien et l'utilisation de ce produit en
toute sécurité.
CONSIGNES DE SECURITÉ:
Les consignes de sécurité de ce manuel ont été classées selon la gravité des risques:
~DANGER:
"Danger" indique la présence d'un risque pouvant être cause de décès ou de blessure
invalidante si les consignes de sécurité ne sont pas respectées.
ATTENTION:
"Attention" indique la présence d'un risque pouvant être cause de blessure grave si les
consignes de sécurité ne sont pas respectées.
OPRUDENCE:
"Prudence" indique la présence d'un risque pouvant être cause de blessure légère ou de
dégât matériel si les consignes de sécurité ne sont pas respectées.
몇NOTIFICATION:
"Notification" contient des informations générales relatives à l'utilisation de cette lampe
torche en toute sécurité.
~DANGER:
• Afin d'éviter les risques de troubles de la vision, ne jamais regarder directement le faisceau
lorsque la lampe est allumée, et ne jamais pointer la lampe torche directement dans les yeux
d'une autre personne.
•N'importe quel accumulateur peut éclater ou exploser une fois jeté au feu ou exposé à une
chaleur excessive. Afin d'éviter les risques de blessure, éviter d'exposer les accumulateurs
en plein soleil ou à une chaleur excessive.
• Ne jamais court-circuiter les accumulateurs en faisant entrer en contact un objet métallique
avec les bornes. Cela peut entrainer des explosions, des brûlures, des incendies ou autres
blessures corporelles.
• Ne jamais essayer de démonter ou de réparer l'adaptateur AC ou le chargeur. Cela peut
entrainer des chocs électriques. Contacter le centre de service autorisé Mag pour les
réparations.
• Ne jamais modifier la prise de votre adaptateur AC ou du chargeur. Si la fiche ne rentre pas
dans la prise de courant disponible, faire installer une prise de courant appropriée par un
électricien qualifié. Des chocs électriques peuvent se produire en cas de branchement sur
une prise de courant inappropriée.
ATTENTION:
•Des substances chimiques peuvent fuir des accumulateurs et peuvent entrainer des dégâts
au niveau de la peau, des vêtements ou de l'intérieur de la lampe torche. Pour éviter les
risques de blessure, ne jamais laisser ce qui fuit d'un accumulateur entrer en contact avec
les yeux ou la peau.
• Ne jamais chauffer ou essayer de démonter les accumulateurs car cela pourrait entrainer
une fuite d'électrolyte, source de corrosion. En cas de contact avec la peau, laver
immédiatement la zone affectée et consulter un médecin dès que possible.
• Ne jamais laisser de liquides se répandre sur l'adaptateur AC ou sur le chargeur, et ne pas
se servir du chargeur à l'extérieur car cet appareil n'est pas waterproof. Les expositions à la
pluie ou à d'autres liquides peuvent entrainer des incendies ou des chocs électriques.
OPRUDENCE:
• Ne jamais entreposer des gaz ou liquides inflammables ou des matériaux explosifs dans le
même compartiment que la lampe torche ou ses accessoires, car une étincelle éventuelle au
niveau de l'équipement pourrait être cause d'explosion ou d'incendie.
• Toujours remettre la lampe torche dans le chargeur lorsqu'elle n'est pas utilisée. Ne jamais
mettre la lampe torche sur le siège passager ou à un autre endroit dans la voiture où elle
pourrait se transformer en un projectile en cas de collision ou d'arrêt brusque.
• Ne jamais exposer les bornes des accumulateurs à des objets métalliques. Pour transporter
les accumulateurs sans lampe torche, les emballer ou les mettre dans un sac plastique, ou
recouvrir les bornes avec du ruban isolant.
• Ne jamais charger ou utiliser la lampe torche à proximité de matériaux inflammables.
• Ne pas recharger les accumulateurs dans des pièces étanches au gaz car l'hydrogène émis
dans certaines conditions peut exploser s'il est concentré et confiné.
• Ne pas opérer une lampe de poche sans capuchon et avec le voyant allumé et
exposé. Il pourrait en résulter des blessures personnelles ou l'endommagement des
matériaux sensibles à la chaleur, par exemple les matières plastiques, le caoutchouc,
les tissus, etc.
몇NOTIFICATION:
Afin de réduire les risques de dégât au niveau de votre lampe torche:
• Placer le câble d'alimentation de fa on à ne pas créer un risque de chute, et le placer à
l'écart des objets lourds et autres causes d'abrasion ou de stress.
14
421_493_Rech_Man_LED_WHS_0320.qxp_Layout 1 4/5/21 9:35 AM Page 15

• Ne jamais tirer sur le câble d'alimentation pour débrancher l'adaptateur AC. Saisir
directement la prise pour éviter d'endommager le câble.
• Débrancher l'adaptateur AC ou le chargeur de la source d'alimentation entre
chaque utilisation.
• Ne pas utiliser d'accumulateurs non-rechargeables dans votre lampe torche rechargeable.
• Utiliser seulement les accumulateurs rechargeables MAG® (modèle No. ARXX235)
ou équivalent.
• Toujours installer les accumulateurs avec le côté positif (+) du côté de la tête de la lampe
torche et le côté négatif (-) du côté de la queue.
• Pour un entreposage prolongé, retirer les accumulateurs et les entreposer à l'écart de la
lampe torche.
• Suivre soigneusement les étapes énumérées dans la partie "Inspection et entretien"
de ce manuel.
• Ne jamais essayer de démonter la lampe torche, ses composants ou ses accessoires.
Rapporter la lampe torche à un centre de service autorisé Mag pour toute prestation
de service.
• Toujours utiliser les accessoires et pièces de rechange Mag Charger®. Ne jamais
brancher la lampe torche sur un produit auxiliaire non-approuvé par Mag Instrument, Inc.
L'utilisation d'un accessoire non-autorisé et non-équivalent peut endommager le produit et
annuler votre garantie, et peut également provoquer des incendies, des chocs électriques ou
des blessures corporelles.
• L'exposition de la lampe de poche et de ses accessoires à des températures trop élevées
supérieures à 122 ˚F (50 ˚C) est susceptible de provoquer des dommages dus à la chaleur sur
des pièces en plastique, des composants électroniques et la batterie.
• Ne jamais ranger cette lampe de poche à des températures inférieures -4 ˚F (-20 ˚C). Les
composants électroniques de la lampe de poche risqueraient d'être endommagés.
• Systèmes 1, 3, et 6: L'adaptateur AC nécessite une source d'alimentation AC standard 120
V. Ou une source DC 12 V avec l'adaptateur allume-cigare en option.
• Systèmes 4 et 5: L'adaptateur AC nécessite une source d'alimentation AC standard 230 V.
Ou une source DC 12 V avec l'adaptateur allume-cigare en option.
• Cesser immédiatement toute utilisation si vous remarquez des changements au niveau des
accumulateurs, tels qu'une malformation ou une décoloration.
• Recharger la batterie à une température comprise entre 32 et 140 °F (0 et 60 °C) pour éviter
l'évacuation de gaz dangereux provenant des cellules de la batterie et une réduction
potentielle de la capacité de la batterie.
• Après un entreposage prolongé et/ou à des températures élevées, les accumulateurs NiMH
peuvent ne supporter qu'un chargement incomplet même avec un temps de rechargement
complet. Leur capacité revient à la normale après 1 à 3 cycles de
chargement/déchargement.
• Ne jamais utiliser un adaptateur AC ou un chargeur avec une prise ou un câble usé(e) ou
endommagé(e). Cela peut entrainer des chocs électriques, des brûlures ou des incendies.
Contacter le centre de service autorisé Mag pour en obtenir un de rechange.
• Afin d'éviter les risques de choc électrique, débrancher l'adaptateur AC ou le chargeur de
la source d'alimentation avant de le nettoyer.
PROTECTION DES ENFANTS
• Ce produit n'est pas con u, prévu ou recommandé pour les enfants.
• Ne pas laisser les enfants jouer, utiliser ou manipuler cette lampe torche, son accumulateur
ou son chargeur car ils risqueraient de se blesser ou de blesser d'autres personnes.
• Conserver tous les accessoires et composants hors de portée des enfants en bas âge. Les
enfants risquent de s'étrangler ou de s'étouffer, en particulier avec les petites pièces.
ÉLIMINATION DES ACCUMULATEURS
• Recouvrir les bornes métalliques avec du ruban isolant avant élimination, de fa on à éviter
les courts-circuits.
• Ne jamais jeter les accumulateurs au feu. Cela pourrait provoquer une explosion.
• Ne jamais jeter les accumulateurs avec les déchets ordinaires car ils contiennent des
substances toxiques.
• Toujours éliminer les accumulateurs usés conformément aux réglementations en vigueur
concernant l'élimination des déchets ménagers toxiques.
• Les accumulateurs scellés contiennent du nickel et de l'hydrure métallique et ils doivent
être recyclés ou éliminés correctement. Contacter les autorités locales concernant les
déchets solides pour obtenir des informations sur leur élimination ou recyclage.
• Mag Instrument, Inc. est fière de faire partie de la RBRC (Société de recyclage des piles
rechargeables). En recyclant les accumulateurs NiMH rechargeables,
vous soutenez l'effort visant à maintenir les accumulateurs NiMH hors
du flux de déchets solides. Lorsque vous jetez un accumulateur NiMH,
il finit éventuellement dans une décharge ou dans un incinérateur
municipal. En recyclant vos accumulateurs NiMH usés via le
programme de recyclage de Mag Instrument, vous contribuez à créer
un environnement plus sain et plus sûr pour les générations futures.
Pour plus d'informations sur RBRC,
rendez-vous sur www.rbrc.com.
www.maglite.com
1715
421_493_Rech_Man_LED_WHS_0320.qxp_Layout 1 4/5/21 9:35 AM Page 16

LA MARQUE DE VÉRIFICATION MONTRE LA COMPOSANTE COMPRISE DANS CHAQUE SYSTÈME
ART. NO. SYSTÈME 1 2 3 4 5
NO. NO. MODÈLE RL1019 RL2019 RL3019 RL4019 RL5019
1 Torche Rechargeable
2 Module de Charge
3 Pile Rechargeable
4 Convertisseur a.c. (120 Volts)
5 Adaptateur c.c. (12 Volts)
6
Convertisseur a.c. (230 Volts) (Euro)
(UK)
Convertisseur a.c. (240 Volts)
7
8Câble Droit Seulement (12 Volts)
(NiMH)
Contenu
Pour commencer . . . . . . . . . . . . . . . . . . 16
La lampe-torche . . . . . . . . . . . . . . . . . . . 17
Le berceau de charge . . . . . . . . . . . . . . . 18
Installation . . . . . . . . . . . . . . . . . . . . . . . . 19
La batterie . . . . . . . . . . . . . . . . . . . . . . . . 20
Fonctionnement – Obtenez le meilleur de
votre Système™ de lampe de poche
rechargeable (Mag Charger® LED
Rechargeable
Flashlight System) . . . . . . . . . . . . . . . . . . . 22
Foire Aux Questions . . . . . . . . . . . . . . . 23
Dépannage, Specifications et
accessoires, Inspection et
entretien . . . . . . . . . . . . . . . . . . . . . . . . 24
Renseignements sur la garantie . . . . . . 25
Pour commencer
Félicitations!
Vous venez de faire un investissement dans l'un
des instruments de précision les plus avancés de
la technologie d'éclairage.
Le système de lampe de poche rechargeable
Mag Charger® LED a été formulé pour sa
précision et sa qualité. Issu de nombreuses
années d'expérience dans le monde de précision
des machines-outils détaillées, nos lampes de
poche ont rapidement été reconnues pour leur
forme et leur fonction et surtout à votre niveau,
celui du consommateur, pour leur qualité et leur
fiabilité.
Veuillez consacrer quelques minutes à la lecture
de ce manuel pour vous familiariser avec le
système de lampe de poche rechargeable Mag
Charger® LED et garantir des années de service
et de satisfaction supérieurs.
Consultez le ta leau ci-joint pour o tenir le
numéro de modèle de votre produit et vérifier
lesquels des 8 articles suivants votre produit
contient :
1. Lampe-torche
2. Berceau de charge
3. Batterie rechargeable
(nickel metal hydride)
4. Convertisseur 120 volts (US)
5. Adaptateur 12 volts
(Automobile)
6. Convertisseur 230 volts (Euro)
7. Convertisseur 240 volts (UK)
8. Fil rectiligne 12 volts
(Automobile)
Systéme Rechargeable (LED / NiMH)
S
6 7
4
5
Remarque : L’article 7 n’est destiné qu’au Royaume-Uni.
3
16
1
8
Facultatif
2
421_493_Rech_Man_LED_WHS_0320.qxp_Layout 1 4/5/21 9:35 AM Page 17

Section 1 La lampe-torche
17
23
4
1
5
1. Assemblage de l'anneau avant (lentille
et réflecteur).
L'assemblage de l'anneau avant est amovible.
L'assemblage du réflecteur est scellé en usine et ne doit pas être retiré de
l'anneau avant (Fig. 1.). Lentille: La lentille en polycarbonate sur la lampe
torche Mag Charger® LED rechargeable fait partie intégrante du système
optique. Réflecteur: réflecteur métallisé scientifiquement conçu.
2. Tête de la lampe-torche.
La tête n'est pas
amovible; toute tentative pour l'enlever risque d'endommager sa
fonction. Réglage du faisceau: Faisceau rapidement ajustable. (Fig. 2.)
Une rotation d'un quart de tour de la tête suffit.
3. L'interrupteur
qui possède un mécanisme scellé et affleure à
la surface du cylindre permet d'accéder à 5 fonctions différentes : Pleine
Puissance,
É
conomie d'énergie,
Stroboscopie
(12x/sec), Eco et marche
Momentanée on/off.
4. Numéro de série. Le numéro de série est gravé de façon
permanente pour permettre l'enregistrement et l'identification de la
lampe-torche. Veuillez noter votre numéro de série pour pouvoir
vous y reporter ultérieurement. ____________________.
5. Finition durable L'ensemble cylindre et tête sont en
aluminium anodisé de dureté de type III utilisé pour les avions à
l'intérieur comme à l'extérieur. Avec un minimum de soins, votre
lampe de poche vous aidera à conserver la richesse de son
apparence noire. (Une exposition directe et constante au soleil
entraîne la décoloration de quasiment toute couleur.)
Fig. 2
Fig. 1
421_493_Rech_Man_LED_WHS_0320.qxp_Layout 1 4/5/21 9:35 AM Page 18

Si vous avez reçu votre système avec la lampe de poche montée dans le socle de
charge (fig. 3), retirez-en la lampe de poche en suivant ces étapes :
1. Tenez fermement le socle de charge dans une main (fig. 4) et prenez la lampe
de poche de l'autre. 2. Exercez une pression ferme vers le bas avec le pouce sur
le socle tout en tirant rapidement sur le cylindre avec les quatre autres doigts
pour le libérer.
Pour remettre la lampe de poche dans le socle de charge,
procédez selon les étapes suivantes : suivez ces étapes pour
replacer la lampe (fig. 5). 1. Placez l'extrémité avant de la
lampe dans l'extrémité avant du socle de charge en l'orientant
selon un léger angle. 2. Tenez le socle de charge et le devant
de la lampe d'une seule main. 3. Appliquez une pression vers
le bas sur la partie du cylindre de la lampe jusqu'à ce qu'elle se
mette en place.
Une fois montée sur un mur ou dans un véhicule, vous
trouverez cette technique très simple pour retirer ou remettre
la lampe torche dans le chargeur.
Berceau de charge
Fabriqué à partir de thermoplastique de calibre technique, cette unité de
socle de charge possède de nombreuses fonctionnalités. L'entrée peut
être de 12 à 14 volts (installations automobiles) ou 120-240 volts secteur
lorsqu'il est utilisé avec un convertisseur de charge à l'intérieur.
Remarque : Tous les composants électriques sont conçus pour des
circuits de 12-14 volts c.c. N'UTILISEZ PAS DE CIRCUITS C.C. DE 24
VOLTS. La chaleur excessive qu'ils créeraient enflammerait ou ferait
fondre les composants.
Section 2 Le berceau de charge S
18
Fig. 3 Lampe-torche dans le berceau de charge
Vert/rouge/orange
Voyant LED Berceau de charge
Fig. 4
Fig. 5
421_493_Rech_Man_LED_WHS_0320.qxp_Layout 1 4/5/21 9:35 AM Page 19

S Section 3
19
Installation
Une installation typique
1. Repérez et montez le socle en utilisant la vis et les chevilles appropriées
pour l'emplacement et le matériel.
2. Fixez l'extrémité du cordon d'alimentation c.c. ou le convertisseur c.a. au
socle de charge en insérant la prise ronde dans le port de connexion
d'alimentation sur le côté du socle de charge.
Remarque : pour débrancher les prises, saisissez la prise par le corps sans
jamais tirer sur le cordon.
OATTENTION : s'assurer que le câ le ne puisse pas être pincé. Si le câble
est pincé, il peut causer immédiatement un court-circuit et les fils peuvent
surchauffer, faire fondre le plastique et créer un risque d'incendie.
Fig. 19
Fil de masse (-)
(noir)
Câble positif (+)
(Rouge)
Fusibles commutés par allumage
Côté masse du fusible
Cordon du berceau de charge
Radio
Chauffage
Accessoire
Remarque : Pour une protection optimale de l'appareil de recharge, il est
recommandé d’installer un fusible de type 1 A dans le câble rouge (+).
Le berceau de charge
Raccordement direct–Installation pour véhicule – 12-14 volts seulement (ne convient pas aux
systèmes de 24 volts)
Le cordon d’alimentation A 4’ est fourni pour permettre le câblage direct du système rechargeable (Fig. 19). Mag
Instrument recommande de n'utiliser qu’un circuit à contact d’allumage (avec fusibles), et de préférence l’intensité la plus basse possible (5 A au
maximum). Il s’agit le plus souvent de la radio ou du fusible. Le fil rouge (plus) est connecté à la sortie du fusible, et le câble de terre noir (moins) doit
être branché sur une partie métallique du châssis, lequel sert de retour par la terre de la batterie.
1 AMP
(Voir Remarque)
Port d'alimentation
Fig. 11
421_493_Rech_Man_LED_WHS_0320.qxp_Layout 1 4/5/21 9:35 AM Page 20
This manual suits for next models
4
Table of contents
Languages:
Other MAG Flashlight manuals
Popular Flashlight manuals by other brands

Miller
Miller SMITH EQUIPMENT HANDI-HEET owner's manual

Nitecore
Nitecore Chameleon CG7 user manual

Wicked lasers
Wicked lasers FlashTorch User's manual and safety guide

NightSearcher
NightSearcher SAFATEX HT PRO user manual

Clas Ohlson
Clas Ohlson 36-3497/18-1080 quick guide

RovyVon
RovyVon Aurora A8 quick start guide