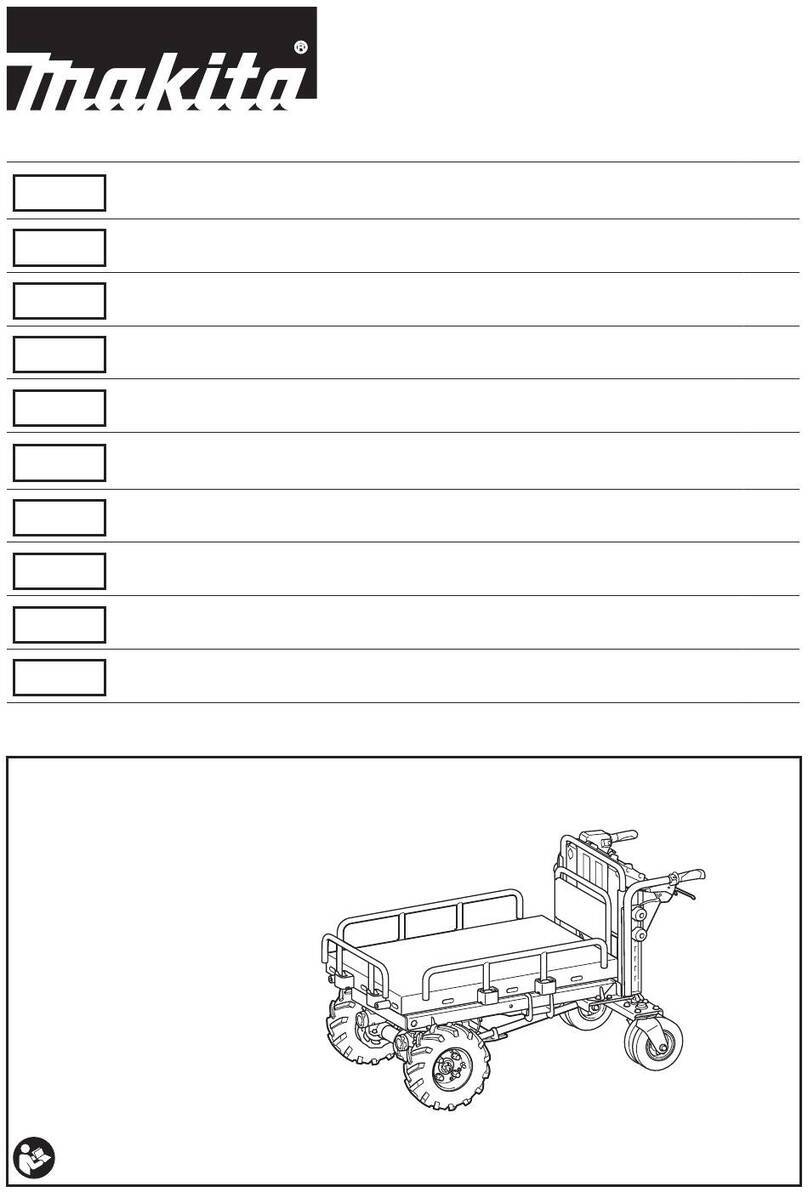
Magliner MGA81G16-3 User manual

1-800-MAGLINE (624-5463) www.magliner.com
1
Date of Purchase: ________________________
Serial Number: ________________________
Motorized Gemini
Owner’s Manual
1. Read the Owners Manual thoroughly before first use.
2. Charge the Motorized Gemini for six hours before using it for the first time. If the battery
completely discharges, recharging may take up to 18 hours. See pages 5-6 for battery and
charging information.
Important Startup Instructions
Model Number: MGA81G16--3

1-800-MAGLINE (624-5463) www.magliner.com
2
Table of Contents
General Safety Instructions ....................................................................................................... 3
Startup Instructions.................................................................................................................... 3
Motorized Gemini....................................................................................................................... 4
Battery Information .................................................................................................................... 5-6
Charging the Battery .................................................................................................................. 6
Converting Between 2- and 4-wheel Positions ........................................................................ 7
Motorized Gemini Drive System............................................................................................... 8
Reverse Operation...................................................................................................................... 9
Pre-Trip Inspection ..................................................................................................................... 9
Storage and Transport............................................................................................................... 9
Slopes and Inclines .................................................................................................................... 10-11
Using the Motorized Gemini .................................................................................................... 12-13
At the End of the Day ................................................................................................................. 13
Preventative Maintenance ......................................................................................................... 14
Wiring Diagram .......................................................................................................................... 15
Troubleshooting Guide .............................................................................................................. 16
Warranty
Magliner products have a one (1) year warranty unless otherwise specified from the date of
purchase against defects in workmanship or material. Any part or component, except items covered
by warranties of other manufacturers, returned to the factory or service center freight prepaid
by the owner, found upon examination by Magline, Inc. to be defective or the result of improper
workmanship by the factory will be repaired or replaced without charge and returned to the owner
freight prepaid by Magline, Inc.
Alterations of Magliner products void any warranty or liability on the part of Magline, Inc.
Magline, Inc. does not guarantee product capacity if alterations are made.

1-800-MAGLINE (624-5463) www.magliner.com
3
Thank you for your purchase! If you have any questions regarding your new Magliner product
please call our customer service department at 1-800-MAGLINE (624-5463) or (989) 512-
1000. Please read this manual thoroughly to become familiar with the safe operation and
maintenance of your new Motorized Gemini.
General Safety Instructions
• Inspect before each use for damaged and loose fasteners/connections.
• Inspect the unit for cracks, wear or damage. Replace damaged components
immediately.
• Keep hands and feet away from all moving parts.
• When unattended, leave the power switch in the off position.
• Operate at a safe speed; go only as fast as safety considerations allow.
• Do not use this product to transport people.
• When using a lift gate, turn the power switch to the OFF position and lock the caster
brakes.
• Do not drive off curbs or ledges higher than one inch. An aluminum walk ramp must
be used to overcome obstacles over one inch.
• Never use on a moving vehicle.
• Always stand beside the machine walking forward while operating in reverse. Never
walk backwards with machine.
• Never exceed rated capacity, especially on ramps or hills. Damage to the Gemini and
personal injury could result.
• Do not operate when the battery charger is plugged in.
• Never attempt to open the battery. If the battery is cracked or leaking, do not
recharge it - it must be replaced.
• Always use a Magliner battery charger to charge your battery.
1. Fully charge battery before first use, and charge the battery after each use to
prevent total battery discharge and to maximize battery life.
2. Read manual thoroughly before first use.
Startup Instructions
General Machine Care
• Charge the machine in a dry place, preferably at 50 degrees F or warmer
• Wash machine with warm soapy water. Do not use pressure washers.
• Do not drive Gemini through more than 2” of water, and never submerge drive
system or battery box.
• Drive system is lubricated for life, so no maintenance is required for drive system.

1-800-MAGLINE (624-5463) www.magliner.com
4
U-Loop Handle
Drive Wheel and
Tire Assembly
Throttle/Speed
Control
Charge Port
Nose Battery Box
Assembly
On/Off Switch
General Specifications 2-Wheel
Position
4-Wheel
Position
Capacity 500 lbs 1,000 lbs
Max speed - 4.3 mph
Weight 100 lbs 100 lbs
Overall height 66.5 inches 49 inches
Overall width 20.75 inches 20.75 inches
Overall depth 18 inches 62.25 inches
Usable platform length - 50.5 inches
Operating temperature* -20 to 120°F -20 to 120°F
*NOTE: When the outside temperature is below 30°F the Gemini ConvertibleTruck should not be left inside the
truck overnight and should never be left inside a freezer or a cooler for extended periods of time. Extended
exposure to subfreezing temperatures will adversely affect Gemini performance and increase cycle time.
Battery Specications
Voltage 24v (two 12v battery cells)
Battery cells Sealed lead acid -
maintenance free
Caster
Folding
Nose
(Opt.)
B-Handle
Motorized Gemini

1-800-MAGLINE (624-5463) www.magliner.com
5
General Battery Warnings
• Do not connect accessories to the battery; this will cause premature battery failure.
• Unauthorized modification could create a hazardous condition and result in serious injury.
• Batteries contain sulfuric acid, which can burn eyes, skin, clothes, etc. Use caution! Always
wear gloves when working with batteries. If contact occurs, flush immediately with water
and get medical attention. Protect surfaces from battery damage by placing batteries on
rubber or acid-safe plastic surfaces.
• Never place a battery near an open flame or heat.
• To prevent electrical shock, do not touch non-insulated parts of the charger output
connectors, battery connectors or battery terminals. Do not use connectors that are
cracked, corroded, or do not make adequate electrical contact. Use of damaged or defective
connectors could result in fire or electrical shock.
• Keep sparks, flame and smoking materials away from batteries.
• Batteries can supply a large amount of current. Do not wear jewelry or watches when
working on the batteries.
General Charging Warnings
• Use only the Magliner 24V charger designated for use with the Motorized Gemini.
Charge using a 110V electrical outlet.
• Do not operate the unit when the battery charger is plugged in.
• Turn the unit Off while charging.
• Do not expose charger to rain or snow.
• Store the charger in a dry, clean place.
• Use the charger only in a dry, well ventilated room without flammable fluids or
explosive gases.
• Make sure the cord is located such that it will not be a trip hazard or otherwise subject
to damage or stress.
• Do not operate a charger with a damaged cord or plug – replace immediately.
• Unplug the charging unit from the AC power supply source before attempting any
maintenance or cleaning.
• Always use battery chargers supplied by Magline, Inc. Other battery charging units
could cause damage to your batteries or personal injury.
• To avoid damage to battery charger connectors and cords, disconnect by grasping the
plug body and pulling it straight out of the outlet or receptacle. DO NOT pull on the
cord. DO NOT twist, rock, or pull the connector sideways.
• The metal tip on the end of the plug may be hot when it is first unplugged.
Battery
This product contains two non-spillable AGM lead-acid batteries. The battery must be charged for a
minimum of six hours before using it the first time. If the battery completely discharges, recharging
may take up to 18 hours. When not in use, it is recommended to keep the battery plugged in
to maintain a maximum charge and extend the battery life. The charger will not overcharge the
batteries.
!
!

1-800-MAGLINE (624-5463) www.magliner.com
6
Charging the Battery
The Motorized Gemini is provided with an off-board
24
V charger. To charge the machine, plug one
end of the charger into a
110
V wall outlet, and the other end into charger port. An LED light on the
charger will blink (or turn amber or red) while the unit is charging. When the unit is completely
charged, the light will turn solid green. For optimum performance, charge in temperatures from
50-
100
degrees F.
It is essential that the Motorized Gemini be kept on a charger whenever it is not in use; the batteries
will not overcharge. Before use, unplug the charger from the Motorized Gemini by carefully pulling
the connector out of the charger port in the throttle. Install the dust cover boot over the plug
connector on throttle to keep the charger port clean.
Battery Care
• Store and charge the Motorized Gemini at temperatures between 50 and 100 degrees F.
• Always keep the machine on charge. Batteries stored for long periods of time will self-
discharge and may get so low, that the charger cannot recharge them.
• Keep the terminals clean and tight.
• Handle the batteries with care.
• The batteries may require 4-10 charge/discharge cycles until batteries charge up to their full
potential.
• DEEP DISCHARGE ON A CONTINUAL BASIS WILL SHORTENTHE SERVICE LIFE OFTHE
BATTERIES.
• Battery performance may be reduced when operating in temperatures less than 40 degrees
F. You should anticipate a range reduction by 50% or more when operating at temperatures
below 32 degrees F.
Charger port for
onboard charging
*Battery has a warranty of six (6) months
Battery Life
The Motorized Gemini is powered by a 24V system using two non-spillable 12V AGM
lead acid batteries connected in series.* A fully-charged battery pack will last at least one
typical day; however, extreme temperature ranges and extreme loads can have an effect
on the amount of power available during one charging cycle. You will know that your
batteries need replacing when you notice diminished range or operational time.

1-800-MAGLINE (624-5463) www.magliner.com
7
Converting Between 2- and 4-wheel Positions
Note: Be sure to allow adequate room on a flat, clear surface for converting the convertible truck
between 2- and 4-wheel positions.
!
Caution: While converting the truck between the 2- and 4-wheel positions, take care to keep
hands out of the way of moving parts.
From 2-wheel to 4-wheel:
1. Hold the truck securely with one hand on the B-handle and the other hand on the top frame cross
member; press release latch (see Figure 1).
2. Keeping the B-handle as perpendicular to the ground as possible, slide the frame down the
B-handle until the handle plate rests on the spreader rod (see Figures 2 and 3).
3. You are now ready to use the convertible truck in the 4-wheel position.
Figure 1 Figure 2 Figure 3
From 4-wheel to 2-wheel:
1. Place one hand securely on the B-handle and the other hand on the top frame cross member
2. Keeping the B-handle as perpendicular to the ground as possible, begin to slide the frame up the
B-handle (see Figure 5). Continue lifting the frame to the top of the B-handle as you orient the
frame so that it becomes perpendicular to the ground (see Figures 5 and 6).
3. With the truck wheels and nose resting squarely on the ground, swing the bottom of the B-handle
toward the cart frame so that the spreader rod locks firmly in place with the latch/lock assembly
(see Figure 6)
4. You are now ready to use the convertible truck in the 2-wheel position
Figure 4 Figure 5 Figure 6

1-800-MAGLINE (624-5463) www.magliner.com
8
Manual Mode (Free Wheeling)
The drive system is equipped with a lever that overrides the electromechanical brake for
manually pushing the Motorized Gemini. This option should only be used if the batteries are
too low to drive the system, or if the drive system becomes inoperable. To disengage the
brake, push the lever down until it clicks into the disengaged position.
With the brake in the disengaged position, the ON/OFF switch MUST be turned off, or the
drive system will not move freely. The controller WILL NOT operate the motor when the
brake is disengaged. This is a safety lock-out that prevents the operation of the machine
when the electromechanical brake on the transaxle has been manually released.
Brake Lever
(at the end of the
transaxle on RH side)
Automatic Electronic Braking
The drive system features regenerative braking by which the electronic controller uses the
motor to slow down the machine in both forward and reverse directions. To slow down the
machine, reduce throttle input, or release the throttle lever, and the machine will brake to a
stop.
While driving downhill, this feature allows direct control over the speed of the machine,
as long as the load on the machine does not exceed the design parameters. In addition,
the drive system is equipped with an electromechanical park brake, which is automatically
engaged when throttle input is zero.This locks the machine in place until there is throttle
input from the operator, or the operator manually overrides it in manual mode (see below).
Motorized Gemini Drive System
NOTE: A safety feature called “push too fast” will aggressively slow the
machine down if the machine begins to move too quickly with the brake
released and the power switch off. Its purpose is to avoid a run-away situation
if the operator forgets to re-engage the brake.
!

1-800-MAGLINE (624-5463) www.magliner.com
9
Reverse Operation
While operating the Motorized Gemini in reverse in the 4-wheel position, DO NOT stand
behind the unit driving it toward you looking over your shoulder. The proper way to operate
the unit in reverse is to STAND BESIDETHE UNIT. DO NOT operate the Motorized Gemini in
reverse while in the 2-wheel position
The Gemini can be stored in any position as the batteries are sealed and there are no fluids
to leak out. The most common (and suggested) storage orientation is unloaded (empty)
in the 4 wheel position and placed on charge. Leaving the Gemini loaded for an extended
period of time is not suggested.
The most common orientation for transporting a Gemini onboard a truck is in the 2-wheel
position while secured to the truck BEFORE any transportation takes place.
Storage and Transportation
Correct Incorrect
Pre-Trip Inspection
1. Before each use, check for damaged or missing components. Replace damaged or
missing components immediately with Magliner replacement parts.
2. Check all fasteners, and make sure to tighten or replace loose or missing hardware.
3. Unplug the charger from the Motorized Gemini by carefully pulling the connector out of
the charger port in the throttle. Install the dust cover boot over the plug connector on
throttle to keep the charger port clean. Store the charger in a dry, clean place.
4. Always check that the propulsion system is functioning properly before beginning the day;
with the unit On, test that the unit moves forward and backward with propulsion.
5. With the unit turned Off, release the park brake and push or pull the Motorized Gemini to
make sure it is functioning properly in manual mode. Then reengage the transaxle.

1-800-MAGLINE (624-5463) www.magliner.com
10
Slopes and Inclines
The Motorized Gemini can carry up to 1,000 lbs. max under propulsion up to an 8 degree incline or
decline. If the degree of incline is steeper than 8 degrees under full load, you can simply assist the
climb with a slight push to assist the drive system.
The use of Motorized Gemini on self-contained or portable truck ramps requires extreme caution
and care. The Motorized Gemini is capable of climbing the curb of most ramps used in these
applications which could result in damaged product, damage to the Motorized Gemini, and/or an
operator injury.The Motorized Gemini is also capable of carrying loads in excess of most ramps
rated capacities. Such a condition may create ramp overloading which may cause ramp failure
resulting in damaged product, damaged equipment, and the potential for personal injury. Ramps
must be correctly and securely attached to the truck or trailer body. The absence of a smooth
transition between ramp and trailer may cause the operator to lose control or the Motorized Gemini
to perform improperly.
Ramp use requires special attention to the operating environment. Inclement weather and foreign
substances on the ramp may affect the performance and ability to operate safely. This is especially
true in restaurant deliveries where a potential exists of substances being transferred to the ramp
surface.
Battery life will be diminished when used to climb ramps fully loaded. The additional current draw
will affect overall battery life.
The following list of recommended operating methods is not intended to cover all instances or
applications, but rather address general practices to consider when using a Motorized Gemini in
conjunction with trucks and truck ramps.Your own personal experiences and the specific terrain at
each delivery site or location should dictate the specific operating methods employed.

1-800-MAGLINE (624-5463) www.magliner.com
11
Ascending
Do: Discontinue throttle use if wheels contact side rail of ramp.
Secure load to Motorized Gemini.
Be sure Motorized Gemini is aligned with ramp upon entering for ascent. This will
help prevent the Motorized Gemini from running off ramp when entering the ramp.
Use throttle to maintain a safe speed at all times.
Ensure casters are aligned for forward travel.
Make sure combined weight of operator and loaded Motorized Gemini does not
exceed manufacturer’s ramp capacity. The Motorized Gemini weighs 100 lbs.
Use extra caution in inclement weather or when the ramp may be slippery.
Be sure ramp and exit area is clear of any obstruction.
Be sure apron of ramp is flat on ground.
Make sure ramp is properly secured to truck trailer per ramp manufacturer
instructions.
Be sure footwear is appropriate for inclined surfaces.
Be sure load is evenly distributed or load is more toward drive wheels (see the
Models section).
Always be aware of the location of the end of the ramp.
Avoid loose or sagging bundles as they may catch on the curb ends of the ramp.
Drive wheel should always lead in direction of travel (see Specifications section).
Don’t: Change direction while on ramp.
Switch to neutral freewheel while in middle of ramp.
Stop abruptly while on ramp.
Descending
Do: Be sure transaxle is engaged before descending ramp.
Discontinue throttle use if wheels contact side rail of ramp.
Secure load to Motorized Gemini.
Be sure Motorized Gemini is aligned with ramp upon entering for descent. This will
help prevent the Motorized Gemini from running off ramp when entering the ramp.
Make sure combined weight of operator and loaded Motorized Gemini does not
exceed manufacturer’s ramp capacity. The Motorized Gemini weighs 100 lbs.
Use extra caution in inclement weather or when the ramp may be slippery.
Be sure ramp and exit area is clear of any obstruction.
Be sure apron of ramp is flat on ground.
Be sure footwear is appropriate for decline surfaces.
Be sure load is evenly distributed or load is more toward drive wheels (see the
Specifications section).
Always be aware of the location of the end of the ramp.
Avoid loose or sagging bundles as they may catch on the curb ends of the ramp.
Drive wheel should always lead in direction of travel (see Specifications section).
Don’t: Change direction while on ramp.
Switch to neutral freewheel while in middle of ramp.
Exceed the open height of the trailer when loading Motorized Gemini.
Stop abruptly while on ramp.

1-800-MAGLINE (624-5463) www.magliner.com
12
Moving with Propulsion
1. To use propulsion, be sure that the motor’s brake lever is in the up position to engage
the transaxle.
2. Turn the unit On. Check to be sure surroundings are clear.
3. Pull the throttle lever toward you to move in reverse; push the throttle away from you
to move forward.
4. To increase the speed, push or pull the throttle lever further away from home
position.
5. To slow the unit, move the throttle lever closer to home position.
6. When you release the throttle lever, the unit will slowly come to a complete stop and
the park brake will engage.
7. The Motorized Gemini will slow to a stop and park in place even on an incline, as
long as the load on the Motorized Gemini does not exceed capacity.
Using the Motorized Gemini
On/Off Switch
1. Turn the rocker switch to ON position.
2. If the switch is left on for approximately 20 minutes without use, the controller goes into
a power save mode (sleep mode).
3. To wake the controller, cycle the rocker switch to the off position for 2 seconds, and then
back to the on position.
Variable Speed Control
Moving the throttle lever increases speed in proportion to how far you pull or push it – the
further you move away from home position, the faster you go forward or reverse. The
maximum speed is approximately 4.3 mph.
Releasing the lever will automatically return it to zero, commanding the controller to slow
down and stop the machine, locking it in place.
Reverse
Forward
On/Off
Switch

1-800-MAGLINE (624-5463) www.magliner.com
13
Considerations When Using Propulsion
• It is recommended to get comfortable operating the truck with and without a load. Care
should be taken with a load to become comfortable and aware of how the added weight
responds to acceleration, deceleration, slopes and turning corners.
• When turning tight corners, keep the unit close to the turn in the direction of travel; for
example, when turning right, keep the unit close to the turn on the right. When turning
left, keep the unit close to the turn on the left.
• Always operate the Motorized Gemini only as fast as safety considerations allow.
• Extra stopping distance may be required with a load.
• Use extra caution when moving loads on ramps or moving loads in reverse as
described on pages 9-11.
• Do not drive the Motorized Gemini through more than 2 inches of water, and never
submerge the drive system or battery box.
• Do not drive off curbs or ledges higher than one inch. An aluminum walk ramp must be
used to overcome obstacles over one inch.
• While unattended, turn the unit off.
At the End of the Day
1. Make sure the Motorized Gemini is unloaded.
2. While unattended, turn the unit Off.
3. The Motorized Gemini when batteries are installed should be stored and charged indoors
and in a dry environment. To maximize battery life and minimize charge time, tempera-
tures should be between 50 to 100 degrees Fahrenheit.
4. Charge the batteries as soon as possible upon returning with the Motorized Gemini from
use. Charge daily or after every use in a dry, well ventilated area away from sparks, heat
and flames. Do not use an extension cord if possible, and do not use the charger if the
cord is damaged.

1-800-MAGLINE (624-5463) www.magliner.com
14
Preventative Maintenance
Area Inspection Frequency Procedure/Normal Condition
Drive Wheels Daily Inspect wheels and tires for wear and cracks.
Fasteners Daily Tighten any loose hardware.
Electrical Daily Check coiled control cord for any damage.
Electrical Daily Check for loose electrical connections.
Battery Charging Daily Red, amber or green charging light should turn on
when charging.
Casters Daily Inspect for wear; clean dirt and debris.
Transaxle Daily
Transaxle should be kept free and clear of debris.
When stored, the transaxle lever should be kept
in powered mode with the power OFF to keep unit
from rolling freely.
Drive Wheels As needed Apply thin film of anti-seize to transaxle wheel
shafts with wheels removed.

1-800-MAGLINE (624-5463) www.magliner.com
15
Wiring Diagram
MAGLINE, INC.
1205 W CEDAR STREET
STANDISH, MI 48658
(P) 800-624-5463
(F) 800-968-7504
WWW.MAGLINER.COM
BATTERY A
12 V
G
BATTERY B
12 V
+ -
BATT MOTOR
12
14
5
13 12 11 10 9
43 2
8
6
71
+ -
+ -
CB
35
MOTOR
BRAKE
COIL
2 1
3THROTTLE
POT
ON OFF
SWITCH
CONNECTOR
A
CONNECTOR B
CONTROLLER
CHARGE
PORT
FEMALE
1 2
3
CHARGE PLUG MALE
+26-27 VDC ACROSS
PINS 1 AND 2
BATTERY POWER SUPPLY
+24 -25 VDC WHEN FULLY
CHARGED
(MIN 20 VDC REQUIRED)
24V SYSTEM
WIRING DIAGRAM
BRAKE SWITCH
(SHOWN IN DISENGAGED POSTION)
14-PIN MOLEX4-PIN MOLEX2-PIN MOLEX

1-800-MAGLINE (624-5463) www.magliner.com
16
Troubleshooting
Problem Possible Causes Remedy
Motor does not run
Power switch in OFF position
Controller in sleep mode
Batteries are drained
Motor brake lever released on drive
system
Electrical fault
Turn switch to ON position
Cycle switch, OFF 2 sec, then ON
Recharge batteries
Re-engage motor brake on drive system
Unplug, then plug in both motor and throttle
connectors
Motor shuts off
during use/abruptly
stops
Circuit breaker has tripped
Controller trip due to thermal
overload (weight and/or climb
angle may exceed controller
capacity)
Broken motor wire or connector
Push circuit breaker to reset
Release throttle, allow controller to cool down
at least 30 seconds. Unload some weight,
cycle power switch, operate machine again.
Check motor wires and brake wires to make
sure none are broken, and also check connector
to make sure wires are secure in connector
Insufficient range
Hilly or soft terrain
Batteries not “broken in”
Cold batteries
Battery not fully charged
Damaged, old batteries
Push to assist drive system
Charge and discharge 4-10 times before
optimum range
Keep batteries warm
ALWAYS keep machine on charge when not in
use
Replace batteries
Machine slows down
aggressively while
in manual release
mode
“Push too fast” safety feature Do not push machine so fast while in manual
release mode (see Manual Mode section)
It is difficult to
transition between
2- and 4-wheel
positions
B-handle may be bent
Burrs on the B-handle
Pivot sockets are damaged
Replace B-handle if damaged
File or sand the B-handle smooth or replace the
B-handle
Replace pivot socket(s) if damaged
The Gemini will not
latch when in the
2-wheel position
Latch components or latch rod are
damaged
Latch component mounting screws
are loose.
Replace worn, damaged or missing
components
Tighten any loose hardware

1-800-MAGLINE (624-5463) www.magliner.com
17
MAGLINE® INC.
1205 West Cedar Street
Standish, Michigan 48658 USA
1-800-MAGLINE (624-5463)
Email: customerservice@magliner.com
www.magliner.com
©2018-2021 Magline, Inc. REV 05/21
B9433
Table of contents
Other Magliner Outdoor Cart manuals

Magliner
Magliner Coolift CPA Series User manual

Magliner
Magliner Powered Stair Climber Operating instructions

Magliner
Magliner Caddy Cart User manual

Magliner
Magliner Hand Truck User manual

Magliner
Magliner 4-WHEEL ARISTOCART User manual

Magliner
Magliner HMK111AA15 User manual

Magliner
Magliner GEMINI XL User manual

Magliner
Magliner BS-MLS User manual

Magliner
Magliner HD Series User manual