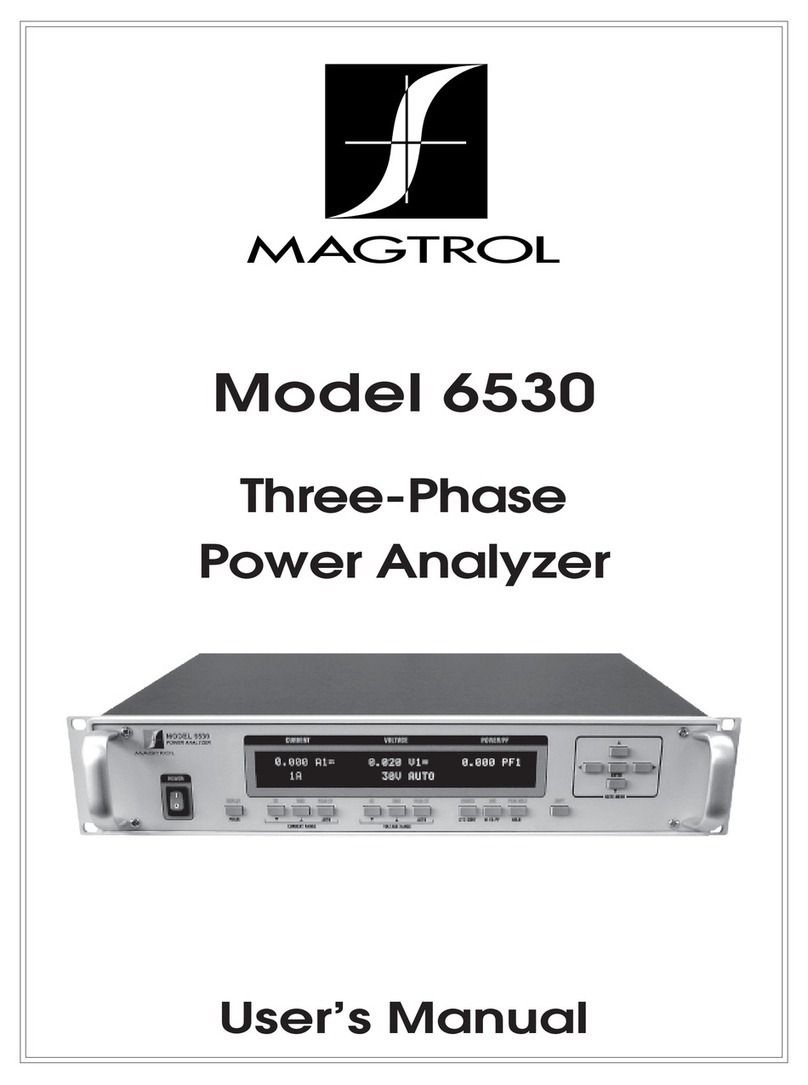
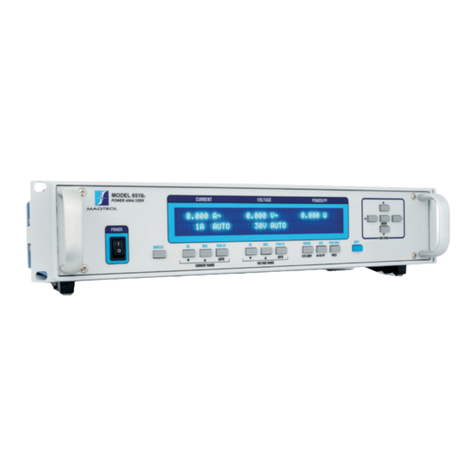
Magtrol 7500 SERIES User manual

7500 Series
Power Analyzer
User’s Manual

1st Edition – October 2017
While every precaution has been exercised in the compilation of this document to
ensure the accuracy of its contents, Magtrol, Inc. assumes no responsibility for errors or
omissions. Additionally, no liability is assumed for any damages that may result from the
use of the information contained within this publication.
COPYRIGHT
Copyright ©2017 Magtrol, Inc. All rights reserved.
Copying or reproduction of all or any part of the contents of this manual without the
express permission of Magtrol is strictly prohibited.
TRADEMARKS
LabVIEW™ is a trademark of National Instruments Corporation.
National Instruments™ is a trademark of National Instruments Corporation.
Windows® is a registered trademark of Microsoft Corporation.
Purchase Record
Please record all model numbers and serial numbers of your
Magtrol equipment, along with the general purchase information.
The model number and serial number can be found on either
a silver identification plate or white label affixed to each unit.
Refer to these numbers whenever you communicate with a
Magtrol representative about this equipment.
Model Number: _____________________________
Serial Number: _____________________________
Purchase Date: _____________________________
Purchased From: _____________________________

i
1. Make sure that all Magtrol dynamometers and electronic products are earth-grounded, to ensure
personal safety and proper operation.
2. Securely ground the 7500 Series Power Wattmeter case by connecting a good earth ground at
the ground stud located on the rear panel of the unit. Use a number 12 AWG, or larger wire.
3. Check line voltage before operating.
4. Make sure that dynamometers and motors under test are equipped with appropriate safety
guards.
Safety Precautions

ii
The contents of this manual are subject to change without prior notice. Should revisions be necessary, updates to all
Magtrol User’s Manuals can be found at Magtrol’s web site at www.magtrol.com/support/manuals.htm.
Please compare the date of this manual with the revision date on the web site, then refer to the manual’s Table of
Revisions for any changes/updates that have been made since this edition.
REVISION DATE
1st Edition – October 2017
Revisions To This Manual

iii
Table of Contents
SAFETY PRECAUTIONS .........................................................................................................................I
REVISIONS TO THIS MANUAL ...............................................................................................................II
REVISION DATE.................................................................................................................................................................II
TABLE OF CONTENTS ..........................................................................................................................III
TABLE OF FIGURES ......................................................................................................................................................... V
PREFACE............................................................................................................................................... VI
PURPOSE OF THIS MANUAL ........................................................................................................................................VI
WHO SHOULD USE THIS MANUAL.............................................................................................................................VI
MANUAL ORGANIZATION............................................................................................................................................VI
CONVENTIONS USED IN THIS MANUAL ..................................................................................................................VII
1. INTRODUCTION ................................................................................................................................1
1.1 UNPACKING YOUR 7500 SERIES POWER ANALYZER ........................................................................................ 1
1.2 NEW FEATURES OF THE 7500 SERIES POWER ANALYZER .............................................................................. 1
1.3 DATA SHEET................................................................................................................................................................ 2
2. CONTROLS.........................................................................................................................................6
2.1 FRONT PANEL............................................................................................................................................................. 6
2.2 FRONT PANEL CONTROLS AND BUTTONS.......................................................................................................... 6
2.2.1 ENABLING SECONDARY FUNCTIONS.................................................................................................... 7
2.2.2 USING FRONT PANEL CONTROLS AND BUTTONS .............................................................................. 7
2.3 VACUUM FLUORESCENT DISPLAY (VFD)............................................................................................................ 9
2.3.1 CONTRAST SETTINGS................................................................................................................................ 9
2.3.2 DISPLAY GUIDE......................................................................................................................................... 10
2.4 REAR PANEL............................................................................................................................................................. 11
2.5 REAR PANEL INPUTS AND OUTPUTS.................................................................................................................. 11
3. INSTALLATION/CONFIGURATION..................................................................................................14
3.1 POWERING UP THE 7500 ........................................................................................................................................ 14
3.1.1 LINE VOLTAGE ........................................................................................................................................... 14
3.1.2 DISPLAY SEQUENCE ................................................................................................................................ 14
3.1.3 MAIN MENU ............................................................................................................................................... 15
3.2 PROTECTING YOUR 7500 ....................................................................................................................................... 16
3.2.1 TRANSIENT OVERLOADS........................................................................................................................ 16
3.2.2 CURRENT OVERLOAD ............................................................................................................................. 16
3.2.3 SURGE PROTECTION ................................................................................................................................ 16
3.2.4 CIRCUIT BREAKERS................................................................................................................................. 17
3.3 TESTING INSTRUMENTATION SETUP ................................................................................................................. 18
3.3.1 WIRING MODE ........................................................................................................................................... 18
3.3.2 MEASUREMENT FILTER .......................................................................................................................... 24
3.3.3 EXTERNAL SENSOR ................................................................................................................................. 25
3.3.4 AMP SCALING............................................................................................................................................ 27
3.3.5 VOLTS SCALING ........................................................................................................................................ 29
3.3.6 PHASE SETUP............................................................................................................................................. 30

iv
Magtrol 7500 Series Power WattmeterTable of Contents
3.3.7 SPECIAL FUNCTIONS ............................................................................................................................... 31
4. OPERATING PRINCIPLES ...............................................................................................................33
4.1 ANALOG PROCESSING ........................................................................................................................................... 33
4.1.1 VOLTS .......................................................................................................................................................... 33
4.1.2 AMPS............................................................................................................................................................ 34
4.1.3 EXTERNAL SHUNT ................................................................................................................................... 35
4.2 DIGITAL PROCESSING............................................................................................................................................ 35
4.2.1 AC DETAILS ................................................................................................................................................ 36
4.2.2 DC DETAILS................................................................................................................................................ 38
4.3 MEASUREMENT MODES........................................................................................................................................ 38
4.3.1 PEAK ........................................................................................................................................................... 38
4.3.2 PEAK HOLD / INRUSH CURRENT........................................................................................................... 40
4.3.3 DC ................................................................................................................................................................. 40
4.3.4 RMS .............................................................................................................................................................. 41
4.3.5 CREST FACTOR .......................................................................................................................................... 41
4.4 MEASUREMENT METHODS .................................................................................................................................. 41
4.4.1 CYCLE-BY-CYCLE MODE ........................................................................................................................ 41
4.4.2 CONTINUOUS MODE................................................................................................................................ 41
5. COMPUTER CONTROLLED OPERATION ......................................................................................42
5.1 ABOUT THE GPIB INTERFACE.............................................................................................................................. 42
5.1.1 INSTALLING THE GPIB/IEEE-488 CONNECTOR CABLE.................................................................... 42
5.1.2 CHANGING THE GPIB PRIMARY ADDRESS......................................................................................... 42
5.2 USB DRIVER SETUP FOR WINDOWS OPERATION SYSTEM........................................................................... 43
5.3 ETHERNET CONNECTION ..................................................................................................................................... 45
5.4 CHECKING THE 7500-TO-PC CONNECTION....................................................................................................... 45
5.5 DATA FORMAT.......................................................................................................................................................... 46
5.5.1 OT EXAMPLE ............................................................................................................................................. 46
5.5.2 OE EXAMPLE ............................................................................................................................................. 47
5.5.3 OA/OV/OW/OF EXAMPLE......................................................................................................................... 47
5.6 PROGRAMMING....................................................................................................................................................... 47
5.6.1 DATA TERMINATION CHARACTERS ..................................................................................................... 47
5.7 7500 MAG.NET COMMANDS.................................................................................................................................. 48
5.7.1 ‘||*| COMMANDS ........................................................................................................................................ 48
5.7.2 |MEAS|URE COMMANDS ......................................................................................................................... 48
5.7.3 |CONF|IGURATION COMMANDS ............................................................................................................ 50
5.7.4 |FUNC|TION COMMANDS ........................................................................................................................ 54
5.7.5 |COMM|UNICATION COMMANDS .......................................................................................................... 54
5.8 WEB INTERFACE OPERATION .............................................................................................................................. 55
6. CALIBRATION ..................................................................................................................................56
6.1 CLOSED-BOX CALIBRATION ................................................................................................................................ 56
6.2 CALIBRATION SCHEDULE..................................................................................................................................... 56
6.3 CALIBRATION COMMANDS.................................................................................................................................. 56
6.4 BASIC CALIBRATION PROCESS............................................................................................................................ 57

v
Magtrol 7500 Series Power Wattmeter Table of Contents
7. TROUBLESHOOTING.......................................................................................................................59
APPENDIX A: SCHEMATICS ...............................................................................................................60
A.1 BLOCK DIAGRAM.................................................................................................................................................... 60
APPENDIX B: COMPATIBLE COMMAND SETS.................................................................................61
B.1 CONFIGURATION COMMANDS ............................................................................................................................ 61
B.2 DATA OUTPUT COMMANDS.................................................................................................................................. 64
SERVICE INFORMATION......................................................................................................................65
RETURNING MAGTROL EQUIPMENT FOR REPAIR AND/OR CALIBRATION ..................................................... 65
RETURNING EQUIPMENT TO MAGTROL, INC. (UNITED STATES) ................................................................ 65
RETURNING EQUIPMENT TO MAGTROL SA (SWITZERLAND)..................................................................... 65
TABLE OF FIGURES
2. CONTROLS
Figure 2–2 Secondary Function Menu........................................................................................................................7
Figure 2–3 Device Setup Menu...................................................................................................................................9
Figure 2–4 Rear Panel ..............................................................................................................................................11
Figure 2–5 Input Module ..........................................................................................................................................11
Figure 2–6 GPIB/IEEE-488 Interface ......................................................................................................................12
Figure 2–7 USB Interface ..........................................................................................................................................12
Figure 2 –8 Ethernet Connector ................................................................................................................................12
3. INSTALLATION/CONFIGURATION
Figure 3–1 Initial Display.........................................................................................................................................14
Figure 3–2 Title Display ...........................................................................................................................................14
Figure 3–3 Revision Display.....................................................................................................................................15
Figure 3–4 Phase Main Menu...................................................................................................................................15
Figure 3–5 Summation Main Menu ..........................................................................................................................15
Figure 3–6 Custom Main Menu ................................................................................................................................16
Figure 3–7 Transient Voltage Suppression................................................................................................................17
Figure 3–8 Single-Phase, Two-Wire Wiring Schematic.............................................................................................19
Figure 3–9 Single-Phase, Two-Wire Wiring Connection ..........................................................................................19
Figure 3-10 Single-Phase, Three-Wire Wiring Schematic.........................................................................................20
Figure 3–11 Single-Phase, Three-Wire Wiring Connection......................................................................................20
Figure 3–12 Three-Phase, Three-Wire Wiring Schematic.........................................................................................21
Figure 3–13 Three-Phase, Three-Wire Wiring Connection.......................................................................................21
Figure 3–14 Three-Phase, Four-Wire Wiring Schematic ..........................................................................................22
Figure 3–15 Three-Phase, Four-Wire Wiring Connection ........................................................................................22
Figure 3–16 Three-Voltage, Three-Ampere Wiring Schematic..................................................................................23
Figure 3–17 Three-Voltage, Three-Ampere Wiring Connection................................................................................23
Figure 3–18 Sensor Substitution Wiring Schematic..................................................................................................25
Figure 3–19 Sensor Substitution Wiring Connection................................................................................................25
Figure 3–20 External Sensor Scale Factor Setup Menu ...........................................................................................26
Figure 3–21 Current/Potential Transformer Connection..........................................................................................27
Figure 3–22 Amp Scaling Setup Menu......................................................................................................................27
Figure 3–23 Amp/Volt Scaling Activated ..................................................................................................................28
Figure 3–24 Volt Scaling Setup Menu.......................................................................................................................29
Figure 3–25 Cycle-by-Cycle Mode ...........................................................................................................................30
Figure 3–26 Hold Mode............................................................................................................................................31
Figure 3–27 Average Mode.......................................................................................................................................31
Figure 3–28 Peak Hold Clear Display......................................................................................................................32
Figure 3–29 Custom Display ....................................................................................................................................32
Figure 3–30 Custom Display Menu ..........................................................................................................................32

vi
Magtrol 7500 Series Power WattmeterTable of Contents
4. OPERATING PRINCIPLES
Figure 4-1 Peak Example ..........................................................................................................................................39
Figure 4–2 Peak Hold/Inrush Current Example .......................................................................................................40
Figure 4–3 Crest Factor Example.............................................................................................................................41
5. COMPUTER CONTROLLED OPERATION
Figure 5–1 GPIB Installation ...................................................................................................................................42
Figure 5–2 GPIB Address Setup Menu .....................................................................................................................43
Figure 5–3 Web Interface Home Page.......................................................................................................................55
6. CALIBRATION
Figure 6–1 Calibration/Verification Test Setup.........................................................................................................57

vii
PURPOSE OF THIS MANUAL
This manual contains all the information required for the installation and general use of the 7500
Series Power Analyzer. To achieve maximum capability and ensure proper use of the instrument,
please read this manual in its entirety before operating. Keep the manual in a safe place for quick
reference whenever a question should arise.
WHO SHOULD USE THIS MANUAL
This manual is intended for those operators who are planning to use the 7500 Series Power Analyzer
for power measurement purposes either as a stand-alone instrument or in conjunction with any Magtrol
Hysteresis, Eddy-Current or Powder Brake Dynamometer, any Magtrol Dynamometer Controller
and M-TEST Motor Testing Software.
MANUAL ORGANIZATION
This section gives an overview of the structure of the manual and the information contained within it.
Some information has been deliberately repeated in different sections of the document to minimize
cross-referencing and to facilitate understanding through reiteration.
The structure of the manual is as follows:
Chapter 1: INTRODUCTION - Contains the technical data sheet for the 7500 Series Power
Analyzer, which describes the unit and provides its mechanical and electrical
characteristics.
Chapter 2: CONTROLS - Description of the elements located on the front and rear panels of
the unit.
Chapter 3: INSTALLATION/CONFIGURATION - Provides information needed for setup of
the 7500 including wiring mode, measurement filter, external sensor, amp scaling
and volt scaling along with phase setup instructions and special functions available.
Chapter 4: OPERATING PRINCIPLES - Information pertaining to theory of operation including
analog processing, digital processing, measurement modes and measurement
methods.
Chapter 5: COMPUTER CONTROLLED OPERATION - How to run a test when the 7500
is used with a PC. Includes information on IEEE-488 and RS-232 Interface, data
format, programming and command set.
Chapter 6: CALIBRATION - Provides recommended calibration schedules along with step-
by-step instructions for the calibration procedure.
Chapter 7: OPTIONAL FEATURES - Provides information regarding various optional features
available with the 7500 including analog outputs.
Chapter 8: TROUBLESHOOTING - Solutions to common problems encountered during setup
and testing.
Appendix A: SCHEMATICS - For the main board, input modules, key pad and analog output.
Preface

viii
Magtrol Model 6530 Three-Phase Power AnalyzerPreface Magtrol 7500 Series Power Analyzer
CONVENTIONS USED IN THIS MANUAL
The following symbols and type styles may be used in this manual to highlight certain parts of the
text:
Note: This is intended to draw the operator’s attention to complementary
information or advice relating to the subject being treated. It
introduces information enabling the correct and optimal functioning
of the product to be obtained.
Caution: this is used to draw the operator’sattention to information,
direCtives, proCedures, etC. whiCh, if ignored, may result
in damage being Caused to the material being used. the
assoCiated text desCribes the neCessary preCautions to take
and the ConsequenCes that may arise if the preCautions are
ignored.
WARNING! THIS INTRODUCES DIRECTIVES, PROCEDURES,
PRECAUTIONARY MEASURES, ETC. WHICH MUST BE
EXECUTED OR FOLLOWED WITH THE UTMOST CARE
AND ATTENTION, OTHERWISE THE PERSONAL SAFETY
OF THE OPERATOR OR THIRD PARTY MAY BE PUT AT
RISK. THE READER MUST ABSOLUTELY TAKE NOTE
OF THE ACCOMPANYING TEXT, AND ACT UPON IT,
BEFORE PROCEEDING FURTHER.
danger: the symbol indiCates danger of injury or death from eleCtriC
shoCk due to high voltages and Current. donot touCh. use
extreme Caution. aC voltages over 33 v rms, 46.7 v peak and
dC voltages over 70 v are deemed to be hazardous in terms
of ieC 61010. further material damage may happen.
Cat ii 1000v: this Category refers to loCal-level eleCtriCal distribution,
suCh as that provided by astandard wall outlet or plug
in loads. examples of measurement Category ii are
measurements performed on household applianCes, portable
tools, and similar modules. 1000v is working voltage.

1
GENERAL
INFORMATION
1. Introduction
2. Inspect the contents for any evidence of damage in shipping. In the event of shipping damage,
immediately notify the carrier and Magtrol’s Customer Service Department.
Note: Save all shipping cartons and packaging material for reuse when
returning the instrument for calibration or servicing.
1.2 NEW FEATURES OF THE 7500 SERIES POWER ANALYZER
Magtrol’s new 7500 Series Power Analyzer is an upgraded version of the 6510e/6530. The new
features that make the unit unique include:
• Peak Hold: Allows the unit to store the highest value read since the last peak hold was
cleared. Values can include amps, watts and volts in any preferred combination.
• Average: Will average the volts, amps and watts over the period that the average function
is enabled.
• Custom Readout: Display can be configured to present data in any desired format.
1.1 UNPACKING YOUR 7500 SERIES POWER ANALYZER
Your 7500 Series Power Analyzer was packaged in reusable, shock resistant packing material that
will protect the instrument during normal handling.
1. Make sure the carton contains the following:
7500 Series Power Analyzer
Line cord
Calibration Certificate
Magtrol
User Manual
DVD-Rom
Isolated BNC Sensor
Connectors (1 each per phase)
Banana Jack Connectors (4 each per phase)
USB cable

2
Magtrol 7500 Series Power AnalyzerChapter 1 – Introduction
GENERAL
INFORMATION
1.3 DATA SHEET
www.magtrol.comDATASHEET
Page 1 / 4
©2017 MAGTROL | Due to continual product development, Magtrol reserves the right to modify specifications without forewarning.
7500
SERIES
7500 SERIES
POWER ANALYZER
FEATURES
▪Single/Three-Phase Capabilities: For single
(7510) or three-phase (7530) power measurements
▪Ranges: Up to 600 V
rms
@ 20 A continuous duty
▪Interfaces: USB & IEEE-488
▪Ethernet Connectivity
▪Data Transfer Rates: Up to 100 per second
▪Accuracy: Up to 0.1%
▪Vacuum Fluorescent Display: High-quality, easy-
to-read, customizable readout displays volts, amps,
power and power factor
▪Measurement: Continuous or cycle-by-cycle
▪Bandwidth: DC up to 100 kHz
▪Input Power: Accepts 120/240 V
rms
, 60/50 Hz
power at 20 VA max
▪Auto Ranging: Automatically scales instrument for
most accurate range
▪Isolation: 1000 V
rms
to earth, 750 V
rms
line-to-line
▪Average: Displays running average of amps, volts
and watts
▪Peak Hold: Stores the highest value read.
Values can include amps, watts and volts in any
combination
▪External Shunt Input
▪Calibration Certificate: NIST Traceable
▪Rack Mounting: 19” (482.6 mm) with handles
Fig.1 : 7500 Series Power Analyzer
DESCRIPTION
The Magtrol 7500 Series Power Analyzer is an easy-to-use instrument ideal for numerous power measurement applications. From
DC to 100 kHz AC, the 7500 measures volts, amps, watts, volt-amps, frequency, crest factor, Vpeak, Apeak and power factor
in one convenient display. They may be used either as stand-alone instruments or in conjunction with any Magtrol Hysteresis,
Eddy-Current or Powder Brake Dynamometer; any Magtrol Dynamometer Controller and M-TEST Software for more demanding
motor test applications.
APPLICATIONS
▪Motors and Drives
▪Lighting Fixtures/Ballasts
▪Office Equipment
▪Household Appliances
▪Power Tools
▪HVAC Equipment
▪Calibration of Test and Measuring Instruments
▪Switching Power Supplies
▪Power Inverters
▪Transformers
The 7500’s data transfer rate makes it ideal for both static and
dynamic tests.

3
Magtrol 7500 Series Power Analyzer Chapter 1 – Introduction
GENERAL
INFORMATION
www.magtrol.comDATASHEET
Page 2 / 4
©2017 MAGTROL | Due to continual product development, Magtrol reserves the right to modify specifications without forewarning.
7500
SERIES
FRONT PANEL
BACK PANEL
SYSTEM CONFIGURATIONS
AC/DC
Input Power
Magtrol Dynamometer
Motor Under Test
Appliances, Ballasts,
Drives, etc.
MODEL 7510
SINGLE-PHASE POWER ANALYZER
AC/DC
Input Power
DSP7001 Dynamometer Controller
MODEL 7530
THREE PHASE POWER ANALYZER
RS-232
GPIB
or
M-TEST
PC
USB
PC
Ready
for Rack
Mounting
Custom
Display
Setup
Amp Readings
(DC, RMS, Peak,
Crest Factor and
Peak Hold/Inrush)
Volt Readings
(DC, RMS, Peak,
Crest Factor and
Peak Hold/Inrush)
Cycle-by-Cycle
Synchronized
Source
Averaging of Volts,
Amps and Watts
Phase and
Summation Data
Current
Auto Ranging
Voltage
Auto Ranging
Continuous or Cycle-by-Cycle
Measurement Mode
Calculate Watts,
V
rms
x A
rms
and
Power Factor
Holds Current Value
Phase Input Module
3 for 7530 (as shown), 1 for 7510
External
Sensor Input
Voltage
Input
Current
Input
GPIB/IEEE-488 Interface
(for Connection to Personal Computer)
USB Connection
Ethernet Connection

4
Magtrol 7500 Series Power AnalyzerChapter 1 – Introduction
GENERAL
INFORMATION
www.magtrol.comDATASHEET
Page 3 / 4© 2017 MAGTROL | Due to continual product development, Magtrol reserves the right to modify specifications without forewarning.
7500 SERIES
SPECIFICATIONS
VOLTAGE INPUT CURRENT INPUT EXTERNAL SENSOR INPUT POWER
Ranges 30 V, 150 V, 300 V, 600 V 1 A, 5 A, 10 A, 20 A 50 mV, 250 mV, 500 mV, 1 V ---
Maximum Voltage
750 V AC/DC terminal (V) to
terminal (±) and
1000 V AC/DC terminal to
earth ground
1000 V AC/DC terminal to
ground ±1 V AC/DC ---
Crest Factor 1.7 @ full scale input 2.7 @ full scale input 2.4 @ full scale input ---
Impedance 2 mΩ12 mΩ17 KΩ---
Display Range 5 digits with 1 mV resolution 5 digits with 1 mA resolution 5 digits with 1 µV
resolution
5 digits with 1 mW
resolution
ACCURACY
DC ±(0.1% Reading + 0.2% Range) 0.4% of VA range
5 Hz - 500 Hz ±(0.1% Reading + 0.1% Range) 0.2% of VA range
500 Hz - 10 kHz ±((0.015 × F(kHz)% Reading) + 0.3% Range) 0.6% of VA range
10 kHz - 100 kHz ±((0.015 × F(kHz)% Reading) + 0.3% Range) 0.6% + (0.03% ×
F(kHz)% of VA range)
> 100 kHz N/A (measurement band limited to DC–100 kHz)
FREQUENCY
Source V1, A1, V2, A2, V3, A3 (For Vx and Ax, source input must be >10% of range
setting)
Accuracy 20 Hz to 500 Hz; 0.05%
EXT. Input BNC non-isolated, earth ground referenced
Input Impedance 100 kΩ
Voltage Level TTL / CMOS
Maximum Voltage 50 V
DIMENSIONS
Width 19.0 in 483 mm
Height 3.5 in 89 mm
Depth
with handles
12.4 in
13.8 in
315 mm
351 mm
Weight 12.97 lb 5.88 kg

5
Magtrol 7500 Series Power Analyzer Chapter 1 – Introduction
GENERAL
INFORMATION
©2017 MAGTROL |Due to continual product development, Magtrol reserves the right to modify specifications without forewarning. Page 4 / 4
Germany
France - China - India
Worldwide Distribution Network
M
70 Gardenville Parkway
Buffalo NY 14224 |USA
M
Route de Montena 77
1728 Rossens |Switzerland
phone +1 716 668 5555
fax +1 716 668 8705
e-mail magtrol@magtrol.com
phone +41 26 407 30 00
fax +41 26 407 30 01
e-mail magtrol@magtrol.ch
www.magtrol.comDATASHEET
7500 SERIES - US 07/2017
7500 SERIES
OPTIONS ANDACCESSORIES
EXTERNAL SHUNTS/SENSORS
If currents continuously reach above 20 amps, an external
sensor must be used. Magtrol offers three different types of
external shunts for use with Magtrol Model 7500 High-Speed
Power Analyzer.
The HA Series shunt, designed for power cable hook-up utilizing
3/8-16 screws, has an insulating base and can be mounted on
conductive surfaces. The LAB Series shunt also comes with
an insulating base, along with thumb screws for the power
leads and knurled nuts on the sensing terminals. The FL Series
is a relatively small bus, bar-mounted shunt with large end
blocks. The comparatively large end blocks and short spacing
aid in cooling and allow the shunt to operate in more extreme
environments. All shunts are calibrated on equipment with
current certifications traceable to N.I.S.T.
SENSOR SUBSTITUTION WIRING CONNECTION
AVAILABLE MODELS
Type P/N Amps
HA 004640 50
HA 004641 100
HA 004642 150
HA 004643 200
HA 004644 250
HA 004645 300
HA 004646 400
HA 004647 500
LAB 004648 750
LAB 004649 1000
FL 005214 2000
FL 005286 3000
SPECIFICATIONS
HA Series LAB Series FL Series
Rated Current 50 to 500 A 750 to 1000 A 2000 to 3000 A
Output 50 mV
Bandwidth DC to 60 Hz
Accuracy
± 0.25%
(± 0.1% accuracy with calibration certificate is
available for an additional cost)
Operating
Temperature
For optimum accuracy, temperature of shunt
should be 30 °C to 70 °C
ORDERING INFORMATION
7510 Single-Phase Power Analyzer
7530 Three-Phase Power Analyzer
LOAD
MOV
CB
SHUNT
LOW
HIGH
EARTH
±A

6
GENERAL
INFORMATION
2. Controls
2.1 FRONT PANEL
The front panel provides a power switch, sixteen control buttons and a Vacuum Fluorescent Display
(VFD).
Figure 2–1 Front Panel
2.2 FRONT PANEL CONTROLS AND BUTTONS
The front panel controls and buttons, from left to right, are:
• Powerswitch
• Tendouble-functioncontrolbuttons:
Primary Function Secondary Function
PHASE DISPLAY
qCURRENT RANGE DC (current)
pCURRENT RANGE RMS (current)
AUTO CURRENT RANGE PEAK-CF (current)
qVOLTAGE RANGE DC (voltage)
pVOLTAGE RANGE RMS (voltage)
AUTO VOLTAGE RANGE PEAK-CF (voltage)
CYC-CONT SOURCE
W-VA-PF AVG
HOLD PEAK HOLD
• SHIFT-enablessecondaryfunctionsprintedinblueabovecontrolbuttons
• FiveUSERMENUbuttons
• LeftArrow
• RightArrow
• UpArrowp
• DownArrowq
• ENTER

7
Magtrol Model 6530 Three-Phase Power Analyzer Chapter 2 – Controls
GENERAL
INFORMATION
Magtrol 7500 Series Power Analyzer
2.2.1 Enabling SEcondary FunctionS
To enable the secondary function of the double-function control buttons:
1. Press the blue SHIFT button and release it. The word “SHIFT” appears in the display:
CURRENT VOLTAGE POWER/PF
Figure 2–2 Secondary Function Menu
2. Press any control button to enable the function shown in blue letters above the button.
2.2.2 uSing Front PanEl controlS and buttonS
2.2.2.1 Controls/Single-Function Buttons
Button To Use Function
POWER Press I to turn power ON Press
O to turn power OFF.
Turns power ON or OFF.
SHIFT Press this button and release;
then press desired control
button.
Enables the function written in blue above
control button.
User Menu
ENTER Press this button. Enables/Disables USER MENU.
Press this button. When USER MENU is enabled, toggles
betweenelds,selectionsorthedigitsina
numerical value.
Press this button. When USER MENU is enabled, toggles
betweenelds,selectionsorthedigitsina
numerical value.
pPress this button. When USER MENU is enabled, toggles
between selections or increases the selected
digit of a numerical value.
qPress this button. When USER MENU is enabled, toggles
between selections or decreases the selected
digit of a numerical value.

8
Magtrol Model 6530 Three-Phase Power AnalyzerChapter 2 – Controls
GENERAL
INFORMATION
Magtrol 7500 Series Power Analyzer
2.2.2.2 Double-Function Buttons
Button To Use Function
DISPLAY Press SHIFT and release; then
press this button. (For further
instruction, see Section 3.3.7.4
- Custom Display.)
Shows custom display.
PHASE Press this button. Toggles through phase 1, 2, 3 and summation.
Current
DC Press SHIFT and release; then
press this button.
Selects DC amps measurement.
RMS Press SHIFT and release; then
press this button.
Selects RMS amps measurement.
PEAK-CF Press SHIFT and release; then
press this button.
Selects displayed amps measurement.
Continue to press SHIFT then PEAK-CF
and the displayed values toggle through the
following:
•Acf (ampscrestfactorreadings)
•A~↑ (amps peak hold/inrush readings)
•Apk (ampspeakreadings)
Current Range
qPress this button. Decrements amps range.
pPress this button. Increments amps range.
AUTO Press this button. Selects/deselects amps auto range.
Voltage
DC Press SHIFT and release; then
press this button.
Selects DC voltage measurement.
RMS Press SHIFT and release; then
press this button.
Selects RMS voltage measurement.
PEAK-CF Press SHIFT and release; then
press this button.
Selects displayed voltage measurement.
Continue to press SHIFT then PEAK-CF
and the displayed values toggle through the
following:
•Vcf (voltagecrestfactorreadings)
•V~↑ (voltage peak hold/inrush readings)
•Vpk (voltagepeakreadings)
Voltage Range
qPress this button. Decrements voltage range.
pPress this button. Increments voltage range.
AUTO Press this button. Selects/deselects voltage auto range.
SOURCE Press SHIFT and release; then
press this button.
Selects the signal that the cycle-by-cycle
measurement will be synchronized with.
Continue to press SHIFT then SOURCE and
the source toggles through the following:
•V1,V2,V3(voltageinput)
•A1,A2,A3(ampsinput)
NOTE: Selecting SHIFT then SOURCE will
automatically switch unit to cycle-by-cycle
mode.
CYC-CONT Press this button. Selects continuous or cycle-by-cycle
measurement method.
AVG Press SHIFT and release; then
press this button.
Enables averaging mode.

9
Magtrol Model 6530 Three-Phase Power Analyzer Chapter 2 – Controls
GENERAL
INFORMATION
Magtrol 7500 Series Power Analyzer
2.3 VACUUM FLUORESCENT DISPLAY (VFD)
The VFD provides information about the control functions, phase voltages and currents.
Top Row Bottom Row
Current Current Range
Voltage Voltage Range
Power/PF Source/Status
2.3.1 contraSt SEttingS
The 7500 Series Power Analyzer is shipped with the Contrast Setting on low in order to prolong
display life. If it is necessary to increase the Contrast for improved readability, execute the following
steps using the USER MENU located on the front panel of the unit.
1. Press the ENTER button. The display should appear as follows:
CURRENT VOLTAGE POWER/PF
DEVICE
SELECTIONS
Figure 2–3 Device Setup Menu
2. Press and buttons until "I/O" appears in the display.
3. Press ENTER button.
4. Press and buttons until "DISPLAY BRIGHTNESS" appears in the display.
5. Use the pand qbuttons until desired brightness is reached.
6. Press ENTER button to return to main menu.
Note: There are three settings available; low, medium and high. Make
Button To Use Function
W-VA-PF Press this button. Selects what calculated value is to be
displayed.Continue to press W-VA-PF and the
displayed values toggle through the following:
•W↑(inrush watts)
•W (watts)
•VA (Vrms × Arms)
•PF (powerfactor)
PEAK HOLD Press SHIFT and release; then
press this button.
Resets peak hold/inrush values.
HOLD Press this button. Holds displayed values until hold is pressed
again.
NOTE: All internal machine functions will be
halted except auto-ranging when the HOLD
feature is enabled.

10
Magtrol Model 6530 Three-Phase Power AnalyzerChapter 2 – Controls
GENERAL
INFORMATION
Magtrol 7500 Series Power Analyzer
sure the lowest possible setting is used to achieve desired result.
Using a setting higher than necessary may cause display segments
to burn-in over a period of time, resulting in uneven illumination
from segment to segment.
2.3.2 diSPlay guidE
Following is a reference for symbols, abbreviations and messages that are used in the 7500.
Symbol/Abbreviation/Message Meaning
SHIFT Shift button was pressed
V Volts
A Amps
W Watts
PF Power Factor
pk Peak
cf Crest Factor
1 Phase 1
2 Phase 2
3 Phase 3
ãScaling function is activated
¹Average function is activated
lPeak Hold/Inrush function is activated
ΣSummation
↑Peak Hold/Inrush
… DC
~ RMS (AC+DC)
Table of contents
Other Magtrol Measuring Instrument manuals

Magtrol
Magtrol HD Series User manual

Magtrol
Magtrol HD-106 User manual

Magtrol
Magtrol HD-106-1 User manual

Magtrol
Magtrol 6510e User manual

Magtrol
Magtrol 5100 User manual

Magtrol
Magtrol 6530 User manual

Magtrol
Magtrol TORQUE 10 User manual

Magtrol
Magtrol WB Series User manual

Magtrol
Magtrol LMU 212 User manual
Popular Measuring Instrument manuals by other brands

Bosch
Bosch GIM 60 L Professional Original instructions

Panametrics
Panametrics DewPro MMY30 user manual

Zenner
Zenner zelsius C5 -ISF Installation and operating instructions

KAEL
KAEL DAM-C-72 quick start guide

Bayer HealthCare
Bayer HealthCare Clinitek 500 operating manual

PASCO
PASCO OS-9171 instruction sheet