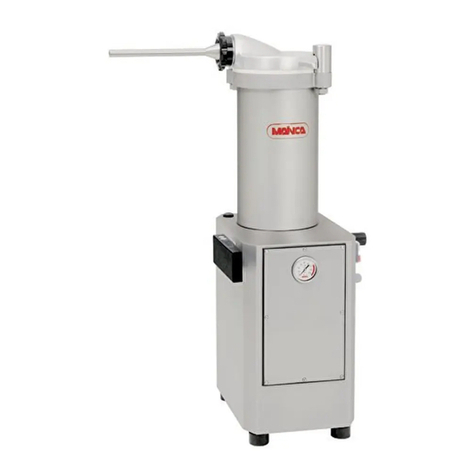
Mainca PR-360 User manual

EQUIPAMIENTOS CARNICOS, S.L.
C.I.F. ES B-59553750
PR-360
1 - ESPAÑOL 1
2 - ENGLISH 12
3 - FRANÇAIS 22
4 - DEUTSCH 28
P. I. “Coll de la Manya” - Jaume Ferràn, s/n. E-08400 Granollers (Barcelona) SPAIN
(+34) 93 849 18 22 / 17 54 – Fax: (+34) 93 849 71 76. www.mainca.com / E-mail:
Versión 20-11-2019

CORTADORAS DE CHULETAS
CONFEC. DE HAMBURGUESAS
EMBUTIDORAS AMASADORAS
CORTADORAS DE FILETAS
PICADORAS Y CUTTERS
MAQUINARIA INDUSTRIA CÁRNICA
EQUIPAMIENTOS CÁRNICOS, S.L.
N.I.F.ES B-59553750
Carretera Nacional 152 Km. 24.B
Polígono Industrial “COLL DE LA MANYA”
Jaume Ferrán, s/n. – Tels. 849 18 22 – 849 17
54
Fax: 849 71 76
08400 GRANOLLERS (Barcelona) SPAIN
IMPORTANTE
Al hacer los pedidos de recambios de material eléctricos, rogamos
indiquen la marca y referencia completa tomada del aparato.
IMPORTANT
Pour les comandes de matériel électrique, indiquez s´il vous plait, la
marque et la référence complète, prise de l´appareil.
IMPORTANT
When placing an order of any electric components, please advice us of
the reference number indicated in the parts to be exchanged and its trade
mark.
ACHTUNG
Für elektrische Bauersatzteil-Bestellungen, geben Sie uns bitte den
Lieferrantennamen und die genaue Referenznummer der zu
austauschenden Teile an.

CORTADORAS DE CHULETAS
CONFEC. DE HAMBURGUESAS
EMBUTIDORAS AMASADORAS
CORTADORAS DE FILETAS
PICADORAS Y CUTTERS
MAQUINARIA INDUSTRIA CÁRNICA
EQUIPAMIENTOS CÁRNICOS, S.L.
N.I.F.ES B-59553750
Carretera Nacional 152 Km. 24.B
Polígono Industrial “COLL DE LA MANYA”
Jaume Ferrán, s/n. – Tels. 849 18 22 – 849 17
54
Fax: 849 71 76
08400 GRANOLLERS (Barcelona) SPAIN
ATENCIÓN
La máquina debe conectarse a la red, obligatoriamente, a través de un
protector diferencial de calibre adecuado a las características técnicas
indicadas en la placa de la máquina.
WARNING
The machine must be connected to a power breaker ( combined
overload and earth leakage detector ) rated as per the details on the
machine data plate.
ATTENTION
La machine devra se brancher, obligatoirement, a la prise générale
moyennant un interrupteur de sécurité calibré selon les renseignements
techniques de la machine, les quelles sont détaillées sur la petite plaque
de caractéristiques.
ACHTUNG
Das Gerät muss an das Stromnetz geschaltet werden. Dabei ist
vorschriftsmässig ein Differenzial-Schutz zu verwenden, welcher nach
den auf dem Typenschild ausgewiesenen technischen Eigenschaften
arbeitet.

INSTRUCCIONES PR-360
IMPORTANTE:
Acaba de adquirir un equipo de alto contenido tecnológico. Lea detenidamente este
manual antes de instalar, conectar o utilizar este equipo. También vea detenidamente el
video en www.mainca.com como complemento a este manual de instrucciones. Siga sus
instrucciones para asegurar un buen funcionamiento del
equipo. Cualquier modificación de los elementos relativos a
la seguridad que incorpora, puede provocar accidentes y
viola la Directiva Europea 89/655/CEE. Equipamientos
Cárnicos, S.L. (MAINCA) no se hace responsable del uso
de la máquina en estas circunstancias.
INSTALACIÓN:
La altura del equipo y su soporte con ruedas es
ajustable a través de la rosca telescópica accionada
mediante la Maneta graduación (B) ver fígura 1.
Esta particularidad hace posible ajustar la altura de
conexión del equipo a cualquier embutidora
MAINCA mediante la Maneta graduación (B). Una
vez ajustada la altura de conexión del equipo al de
la máquina de embutir, apriete la Maneta (C).
La unión entre el Porcionador y la Embutidora es a través de la tuerca portaembudos del
porcionador (D) (ver fig. 2).
Importante: Equipamientos Cárnicos S.L. (MAINCA), no se hace responsable de los
daños o problemas que puedan acaecerse de la conexión y uso de nuestro
porcionador-retorcedor mod. PR-360 con cualquier otra embutidora que no sea
MAINCA.
Compruebe que la tensión y la frecuencia de la red se corresponden con las indicadas en
la placa de características (situada en la parte trasera del equipo). La máquina debe
conectarse a la red, obligatoriamente a través de un protector de diferencial de
calibre adecuado a las características técnicas del equipo.
fig. 2
A
fig. 1
C
B
D
J N

CONDICIONES DE USO:
El PR-360, está exclusivamente diseñado para ser alimentado por cualquier embutidora
hidráulica de pistón que pueda mantener una presión de alimentación constante, y está
destinado al porcionado y torsionado de productos cárnicos. La temperatura de la carne es
aconsejable que esté entre 5ºC y 10ºC. A temperaturas superiores o inferiores se corre el
riesgo de provocar el embarrado del producto, una irregular dosificación de la porción o
unas presiones de trabajo demasiado elevadas.
INSTRUCCIONES DE UTLIZACIÓN:
1.- Conecte el porcionador MAINCA PR-360 a la embutidora mediante el Portaembudos
correspondiente y active el interruptor general en posición ON (E).
2.- Compruebe que el Piston (F) está insertado con el Eje pistón (G),y los 4 Pomos (H)
correctamente apretados.
3.- Cargue el producto en el cilindro de la embutidora y cierre a continuación la tapa del
cilindro desplazando a su vez el equipo ya unido a ésta.
4.- Ajuste la porción, con la empuñadura (I) (en sentido antihorario aumenta el volumen de
la cámara del porcionador ), seleccione la posición MANUAL en la Pantalla tactil del PR-
360, apriete la rodillera de la embutidora para así alimentar el porcionador y apriete el
pulsador de marcha (J), ver figura 2, hasta que aparezca producto por la salida del
embudo. En caso de que no salga producto, apriete nuevamente el pulsador de marcha,
repitiendo el proceso hasta conseguirlo. Durante este proceso es muy importante que para
evitar el embarrado del producto, el manómetro de la embutidora no supere los 50 bares
de presión en un principio e ir ajustando según necesidad o tamaño de la porción,(ver fig.3)
fig. 3
G F H
LM IKfig. 3

5.- Coloque el Embudo deseado, fijándolo mediante la tuerca cabezal (K) y cargue tripa
natural o de colágeno, humedecida con agua en el embudo (L) del PR-360 y ya puede
empezar a embutir y a porcionar normalmente. Cuanto más gire el pomo (I) en sentido
horario la porción será más pequeña. El rango de porciones va desde 10 grs
aproximadamente hasta 215 grs aproximadamente,una vez conseguido el tamaño
deseado, fije la espiga (M) mediante el pomo (I).En determinados productos (muy licuados
o extremadamente sólidos), trabajar con la presión de la embutidora no apropiada o variar
esta durante el empleo del porcionador puede llegar a desajustar el tamaño de las
porciones. Porcionando miniaturas (porciones de 10 grs aprox.) esta situación puede ser
más acentuada que haciendo porciones grandes, ( ver fig. 3)
6.- Para una mayor coordinación y comprensión del equipo, es altamente aconsejable que
durante los primeros momentos de utilización de éste se haga en posición manual,
combinando rodillera embutidora y Pulsador. Hay que recordar quese trata de un equipo
semi-automático y la habilidad del usuario alimentando a través de la embutidora y
porcionando/torsionando a través del porcionador es muy importante y necesario.
DESCRIPCIÓN AJUSTES Y MODO DE UTILIZACION EN LA PANTALLA:
1- MODO DE UTILIZACION ( primera pantalla )
AUTOMATICO: El PR-360 producirá porciones y a continuación retorcerá
MANUAL: Solo retorcerá cuando se pulse el Boton verde de Marcha
2- TIEMPO PORCION Permite el ajuste del tiempo entre una Torsion y la siguiente.
3- NUMERO DE GIROS EMBUDO Ajusta el numero de giros deseado del Embudo desde
0 hasta 10 v
4- VELOCIDAD EMBUDO Ajusta la velocidad de giro del Embudo
5- RETARDO GIRO PISTON Permite un tiempo de espera posterior al torsionado, antes
de
iniciar una nueva porción.
6- GIROS PISTON POR CICLO Ajusta el número de porciones antes de cada
torsionado; ( su valor habitual es 1 ) se utiliza para porciones mayores a 200 gramos.
7- VELOCIDAD PISTON Ajusta la velocidad de giro del Piston. Normalmente a
2500rpm.

8- SENTIDO GIRO RETORCEDOR HN para uso en hemisferio Norte
HS para uso en Hemisferio Sur
9- SELECCION IDIOMA Acceso a cambiar el idioma de las pantallas.
El Paro de emergencia (N) se utiliza para parar el ciclo de trabajo, ver figura 2.
LIMPIEZA:
1.- Pulsar el Pulsador de paro de emergencia (N).
2. Desmontar el embudo (L) (ver fig. 4).
3.- Desmontar los 4 pomos (H) de la tapa frontal (O) del porcionador (ver fig. 4). retirar la
Tapa frontal (O) y sacar el Piston ,mediante la llave (P), (ver fig. 4).
fig. 4
LHOP
N
E

4.- Desenroscar el portaembudos (D) de la embutidora y el Cierre (Q) y retirarlo hacia la
izquierda para poder extraer el Cuerpo (R) y lavar los elementos retirados con agua tibia,
jabon neutro y una esponja. Evite el uso de elementos metálicos en el proceso de limpieza,
(ver fig. 5).
5.- Para la limpieza del interior de los embudos, es necesario el cepillo espiral (S),
(ver fig. 6).
MANTENIMIENTO:
Es primordial mantener siempre engrasados con lubricante apto para uso alimentario el
Anillo (T) y el émbolo o Piston porcionador (F) (ver fig. 7).
NIVEL SONORO:
fig. 5 fig. 6
D
Q
R
S
fig. 7
T U

El nivel de presión acústico continuo equivalente ponderado “A” en el puesto de trabajo y
sin carga es de cómo máximo 62 dB(A).
SEGURIDAD:
El MAINCA PR-360 dispone de 2 elementos de seguridad.
El primero es el paro de emergencia (N) situado en su panel de mandos que impide el
funcionamiento del equipo.
El segundo es un sensor de posición (U) de presencia de la tapa frontal (O) que también
impide el funcionamiento del equipo (ver fig. 7)
.

OPCIÓN BRAZO MECÁNICO: 2PR36MM
Se trata de un acoplamiento a la parte frontal del PR-360 para rentabilizar el tiempo y
automatizar la productividad a través de un proceso mecánico.
Para poder acoplarlo, primero se debe desmontar los pomos (R) y coincidir los
agujeros de la parte del brazo mecánico con los agujeros de la envolvente. (ver fig. 10)
Dicho mecanismo, está diseñado para funcionar con el embudo (H) y el cono blando
(X) para el uso de tripa sintética (celulosa o colágeno) y también para el uso de tripa
natural añadiendo la opción del doble embudo que corresponda.
Una vez acoplado, volver a roscar los pomo (R) y lo primero a realizar es la regulación
de la longitud y la separación del brazo mecánico.
Para ello, se debe aflojar la tuerca (1) y la regulación se realiza a través del pomo (2)
con un sistema de rosca.
La separación entre el cono blando (X) y los rodillos (3) dependerá de la longitud del
embudo (H).Recomendamos por lo menos 1 cm de separación, separando más si
fuera preciso (ver fig. 11).
fig.11
fig.10

A continuación, se debe regular la altura y centrado de los rodillos (3) con respecto al
cono. Para ello, aflojar la empuñadura transversal (4) y desplazar la parte del soporte
de los rodillos verticalmente.
¡MUY IMPORTANTE!
El centrado de los rodillos no debe ser perfecto, es imprescindible que queden
desalineados hacia abajo para dominar el producto final hasta el recipiente
(ver fig. 12).
fig.12

Una vez posicionado, volver a apretar la empuñadura (4).
Seguidamente, proceder a la regulación de la separación de los rodillos según el
diámetro del embudo (H) y el cono (X). Para ello, regularemos con la empuñadura
vertical (5), en sentido horario aumenta la separación, y en sentido antihorario, la
disminuye (ver fig. 13).
Por último, el mecanismo para proceder al cambio del embudo (H) y/o cargar la tripa
nuevamente, sólo hay que girar 90º el conjunto del soporte de los rodillos hacia la
izquierda.
El mecanismo contiene un muelle tensor que al estar en reposo no queda tensado
(ver fig. 14).
Una vez cargada la tripa en el embudo (H), volver a iniciar el proceso desde la fig. 11.
fig.13
fig.14

INSTRUCTIONS FOR PR-360
IMPORTANT:
You have just acquired a machine that employs high technology. Please read this manual
carefully before installing, connecting or using the machine. There is a video that
complements this instruction manual at www.mainca.com, which we also recommend
watching carefully. Follow their instructions to ensure that
the machine operates optimally. Any changes made to
incorporated parts related to safety can lead to accidents
and violates European Directive 89/655/EEC.
Equipamientos Cárnicos, SL (MAINCA) shall not be held
responsible for use made of the machine under these
circumstances.
INSTALLATION:
The machine height and its stand with wheels can
be adjusted using the telescoping thread activated
via the adjustment lever (B). See figure 1. This
feature makes it possible to adjust the height of the
machine connection to any MAINCA sausage stuffer
using the adjustment lever (B)
After the height of the machine connection to that of
the filling/stuffing machine, tighten the lever (C).
The joint between the Twist Linker and the stuffer/filler is through the nozzle nut of the Twist
Linker (D) (see fig. 2).
Important: Equipamientos Cárnicos, SL (MAINCA) shall not be held responsible from
any damages or problems that could occur due to connecting and using our Twist
Linker model PR-360 with any other stuffer that is not MAINCA.
Verify that the grid voltage and frequency match those detailed on the data plate (located
on the back of the machine). The machine must be connected to a power breaker
(combined overload and earth leakage detector) rated as per the details on the machine
data plate.
B
D
A
fig. 1
C
J N
fig. 2

USAGE CONDITIONS:
The PR-360 has been designed to work with any hydraulic piston filler/stuffer in the market
that can maintain a constant working pressure, and it’s made to link and twist meat
products. There is also and special version to run with Automatic Vacuum fillers.
The recommended meat temperature is from 2º to 10º C. At lower or higher temperatures,
there is a risk of the product smearing, irregular dosing of the portion or working pressures
that are too high.
USAGE INSTRUCTIONS:
1. Connect the MAINCA PR-360 Twist Linker to the filler/stuffer by means of the nozzle nut
and switch on the main Power switch (E). Note that the nozzle nut supplied with the twist
linker is only suitable for MAINCA fillers/stuffers. If you intend to use this twist linker with a
non MAINCA filler, you need to replace our nozzle nut by the one used on your filler.
Unscrew the feeding tube to simply replace the nozzle nut.
2. Verify that the piston (F) is inserted into the piston shaft (G) and the 4 knobs (H) are
properly tightened.
3. Load the product into the stuffer cylinder and then close the cylinder lid, moving the
machine that is already attached to it at the same time.
4. The portion size of the sausage is manually set by means of the handle (I). Clockwise to
reduce the volume and counter-clockwise to increase the volume of the portioning chamber
up to 220g capacity. Each complete turn of the handle (I) equals to approximately 12g. If
you need bigger size than 220g, the menu on the panel allows you to discharge multiples
continued chambers before twisting. Using this function, portion size is unlimited.
fig. 3
LM IKfig. 3
FHG

The piston (F) moves forward and backward inside the portioning chamber. One cycle
forward and one cycle backward. It you find difficult to adjust the handle (I), means the
piston is right behind the lid. On next cycle it will be much easier to adjust it.
Select the MANUAL mode on the touchscreen of the PR-360, press the knee lever of the
sausage filler/stuffer and push the ON button (J) shown in figure 2, until product starts to
appear through the nozzle. If no product appears, push the ON button again, repeating the
process until the product appears. When using the twist linker PR-360, the sausage
filler/stuffer needs to have the knee lever pressed all the time in order to feed the twist
linker. We highly recommend to install a knee lever lock mechanism on you filler/stuffer.
Adjust the required working pressure on your filler/stuffer. The higher the pressure, the
higher the speed and production. We recommend to work between 50 and 100 bar
pressure. Start at low pressure and adjust it accordingly once you have set the right portion
size. The type of product and the casing used will determine the right working pressure. A
stiff dough stuffed using a small nozzle will require more pressure than a soft dough using a
bigger nozzle. (see fig. 3).
5. Install the most suitable nozzle size (L) using the nozzle nut (K) and use the most
appropriate rubber cone according to your casing calibre. There are different rubber cone
sizes to fit with all casing calibres from 17 to 36 mm diameter. See annex “List of available
rubber cones”.
The PR-360 twist linker is suitable for all types of natural, collagen or cellulose casings in
the market. When twisting natural casing, a double nozzle (outer sleeve) is required.
There is an optional automatic hand (2PR36MM) to run fully automatically (suitable for
collagen & cellulose casing).
6. For better coordination and understanding of the machine, it is recommendable to use it
in the Manual mode at the beginning, and change to Automatic after some practice.
TOUCHSCREEN PANEL MENU & SETTING:
1. USAGE MODE (first screen)
AUTOMATIC:With this mode the machine will run automatically portioning and
twisting. You just need to press the ON button once to Start and/or Stop the
automatic mode. Every twist will be made automatically according to the setting on
the PORTION TIME. See below point 2.
MANUAL: With this mode the machine will only twist IF you push the green ON
button. Every time you get a portion, then you will have to press the green ON button
to twist the casing. This option is recommendable for beginners and when you refill
the meat cylinder or when you start operating.

2. PORTION TIME: This setting allows you to adjust the time between one twisting and the
next twisting. This is a very important setting if you want to get accurate portions. The
portions will be stuffed faster or slower depending on the sausage size (weight and
diameter) as well as the working pressure on the filler/stuffer (the higher the pressure, the
faster the stuffing). The operator needs to determine how many seconds does the machine
really needs to wait between one twisting and the next twisting. For instance, if you adjust
the PORTION TIME at 0.5 seconds and the machine really needs 1 second to stuff one
portion, you will be twisting before the portion is completed, which is not correct. On the
other side, if machine just needs 0.5 seconds to stuff on portion and you set the PORTION
TIME at 1 second or more, there will be an unnecessary idle time. The right setting consist
on eliminating the waiting time since the portion is fully stuffed until the machine starts to
twist. If you think the machine needs 0.5 seconds to stuff one portion, then set the
PORTION TIME at 0.5 or 0.6 seconds.
3. NUMBER OF NOZZLE TURNS: This setting allows you to adjust the number of
complete nozzle turns on each twisting from 0 to 10v
4. NOZZLE SPEED: This setting allows you to adjust the twisting speed of the nozzle. This
is a very important setting if you don’t want to break the casing when twisting. Adjust this
setting depending on the type of casing you are using. We recommend to twist natural
casing at low speed (between 800 to 1000rpm), collagen casing at medium speed
(between 1000 to 1500rpm) and cellulose casing at high speed (between 1500 and
2000rrpm).
5. DELAY PISTON TURNING: This setting allows you to adjust the waiting time after
twisting, before starting a new portion. We recommend do not touch this setting and leave
the factory setting (0.1 second). If you increase this time, production will slow down
unnecessarily.
6. PISTON TURNS PER CYCLE: This setting allows you to get portions bigger than 220g
by discharging multiples continued chambers before twisting. Using this function, portion
size is unlimited. The factory setting is 1. That means only one chamber will be discharged
on each portion. Do not change this setting if you don’t need to make bigger portions than
220g. This is the maximum capacity of the chamber. If you need a bigger portion than
220g, then adjust the portion size using the handle (I) to 50% of the required size and
change this setting to 2 in order to discharge 2 continued equal portions.
7. PISTON SPEED: This setting allows you to adjust the speed of the piston inside the
chamber when turning. We recommend do not touch this setting and leave the factory
setting at 2500rpm.
8. TWISTING DIRECTION OF THE NOZZLE:
CW (Clockwise) for using in all countries in the northern hemisphere
CCW (Counter Clockwise) for using in all countries in the southern hemisphere

The twisting direction of the nozzle can be changed with this setting, Clockwise or Counter
clockwise. This is important to avoid the sausage unwind during cooking. We supply the
machine with the right setting from factory. We recommend do not touch this setting.
Machines with nozzle turning clockwise are equipped with reverse thread nozzle nut.
Machines with nozzle turning Counter clockwise are equipped with regular thread nozzle
nut.
9. LANGUAGE SELECTION: This setting allows you to change the language displayed on
the touchscreen.
The emergency stop button (N) is used to stop the working cycle (see figure 2).
CLEANING:
1. Press the emergency stop button (N).
2. Dismantle the nozzle (L) (see fig. 4).
3. Remove the 4 knobs (H) from the front cover (O) and remove the piston using the
wrench (P) (see fig. 4).
fig. 4
LHOP
N
E

4. Unscrew the nozzle nut (D) of the stuffer/filler as well as the locking nut (Q). Move this
locking nut the left to be able to pull out the body (R) and wash the parts removed with
warm water, neutral soap and a sponge. Avoid using metal items during the cleaning
process (see fig. 5).
5. To clean inside the nozzles, use the spiral brush (S) supplied with each machine (see fig.
6).
MAINTENANCE:
It is essential to always keep the ring (T) and the portioning piston (F) duly lubricated with
Food Contact Grade lubricant. (see fig. 7).
fig. 5 fig. 6
D
Q
R
S
fig. 7
T U

NOISE LEVEL
The A-weighted continuous equivalent sound pressure at the work station without load is at
most 62 dB(A).
SAFETY:
The MAINCA PR-360 has two safety elements.
The first is the emergency stop button (N) located on the control panel that stops the
machine from running.
The second is the lid sensor (U) to ensure that the front cover (O) is on it’s place, which
also prevents the machine from running (see fig. 7)
.

OPTIONAL AUTOMATIC HAND 2PR36MM FOR THE PR-250 TWIST LINKER
This accessory has been designed to make the sausage production with the PR-360
twist linker fully automatic saving time, improving accuracy and hygiene without the
need to hold every sausage with your hands when twisting.
The automatic hand is mainly suitable for cellulose and collagen casing using the right
twisting nozzle (H) and silicon tip (X), as well as natural casing adding an optional outer
sleeve (double nozzle) on the twisting nozzle. (see fig. 10)
It has a very easy connection to the PR-250 using the front lid knobs (R). Unscrew the
2 knobs, hook up the automatic hand to the threaded pins and screw the knobs on tight
by hand. (see fig. 10)
Once the automatic hand is duly installed, connect the twisting nozzle (H) with the
silicon tip (X) to the PR-250 and set the right distance between the rollers (3) and the
silicon tip (X) by adjusting the length of the automtic hand arm.(see fig. 11). We
recommend at least 1 cm (3/8 inch) distance between both parts. Increase or decrease
if necessary for better results.
Adjust the length of the automatic hand arm by unlocking the nut (1) and screwing or
unscrewing the nut (2) in order to enlarge/reduce the arm’s length. Once it’s set, lock
the nut (1) to fix the position. (see fig. 11).
fig.11
fig.10
Table of contents
Languages:
Other Mainca Commercial Food Equipment manuals
Popular Commercial Food Equipment manuals by other brands

Nordcap
Nordcap BKU 460 instruction manual

Star
Star VBE30 Installation and operation instructions

Henny Penny
Henny Penny LOV 100 Series Guide

Electrolux Professional
Electrolux Professional thermaline M L EO/DAO Series Installation and operating manual

Crown
Crown GMT-6 Installation and operation manual

Omcan
Omcan RS-CN-0770 instruction manual