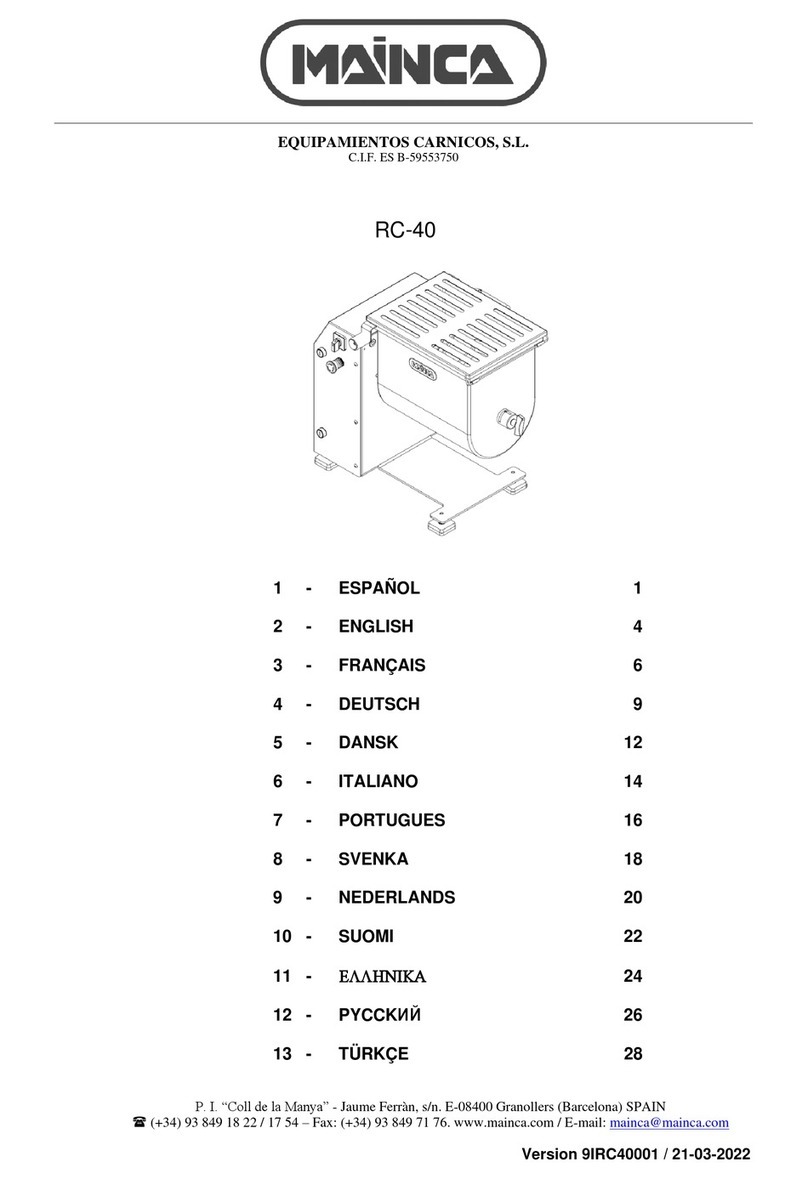
Mainca RC-100 User manual

EQUIPAMIENTOS CARNICOS, S.L.
C.I.F. ES B-59553750
RC-100
1 - ESPAÑOL 1
2 - ENGLISH 5
3 - DEUTSCH 7
4 - FRANÇAIS 9
P. I. “Coll de la Manya” - Jaume Ferràn, s/n. E-08400 Granollers (Barcelona) SPAIN
(+34) 93 849 18 22 / 17 54 – Fax: (+34) 93 849 71 76. www.mainca.com / E-mail: [email protected]om
Versión 28-07-2015

CORTADORAS DE CHULETAS
CONFEC. DE HAMBURGUESAS
EMBUTIDORAS AMASADORAS
CORTADORAS DE FILETAS
PICADORAS Y CUTTERS
MAQUINARIA INDUSTRIA CÁRNICA
EQUIPAMIENTOS CÁRNICOS, S.L.
N.I.F.ES B-59553750
Carretera Nacional 152 Km. 24.B
Polígono Industrial “COLL DE LA MANYA”
Jaume Ferrán, s/n. – Tels. 849 18 22 – 849 17 54
Fax: 849 71 76
08400 GRANOLLERS (Barcelona) SPAIN
IMPORTANTE
Al hacer los pedidos de recambios de material eléctricos, rogamos
indiquen la marca y referencia completa tomada del aparato.
IMPORTANT
Pour les comandes de matériel électrique, indiquez s´il vous plait, la
marque et la référence complète, prise de l´appareil.
IMPORTANT
When placing an order of any electric components, please advice us of
the reference number indicated in the parts to be exchanged and its trade
mark.
ACHTUNG
Für elektrische Bauersatzteil-Bestellungen, geben Sie uns bitte den
Lieferrantennamen und die genaue Referenznummer der zu
austauschenden Teile an.

CORTADORAS DE CHULETAS
CONFEC. DE HAMBURGUESAS
EMBUTIDORAS AMASADORAS
CORTADORAS DE FILETAS
PICADORAS Y CUTTERS
MAQUINARIA INDUSTRIA CÁRNICA
EQUIPAMIENTOS CÁRNICOS, S.L.
N.I.F.ES B-59553750
Carretera Nacional 152 Km. 24.B
Polígono Industrial “COLL DE LA MANYA”
Jaume Ferrán, s/n. – Tels. 849 18 22 – 849 17 54
Fax: 849 71 76
08400 GRANOLLERS (Barcelona) SPAIN
ATENCIÓN
La máquina debe conectarse a la red, obligatoriamente, a través de un
protector diferencial de calibre adecuado a las características técnicas
indicadas en la placa de la máquina.
WARNING
The machine must be connected to a power breaker ( combined
overload and earth leakage detector ) rated as per the details on the
machine data plate.
ATTENTION
La machine devra se brancher, obligatoirement, a la prise générale
moyennant un interrupteur de sécurité calibré selon les renseignements
techniques de la machine, les quelles sont détaillées sur la petite plaque
de caractéristiques.
ACHTUNG
Das Gerät muss an das Stromnetz geschaltet werden. Dabei ist
vorschriftsmässig ein Differenzial-Schutz zu verwenden, welcher nach
den auf dem Typenschild ausgewiesenen technischen Eigenschaften
arbeitet.

1
AMASADORA
ÍNDICE
- INSTALACIÓN.
- CONDICIONES DE UTILIZACIÓN.
- INSTRUCCIONES DE UTILIZACIÓN.
- LIMPIEZA 1.
- MANTENIMIENTO.
- NIVEL SONORO.
- CONEXIONES INVERSOR.
- ESQUEMA ELÉCTRICO.
- LISTA DE RECAMBIOS.
- DETALLE GRUPO GIRO RECIPIENTE.
- PLANO DE CONJUNTO.
INSTRUCCIONES
Antes de cualquier manipulación de la máquina deberán observarse todas las indicaciones de este manual de
instrucciones.
El uso de la máquina con cualquier modificación de los elementos relativos a la seguridad que incorpora, puede
provocar accidentes y viola la Directiva Social 89/655/CEE. Equipamientos Carnicos S.L no se hace responsable
del uso de la máquina en estas circunstancias.
INSTALACIÓN
La amasadora viene embalada en posición de trabajo. Conviene conservar esta posición durante el desembalado
e instalación. Situar la máquina sobre una superficie fija y sólida de modo que quede nivelada colocando los
tacos base que se entregan con la máquina. En el caso de las amasadoras de 20 y 40 litros, conviene situarlas
sobre una plataforma para que el borde superior del recipiente quede a una altura cómoda para trabajar ( entre
80 y 110 cm ). En el modelo de 90 litros, rosque en su lugar la palanca volcaje (A).
Comprobar que la tensión y la frecuencia de la red se corresponden con las indicadas en la placa de
características técnicas de la máquina, así como el tipo de alimentación de la red y de la máquina ( monofásica,
trifásica, con o sin neutro ). El instalador deberá adecuar la conexión macho ( clavija ) de la máquina a la base
portadora de la red, de modo que se correspondan perfectamente. La máquina debe conectarse a la red,
obligatoriamente, a través de un protector diferencial de calibre adecuado a las características técnicas indicadas
en la placa de la máquina.
Conecte la clavija a la red. Asegúrese de que no hay ningún objeto suelto en el interior del recipiente y coloque la
maneta del conmutador en posición 1. Pulse el botón verde de marcha y la máquina girará en un sentido.
Cambie la maneta del conmutador a la posición 2 y pulse nuevamente el botón de marcha. Observe que la pala
gira en sentido inverso. Levante la tapa despacio para comprobar que al separarla del recipiente ( 5 cm o menos)
la máquina se detiene. Coloque la maneta del interruptor en posición " 0 ".
A partir de este punto la máquina se considerará lista para su uso, previa limpieza.
CONDICIONES DE UTILIZACIÓN
La amasadora está destinada a la mezcla y/o amasado de productos cárnicos, no descartándose las mezclas de
base vegetal o de pescado. Las mezclas o productos con féculas o farináceos pueden llegar a obtener
consistencias muy elevadas lo cual deberá tenerse en cuenta para reducir la cantidad total de producto
elaborado.
La temperatura del género no será inferior a los 2ºC. Para cualquier otra aplicación deberán abstenerse de
utilizar la máquina o bien consultar con el fabricante. Asimismo, sólo podrá utilizarse la amasadora en el modo
descrito en este manual.
Para poner en marcha la máquina es imprescindible haber leído detenidamente todas las intrucciones y seguir
todas las indicaciones de instalación y utilización.
La capacidad para el modelo de 20 litros está entre 10 y 12 Kg. siendo variable según el tipo de género.
En el modelo de 40 litros, la capacidad está entre 20 y 25 Kg.
En el modelo de 90 litros, la capacidad está entre 55 y 60 Kg.

2
En el modelo de 100 litros, la capacidad está entre 60 y 65 Kg.
INSTRUCCIONES DE UTILIZACIÓN
A continuación detallamos la forma de utilizar la " amasadora-mezcladora " en las distintas clases de género que
más usualmente se elaboran. La carne deberá tener, a ser posible, un mínimo de 24 horas de cámara de
conservación, antes de su elaboración cuando se trate de embutido para curar.
a.- Picamos el género y a continuación lo pasamos a la amasadora.
b.- Vertemos, esparciendo por todo el recipiente, el pimentón, la sal, o sus correspondientes aditivos, según los
casos.
c.- Ponemos la máquina en marcha en la posición MEZCLA - pala hacia atrás durante 30 segundos. Luego
paramos e invertimos el sentido de giro de la pala; o sea, el interruptor en la posición AMASADO - pala hacia
delante durante 30 segundos y así sucesivamente según las necesidades que requiera el buen estado de
amasado o mezclado de la masa que se esté elaborando.
Orientativamente, podemos indicar unos tiempos de proceso para algunos productos:
- de 3 a 4 minutos girando alternativamente la pala en cada sentido para la salchicha o cruda.
- de 4 a 6 minutos para morcilla o negra.
- de 6 a 8 minutos para longaniza o chorizo.
- de 8 a 10 minutos para sobrasada.
Para vaciar la máquina deberá levantar la tapa recipiente (B) .
Tirar de la corredera de bloqueo del recipiente (C) y volcar el recipiente tirando de la maneta del mismo. Coloque
un recipiente de forma rectangular frente a la cuba de la máquina para que el producto caiga en su interior, bien
por su propio peso o ayudado manualmente. En caso de precisar movimiento de las palas en esta situación,
accionar los dos pulsadores simultaneamente ( excepto para la amasadora de 20 litros).
LIMPIEZA
Para proceder a la limpieza de la amasadora, deberá desconectar la clavija de la red eléctrica.
Saque y coloque la pala con las piezas triangulares laterales en posición horizontal, para tirar hacia arriba y
sacarla del recipiente. De esta forma y con la ayuda de agua caliente, jabón neutro y unos trapos húmedos, la
limpieza será tarea fácil. También es posible limpiar el recipiente y la pala con un aparato de presión, procurando
no incidir de forma directa en las zonas de los ejes derecho e izquierdo, donde se hallan los retenes.
MANTENIMIENTO
Engrase el engranaje de transmisión de la pala cada 100 horas de funcionamiento, aproximadamente, con una
grasa consistente y antigoteo.
Lubrique también las zonas de giro de ambos extremos del recipiente ( en modelo de 40 litros, solo lado
izquierdo ) con aceite fino atóxico. Para la amasadora de 20 litros no es necesário ningún tipo de engrase.
NIVEL SONORO
El nivel de presión acústica continuo equivalente ponderado " A" en el puesto de trabajo y sin carga es de como
máximo 62 dB(A).

KNEADER
TABLE OF CONTENTS
- INSTALLATION.
- CONDITIONS FOR USE.
- INSTRUCTIONS FOR USE.
- CLEANING 1.
- MAINTENANCE.
- SOUND LEVEL.
- INVERTER CONNECTIONS.
- ELECTRICAL SCHEMATIC.
- LIST OF ELECTRICAL MATERIALS.
- DETAIL OF THE CONTAINER ROTATION UNIT.
- ASSEMBLY DRAWING.
INSTRUCTIONS
Before handling the machine, all indications in this Instruction Manual must be observed.
The use of the machine with any modification of the safety elements that it includes may cause accidents and
violate Council Directive 89/655/EEC. Equipamientos Cárnicos S.L. may not be held liable for using the machine
under said circumstances.
INSTALLATION
The kneader comes packed in the working position. It is advisable to keep this position during unpacking and
installation. Place the machine on a permanent and solid surface so that it remains level with the base pads
installed, which are delivered with the machine. In the case of the 20- and 40-litre kneaders, it is advisable to
place them on a platform so that the top edge of the container is at a comfortable working height (between 80 and
110 cm). For the 90-litre model, screw the tilting lever (A) in place.
Ensure that the voltage and frequency of the mains correspond to the specifications on the machine’s nameplate.
Also ensure that the type of power supply of the mains and of the machine (single-phase, three-phase, with or
without neutral) is correct. The installer should adapt the male connection (plug) of the machine to the socket of
the mains so that they match perfectly. It is mandatory that the machine be connected to the mains through a
differential protector with an adequate gauge for the technical specifications indicated on the machine’s
nameplate.
Connect the plug to the mains. Be sure that there are no loose objects in the interior of the container, and place
the switch lever in position 1. Press the green Run button and the machine will rotate in one direction. Change the
switch lever to position 2, and then press the Run button again. Observe that the paddle rotates in the opposite
direction. Lift the cover slowly to ensure that the machine stops when it is separated from the container (5 cm or
less). Place the power switch in position “0”.
As from this point, the machine is considered ready for use, subject to cleaning.
CONDITIONS FOR USE
The kneader is designed to mix and/or knead meat products, and it is also possible to mix vegetable- or fish-
based products. Mixtures or products with starch or farinaceous products may reach very high consistencies,
which should be taken into account in order to reduce the total quantity of prepared product.
The temperature of the product must not be less than 2º C. For any other application, refrain from using the
machine or consult the manufacturer. Moreover, the kneader can only be used in the manner described in this
manual.
Before starting the machine, all instructions must have been read first and all installation and use indications must
be followed.
The capacity of the 20-litre model is between 10 and 12 kg, which can vary according to the type of product.
For the 40-litre model, the capacity is between 20 and 25 kg.
For the 90-litre model, the capacity is between 55 and 60 kg.
For the 100-litre model, the capacity is between 60 and 65 kg.

INSTRUCTIONS FOR USE
We have detailed below how to use the “kneader-mixer” for the various kinds of products that are most commonly
prepared. If possible, meat should have been placed in a walk-in cooler for a minimum of 24 hours before
preparing it for sausages.
a. First, a product is minced and then sent to the kneader.
b. Spread the product around the entire container and add the paprika, salt or applicable spices.
c. Start the machine in the MIX position – paddle in reverse – for 30 seconds. Then stop the machine and reverse
the paddle direction, in other words, place the machine in the KNEADING position – paddle forward – for 30
seconds. Continuously alternate directions this way as needed to produce the correct kneading or mixing of the
mince that is being prepared.
As a guideline, we can indicate some processing times for a few products:
- from 3 to 4 minutes, alternately rotating the paddle in each direction, for sausage.
- from 4 to 6 for blood sausage.
- from 6 to 8 for loganiza or chorizo sausages.
- from 8 to 10 minutes for sobrasada sausage.
To empty the machine, first lift the container cover (B).
Pull the container locking slide (C), and then tip the container by pulling on its handle. Place a rectangular
container in front of the machine’s bowl so that the product falls in the interior of the container by its own weight or
by helping it manually. If it is necessary to move the paddles in this situation, press the two buttons
simultaneously (except for the 20-litre kneader).
CLEANING
To clean the kneader, it must be unplugged from the mains.
Pull out and position the paddle with the lateral, triangular pieces in the horizontal position so that it can be pulled
upwards and removed from the container. The cleaning task will thus be easy, for which hot water, neutral soap
and damp cloths should be used. It is also possible to clean the container and the paddle with a pressure cleaner.
Be sure not to apply pressurised water directly in the areas around the right and left axles, where the grease seal
rings are located.
MAINTENANCE
Lubricate the transmission gears of the paddle after approximately every 100 operating hours using a consistent
and non-drip grease.
Also lubricate the rotation areas of both ends of the container (in the 40-litre model, only the left-hand side) using
a refined, non-toxic oil. For the 20-litre kneader, no type of lubrication is necessary.
SOUND LEVEL
The weighted and continuous, equivalent acoustic pressure level “A” at the work station and with no load is a
maximum of 62 dB(A).

KNETMASCHINE
INHALTSÜBERSICHT
- AUFSTELLUNG DER MASCHINE
- BETRIEBSBEDINGUNGEN UND ANWENDUNGSBEREICHE
- BEDIENUNG
- REINIGUNG 1
- WARTUNG
- GERÄUSCHPEGEL
- WECHSELRICHTER-ANSCHLUSS
- ELEKTRISCHER SCHALTPLAN
- LISTE DER ELEKTRISCHEN BESTANDTEILE
- ERSATZTEIL-LISTE
- DETAILANSICHT DREH-EINHEIT/BEHÄLTER
- DETAILANSICHT EINSTUFIGES GETRIEBE
- ZUSAMMENBAUZEICHNUNG
WICHTIGE HINWEISE
Bevor Sie Einstellungen an der Maschine vornehmen, müssen Sie sämtliche Anweisungen dieses
Benutzerhandbuches gelesen und verstanden haben.
Jegliche Veränderung der sicherheitsrelevanten Bestandteile der Maschine kann bei ihrem Gebrauch Unfälle
hervorrufen und verletzt die Arbeitsmittel-Benutzungs-Richtlinie 89/655/EWG. Equipamientos Carnicos, S.L
übernimmt keine Haftung für den Gebrauch der Maschine unter diesen Umständen.
AUFSTELLUNG DER MASCHINE
Die Knetmaschine ist in der Arbeitsposition verpackt. Es empfiehlt sich, diese Position beim Auspacken und
Aufstellen der Maschine beizubehalten. Montieren Sie die mitgelieferten Füße und stellen Sie die Maschine auf
eine feste und stabile Fläche, sodass sie waagrecht steht. Bei den Knetmaschinen mit 20 und 40 Litern
Fassungsvermögen empfiehlt es sich, sie auf eine Erhöhung zu stellen, damit der obere Rand des Behälters eine
bequeme Arbeitshöhe (zwischen 80 und 110 cm) erreicht. Beim 90-Liter-Modell schrauben Sie zu diesem Zweck
am Kipphebel (A).
Überprüfen Sie, ob die Netzspannung und Netzfrequenz sowie die Versorgungsart des Stromnetzes und der
Maschine (einphasig, dreiphasig, mit oder ohne Nullleiter) mit den Angaben auf dem Typenschild der Maschine
übereinstimmen. Der Elektriker muss den Netzstecker der Maschine so an die Netzsteckdose anpassen, dass
beide perfekt zusammenpassen. Die Maschine muss unbedingt mit Differenzialschutz an das Stromnetz
angeschlossen werden; die Art des Differenzialschutzes muss mit den Angaben auf dem Typenschild
übereinstimmen.
Schließen Sie den Stecker an das Stromnetz an. Vergewissern Sie sich, dass sich im Inneren des Behälters kein
loser Gegenstand befindet, und stellen Sie den Hebel des Umschalters in die Position 1. Drücken Sie den grünen
Startknopf, und die Maschine dreht in eine Richtung. Stellen Sie nun den Hebel des Umschalters in die Position 2
und drücken Sie erneut den Startknopf. Sie können beobachten, dass sich die Schaufel nun in die
entgegengesetzte Richtung dreht. Heben Sie den Deckel langsam hoch, um zu überprüfen, ob die Maschine
anhält, wenn Sie den Deckel vom Gefäß nehmen (5 cm oder weniger). Stellen Sie den Hebel des Schalters in die
Position „0“.
Nach diesen Überprüfungen und Einstellungen und nach erfolgter Reinigung ist die Maschine betriebsbereit
installiert.
BETRIEBSBEDINGUNGEN UND ANWENDUNGSBEREICHE
Die Knetmaschine ist für das Mischen und/oder Kneten von Fleischprodukten bestimmt, wobei auch Produkte auf
vegetarischer Basis oder Fischmischungen hergestellt werden können. Bei stärkehaltigen oder mehligen
Mischungen können sich die Dichtheit und das Volumen der Produkte im Zuge der Verarbeitung stark erhöhen;
dieser Aspekt muss bei der Wahl der Zutatenmenge berücksichtigt werden.

Die Temperatur der Produkte darf nicht unter 2ºC liegen. Die Maschine darf nicht für andere Zwecke verwendet
werden; fragen Sie gegebenenfalls den Hersteller. Verwenden Sie das Gerät darüber hinaus ausschließlich
gemäß den Anweisungen in diesem Handbuch.
Vor Inbetriebnahme der Maschine müssen Sie unbedingt sämtliche Anweisungen gelesen und sämtliche
Angaben zu Installation und Gebrauch befolgt haben.
Das empfohlene Füllgewicht beträgt beim 20-Liter-Modell je nach Zutaten 10 bis 12 kg.
Beim 40-Liter-Modell beträgt das empfohlene Füllgewicht 20 bis 25 kg.
Beim 90-Liter-Modell beträgt das empfohlene Füllgewicht 55 bis 60 kg.
Beim 100-Liter-Modell beträgt das empfohlene Füllgewicht 60 bis 65 kg.
BEDIENUNG
Im Folgenden wird die Verwendungsweise der Knet- und Mischmaschine für die am häufigsten verarbeiteten
Produktarten erläutert. Fleisch sollte vor der Verarbeitung nach Möglichkeit mindestens 24 Stunden lang gekühlt
werden, wenn daraus Räucherwurst hergestellt werden soll.
a.- Zerkleinern Sie die Ware und geben Sie sie anschließend in die Knetmaschine.
b.- Fügen Sie Paprikagewürz, Salz und die sonstigen jeweils nötigen Wurstgewürze und -Zusätze hinzu und
verteilen Sie diese Zutaten im gesamten Behälter.- Setzen Sie die Maschine in Betrieb und stellen Sie sie in die
Position MISCHEN – Schaufel 30 Sekunden lang rückwärts. Halten Sie anschließend die Maschine an und
kehren Sie die Drehrichtung der Schaufel um; d.h. stellen Sie den Schalter in die Position KNETEN – Schaufel 30
Sekunden lang vorwärts. Fahren Sie auf diese Weise abwechselnd so lange fort, bis der Teig bzw. die
zubereitete Produktmischung das gewünschte Aussehen und die erforderliche Textur erreicht.
Zur Orientierung werden nachstehend die Verarbeitungszeiten von einigen Produkten genannt:
- 3 bis 4 Minuten für Brüh- und Rohwürste, wenn die Schaufel abwechselnd in die eine und in die andere
Richtung gedreht wird.
- 4 bis 6 Minuten für Blut- und Rotwurst.
- 6 bis 8 Minuten für luftgetrocknete Dauerwurst wie Longaniza und Chorizo.
- 8 bis 10 Minuten für streichfähige Wurst wie Sobrasada.
Um die Maschine zu entleeren, müssen Sie den Behälterdeckel (B) abnehmen.
Ziehen Sie am Sperrschieber des Behälters (C) und kippen Sie den Behälter, indem Sie an seinem Hebel ziehen.
Stellen Sie ein rechteckiges Gefäß gegenüber dem Bottich der Knetmaschine auf, damit das fertige Produkt −
entweder durch sein Eigengewicht oder mit manueller Hilfe −hineinfällt. Falls in dieser Situation eine
Schaufelbewegung erforderlich ist, betätigen Sie gleichzeitig die beiden Knöpfe (gilt nicht für das 20-Liter-Modell).
REINIGUNG
Zur Reinigung der Maschine muss zunächst der Netzstecker vom Stromnetz getrennt werden.
Bringen Sie die anschließend die Schaufel mit den dreieckigen Seitenteilen in die horizontale Lage, um sie nach
oben und aus dem Gefäß heraus zu ziehen. Nun lässt sich die Maschine mit warmem Wasser, einem neutralen
Reinigungsmittel und feuchten Lappen einfach reinigen. Das Gefäß und die Schaufel können auch mit einem
Druckreiniger gereinigt werden, wobei darauf zu achten ist, damit nicht direkt in die Bereiche der rechten und der
linken Achse, wo sich die Verriegelungsvorrichtungen befinden, zu gelangen.
WARTUNG
Befetten Sie das Übertragungsgetriebe der Schaufel ca. alle 100 Betriebsstunden mit einem konsistenten,
tropffreien Schmiermittel.
Schmieren Sie auch die Drehbereiche an den beiden Enden des Gefäßes (beim 40-Liter-Modell nur die linke
Seite) mit einem feinen, atoxischen Öl. Beim 20-Liter-Modell ist keine Schmierung notwendig.
GERÄUSCHPEGEL
Der äquivalente Schalldruckpegel (A-gewichtet) am Arbeitsplatz und ohne Last beträgt maximal 62 dB(A).

PÉTRIN- MÉLANGEUR
INDEX
- INSTALLATION.
- CONDITIONS D’UTILISATION.
- MODE D’EMPLOI.
- NETTOYAGE 1.
- ENTRETIEN.
- NIVEAU SONORE.
- CONNEXIONS INVERSEUR.
- SCHÉMA ÉLECTRIQUE.
- LISTE DE MATÉRIEL ÉLECTRIQUE.
- LISTE DE PIÈCES DE RECHANGE.
- DÉTAIL GROUPE ROTATION RÉCIPIENT.
- DÉTAIL GROUPE TRAIN D’ENGRENAGES MONOPHASÉ.
- PLAN D’ENSEMBLE.
INSTRUCTIONS
Avant toute manipulation de la machine, vous devrez suivre toutes les indications données dans le Manuel
d’Instructions.
L’apport de toute modification aux éléments de sécurité de la machine peut être la cause de la production
d’accidents lors de son usage et viole donc la Directive Sociale 89/655/CEE.
Equipamientos Cárnicos, S.L décline toute responsabilité résultant de l’usage de la machine dans de tels cas et
conditions.
INSTALLATION
Le pétrin mélangeur est emballé en position de travail. Il convient de le laisser dans cette position, y compris lors
du déballage et de l’installation. Placer la machine sur une surface plane et solide de sorte qu’elle soit stable.
Pour ce faire, la niveler au moyen des cales de base livrées avec la machine. Concernant les pétrins mélangeurs
de 20 et 40 litres, il convient de les placer sur une plate-forme de façon à ce que le bord supérieur du récipient
soit situé à une hauteur telle que l’opérateur puisse travailler commodément (entre 80 et 110 cm). Quant au
modèle de 90 litres, à sa place vissez le levier de versement (A).
Vérifiez que la tension et la fréquence du réseau correspondent bien à celles indiquées sur la plaque de
caractéristiques techniques de la machine. De même, vérifiez le type d’alimentation du réseau et de la machine
(monophasé, triphasé, avec ou sans neutre). L’installateur doit adapter la prise mâle (fiche) de la machine à la
base porteuse du réseau de sorte qu’elles s’épousent parfaitement. La machine doit être branchée au réseau et
doit obligatoirement l’être à travers un disjoncteur différentiel dont le calibre répond aux caractéristiques
techniques indiquées sur la plaque de la machine.
Connectez la prise au réseau. Assurez-vous qu’il n’y a aucune pièce détachée à l’intérieur du récipient et placez
la manette du commutateur dans la position 1. Appuyez sur le bouton vert de mise en marche. La machine tourne
alors dans un sens. Placez ensuite la manette du commutateur dans la position 2 et appuyez à nouveau sur le
bouton de mise en marche. La pale doit alors tourner dans le sens inverse. Levez doucement le couvercle pour
vérifier que la machine s’arrête bien lorsqu’il est ôté du récipient (5 cm ou moins). Placez la manette de
l’interrupteur sur la position « 0 ».
La machine est alors installée et prête à l’usage, en prenant soin de l’avoir préalablement nettoyée.
CONDITIONS D’UTILISATION
Le pétrin mélangeur est conçu pour le mélange et/ou pétrissage de produits carniques. Cependant, il peut être
utilisé pour le mélange de produits végétaux ou de poisson. Les mélanges ou les produits à fécules ou farineux
peuvent prendre des consistances très élevées ; il faudra donc prendre soin de réduire la quantité totale de
produit fini.
La température du produit ne doit pas être inférieure à 2ºC. Pour toute autre application, vous devrez vous
abstenir d’utiliser la machine ou consulter le fabricant. De même, le pétrin mélangeur ne pourra être utilisé que de
la façon décrite dans ce manuel.

Avant de mettre la machine en marche, il est indispensable d’avoir lu attentivement toutes les instructions et
d’avoir suivi le mode l’installation et d’emploi.
La capacité pour le modèle de 20 litres est d’entre 10 et 12 kg, mais elle peut varier en fonction du type de
produit.
Pour le modèle de 40 litres, la capacité est d’entre 20 et 25 kg.
Pour le modèle de 90 litres, la capacité est d’entre 55 et 60 kg.
MODE D’EMPLOI
Nous détaillons ci-après le mode d’emploi du « pétrin mélangeur » pour les différents types de produits qu’il sert
le plus souvent à élaborer. La viande doit, si possible, avoir passé au moins 24 heures dans une chambre de
conservation avant son élaboration lorsqu’il s’agit de charcuterie à sécher.
a.- Hacher le produit puis le mettre dans le pétrin mélangeur.
b.- Verser le paprika, le sel ou les additifs qui correspondent, selon le cas, en les éparpillant dans tout le récipient.
c.- Mettre la machine en marche et la mettre en position de MÉLANGE – pale vers l’arrière pendant 30 secondes.
Arrêter la machine et inverser le sens de rotation de la pale en plaçant l’interrupteur dans la position de
PÉTRISSAGE – pale vers l’avant pendant 30 secondes – et ainsi successivement en fonction des besoins de
pétrissage ou de mélange de la masse élaborée.
De façon indicative, voici quelques temps de traitement pour certains produits :
- entre 3 et 4 minutes en faisant tourner la pale dans chaque sens, alternativement, pour la chair à saucisse cuite
ou crue.
- entre 4 et 6 minutes pour le boudin blanc ou noir.
- entre 6 et 8 minutes pour la grosse saucisse ou le chorizo.
- entre 8 et 10 minutes pour le cervelas.
Pour vider la machine, lever le couvercle du récipient (B).
Tirer de la glissière de verrouillage du récipient (C) et retourner le récipient en tirant de la manette de ce dernier.
Placer le récipient rectangulaire face à la cuve de la machine pour que le produit tombe à l’intérieur de son propre
poids ou en vous s’aidant des mains. Si le mouvement des pales est requis, actionner les deux boutons poussoirs
simultanément (sauf pour le pétrin mélangeur de 20 litres).
NETTOYAGE
Pour procéder au nettoyage du pétrin mélangeur, la prise de la machine doit avoir été débranchée du réseau
électrique.
Extraire la pale avec les pièces triangulaires latérales et la placer à l’horizontale pour tirer vers le haut et l’extraire
du récipient. De cette façon, le nettoyage sera tâche facile avec de l’eau chaude, du savon neutre et des linges
humides. Il est aussi possible de nettoyer le récipient et la pale avec un appareil de pression, mais, dans ce cas,
prendre soin de ne pas toucher directement les zones des axes droit et gauche où se trouvent les joints.
ENTRETIEN
Graissez l’engrenage de transmission de la pale toutes les 100 heures de fonctionnement, environ, avec de la
graisse consistante et anti-goutte.
Lubrifiez également les zones de rotation des deux extrémités du récipient (sur le modèle de 40 litres,
uniquement du côté gauche) avec de l’huile fine atoxique. Pour le pétrin mélangeur de 20 litres, aucun type de
graissage n’est requis.
NIVEAU SONORE
Le niveau de pression acoustique continu équivalent pondéré sur le poste de travail A et sans charge est au plus
de 62 dB (A).

RC-100 III
SQ 2
14 16
L 1
L 2
10-2012
2
1.5 mm
33
34
FU1
2A
1500rpm
KM-1
SA 1
201 2 4 6 8 10 12
13
57911
L2
PE
1.5 mm2
1 mm 2
KM-1
A2
A1
3
4
SB 2
FA 1
FA 2
SB 1
2
1
SQ 1
11
12
KM-1
13
14
SA 1
14 13
SB 3
SQ 2
11
12
3
4
SB 2
34
L 3
M 1
3~
13

~
T3
L 1
L 2
1.5 mm
QM1
13
2
FU1
16
2A
1500rpm
KM-1
SA 1
201 2 4 6 8 10 12
13
57911
L2
PE
1.5 mm2
1 mm 2
KM-1
A2
A1
3
4
SB 2
FA 1
FA 2
SB 1
2
1
SQ 1
11
12
KM-1
13
14
SA 1
14 13
SB 3
SQ 2
11
12
3
4
SB 2
34
L 3
34
33
06-2014
SQ 2
14
M 1
3
PKZM0
T1
OPCION GUARDAMOTOR RC-100 III
T2

TABLA 1
CONMUTADOR-INVERSOR III
KM-1 FR-1
RC-100-V 3P ~200V/50 + PE 1.3 kW RC-100 III DIL EM-10 (190V 50Hz)
(MOELLER) ZE-9
RC-100-O 3P ~230V/50 + PE 1.3 kW RC-100 III DIL EM-10 (230V 50/60Hz)
(MOELLER) ZE-9
RC-100-P 3P ~220V/60 + PE 1.3 kW RC-100 III DIL EM-10 (230V 50/60Hz)
(MOELLER) ZE-9
RC-100-S 3P ~380V/60 + PE 1.3 kW RC-100 III DIL EM-10 (380V 60Hz)
(MOELLER) ZE-4
RC-100-R 3P ~400V/50 + PE 1.3 kW RC-100 III DIL EM-10 (400V 50Hz)
(MOELLER) ZE-4
L3
L1
L2
(
2
)
SB1
(
3
)
SB2
6CBL115NE
(70 mm)
6
8
2
4
10
12
14
16
5
9
7
1
3
15
13
11

75
DETALLE G
77
112
113
93
97
58 73
A
69
68 65
99 98
66
31 67
91
92
2
63
23
8 7
12
11
10
9
16
27
18
14
15
95
109
B
64
22
90
57 50
49 55
47
80
22 48 8
5 4 37
35
59
72
110
61 111
94
63
62 30
103
70
6079
84
28
113
82
83
85
86
87
104
88
89
82
81
106
81
22
101
15
78
93
37
36438
5
43
4439
42
40
41 1
71
24
26
105
25
15 100
56
C
76
F
A
D
E
G
29 30
DETALLE A
21
2019
77 34
32
94
45
31
53
54
DETALLE D
36 40 4152
37
17 96
DETALLE F
13
108107
13 51
DETALLE E
41 46
28-07-2015
RC-100 01

RC-100
28-07-2015
Subgrupos 01
131 122
130
125 133 123 120 132 121
120
128 129
127 126
124 133 125
62 →4RM31013; CAJETIN MICRO RM-100
145148141
140142147144146
56 (C)→4MG43335; GRUPO CORREDERA BLOQU. MG90
149

155
156158 157 20
RC-100
28-07-2015
OPCION GUARDAMOTOR

RC/MG

RC-100
ORDEN CÓDIGO DENOMINACIÓN CANTIDAD
1 5RM10185 BANCADA RM-100 1
2 5MG43330 PLETINA SUPLEMENT CORONA MG-90 1
3 5RM31007 PORTADADO IZQUIERDO RM-100 1
4 5RM42386 ARANDELA TEFLON CUBELL 2
5 6007I0410 PASADOR CILIN 04x10 INOX 2
6 6ASTO1253 TORICA 125x3 OR 1
7 5RM31051 DADO RECIPIENTE RM-100 1
8 6TO9504VI TORICA 95x4 (OR VI) 3
9 5MG30991 SOPORTE REDUCTOR PALA MG-90 1
10 6125I12 ARANDELA 12 INOX 4
11 6127I12 ARANDELA GROWER 12 INOX 4
12 6934I12 TUERCA M-12 INOX 4
13 6912I0650 TORNILLO ALLEN 06x50 INOX 8
14 6125I10 ARANDELA 10 INOX 8
15 6933I1030 TLLO 6C M-10x30 INOX 8
16 5RM31052 EJE IZQUIERDO RM-100 1
17 5MG43632A ARANDELA AJUSTE PALA MG-95 1
18 6CT100840 CHAVETA 10x08x40 (AS) 2
19 5RM43462 CHAPA DETECCION SUPERIOR RM-100 1
20 6125I05 ARANDELA 05 INOX 4
21 6933I0512 TLLO 6C M 5x12 INOX 2
22 6125I08 ARANDELA 08 INOX 14
23 6934I08 TUERCA M-8 INOX 6
24 5AS40489 ARANDELA RUEDA AS 1
25 6127I10 ARANDELA GROWER 10 INOX 1
26 6933I1025 TLLO 6C M-10x25 INOX 1
27 5RM43605 CASQUILLO TOPE RM-100 1
28 5RC10224 ENVOLVENTE RM-100 1
29 5CM42351 PLACA FIJACION MICRO CM-21 1
30 6125I06 ARANDELA 06 INOX 8
31 6933I0612 TLLO 6C M6x12 INOX 3
32 6XX1A32N MICRO OMRON D4D 1A32N 1
33 6125I04 ARANDELA 04 INOX 2
34 6912I0425 TORNILLO ALLEN 04x25 INOX 2
35 5RM10184 RECIPIENTE RM-100 2
36 5RM42387 ARANDELA 4 TEFLON CUBELL 2
37 6TO1003VI TORICA 100x3 VITON 2
38 6RMTO743 TORICA 74x3 ANILLO REC RM-60-90 1
39 5RM43602 PLATINA RETENES RM-100 1
40 6963I0516 TORNILLO CAB PLANA M5x16 8
41 5XX40694 TAPON 10,5x2 12
42 5MG43604 RASCADOR MG-90 1
43 6RT405207M RETEN 40x52x7 G-1 MUELLE INOX 2
44 5MG43603 ANILLO SEPARADOR RETENES MG-95 1
45 6007I0406 PASADOR CILINDRICO 04x06 INOX 4
46 5RM31009 DADO DERECHO RM-100 1
47 5RM31010 PORTADADO DERECHO RM-100 1
48 6933I0825 TLLO 6C 08x25INOX 4
49 6TO2025 TORICA 20x2.5 1
50 5RM42024 EJE DERECHO 1
51 67343I0510 PASSADOR ELASTICO 05x10 INOX 1
52 5RM42025 PLATINA RECIPIENTE DERECHO RM 1
53 6TO2525 TORICA 25x2.5 1
54 5RM42031 CASQUILLO PLATINA RM-60-90 1
55 5RM41970 MUELLE EJE DERECHO comprimit a 38 1
56 4MG43335 GRUPO CORREDERA BLOQU. MG90 1
57 6RM3772 MANETA OPAC 3772 M-10 1
58 5RM43470 PALANCA RECIPIENTE RM-100 1
07-02-2011

RC-100
ORDEN CÓDIGO DENOMINACIÓN CANTIDAD
59 6125I14 ARANDELA 14 INOX 1
60 6XX41478 JUNTA ENVOLVENTE RM-100 1
61 5RM31057 SOPORTE LATERAL RM-100 1
62 4RM31013 CAJETIN MICRO RM-100 1
63 5RM42983 JUNTA CAJETIN RM-90 NOU 1
64 5RM20334 TAPA RECIPIENTE RM-100 1
65 5RM43752 ARANDELA AJUSTE MICRO RM-100 1
66 69021I06 ARANDELA ALA ANCHA M6 INOX 1
67 6916I0612 ESPARRAGO ALLEN M6x12 INOX 1
68 5CH40860 ARANDELA DESLIZ. EJE CENTRAL 1
69 6985I08 TUERCA AUTOBLOCANTE M-8 INOX 1
70 6934I06 TUERCA M-6 INOX 6
71 6AS225 PASACABLES REF. 225 1
72 6439I14 TUERCA BAJA M-14 INOX 2
73 5RM43469 FIJADOR RM-100 1
74 6RM622 TOPE A PRESION CON RANURA 622 2
75 4PM41912 GRUPO TAPA VENTILADOR 1
76 5RC31291 PROTECTOR CAMARA 1
77 6934I04 TUERCA M-4 INOX 4
78 6POEI0516 TRNLLO POELIER M5x16 INOX 17
79 6CR22809 GRAPA 2222809 CM-41 4
80 4XX42437RM GRUPO TACO BASE RM-PM 4
81 6M22DGX1 PULSADOR MARCHA I 2
82 6M22TD MEMBRANA PULSADOR 2
83 6NP2ES542 PULSADOR SETA D40 CC 1
84 6INT048213 INTERRUPTOR INVERSOR 1
85 6EM10400 CONTACTOR DIL EM-10 400v 1
86 6CG120 BORNE PORAFUSIBLES CSFL4U 1
87 6FUS19195 FUSIBLE T 2A REF-19195 CR-GS 1
88 6MK10 CAMARA A+K10 1
89 6M22AK11 CAMARA A+K01+K10 1
90 4RM20359 GRUPO NUCLEO RM-100 1
91 5RM42030 CASQUILLO NUCLEO RM-90-100 1
92 4MG43245 CONJUNTO RESORTE MG-90 1
93 5SM42009 ARANDELA GOMA PM-70 26
94 6PEPG13,5C PRENSA ESTOPA PG-13,5 CAP-TOP 2
95 6RD62072RS RODAMIENTO RADIAL 6207 2RS 1
96 6472I72 SEEGER I-72 1
97 6007I0414 PASADOR CILIN. 04x14 INOX 1
98 5RM31058 ROMPEDORES RM-100 1
99 5MG43626 TUERCA CON MANETA MG-95 1
100 69021I10 ARANDELA ALA ANCHA M10 INOX 4
101 5RM31079 TAPA INFERIOR RM-100 1
102 6XX68210 MALLA TAPA INFERIOR RM-100 1
103 4XX41469A GRUPO CABLE LINEA 4x1,5 1
104 5MG31075 REDUCTOR MK-90 60-1 Ø35 1
105 5MG30992 MOTOR 80 III 1.75HP MG-95 1
106 6933I0820 TLLO 6C 08x20 INOX 4
107 6551P0820 ESPARRAGO M8x20 Ref.00100101071 4
108 6934P08 TUERCA M8 Ref.00100101112 4
109 5MG43639 ARANDELA TEFLON MG-95 1
110 5RM43658 BARRA UNION 2
111 5XX41368M PLAQUITA MEDIANA R - S MAINCA 3M 1
112 6964I0412 TORNILLO GOTA SEBO M4x12 4
113 6125I04 ARANDELA 04 INOX 4
114 5MG31017
07-02-2011
Table of contents
Languages:
Other Mainca Commercial Food Equipment manuals
Popular Commercial Food Equipment manuals by other brands

Vollrath
Vollrath Cayenne TSA7209 Operator's manual

Delfield
Delfield 18000-PTB series Service and installation manual

Perlick
Perlick DDC Series Installation & operation manual

METVISA
METVISA FIE.30 instruction manual

STODDART
STODDART Woodson W.HFS22 Specification, installation and operation manual

Casselin
Casselin CPAST480 manual

Fimar
Fimar EASYLINE SM-CJ4 Use and maintenance

Tecfrigo
Tecfrigo DRINK 360 FG Installation and use manual

Scharfen
Scharfen HR 2035 operating instructions

ISA
ISA tornado 50 RV TN Use and maintenance manual

Hendi
Hendi 630402 manual

Lincat
Lincat Silverlink 600 Series Installation, operating and servicing instructions