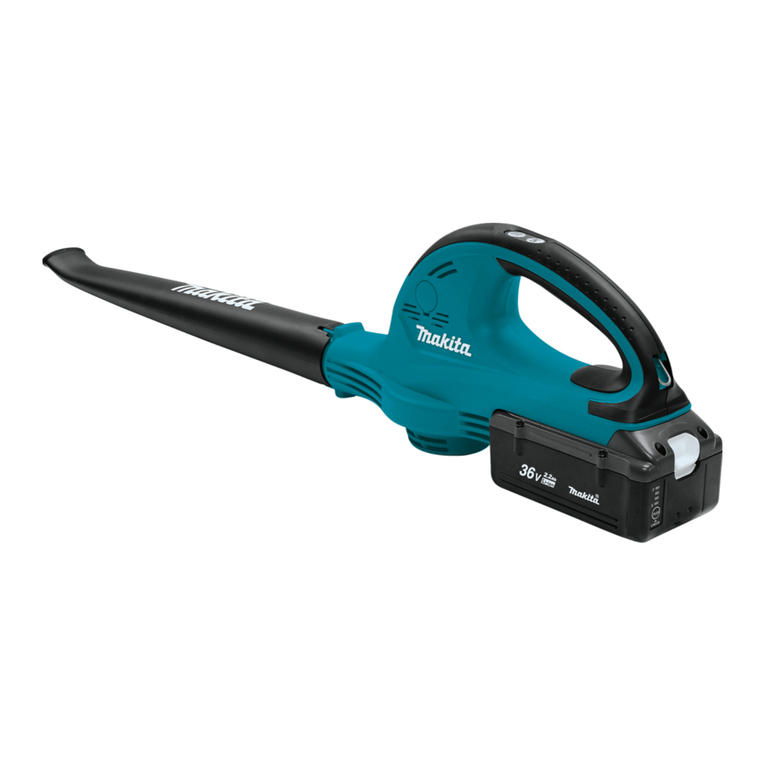
Makita UB402MP User guide

EN Blower Attachment ORIGINAL INSTRUCTION MANUAL 7
FR INSTRUCTIONS D’EMPLOI 14
DE Gebläse-Aufsatz ORIGINAL-BETRIEBSANLEITUNG 22
IT
MANUALE DI ISTRUZIONI ORIGINALE
30
NL Bladblazerhulpstuk ORIGINELE GEBRUIKSAANWIJZING 38
ES Accesorio de Soplado
MANUAL DE INSTRUCCIONES ORIGINAL
46
PT Implemento Soprador
MANUAL DE INSTRUÇÕES ORIGINAL
54
DA Blæsertilbehør OPRINDELIG BRUGSANVISNING 62
EL 69
TR 78
SV Blåstillbehör ORIGINALBRUKSANVISNING 85
NO Blåsertilbehør ORIGINALHÅNDBOK 92
FI Puhallinlisävaruste ALKUPERÄINEN KÄYTTÖOHJE 99
LV
106
LT
ORIGINALI NAUDOJIMO INSTRUKCIJA
113
ET Puhuritarvik ORIGINAALJUHEND 120
PL INSTRUKCJA ORYGINALNA 127
HU Fúvótartozék EREDETI HASZNÁLATI ÚTMUTATÓ 135
SK Nadstavec dúchadla
143
CS Nástavec fukaru 151
SL IZVIRNA NAVODILA ZA UPORABO 158
SQ MANUALI ORIGJINAL I PËRDORIMIT 165
BG
173
HR
181
188
SR
196
RO
204
UK
212
RU
220
KK
229
ZHTW
吹風機組 原始操作手冊 237
ZHCN
吹风附件 原版使用说明书 245
KO 브로어 어테치먼트 취급 설명서 253
UB402MP

2
15 m
Fig.1
Fig.2
3
2
1
Fig.3
1
2
Fig.4
1
Fig.5
1
2
3
4
5
Fig.6
1
Fig.7
Fig.12
3
1
2
Fig.8

3
1
2 3
Fig.9
Fig.10
1
2
3
Fig.11
1
2
3
Fig.12
2
1
Fig.13
2
1
Fig.14

4
Fig.15
1
2
3
Fig.16
1
2
3
Fig.17
Fig.18
Fig.19
Fig.20
Fig.21

5
15m
Fig.22
Fig.23
Fig.24
Fig.25
2
1
Fig.26
1
Fig.27
Fig.28

6
1
Fig.29
Fig.30
Fig.31

7ENGLISH
ENGLISH (Original instructions)
SPECIFICATIONS
Model: UB402MP
Capacities *1 Air volume 0 - 6.2 m3/min
Air speed (average) 0 - 39.1 m/s
Air speed (max.) 0 - 47.4 m/s
Capacities *2 Air volume 0 - 6.2 m3/min
Air speed (average) 0 - 39.1 m/s
Air speed (max.) 0 - 47.4 m/s
Capacities *3 Air volume 0 - 6.2 m3/min
Air speed (average) 0 - 39.1 m/s
Air speed (max.) 0 - 47.4 m/s
Overall length 760 mm
Net weight 1.2 kg
*1. Capacities of blower attachment in conjunction with DUX60 Cordless Multi Function Power Head
*2. Capacities of blower attachment in conjunction with DUX18 Cordless Multi Function Power Head
*3. Capacities of blower attachment in conjunction with UX01G Cordless Multi Function Power Head
without notice.
Approved power unit
-
ing power unit(s):
• DUX60 Cordless multi function power head
• DUX18 Cordless multi function power head
• UX01G Cordless multi function power head
WARNING: Never use the attachment with
non-approved power unit. Non-approved combi-
meaning before use.
Take particular care and attention.
Read instruction manual.
accident.
Do not expose to moisture.
Keep distance at least 15 m.
Ni-MH
Li-ion
Due to the presence of hazardous com-
ponents in the equipment, waste electrical
and electronic equipment, accumulators
on the environment and human health.
Do not dispose of electrical and electronic
appliances or batteries with household
waste!
on waste electrical and electronic equip-
ment and on accumulators and batteries
and waste accumulators and batteries,
as well as their adaptation to national law,
waste electrical equipment, batteries and
and delivered to a separate collection point
for municipal waste, operating in accor-
dance with the regulations on environmen-
tal protection.
crossed-out wheeled bin placed on the
equipment.
Intended use
blowing dust in conjunction with an approved power
unit. Never use the attachment for other purposes.

8ENGLISH
For European countries only
We as the manufacturers: Makita Europe N.V.,
Business address: Jan-Baptist Vinkstraat 2 3070
Kortenberg BELGIUM. Authorize
Designation: Blower Attachment. Designation of
UB402MP.
2006/42/EC and
2000/14/EC and are manufactured in
accordance with the following Harmonised Standards:
EN 60335-1:2012+A11:2014+A13:2017+A1:2019+A14
:2019+A2:2019, EN 50636-2-100:2014.
Place and date of declaration: Kortenberg, Belgium.
31.10.2022
Responsible person:
Makita Europe N.V.
For UK only
We as the manufacturers: Makita Europe N.V.,
Business address: Jan-Baptist Vinkstraat 2 3070
Kortenberg BELGIUM. Authorize
Designation: Blower Attachment. Designation of
UB402MP.
S.I. 2008/1597
(as amended)
provisions of the following UK Regulations: S.I.
2001/1701 (as amended) and are manufactured
in accordance with the following Designated
Standards: EN 15503:2009+A1:2013+A2:2015, EN
50636-2-100:2014.
Place and date of declaration: Kortenberg, Belgium.
31.10.2022
Responsible person:
Makita Europe N.V.
Importer: Makita (UK) Limited, Michigan Drive,
8JD, UK
SAFETY WARNINGS
WARNING: -
with this machine as well as the instruction man-
ual of the power unit before using. Failure to follow
Save all warnings and instruc-
tions for future reference.
The term “blower” and “machine” in the warnings and
precautions refer to the combination of the attachment
and the power unit.
Training
1.
the controls and the correct use of the blower.
2.
-
experience and knowledge or people unfamiliar
with these instructions to use the blower. Local
3. Never operate the blower while people, espe-
4. Keep in mind that the operator or user is
responsible for accidents or hazards occurring
Preparation
1.
trousers while operating the blower.
2.
can be drawn into the air inlet. Keep long hair
3.
the USA, EN 166 in Europe, or AS/NZS 1336
in Australia/New Zealand. In Australia/New
-
-
sons in the immediate working area.

9ENGLISH
4. To prevent dust irritation the wearing of a face
mask is recommended.
5.
non-slip and protective footwear. Non-skid,
6.
Operation
1.
-
ers, and pets outside a 15 m radius; outside
approached, stop the machine.
Fig.1
2.
cartridge, and make sure that all moving parts
have come to a complete stop
•
• before clearing blockages.
• before checking, cleaning or working on
the blower.
•
3.
4. Do not overreach and keep proper balance and
footing at all times.
5.
6. Walk, never run.
7. Keep all cooling air inlets clear of debris.
8. Never blow debris in the direction of
9. Operate the blower in a recommended position
10. Do not operate the blower at high places.
11.
when using the blower.
12. Never block suction inlet and/or blower outlet.
• Be careful not to block suction inlet or
blower outlet with dust or dirt when oper-
• Do not use nozzles other than the nozzles
•
rubber boat or the similar.
13. Do not operate the blower near open window,
etc.
14.
late at night when people might be disturbed.
15. Using rakes and brooms to loosen debris
before blowing is recommended.
16.
17.
the air stream can work close to the ground.
18.
inspect the blower for damage before restart-
ing and operating the blower. If the blower
is damaged, ask Makita Authorized Service
Centers for repair.
19.
suction inlet or blower outlet.
20. Prevent unintentional starting. Ensure the
on the switch or energizing the blower that has
the switch on invites accidents.
21. Never blow dangerous materials, such as
nails, fragments of glass, or blades.
22.
materials.
23. Avoid operating the blower for a long time in
low temperature environment.
24.
cartridge.
25.
before starting the motor.
26. Before starting the motor, inspect the machine
for damages, loose screws/nuts or improper
handles.
27. Never attempt to start the motor if the machine
28.
29. During operation, use the shoulder harness.
Fig.2
30. Hold the front handle with the left hand and the
and thumbs around the handles.
31. Never attempt to operate the machine with one
32.
the condition before continuing work. Check
-
authorized service center for the inspection
and repair.
33. Follow the instruction manual of the power
unit for proper use of the power unit.
34. Refer to the instruction manual of the power
unit for how to start and control the machine.
35. During operation, never stand on an unstable
the cold season, beware of ice and snow and
36. Do not use the machine in bad weather where
37. Do not use the machine when there is a risk of
lightning.

10 ENGLISH
Transportation
1. Stop the motor during transportation.
Vibration
1.
hands or wrists: “Falling asleep” (numbness),
tingling, pain, stabbing sensation, alteration of
-
well maintain the machine and accessories.
Maintenance and storage
1. Keep all nuts, bolts and screws tight to be sure
the blower is in safe working condition.
2. If the parts are worn or damaged, replace them
3.
of children.
4. -
parts come to a complete stop, and remove the
blower with care and keep it clean.
5.
6. Do not expose the blower to rain. Store the
blower indoors.
7.
8.
Never use gasoline, benzine, thinner, alcohol or
the like for the purpose. Discoloration, deforma-
9.
described in this instruction manual or the
instruction manual of the power unit. Ask our
authorized service center for such work.
10. Follow instructions for lubricating and chang-
ing accessories.
11. -
Using parts or accessories supplied
-
12.
and maintain the machine at regular interval.
13. Before storing the machine, perform full clean-
cartridge.
14.
such as a wall.
1.
the manufacturer. A charger that is suitable for
2. -
3.
terminal to another.-
4.
-
help.
irritation or burns.
5. -
6.
excessive temperature.-
7. Follow all charging instructions and do not
-
tions.
1.
possible special disposal instructions.
2.
swallowed.
3.
locations.
4.
5. Do not handle charger, including charger plug,
and charger terminals with wet hands.
Service
1.
parts.
tool is maintained.
2. Service
manufacturer or authorized service providers.
SAVE THESE INSTRUCTIONS.
WARNING:
with product (gained from repeated use) replace
product.
PARTS DESCRIPTION
Fig.3: 1. Cap 2. Pipe 3.

11 ENGLISH
ASSEMBLY
WARNING:
cartridge.
WARNING:
Assembling or
WARNING: Follow the warnings and precau-
tions in the chapter “SAFETY WARNINGS” and
the instruction manual of the power unit.
Mounting the attachment pipe
CAUTION:
pipe is secured after installation. Improper instal-
Mount the attachment pipe to the power unit.
1. Remove the cap from the end of the pipe.
Fig.4: 1. Pipe 2. Cap
NOTICE: Do not dispose of the cap since the cap
2. Turn the lever toward the attachment.
Fig.5: 1. Lever
3. Align the pin with the arrow mark on the power
unit. Insert the pipe until the release button pops up.
Make sure that the position line is on the tip of the arrow
mark on the power unit, and the arrow mark on the power
unit and the arrow mark on the pipe are facing each other.
Fig.6:
1. Release button 2. Arrow mark on the power unit
3. Pin 4. Position line 5. Arrow mark on the pipe
4. Turn the lever toward the power unit.
Fig.7: 1. Lever
Make sure that the surface of the lever is parallel to the pipe.
NOTICE: Do not tighten the lever without the
attachment pipe inserted.
tighten the entrance of the drive shaft too much and
damage it.
To remove the pipe, turn the lever toward the attachment and
pull the pipe out while pressing down the release button.
Fig.8: 1. Release button 2. Lever 3. Pipe
Installing the end nozzle
Align the protrusion on the blower pipe with the groove on
the end nozzle, then attach the end nozzle to the blower
pipe, and then turn the end nozzle to lock it into place.
Fig.9: 1. Triangle mark 2.3. Blower pipe
To remove the end nozzle, perform the installation
procedure in reverse.
NOTE:
Fig.10
extension nozzle
Optional accessory
1. Remove the end nozzle from the attachment.
2.
attachment, and then turn it to lock it into place.
Fig.11: 1. Flat nozzle 2.
3. Attachment
Installing the gutter nozzle set
Optional accessory
1.
nozzle from the attachment.
2. Loosen the screw on the small hose clamp, and
pass the hose clamp through the attachment.
Fig.12: 1. Screw 2. Hose clamp (small)
3. Attachment
3. Connect the extension pipe to the attachment.
Align the groove on the extension pipe with the protru-
sion on the attachment, and then slide the extension
pipe along its groove so that the triangle markings face
each other.
Fig.13: 1.2. Attachment
4. Place the hose clamp onto the groove as illus-
trated and tighten the screw.
Fig.14: 1. Screw 2. Hose clamp
5. According to the working height, connect the rest
of extension pipes to the extension pipe which has
CAUTION: When using the gutter nozzle set
and blower attachment, do not use three or more
extension pipes.
6. Turn the outlet of the end nozzle as shown in the
Fig.15
7. Connect the end nozzle to the extension pipe.
When connecting, align the triangle marking on the end
nozzle and the extension pipe, and then push the end
nozzle until it clicks. After that, rotate the end nozzle to
Fig.16: 1.2.3. Triangle
marking
When removing the end nozzle, align the triangle mark-
ings on the end nozzle and extension pipe, and then
pull out the end nozzle from the extension pipe.
Fig.17: 1.2.3. Triangle
marking

12 ENGLISH
OPERATION
WARNING: Follow the warnings and precau-
tions in the chapter “SAFETY WARNINGS” and
the instruction manual of the power unit.
WARNING:
before operating.
Blower operation
CAUTION: Do not place the machine on the
ground while it is switched on.
enter from suction inlet and cause a malfunction or
blowing around building, big stone or vehicle, direct the
in a corner, start from the corner and then move to wide
area.
Adjust the air speed with the switch trigger of the power
usage.
Fig.18
Using the gutter nozzle set
CAUTION: When using the gutter nozzle set,
do not hold the blower with single hand but with
both hands.
Fig.19
CAUTION: Do not use the gutter nozzle set
near electric wires.
Fig.20
CAUTION: Do not use the gutter nozzle set on
Fig.21
CAUTION: When using the gutter nozzle set,
from the blower.
Fig.22
blower. Place the outlet of the blower on the gutter and
then turn on the blower.
Fig.23
For UX01G users
NOTICE:
use UX01G as the power unit and install BL4080F
to UX01G, do not use the shoulder harness
included in the power unit package, but use the
recommended shoulder harness shown below.
For the recommended shoulder harness, ask Makita
Authorized Service Centers.
Attaching the shoulder harness
CAUTION:
harness according to the user size to prevent fatigue.
CAUTION: Before operation, make sure that
hanger on the power unit.
CAUTION:
Before operation, make sure that the
CAUTION:
shown below. Do not use other shoulder harnesses.
1.
Put on the shoulder harness and fasten the buckle.
Fig.24: 1. Buckle
NOTE: When removing the shoulder harness, unlock
the buckle and remove the shoulder harness.
2.
Adjust the shoulder harness to a comfortable working position.
Fig.25
3. Clasp the hook on the shoulder harness to the
hanger of the power unit.
Fig.26: 1. Hook 2. Hanger
The shoulder harness features a means of quick
release the shoulder harness.
Fig.27: 1. Buckle
MAINTENANCE
WARNING: Before inspecting or maintaining
WARNING: When inspecting or maintaining
Assembling or
WARNING: Follow the warnings and precau-
tions in the chapter “SAFETY WARNINGS” and
the instruction manual of the power unit.
NOTICE: Never use gasoline, benzine, thinner,
alcohol or the like. Discoloration, deformation or
Cleaning the machine
Fig.28
Remove dust or dirt from the suction inlet at the rear of
the attachment.
Fig.29: 1. Suction inlet

13 ENGLISH
Overall inspection
Check for damaged parts. Ask our authorized service
Lubricating moving parts
NOTICE:
and amount of grease supplied.-
Drive axle:
Fig.30
NOTE:
Storage
When storing the attachment separated from the power
unit, put the cap onto the end of the pipe.
Fig.31
Interval of inspection and maintenance
Operating hour Before
Operation 30 hours
Whole unit - -
Drive axle - -
Power unit Refer to the instruction manual of the power unit
TROUBLESHOOTING
replacement parts for repairs.
Probable cause (malfunction)
Motor does not start. -Refer to the instruction manual of the power unit.
Motor stops soon. -Refer to the instruction manual of the power unit.
Motor speed does not increase. -Refer to the instruction manual of the power unit.
Fans do not rotate.
The pipes of the power unit and the
Contact an authorized service center for repairs.
Fans continue to rotate even if the
switch trigger is released.
Contact an authorized service center for repairs.
OPTIONAL ACCESSORIES
CAUTION: These accessories or attachments
other accessories or attachments might present a risk
-
ment for its stated purpose.
• Flat nozzle
• Gutter nozzle set
NOTE:

14 FRANÇAIS
FRANÇAIS (Instructions originales)
SPÉCIFICATIONS
Modèle : UB402MP
Capacités *1 Volume d’air 0 - 6,2 m3/min
0 - 39,1 m/s
Vitesse de l’air (max.) 0 - 47,4 m/s
Capacités *2 Volume d’air 0 - 6,2 m3/min
0 - 39,1 m/s
Vitesse de l’air (max.) 0 - 47,4 m/s
Capacités *3 Volume d’air 0 - 6,2 m3/min
0 - 39,1 m/s
Vitesse de l’air (max.) 0 - 47,4 m/s
Longueur totale 760 mm
Poids net 1,2 kg
Unité motorisée approuvée
Cet accessoire est approuvé pour être utilisé avec le ou
les unités motorisées suivantes :
AVERTISSEMENT : -
cessoire avec une unité motorisée non approu-
vée. Une combinaison non approuvée peut provo-
d’être utilisés pour l’appareil. Veillez à comprendre leur
Veuillez être prudent et rester attentif.
Lire le mode d’emploi.
Gardez vos mains à l’écart des pièces en
rotation.
Les cheveux longs risquent de se prendre
dans les pièces en mouvement.
Tenez les personnes à l’écart.
Porter des lunettes de protection et un
serre-tête antibruit.
Ne pas exposer à l’eau.
Maintenez une distance d’au moins 15 m.
Ni-MH
Li-ion
uniquement
dangereux dans l’équipement, les déchets
d’équipements électriques et électro-
niques, les accumulateurs et les batteries
peuvent avoir un impact négatif sur l’envi-
ronnement et la santé humaine.
Ne jetez pas les appareils électriques et
électroniques ou les batteries avec les
ordures ménagères !
Conformément à la directive européenne
relative aux déchets d’équipements élec-
triques et électroniques et aux déchets
d’accumulateurs et de batteries, ainsi qu’à
son adaptation à la législation nationale,
les déchets d’équipements électriques,
les batteries et les accumulateurs doivent
être collectés séparément et déposés
dans un point de collecte distinct pour
déchets urbains, conformément aux régle-
mentations en matière de protection de
l’environnement.
-
belle à roulettes barrée sur l’équipement.
Utilisations
de la poussière en association avec un outil motorisé
approuvé. N’utilisez jamais l’accessoire à toutes autres
entraîner de graves blessures.

15 FRANÇAIS
Déclaration de conformité CE
Pour les pays européens uniquement
Nous, fabricants : Makita Europe N.V., adresse com-
merciale : Jan-Baptist Vinkstraat 2 3070 Kortenberg
BELGIQUE. Autorisons pour la
désignation : désignation du (des)
UB402MP
Respectent toutes les dispositions pertinentes de
la Directive 2006/42/CE et respectent également
2000/14/CE et sont fabriqués confor-
mément aux normes harmonisées suivantes : EN
60335-1:2012+A11:2014+A13:2017+A1:2019+A14:20
19+A2:2019, EN 50636-2-100:2014.
Lieu et date de déclaration :
31.10.2022
Personne responsable :
- Makita Europe N.V.
CONSIGNES DE
SÉCURITÉ
Consignes de sécurité pour
AVERTISSEMENT : Lisez toutes les
consignes de sécurité, instructions, illustrations
avant utilisation. Le non-respect de toutes les ins-
tructions indiquées ci-dessous peut entraîner une
électrocution, un incendie et/ou de graves blessures
pour l’opérateur et/ou les badauds.
Garder tous les avertissements
et instructions pour consultation
ultérieure.
Les termes « balai brosse/balai racleur » et « machine
» dans les avertissements et les précautions se rap-
portent à la combinaison de l’accessoire et de l’outil
motorisé.
Formation
1. Lisez attentivement les instructions.
Familiarisez-vous avec les commandes et la
2. Ne laissez en aucun cas les enfants, les per-
ou mentales diminuées ou sans expérience
familiarisées avec ces instructions utiliser le
limiter l’âge de l’utilisateur.
3. -
sonnes, et tout particulièrement des enfants,
proximité.
4. -
encourus par les personnes ou leur propriété.
Préparatifs
1.
et un pantalon long pendant l’utilisation du
2. Ne portez pas de vêtements amples ou de
entrées d’air.
3.
-
États-Unis, EN 166 en Europe ou AS/NZS 1336
en Australie/Nouvelle-Zélande. En Australie/
Nouvelle-Zélande, la loi exige également le
port d’un écran facial pour se protéger le
visage.
par les utilisateurs de l’outil et par les autres
de travail.
4. Il est recommandé de porter un écran facial
5.
porter des chaussures antidérapantes et de
protection. Porter des bottes ou des chaussures
de sécurité fermées et antidérapantes permet de
réduire le risque de blessure.
6. Portez une protection auditive, comme un
serre-tête antibruit. L’exposition au bruit peut
entraîner une perte auditive.
Fonctionnement
1. Éloignez enfants, badauds et animaux. Au
minimum, les enfants, badauds et animaux
-
des lunettes de protection. Arrêtez la machine
Fig.1

16 FRANÇAIS
2. -
parfaitement arrêtées
•
sans surveillance ;
•
• -
•
anormale.
3.
4. Ne vous penchez pas trop loin et maintenez
constamment une bonne assise et un bon
5.
stable dans les pentes.
6.
7.
refroidissement ne sont pas obstruées par des
débris.
8.
personnes.
9. -
mandée et sur une surface ferme.
10.
11.
12.
•
avec de la poussière ou de la saleté
poussiéreuse.
•
fournies par Makita.
•
autre.
13.
ouvertes, etc.
14. -
déranger les gens.
15.
l’aide d’un râteau ou d’un balai avant de les
16. -
un pulvérisateur d’eau au besoin.
17.
18.
démarre en faisant un bruit anormal ou en
vibrant, éteignez-le immédiatement pour l’ar-
de dommages avant de redémarrer et d’utiliser
vente Makita agréé de le réparer.
19.
dans l’entrée d’aspiration ou la sortie du
20. Évitez les démarrages intempestifs. Assurez-
avant d’insérer la batterie, de ramasser ou de
-
-
tion de marche est source d’accidents.
21.
des clous, des débris de verre ou des lames.
22. -
23.
basse température.
24. Avant d’assembler ou de régler la machine,
coupez le moteur et retirez la batterie.
25.
avant de démarrer le moteur.
26. Avant de démarrer le moteur, inspectez la
leviers de commande et les interrupteurs fonc-
les poignées.
27.
machine est endommagée ou pas entièrement
assemblée.
28. Réglez la bandoulière et la poignée selon la
corpulence de l’opérateur.
29. Pendant le fonctionnement, utilisez la bandou-
lière. Maintenez fermement la machine contre
Fig.2
30. Tenez la poignée avant de la main gauche et
poignées avec vos doigts et vos pouces.
31.
machine d’une main. Une perte de maîtrise
peut entraîner des blessures graves, voire
-
des brosses ou des rouleaux racleurs.
32. Si la machine subit un choc violent ou tombe,
sécurité fonctionnent correctement. En cas de
vente agréé.
33. Respectez le mode d’emploi de l’outil motorisé
34. Reportez-vous au mode d’emploi de l’outil
motorisé pour savoir comment démarrer et
35. Pendant le fonctionnement, ne vous tenez
ou sur une pente abrupte. En hiver, faites
-

17 FRANÇAIS
36. N’utilisez pas la machine par mauvais temps
avec une visibilité réduite. Le non-respect de
cette précaution pourrait entraîner votre chute ou
un fonctionnement incorrect en raison de la faible
visibilité.
37. N’utilisez pas la machine en cas d’orage.
Transport
1. Coupez le moteur pendant le transport. Sinon,
un démarrage intempestif peut provoquer des
blessures.
Vibration
1.
-
les poignets : engourdissement, picotement,
douleur, douleur lancinante, changement de
couleur de la peau ou de la peau elle-même.
-
raissent, consultez un médecin.
-
dant l’utilisation et maintenez en bon état la
machine et les accessoires.
Entretien et rangement
1. Gardez tous les écrous, boulons et vis bien
serrés pour assurer le fonctionnement sûr du
2.
Si les pièces sont usées ou endommagées, rem-
placez-les par des pièces fournies par Makita.
3.
de la portée des enfants.
4. -
pection, entretien, rangement ou changement
d’accessoire, éteignez-le et assurez-vous
-
ment arrêtées, et retirez la batterie. Laissez
propre.
5.
le ranger.
6.
7. -
rez-vous de plier les genoux et prenez soin de
ne pas vous blesser le dos.
8.
-
Ils
présentent un risque de décoloration, de déformation
9.
d’entretien ou de réparation non décrites dans
ce livret ou le mode d’emploi de l’outil moto-
notre service après-vente agréé.
10.
le remplacement des accessoires.
11.
L’utilisation
de pièces ou accessoires fournis par un tiers peut
entraîner la panne de l’appareil, des dommages
matériels et/ou corporels graves.
12. -
agréé.
13.
batterie.
14.
exemple. Il risquerait de tomber brusquement et
de provoquer des blessures.
Utilisation et entretien des outils fonctionnant sur
batterie
1. -
Un chargeur qui
présenter un risque d’incendie s’il est utilisé avec
2.
L’utilisation
de toute autre batterie peut présenter un risque de
blessure et d’incendie.
3.
trombones, pièces de monnaie, clés, clous,
-
ceptibles de créer une connexion entre deux
bornes. Court-circuiter les bornes d’une batterie
entre elles peut provoquer des brûlures ou un
incendie.
4.
batterie. Le cas échéant, évitez tout contact
Le
liquide s’échappant de la batterie peut provoquer
une irritation ou des brûlures.
5. N’utilisez pas une batterie ou un outil s’ils sont
Une batterie endom-
imprévisible susceptible d’entraîner un incendie,
une explosion ou des blessures.
6.
une température excessive. L’exposition au feu
ou à une température supérieure à 130 °C peut
provoquer une explosion.
7. Respectez toutes les instructions de charge et
ne chargez pas la batterie ou l’outil en dehors
instructions. Une charge incorrecte ou à une
température en dehors de la plage indiquée peut
endommager la batterie et augmenter le risque
d’incendie.
1.
L’élément de la pile pourrait exploser. Consultez
les codes locaux pour de possibles instructions de
mise au rebut spéciales.
2. N’ouvrez ni ne manipulez la ou les batteries.
-
toxique en cas d’ingestion.
3. Ne chargez pas la batterie sous la pluie ou
dans un endroit mouillé.
4.

18 FRANÇAIS
5.
avec les mains mouillées.
Dépannage
1.
La sécurité de l’outil élec-
trique sera ainsi préservée.
2. -
gées.-
tué uniquement par le fabricant ou un dépanneur
agréé.
CONSERVEZ CES
INSTRUCTIONS.
AVERTISSEMENT : NE vous laissez PAS
sentiment d’aisance et de familiarité avec le
produit, en négligeant le respect rigoureux des
-
La MAUVAISE UTILISATION de l’outil ou l’igno-
dans ce mode d’emploi peut entraîner de graves
blessures.
DESCRIPTION DES
PIÈCES
Fig.3: 1. Capuchon 2.3. Buse d’extrémité
ASSEMBLAGE
AVERTISSEMENT : Avant d’assembler ou de
batterie. Autrement, les ventilateurs pourraient bou-
ger et vous blesser.
AVERTISSEMENT :
Le
montage ou le réglage de l’équipement en position
verticale peut entraîner de graves blessures.
AVERTISSEMENT : Suivez les aver-
tissements et les précautions du chapitre «
CONSIGNES DE SÉCURITÉ » et le manuel d’ins-
tructions de l’unité motorisée.
ATTENTION :
-
lation. Une installation incorrecte peut faire tomber
l’accessoire de l’outil motorisé et provoquer des
blessures.
1.
Fig.4: 1.2. Capuchon
REMARQUE :
est nécessaire pour ranger l’accessoire.
2. Actionnez le levier vers l’accessoire.
Fig.5: 1. Levier
3.
dégagement sorte.
Assurez-vous que la ligne de position se trouve sur la
font face.
Fig.6: 1. Bouton de dégagement 2.
sur l’outil motorisé 3. Goupille 4. Ligne de
position 5.
4. Actionnez le levier vers l’outil motorisé.
Fig.7: 1. Levier
Assurez-vous que la surface du levier est parallèle au
REMARQUE : Ne serrez pas le levier sans avoir
Le levier pourrait
autrement trop serrer l’entrée de l’arbre d’entraîne-
ment et l’endommager.
-
sur le bouton de dégagement.
Fig.8: 1. Bouton de dégagement 2. Levier 3.
Installation de la buse d’extrémité
-
d’extrémité pour qu’elle se verrouille en place.
Fig.9: 1. Repère triangulaire 2. Buse d’extrémité
3.
de pose en sens inverse.
NOTE :
Fig.10
Installation de la buse plate ou de la
rallonge de buse
Accessoire en option
1. Retirez la buse d’extrémité de l’accessoire.
2. Fixez la buse plate ou la rallonge de buse sur
l’accessoire, puis tournez-la pour qu’elle se verrouille
en place.
Fig.11: 1. Buse plate 2. Rallonge de buse
3. Accessoire

19 FRANÇAIS
Installation du kit de buse pour
gouttière
Accessoire en option
1. Retirez la buse d’extrémité, la rallonge de buse ou
la buse plate de l’accessoire.
2. Desserrez la vis sur le petit collier de serrage et
faites passer le collier de serrage par l’accessoire.
Fig.12: 1. Vis 2. Collier de serrage (petit)
3. Accessoire
3.
partie saillante sur l’accessoire, puis faites glisser le
les repères triangulaires soient en face l’un de l’autre.
Fig.13: 1.2. Accessoire
4. Placez le collier de serrage sur la rainure comme
illustré et serrez la vis.
Fig.14: 1. Vis 2. Collier de serrage
5. Selon la hauteur de travail, connectez le reste des
ATTENTION :
Cela pourrait
provoquer un déséquilibre et entraîner des blessures.
6. Tournez la sortie de la buse d’extrémité comme
Fig.15
7. -
gateur. Lors du raccordement, alignez le repère trian-
puis poussez la buse d’extrémité jusqu’au déclic. Après
cela, tournez la buse d’extrémité sur une position adé-
quate pour votre travail.
Fig.16: 1. Buse d’extrémité 2.
3. Repère triangulaire
Lors du retrait de la buse d’extrémité, alignez les
prolongateur, puis tirez sur la buse d’extrémité pour la
Fig.17: 1. Buse d’extrémité 2.
3. Repère triangulaire
UTILISATION
AVERTISSEMENT : Suivez les aver-
tissements et les précautions du chapitre «
CONSIGNES DE SÉCURITÉ » et le manuel d’ins-
tructions de l’unité motorisée.
AVERTISSEMENT : Réglez la position du
dispositif de suspension et la bandoulière sur une
position confortable pour vous avant utilisation.
ATTENTION : Ne posez pas la machine au sol
Du sable ou de la
poussière pourrait pénétrer par l’entrée d’aspiration et
Tenez fermement la machine des deux mains et souf-
-
ment, d’un gros rocher ou d’un véhicule, ne dirigez pas
la buse dessus. Lorsque vous travaillez dans un coin,
commencez par l’intérieur du coin, puis éloignez-vous.
motorisé en fonction de l’environnement ou des condi-
tions de votre utilisation.
Fig.18
Utilisation du kit de buse pour
gouttière
ATTENTION : Lors de l’utilisation du kit de
d’une main mais des deux mains.
Fig.19
ATTENTION : N’utilisez pas le kit de buse
Fig.20
ATTENTION : N’utilisez pas le kit de buse
pour gouttière par temps venteux.
Fig.21
ATTENTION : Lors de l’utilisation du kit de
buse pour gouttière, éloignez les gens ou les
Fig.22
Fig.23
Pour les utilisateurs UX01G
REMARQUE :
buse pour gouttière, si vous utilisez UX01G
comme outil motorisé et installez BL4080F
surUX01G, n’utilisez pas la bandoulière incluse
dans l’emballage de l’outil motorisé, mais utilisez
la bandoulière recommandée illustrée ci-dessous.
Pour connaître la bandoulière recommandée, adres-
sez-vous à un centre de service après-vente Makita
agréé.

20 FRANÇAIS
Fixation de la bandoulière
ATTENTION : -
l’utilisateur pour éviter la fatigue.
ATTENTION : Avant utilisation, assurez-vous
dispositif de suspension sur l’outil motorisé.
ATTENTION : Avant utilisation, assurez-vous
serrée.
ATTENTION : -
lière illustrée ci-dessous. N’utilisez pas d’autres
bandoulières.
1.
Fig.24: 1. Boucle
NOTE : Lorsque vous retirez la bandoulière, déblo-
quez la boucle et retirez la bandoulière.
2. Ajustez la bandoulière sur une position confor-
table pour travailler.
Fig.25
3. Refermez le crochet sur la bandoulière sur le
dispositif de suspension de l’outil motorisé.
Fig.26: 1. Crochet 2. Dispositif de suspension
-
pour libérer la bandoulière.
Fig.27: 1. Boucle
ENTRETIEN
AVERTISSEMENT : Avant l’inspection ou
l’entretien de l’appareil, coupez le moteur et reti-
rez la batterie. Autrement, les ventilateurs pourraient
bouger et vous blesser grièvement.
AVERTISSEMENT :
Le
montage ou le réglage de l’équipement en position
verticale peut entraîner de graves blessures.
AVERTISSEMENT : Suivez les aver-
tissements et les précautions du chapitre «
CONSIGNES DE SÉCURITÉ » et le manuel d’ins-
tructions de l’unité motorisée.
REMARQUE : -
zine, diluant, alcool ou autre produit similaire.
Pour assurer la SÉCURITÉ et la FIABILITÉ du produit,
toute réparation, tout travail d’entretien ou de réglage
agréé, avec des pièces de rechange Makita.
essoré.
Fig.28
-
tion à l’arrière de l’accessoire.
Fig.29: 1.
Inspection générale
après-vente agréé.
REMARQUE : Suivez les instructions sur la
endommager les pièces mobiles.
Essieu moteur :
Appliquez la graisse (Graisse Makita N No.2 ou équiva-
lent) toutes les 30 heures de fonctionnement.
Fig.30
NOTE : Vous pouvez acheter de la graisse de
marque Makita auprès de votre revendeur local
Makita.
Rangement
Lorsque vous rangez l’accessoire séparément de l’outil
Fig.31
Other manuals for UB402MP
2
Table of contents
Languages:
Other Makita Blower manuals

Makita
Makita PM7650H User manual

Makita
Makita BBX7600 User manual

Makita
Makita BUB143 User manual

Makita
Makita UB001C User manual

Makita
Makita BHX2500 User manual

Makita
Makita UB0800 User guide

Makita
Makita UB1100 User manual

Makita
Makita UB003C User manual

Makita
Makita XBU05 User manual

Makita
Makita UB120D User manual

Makita
Makita DUB362 User manual

Makita
Makita BHX2500 User manual

Makita
Makita DUB362 User manual

Makita
Makita ADBU05 User manual

Makita
Makita UB1101 User manual

Makita
Makita UB001G User manual

Makita
Makita UB181DZ User manual

Makita
Makita UB0800X User guide

Makita
Makita UB001C User manual

Makita
Makita DUB187 User manual