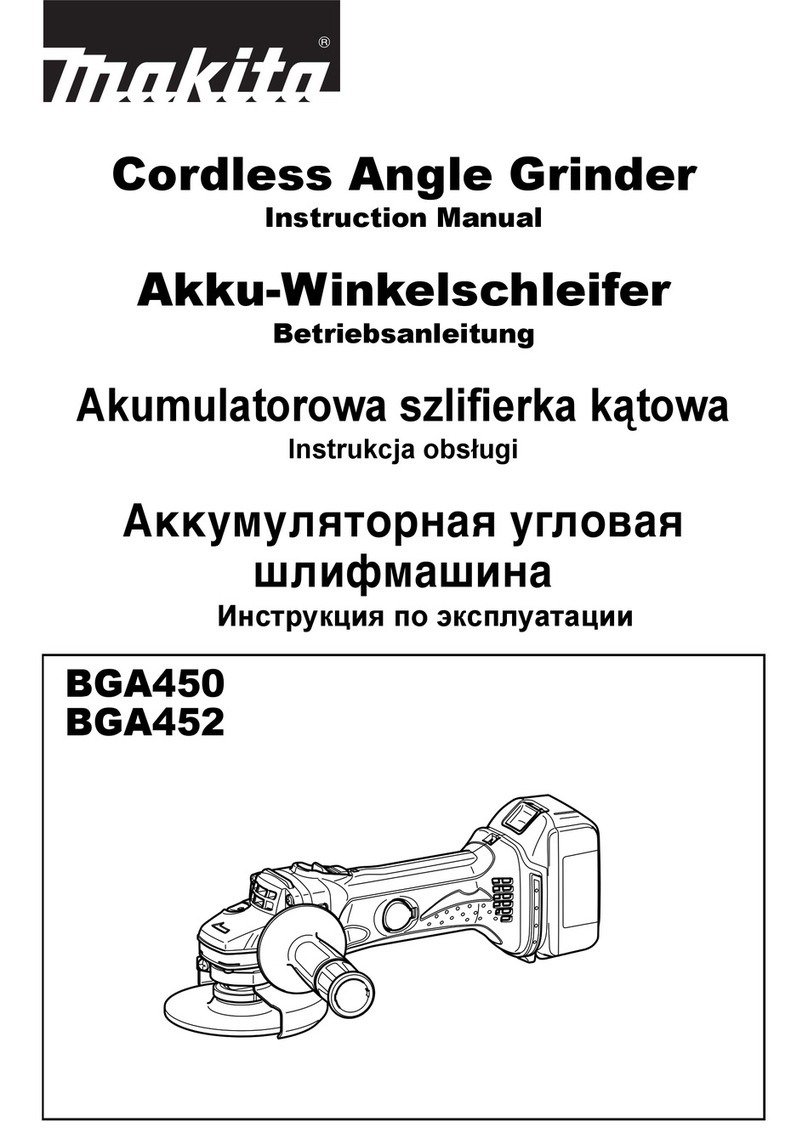
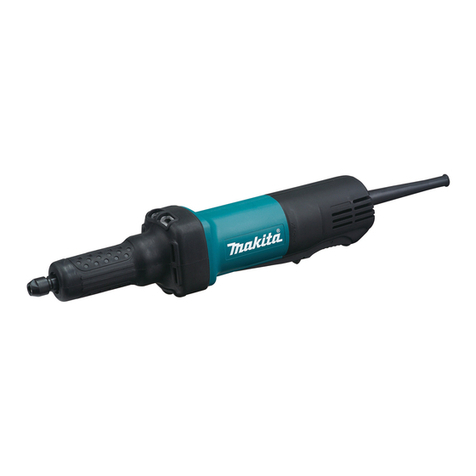
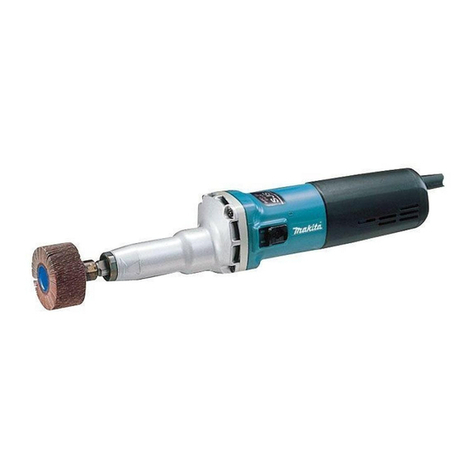
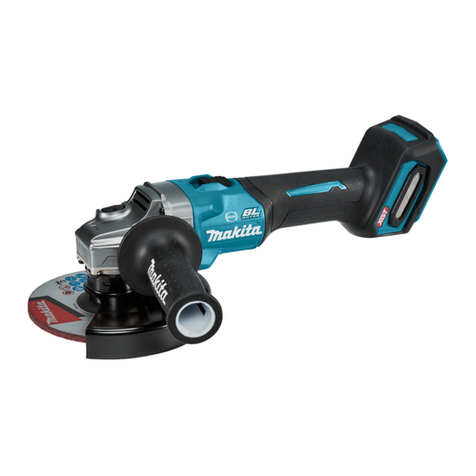
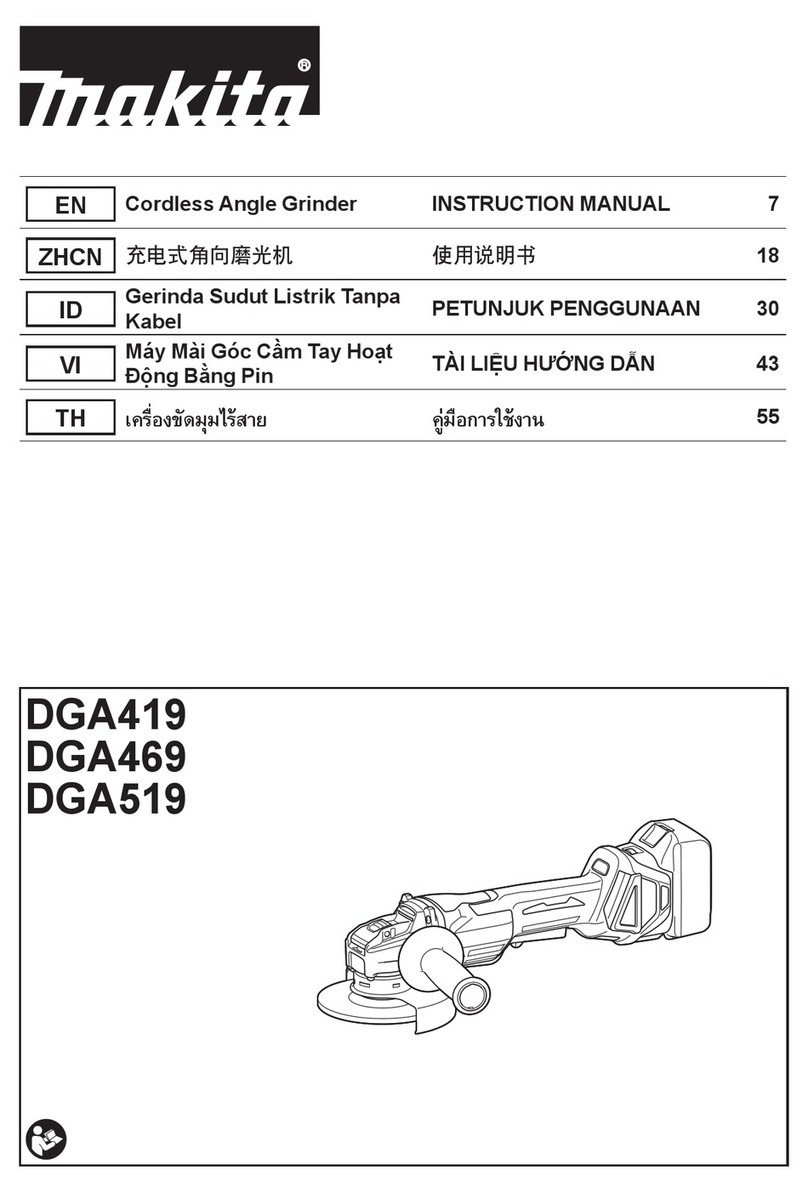
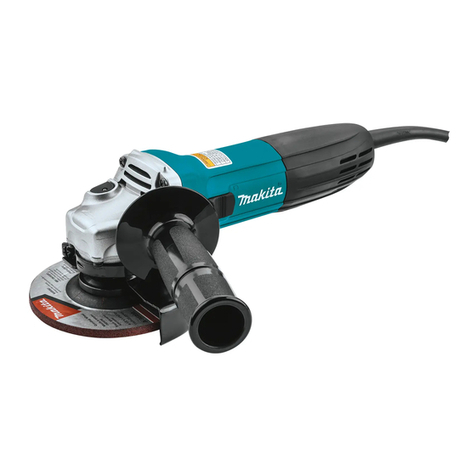
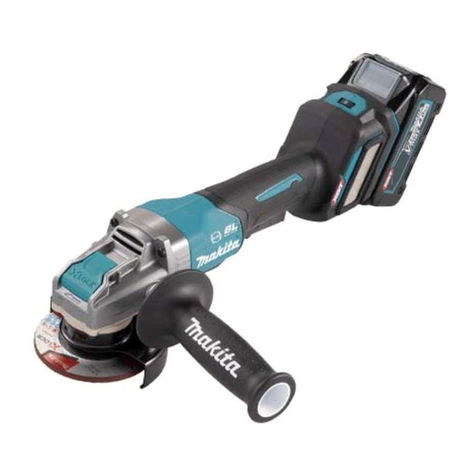
Makita DGA508RFE User manual

DGA408
DGA458
DGA508
EN Cordless Angle Grinder INSTRUCTION MANUAL 6
ID Gerinda Sudut Listrik Tanpa
Kabel PETUNJUK PENGGUNAAN 16
VI Máy Mài Góc Cầm Tay Hoạt
Động Bằng Pin TÀI LIỆU HƯỚNG DẪN 28
TH 39

1
2
3
Fig.1
1
2
Fig.2
1
Fig.3
1
Fig.4
2
1
Fig.5
1
Fig.6
Fig.7
1
2
3
Fig.8
2

1
2
3
4
Fig.9
1
2
Fig.10
1
2
4
3
Fig.11
1
2
Fig.12
1
2
3
4
Fig.13
1
2
3
4
Fig.14
1
2
3
Fig.15
Fig.16
3

1
2
3
4
Fig.17
16 mm (5/8″) 16 mm (5/8″)
11
44
23
Fig.18
11
44
23
Fig.19
11
44
23
Fig.20
11
44
23
Fig.21
1
Fig.22
1
Fig.23
1
2
Fig.24
4

1
Fig.25
1
2
5
22
11
12
4
3
5
6
7
8
9
10
13
3
14
5
3
Fig.26
5

6ENGLISH
ENGLISH (Original instructions)
SPECIFICATIONS
Model: DGA408 DGA458 DGA508
Wheel diameter 100mm (4″) 115mm (4-1/2″) 125mm (5″)
Max. wheel thickness 6.4mm
Spindle thread M10 M14 or 5/8″ (country specic)
Rated speed (n) 8,500min-1
Overall length With battery cartridge
BL1815N, BL1820,
BL1820B
348mm
With battery cartridge
BL1830, BL1830B, BL1840,
BL1840B, BL1850,
BL1850B, BL1860B
362mm
Net weight With battery cartridge
BL1815N, BL1820,
BL1820B
2.2kg 2.4kg
With battery cartridge
BL1830, BL1830B,
BL1840, BL1840B, BL1850,
BL1850B, BL1860B
2.5kg 2.6kg
Rated voltage D.C.18 V
• Due to our continuing program of research and development, the specications herein are subject to change
without notice.
• Specications and battery cartridge may differ from country to country.
• Weight, with battery cartridge, according to EPTA-Procedure 01/2003
Symbols
The following show the symbols used for the equip-
ment. Be sure that you understand their meaning before
use.
Read instruction manual.
Wear safety glasses.
Cd
Ni-MH
Li-ion
Only for EU countries
Do not dispose of electric equipment or
battery pack together with household waste
material!
In observance of the European Directives,
on Waste Electric and Electronic
Equipment and Batteries and Accumulators
and Waste Batteries and Accumulators
and their implementation in accordance
with national laws, electric equipment and
batteries and battery pack(s) that have
reached the end of their life must be col-
lected separately and returned to an envi-
ronmentally compatible recycling facility.
Intended use
The tool is intended for grinding, sanding and cutting of
metal and stone materials without the use of water.
General power tool safety warnings
WARNING: Read all safety warnings and
all instructions. Failure to follow the warnings and
instructions may result in electric shock, re and/or
serious injury.
Save all warnings and instruc-
tions for future reference.
The term “power tool” in the warnings refers to your
mains-operated (corded) power tool or battery-operated
(cordless) power tool.
Work area safety
1. Keep work area clean and well lit. Cluttered or
dark areas invite accidents.
2. Do not operate power tools in explosive atmo-
spheres, such as in the presence of ammable
liquids, gases or dust. Power tools create sparks
which may ignite the dust or fumes.
3. Keep children and bystanders away while
operating a power tool. Distractions can cause
you to lose control.
Electrical Safety
1. Power tool plugs must match the outlet. Never
modify the plug in any way. Do not use any
adapter plugs with earthed (grounded) power
tools. Unmodied plugs and matching outlets will
reduce risk of electric shock.
2. Avoid body contact with earthed or grounded
surfaces such as pipes, radiators, ranges and

7ENGLISH
refrigerators. There is an increased risk of elec-
tric shock if your body is earthed or grounded.
3. Do not expose power tools to rain or wet con-
ditions. Water entering a power tool will increase
the risk of electric shock.
4. Do not abuse the cord. Never use the cord for
carrying, pulling or unplugging the power tool.
Keep cord away from heat, oil, sharp edges
or moving parts. Damaged or entangled cords
increase the risk of electric shock.
5. When operating a power tool outdoors, use an
extension cord suitable for outdoor use. Use of
a cord suitable for outdoor use reduces the risk of
electric shock.
6. If operating a power tool in a damp location
is unavoidable, use a residual current device
(RCD) protected supply. Use of an RCD reduces
the risk of electric shock.
Personal Safety
1. Stay alert, watch what you are doing and use
common sense when operating a power tool.
Do not use a power tool while you are tired or
under the inuence of drugs, alcohol or med-
ication. A moment of inattention while operating
power tools may result in serious personal injury.
2. Use personal protective equipment. Always
wear eye protection. Protective equipment such
as dust mask, non-skid safety shoes, hard hat, or
hearing protection used for appropriate conditions
will reduce personal injuries.
3. Prevent unintentional starting. Ensure the
switch is in the off-position before connecting
to power source and/or battery pack, picking
up or carrying the tool. Carrying power tools with
your nger on the switch or energising power tools
that have the switch on invites accidents.
4. Remove any adjusting key or wrench before
turning the power tool on. A wrench or a key left
attached to a rotating part of the power tool may
result in personal injury.
5. Do not overreach. Keep proper footing and
balance at all times. This enables better control
of the power tool in unexpected situations.
6. Dress properly. Do not wear loose clothing or
jewellery. Keep your hair, clothing, and gloves
away from moving parts. Loose clothes, jewel-
lery or long hair can be caught in moving parts.
7. If devices are provided for the connection of
dust extraction and collection facilities, ensure
these are connected and properly used. Use of
dust collection can reduce dust-related hazards.
Power tool use and care
1. Do not force the power tool. Use the correct
power tool for your application. The correct
power tool will do the job better and safer at the
rate for which it was designed.
2. Do not use the power tool if the switch does
not turn it on and off. Any power tool that cannot
be controlled with the switch is dangerous and
must be repaired.
3. Disconnect the plug from the power source
and/or the battery pack from the power tool
before making any adjustments, changing
accessories, or storing power tools. Such
preventive safety measures reduce the risk of
starting the power tool accidentally.
4. Store idle power tools out of the reach of chil-
dren and do not allow persons unfamiliar with
the power tool or these instructions to operate
the power tool. Power tools are dangerous in the
hands of untrained users.
5. Maintain power tools. Check for misalignment
or binding of moving parts, breakage of parts
and any other condition that may affect the
power tool’s operation. If damaged, have the
power tool repaired before use. Many accidents
are caused by poorly maintained power tools.
6. Keep cutting tools sharp and clean. Properly
maintained cutting tools with sharp cutting edges
are less likely to bind and are easier to control.
7. Use the power tool, accessories and tool bits
etc. in accordance with these instructions, tak-
ing into account the working conditions and
the work to be performed. Use of the power tool
for operations different from those intended could
result in a hazardous situation.
Battery tool use and care
1. Recharge only with the charger specied by
the manufacturer. A charger that is suitable for
one type of battery pack may create a risk of re
when used with another battery pack.
2. Use power tools only with specically desig-
nated battery packs. Use of any other battery
packs may create a risk of injury and re.
3. When battery pack is not in use, keep it away
from other metal objects, like paper clips,
coins, keys, nails, screws or other small metal
objects, that can make a connection from one
terminal to another. Shorting the battery termi-
nals together may cause burns or a re.
4. Under abusive conditions, liquid may be
ejected from the battery; avoid contact. If con-
tact accidentally occurs, ush with water. If
liquid contacts eyes, additionally seek medical
help. Liquid ejected from the battery may cause
irritation or burns.
Service
1. Have your power tool serviced by a qualied
repair person using only identical replacement
parts. This will ensure that the safety of the power
tool is maintained.
2. Follow instruction for lubricating and chang-
ing accessories.
3. Keep handles dry, clean and free from oil and
grease.
Cordless grinder safety warnings
Safety Warnings Common for Grinding, Sanding,
Wire Brushing, or Abrasive Cutting-Off Operations:
1. This power tool is intended to function as a
grinder, sander, wire brush or cut-off tool.
Read all safety warnings, instructions, illus-
trations and specications provided with this
power tool. Failure to follow all instructions listed
below may result in electric shock, re and/or
serious injury.
2. Operations such as polishing are not

8ENGLISH
recommended to be performed with this power
tool. Operations for which the power tool was not
designed may create a hazard and cause per-
sonal injury.
3. Do not use accessories which are not speci-
cally designed and recommended by the tool
manufacturer. Just because the accessory can
be attached to your power tool, it does not assure
safe operation.
4. The rated speed of the accessory must be at
least equal to the maximum speed marked on
the power tool. Accessories running faster than
their rated speed can break and y apart.
5. The outside diameter and the thickness of your
accessory must be within the capacity rating
of your power tool. Incorrectly sized accessories
cannot be adequately guarded or controlled.
6. Threaded mounting of accessories must
match the grinder spindle thread. For acces-
sories mounted by anges, the arbour hole of
the accessory must t the locating diameter
of the ange. Accessories that do not match the
mounting hardware of the power tool will run out of
balance, vibrate excessively and may cause loss
of control.
7. Do not use a damaged accessory. Before each
use inspect the accessory such as abrasive
wheels for chips and cracks, backing pad for
cracks, tear or excess wear, wire brush for
loose or cracked wires. If power tool or acces-
sory is dropped, inspect for damage or install
an undamaged accessory. After inspecting and
installing an accessory, position yourself and
bystanders away from the plane of the rotating
accessory and run the power tool at maximum
no-load speed for one minute. Damaged acces-
sories will normally break apart during this test
time.
8. Wear personal protective equipment.
Depending on application, use face shield,
safety goggles or safety glasses. As appro-
priate, wear dust mask, hearing protectors,
gloves and workshop apron capable of stop-
ping small abrasive or workpiece fragments.
The eye protection must be capable of stopping
ying debris generated by various operations.
The dust mask or respirator must be capable of
ltrating particles generated by your operation.
Prolonged exposure to high intensity noise may
cause hearing loss.
9. Keep bystanders a safe distance away from
work area. Anyone entering the work area
must wear personal protective equipment.
Fragments of workpiece or of a broken accessory
may y away and cause injury beyond immediate
area of operation.
10. Hold the power tool by insulated gripping
surfaces only, when performing an operation
where the cutting tool may contact hidden
wiring. Contact with a “live” wire will also make
exposed metal parts of the power tool “live” and
could give the operator an electric shock.
11. Never lay the power tool down until the acces-
sory has come to a complete stop. The spinning
accessory may grab the surface and pull the
power tool out of your control.
12. Do not run the power tool while carrying it at
your side. Accidental contact with the spinning
accessory could snag your clothing, pulling the
accessory into your body.
13. Regularly clean the power tool’s air vents. The
motor’s fan will draw the dust inside the housing
and excessive accumulation of powdered metal
may cause electrical hazards.
14. Do not operate the power tool near ammable
materials. Sparks could ignite these materials.
15. Do not use accessories that require liquid
coolants. Using water or other liquid coolants
may result in electrocution or shock.
Kickback and Related Warnings
Kickback is a sudden reaction to a pinched or snagged
rotating wheel, backing pad, brush or any other acces-
sory. Pinching or snagging causes rapid stalling of the
rotating accessory which in turn causes the uncon-
trolled power tool to be forced in the direction opposite
of the accessory’s rotation at the point of the binding.
For example, if an abrasive wheel is snagged or
pinched by the workpiece, the edge of the wheel that is
entering into the pinch point can dig into the surface of
the material causing the wheel to climb out or kick out.
The wheel may either jump toward or away from the
operator, depending on direction of the wheel’s move-
ment at the point of pinching. Abrasive wheels may also
break under these conditions.
Kickback is the result of power tool misuse and/or
incorrect operating procedures or conditions and can be
avoided by taking proper precautions as given below.
1. Maintain a rm grip on the power tool and
position your body and arm to allow you to
resist kickback forces. Always use auxiliary
handle, if provided, for maximum control over
kickback or torque reaction during start-up.
The operator can control torque reactions or kick-
back forces, if proper precautions are taken.
2. Never place your hand near the rotating acces-
sory. Accessory may kickback over your hand.
3. Do not position your body in the area where
power tool will move if kickback occurs.
Kickback will propel the tool in direction opposite
to the wheel’s movement at the point of snagging.
4. Use special care when working corners, sharp
edges etc. Avoid bouncing and snagging the
accessory. Corners, sharp edges or bouncing
have a tendency to snag the rotating accessory
and cause loss of control or kickback.
5. Do not attach a saw chain woodcarving blade
or toothed saw blade. Such blades create fre-
quent kickback and loss of control.
Safety Warnings Specic for Grinding and Abrasive
Cutting-Off Operations:
1. Use only wheel types that are recommended
for your power tool and the specic guard
designed for the selected wheel. Wheels for
which the power tool was not designed cannot be
adequately guarded and are unsafe.
2. The grinding surface of centre depressed
wheels must be mounted below the plane of
the guard lip. An improperly mounted wheel that
projects through the plane of the guard lip cannot
be adequately protected.

9ENGLISH
3. The guard must be securely attached to the
power tool and positioned for maximum safety,
so the least amount of wheel is exposed
towards the operator. The guard helps to protect
the operator from broken wheel fragments, acci-
dental contact with wheel and sparks that could
ignite clothing.
4. Wheels must be used only for recommended
applications. For example: do not grind with
the side of cut-off wheel. Abrasive cut-off wheels
are intended for peripheral grinding, side forces
applied to these wheels may cause them to
shatter.
5. Always use undamaged wheel anges that are
of correct size and shape for your selected
wheel. Proper wheel anges support the wheel
thus reducing the possibility of wheel breakage.
Flanges for cut-off wheels may be different from
grinding wheel anges.
6. Do not use worn down wheels from larger
power tools. Wheel intended for larger power tool
is not suitable for the higher speed of a smaller
tool and may burst.
Additional Safety Warnings Specic for Abrasive
Cutting-Off Operations:
1. Do not “jam“ the cut-off wheel or apply exces-
sive pressure. Do not attempt to make an
excessive depth of cut. Overstressing the wheel
increases the loading and susceptibility to twisting
or binding of the wheel in the cut and the possibil-
ity of kickback or wheel breakage.
2. Do not position your body in line with and
behind the rotating wheel. When the wheel, at
the point of operation, is moving away from your
body, the possible kickback may propel the spin-
ning wheel and the power tool directly at you.
3. When wheel is binding or when interrupting
a cut for any reason, switch off the power
tool and hold the power tool motionless until
the wheel comes to a complete stop. Never
attempt to remove the cut-off wheel from the
cut while the wheel is in motion otherwise
kickback may occur. Investigate and take correc-
tive action to eliminate the cause of wheel binding.
4. Do not restart the cutting operation in the
workpiece. Let the wheel reach full speed and
carefully re-enter the cut. The wheel may bind,
walk up or kickback if the power tool is restarted in
the workpiece.
5. Support panels or any oversized workpiece to
minimize the risk of wheel pinching and kick-
back. Large workpieces tend to sag under their
own weight. Supports must be placed under the
workpiece near the line of cut and near the edge
of the workpiece on both sides of the wheel.
6. Use extra caution when making a “pocket cut”
into existing walls or other blind areas. The
protruding wheel may cut gas or water pipes, elec-
trical wiring or objects that can cause kickback.
Safety Warnings Specic for Sanding Operations:
1. Do not use excessively oversized sanding
disc paper. Follow manufacturers recommen-
dations, when selecting sanding paper. Larger
sanding paper extending beyond the sanding
pad presents a laceration hazard and may cause
snagging, tearing of the disc or kickback.
Safety Warnings Specic for Wire Brushing
Operations:
1. Be aware that wire bristles are thrown by the
brush even during ordinary operation. Do not
overstress the wires by applying excessive
load to the brush. The wire bristles can easily
penetrate light clothing and/or skin.
2. If the use of a guard is recommended for wire
brushing, do not allow any interference of the
wire wheel or brush with the guard. Wire wheel
or brush may expand in diameter due to work load
and centrifugal forces.
Additional Safety Warnings:
1. When using depressed centre grinding wheels,
be sure to use only berglass-reinforced
wheels.
2. NEVER USE Stone Cup type wheels with this
grinder. This grinder is not designed for these
types of wheels and the use of such a product
may result in serious personal injury.
3. Be careful not to damage the spindle, the
ange (especially the installing surface) or the
lock nut. Damage to these parts could result in
wheel breakage.
4. Make sure the wheel is not contacting the
workpiece before the switch is turned on.
5. Before using the tool on an actual workpiece,
let it run for a while. Watch for vibration or
wobbling that could indicate poor installation
or a poorly balanced wheel.
6. Use the specied surface of the wheel to per-
form the grinding.
7. Do not leave the tool running. Operate the tool
only when hand-held.
8. Do not touch the workpiece immediately after
operation; it may be extremely hot and could
burn your skin.
9. Observe the instructions of the manufacturer
for correct mounting and use of wheels.
Handle and store wheels with care.
10. Do not use separate reducing bushings or
adaptors to adapt large hole abrasive wheels.
11. Use only anges specied for this tool.
12. For tools intended to be tted with threaded
hole wheel, ensure that the thread in the wheel
is long enough to accept the spindle length.
13. Check that the workpiece is properly
supported.
14. Pay attention that the wheel continues to
rotate after the tool is switched off.
15. If working place is extremely hot and humid,
or badly polluted by conductive dust, use a
short-circuit breaker (30 mA) to assure opera-
tor safety.
16. Do not use the tool on any materials contain-
ing asbestos.
17. When use cut-off wheel, always work with
the dust collecting wheel guard required by
domestic regulation.
18. Cutting discs must not be subjected to any
lateral pressure.

10 ENGLISH
19. Do not use cloth work gloves during operation.
Fibers from cloth gloves may enter the tool, which
causes tool breakage.
SAVE THESE INSTRUCTIONS.
WARNING: DO NOT let comfort or familiarity
with product (gained from repeated use) replace
strict adherence to safety rules for the subject
product. MISUSE or failure to follow the safety
rules stated in this instruction manual may cause
serious personal injury.
Important safety instructions for
battery cartridge
1. Before using battery cartridge, read all instruc-
tions and cautionary markings on (1) battery
charger, (2) battery, and (3) product using
battery.
2. Do not disassemble battery cartridge.
3. If operating time has become excessively
shorter, stop operating immediately. It may
result in a risk of overheating, possible burns
and even an explosion.
4. If electrolyte gets into your eyes, rinse them
out with clear water and seek medical atten-
tion right away. It may result in loss of your
eyesight.
5. Do not short the battery cartridge:
(1) Do not touch the terminals with any con-
ductive material.
(2) Avoid storing battery cartridge in a con-
tainer with other metal objects such as
nails, coins, etc.
(3) Do not expose battery cartridge to water
or rain.
A battery short can cause a large current
ow, overheating, possible burns and even a
breakdown.
6. Do not store the tool and battery cartridge in
locations where the temperature may reach or
exceed 50 °C (122 °F).
7. Do not incinerate the battery cartridge even if
it is severely damaged or is completely worn
out. The battery cartridge can explode in a re.
8. Be careful not to drop or strike battery.
9. Do not use a damaged battery.
10. The contained lithium-ion batteries are subject
to the Dangerous Goods Legislation require-
ments.
For commercial transports e.g. by third parties,
forwarding agents, special requirement on pack-
aging and labeling must be observed.
For preparation of the item being shipped, consult-
ing an expert for hazardous material is required.
Please also observe possibly more detailed
national regulations.
Tape or mask off open contacts and pack up the
battery in such a manner that it cannot move
around in the packaging.
11. Follow your local regulations relating to dis-
posal of battery.
SAVE THESE INSTRUCTIONS.
CAUTION: Only use genuine Makita batteries.
Use of non-genuine Makita batteries, or batteries that
have been altered, may result in the battery bursting
causing res, personal injury and damage. It will
also void the Makita warranty for the Makita tool and
charger.
Tips for maintaining maximum
battery life
1. Charge the battery cartridge before completely
discharged. Always stop tool operation and
charge the battery cartridge when you notice
less tool power.
2. Never recharge a fully charged battery car-
tridge. Overcharging shortens the battery
service life.
3. Charge the battery cartridge with room tem-
perature at 10 °C - 40 °C (50 °F - 104 °F). Let
a hot battery cartridge cool down before
charging it.
4. Charge the battery cartridge if you do not use
it for a long period (more than six months).
FUNCTIONAL
DESCRIPTION
CAUTION: Always be sure that the tool is
switched off and the battery cartridge is removed
before adjusting or checking function on the tool.
Installing or removing battery
cartridge
CAUTION: Always switch off the tool before
installing or removing of the battery cartridge.
CAUTION: Hold the tool and the battery car-
tridge rmly when installing or removing battery
cartridge. Failure to hold the tool and the battery
cartridge rmly may cause them to slip off your hands
and result in damage to the tool and battery cartridge
and a personal injury.
► Fig.1: 1. Red indicator 2. Button 3. Battery cartridge
To remove the battery cartridge, slide it from the tool
while sliding the button on the front of the cartridge.
To install the battery cartridge, align the tongue on the
battery cartridge with the groove in the housing and slip
it into place. Insert it all the way until it locks in place
with a little click. If you can see the red indicator on the
upper side of the button, it is not locked completely.

11 ENGLISH
CAUTION: Always install the battery cartridge
fully until the red indicator cannot be seen. If not,
it may accidentally fall out of the tool, causing injury to
you or someone around you.
CAUTION: Do not install the battery cartridge
forcibly. If the cartridge does not slide in easily, it is
not being inserted correctly.
Indicating the remaining battery
capacity
Only for battery cartridges with “B” at the end of the
model number
► Fig.2: 1. Indicator lamps 2. Check button
Press the check button on the battery cartridge to indi-
cate the remaining battery capacity. The indicator lamps
light up for few seconds.
Indicator lamps Remaining
capacity
Lighted Off Blinking
75% to 100%
50% to 75%
25% to 50%
0% to 25%
Charge the
battery.
The battery
may have
malfunctioned.
NOTE: Depending on the conditions of use and the
ambient temperature, the indication may differ slightly
from the actual capacity.
Indicating the remaining battery
capacity
Country specic
When you turn the tool on, the battery indicator shows
the remaining battery capacity.
► Fig.3: 1. Battery indicator
The remaining battery capacity is shown as the follow-
ing table.
Battery indicator status Remaining
battery
capacity
On Off Blinking
50% - 100%
20% - 50%
0% - 20%
Charge the
battery
Tool / battery protection system
The tool is equipped with a tool/battery protection
system. This system automatically cuts off power to
the motor to extend tool and battery life. The tool will
automatically stop during operation if the tool or battery
is placed under one of the following conditions. In some
conditions, the indicators light up.
Overload protection
When the tool is operated in a manner that causes it to
draw an abnormally high current, the tool automatically
stops without any indication. In this situation, turn the
tool off and stop the application that caused the tool to
become overloaded. Then turn the tool on to restart.
Overheat protection
When the tool is overheated, the tool stops automati-
cally and the battery indicator shows following state. In
this situation, let the tool cool before turning the tool on
again.
On Blinking
If the tool does not start, the battery may be overheated.
In this situation, let the battery cool before starting the
tool again.
Overdischarge protection
When the battery capacity is not enough, the tool stops
automatically. In this case, remove the battery from the
tool and charge the battery.
Releasing protection lock
When the protection system works repeatedly, the tool
is locked and the battery indicator shows the following
state.
In this situation, the tool does not start even if turning
the tool off and on. To release the protection lock,
remove the battery, set it to the battery charger and wait
until the charging nishes.

12 ENGLISH
On Off Blinking
Shaft lock
Press the shaft lock to prevent spindle rotation when
installing or removing accessories.
► Fig.4: 1. Shaft lock
NOTICE: Never actuate the shaft lock when the
spindle is moving. The tool may be damaged.
Switch action
CAUTION: Before installing the battery car-
tridge into the tool, always check to see that the
switch lever actuates properly and returns to the
“OFF” position when released.
CAUTION: Do not pull the switch lever hard
without pulling the lock-off lever. This can cause
switch breakage.
To prevent the switch lever from being accidentally
pulled, a lock-off lever is provided.
To start the tool, pull the lock-off lever toward the opera-
tor and then pull the switch lever.
To stop the tool, release the switch lever.
► Fig.5: 1. Lock-off lever 2. Switch lever
Automatic speed change function
► Fig.6: 1. Mode indicator
Mode indicator status Operation mode
High speed mode
High torque mode
This tool has “high speed mode” and “high torque
mode”. It automatically changes operation mode
depending on the work load. When mode indicator
lights up during operation, the tool is in high torque
mode.
Accidental re-start preventive
function
Even if installing the battery cartridge while pulling the
switch lever, the tool does not start.
To start the tool, rst release the switch lever. Then pull
the lock-off lever, and pull the switch lever.
Electronic torque control function
The tool electronically detects situations where the
wheel or accessory may be at risk to be bound. In the
situation, the tool is automatically shut off to prevent
further rotation of the spindle (it does not prevent
kickback).
To restart the tool, switch off the tool rst, remove the
cause of sudden drop in the rotation speed, and then
turn the tool on.
Soft start feature
Soft start feature reduces starting reaction.
Electric brake
Electric brake is activated after the tool is switched off.
The brake does not work when the power supply is shut
down, such as the battery is removed accidentally, with
the switch still on.
ASSEMBLY
CAUTION: Always be sure that the tool is
switched off and the battery cartridge is removed
before adjusting or checking function on the tool.
Installing side grip (handle)
CAUTION: Always be sure that the side grip is
installed securely before operation.
Screw the side grip securely on the position of the tool
as shown in the gure.
► Fig.7
Installing or removing wheel guard
(For depressed center wheel, ap
disc, ex wheel, wire wheel brush
/ abrasive cut-off wheel, diamond
wheel)
WARNING: When using a depressed center
wheel, ap disc, ex wheel or wire wheel brush,
the wheel guard must be tted on the tool so that
the closed side of the guard always points toward
the operator.
WARNING: When using an abrasive cut-off
/ diamond wheel, be sure to use only the special
wheel guard designed for use with cut-off wheels.
(In some European countries, when using a diamond
wheel, the ordinary guard can be used. Follow the
regulations in your country.)
For tool with locking screw type
wheel guard
Mount the wheel guard with the protrusions on the
wheel guard band aligned with the notches on the bear-
ing box. Then rotate the wheel guard to such an angle
that it can protect the operator according to work. Be
sure to tighten the screw securely.
To remove wheel guard, follow the installation proce-
dure in reverse.
► Fig.8: 1. Wheel guard 2. Bearing box 3. Screw

13 ENGLISH
For tool with clamp lever type wheel
guard
Loosen the screw, and then pull the lever in the direc-
tion of the arrow. Mount the wheel guard with the protru-
sions on the wheel guard band aligned with the notches
on the bearing box. Then rotate the wheel guard to such
an angle that it can protect the operator according to
work.
► Fig.9: 1. Wheel guard 2. Bearing box 3. Screw
4. Lever
Pull the lever in direction of the arrow. Then tighten the
wheel guard with fastening the screw. Be sure to tighten
the screw securely. The setting angle of the wheel
guard can be adjusted with the lever.
► Fig.10: 1. Screw 2. Lever
To remove wheel guard, follow the installation proce-
dure in reverse.
Installing or removing depressed
center wheel or ap disc
Optional accessory
WARNING: When using a depressed center
wheel or ap disc, the wheel guard must be tted
on the tool so that the closed side of the guard
always points toward the operator.
CAUTION: Make sure that the mounting part
of the inner ange ts into the inner diameter of
the depressed center wheel / ap disc perfectly.
Mounting the inner ange on the wrong side may
result in the dangerous vibration.
Mount the inner ange onto the spindle.
Make sure to t the dented part of the inner ange onto
the straight part at the bottom of the spindle.
Fit the depressed center wheel / ap disc on the inner
ange and screw the lock nut onto the spindle.
► Fig.11: 1. Lock nut 2. Depressed center wheel
3. Inner ange 4. Mounting part
To tighten the lock nut, press the shaft lock rmly so
that the spindle cannot revolve, then use the lock nut
wrench and securely tighten clockwise.
► Fig.12: 1. Lock nut wrench 2. Shaft lock
To remove the wheel, follow the installation procedure
in reverse.
Installing or removing ex wheel
Optional accessory
WARNING: Always use supplied guard when
ex wheel is on tool. Wheel can shatter during use
and guard helps to reduce chances of personal injury.
► Fig.13: 1. Lock nut 2. Flex wheel 3. Back up pad
4. Inner ange
Follow instructions for depressed center wheel but also
use back up pad over wheel. See order of assembly on
accessories page in this manual.
Installing or removing abrasive disc
Optional accessory
NOTE: Use sander accessories specied in this man-
ual. These must be purchased separately.
For 100 mm (4″) model
► Fig.14: 1. Sanding lock nut 2. Abrasive disc
3. Rubber pad 4. Inner ange
1. Mount the inner ange onto the spindle.
2. Mount the rubber pad onto the spindle.
3. Fit the disc on the rubber pad and screw the sand-
ing lock nut onto the spindle.
4. Hold the spindle with the shaft lock, and securely
tighten the sanding lock nut clockwise with the lock nut
wrench.
To remove the disc, follow the installation procedure in
reverse.
For 115 mm (4 - 1/2″) / 125 mm (5″)
model
► Fig.15: 1. Sanding lock nut 2. Abrasive disc
3. Rubber pad
1. Mount the rubber pad onto the spindle.
2. Fit the disc on the rubber pad and screw the sand-
ing lock nut onto the spindle.
3. Hold the spindle with the shaft lock, and securely
tighten the sanding lock nut clockwise with the lock nut
wrench.
To remove the disc, follow the installation procedure in
reverse.
OPERATION
WARNING: It should never be necessary to
force the tool. The weight of the tool applies ade-
quate pressure. Forcing and excessive pressure
could cause dangerous wheel breakage.
WARNING: ALWAYS replace wheel if tool is
dropped while grinding.
WARNING: NEVER bang or hit grinding disc
or wheel onto work.
WARNING: Avoid bouncing and snagging
the wheel, especially when working corners,
sharp edges etc. This can cause loss of control and
kickback.
WARNING: NEVER use tool with wood cutting
blades and other saw blades. Such blades when
used on a grinder frequently kick and cause loss of
control leading to personal injury.

14 ENGLISH
CAUTION: Never switch on the tool when it
is in contact with the workpiece, it may cause an
injury to operator.
CAUTION: Always wear safety goggles or a
face shield during operation.
CAUTION: After operation, always switch off
the tool and wait until the wheel has come to a
complete stop before putting the tool down.
CAUTION: ALWAYS hold the tool rmly with
one hand on housing and the other on the side
handle.
Grinding and sanding operation
► Fig.16
Turn the tool on and then apply the wheel or disc to the
workpiece.
In general, keep the edge of the wheel or disc at an
angle of about 15° to the workpiece surface.
During the break-in period with a new wheel, do not
work the grinder in forward direction or it may cut into
the workpiece. Once the edge of the wheel has been
rounded off by use, the wheel may be worked in both
forward and backward direction.
Operation with abrasive cut-off /
diamond wheel
Optional accessory
WARNING: When using an abrasive cut-off
/ diamond wheel, be sure to use only the special
wheel guard designed for use with cut-off wheels.
(In some European countries, when using a diamond
wheel, the ordinary guard can be used. Follow the
regulations in your country.)
WARNING: NEVER use cut-off wheel for side
grinding.
WARNING: Do not “jam” the wheel or apply
excessive pressure. Do not attempt to make an
excessive depth of cut. Overstressing the wheel
increases the loading and susceptibility to twisting
or binding of the wheel in the cut and the possibility
of kickback, wheel breakage and overheating of the
motor may occur.
WARNING: Do not start the cutting operation
in the workpiece. Let the wheel reach full speed
and carefully enter into the cut moving the tool
forward over the workpiece surface. The wheel
may bind, walk up or kickback if the power tool is
started in the workpiece.
WARNING: During cutting operations, never
change the angle of the wheel. Placing side pres-
sure on the cut-off wheel (as in grinding) will cause
the wheel to crack and break, causing serious per-
sonal injury.
WARNING: A diamond wheel shall be oper-
ated perpendicular to the material being cut.
► Fig.17: 1. Lock nut 2. Abrasive cut-off wheel / dia-
mond wheel 3. Inner ange 4. Wheel guard
for abrasive cut-off wheel / diamond wheel
As for the installation, follow the instructions for
depressed center wheel.
The direction for mounting the lock nut and the
inner ange varies by wheel type and thickness.
Refer to the following gures.
For 100 mm (4″) model
When installing the abrasive cut-off wheel:
► Fig.18: 1. Lock nut 2. Abrasive cut-off wheel
(Thinner than 4mm (5/32")) 3. Abrasive cut-
off wheel (4mm (5/32") or thicker) 4. Inner
ange
When installing the diamond wheel:
► Fig.19: 1. Lock nut 2. Diamond wheel (Thinner
than 4mm (5/32″)) 3. Diamond wheel (4mm
(5/32″) or thicker) 4. Inner ange
For 115 mm (4 - 1/2″) / 125 mm (5″)
model
When installing the abrasive cut-off wheel:
► Fig.20: 1. Lock nut 2. Abrasive cut-off wheel
(Thinner than 4mm (5/32")) 3. Abrasive cut-
off wheel (4mm (5/32") or thicker) 4. Inner
ange
When installing the diamond wheel:
► Fig.21: 1. Lock nut 2. Diamond wheel (Thinner
than 4mm (5/32″)) 3. Diamond wheel (4mm
(5/32″) or thicker) 4. Inner ange
Operation with wire cup brush
Optional accessory
CAUTION: Check operation of brush by run-
ning tool with no load, insuring that no one is in
front of or in line with brush.
CAUTION: Do not use brush that is damaged,
or which is out of balance. Use of damaged brush
could increase potential for injury from contact with
broken brush wires.
► Fig.22: 1. Wire cup brush
Remove the battery cartridge from the tool and place it
upside down allowing easy access to spindle.
Remove any accessories on spindle. Thread wire cup
brush onto spindle and tighten with supplied wrench.
NOTICE: Avoid applying too much pressure
which causes over bending of wires when using
brush. It may lead to premature breakage.

15 ENGLISH
Operation with wire wheel brush
Optional accessory
CAUTION: Check operation of wire wheel
brush by running tool with no load, insuring that
no one is in front of or in line with the wire wheel
brush.
CAUTION: Do not use wire wheel brush that
is damaged, or which is out of balance. Use of
damaged wire wheel brush could increase potential
for injury from contact with broken wires.
CAUTION: ALWAYS use guard with wire
wheel brushes, assuring diameter of wheel ts
inside guard. Wheel can shatter during use and
guard helps to reduce chances of personal injury.
► Fig.23: 1. Wire wheel brush
Remove the battery cartridge from the tool and place it
upside down allowing easy access to spindle.
Remove any accessories on spindle. Thread wire wheel
brush onto spindle and tighten with the wrenches.
NOTICE: Avoid applying too much pressure
which causes over bending of wires when
using wire wheel brush. It may lead to premature
breakage.
MAINTENANCE
CAUTION: Always be sure that the tool is
switched off and the battery cartridge is removed
before attempting to perform inspection or
maintenance.
NOTICE: Never use gasoline, benzine, thinner,
alcohol or the like. Discoloration, deformation or
cracks may result.
Air vent cleaning
The tool and its air vents have to be kept clean.
Regularly clean the tool's air vents or whenever the
vents start to become obstructed.
► Fig.24: 1. Exhaust vent 2. Inhalation vent
Remove the dust cover from inhalation vent and clean it
for smooth air circulation.
► Fig.25: 1. Dust cover
NOTE: Clean out the dust cover when it is clogged
with dust or foreign matters. Continuing operation
with a clogged dust cover may damage the tool.
OPTIONAL ACCESSORIES
CAUTION: These accessories or attachments are recommended for use with your Makita tool spec-
ied in this manual. The use of any other accessories or attachments might present a risk of injury to persons.
Only use accessory or attachment for its stated purpose.
If you need any assistance for more details regarding these accessories, ask your local Makita Service Center.
• Makita genuine battery and charger
► Fig.26
-100 mm (4″) model 115 mm (4-1/2″) model 125 mm (5″) model
1Grip 36
2Wheel Guard (for grinding wheel)
3Inner ange
4Depressed center wheel / Flap disc
5Lock nut
6Back up pad
7Flex wheel
8Inner ange and rubber pad 76 Rubber pad 100 Rubber pad 115
9Abrasive disc
10 Sanding lock nut
11 Wire wheel brush
12 Wire cup brush
13 Wheel Guard (for cut-off wheel) *1
14 Abrasive cut-off wheel / Diamond wheel
-Lock nut wrench
NOTE: *1 In some European countries, when using a diamond wheel, the ordinary guard can be used instead of the
special guard covering the both side of the wheel. Follow the regulations in your country.
NOTE: Some items in the list may be included in the tool package as standard accessories. They may differ from
country to country.

16 BAHASA INDONESIA
BAHASA INDONESIA (Petunjuk Asli)
SPESIFIKASI
Model: DGA408 DGA458 DGA508
Diameter roda 100 mm (4″) 115 mm (4-1/2″) 125 mm (5″)
Ketebalan roda maks. 6,4 mm
Ulir spindel M10 M14 atau 5/8″ (tergantung negara)
Kecepatan terukur (n) 8.500 min-1
Panjang
keseluruhan
Dengan kartrid baterai
BL1815N, BL1820,
BL1820B
348 mm
Dengan kartrid baterai
BL1830, BL1830B,
BL1840, BL1840B, BL1850,
BL1850B, BL1860B
362 mm
Berat bersih Dengan kartrid baterai
BL1815N, BL1820,
BL1820B
2,2 kg 2,4 kg
Dengan kartrid baterai
BL1830, BL1830B,
BL1840, BL1840B, BL1850,
BL1850B, BL1860B
2,5 kg 2,6 kg
Tegangan terukur D.C.18 V
• Karena kesinambungan program penelitian dan pengembangan kami, spesikasi yang disebutkan di sini dapat
berubah tanpa pemberitahuan.
• Spesikasi dan kartrid baterai dapat berbeda dari satu negara ke negara lainnya.
• Berat, dengan kartrid baterai, menurut Prosedur EPTA 01/2003
Simbol
Berikut ini adalah simbol-simbol yang digunakan pada
peralatan ini. Pastikan Anda mengerti makna masing-
masing simbol sebelum menggunakan alat.
Baca petunjuk penggunaan.
Gunakan kaca mata pengaman.
Cd
Ni-MH
Li-ion
Hanya untuk negara-negara UE
Jangan membuang peralatan listrik atau
paket baterai bersama-sama dengan
bahan limbah rumah tangga!
Dengan memerhatikan Petunjuk Eropa,
tentang Limbah Peralatan Listrik dan
Elektronik serta Baterai dan Akumulator
serta Limbah Baterai dan Akumulator dan
pelaksanaannya sesuai dengan ketentuan
hukum nasional, peralatan listrik dan
baterai dan paket baterai yang telah habis
umur pakainya harus dikumpulkan secara
terpisah dan dikembalikan ke fasilitas daur
ulang yang kompatibel secara lingkungan.
Penggunaan
Mesin ini dirancang untuk menggerinda, mengampelas
dan memotong logam dan material batuan tanpa
menggunakan air.
Peringatan keselamatan umum
mesin listrik
PERINGATAN: Bacalah semua peringatan
keselamatan dan semua petunjuk. Kelalaian
mematuhi peringatan dan petunjuk dapat
menyebabkan sengatan listrik, kebakaran dan/atau
cedera serius.
Simpanlah semua peringatan
dan petunjuk untuk acuan di
masa depan.
Istilah “mesin listrik” dalam semua peringatan mengacu
pada mesin listrik yang dijalankan dengan sumber listrik
jala-jala (berkabel) atau baterai (tanpa kabel).
Keselamatan tempat kerja
1. Jaga tempat kerja selalu bersih dan
berpenerangan cukup. Tempat kerja yang
berantakan dan gelap mengundang kecelakaan.
2. Jangan gunakan mesin listrik dalam
lingkungan yang mudah meledak, misalnya
jika ada cairan, gas, atau debu yang mudah
menyala. Mesin listrik menimbulkan bunga api
yang dapat menyalakan debu atau uap tersebut.
3. Jauhkan anak-anak dan orang lain saat
menggunakan mesin listrik. Bila perhatian
terpecah, anda dapat kehilangan kendali.
Keamanan Kelistrikan
1. Steker mesin listrik harus cocok dengan

17 BAHASA INDONESIA
stopkontak. Jangan sekali-kali mengubah
steker dengan cara apa pun. Jangan
menggunakan steker adaptor dengan mesin
listrik terbumi (dibumikan). Steker yang
tidak diubah dan stopkontak yang cocok akan
mengurangi risiko sengatan listrik.
2. Hindari sentuhan tubuh dengan permukaan
terbumi atau yang dibumikan seperti pipa,
radiator, kompor, dan kulkas. Risiko sengatan
listrik bertambah jika tubuh Anda terbumikan atau
dibumikan.
3. Jangan membiarkan mesin listrik kehujanan
atau kebasahan. Air yang masuk ke dalam mesin
listrik akan meningkatkan risiko sengatan listrik.
4. Jangan menyalahgunakan kabel. Jangan
sekali-kali menggunakan kabel untuk
membawa, menarik, atau mencabut mesin
listrik dari stopkontak. Jauhkan kabel dari
panas, minyak, tepian tajam, atau bagian
yang bergerak. Kabel yang rusak atau kusut
memperbesar risiko sengatan listrik.
5. Bila menggunakan mesin listrik di luar
ruangan, gunakan kabel ekstensi yang
sesuai untuk penggunaan di luar ruangan.
Penggunaan kabel yang sesuai untuk
penggunaan luar ruangan mengurangi risiko
sengatan listrik.
6. Jika mengoperasikan mesin listrik di lokasi
lembap tidak terhindarkan, gunakan pasokan
daya yang dilindungi peranti imbasan arus
(residual current device - RCD). Penggunaan
RCD mengurangi risiko sengatan listrik.
Keselamatan Diri
1. Jaga kewaspadaan, perhatikan pekerjaan Anda
dan gunakan akal sehat bila menggunakan
mesin listrik. Jangan menggunakan mesin
listrik saat Anda lelah atau di bawah pengaruh
obat bius, alkohol, atau obat. Sekejap saja
lalai saat menggunakan mesin listrik dapat
menyebabkan cedera badan serius.
2. Gunakan alat pelindung diri. Selalu gunakan
pelindung mata. Peralatan pelindung seperti
masker debu, sepatu pengaman anti-selip, helm
pengaman, atau pelindung telinga yang digunakan
untuk kondisi yang sesuai akan mengurangi risiko
cedera badan.
3. Cegah penyalaan yang tidak disengaja.
Pastikan bahwa sakelar berada dalam posisi
mati (off) sebelum menghubungkan mesin
ke sumber daya dan/atau paket baterai, atau
mengangkat atau membawanya. Membawa
mesin listrik dengan jari Anda pada sakelarnya
atau mengalirkan listrik pada mesin listrik
yang sakelarnya hidup (on) akan mengundang
kecelakaan.
4. Lepaskan kunci-kunci penyetel sebelum
menghidupkan mesin listrik. Kunci-kunci yang
masih terpasang pada bagian mesin listrik yang
berputar dapat menyebabkan cedera.
5. Jangan meraih terlalu jauh. Jagalah pijakan
dan keseimbangan sepanjang waktu. Hal ini
memungkinkan kendali yang lebih baik atas mesin
listrik dalam situasi yang tidak diharapkan.
6. Kenakan pakaian dengan baik. Jangan
memakai pakaian yang kedodoran atau
perhiasan. Jaga jarak antara rambut, pakaian,
dan sarung tangan Anda dengan bagian mesin
yang bergerak. Pakaian kedodoran, perhiasan,
atau rambut panjang dapat tersangkut pada
bagian yang bergerak.
7. Jika tersedia fasilitas untuk menghisap dan
mengumpulkan debu, pastikan fasilitas
tersebut terhubung listrik dan digunakan
dengan baik. Penggunaan pembersih debu dapat
mengurangi bahaya yang terkait dengan debu.
Penggunaan dan pemeliharaan mesin listrik
1. Jangan memaksa mesin listrik. Gunakan
mesin listrik yang tepat untuk keperluan
Anda. Mesin listrik yang tepat akan menuntaskan
pekerjaan dengan lebih baik dan aman pada
kecepatan sesuai rancangannya.
2. Jangan gunakan mesin listrik jika sakelar
tidak dapat menyalakan dan mematikannya.
Mesin listrik yang tidak dapat dikendalikan
dengan sakelarnya adalah berbahaya dan harus
diperbaiki.
3. Cabut steker dari sumber listrik dan/atau paket
baterai dari mesin listrik sebelum melakukan
penyetelan, penggantian aksesori, atau
menyimpan mesin listrik. Langkah keselamatan
preventif tersebut mengurangi risiko hidupnya
mesin secara tak sengaja.
4. Simpan mesin listrik jauh dari jangkauan anak-
anak dan jangan biarkan orang yang tidak
paham mengenai mesin listrik tersebut atau
petunjuk ini menggunakan mesin listrik. Mesin
listrik sangat berbahaya di tangan pengguna yang
tak terlatih.
5. Rawatlah mesin listrik. Periksa apakah ada
bagian bergerak yang tidak lurus atau macet,
bagian yang pecah dan kondisi lain yang dapat
memengaruhi penggunaan mesin listrik. Jika
rusak, perbaiki dahulu mesin listrik sebelum
digunakan. Banyak kecelakaan disebabkan oleh
kurangnya pemeliharaan mesin listrik.
6. Jaga agar mesin pemotong tetap tajam dan
bersih. Mesin pemotong yang terawat baik
dengan mata pemotong yang tajam tidak mudah
macet dan lebih mudah dikendalikan.
7. Gunakan mesin listrik, aksesori, dan mata
mesin, dll. sesuai dengan petunjuk ini, dengan
memperhitungkan kondisi kerja dan jenis
pekerjaan yang dilakukan. Penggunaan mesin
listrik untuk penggunaan yang lain dari peruntukan
dapat menimbulkan situasi berbahaya.
Penggunaan dan pemeliharaan mesin bertenaga
baterai
1. Isi ulang baterai hanya dengan pengisi daya
yang ditentukan oleh pabrikan. Pengisi daya
yang cocok untuk satu jenis paket baterai dapat
menimbulkan risiko kebakaran ketika digunakan
untuk paket baterai yang lain.
2. Gunakan mesin listrik hanya dengan
paket baterai yang telah ditentukan secara
khusus. Penggunaan paket baterai lain dapat
menimbulkan risiko cedera dan kebakaran.
3. Ketika paket baterai tidak digunakan, jauhkan
dari benda logam lain, seperti penjepit
kertas, uang logam, kunci, paku, sekrup
atau benda logam kecil lainnya, yang dapat

18 BAHASA INDONESIA
menghubungkan satu terminal ke terminal
lain. Hubungan singkat terminal baterai dapat
menyebabkan luka bakar atau kebakaran.
4. Pemakaian yang salah, dapat menyebabkan
keluarnya cairan dari baterai; hindari kontak.
Jika terjadi kontak secara tidak sengaja, bilas
dengan air. Jika cairan mengenai mata, cari
bantuan medis. Cairan yang keluar dari baterai
bisa menyebabkan iritasi atau luka bakar.
Servis
1. Berikan mesin listrik untuk diperbaiki hanya
kepada oleh teknisi yang berkualikasi dengan
menggunakan hanya suku cadang pengganti
yang serupa. Hal ini akan menjamin terjaganya
keamanan mesin listrik.
2. Patuhi petunjuk pelumasan dan penggantian
aksesori.
3. Jagalah agar gagang kering, bersih, dan bebas
dari minyak dan gemuk.
Peringatan keselamatan gerinda
tanpa kabel
Peringatan Keselamatan yang Umum untuk
Penggerindaan, Pengampelasan, Penyikatan
dengan Sikat Kawat, atau Pengoperasian
Pemotongan Abrasif:
1. Mesin listrik ini dirancang untuk berfungsi
sebagai gerinda, pengampelas, sikat kawat
atau mesin pemotong. Bacalah semua
peringatan keselamatan, petunjuk, ilustrasi
dan spesikasi yang disertakan bersama
mesin listrik ini. Kelalaian untuk mematuhi
semua petunjuk yang tercantum di bawah ini
dapat menyebabkan sengatan listrik, kebakaran
dan/atau cedera serius.
2. Tidak dianjurkan menggunakan mesin
listrik ini untuk melakukan pekerjaan seperti
memoles. Pekerjaan yang tidak sesuai dengan
spesikasi mesin listrik ini dapat menimbulkan
bahaya dan menyebabkan cedera pada
pengguna.
3. Jangan gunakan aksesori yang tidak
dirancang secara khusus dan dianjurkan
oleh produsen mesin. Hanya karena aksesori
tersebut dapat dipasang pada mesin listrik Anda,
bukan berarti dapat menjamin keselamatan dalam
pengoperasian.
4. Kecepatan terukur pada aksesori setidaknya
harus sama dengan kecepatan maksimum
yang tertera pada mesin listrik. Aksesori yang
bekerja lebih cepat dari kecepatan terukurnya
mungkin saja pecah dan terlempar.
5. Diameter luar dan tebal aksesori Anda harus
berada dalam nilai kapasitas mesin listrik
Anda. Aksesori dengan ukuran yang tidak tepat
tidak dapat dilindungi atau dikendalikan secara
memadai.
6. Pemasangan aksesori berulir harus sesuai
dengan ulir spindel gerinda. Untuk aksesori
yang dipasang menggunakan ensa, lubang
punjung pada aksesori harus cocok dengan
diameter tempat pemasangan pada ensa.
Aksesori punjung yang tidak sesuai dengan
perangkat keras pemasangan mesin listrik
akan bekerja secara tidak seimbang, bergetar
berlebihan dan dapat menyebabkan hilangnya
kendali.
7. Jangan menggunakan aksesori yang sudah
rusak. Setiap kali sebelum digunakan, periksa
apakah ada patahan dan retakan pada roda
abrasif, apakah ada retakan, sobekan atau
keausan pada bantalan belakang, serta apakah
ada kawat yang longgar atau patah pada sikat
kawat. Jika mesin listrik atau aksesori jatuh,
periksa apakah terjadi kerusakan, atau pasang
aksesris yang tidak rusak. Setelah memeriksa
dan memasang aksesori, posisikan diri Anda
dan orang di sekitar jauh dari bidang aksesori
yang berputar dan jalankan mesin listrik pada
kecepatan maksimum tanpa beban selama
satu menit. Aksesori yang rusak umumnya akan
pecah selama waktu pengujian ini.
8. Kenakan alat pelindung diri. Tergantung
pekerjaannya, gunakan pelindung muka, kaca
mata pelindung atau kaca mata pengaman.
Sesuai dengan pekerjaannya, kenakan
masker debu, pelindung telinga, sarung
tangan, dan apron bengkel yang mampu
menahan debu gerinda atau serpihan benda
kerja. Pelindung mata harus mampu menahan
debu yang berhamburan, yang ditimbulkan dari
berbagai jenis pekerjaan. Masker debu atau alat
pernapasan harus mampu menyaring partikel
yang dihasilkan dari pekerjaan Anda. Terpaan
yang berkepanjangan terhadap kebisingan
berintensitas tinggi dapat menyebabkan hilangnya
pendengaran.
9. Jaga agar orang di sekitar berada dalam jarak
aman yang jauh dari area kerja. Siapa pun
yang masuk ke area kerja harus mengenakan
alat pelindung diri. Potongan benda kerja atau
dari aksesori yang rusak mungkin saja terlempar
dan menyebabkan cedera di area yang langsung
berdekatan dengan pekerjaan.
10. Pegang mesin listrik hanya pada permukaan
genggam yang terisolasi saat melakukan
pekerjaan karena mesin pemotong mungkin
saja bersentuhan dengan kabel tersembunyi.
Sentuhan kawat “hidup” dapat menyebabkan
bagian logam pada mesin teraliri arus listrik dan
menyengat pengguna.
11. Jangan sekali-kali meletakkan mesin listrik
sebelum aksesorinya benar-benar berhenti.
Aksesori yang berputar dapat menyambar
permukaan dan menarik mesin listrik di luar
kendali Anda.
12. Jangan menyalakan mesin listrik sambil
membawanya di sisi badan Anda. Sentuhan
yang tidak disengaja oleh aksesori yang berputar
dapat merobek pakaian Anda, yang akan menarik
aksesori ke arah badan Anda.
13. Bersihkan ventilasi udara mesin listrik secara
rutin. Kipas motor akan menarik debu ke dalam
rumahan, dan serbuk logam yang terkumpul
secara berlebihan dapat menyebabkan bahaya
listrik.
14. Jangan mengoperasikan mesin listrik di dekat
benda-benda yang mudah terbakar. Percikan
apinya dapat menyulut benda-benda tersebut.
15. Jangan menggunakan aksesori yang

19 BAHASA INDONESIA
membutuhkan cairan pendingin. Menggunakan
air atau cairan pendingin lain dapat
mengakibatkan kematian akibat sengatan listrik.
Hentakan balik dan Peringatan Terkait
Hentakan balik merupakan reaksi tiba-tiba akibat
terjepit atau tersangkutnya roda yang berputar,
bantalan belakang, sikat atau aksesori lainnya. Kondisi
terjepit atau tersangkut akan menyebabkan aksesori
yang berputar akan berhenti dengan cepat yang
kemudian berubah mengakibatkan terdorongnya mesin
listrik yang tak terkendali ke arah yang berlawanan
dengan putaran aksesori di titik tempat aksesori
tersebut terjepit.
Sebagai contoh, jika roda ampelas tersangkut atau
terjepit oleh benda kerja, tepi roda yang masuk ke titik
tempat roda tersebut terjepit bisa menggali permukaan
bahan, yang menyebabkan roda tersebut menanjak
atau menghentak. Roda mungkin saja melompat ke
arah atau menjauhi operator, tergantung arah gerakan
roda di titik tempat roda tersebut terjepit. Roda ampelas
juga mungkin saja pecah karena kondisi tersebut.
Hentakan balik merupakan akibat dari kesalahan cara
penggunaan mesin listrik dan/atau prosedur atau
kondisi pengoperasian yang salah, dan dapat dihindari
dengan melakukan tindakan kewaspadaan yang tepat
sebagaimana diuraikan di bawah ini.
1. Pertahankan genggaman yang kuat pada
mesin listrik serta posisi badan dan lengan
Anda sehingga Anda dapat menahan gaya
hentakan balik. Selalu gunakan pegangan
tambahan, bila tersedia, untuk mengendalikan
hentakan balik atau reaksi torsi secara
maksimum selama mesin mulai dihidupkan.
Jika tindakan kewaspadaan yang tepat dilakukan,
operator dapat mengendalikan reaksi torsi atau
gaya hentakan balik.
2. Jangan sekali-kali memosisikan tangan Anda
di dekat aksesori yang berputar. Aksesori
mungkin saja menghentak balik ke arah tangan
Anda.
3. Jangan memosisikan badan Anda di area
tempat mesin listrik akan bergerak bila
terjadi hentakan balik. Hentakan balik akan
memutar mesin dalam arah yang berlawanan
dengan gerakan roda di titik tempat roda tersebut
tersangkut.
4. Sangat berhati-hatilah saat bekerja di area
sudut, tepi yang tajam, dsb. Jaga agar
aksesori tidak memantul atau tersangkut. Area
sudut, tepi yang tajam, atau pantulan cenderung
menyebabkan aksesori yang berputar tersangkut
dan menyebabkan kehilangan kendali atau
timbulnya hentakan balik.
5. Jangan memasang mata gergaji rantai atau
mata gergaji bergerigi. Mata mesin seperti ini
menghasilkan hentakan balik secara berkali-kali
dan menyebabkan kehilangan kendali.
Peringatan Keselamatan Khusus untuk Pekerjaan
Penggerindaan dan Pengoperasian Pemotongan
Abrasif:
1. Gunakan hanya tipe roda yang dianjurkan
untuk mesin listrik Anda dan pelindung
khusus yang dirancang untuk roda yang Anda
pilih. Roda yang tidak sesuai dengan spesikasi
mesin listrik ini tidak dapat terlindungi secara
memadai, dan karenanya tidak aman.
2. Permukaan untuk penggerindaan pada roda
tengah gerinda harus dipasang di bawah
bidang pada tepi pelindung. Roda yang tidak
dipasang dengan benar sehingga menonjol pada
bidang tepi pelindung tidak dapat benar-benar
terlindungi.
3. Pelindung harus terpasang dengan kencang
pada mesin listrik dan diposisikan untuk
pengamanan maksimal, sehingga bagian roda
yang menghadap ke operator menjadi minimal.
Pelindung tersebut ikut melindungi operator dari
potongan patahan roda, gesekan dengan roda
dan percikan api yang dapat membakar pakaian.
4. Roda harus digunakan hanya untuk
penggunaan yang disarankan. Misalnya:
jangan menggerinda dengan bagian samping
roda pemotong. Roda pemotong abrasif
ditujukan untuk pekerjaan gerinda sisi luar;
jika roda dikenai tenaga dari samping, roda ini
mungkin saja pecah.
5. Selalu gunakan ensa roda yang tidak rusak
dengan ukuran dan bentuk yang tepat sesuai
dengan roda yang Anda pilih. Flensa roda yang
tepat akan menopang roda sehingga mengurangi
kemungkinan pecahnya roda. Flensa untuk roda
pemotongan mungkin saja berbeda dengan ensa
roda gerinda.
6. Jangan gunakan roda dengan kinerja yang
sudah rendah dari mesin listrik yang lebih
besar. Roda yang dirancang untuk mesin listrik
yang lebih besar tidak cocok untuk digunakan
pada alat yang lebih kecil dengan kecepatan yang
lebih tinggi dan mungkin saja akan rusak.
Tambahan Peringatan Keselamatan Khusus untuk
Pengoperasian Pemotongan Abrasif:
1. Jangan membuat roda pemotong “macet”
atau menekannya secara berlebihan.
Jangan mencoba memotong terlalu dalam.
Menempatkan tekanan berlebihan pada roda akan
meningkatkan beban dan dapat menyebabkan
roda berputar atau terjepit pada potongan dan
terdapat kemungkinan terjadi hentakan balik atau
kerusakan roda.
2. Jangan menempatkan diri Anda sejajar dan
di belakang roda yang berputar. Pada titik
pengerjaan, saat roda bergerak menjauh dari
Anda, hentakan balik dapat menggerakkan roda
yang berputar dan mesin listrik ke arah Anda
secara langsung.
3. Ketika roda terjepit atau pemotongan terhenti
karena alasan apa pun, matikan mesin listrik
dan tahan hingga roda benar-benar berhenti.
Jangan pernah mencoba melepas roda
pemotong dari pekerjaan pemotongan saat
roda bergerak, jika tidak, akan terjadi hentakan
balik. Periksa dan ambil tindakan perbaikan yang
tepat untuk mengatasi penyebab macetnya roda.
4. Jangan ulangi pemotongan pada benda kerja.
Biarkan roda mencapai kecepatan penuh dan
masukkan kembali dengan hati-hati pada
potongan. Roda mungkin saja terjepit, bergerak
ke atas atau terjadi hentakan balik jika mesin
listrik dinyalakan ulang pada benda kerja.
5. Tahan panel atau benda kerja berukuran
besar untuk meminimalkan risiko roda

20 BAHASA INDONESIA
terjepit dan terjadi hentakan balik. Benda kerja
besar cenderung melengkung karena beratnya.
Penunjang harus diletakkan di bawah benda kerja
dekat garis pemotongan dan dekat ujung benda
kerja pada kedua sisi roda.
6. Berhati-hatilah saat melakukan “pemotongan
saku” pada dinding atau area buta lain. Roda
yang mencuat dapat memotong pipa gas atau
air, kabel listrik, atau objek lain yang dapat
menyebabkan hentakan balik.
Peringatan Keselamatan Khusus untuk Pekerjaan
Pengampelasan:
1. Jangan menggunakan kertas cakram
ampelas yang ukurannya terlalu besar. Ikuti
rekomendasi pabrik saat memilih kertas
ampelas. Kertas ampelas yang lebih besar
melebihi bantalan ampelas akan menimbulkan
bahaya cedera dan bisa menyebabkan
tersangkut, pecahnya cakram atau terjadinya
hentakan balik.
Peringatan Keselamatan Khusus untuk
Pengoperasian dengan Sikat Kawat:
1. Berhati-hatilah, jangan sampai serpihan kawat
terlepas dari sikat bahkan pada pengoperasian
standar. Jangan terlalu keras menekan kawat
dengan memberikan tekanan yang terlalu
besar pada sikat. Serpihan kawat dapat dengan
mudah menembus pakaian yang tipis dan/atau
kulit.
2. Jika penggunaan pelindung direkomendasikan
untuk sikat kawat, jangan sampai roda kawat
atau sikat mengganggu kerja pelindung. Roda
kawat atau sikat dapat bertambah diameternya
bergantung pada beban kerja dan gaya
sentrifugal.
Peringatan Keselamatan Tambahan:
1. Saat menggunakan roda gerinda tengah,
pastikan bahwa Anda hanya menggunakan
roda dengan berglass.
2. JANGAN PERNAH GUNAKAN roda berjenis
Stone Cup dengan gerinda ini. Gerinda ini tidak
dirancang untuk tipe roda semacam ini dan jika
digunakan, hal ini dapat mengakibatkan cedera
serius pada penggunanya.
3. Hati-hati jangan sampai merusak spindel,
ensa (terutama permukaan pemasangan)
atau mur kunci. Kerusakan pada bagian ini
dapat mengakibatkan rusaknya roda.
4. Pastikan bahwa roda tidak menyentuh benda
kerja sebelum sakelar dinyalakan.
5. Sebelum menggunakan mesin pada benda
kerja yang sebenarnya, jalankan mesin
sebentar. Waspadai getaran atau goyangan
yang dapat menunjukkan lemahnya
pemasangan atau roda yang kurang seimbang.
6. Gunakan permukaan roda yang sudah
ditentukan untuk melakukan penggerindaan.
7. Jangan tinggalkan mesin dalam keadaan
hidup. Jalankan mesin hanya ketika
digenggam dengan tangan.
8. Jangan menyentuh benda kerja segera setelah
pengoperasian; suhunya mungkin masih
sangat panas dan dapat membakar kulit Anda.
9. Patuhi petunjuk produsen mengenai cara
memasang dan menggunakan roda yang
benar. Rawat dan simpan roda dengan cermat.
10. Jangan menggunakan bos atau adaptor
pengurang yang terpisah untuk menyesuaikan
roda dengan lubang abrasif berukuran besar.
11. Gunakan hanya ensa yang ditentukan untuk
mesin ini.
12. Untuk mesin yang memang dirancang untuk
roda lubang berulir, pastikan bahwa ulir
dalam roda cukup panjang untuk menampung
panjang spindel.
13. Periksa apakah benda kerja telah ditopang
dengan baik.
14. Perhatikan bahwa roda terus berputar setelah
mesin dimatikan.
15. Jika tempat kerja sangat panas dan lembap,
sangat kotor oleh debu konduktif, gunakan
pemutus daya (30 mA) untuk menjamin
keselamatan operator.
16. Jangan menggunakan mesin pada bahan yang
mengandung asbes.
17. Roda pemotongan hendaknya selalu
digunakan dengan pelindung roda pengumpul
debu yang disyaratkan oleh undang-undang
setempat.
18. Cakram pemotongan harus disesuaikan
dengan tekanan lateral.
19. Jangan gunakan sarung tangan kerja kain
selama pengoperasian. Serat dari sarung tangan
kain dapat masuk ke mesin dan mengakibatkan
kerusakan.
SIMPAN PETUNJUK INI.
PERINGATAN: JANGAN biarkan kenyamanan
atau terbiasanya Anda dengan produk (karena
penggunaan berulang) mengurangi kepatuhan
yang ketat terhadap aturan keselamatan untuk
produk yang terkait. PENYALAHGUNAAN atau
kelalaian mematuhi kaidah keselamatan yang
tertera dalam petunjuk ini dapat menyebabkan
cedera badan serius.
Petunjuk keselamatan penting untuk
kartrid baterai
1. Sebelum menggunakan kartrid baterai,
bacalah semua petunjuk dan penandaan pada
(1) pengisi daya baterai, (2) baterai, dan (3)
produk yang menggunakan baterai.
2. Jangan membongkar kartrid baterai.
3. Jika waktu beroperasinya menjadi sangat
singkat, segera hentikan penggunaan. Hal
tersebut dapat menimbulkan risiko panas
berlebih, kemungkinan mengalami luka bakar
atau bahkan terjadi ledakan.
4. Jika elektrolit mengenai mata Anda, basuh
dengan air bersih dan segera cari pertolongan
medis. Hal tersebut dapat mengakibatkan
hilangnya kemampuan penglihatan Anda.
5. Jangan menghubungkan terminal kartrid
baterai:
(1) Jangan menyentuhkan terminal dengan
bahan penghantar listrik apa pun.
This manual suits for next models
5
Table of contents
Languages:
Other Makita Grinder manuals

Makita
Makita GA027G User manual

Makita
Makita GA5010 User manual

Makita
Makita GA049G User manual

Makita
Makita 9526PB User manual

Makita
Makita GD0601 User manual

Makita
Makita GA7050 User manual

Makita
Makita XAG25 User manual

Makita
Makita XAG03 User manual

Makita
Makita 9015A User manual

Makita
Makita GA4031 User manual
Popular Grinder manuals by other brands

Hitachi
Hitachi G 13SR Technical data and service manual

Graphite
Graphite 58G003 Translation of the original instructions

Fein
Fein MSfv 649 operating instructions

Kogan
Kogan Pawever Pets PP2PTNLGRDA user guide

Black & Decker
Black & Decker Linea Pro G720 instruction manual

Blastrac
Blastrac BGS-250-115-S operating manual