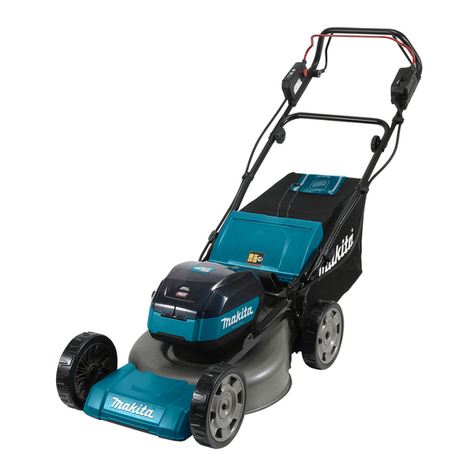
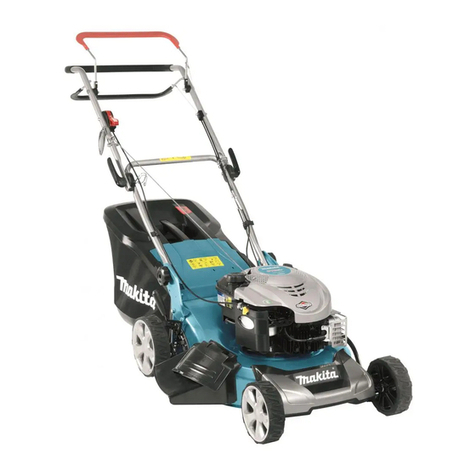
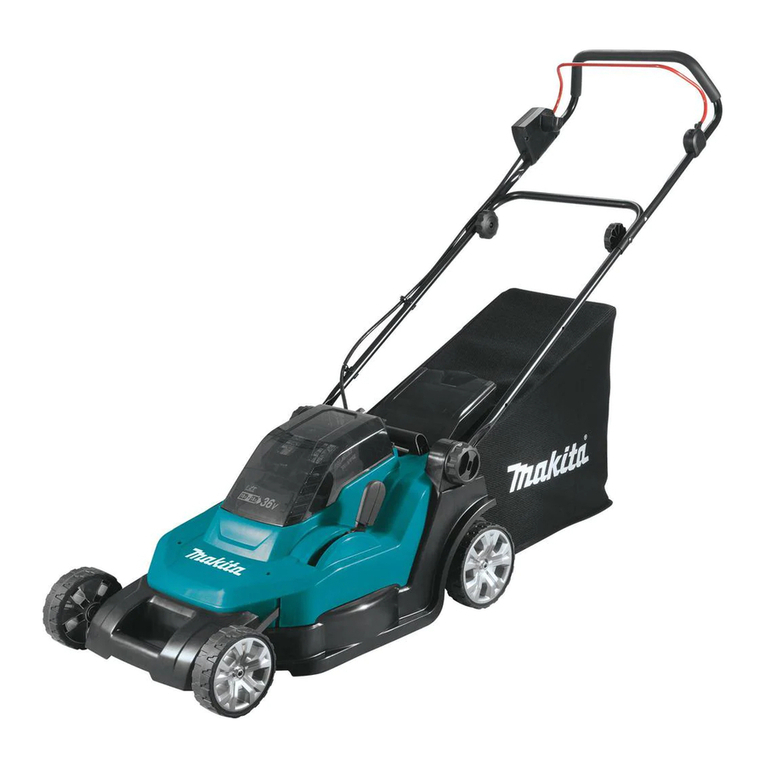
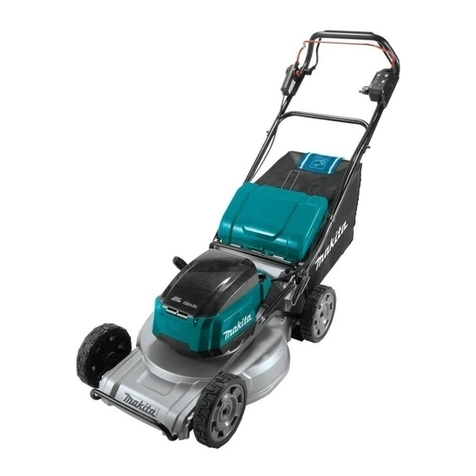
Makita BLM430 User manual

1
GB Cordless Lawn Mower INSTRUCTION MANUAL
UA Бездротова газонокосарка ІНСТРУКЦІЯ ЗЕКСПЛУАТАЦІЇ
PL Akumulatorowa kosiarka do trawy INSTRUKCJA OBSŁUGI
RO Maşinăde tuns iarba fărăcablu MANUAL DE INSTRUCŢIUNI
DE Akku Rasenmäher BEDIENUNGSANLEITUNG
HU Vezeték nélküli fűnyíró HASZNÁLATI KÉZIKÖNYV
SK Akumulátorová kosačka NÁVOD NA OBSLUHU
CZ Akumulátorová sekačka na trávu NÁVOD K OBSLUZE
BLM430
LM430D

2
1
1 012297
1
2
3
2 012379
1
2
3 012380
1
2
3
4 012381
1
5 014472
1
6 012297
1
7 012303
1
2
3
4
8 012386
1
2
3
4
5
9 012606
1
2
10 012421
1
2
11 012605
1
23
4
12 012389

3
13 012382
14 012604
15 012309
1
16 012600 17 012420

4
ENGLISH (Original instructions)
Explanation of general view
1-1. Lock key
2-1. Battery converter (BCV01)
2-2. Installation hole
2-3. Hook
3-1. Battery cover
3-2. Product mounting adapter of the
BCV01
4-1. Cord
4-2. Slit
4-3. Upper holders
5-1. Battery converter (BCV03)
6-1. Lock key
7-1. Mowing height adjusting lever
8-1. Upper handle
8-2. Lower handle
8-3. Screw holes
8-4. Screw holes
9-1. Clamping nut
9-2. Lower handle
9-3. Upper handle
9-4. Screw holes
9-5. Screw
10-1. Holders
10-2. Cord
11-1. Holders
11-2. Cord
12-1. Screw
12-2. Clamping nut
12-3. Upper handle
12-4. Lower handle
16-1. Front grip
SPECIFICATIONS
Model BLM430 / LM430D
Mowing width 430 mm
No load speed 3,600 min-1
during operation 1,450 mm -1,490 mm x 460 mm x 950 mm -1,020 mm
Dimensions (L x W x H) when stored 490 mm - 500 mm x 460 mm x 810 mm
Net weight 17.9 kg
Rated voltage D.C. 36 V
Standard battery cartridge(s)
Warning: Use only the battery cartridge(s) described. BL3626 / BL3622A
• Due to our continuing program of research and development, the specifications herein are subject to change without notice.
• Specifications and battery cartridge may differ from country to country.
• Weight, with battery cartridge, according to EPTA-Procedure 01/2003
END016-2
Symbols
The following show the symbols used for the equipment.
Be sure that you understand their meaning before use.
・Take particular care and attention.
・Read instruction manual.
・Danger; be aware of thrown objects.
・The distance between the tool and
bystanders must be at least 15 m.
・Never put your hands and feet near the
blade under the mower.
・Remove the lock key before inspecting,
adjusting, cleaning, servicing, leaving
and storing the mower.
・Only for EU countries
Do not dispose of electric equipment or
battery pack together with household
waste material!
In observance of European Directive
2002/96/EC on waste electric and
electronic equipment, 2006/66/EC on
batteries and accumulators and waste
batteries and accumulators and their
implementation in accordance with
national laws, electric equipment and
battery pack that have reached the end
of their life must be collected separately
and returned to an environmentally
compatible recycling facility.
ENG905-1
Noise
The typical A-weighted noise level determined according
to EN60335:
Sound pressure level (LpA) : 80 dB (A)
Sound power level (LWA) : 93 dB (A)
Uncertainty (K) : 3 dB (A)
Wear ear protection
ENG900-1
Vibration
The vibration total value (tri-axial vector sum)
determined according to EN60335:
Vibration emission (ah) : 2.5 m/s2or less
Uncertainty (K) : 1.5 m/s2
ENG901-1
• The declared vibration emission value has been
measured in accordance with the standard test
method and may be used for comparing one tool
with another.
Cd
Ni-MH
Li-ion

5
• The declared vibration emission value may also be
used in a preliminary assessment of exposure.
WARNING:
• The vibration emission during actual use of the
power tool can differ from the declared emission
value depending on the ways in which the tool is
used.
• Be sure to identify safety measures to protect the
operator that are based on an estimation of
exposure in the actual conditions of use (taking
account of all parts of the operating cycle such as
the times when the tool is switched off and when it
is running idle in addition to the trigger time).
ENH217-1
For European countries only
EC Declaration of Conformity
We Makita Corporation as the responsible
manufacturer declare that the following Makita
machine(s):
Designation of Machine:
Cordless Lawn Mower
Model No./ Type: BLM430, LM430D
Specifications: see "SPECIFICATIONS" table.
are of series production and
Conforms to the following European Directives:
2000/14/EC, 2006/42/EC
And are manufactured in accordance with the following
standards or standardised documents:
EN60745, EN60335
The technical documentation is kept by our authorised
representative in Europe who is:
Makita International Europe Ltd.
Michigan Drive, Tongwell,
Milton Keynes, Bucks MK15 8JD, England
The conformity assessment procedure required by
Directive 2000/14/EC was in Accordance with annex VI.
Notified Body:
TÜV Rheinland LGA Products GmbH
Am Grauen Stein 29
51105 Köln Germany
Identification number 0197
Measured Sound Power Level: 93 dB (A)
Guaranteed Sound Power Level: 94 dB (A)
7.9.2011
000230
Tomoyasu Kato
Director
Makita Corporation
3-11-8, Sumiyoshi-cho,
Anjo, Aichi, 446-8502, JAPAN
GEB091-5
IMPORTANT SAFETY
INSTRUCTIONS
WARNING! Read all safety warnings and all
instructions. Failure to follow the warnings and
instructions may result in electric shock, fire and/or
serious injury.
Save all warnings and
instructions for future reference.
1. Do not insert key into mower until it is ready to
be used.
2. This appliance is not intended for use by
persons (including children) with reduced
physical, sensory or mental capabilities, or
lack of experience and knowledge, unless they
have been given supervision or instruction
concerning use of the appliance by a person
responsible for their safety.
3. Children should be supervised to ensure that
they do not play with the appliance.
4. Never allow children or people unfamiliar with
these instructions to use the machine. Local
regulations can restrict the age of the
operator.
5. Never operate the machine while people,
especially children, or pets are nearby.
6. Keep in mind that the operator or user is
responsible for accidents or hazards
occurring to other people or their property.
7. While operating the machine always wear
substantial footwear and long trousers. Do not
operate the machine when barefoot or wearing
open sandals. Avoid wearing clothing or
jewelry that is loose fitting or that has hanging
cords or ties. They can be caught in moving
parts.
8. Operate the machine only in daylight or in
good artificial light.
9. Avoid operating the machine in wet grass.
10. Never operate the mower in the rain.
11. Battery tool use
- Recharge only with the charger specified by
the manufacturer. A charger that is suitable for
one type of battery pack may create a risk of fire
when used with another battery pack.
- Use power tools only with specifically
designated battery packs. Use of any other
battery packs may create a risk of injury and fire.
12. Always keep a firm hold on the handle.
13. Always be sure of your footing on slopes.
14. Walk, never run.
15. Don't grasp the exposed cutting blades or
cutting edges when picking up or holding the
appliance.

6
16. Physical condition - Do not operate mower
while under the influence of drugs, alcohol, or
any medication.
17. KEEP GUARDS IN PLACE and in working
order.
18. Keep hands and feet away from rotating
blades. Caution - Blades coast after turn off.
19. Remove key before servicing, cleaning or
removing material from the gardening
appliance.
20. Use only the manufacturer genuine blades
specified in this manual.
21. Check the blades carefully for cracks or
damage before operation. Replace cracked or
damaged blades immediately.
22.
Be sure the area is clear of other people before
mowing. Stop mower if anyone enters the area.
23. Remove foreign matters such as rocks, wire,
bottles, bones and large sticks from the work
area before mowing to prevent personal injury
or damage to the mower.
24. Stop operation immediately if you notice
anything unusual. Switch off the mower and
remove the key from the appliance. Then
inspect the mower.
25. Never attempt to make wheel height
adjustments while mower is running.
26. Release switch lever and wait for blade
rotation to stop before crossing driveways,
walks, roads, and any gravel-covered areas.
Also remove key if you leave it, reach to pick
up or remove something out of your way, or
for any other reason that may distract you
from what you are doing.
27. Objects struck by the lawn mower blade can
cause severe injuries to persons. The lawn
should always be carefully examined and
cleared of all objects prior to each mowing.
28. If lawn mower strikes a foreign object, follow
these steps:
- Stop the mower, release the switch lever and
wait until the blade comes to a complete stop.
- Remove the lock key and the battery cartridge.
- Thoroughly inspect the mower for any
damage.
- Replace the blade if it is damaged in any way.
Repair any damage before restarting and
continuing to operate the mower.
29. Check the rear bag frequently for wear or
deterioration. For storage, always make sure
the rear bag is empty. Replace a worn bag with
a new factory replacement bag for safety.
30. Stop the motor and remove key whenever you
leave the equipment, before cleaning the
mower housing, and before making any
repairs or inspections.
31. Use extreme caution when reversing or pulling
the machine towards you.
32.
Stop the blade(s) if the machine has to be tilted
for transportation when crossing surfaces
other than grass, and when transporting the
machine to and from the area to be used.
33. Never operate the machine with defective
guards or shields, or without safety devices,
for example deflectors and/or grass collector,
in place.
34. Switch on the motor carefully according to
instructions and with feet well away from the
blade(s).
35. Do not tilt the machine when switching on the
motor, except if the machine has to be tilted
for starting. In this case, do not tilt it more
than absolutely necessary and lift only the
part, which is away from the operator.
36. Do not start the machine when standing in
front of the discharge opening.
37. Do not put hands or feet near or under rotating
parts. Keep clear of the discharge opening at
all times.
38. Do not transport the machine while the mower
is turned on.
39. Stop the machine, and remove the disabling
device. Make sure that all moving parts have
come to a complete stop
- whenever you leave the machine,
- before clearing blockages or unclogging
chute,
- before checking, cleaning or working on the
machine,
- after striking a foreign object. Inspect the
machine for damage and make repairs before
restarting and operating the machine;
40. If the machine starts to vibrate abnormally
(check immediately)
- inspect for damage,
- replace or repair any damaged parts,
- check for and tighten any loose parts.
41. Be careful during adjustment of the machine
to prevent entrapment of the fingers between
moving blades and fixed parts of the machine.
42. Mow across the face of slopes, never up and
down. Exercise extreme caution when
changing direction on slopes. Do not mow
excessively steep slopes.
43. Do not wash with a hose; avoid getting water
in motor and electrical connections.
44. Check the blade mounting bolt at frequent
intervals for proper tightness.
45. Keep all nuts, bolts, and screws tight to be
sure the equipment is in safe working
condition.
46. Always allow the machine to cool down before
storing.
47. When servicing the blades be aware that, even
though the power source is switched off, the
blades can still be moved.

7
48. Replace worn or damaged parts for safety. Use
only genuine replacement parts and
accessories.
SAVE THESE INSTRUCTIONS.
WARNING:
DO NOT let comfort or familiarity with product (gained
from repeated use) replace strict adherence to safety
rules for the subject product. MISUSE or failure to
follow the safety rules stated in this instruction
manual may cause serious personal injury.
ENC007-7
IMPORTANT SAFETY
INSTRUCTIONS
FOR BATTERY CARTRIDGE
1. Before using battery cartridge, read all
instructions and cautionary markings on (1)
battery charger, (2) battery, and (3) product
using battery.
2. Do not disassemble battery cartridge.
3. If operating time has become excessively
shorter, stop operating immediately. It may
result in a risk of overheating, possible burns
and even an explosion.
4. If electrolyte gets into your eyes, rinse them
out with clear water and seek medical
attention right away. It may result in loss of
your eyesight.
5. Do not short the battery cartridge:
(1) Do not touch the terminals with any
conductive material.
(2) Avoid storing battery cartridge in a
container with other metal objects such as
nails, coins, etc.
(3) Do not expose battery cartridge to water
or rain.
A battery short can cause a large current flow,
overheating, possible burns and even a
breakdown.
6. Do not store the tool and battery cartridge in
locations where the temperature may reach or
exceed 50 ゚C (122 ゚F).
7. Do not incinerate the battery cartridge even if
it is severely damaged or is completely worn
out. The battery cartridge can explode in a fire.
8. Be careful not to drop or strike battery.
9. Do not use a damaged battery.
SAVE THESE INSTRUCTIONS.
Tips for maintaining maximum battery life
1. Charge the battery cartridge before
completely discharged.
Always stop tool operation and charge the
battery cartridge when you notice less tool
power.
2.
Never recharge a fully charged battery cartridge.
Overcharging shortens the battery service life.
3. Charge the battery cartridge with room
temperature at 10 ゚C - 40 ゚C (50 ゚F - 104 ゚F).
Let a hot battery cartridge cool down before
charging it.
4. Charge the battery cartridge once in every six
months if you do not use it for a long period of
time.
FUNCTIONAL DESCRIPTION
Installing or removing battery cartridge
CAUTION:
• Always switch off the tool before installing or
removing the battery cartridge.
• Make sure that you lock the battery cover before
use. Otherwise, mud, dirt, or water may cause
damage to the product or the battery cartridge.
32
1
012296
To install the battery cartridge;
1. Pull the battery cover locking lever toward
yourself and open the battery cover.
2. Insert the battery cartridge in the direction shown
in the figure until a click is heard.
Fig.1
3. Insert the lock key in the place shown in the figure
as far as it will go.
4. Close the battery cover and push it on until it is
latched with the locking lever.
To remove the battery cartridge from the mower;
1. Pull the battery cover locking lever toward
yourself and open the battery cover.
2. Pull out the lock key.
3. Withdraw it from the tool while sliding the button
on the front of the cartridge.
4. Close the battery cover.
1. Battery cover locking lever
2. Battery cartridge
3. Battery cove
r

8
Battery converters (optional accessory)
WARNING:
• Before installing or removing the battery converters
BCV01/BCV03, remove the lock key.
BCV01 (optional accessory)
WARNING:
• When using the BCV01, never attach it to any part
of your body. Attaching the BCV01 to any part of
your body may cause a serious injury.
Fig.2
Slide the battery converter BCV01 into the installation
hole until it stops.
Fig.3
Open out the battery cover on the mower and then slide
all the way and click the product mounting adapter of the
BCV01 into the battery port on the mower.
Run the cord of the BCV01 through the slit in the battery
cover and close the battery cover.
Fig.4
Fit the cord of the BCV01 into the upper holders on the
handle.
NOTE:
• When using the battery converter BCV01 (optional
accessory), hook the power cord to the designated
holder on the mower. Failure to do so may cause
the cord to be cut off.
To remove the BCV01 from the mower, open out the
battery cover and then press the hook on the battery
mounting side of the BCV01.
BCV03 (optional accessory)
Fig.5
Open the battery cover and click in the BCV03 into the
battery port on the mower.
Close the battery cover.
1
014473
To remove the BCV03, press on the hook of the BCV03
and withdraw it with both hands.
Power switch action
WARNING:
• Before inserting the battery cartridge in the
tool, always check to see that the switch lever
actuates properly and returns to the original
position when released. Operating a tool with a
switch that does not actuate properly can lead to
loss of control and serious personal injury.
NOTE:
• Trying to mow much grass at a time may not allow
the motor to start due to the overload. At this time,
change the mowing height to higher level to restart.
• The mower does not start without pressing the
switch button even if the switch lever is squeezed.
This mower is equipped with the interlock switch and
handle switch. If you notice anything unusual with either
of these switches, stop operation immediately and have
them checked by your nearest Makita Authorized
Service Center.
Fig.6
1. Insert the lock key into the interlock switch.
1
2
012603
2. Depress the switch button.
3. Pull the switch lever toward you while depressing
the switch button.
4. Release the switch button as soon as the motor
starts running. The mower will continue to run until
you release the switch lever.
5. Release the switch lever to stop the motor.
6. When not in use, remove the lock key. Store the
lock key in a safe place out of reach of children.
1. Switch button
2. Switch lever
1. Battery converter (BCV03)

9
Adjusting the mowing height
WARNING:
• Never put your hand or leg under the mower unit
when adjusting the mowing height.
• Always make sure that the lever fits in the groove
properly before operation.
The mowing height can be adjusted in the range of
between 20 mm - 75 mm.
1. Remove the lock key.
Fig.7
2. Pull the mowing height adjusting lever toward
yourself and move it to your desired mowing
height.
Make sure that the protrusion on the mowing
height adjusting lever fits in the groove in the
mower.
NOTE:
• The mowing height figures should be used just as
a guideline, as the state of the lawn or ground may
cause lawn height to be slightly different to the set
height figure.
• Try a test mowing of grass in a less conspicuous
place to get your desired height.
Battery protection system
Lithium-ion batteries are equipped with a protection
system. This system automatically cuts off power to the
tool to extend battery life.
The tool will automatically stop during operation if the
tool and/or battery are placed under one of the following
conditions:
• Overloaded:
The tool is operated in a manner that causes
it to draw an abnormally high current.
In this situation, release the trigger switch on
the tool and stop the application that caused
the tool to become overloaded. Then pull the
trigger switch again to restart.
If the tool does not start, the battery is
overheated. In this situation, let the battery
cool before pulling the trigger switch again.
• Low battery voltage:
The remaining battery capacity is too low and
the tool will not operate. In this situation,
remove and recharge the battery.
Battery remaining capacity indicator
(only for models with Battery BL3622A)
Battery BL3622A is equipped with the battery remaining
capacity indicator.
1
2
011715
Press the CHECK button to indicate the battery
remaining capacity. The indicator lamps will then light for
approx. three seconds.
Indicator lamps
Lighted Off Blinking
EF
Remaining capacity
70% to 100%
45% to 70%
20% to 45%
0% to 20%
Charge the battery.
The battery may have
malfunctioned.
011713
• When only the lowermost indicator lamp (next to
the “E”) blinks, or when none of the indicator lamps
light, the battery capacity has run out, so the tool
does not operate. In these cases, charge the
battery or replace the empty battery with a fully
charged one.
• When two or more indicator lamps do not light
even after charging is complete, the battery has
reached the end of its service life.
• When the upper two and lower two indicator lamps
light alternately, the battery may have
malfunctioned. Contact your local Makita
authorized service center.
NOTE:
• The indicated capacity may be lower than the
actual level during use or immediately after using
the tool.
• Depending on the conditions of use and the
ambient temperature, the indication may differ
slightly from the actual capacity.
1. Indicator lamps
2. CHECK button

10
ASSEMBLY
WARNING:
• Always be sure that the lock key and battery
cartridge are removed before carrying out any
work on the mower. Failure to remove the lock
key and the battery cartridge may result in serious
personal injury from accidental start-up.
• Never start the tool unless it is completely
assembled. Operation of the tool in a partially
assembled state may result in serious personal
injury from accidental start-up.
Installing the handle
WARNING:
• When installing handles, position the wires so that
they are not caught by anything in between the
handles.
1. Loosen the clamping screws (two pcs).
1
2
3
012385
Expand the lower handle to its both sides and with it
expanded in that position pivot it backward and then fit it
in the groove in the deck.
2. Tighten the clamping screws on both sides to
secure the lower handle.
Fig.8
Fig.9
3. Raise the upper handle and align the screw holes
in the upper handle with those in the lower handle
and then secure it with the supplied screws and
clamping nuts.
NOTE:
• At this time, keep a firm grip on the upper handle
so that it does not drop off your hand.
Fig.10
Fig.11
NOTE:
• Install the upper handle so that the direction of the
upper handle and the power supply cord are
positioned as shown in the figure.
Fig.12
NOTE:
• The upper handle has two holes each on both
sides. Using the different position holes for the
screws and clamping nuts allows the handle height
adjustment.
Removing or installing the blade
WARNING:
• Always remove the lock key and battery cartridge
when removing or installing the blade. Failure to
remove the lock key and battery cartridge may
cause a serious injury.
• The blade coasts for a few seconds after releasing
the switch. Make sure that the blade has come to a
complete stop.
• Always wear gloves when handling the blade.
2
1
3
012304
1. Put the mower on its side so that the mowing
height adjusting lever is placed on the upper side.
2. To lock the blade, insert a screwdriver available or
the similars in market into a hole in the mower.
3. Loosen the bolt counterclockwise with the wrench.
1. Lower handle
2. Groove on the deck
3. Clamping screw
1. Screwdriver
2. Blade
3. Bolt

11
1
2
3
4
5
012601
4. Remove the bolt, outer flange, blade and inner
flange in order.
To install the blade, take the blade removal procedure in
reverse.
WARNING:
• Install the inner flange, the blade and the outer
flange carefully as these have a top/bottom facing.
• Tighten the bolt clockwise firmly to secure the
blade.
• Put the blade so that the blade side with a
rotational direction arrow faces outward.
• Make sure that the blade is installed securely.
• Always take away the screwdriver or similars
inserted in a hole to lock the blade.
Installing the grass basket
Remove the lock key.
1
2
012302
1
2
3
012301
Raise the rear guard of the mower unit and hook the
grass basket on the groove of the mower unit.
OPERATION
Mowing
WARNING:
• Before mowing, clear away sticks and stones from
mowing area. Furthermore, clear away any weeds
from mowing area in advance.
• Always wear the safety goggles or safety glasses
with side shields when operating the mower.
Firmly hold the lawn mower handle with both hands
when mowing.
The front wheel outside edges of the main unit provide a
guideline to mowing width. Using the two front wheel
outside edges as a guideline, mow in strips, overlapping
by one half to one third the previous strip, to mow the
lawn evenly.
Periodically check the level of the grass basket, and
empty before it becomes full. Before every periodical
checks, be sure to stop the mower and remove the lock
key and the battery cartridge.
NOTE:
•
Using the lawn mower with the grass basket full
prevents smooth blade rotation and places an extra
load on the motor, which may cause breakdown.
Mowing a long-grass lawn
Fig.13
Do not try to cut long grass all in one go. Instead, mow
the lawn in stages, leaving it for a day or two between
mows, until the lawn is evenly short.
NOTE:
• Mowing long grass to a short length all in one go
may cause the grass to die and/or block up the
1. Inner flange
2. Arrow
3. Outer flange
4. Bolt
5. Blade
1. Rear guard
2. Groove
3. Grass basket
1. Rear guard
2. Groove

12
inside of the main unit.
Emptying the grass basket
WARNING:
• To reduce a risk of accident, regularly check the
grass basket for any damage or weakened
strength and replace it if necessary.
1. Release the switch lever.
2. Remove the lock key.
1
2
012307
3. Open the rear guard and take out the grass
basket with its handle.
4. Empty the grass basket.
MAINTENANCE & STORAGE
WARNING:
• Always be sure that the lock key and battery
cartridge are removed from the mower before
storage or attempting to perform inspection or
maintenance.
• Wear gloves when performing inspection or
maintenance.
CAUTION:
• Never use gasoline, benzine, thinner, alcohol or
the like. Discoloration, deformation or cracks may
result.
MAINTENANCE
1. REMOVE THE LOCK KEY. Store it in a safe place
out of the reach of children.
2. Clean your mower using only mild soap and a
damp cloth. Do not spray or pour water on your
mower when cleaning.
3. Turn mower on its side and clean grass clippings
that have accumulated on the underside of mower
deck.
4. Check all nuts, bolts, knobs, screws, fasteners etc.
for tightness.
5. Inspect moving parts for damage, breakage, and
wear. Have repairs made on any damaged or
missing parts.
6. Before storing the mower, remove the battery
cartridge from it.
7. Store mower indoors in a cool, dry and locked
place. Don't store the mower and charger in
locations where the temperature may reach or
exceed 40 ゚C (l04 ゚F).
Storage
Fig.14
WARNING:
• When carrying or storing the mower, do not hold
the folded handles but the front grip of the mower.
Holding the folded handles may cause a serious
injury or damage to the mower.
Fig.15
The mower can be stored in upright position.
1
2
3
4
5
012298
1. Loosen the clamping screw, expand the lower
handle to both sides and then move down the
handle forward.
NOTE:
• At this time, keep a firm grip on the lower handle so
that it does not fall down to the far side from the
tool.
2. Loosen the clamping nut and pivot the upper
handle back.
1. Rear guard
2. Grass basket
1. Clamping screw
2. Expand
3. Move down forward
4. Clamping nut
5. Pivot back

13
1
2
012602
3. Take off the grass basket and put the mower in
the upright position.
Fig.16
NOTE:
• When putting the mower in the upright position, do
not hold the handle but use the front grip of the
mower.
Fig.17
4. Store the grass basket between the handle and
the mower body.
To maintain product SAFETY and RELIABILITY, repairs,
any other maintenance or adjustment should be
performed by Makita Authorized Service Centers,
always using Makita replacement parts.
1. Rear guard
2. Grass basket

14
TROUBLE SHOOTING
Before asking for repairs, conduct your own inspection
first. If you find a problem that is not explained in the
manual, do not attempt to dismantle the tool. Instead,
ask Makita Authorized Service Centers, always using
Makita replacement parts for repairs.
Malfunction status
Mower does not start.
Cause
Battery cartridge is not installed.
Battery problem (under voltage)
Cutting height set is too low.
Battery power is dropping.
Electric or electronic malfunction.
Action
Install the battery cartridge.
Remove the foreign object.
Motor stops running after
a little use.
It does not reach maximum
RPM.
Cutting tool does not rotate:
stop the machine immediately!
Abnormal vibration:
stop the machine immediately!
Cutting tool and motor cannot
stop:
Remove the battery
immediately!
Blade is imbalanced, excessively
or unevenly worn
The drive system does not work
correctly.
Foreign object such as a branch is
jammed near the blade.
The drive system does
not work correctly.
Battery is installed improperly.
Battery's charge level is low.
Recharge the battery. If recharging
is not effective, replace battery.
Ask your local authorized service
center for repair.
Ask your local authorized service
center for repair.
Replace the blade.
Remove the battery and ask your
local authorized service center for
repair.
Recharge the battery. If recharging
is not effective, replace battery.
Install the battery cartridge as
described in this manual.
Raise the height.
Recharge the battery. If recharging
is not effective, replace battery.
The lock key is not inserted. Insert the lock key.
012350
OPTIONAL ACCESSORIES
CAUTION:
• These accessories or attachments are
recommended for use with your Makita tool
specified in this manual. The use of any other
accessories or attachments might present a risk of
injury to persons. Only use accessory or
attachment for its stated purpose.
If you need any assistance for more details regarding
these accessories, ask your local Makita Service Center.
• Blade
• Makita genuine battery and charger
NOTE:
• Some items in the list may be included in the tool
package as standard accessories. They may differ
from country to country.

15
УКРАЇНСЬКА (Оригінальні інструкції)
Пояснення до загального виду
1-1. Блокувальний ключ
2-1. Перетворювач напруги (BCV01)
2-2. Отвір для встановлення
2-3. Скоба
3-1. Кришка акумулятора
3-2. Адаптер для встановлення
пристрою BCV01
4-1. Кабель
4-2. Проріз
4-3. Верхні тримачі
5-1. Перетворювач напруги (BCV03)
6-1. Блокувальний ключ
7-1. Важіль налаштування висоти
скошування
8-1. Верхня ручка
8-2. Нижня ручка
8-3. Отвори для гвинтів
8-4. Отвори для гвинтів
9-1. Затискна гайка
9-2. Нижня ручка
9-3. Верхня ручка
9-4. Отвори для гвинтів
9-5. Гвинт
10-1. Тримачі
10-2. Кабель
11-1. Тримачі
11-2. Кабель
12-1. Гвинт
12-2. Затискна гайка
12-3. Верхня ручка
12-4. Нижня ручка
16-1. Передня ручка
ТЕХНІЧНІ ХАРАКТЕРИСТИКИ
Модель BLM430 / LM430D
Ширина скошування 430 мм
Швидкість без навантаження 3600 хв-1
під час роботи 1450 мм -1490 мм x 460 мм x 950 мм -1020 мм
Розміри (ДхШхВ) під час зберігання 490 мм - 500 мм x 460 мм x 810 мм
Чиста вага 17,9 кг
Номінальна напруга 36 Впост. Тока
Стандартна (-і) касета (-и) закумулятором
Увага: Використовуйте лише зазначену (-і) касету (-и) закумулятором.
BL3626 / BL3622A
• Через те, що ми не припиняємо програми досліджень ірозвитку, наведені тут технічні характеристики можуть бути змінені
без попередження.
• Технічні характеристики приладу та касета закумулятором можуть відрізнятися врізних країнах.
• Вага разом зкасетою закумулятором відповідно до EPTA-Procedure 01/2003
END016-2
Символи
Далі наведені символи, які застосовуються для
позначення обладнання. Перед користуванням
переконайтеся, що Ви розумієте їхнє значення.
・Будьте особливо уважні та обережні!
・Читайте інструкцію зексплуатації.
・Небезпека; пам’ятайте, що предмети
можуть відскочити.
・Відстань між інструментом ілюдьми,
що знаходяться поблизу, повинна
становити не менше 15 метрів.
・Ніколи не наближайте руки та ноги до
ріжучого полотна під газонокосаркою.
・
Дістаньте блокувальний ключ, перш
ніж оглядати, налаштовувати, чистити
іпроводити технічне обслуговування
інструмента, атакож утому випадку,
якщо Вам потрібно залишити
газонокосарку без нагляду на деякий
час або поставити її на зберігання.
・Тільки для країн ЄС
Не викидайте електроприлади або
акумуляторні батареї разом з
побутовим сміттям!
Згідно зЄвропейською директивою
2002/96/ЕС про утилізацію
електричного та електронного
обладнання та 2006/66/EC відносно
батарей та акумуляторів ібатарей та
акумуляторів, термін служби яких
закінчився, та їх використання з
дотриманням національних законів,
електричне обладнання та
акумуляторні батареї, термін служби
яких закінчився, потрібно збирати
окремо та повертати на відповідні
підприємства по їх переробці.
ENG905-1
Шум
Рівень шуму за шкалою Аутиповому виконанні,
визначений відповідно до EN60335:
Рівень звукового тиску (LpA) : 80 дБ (A)
Рівень акустичної потужності (LWA) : 93 дБ (A)
Похибка (K) : 3 дБ (A)
Cd
Ni-MH
Li-ion

16
Користуйтеся засобами захисту слуху
ENG900-1
Вібрація
Загальна величина вібрації (сума трьох векторів)
визначена згідно зEN60335:
Вібрація (ah) : 2,5 м/с2або менше
Похибка (К) : 1,5 м/с2
ENG901-1
• Заявлене значення вібрації було виміряно у
відповідності до стандартних методів
тестування та може використовуватися для
порівняння одного інструмента зіншим.
•
Заявлене значення вібрації може також
використовуватися для попередньої оцінки впливу.
УВАГА:
• Залежно від умов використання вібрація під час
фактичної роботи інструмента може
відрізнятися від заявленого значення вібрації.
• Забезпечте належні запобіжні заходи для
захисту оператора, що відповідатимуть умовам
використання інструмента (слід брати до уваги
всі складові робочого циклу, такі як час, коли
інструмент вимкнено та коли він починає
працювати на холостому ході під час запуску).
ENH217-1
Тільки для країн Європи
Декларація про відповідність стандартам ЄС
Наша компанія, Makita Corporation, як
відповідальний виробник, наголошує на тому, що
обладнання Makita:
Позначення обладнання:
Бездротова газонокосарка
№моделі / тип: BLM430, LM430D
Технічні характеристики: див. Таблицю
"ТЕХНІЧНІ ХАРАКТЕРИСТИКИ".
єсерійним виробництвом та
Відповідає таким Європейським Директивам:
2000/14/EC, 2006/42/EC
Та вироблені увідповідності до таких стандартів та
стандартизованих документів:
EN60745, EN60335
Технічна документація знаходиться унашого
уповноваженого представника вЄвропі, асаме:
Makita International Europe Ltd,
Michigan Drive, Tongwell,
Milton Keynes, Bucks MK15 8JD, Англія
Процедура оцінювання відповідності, якої вимагає
Директива 2000/14/EC, відбулася відповідно до
Додатку VI.
Уповноважений орган:
TÜV Rheinland LGA Products GmbH
Am Grauen Stein 29
51105 Кельн, Німеччина
Ідентифікаційний номер 0197
Виміряний рівень акустичної потужності: 93 дБ (А)
Гарантований рівень акустичної потужності: 94 дБ (А)
7.9.2011
000230
Tomoyasu Kato
Директор
Makita Corporation
3-11-8, Sumiyoshi-cho,
Anjo, Aichi, 446-8502, ЯПОНІЯ
GEB091-5
ВАЖЛИВІ ІНСТРУКЦІЇ БЕЗПЕКИ
УВАГА! Прочитайте усі застереження
стосовно техніки безпеки та всі інструкції.
Недотримання цих застережень та інструкцій може
призвести до ураження струмом, виникнення пожежі
та/або може спричинити серйозні травми.
Збережіть усі інструкції з
техніки безпеки та експлуатації
на майбутнє.
1. Не вставляйте ключ угазонокосарку, якщо
вона ще не готова до використання.
2.
Цей пристрій не призначений для
використання особами (утому числі дітьми)
зобмеженими фізичними, сенсорними або
розумовими здібностями та особами з
недостатнім досвідом ізнаннями, доки за
ними не буде встановлено нагляду або їм не
буде надано інструкцій особою,
відповідальною за їх безпеку, стосовно
використання цього пристрою.
3. Забезпечте належний нагляд за дітьми, щоб
упевнитися, що вони не грають зприладом.
4.
Ніколи не дозволяйте користуватися
інструментом особам, не ознайомленим з
цими інструкціями, та дітям. Місцеві норми
можуть обмежувати віковий поріг оператора.
5. Ніколи не працюйте зінструментом, коли
інші люди, особливо діти, або домашні
тварини знаходяться поблизу.
6. Пам'ятайте, що оператор або користувач
несе відповідальність за нещасні випадки
та створення небезпечних ситуацій, що
можуть зашкодити людям та їхньому майну.
7.
Перед використанням інструмента завжди
вдягайте міцне взуття та довгі штани.
Забороняється використовувати інструмент
босоніж або увідкритих сандаліях. Не
рекомендується вдягати прикраси, занадто
вільний одяг або одяг, який має звисаючі
мотузки або шнурки. Вони можуть потрапити
участини інструмента, що рухаються.

17
8. Користуйтеся інструментом тільки у
світлий час доби або за умови належного
штучного освітлення.
9. Не використовуйте інструмент на вологій
траві.
10. Ніколи не використовуйте газонокосарку
під дощем.
11. Використання акумуляторних інструментів
- Акумулятор слід заряджати тільки
зарядним пристроєм, що зазначений
виробником.Зарядний пристрій, що підходить
до одного типу акумуляторів, може створити
ризик пожежі уразі його використання зіншим
акумуляторним блоком.
- Із електричними інструментами
використовуйте тільки спеціально
призначені для них акумуляторні блоки.
Використання будь-яких інших акумуляторних
блоків може створити ризик поранення та пожежі.
12. Завжди міцно тримайтеся за ручку.
13. Завжди займайте стійке положення на
похилій поверхні.
14. Пересувайтеся повільно, ніколи не біжіть.
15. Піднімаючи інструмент або тримаючи його,
не торкайтеся відкритого ріжучого полотна
або ріжучої кромки.
16. Фізичний стан. Ніколи не використовуйте
газонокосарку, знаходячись під впливом
наркотичних речовин, алкоголю або
будь-яких медичних препаратів.
17. ТРИМАЙТЕ ЗАХИСНІ КОЖУХИ ВРОБОЧОМУ
ПОЛОЖЕННІ та вробочому стані.
18. Тримайте ноги та руки подалі від ріжучого
полотна, що обертається. Увага - Ріжуче
полотно продовжує рухатися за інерцією
навіть після вимкнення інструмента.
19. Діставайте ключ, перш ніж проводити
технічне обслуговування інструмента,
чистити або прибирати знього сторонній
матеріал.
20. Дозволяється застосовувати тільки
оригінальне ріжуче полотно, що зазначене в
цій інструкції.
21. Перед початком роботи слід ретельно
перевірити полотна на наявність тріщин
або пошкодження. Слід негайно замінити
тріснуті або пошкоджені диски.
22. Перед початком роботи переконайтеся, що
поблизу не знаходяться сторонні особи.
Припиніть використання газонокосарки,
якщо хтось наблизиться до місця роботи.
23.
Щоб уникнути пошкодження інструмента або
травм, прибирайте зробочої зони сторонні
предмети, наприклад, каміння, дроти,
пляшки, кістки або великі гілки, перш ніж
починати використовувати газонокосарку.
24. Негайно зупинить інструмент, якщо Ви
помітили щось нехарактерне вйого роботі.
Вимкніть газонокосарку та дістаньте знеї
ключ. Після цього огляньте газонокосарку.
25. Ніколи не намагайтеся відрегулювати
висоту коліс, коли газонокосарка увімкнена.
26. Відпустіть пусковий важіль та зачекайте,
доки ріжуче полотно не зупиниться, перш
ніж переходити через дорогу, тротуар,
проїзну частину або пересікати будь-яку
ділянку, вкриту гравієм. Крім того, слід
дістати ключ, коли Вам потрібно залишити
інструмент без нагляду, коли Ви
нахиляєтесь, щоб підняти або прибрати
сторонні предмети здороги, атакож коли
Ви збудь-якої іншої причини відволікаєтесь
від основної роботи.
27. Якщо ріжуче полотно газонокосарки
натрапить на будь-який предмет, це може
призвести до травмування сторонніх осіб.
Кожного разу перед використанням
газонокосарки слід уважно оглядати газон
та прибирати знього усі сторонні предмети.
28.
Якщо газонокосарка натрапила на сторонній
предмет, виконайте кроки, зазначені нижче:
- Зупиніть газонокосарку, відпустіть
пусковий важіль та дочекайтеся, доки ріжуче
полотно не зупиниться повністю.
- Дістаньте блокувальний ключ та касету з
акумулятором.
- Ретельно огляньте газонокосарку на
наявність пошкоджень.
- Якщо ріжуче полотно пошкоджене
будь-яким чином, замініть його. Усуньте усі
пошкодження, перш ніж продовжувати
використання газонокосарки.
29. Часто перевіряйте задній мішок на
наявність зношення або пошкоджень.
Зберігати інструмент слід зпорожнім
заднім мішком. Щоб гарантувати безпечне
використання інструмента, заміняйте
зношений мішок на новий оригінальний
запасний мішок.
30. Зупиняйте двигун та виймайте ключ
кожного разу, коли Ви залишаєте
газонокосарку без нагляду, плануєте
очистити її корпус, провести ремонт або
огляд.
31. Будьте надзвичайно уважні, повертаючи
або пересуваючи інструмент до себе.
32. Зупиніть ріжуче (-і) полотно (-а), якщо
потрібно нахилити інструмент та перенести
через ділянку, де не росте газон, або з
однієї робочої ділянки на іншу.
33.
Ніколи не використовуйте інструмент із
пошкодженими захисними кожухами або
щитками або без інших захисних пристроїв,
наприклад, відбивачів та/або травозбірника.
34. Обережно увімкніть двигун згідно з
наведеними інструкціями, тримаючи ноги

18
подалі від ріжучого (-их) полотна (-ен).
35. Під час запуску двигуна не нахиляйте
інструмент; виняток становлять ті випадки,
коли для запуску двигуна інструмент
необхідно нахилити. Однак навіть уцьому
разі не нахиляйте інструмент більше, ніж це
потрібно, підіймаючи ту його частину, яка
знаходиться зпротилежного від Вас боку.
36. Не запускайте інструмент, якщо Ви стоїте
напроти випускного отвору.
37. Не наближайте руки та ноги до частин, що
обертаються. Завжди тримайтеся на
відстані від випускного отвору.
38. Забороняється транспортувати
газонокосарку вувімкненому стані.
39. Зупиніть інструмент та зніміть
блокувальний пристрій. Переконайтеся, що
усі обертальні частини повністю
зупинилися
- коли Ви залишаєте інструмент без нагляду,
- перш ніж видаляти засмічення або
прочищати трубки,
- перш ніж перевіряти, чистити інструмент
або здійснювати його технічне
обслуговування,
- якщо інструмент натрапив на сторонній
предмет. Огляньте інструмент на наявність
пошкоджень, виконайте необхідний ремонт
та тільки після цього продовжуйте роботу;
40. Якщо спостерігається незвичайна вібрація
інструмента (потрібна негайна перевірка)
- огляньте інструмент на наявність
пошкоджень,
- замініть або відремонтуйте пошкоджені
частини,
- перевірте, чи не послаблені кріплення
частин інструмента; за необхідності
затягніть їх.
41. Під час налаштування інструмента
слідкуйте за тим, щоб пальці не потрапили
між ріжучими полотнами, що обертаються,
та нерухомими частинами інструмента.
42. Знаходячись на похилій поверхні,
пересувайте газонокосарку вздовж неї, ане
вгору та вниз. Будьте надзвичайно уважні,
коли Ви змінюєте напрямок руху
газонокосарки на похилій поверхні. Не
використовуйте газонокосарку на дуже
крутих схилах.
43. Не мийте інструмент за допомогою шланга;
уникайте потрапляння води удвигун та до
електричних з'єднань.
44. Регулярно через невеликі проміжки часу
перевіряйте, чи надійно затягнутий болт,
що утримує ріжуче полотно.
45. Щоб гарантувати безпечну роботу
інструмента, перевіряйте надійність
затягування всіх гайок, болтів та гвинтів.
46. Перед тим як ставити інструмент на
зберігання, йому слід дати охолонути.
47. Здійснюючи технічне обслуговування
ріжучих полотен, пам'ятайте про те, що
вони все ще можуть рухатись, незважаючи
на те що джерело живлення відключене.
48.
Щоб гарантувати безпечне використання
інструмента, заміняйте зношені або
пошкоджені частини. Використовуйте тільки
оригінальні запасні частини та приладдя.
ЗБЕРІГАЙТЕ ЦІ ВКАЗІВКИ.
УВАГА:
НІКОЛИ НЕ СЛІД втрачати пильності та
розслаблюватися під час користування виробом
(що приходить при частому використанні); слід
завжди строго дотримуватися правил безпеки під
час використання цього пристрою. НЕНАЛЕЖНЕ
ВИКОРИСТАННЯ або недотримання правил
безпеки, викладених вцьому документі, може
призвести до серйозних травм.
ENC007-7
ВАЖЛИВІ ІНСТРУКЦІЇ БЕЗПЕКИ
ДЛЯ КАСЕТИ АКУМУЛЯТОРА
1.
Перед тим як користуватися касетою
акумулятора, слід прочитати усі інструкції та
попереджуючі відмітки щодо (1) зарядний
пристрій акумулятора, (2) акумулятор та (3)
вироби, що працюють від акумулятора.
2. Не слід розбирати касету акумулятора.
3. Якщо період роботи дуже покоротшав, слід
негайно припинити користування. Це може
призвести до ризику перегріву, опіку та
навіть вибуху.
4. Якщо електроліт потрапив до очей, слід
промити їх чистою водою та негайно
звернутися за медичного закладу. Це може
призвести до втрати зору.
5. Не замкніть касету акумулятора.
(1) Не слід торкатися клем будь яким
струмопровідним матеріалом.
(2) Не слід зберігати касету акумулятора в
ємності зіншими металевими
предметами, такими як цвяхи, монети і
т.д.
(3) Не виставляйте касету збатареєю під
дощ чи сніг.
Коротке замикання може призвести до появи
значного струму, перегріву та можливим
опікам та навіть поломки.
6. Не слід зберігати інструмент та касету з
акумулятором вмістах, де температура
може сягнути та перевищити 50гр.゚C (122 ゚
F).

19
7. Не слід спалювати касету закумулятором
навіть, якщо вона була неодноразово
пошкоджена або повністю спрацьована.
Касета закумулятором може вибухнути в
огні.
8. Не слід кидати або ударяти акумулятор.
9. Не слід використовувати пошкоджений
акумулятор.
ЗБЕРІГАЙТЕ ЦІ ВКАЗІВКИ.
Поради по забезпеченню максимального
строку експлуатації акумулятора
1. Касету закумулятором слід заряджати до
того, як він розрядиться повністю.
Завжди слід зупинити роботу інструменту
та зарядити акумулятор, якщо ви помітили
зменшення потужності інструменту.
2. Ніколи не слід заряджати повторно
повністю заряджену касету закумулятором.
Перезарядження скорочує строк
експлуатації акумулятора.
3. Касету закумулятором слід заряджати при
кімнатній температурі 10 ゚C - 40 ゚C (50 ゚F -
104 ゚F). Перед тим як заряджати касету з
акумулятором слід залишити її доки вона не
остигне.
4. Заряджайте касету закумулятором кожні
шість місяців, якщо не використовуєте її
протягом тривалого часу.
ІНСТРУКЦІЯ ЗВИКОРИСТАННЯ
Встановлення та зняття касети з
акумулятором.
ОБЕРЕЖНО:
• Завжди вимикайте інструмент перед
встановленням або зніманням касети з
акумулятором.
• Перед використанням слід обов’язково
заблокувати кришку відсіку для акумулятора.
Інакше бруд чи вода можуть спричинити
пошкодження виробу або касети з
акумулятором.
32
1
012296
Установлення касети закумулятором:
1. Потягніть фіксуючий важіль кришки відсіку для
акумулятора до себе та відкрийте кришку
відсіку для акумулятора.
2. Уставте касету закумулятором унапрямку,
показаному на малюнку, доки не почуєте
клацання.
Fig.1
3. Уставте блокувальний ключ до упора, як
показано на малюнку.
4. Закрийте кришку відсіку для акумулятора та
натисніть на неї, доки вона не увійде у
зачеплення зфіксуючим важелем.
Знімання касети закумулятором згазонокосарки:
1. Потягніть фіксуючий важіль кришки відсіку для
акумулятора до себе та відкрийте кришку
відсіку для акумулятора.
2. Дістаньте блокувальний ключ.
3. Зніміть касету закумулятором зінструмента,
пересунувши кнопку спереду касети.
4. Закрийте кришку відсіку для акумулятора.
1. Фіксуючий важіль кришки відсіку для акумулятора
2. Касета закумулятором
3. Кришка акумулятора

20
Перетворювачі напруги
(додаткове приладдя)
УВАГА:
• Перш ніж встановлювати або знімати
перетворювачі напруги BCV01/BCV03, дістаньте
блокувальний ключ.
BCV01 (додаткове приладдя)
УВАГА:
• При використанні BCV01 ніколи не прикладайте
його до тіла. Контакт BCV01 збудь-якою
частиною тіла може призвести до серйозної
травми.
Fig.2
Уставте перетворювач напруги BCV01 до упора у
призначений для цього отвір для встановлення.
Fig.3
Відкрийте кришку відсіку для акумулятора на
газонокосарці та просуньте адаптер для встановлення
пристрою BCV01 угніздо акумулятора газонокосарки.
Просмикніть шнур перетворювача напруги BCV01
через проріз укришці акумулятора, після чого
закрийте кришку відсіку для акумулятора.
Fig.4
Установіть шнур перетворювача напруги BCV01 у
верхні держаки на ручці.
ПРИМІТКА:
• При використання перетворювача напруги
BCV01 (додаткове приладдя) зафіксуйте шнур
живлення за допомогою спеціально
призначеного для цього держака на
газонокосарці. Якщо цього не зробити, шнур
може бути перерізаний.
Щоб зняти перетворювач напруги BCV01 від
газонокосарки, відкрийте кришку відсіку для
акумулятора та натисніть на гачок, розташований з
того боку BCV01, де встановлюється акумулятор.
BCV03 (додаткове приладдя)
Fig.5
Відкрийте кришку відсіку для акумулятора та вставте
BCV03 угніздо акумулятора на газонокосарці.
Закрийте кришку відсіку для акумулятора.
1
014473
Щоб зняти перетворювач напруги BCV03, натисніть
на гачок на BCV03 та дістаньте його, тримаючи
обома руками.
Умикання живлення
УВАГА:
•
Перш ніж вставляти вінструмент касету з
акумулятором, слід завжди перевіряти, що
пусковий важіль функціонує належним чином
та повертається увихідне положення, коли
Ви його відпускаєте.
Якщо використовувати
інструмент знесправним пусковим важелем, це
може призвести до втрати контролю та
отримання серйозних травм.
ПРИМІТКА:
• Якщо намагатися скошувати забагато трави за
один прохід, двигун може не запуститися через
перенавантаження. Уцьому випадку збільште
висоту скошування, щоб запустити двигун.
• Навіть при натисканні на пусковий важіль
газонокосарка не запуститься, якщо не
натиснута пускова кнопка.
Газонокосарка оснащена блокувальним вимикачем
та вимикачем на ручці. Якщо Ви помітите щось
незвичайне уроботі будь-якого зцих вимикачів,
негайно припиніть використання інструмента та
перевірте їх унайближчому авторизованому
сервісному центрі Makita.
Fig.6
1. Уставте блокувальний ключ ублокувальний
вимикач.
1. Перетворювач напруги (BCV03)
Other manuals for BLM430
6
This manual suits for next models
1
Table of contents
Languages:
Other Makita Lawn Mower manuals

Makita
Makita BLM430 User manual

Makita
Makita ELM3320 User manual

Makita
Makita PLM4630N User guide

Makita
Makita LM004G User manual

Makita
Makita LM001J User manual

Makita
Makita DLM531 User manual

Makita
Makita PLM4810 User manual

Makita
Makita DLM431 User manual

Makita
Makita LM001C User manual

Makita
Makita DLM481 User manual

Makita
Makita ELM4610 User guide

Makita
Makita DLM462 User manual

Makita
Makita LM003G User manual

Makita
Makita PLM5113N2 User guide

Makita
Makita ELM4120 User manual

Makita
Makita PLM4630 User guide

Makita
Makita PLM4621N2 User guide

Makita
Makita DLM465 User manual

Makita
Makita DLM380 User manual

Makita
Makita DLM380RF4 User manual