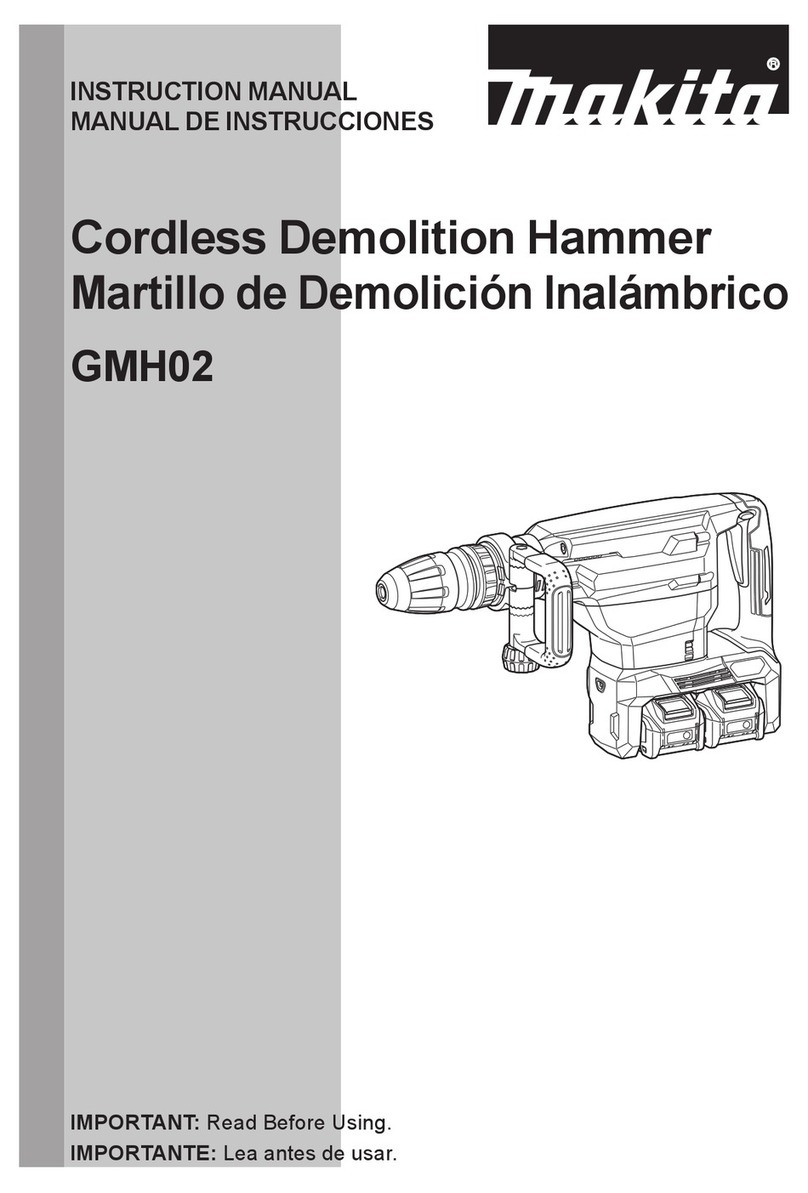
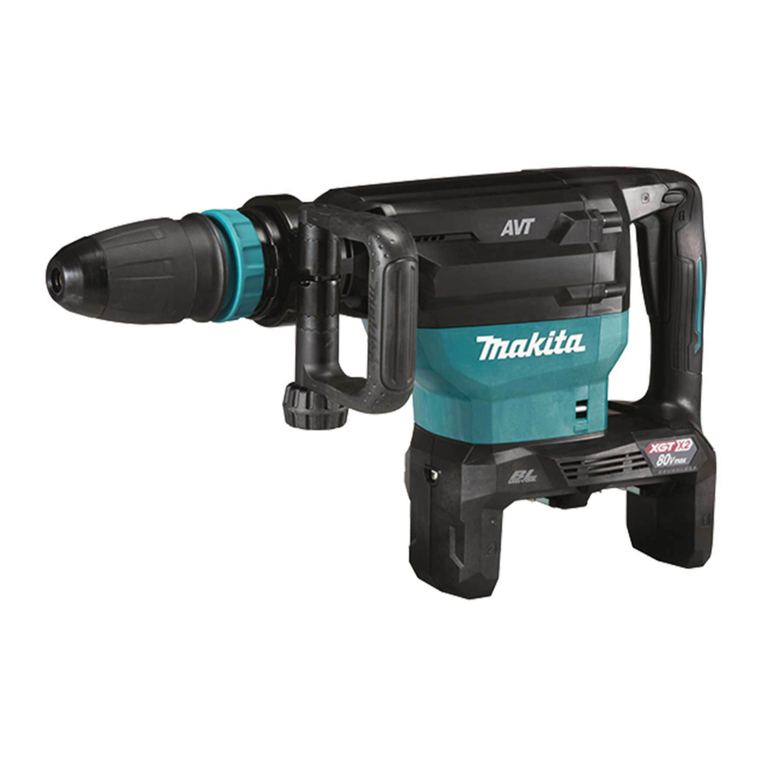
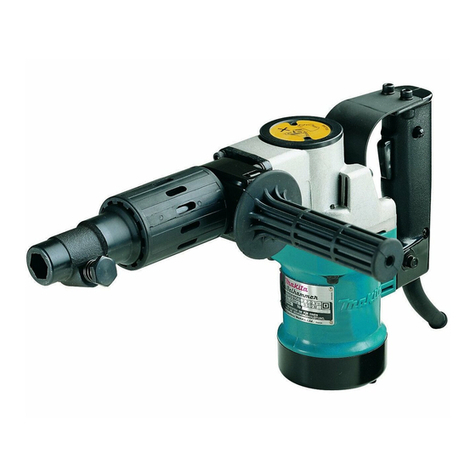
Makita HM002G User manual

HM002G
EN Cordless Demolition Hammer INSTRUCTION MANUAL 7
FR MANUEL D’INSTRUCTIONS 17
DE Akku-Stemmhammer BETRIEBSANLEITUNG 28
IT Martello demolitore a batteria ISTRUZIONI PER L’USO 39
NL Accusloophamer GEBRUIKSAANWIJZING 50
ES Martillo de Demolición
Inalámbrico
MANUAL DE
INSTRUCCIONES 61
PT Martelo Rompedor a Bateria MANUAL DE INSTRUÇÕES 72
DA Akku nedbrydningshammer BRUGSANVISNING 82
EL
92
TR KULLANMA KILAVUZU 103

1
2
3
Fig.1
1
2
Fig.2
1
2
B A
Fig.3
1
Fig.4
1
Fig.5
1
2
Fig.6
1
2
Fig.7
1 2
Fig.8
2

2
1
Fig.9
1
Fig.10
1
2
3
Fig.11
1
2
Fig.12
3
21 4
Fig.13
(1)
Fig.14
3

Fig.15
Fig.16
1
Fig.17
1
2
34
Fig.18
1
2
3
Fig.19
1
Fig.20
4

12
1
2
Fig.21
Fig.22
1
Fig.23
21
Fig.24
1
Fig.25
1
Fig.26
5

12
1
2
Fig.27
6

7ENGLISH
ENGLISH (Original instructions)
SPECIFICATIONS
Model: HM002G
Blows per minute 950 - 1,900 min-1
Rated voltage D.C. 72 V - 80 V max
Overall length 574 mm
Net weight 12.0 - 13.3 kg
without notice.
-
Applicable battery cartridge and charger
Charger
•
WARNING: Only use the battery cartridges and chargers listed above.
Intended use
The tool is intended for chiselling work in concrete,
-
pacting with appropriate accessories.
Noise
-
NOTE:
another.
NOTE:
exposure.
WARNING: Wear ear protection.
WARNING: The noise emission during actual
value(s) depending on the ways in which the
tool is used especially what kind of workpiece is
processed.
WARNING: Be sure to identify safety mea-
sures to protect the operator that are based on an
estimation of exposure in the actual conditions of
use (taking account of all parts of the operating
cycle such as the times when the tool is switched
trigger time).
Vibration
-
h, Cheq2
2
NOTE:
measured in accordance with a standard test method
NOTE:
WARNING: The vibration emission during
declared value(s) depending on the ways in which
the tool is used especially what kind of workpiece
is processed.
WARNING: Be sure to identify safety mea-
sures to protect the operator that are based on an
estimation of exposure in the actual conditions of
use (taking account of all parts of the operating
cycle such as the times when the tool is switched
trigger time).
EC Declaration of Conformity
For European countries only
to this instruction manual.

8ENGLISH
SAFETY WARNINGS
General power tool safety warnings
WARNING: Read all safety warnings, instruc-
with this power tool.
Save all warnings and instruc-
tions for future reference.
Cordless Demolition Hammer safety
warnings
1. Wear ear protectors.
cause hearing loss.
2. Use auxiliary handle(s), if supplied with the
tool.
3.
Hold power tool by insulated gripping sur-
faces, when performing an operation where the
cutting accessory may contact hidden wiring.
make exposed metal parts of the power tool "live"
and could give the operator an electric shock.
4.
Wear a hard hat (safety helmet), safety glasses and/
or face shield. Ordinary eye or sun glasses are NOT
safety glasses. It is also highly recommended that
you wear a dust mask and thickly padded gloves.
5.
Be sure the bit is secured in place before operation.
Under normal operation, the tool is designed to
produce vibration. The screws can come loose
easily, causing a breakdown or accident. Check
tightness of screws carefully before operation.
7. In cold weather or when the tool has not been
used for a long time, let the tool warm up for
a while by operating it under no load. This
will loosen up the lubrication. Without proper
8.
one is below when using the tool in high locations.
9.
10. Keep hands away from moving parts.
11. Do not leave the tool running. Operate the tool
only when hand-held.
12. Do not point the tool at any one in the area
injure someone seriously.
13.
Do not touch the bit, parts close to the bit, or
workpiece immediately after operation; they
may be extremely hot and could burn your skin.
14.
Some material contains chemicals which may be
toxic. Take caution to prevent dust inhalation and
skin contact. Follow material supplier safety data.
15.
the battery cartridge and the bit are removed
before handing the tool to other person.
Before operation, make sure that there is no
buried object such as electric pipe, water pipe
or gas pipe in the working area. Otherwise, the
shock, electrical leakage or gas leak.
17. Do not operate the tool at no-load
unnecessarily.
SAVE THESE INSTRUCTIONS.
WARNING: DO NOT let comfort or familiarity
with product (gained from repeated use) replace
strict adherence to safety rules for the subject
product. MISUSE or failure to follow the safety
rules stated in this instruction manual may cause
serious personal injury.
Important safety instructions for
battery cartridge
1.
Before using battery cartridge, read all instruc-
tions and cautionary markings on (1) battery char-
ger, (2) battery, and (3) product using battery.
2.
Do not disassemble or tamper the battery cartridge.
3. If operating time has become excessively
shorter, stop operating immediately. It may
result in a risk of overheating, possible burns
and even an explosion.
4.
If electrolyte gets into your eyes, rinse them out
with clear water and seek medical attention right
away. It may result in loss of your eyesight.
5. Do not short the battery cartridge:
Do not touch the terminals with any con-
ductive material.
Avoid storing battery cartridge in a con-
tainer with other metal objects such as
nails, coins, etc.
Do not expose battery cartridge to water
or rain.
overheating, possible burns and even a breakdown.
Do not store and use the tool and battery car-
tridge in locations where the temperature may
reach or exceed 50 °C (122 °F).
7. Do not incinerate the battery cartridge even if
it is severely damaged or is completely worn
8. Do not nail, cut, crush, throw, drop the battery
cartridge, or hit against a hard object to the
battery cartridge.
9. Do not use a damaged battery.
10.
The contained lithium-ion batteries are subject to
the Dangerous Goods Legislation requirements.
forwarding agents, special requirement on pack-
-
ing an expert for hazardous material is required.
national regulations.
around in the packaging.
9ENGLISH
11. When disposing the battery cartridge, remove
it from the tool and dispose of it in a safe
place. Follow your local regulations relating to
disposal of battery.
12. Use the batteries only with the products
-
13. If the tool is not used for a long period of time,
the battery must be removed from the tool.
14. During and after use, the battery cartridge may
take on heat which can cause burns or low
temperature burns. Pay attention to the han-
dling of hot battery cartridges.
15. Do not touch the terminal of the tool imme-
diately after use as it may get hot enough to
cause burns.
Do not allow chips, dust, or soil stuck into the
terminals, holes, and grooves of the battery
cartridge.
17. Unless the tool supports the use near
high-voltage electrical power lines, do not use
the battery cartridge near a high-voltage elec-
trical power lines.
18. Keep the battery away from children.
SAVE THESE INSTRUCTIONS.
CAUTION: Only use genuine Makita batteries.
charger.
Tips for maintaining maximum
battery life
1. Charge the battery cartridge before completely
discharged. Always stop tool operation and
charge the battery cartridge when you notice
less tool power.
2.
Never recharge a fully charged battery cartridge.
Overcharging shortens the battery service life.
3.
Charge the battery cartridge with room tempera-
ture at 10 °C - 40 °C (50 °F - 104 °F). Let a hot
battery cartridge cool down before charging it.
4. When not using the battery cartridge, remove
it from the tool or the charger.
5. Charge the battery cartridge if you do not use
it for a long period (more than six months).
Important safety instructions for
wireless unit
1. Do not disassemble or tamper with the wire-
less unit.
2. Keep the wireless unit away from young chil-
dren. If accidentally swallowed, seek medical
attention immediately.
3. Use the wireless unit only with Makita tools.
4. Do not expose the wireless unit to rain or wet
conditions.
5. Do not use the wireless unit in places where
the temperature exceeds 50 °C (122 °F).
Do not operate the wireless unit in places
where medical instruments, such as heart
pace makers are nearby.
7.
Do not operate the wireless unit in places where
automated devices are nearby. If operated, auto-
8. Do not operate the wireless unit in places
under high temperature or places where
static electricity or electrical noise could be
generated.
9.
The wireless unit can produce electromagnetic
10. The wireless unit is an accurate instrument. Be
careful not to drop or strike the wireless unit.
11. Avoid touching the terminal of the wireless
unit with bare hands or metallic materials.
12. Always remove the battery on the product
when installing the wireless unit into it.
13. When opening the lid of the slot, avoid the
place where dust and water may come into the
slot. Always keep the inlet of the slot clean.
14. Always insert the wireless unit in the correct
direction.
15. Do not press the wireless activation button
on the wireless unit too hard and/or press the
button with an object with a sharp edge.
Always close the lid of the slot when
operating.
17.
Do not remove the wireless unit from the slot
while the power is being supplied to the tool.
18. Do not remove the sticker on the wireless unit.
19. Do not put any sticker on the wireless unit.
20. Do not leave the wireless unit in a place where
static electricity or electrical noise could be
generated.
21. Do not leave the wireless unit in a place sub-
ject to high heat, such as a car sitting in the
sun.
22. Do not leave the wireless unit in a dusty or
powdery place or in a place corrosive gas
could be generated.
23. Sudden change of the temperature may bedew
the wireless unit. Do not use the wireless unit
until the dew is completely dried.
24. When cleaning the wireless unit, gently wipe
with a dry soft cloth. Do not use benzine, thin-
ner, conductive grease or the like.
25. When storing the wireless unit, keep it in the
supplied case or a static-free container.
Do not insert any devices other than Makita
wireless unit into the slot on the tool.
27. Do not use the tool with the lid of the slot dam-
aged.
cause malfunction.
28. Do not pull and/or twist the lid of the slot more
than necessary.
from the tool.
29. Replace the lid of the slot if it is lost or
damaged.
SAVE THESE INSTRUCTIONS.

10 ENGLISH
FUNCTIONAL DESCRIPTION
CAUTION: Always be sure that the tool is
before adjusting or checking function on the tool.
Installing or removing battery cartridge
CAUTION:
installing or removing of the battery cartridge.
CAUTION: Hold the tool and the battery car-
cartridge.
Fig.1: 1. Red indicator 2. Button 3.
CAUTION: Always install the battery cartridge
fully until the red indicator cannot be seen. If not,
CAUTION: Do not install the battery cartridge
forcibly.
Indicating the remaining battery capacity
-
light up for a few seconds.
Fig.2: 1. Indicator lamps 2.
Indicator lamps Remaining
capacity
Lighted Blinking
75% to 100%
50% to 75%
25% to 50%
0% to 25%
Charge the
malfunctioned.
NOTE: Depending on the conditions of use and the
NOTE:
Tool / battery protection system
-
-
Overload protection
-
tool on to restart.
Overheat protection
NOTE:
Overdischarge protection
Switch action
WARNING: Before installing the battery car-
tridge into the tool, always check to see that the
switch trigger actuates properly and returns to
the "OFF" position when released.
CAUTION: When not operating the tool,
depress the trigger-lock button from side to
lock the switch trigger in the OFF position.
-
ing pressure on the switch trigger. Release the switch
Fig.3: 1.2. Switch trigger
Using the trigger-lock button for
continuous operation
-
then release the switch trigger. To stop the tool, depress

11 ENGLISH
Speed change
Fig.4: 1.
-
Number Blows per minute
51,900 min-1
41,800 min-1
31,450 min-1
21,000 min-1
1950 min-1
CAUTION: Do not turn the adjusting dial when
the tool is running. Failure to do so may result in
the loss of control of the tool and cause an injury.
NOTICE: The speed adjusting dial can be turned
only as far as 5 and back to 1. Do not force it past
5 or 1, or the speed adjusting function may no
longer work.
NOTE: Soft no-load rotation function
function even with the motor rotating.
Lighting up the front lamp
Fig.5: 1. Lamp
CAUTION: Do not look in the light or see the
source of light directly.
releasing the switch trigger.
NOTE:
the lamp. Be careful not to scratch the lens of lamp, or
Electronic function
The tool is equipped with the electronic functions for
• Constant speed control
The speed control function provides the constant
rotation speed regardless of load conditions.
• Soft start
The soft-start function minimizes start-up shock,
ASSEMBLY
CAUTION: Always be sure that the tool is
before carrying out any work on the tool.
Side handle (auxiliary handle)
CAUTION: Always use the side handle to
ensure safe operation.
CAUTION: After installing or adjusting the
side handle, make sure that the side handle is
direction. Loosen the clamp nut to swing the side han-
dle to a desired position, and then tighten the clamp nut
Fig.6: 1. Side handle 2. Clamp nut
Installing or removing bit
Grease
-
tion assures smooth action and longer service life.
Fig.7: 1. Shank end 2. Grease
it engages.
release cover down a couple of times. Then insert the
Fig.8: 1. Bit 2. Release cover
Fig.9: 1. Bit 2. Release cover
Bit angle
-
place.
Fig.10: 1. Change ring cover

12 ENGLISH
Dust extractor attachment
Optional accessory
1.
Fig.11: 1.2.3. Clamp nut
2.
Fig.12: 1.2.
NOTE:
of the tool.
WARNING: Use the mounting part of the tool
only for attaching the holder joint.
cause an unexpected accident.
3.
Fig.13: 1. Dust cover 2. Hose 3.
4.
4. Connect the hose to the hose of the vacuum
NOTE: If the hose is not included, attach the dust
hose ø28.
5.
distance is 30 mm to 100 mm.
Fig.14: (1) 30 mm to 100 mm
OPERATION
CAUTION: Always use the side grip (auxiliary
and switch handle during operations.
CAUTION: Always make sure that the work-
piece is secured before operation. -
CAUTION: Do not pull the tool out forcibly
even the bit gets stuck. Loss of control may
cause injury.
CAUTION: Do not leave the tool stabbed in
the workpiece. -
NOTE:
Chipping/Scaling/Demolition
Fig.15
WIRELESS ACTIVATION
FUNCTION
Optional accessory
What you can do with the wireless
activation function
-
Fig.16
To use the wireless activation function, prepare follow-
activation function
The overview of the wireless activation function
setting is as follows. Refer to each section for detail
procedures.
1. Installing the wireless unit
2. Tool registration for the vacuum cleaner
3. Starting the wireless activation function
Installing the wireless unit
Optional accessory
CAUTION:
surface when installing the wireless unit.
NOTICE: Clean the dust and dirt on the tool
before installing the wireless unit. Dust or dirt
wireless unit.
NOTICE: To prevent the malfunction caused by
static, touch a static discharging material, such
as a metal part of the tool, before picking up the
wireless unit.
NOTICE: When installing the wireless unit,
always be sure that the wireless unit is inserted
in the correct direction and the lid is completely
closed.

13 ENGLISH
1.
Fig.17: 1. Lid
2. Insert the wireless unit to the slot and then close
the lid.
with the recessed portions on the slot.
Fig.18: 1. Wireless unit 2.3. Lid
4. Recessed portion
Fig.19: 1. Wireless unit 2. Hook 3. Lid
case or a static-free container.
NOTICE: Always use the hooks on the back of
the lid when removing the wireless unit. If the
hooks do not catch the wireless unit, close the lid
Tool registration for the vacuum
cleaner
NOTE:
wireless activation function is required for the tool
registration.
NOTE:
NOTE: During the tool registration, do not pull the
switch trigger or turn on the power switch on the
vacuum cleaner.
NOTE: Refer to the instruction manual of the vacuum
cleaner, too.
-
1.
tool.
2.
Fig.20: 1.
3. -
uum cleaner for 3 seconds until the wireless activation
-
Fig.21: 1.2. Wireless
activation lamp
If the vacuum cleaner and the tool are linked success-
NOTE:
-
-
NOTE: When performing two or more tool registra-
-
Starting the wireless activation
function
NOTE:
cleaner prior to the wireless activation.
NOTE: Refer to the instruction manual of the vacuum
cleaner, too.
switch operation of the tool.
1. Install the wireless unit to the tool.
2. Connect the hose of the vacuum cleaner with the
tool.
Fig.22
3.
Fig.23: 1.
4.
Fig.24: 1.2. Wireless
activation lamp
5.
pulled.
To stop the wireless activation of the vacuum cleaner,
NOTE: The wireless activation lamp on the tool will
NOTE:
There is a time lag when the vacuum cleaner detects
a switch operation of the tool.
NOTE: The transmission distance of the wireless unit
circumstances.
NOTE: When two or more tools are registered to one
-
another user is using the wireless activation function.

14 ENGLISH
Description of the wireless activation lamp status
Fig.25: 1. Wireless activation lamp
meaning of the lamp status.
Status Wireless activation lamp Description
Color
On
Blinking
Duration
Blue 2 hours
for 2 hours.
When
the tool is
running.
tool is running.
Tool
registration
Green 20 seconds
vacuum cleaner.
2 seconds
Cancelling
tool
registration
Red 20 seconds
2 seconds
Others Red 3 seconds The power is supplied to the wireless unit and the wireless activa-
tion function is starting up.
- - The wireless activation of the vacuum cleaner is stopped.
Cancelling tool registration for the
vacuum cleaner
tool registration for the vacuum cleaner.
1.
tool.
2.
Fig.26: 1.
3. -
Fig.27: 1.2. Wireless
activation lamp
-
less activation lamps will light up in red for 2 seconds
NOTE:
-
-

15 ENGLISH
Troubleshooting for wireless activation function
-
ment parts for repairs.
State of abnormality Probable cause (malfunction) Remedy
The wireless activation lamp does
The wireless unit is not installed into the tool.
into the tool.
wireless unit and clean the slot.
-
The wireless unit is not installed into the tool.
into the tool.
wireless unit and clean the slot.
Incorrect operation
Get the tool and vacuum cleaner closer to each other.
cleaner is turned on.
again.
The tool registration procedures for the
tool and the vacuum cleaner at the same timing.
waves.
ovens.
The vacuum cleaner does not run
along with the switch operation of
the tool.
The wireless unit is not installed into the tool.
into the tool.
wireless unit and clean the slot.
More than 10 tools are registered to the
vacuum cleaner.
If more than 10 tools are registered to the vacuum
The vacuum cleaner erased all tool
registrations.
Get the tool and vacuum cleaner closer each other. The
waves.
ovens.
The vacuum cleaner runs while the
tool's switch trigger is not pulled.
Other users are using the wireless
activation of the vacuum cleaner with
their tools.
tools or cancel the tool registration of the other
tools.

16 ENGLISH
MAINTENANCE
CAUTION: Always be sure that the tool is
before attempting to perform inspection or
maintenance.
NOTICE: Never use gasoline, benzine, thinner,
alcohol or the like. Discoloration, deformation or
cracks may result.
OPTIONAL
ACCESSORIES
CAUTION: These accessories or attachments
are recommended for use with your Makita tool
accessories or attachments might present a risk of
for its stated purpose.
-
Center.
• Bit grease
• Side handle
• Dust extractor attachment
• Wireless unit
NOTE:

17 FRANÇAIS
FRANÇAIS (Instructions originales)
SPÉCIFICATIONS
Modèle : HM002G
950 - 1 900 min-1
Tension nominale 72 V - 80 V c.c. max.
Longueur totale 574 mm
12,0 - 13,3 kg
Batterie et chargeur applicables
Batterie
Chargeur
•
AVERTISSEMENT : N’utilisez que les batteries et les chargeurs répertoriés ci-dessus. L’utilisation
Utilisation prévue
et le compactage avec des accessoires appropriés.
Bruit
NOTE :-
de test standard et peuvent être utilisées pour com-
parer les outils entre eux.
NOTE :-
rées peuvent aussi être utilisées pour l’évaluation
préliminaire de l’exposition.
AVERTISSEMENT :
Portez un serre-tête antibruit.
AVERTISSEMENT : L’émission de bruit
lors de l’usage réel de l’outil électrique peut être
la façon dont l’outil est utilisé, particulièrement
selon le type de pièce usinée.
AVERTISSEMENT :
Les mesures de sécurité à
prendre pour protéger l’utilisateur doivent être basées
sur une estimation de l’exposition dans des condi-
tions réelles d’utilisation (en tenant compte de toutes
les composantes du cycle d’utilisation, comme par
exemple le moment de sa mise hors tension, lorsqu’il
tourne à vide et le moment de son déclenchement).
Vibrations
h, Cheq2
2
NOTE :-
de test standard et peuvent être utilisées pour com-
parer les outils entre eux.
NOTE :-
rées peuvent aussi être utilisées pour l’évaluation
préliminaire de l’exposition.
AVERTISSEMENT : L’émission de vibrations
lors de l’usage réel de l’outil électrique peut être
la façon dont l’outil est utilisé, particulièrement
selon le type de pièce usinée.
AVERTISSEMENT : Les mesures de sécurité
à prendre pour protéger l’utilisateur doivent être
basées sur une estimation de l’exposition dans
des conditions réelles d’utilisation (en tenant
compte de toutes les composantes du cycle
d’utilisation, comme par exemple le moment de
sa mise hors tension, lorsqu’il tourne à vide et le
moment de son déclenchement).
Déclaration de conformité CE
Pour les pays européens uniquement

18 FRANÇAIS
CONSIGNES DE SÉCURITÉ
Consignes de sécurité générales
pour outils électriques
AVERTISSEMENT : Veuillez lire les
consignes de sécurité, instructions, illustrations
électrique. Le non-respect de toutes les instructions
indiquées ci-dessous peut entraîner une électrocu-
Conservez toutes les mises en
garde et instructions pour réfé-
rence ultérieure.
Le terme « outil électrique » dans les avertissements
-
Consignes de sécurité pour marteau
1. Portez des protecteurs d’oreilles. L’exposition
2. Utilisez la ou les poignées auxiliaires, si l’outil
en possède. Toute perte de maîtrise de l’outil
3. Tenez l’outil électrique par des surfaces de
au cours de laquelle l’accessoire de coupe
sous tension peut transmettre du courant dans les
et électrocuter l’utilisateur.
4.
Portez un casque de sécurité (casque de chan-
tier), des lunettes de sécurité et/ou un écran
facial. Les lunettes de vue ou les lunettes de
soleil NE sont PAS des lunettes de sécurité. Il est
également vivement recommandé de porter un
masque anti-poussière et des gants matelassés.
5. Avant utilisation, assurez-vous que le foret est
Dans des conditions normales de fonctionne-
ment, l’outil est conçu pour émettre des vibra-
tions. Les vis peuvent se desserrer facilement
et provoquer une panne ou un accident. Avant
sont bien serrées.
7. Par temps froid ou si l’outil n’a pas été utilisé
instant en le faisant fonctionner à vide. Cela
adéquatement l’outil, le martelage s’exécutera
8.
Assurez-vous toujours de travailler en position
stable. Veillez à ce que personne ne se trouve en des-
sous de vous quand vous utilisez l’outil en hauteur.
9. Tenez l’outil fermement à deux mains.
10. Éloignez les mains des pièces en mouvement.
11. Ne vous éloignez pas en laissant l’outil tour-
ner. Ne le faites fonctionner que lorsque vous
l’avez bien en main.
12. Ne pointez l’outil vers personne dans la zone
d’utilisation. Le foret peut être projeté et bles-
ser gravement quelqu’un.
13. Ne touchez pas le foret, les pièces proches du
foret ou la pièce immédiatement après l’exécu-
tion du travail ; ils peuvent être extrêmement
chauds et vous brûler la peau.
14. Certains matériaux contiennent des produits
chimiques qui peuvent être toxiques. Prenez
garde de ne pas avaler la poussière et évitez
tout contact avec la peau. Suivez les données
de sécurité du fournisseur du matériau.
15. Assurez-vous toujours que l’outil est hors
tension et que la batterie et le foret sont retirés
avant de passer l’outil à une autre personne.
Avant utilisation, assurez-vous qu’aucun objet tel
que des conduites électriques, de tuyaux d’eau ou
de tuyaux de gaz n’est pas enterré sous la zone de
travail.
avec eux, ce qui peut entraîner une électrocution, une
dispersion électrique ou une fuite de gaz.
17. Ne faites pas tourner l’outil à vide inutilement.
CONSERVEZ CES
INSTRUCTIONS.
AVERTISSEMENT : NE vous laissez PAS
sentiment d’aisance et de familiarité avec le
produit, en négligeant le respect rigoureux des
consignes de sécurité qui accompagnent le pro-
duit en question. La MAUVAISE UTILISATION de
l’outil ou l’ignorance des consignes de sécurité
indiquées dans ce mode d’emploi peut entraîner
de graves blessures.
Consignes de sécurité importantes
pour la batterie
1. Avant d’utiliser la batterie, lisez toutes les
instructions et précautions relatives (1) au
chargeur de batterie, (2) à la batterie, et (3) au
produit utilisant la batterie.
2.
batterie. Cela pourrait entraîner un incendie, une
chaleur excessive ou une explosion.
3.
Cessez immédiatement l’utilisation si le temps de
fonctionnement devient excessivement court. Il y a
4.
Si l’électrolyte pénètre dans vos yeux, rincez-les
à l’eau claire et consultez immédiatement un
médecin. Il y a risque de perte de la vue.
5. Ne court-circuitez pas la batterie :
Ne touchez les bornes avec aucun maté-
riau conducteur.
Évitez de ranger la batterie dans un
conteneur avec d’autres objets métal-
liques, par exemple des clous, des pièces
de monnaie, etc.
N’exposez pas la batterie à l’eau ou à la
pluie.

19 FRANÇAIS
Un court-circuit de la batterie peut provoquer
une intensité de courant élevée, une sur-
panne.
Ne rangez ni n’utilisez l’outil et la batterie dans
un endroit où la température risque d’atteindre
ou de dépasser 50 °C.
7.
Ne jetez pas la batterie au feu même si elle est
sérieusement endommagée ou complètement épui-
sée. La batterie peut exploser au contact du feu.
8.
Abstenez-vous de clouer, couper, écraser,
jeter, laisser tomber la batterie, ou de la heurter
contre un objet dur. Cela pourrait entraîner un
incendie, une chaleur excessive ou une explosion.
9. N’utilisez pas la batterie si elle est
endommagée.
10. Les batteries au lithium-ion contenues sont
soumises aux exigences de la législation sur
les marchandises dangereuses.
Lors du transport commercial par des tierces
parties ou des transitaires par exemple, des exi-
nécessaire de consulter un expert en matériau
dangereux. Veuillez également respecter les
plus détaillées.
11. Lors de la mise au rebut de la batterie, reti-
rez-la de l’outil et jetez-la en lieu sûr. Suivez les
réglementations locales en matière de mise au
rebut des batteries.
12. Utilisez les batteries uniquement avec les
L’insertion de
provoquer un incendie, une chaleur excessive,
13. Lorsque vous n’utilisez pas l’outil pendant une
période prolongée, la batterie doit être retirée
de l’outil.
14. Pendant et après l’utilisation, la batterie peut
compris en cas de température relativement
basse. Manipulez les batteries chaudes avec
précaution.
15. Ne touchez pas la borne de l’outil immédiate-
ment après utilisation car elle peut être assez
chaude pour provoquer des brûlures.
Évitez que des copeaux, de la poussière ou
du sol adhèrent aux bornes, aux trous et aux
rainures de la batterie. Cela pourrait réduire les
17.
À moins que l’outil prenne en charge un tel usage,
n’utilisez pas la batterie à proximité de lignes
électriques haute tension. Cela pourrait entraîner un
18. Conservez la batterie hors de portée des
enfants.
CONSERVEZ CES
INSTRUCTIONS.
ATTENTION : N’utilisez que des batteries
Makita d’origine.
-
risque d’incendie, de dommages matériels et corpo-
rels. Cela annulera également la garantie Makita pour
l’outil et le chargeur Makita.
Conseils pour assurer la durée
de vie optimale de la batterie
1. Chargez la batterie avant qu’elle ne soit com-
plètement déchargée. Arrêtez toujours l’outil
et rechargez la batterie quand vous remarquez
que la puissance de l’outil diminue.
2. Ne rechargez jamais une batterie complète-
ment chargée. La surcharge réduit la durée de
service de la batterie.
3. Chargez la batterie à une température
ambiante comprise entre 10 °C et 40 °C. Avant
de charger une batterie chaude, laissez-la
refroidir.
4. Lorsque vous n’utilisez pas la batterie, reti-
rez-la de l’outil ou du chargeur.
5. Rechargez la batterie si elle est restée inutili-
sée pendant une période prolongée (plus de
six mois).
Consignes de sécurité importantes
1.
2.
portée des jeunes enfants. En cas d’ingestion
accidentelle, consultez immédiatement un
médecin.
3.
avec des outils Makita.
4.
ou à l’humidité.
5.
endroit où la température dépasse 50 °C.
Ne faites pas fonctionner le connecteur sans
comme des simulateurs cardiaques sont
utilisés.
7.
dans un endroit où des appareils automatiques
sont utilisés. Sinon, ces appareils pourraient
8.
un endroit à température élevée ou dans un
endroit susceptible de générer de l’électricité
statique ou du bruit électrique.
9.
champs électromagnétiques (CEM), mais
ceux-ci ne sont pas dangereux pour l’utilisateur.
10.
précision. Évitez de laisser tomber ou de
11. Évitez de toucher la borne du connecteur sans
métalliques.

20 FRANÇAIS
12. Retirez toujours la batterie du produit avant
13. Évitez d’ouvrir le couvercle de la fente dans un
endroit où de la poussière ou de l’eau pourrait
pénétrer dans la fente. Maintenez toujours
propre l’entrée de la fente.
14.
bon sens.
15. N’appuyez pas trop fort sur le bouton d’acti-
-
puyez dessus avec un objet pointu.
Fermez toujours le couvercle de la fente pen-
dant le fonctionnement.
17.
fente alors que l’outil est sous tension. Vous
18. Ne retirez pas l’autocollant du connecteur
19. Ne placez pas d’autocollant sur le connecteur
20.
endroit susceptible de générer de l’électricité
statique ou du bruit électrique.
21.
endroit soumis à une forte chaleur, comme
une voiture en plein soleil.
22.
endroit poussiéreux ou sablonneux ou dans
un endroit susceptible de générer des gaz
corrosifs.
23. De la condensation peut se former sur le
-
ment de température. N’utilisez pas le connec-
complètement séché.
24.
et sec. N’utilisez pas de benzine, diluant,
graisse conductrice ou autre.
25. -
vant dans l’étui fourni ou dans un récipient
anti-statique.
N’insérez pas d’autres dispositifs que le
l’outil.
27. N’utilisez pas l’outil si le couvercle de la fente
est endommagé.
pourraient pénétrer dans la fente provoquant un
28. Ne tirez, ni ne tordez plus que nécessaire le
couvercle de la fente. Remettez le couvercle en
place s’il se détache de l’outil.
29. Remplacez le couvercle de la fente si vous le
perdez ou l’endommagez.
CONSERVEZ CES
INSTRUCTIONS.
DESCRIPTION DU
FONCTIONNEMENT
ATTENTION :
Assurez-vous toujours que
l’outil est hors tension et que sa batterie est retirée
Insertion ou retrait de la batterie
ATTENTION : Éteignez toujours l’outil avant
de mettre en place ou de retirer la batterie.
ATTENTION :
Tenez fermement l’outil et la batte-
rie lors de la mise en place ou du retrait de la batterie. Si
Fig.1: 1. Indicateur rouge 2. Bouton 3. Batterie
ATTENTION : Insérez toujours complètement
la batterie jusqu’à ce que l’indicateur rouge ne
soit plus visible.-
ATTENTION : N’insérez pas la batterie de
force. Si elle ne glisse pas facilement, c’est que vous
ne l’insérez pas correctement.
Indication de la charge restante de la batterie
témoins s’allument pendant quelques secondes.
Fig.2: 1. Témoins 2.
Témoins Charge
restante
Allumé Éteint Clignotant
Chargez la
Other manuals for HM002G
8
Table of contents
Languages:
Other Makita Power Hammer manuals

Makita
Makita M8600B User manual

Makita
Makita HM1202C User manual

Makita
Makita HM001G User manual

Makita
Makita DHR241RTJ User manual

Makita
Makita HM0871C User manual

Makita
Makita HM1201 User manual

Makita
Makita HM002G User manual

Makita
Makita M8600 User manual

Makita
Makita HM1500B User manual

Makita
Makita HM1810 User manual

Makita
Makita HM002G User manual

Makita
Makita HR2410 Quick start guide

Makita
Makita HM0810T User manual

Makita
Makita M8600 User manual

Makita
Makita BHR261 User manual

Makita
Makita HM1214C User manual

Makita
Makita HM0810 User manual

Makita
Makita HM001G User manual

Makita
Makita HM0871C User manual

Makita
Makita HM1213C User manual