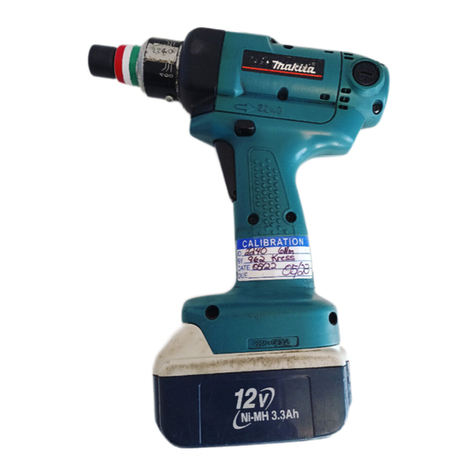
Makita DFT087F User manual

DFT087F
DFT129F
EN Cordless Screwdriver INSTRUCTION MANUAL 4
FR Visseuse sans Fil MANUEL D’ INSTRUCTIONS 11
DE Akku-Schrauber BETRIEBSANLEITUNG 19
IT Avvitatore a batteria ISTRUZIONI PER L’ USO 28
NL Accuschroefmachine GEBRUIKSAANW IJZING 36
ES Atornillador Inalámbrico MANUAL DE
INSTRUCCIONES 44
PT Parafusadeira a Bateria MANUAL DE INSTRUÇÕ ES 52
DA Akku skruetrækker BRUGSANVISNING 60
EL Ασύρματο κατσαβίδι ΕΕΙΙΔΙ ΔΗΙΝ 68
TR Akülü Tornavda KULLANMA KILAVUZU 76

2
1
2
3
Fig.1
1
2
Fig.2
1
Fig.3
1
Fig.4
1
AB
Fig.5
1
Fig.6
1
Fig.7
1
2
Fig.8

3
1
23
Fig.9
Fig.10
12
Fig.11
132
Fig.12
1
2
2
Fig.13
Fig.14

4ENGLISH
ENGLISH (Original instructions)
SPECIFICATIONS
Model: DFT087F DFT129F
F a s t e n i n g t o r q u e H a r d j o i n t 3 - 8 N • m 5 - 1 2 N • m
S o f t j o i n t 3 - 8 N • m 5 - 1 2 N • m
N o l o a d s p e e d ( R P M ) 1 00 - 1 , 250 m i n -1 70 - 900 m i n -1
Di m e n s i o n s ( L x W x H ) w i t h B L 1 81 5N b a t t e r y 1 79 m m x 75 m m x 242 m m
w i t h B L 1 86 0B b a t t e r y 1 79 m m x 75 m m x 258 m m
R a t e d v o l t a g e D.C . 1 8 V
N e t w e i g h t 1 .3 - 1 .6 k g
A p p l i c a b l e U S B c a b l e 6 6 1 432-2
Due to our continuing program of research and development, the specications herein are subject to change
w i t h o u t n o t i c e .
Specications may dier from country to country.
The weight may dier depending on the attachment(s), including the battery cartridge. The lightest and heavi-
e s t c o m b i n a t i o n s , a c c o r d i n g t o EP T A -P r o c e d u r e 01 / 201 4, a r e s h o w n i n t h e t a b l e .
Applicable battery cartridge and charger
B a t t e r y c a r t r i d g e B L 1 81 5N / B L 1 820B / B L 1 830B / B L 1 840B / B L 1 850B / B L 1 86 0B
C harger DC 1 8R C / DC 1 8R D / DC 1 8R E / DC 1 8S D / DC 1 8S E / DC 1 8S F /
DC 1 8S H / DC 1 8W C
•S o m e o f t h e b a t t e r y c a r t r i d g e s a n d c h a r g e r s l i s t e d a b o v e m a y n o t b e a v a i l a b l e d e p e n d i n g o n y o u r r e g i o n o f
r e s i d e n c e .
WARNING: Only use the battery cartridges and chargers listed above. U s e o f a n y o t h e r b a t t e r y c a r t r i d g e s
and chargers may cause injury and/or re.
Intended use
T h e t o o l i s i n t e n d e d f o r s c r e w d r i v i n g i n w o o d , m e t a l
a n d p l a s t i c .
Noise
T h e t y p i c a l A -w e i g h t e d n o i s e l e v e l d e t e r m i n e d a c c o r d -
i n g t o EN 6 2841 -2-2:
Model DFT087F
S o u n d p r e s s u r e l e v e l ( L p A ) : 71 d B ( A )
U n c e r t a i n t y ( K ) : 3 d B ( A )
Model DFT129F
S o u n d p r e s s u r e l e v e l ( L p A ) : 71 d B ( A )
U n c e r t a i n t y ( K ) : 3 d B ( A )
T h e n o i s e l e v e l u n d e r w o r k i n g m a y e x c e e d 80 d B ( A ) .
NOTE: T h e d e c l a r e d n o i s e e m i s s i o n v a l u e ( s ) h a s
b e e n m e a s u r e d i n a c c o r d a n c e w i t h a s t a n d a r d t e s t
m e t h o d a n d m a y b e u s e d f o r c o m p a r i n g o n e t o o l w i t h
another.
NOTE: T h e d e c l a r e d n o i s e e m i s s i o n v a l u e ( s )
m a y a l s o b e u s e d i n a p r e l i m i n a r y a s s e s s m e n t o f
exposure.
WARNING: W ear ear protection.
WARNING: The noise emission during actual
use of the poer tool can dier from the declared
value(s) depending on the ways in which the
tool is used especially what kind of workpiece is
processed.
WARNING: Be sure to identify safety mea-
sures to protect the operator that are based on an
estimation of exposure in the actual conditions of
use (taking account of all parts of the operating
cycle such as the times when the tool is switched
o and hen it is running idle in addition to the
trigger time).
Vibration
T h e v i b r a t i o n t o t a l v a l u e ( t r i -a x i a l v e c t o r s u m ) d e t e r -
m i n e d a c c o r d i n g t o EN 6 2841 -2-2:
Model DFT087F
W o r k m o d e : s c r e w d r i v i n g w i t h o u t i m p a c t
V i b r a t i o n e m i s s i o n ( a h) : 2.5 m / s 2o r l e s s
U n c e r t a i n t y ( K ) : 1 .5 m / s 2
Model DFT129F
W o r k m o d e : s c r e w d r i v i n g w i t h o u t i m p a c t
V i b r a t i o n e m i s s i o n ( a h) : 2.5 m / s 2o r l e s s
U n c e r t a i n t y ( K ) : 1 .5 m / s 2

5ENGLISH
NOTE: T h e d e c l a r e d v i b r a t i o n t o t a l v a l u e ( s ) h a s b e e n
m e a s u r e d i n a c c o r d a n c e w i t h a s t a n d a r d t e s t m e t h o d
a n d m a y b e u s e d f o r c o m p a r i n g o n e t o o l w i t h a n o t h e r .
NOTE: T h e d e c l a r e d v i b r a t i o n t o t a l v a l u e ( s ) m a y a l s o
b e u s e d i n a p r e l i m i n a r y a s s e s s m e n t o f e x p o s u r e .
WARNING: The vibration emission during
actual use of the poer tool can dier from the
declared value(s) depending on the ways in which
the tool is used especially what kind of workpiece
is processed.
WARNING: Be sure to identify safety mea-
sures to protect the operator that are based on an
estimation of exposure in the actual conditions of
use (taking account of all parts of the operating
cycle such as the times when the tool is switched
o and hen it is running idle in addition to the
trigger time).
EC Declaration of Conformity
For European countries only
T h e EC d e c l a r a t i o n o f c o n f o r m i t y i s i n c l u d e d a s A n n e x A
t o t h i s i n s t r u c t i o n m a n u a l .
SAFETY W ARNINGS
General power tool safety warnings
WARNING: Read all safety warnings, instruc-
tions, illustrations and specications provided
with this power tool. F a i l u r e t o f o l l o w a l l i n s t r u c t i o n s
listed below may result in electric shock, re and/or
s e r i o u s i n j u r y .
Save all warnings and instruc-
tions for future reference.
T h e t e r m " p o w e r t o o l " i n t h e w a r n i n g s r e f e r s t o y o u r
m a i n s -o p e r a t e d ( c o r d e d ) p o w e r t o o l o r b a t t e r y -o p e r a t e d
( c o r d l e s s ) p o w e r t o o l .
Cordless screwdriver safety
warnings
1 . Hold the power tool by insulated gripping
surfaces, when performing an operation
where the fastener may contact hidden wiring.
F a s t e n e r s c o n t a c t i n g a " l i v e " w i r e m a y m a k e
e x p o s e d m e t a l p a r t s o f t h e p o w e r t o o l " l i v e " a n d
c o u l d g i v e t h e o p e r a t o r a n e l e c t r i c s h o c k .
2. Alays be sure you have a rm footing.
Be sure no one is below when using the tool in
high locations.
3. Hold the tool rmly.
4. Keep hands away from rotating parts.
5. Do not touch the bit or the workpiece immedi-
ately after operation; they may be extremely
hot and could burn your skin.
6 . Always secure workpiece in a vise or similar
hold-down device.
7. Make sure there are no electrical cables, water
pipes, gas pipes etc. that could cause a hazard
if damaged by use of the tool.
SAVE THESE INSTRUCTIONS.
WARNING: DO NOT let comfort or familiarity
with product (gained from repeated use) replace
strict adherence to safety rules for the subject
product.
MISUSE or failure to follow the safety rules stated
in this instruction manual may cause serious
personal injury.
Important safety instructions for
battery cartridge
1 .
Before using battery cartridge, read all instruc-
tions and cautionary markings on (1) battery
charger, (2) battery, and (3) product using battery.
2. Do not disassemble or tamper with the battery
cartridge. It may result in are, excessive heat,
o r e x p l o s i o n .
3. If operating time has become excessively
shorter, stop operating immediately. It may
result in a risk of overheating, possible burns
and even an explosion.
4.
If electrolyte gets into your eyes, rinse them out
with clear water and seek medical attention right
away. It may result in loss of your eyesight.
5. Do not short the battery cartridge:
( 1 ) Do not touch the terminals with any con-
ductive material.
( 2) Avoid storing battery cartridge in a con-
tainer with other metal objects such as
nails, coins, etc.
( 3) Do not expose battery cartridge to water
or rain.
A battery short can cause a large current
o, overheating, possible burns and even a
breakdown.
6 . Do not store and use the tool and battery car-
tridge in locations where the temperature may
reach or exceed 50 ° C (122 ° F).
7. Do not incinerate the battery cartridge even if
it is severely damaged or is completely worn
out. The battery cartridge can explode in a re.
8. Do not nail, cut, crush, throw, drop the battery
cartridge, or hit against a hard object to the
battery cartridge. S u c h c o n d u c t m a y r e s u l t i n a
re, excessive heat, or explosion.
9. Do not use a damaged battery.
1 0.
The contained lithium-ion batteries are subject to
the Dangerous Goods Legislation requirements.
F o r c o m m e r c i a l t r a n s p o r t s e .g . b y t h i r d p a r t i e s ,
f o r w a r d i n g a g e n t s , s p e c i a l r e q u i r e m e n t o n p a c k -
a g i n g a n d l a b e l i n g m u s t b e o b s e r v e d .
F o r p r e p a r a t i o n o f t h e i t e m b e i n g s h i p p e d , c o n s u l t -
i n g a n e x p e r t f o r h a z a r d o u s m a t e r i a l i s r e q u i r e d .
P l e a s e a l s o o b s e r v e p o s s i b l y m o r e d e t a i l e d
n a t i o n a l r e g u l a t i o n s .
Tape or mask o open contacts and pack up the
b a t t e r y i n s u c h a m a n n e r t h a t i t c a n n o t m o v e
a r o u n d i n t h e p a c k a g i n g .

6ENGLISH
1 1 . W hen disposing the battery cartridge, remove
it from the tool and dispose of it in a safe
place. Follow your local regulations relating to
disposal of battery.
1 2. Use the batteries only with the products
specied by Makita. In s t a l l i n g t h e b a t t e r i e s t o
non-compliant products may result in are, exces-
s i v e h e a t , e x p l o s i o n , o r l e a k o f e l e c t r o l y t e .
1 3. If the tool is not used for a long period of time,
the battery must be removed from the tool.
1 4. During and after use, the battery cartridge may
take on heat which can cause burns or low
temperature burns. Pay attention to the han-
dling of hot battery cartridges.
1 5. Do not touch the terminal of the tool imme-
diately after use as it may get hot enough to
cause burns.
16. Do not allow chips, dust, or soil stuck into the
terminals, holes, and grooves of the battery
cartridge. It may cause heating, catching re,
b u r s t a n d m a l f u n c t i o n o f t h e t o o l o r b a t t e r y c a r -
t r i d g e , r e s u l t i n g i n b u r n s o r p e r s o n a l i n j u r y .
1 7. Unless the tool supports the use near
high-voltage electrical power lines, do not use
the battery cartridge near high-voltage electri-
cal power lines. It m a y r e s u l t i n a m a l f u n c t i o n o r
b r e a k d o w n o f t h e t o o l o r b a t t e r y c a r t r i d g e .
1 8. Keep the battery away from children.
SAVE THESE INSTRUCTIONS.
CAUTION: Only use genuine Makita batteries.
U s e o f n o n -g e n u i n e M a k i t a b a t t e r i e s , o r b a t t e r i e s t h a t
h a v e b e e n a l t e r e d , m a y r e s u l t i n t h e b a t t e r y b u r s t i n g
causing res, personal injury and damage. It will
a l s o v o i d t h e M a k i t a w a r r a n t y f o r t h e M a k i t a t o o l a n d
c h a r g e r .
Tips for maintaining maximum
battery life
1 . Charge the battery cartridge before completely
discharged. Always stop tool operation and
charge the battery cartridge when you notice
less tool power.
2. Never recharge a fully charged battery car-
tridge. Overcharging shortens the battery
service life.
3. Charge the battery cartridge with room tem-
perature at 10 ° C - 40 ° C (50 ° F - 104 ° F). Let
a hot battery cartridge cool down before
charging it.
4. W hen not using the battery cartridge, remove
it from the tool or the charger.
5. Charge the battery cartridge if you do not use
it for a long period (more than six months).
FUNCTIONAL DESCRIPTION
CAUTION: Always be sure that the tool is
sitched o and the battery cartridge is removed
before adjusting or checking function on the tool.
Installing or removing battery cartridge
CAUTION: Alays sitch o the tool before
installing or removing of the battery cartridge.
CAUTION: Hold the tool and the battery car-
tridge rmly hen installing or removing battery
cartridge. F a i l u r e t o h o l d t h e t o o l a n d t h e b a t t e r y
cartridge rmly may cause them to slip o your hands
a n d r e s u l t i n d a m a g e t o t h e t o o l a n d b a t t e r y c a r t r i d g e
a n d a p e r s o n a l i n j u r y .
Fig.1: 1. R e d i n d i c a t o r 2. B u t t o n 3. B a t t e r y c a r t r i d g e
T o r e m o v e t h e b a t t e r y c a r t r i d g e , s l i d e i t f r o m t h e t o o l
w h i l e s l i d i n g t h e b u t t o n o n t h e f r o n t o f t h e c a r t r i d g e .
T o i n s t a l l t h e b a t t e r y c a r t r i d g e , a l i g n t h e t o n g u e o n t h e
b a t t e r y c a r t r i d g e w i t h t h e g r o o v e i n t h e h o u s i n g a n d s l i p
i t i n t o p l a c e . In s e r t i t a l l t h e w a y u n t i l i t l o c k s i n p l a c e
w i t h a l i t t l e c l i c k . If y o u c a n s e e t h e r e d i n d i c a t o r a s
shown in the gure, it is not locked completely.
CAUTION: Always install the battery cartridge
fully until the red indicator cannot be seen. If n o t ,
i t m a y a c c i d e n t a l l y f a l l o u t o f t h e t o o l , c a u s i n g i n j u r y t o
y o u o r s o m e o n e a r o u n d y o u .
CAUTION: Do not install the battery cartridge
forcibly. If t h e c a r t r i d g e d o e s n o t s l i d e i n e a s i l y , i t i s
n o t b e i n g i n s e r t e d c o r r e c t l y .
Indicating the remaining battery capacity
Only for battery cartridges with the indicator
Fig.2: 1. In d i c a t o r l a m p s 2. C h e c k b u t t o n
P r e s s t h e c h e c k b u t t o n o n t h e b a t t e r y c a r t r i d g e t o i n d i -
c a t e t h e r e m a i n i n g b a t t e r y c a p a c i t y . T h e i n d i c a t o r l a m p s
l i g h t u p f o r a f e w s e c o n d s .
Indicator lamps Remaining
capacity
Lighted O Blinking
75% t o 1 00%
50% t o 75%
25% t o 50%
0% t o 25%
C h a r g e t h e
b a t t e r y .
T h e b a t t e r y
m a y h a v e
m a l f u n c t i o n e d .

7ENGLISH
NOTE: De p e n d i n g o n t h e c o n d i t i o n s o f u s e a n d t h e
ambient temperature, the indication may dier slightly
f r o m t h e a c t u a l c a p a c i t y .
NOTE: The rst (far left) indicator lamp will blink when
t h e b a t t e r y p r o t e c t i o n s y s t e m w o r k s .
Tool / battery protection system
T h e t o o l i s e q u i p p e d w i t h a t o o l / b a t t e r y p r o t e c t i o n s y s -
tem. This system automatically cuts o power to the
m o t o r t o e x t e n d t o o l a n d b a t t e r y l i f e . T h e t o o l w i l l a u t o -
m a t i c a l l y s t o p d u r i n g o p e r a t i o n i f t h e t o o l o r b a t t e r y i s
p l a c e d u n d e r o n e o f t h e f o l l o w i n g c o n d i t i o n s :
Overload protection
W h e n t h e t o o l / b a t t e r y i s o p e r a t e d i n a m a n n e r t h a t
c a u s e s i t t o d r a w a n a b n o r m a l l y h i g h c u r r e n t , t h e t o o l
stops automatically. In this situation, turn the tool o
a n d s t o p t h e a p p l i c a t i o n t h a t c a u s e d t h e t o o l t o b e c o m e
o v e r l o a d e d . T h e n t u r n t h e t o o l o n t o r e s t a r t .
Overheat protection
W h e n t h e t o o l / b a t t e r y i s o v e r h e a t e d , t h e t o o l s t o p s
a u t o m a t i c a l l y . In t h i s s i t u a t i o n , l e t t h e t o o l / b a t t e r y c o o l
b e f o r e t u r n i n g t h e t o o l o n a g a i n .
Overdischarge protection
W h e n t h e b a t t e r y c a p a c i t y i s n o t e n o u g h , t h e t o o l s t o p s
a u t o m a t i c a l l y . In t h i s c a s e , r e m o v e t h e b a t t e r y f r o m t h e
t o o l a n d c h a r g e t h e b a t t e r y .
Protections against other causes
P r o t e c t i o n s y s t e m i s a l s o d e s i g n e d f o r o t h e r c a u s e s
t h a t c o u l d d a m a g e t h e t o o l a n d a l l o w s t h e t o o l t o s t o p
a u t o m a t i c a l l y . T a k e a l l t h e f o l l o w i n g s t e p s t o c l e a r t h e
c a u s e s , w h e n t h e t o o l h a s b e e n b r o u g h t t o a t e m p o r a r y
h a l t o r s t o p i n o p e r a t i o n .
1. Turn the tool o, and then turn it on again to
r e s t a r t .
2. C h a r g e t h e b a t t e r y ( i e s ) o r r e p l a c e i t / t h e m w i t h
r e c h a r g e d b a t t e r y ( i e s ) .
3. L e t t h e t o o l a n d b a t t e r y ( i e s ) c o o l d o w n .
If n o i m p r o v e m e n t c a n b e f o u n d b y r e s t o r i n g p r o t e c t i o n
s y s t e m , t h e n c o n t a c t y o u r l o c a l M a k i t a S e r v i c e C e n t e r .
Switch action
WARNING: Before installing the battery car-
tridge into the tool, always check to see that the
switch trigger actuates properly and returns to
the " OFF" position when released.
T o s t a r t t h e t o o l , s i m p l y p u l l t h e s w i t c h t r i g g e r . R e l e a s e
t h e s w i t c h t r i g g e r t o s t o p .
Fig.3: 1. S w i t c h t r i g g e r
Lighting up the front lamp
Fig.4: 1. L a m p
CAUTION: Do not look in the light or see the
source of light directly.
P u l l t h e s w i t c h t r i g g e r t o l i g h t u p t h e l a m p . T h e l a m p
k e e p s o n l i g h t i n g w h i l e t h e s w i t c h t r i g g e r i s b e i n g p u l l e d .
T h e l a m p g o e s o u t a p p r o x i m a t e l y 1 0 s e c o n d s a f t e r
r e l e a s i n g t h e s w i t c h t r i g g e r .
NOTE: Use adry cloth to wipe the dirt o the lens of
t h e l a m p . B e c a r e f u l n o t t o s c r a t c h t h e l e n s o f l a m p , o r
i t m a y l o w e r t h e i l l u m i n a t i o n .
Reversing switch action
Fig.5: 1. R e v e r s i n g s w i t c h l e v e r
CAUTION: Always check the direction of
rotation before operation.
CAUTION: Use the reversing switch only after
the tool comes to a complete stop. C h a n g i n g t h e
d i r e c t i o n o f r o t a t i o n b e f o r e t h e t o o l s t o p s m a y d a m -
a g e t h e t o o l .
CAUTION: W hen not operating the tool,
always set the reversing switch lever to the neu-
tral position.
T h i s t o o l h a s a r e v e r s i n g s w i t c h t o c h a n g e t h e d i r e c t i o n
o f r o t a t i o n . De p r e s s t h e r e v e r s i n g s w i t c h l e v e r f r o m t h e
A s i d e f o r c l o c k w i s e r o t a t i o n o r f r o m t h e B s i d e f o r c o u n -
t e r c l o c k w i s e r o t a t i o n .
W h e n t h e r e v e r s i n g s w i t c h l e v e r i s i n t h e n e u t r a l p o s i -
t i o n , t h e s w i t c h t r i g g e r c a n n o t b e p u l l e d .
Electric brake
T h i s t o o l i s e q u i p p e d w i t h a n e l e c t r i c b r a k e . If t h e t o o l
c o n s i s t e n t l y f a i l s t o q u i c k l y s t o p a f t e r t h e s w i t c h t r i g g e r
i s r e l e a s e d , h a v e t h e t o o l s e r v i c e d a t a M a k i t a s e r v i c e
c e n t e r .
NOTE: A n e l e c t r i c b r a k e f u n c t i o n c a n b e a c t i v a t e d o r
d e a c t i v a t e d i n a p p l i c a t i o n p r e f e r e n c e s . F o r d e t a i l e d
i n f o r m a t i o n , r e f e r t o t h e i n s t r u c t i o n m a n u a l s u p p l i e d
w i t h t h e a p p l i c a t i o n s o f t w a r e d e s i g n e d f o r t h i s t o o l .

8ENGLISH
LED indicator / Beeper
Fig.6: 1. L ED i n d i c a t o r
L ED i n d i c a t o r / B e e p e r o n t h e t o o l s h o w s t h e f o l l o w i n g f u n c t i o n s .
Function Status of the tool Status of the LED indicator/beeper Action to be taken
LED indicator Beeper
C h e c k o f t h e L ED i n d i -
c a t o r , l a m p a n d b e e p e r
operation
W h e n t h e b a t t e r y c a r -
t r i d g e i s i n s t a l l e d , t h e t o o l
c h e c k s f o r i t s L ED i n d i c a -
t o r , l a m p a n d b e e p e r .
Lights up rst in green,
n e x t r e d .
( A n d t h e n t h e l a m p
c o m e s o n .)
A s e r i e s o f v e r y s h o r t
beeps
–
De t e c t i o n o f s w i t c h
t r i g g e r o p e r a t i o n w h e n
i n s t a l l i n g b a t t e r y
W h e n t h e b a t t e r y c a r t r i d g e
i s i n s t a l l e d w i t h t h e s w i t c h
t r i g g e r p u l l e d , t h e t o o l s t o p s
t o a v o i d u n i n t e n t i o n a l s t a r t .
B l i n k s i n r e d a n d g r e e n
a l t e r n a t i v e l y .
A s e r i e s o f s h o r t b e e p s R e l e a s e t h e s w i t c h
t r i g g e r .
A u t o -s t o p w i t h f a s t e n i n g
c o m p l e t i o n
T h e t o o l s e t t i n g h a s
b e e n a c h i e v e d a n d t h e
toolhas stopped.
L i g h t s u p i n g r e e n f o r
a p p r o x i m a t e l y o n e
second.
– –
Alarm against insu-
c i e n t f a s t e n i n g
T h e t o o l h a s n o t c o m p l e t e d
t h e t o o l s e t t i n g b e c a u s e t h e
s w i t c h t r i g g e r h a s r e l e a s e d
b e f o r e r e a c h i n g t h e s e t v a l -
u e s . O t h e r w i s e , t h e s e t t i n g s
o f " F a i l u r e C r i t e r i a f o r P h a s e "
has been achieved.
L i g h t s u p i n r e d . A l o n g b e e p R e t i g h t e n t h e s c r e w .
In t e r m i s s i o n b e t w e e n
t h e p h a s e s
T h e t o o l i s i n t h e i n t e r -
mitting period congured
b y t h e s e t t i n g o f " S h i f t t o
t h e n e x t P h a s e " .
L i g h t s u p o r b l i n k s i n
green (depending on
s e t t i n g s )
– –
Do u b l e -h i t t i n g d e t e c t i o n
W h e n t h e o p e r a t o r s t a r t s
t o r e -f a s t e n a n a l r e a d y -f a s -
t e n e d s c r e w , t h e t o o l d e t e c t
i t a n d s t o p s .
L i g h t s u p i n r e d . A l o n g b e e p –
A l a r m f o r l o w b a t t e r y
c a p a c i t y
T h e b a t t e r y p o w e r b e c a m e
l o w a n d i t i s t i m e t o r e p l a c e
t h e b a t t e r y c a r t r i d g e .
B l i n k s i n r e d s l o w l y . A s e r i e s o f l o n g b e e p s R e p l a c e t h e b a t t e r y w i t h
f u l l y c h a r g e d o n e .
A u t o -s t o p w i t h l o w
r e m a i n i n g b a t t e r y
c a p a c i t y
T h e b a t t e r y p o w e r i s
a l m o s t u s e d u p a n d t h e
toolstopped.
L i g h t s u p i n r e d . A l o n g b e e p R e p l a c e t h e b a t t e r y w i t h
f u l l y c h a r g e d o n e .
A n t i -r e s e t o f c o n t r o l l e r
T h e b a t t e r y v o l t a g e d r o p p e d
a b n o r m a l l y f o r s o m e r e a s o n ,
a n d t h e t o o l s t o p p e d .
B l i n k s i n r e d a n d g r e e n
a l t e r n a t i v e l y .
A s e r i e s o f s h o r t b e e p s R e p l a c e t h e b a t t e r y w i t h
f u l l y c h a r g e d o n e .
O v e r l o a d p r o t e c t i o n A n a b n o r m a l l y h i g h
current continued to ow
t h r o u g h t h e c o n t r o l l e r
a n d t h e t o o l s t o p p e d .
B l i n k s i n r e d a n d g r e e n
a l t e r n a t i v e l y .
A s e r i e s o f s h o r t b e e p s
R e m o v e t h e c a u s e o f
o v e r l o a d a n d r e s t a r t t h e
t o o l . If n o i m p r o v e m e n t i s
f o u n d , a s k y o u r l o c a l M a k i t a
S e r v i c e C e n t e r f o r r e p a i r .
O v e r h e a t p r o t e c t i o n T h e m o t o r o r t h e c o n t r o l -
l e r h e a t e d u p a b n o r m a l l y
a n d t h e t o o l s t o p p e d .
B l i n k s i n r e d q u i c k l y . A s e r i e s o f s h o r t b e e p s R e m o v e t h e b a t t e r y c a r -
t r i d g e i m m e d i a t e l y a n d
c o o l t h e t o o l d o w n .
F a i l u r e t o d e t e c t h e a t
o f m o t o r
T h e d e t e c t i o n u n i t o f
t h e m o t o r f a i l s t o d e t e c t
t h e h e a t b e c a u s e t h e
c o r d h a s b r o k e n o r o t h e r
r e a s o n s .
B l i n k s i n r e d q u i c k l y . A s e r i e s o f s h o r t b e e p s
R e m o v e t h e b a t t e r y c a r t r i d g e
a n d c o o l t h e t o o l d o w n . If t h e
i n d i c a t o r d o e s n o t s t o p , a s k
y o u r l o c a l M a k i t a S e r v i c e
C e n t e r f o r r e p a i r .
M o t o r o r c o n t r o l l e r f a i l u r e
d e t e c t i o n
M o t o r o r c o n t r o l l e r f a i l u r e
h a s b e e n d e t e c t e d . A t t h i s
t i m e , t o o l d o e s n o t w o r k .
B l i n k s i n r e d a n d g r e e n
a l t e r n a t i v e l y .
A s e r i e s o f s h o r t b e e p s A s k y o u r l o c a l M a k i t a
S e r v i c e C e n t e r f o r r e p a i r .
M a i n t e n a n c e a l a r m
A m a i n t e n a n c e t i m e h a s
c o m e a c c o r d i n g t o y o u r p r e -
s e t n u m b e r o f s c r e w s d r i v e n .
B l i n k s i n y e l l o w . –R e s e t t h e a l a r m w i t h t h e
a p p l i c a t i o n s o f t w a r e .
A l a r m f o r u n a v a i l a b l e d a t a
c o m m u n i c a t i o n ( w i t h t h e
t o o l i n c o n n e c t i o n w i t h P C )
Da t a c a n n o t b e e x c h a n g e d
b e t w e e n t h e t o o l a n d P C i n
s p i t e o f t h e c o n n e c t i o n .
B l i n k s i n y e l l o w . –R e s t a r t t h e a p p l i c a t i o n
s o f t w a r e a n d r e -c o n n e c t
t h e U S B c a b l e .
In d i c a t i o n t h a t d a t a c o m -
m u n i c a t i o n i s a v a i l a b l e
( w i t h t h e t o o l i n c o n n e c -
t i o n w i t h P C )
T h e t o o l i s c o n n e c t e d t o
P C a n d d a t a c o m m u n i -
c a t i o n i s a v a i l a b l e .
B l i n k s i n g r e e n . – –
9ENGLISH
Adjusting the fastening torque
W h e n y o u w i s h t o d r i v e m a c h i n e s c r e w s , h e x b o l t s ,
e t c . w i t h t h e p r e d e t e r m i n e d t o r q u e , a d j u s t t h e f a s t e n i n g
t o r q u e a s f o l l o w s .
CAUTION: W hen adjusting the fastening
torque, remove the battery cartridge (excluding
the process of working with the battery cartridge
attached).
1. O p e n t h e c h a n g e p l a t e b y h a n d s o t h a t y o u c a n
s e e a h o l e .
Fig.7: 1. C h a n g e p l a t e
2. P u l l t h e s w i t c h t r i g g e r a n d r e l e a s e i t s o t h a t t h e
a d j u s t r i n g r o t a t e s a n d t h e h o l e b e c o m e s v i s i b l e . A n d
t h e n r e m o v e t h e b a t t e r y c a r t r i d g e .
3. U s e a n o p t i o n a l a d j u s t g r i p t o a d j u s t t h e f a s t e n i n g
t o r q u e . In s e r t t h e p i n o f t h e a d j u s t g r i p i n t o t h e h o l e
i n t h e f r o n t o f t h e t o o l . A n d t h e n , t u r n t h e a d j u s t g r i p
c l o c k w i s e t o s e t a g r e a t e r f a s t e n i n g t o r q u e , a n d c o u n -
t e r c l o c k w i s e t o s e t a s m a l l e r f a s t e n i n g t o r q u e .
Fig.8: 1. A d j u s t g r i p 2. H o l e f o r a d j u s t g r i p
4. In s e r t t h e b a t t e r y c a r t r i d g e a n d b e s u r e t h a t a
f a s t e n i n g t o r q u e h a s b e e n s e t u p b y u s i n g a f a s t e n i n g
t o r q u e t e s t e r .
CAUTION: Remove the adjust grip before
turning on the power of the tool.
5. C l o s e t h e c h a n g e p l a t e b y h a n d s e c u r e l y .
Adjusting no-load speed and
revolution angle etc.
Y o u c a n a d j u s t t h e n o -l o a d s p e e d , n u m b e r o f t u r n , e t c .
o f t h e t o o l w i t h y o u r c o m p u t e r . In s t a l l t h e a p p l i c a t i o n
s o f t w a r e i n y o u r c o m p u t e r a n d c o n n e c t i t t o t h e t o o l w i t h
a n U S B c a b l e .
Fig.9: 1. U S B p o r t 2. U S B c o v e r 3. U S B c a b l e
NOTICE: M a k e s u r e t h a t t h e U S B c o v e r c l o s e d
w h e n f a s t e n i n g .
NOTE: U s e t h e M a k i t a g e n u i n e U S B c a b l e t o c o n -
n e c t y o u r c o m p u t e r t o t h e t o o l . R e f e r t o t h e s e c t i o n
" S P EC IF IC A T IO N S " .
NOTE: F o r t h e a p p l i c a t i o n s o f t w a r e , p l e a s e c o n t a c t
M a k i t a s a l e s r e p r e s e n t a t i v e .
ASSEMBLY
CAUTION: Always be sure that the tool is
sitched o and the battery cartridge is removed
before carrying out any work on the tool.
Installing or removing driver bit/socket bit
Fig.10
U s e o n l y d r i v e r b i t / s o c k e t b i t t h a t h a s i n s e r t i n g p o r t i o n
shown in the gure. Do not use any other driver bit/
s o c k e t b i t .
For tool with shallow driver bit hole
A = 1 2m m
B = 9m m
U s e o n l y t h e s e t y p e o f d r i v e r
b i t . F o l l o w t h e p r o c e d u r e
1 . ( N o t e ) B i t -p i e c e i s n o t
n e c e s s a r y .
For tool with deep driver bit hole
A = 1 7m m
B = 1 4m m
T o i n s t a l l t h e s e t y p e s o f d r i v e r
b i t s , f o l l o w t h e p r o c e d u r e 1 .
A = 1 2m m
B = 9m m
T o i n s t a l l t h e s e t y p e s o f d r i v e r
b i t s , f o l l o w t h e p r o c e d u r e 2.
( N o t e ) B i t -p i e c e i s n e c e s s a r y
f o r i n s t a l l i n g t h e b i t .
Procedure 1
For tool without one-touch type sleeve
Fig.11: 1. Dr i v e r b i t 2. S l e e v e
T o i n s t a l l t h e d r i v e r b i t , p u l l t h e s l e e v e i n t h e d i r e c t i o n o f t h e
a r r o w a n d i n s e r t t h e d r i v e r b i t i n t o t h e s l e e v e a s f a r a s i t w i l l g o .
T h e n r e l e a s e t h e s l e e v e t o s e c u r e t h e d r i v e r b i t .
For tool with one-touch type sleeve
T o i n s t a l l t h e d r i v e r b i t , i n s e r t t h e d r i v e r b i t i n t o t h e
s l e e v e a s f a r a s i t w i l l g o .
Procedure 2
In a d d i t i o n t o Procedure 1, i n s e r t t h e b i t -p i e c e i n t o t h e
s l e e v e w i t h i t s p o i n t e d e n d f a c i n g i n .
Fig.12: 1. Dr i v e r b i t 2. B i t -p i e c e 3. S l e e v e
T o r e m o v e t h e d r i v e r b i t , p u l l t h e s l e e v e i n t h e d i r e c t i o n
o f t h e a r r o w a n d p u l l t h e d r i v e r b i t o u t .
NOTE: If t h e d r i v e r b i t i s n o t i n s e r t e d d e e p e n o u g h
i n t o t h e s l e e v e , t h e s l e e v e w i l l n o t r e t u r n t o i t s o r i g i n a l
p o s i t i o n a n d t h e d r i v e r b i t w i l l n o t b e s e c u r e d . In t h i s
c a s e , t r y r e -i n s e r t i n g t h e b i t a c c o r d i n g t o t h e i n s t r u c -
t i o n s a b o v e .
NOTE: When it is dicult to insert the driver bit, pull
t h e s l e e v e a n d i n s e r t i t i n t o t h e s l e e v e a s f a r a s i t w i l l
go.
NOTE: A f t e r i n s e r t i n g t h e d r i v e r b i t , m a k e s u r e t h a t i t
is rmly secured. If it comes out, do not use it.
Installing hook
Optional accessory
T h e h o o k i s u s e f u l t o h a n g t h e t o o l . In s t a l l t h e h o o k t o
t h e h o l e s o n t h e t o o l b o d y .
Fig.13: 1. H o o k 2. H o l e

10 ENGLISH
OPERATION
Screwdriving operation
CAUTION:
Hold the tool rmly and place the
driver bit/socket bit securely over the screw head/bolt
head during fastening operation. F a i l u r e t o d o s o m a y
c a u s e m i s h a n d l i n g o f t h e t o o l r e s u l t i n g i n p e r s o n a l i n j u r y .
CAUTION: Make sure that the bit is inserted
straight in the screw head, or the screw and/or bit
may be damaged.
CAUTION: Keep hands away from the rotating
parts during operation. F a i l u r e t o d o s o m a y c a u s e
y o u r h a n d s t o b e c a u g h t i n t h e m o v i n g p a r t s , r e s u l t i n g
i n p e r s o n a l i n j u r y .
P l a c e t h e p o i n t o f t h e d r i v e r b i t i n t h e s c r e w h e a d a n d
a p p l y p r e s s u r e t o t h e t o o l . T h e n s w i t c h t h e t o o l o n .
W h e n t h e c l u t c h c u t s i n , t h e m o t o r w i l l s t o p a u t o m a t i -
c a l l y . T h e n r e l e a s e t h e s w i t c h t r i g g e r .
Fig.14
Limits of fastening capacity
U s e t h e t o o l w i t h i n t h e l i m i t s o f f a s t e n i n g c a p a c i t y . If y o u
u s e t h e t o o l b e y o n d t h e l i m i t s , t h e c l u t c h d o e s n o t w o r k .
A n d t h e t o o l c a n n o t d e l i v e r e n o u g h f a s t e n i n g t o r q u e .
For model DFT087F
38
4567
360°
300°
240°
180°
120°
60°
30°
1
3
2
N•m
1. R a n g e o f f a s t e n i n g c a p a c i t y 2. R o t a t i o n a n g l e
3. T o r q u e
For model DFT129F
5867 9101112
360°
300°
240°
180°
120°
60°
30°
1
3
2
N•m
1. R a n g e o f f a s t e n i n g c a p a c i t y 2. R o t a t i o n a n g l e
3. T o r q u e
NOTE: T h e r o t a t i o n a n g l e i s t h e a n g l e f r o m t h e p o i n t
t h a t t h e b o l t i s t i g h t e n e d i n 50% o f d e s i r e d t o r q u e t o
t h e p o i n t t h a t t h e b o l t i s t i g h t e n e d i n 1 00% t o r q u e .
NOTE: T h i s r e f e r e n c e v a l u e i s m e a s u r e d b y t h e m e a -
surement conditions specied by Makita.
NOTE: U s e o f a c o l d b a t t e r y c a r t r i d g e m a y g i v e
w a r n i n g f o r b a t t e r y c a p a c i t y b y L ED i n d i c a t o r a n d
b e e p e r a n d s t o p t h e t o o l i m m e d i a t e l y , e v e n i f i t i s f u l l y
c h a r g e d . In t h i s c a s e , t h e f a s t e n i n g c a p a c i t y m a y b e
inferior to the specication on this manual.
MAINTENANCE
CAUTION: Always be sure that the tool is
sitched o and the battery cartridge is removed
before attempting to perform inspection or
maintenance.
NOTICE: Never use gasoline, benzine, thinner,
alcohol or the like. Discoloration, deformation or
cracks may result.
T o m a i n t a i n p r o d u c t S A F ET Y a n d R EL IA B IL IT Y ,
r e p a i r s , a n y o t h e r m a i n t e n a n c e o r a d j u s t m e n t s h o u l d
b e p e r f o r m e d b y M a k i t a A u t h o r i z e d o r F a c t o r y S e r v i c e
C e n t e r s , a l w a y s u s i n g M a k i t a r e p l a c e m e n t p a r t s .
OPTIONAL
ACCESSORIES
CAUTION: These accessories or attachments
are recommended for use with your Makita tool
specied in this manual. T h e u s e o f a n y o t h e r
a c c e s s o r i e s o r a t t a c h m e n t s m i g h t p r e s e n t a r i s k o f
i n j u r y t o p e r s o n s . O n l y u s e a c c e s s o r y o r a t t a c h m e n t
f o r i t s s t a t e d p u r p o s e .
If y o u n e e d a n y a s s i s t a n c e f o r m o r e d e t a i l s r e g a r d -
i n g t h e s e a c c e s s o r i e s , a s k y o u r l o c a l M a k i t a S e r v i c e
C e n t e r .
•A d j u s t g r i p
•P r o t e c t o r ( N a t u r a l , R e d , B l u e , Y e l l o w , G r e e n )
•U S B c a b l e
•H o o k
•L o c k n u t ( R e d , B l u e , Y e l l o w )
•M a k i t a g e n u i n e b a t t e r y a n d c h a r g e r
NOTE: S o m e i t e m s i n t h e l i s t m a y b e i n c l u d e d i n t h e
t o o l p a c k a g e a s s t a n d a r d a c c e s s o r i e s . T h e y m a y
dier from country to country.

11 FRANÇAIS
FRANÇAIS (Instructions originales)
SPÉ CIFICATIONS
Modè le :DFT087F DFT129F
C o u p l e d e s e r r a g e J o i n t r i g i d e 3 - 8 N • m 5 - 1 2 N • m
J o i n t s o u p l e 3 - 8 N • m 5 - 1 2 N • m
V i t e s s e à v i d e ( t r / m i n ) 1 00 - 1 250 m i n -1 70 - 900 m i n -1
Di m e n s i o n s ( L x l x H ) b a t t e r i e B L 1 81 5N i n c l u s e 1 79 m m x 75 m m x 242 m m
b a t t e r i e B L 1 86 0B i n c l u s e 1 79 m m x 75 m m x 258 m m
T e n s i o n n o m i n a l e 1 8 V C C
P o i d s n e t 1 , 3 - 1 , 6 k g
C â b l e U S B a p p l i c a b l e 6 6 1 432-2
tant donné l’évolution constante de notre programme de recherche et de développement, les spécications
contenues dans ce manuel sont sujettes àmodication sans préavis.
Les spécications peuvent varier suivant les pays.
Le poids peut tre diérent selon les accessoires, notamment la batterie. Les associations la plus légère et la
p l u s l o u r d e , c o n f o r m é m e n t à l a p r o c é d u r e EP T A 01 / 201 4, s o n t i n d i q u é e s d a n s l e t a b l e a u .
Batterie et chargeur applicables
B a t t e r i e B L 1 81 5N / B L 1 820B / B L 1 830B / B L 1 840B / B L 1 850B / B L 1 86 0B
C hargeur DC 1 8R C / DC 1 8R D / DC 1 8R E / DC 1 8S D / DC 1 8S E / DC 1 8S F /
DC 1 8S H / DC 1 8W C
•C e r t a i n s c h a r g e u r s e t b a t t e r i e s r é p e r t o r i é s c i -d e s s u s p e u v e n t n e p a s ê t r e d i s p o n i b l e s s e l o n l a r é g i o n o ù v o u s
r é s i d e z .
AVERTISSEMENT : N’ utilisez que les batteries et les chargeurs répertoriés ci-dessus. L ’ u t i l i s a t i o n
d ’ a u t r e s b a t t e r i e s e t c h a r g e u r s p e u t p r o v o q u e r d e s b l e s s u r e s e t / o u u n i n c e n d i e .
Utilisations
L ’ o u t i l e s t c o n ç u p o u r s e r r e r d e s v i s d a n s l e b o i s , l e
m é t a l e t l e p l a s t i q u e .
Bruit
N i v e a u d e b r u i t p o n d é r é A t y p i q u e , d é t e r m i n é s e l o n
EN 6 2841 -2-2 :
Modè le DFT087F
N i v e a u d e p r e s s i o n s o n o r e ( L p A ): 71 d B ( A )
In c e r t i t u d e ( K ) : 3 d B ( A )
Modè le DFT129F
N i v e a u d e p r e s s i o n s o n o r e ( L p A ): 71 d B ( A )
In c e r t i t u d e ( K ) : 3 d B ( A )
L e n i v e a u d e b r u i t e n f o n c t i o n n e m e n t p e u t d é p a s s e r 80 d B ( A ) .
NOTE : L a o u l e s v a l e u r s d ’ é m i s s i o n d e b r u i t d é c l a -
r é e s o n t é t é m e s u r é e s c o n f o r m é m e n t à l a m é t h o d e
d e t e s t s t a n d a r d e t p e u v e n t ê t r e u t i l i s é e s p o u r c o m -
p a r e r l e s o u t i l s e n t r e e u x .
NOTE : L a o u l e s v a l e u r s d ’ é m i s s i o n d e b r u i t d é c l a -
r é e s p e u v e n t a u s s i ê t r e u t i l i s é e s p o u r l ’ é v a l u a t i o n
p r é l i m i n a i r e d e l ’ e x p o s i t i o n .
AVERTISSEMENT : Portez un serre-tê te
antibruit.
AVERTISSEMENT : L’ émission de bruit
lors de l’ usage réel de l’ outil électrique peut ê tre
diérente de la ou des valeurs déclarées, suivant
la façon dont l’ outil est utilisé, particuliè rement
selon le type de piè ce usinée.
AVERTISSEMENT : Les mesures de sécurité
à prendre pour protéger l’ utilisateur doivent ê tre
basées sur une estimation de l’ exposition dans
des conditions réelles d’ utilisation (en tenant
compte de toutes les composantes du cycle
d’ utilisation, comme par exemple le moment de
sa mise hors tension, lorsqu’ il tourne à vide et le
moment de son déclenchement).
Vibrations
V a l e u r t o t a l e d e v i b r a t i o n s ( s o m m e d e v e c t e u r t r i a x i a l )
d é t e r m i n é e s e l o n EN 6 2841 -2-2 :
Modè le DFT087F
M o d e d e t r a v a i l : v i s s a g e s a n s i m p a c t
É m i s s i o n d e v i b r a t i o n s ( a h): 2, 5 m / s 2o u m o i n s
In c e r t i t u d e ( K ) : 1 , 5 m / s 2
Modè le DFT129F
M o d e d e t r a v a i l : v i s s a g e s a n s i m p a c t
É m i s s i o n d e v i b r a t i o n s ( a h): 2, 5 m / s 2o u m o i n s
In c e r t i t u d e ( K ) : 1 , 5 m / s 2

12 FRANÇAIS
NOTE : L a o u l e s v a l e u r s d e v i b r a t i o n t o t a l e s d é c l a -
r é e s o n t é t é m e s u r é e s c o n f o r m é m e n t à l a m é t h o d e
d e t e s t s t a n d a r d e t p e u v e n t ê t r e u t i l i s é e s p o u r c o m -
p a r e r l e s o u t i l s e n t r e e u x .
NOTE : L a o u l e s v a l e u r s d e v i b r a t i o n t o t a l e s d é c l a -
r é e s p e u v e n t a u s s i ê t r e u t i l i s é e s p o u r l ’ é v a l u a t i o n
p r é l i m i n a i r e d e l ’ e x p o s i t i o n .
AVERTISSEMENT : L’ émission de vibrations
lors de l’ usage réel de l’ outil électrique peut ê tre
diérente de la ou des valeurs déclarées, suivant
la façon dont l’ outil est utilisé, particuliè rement
selon le type de piè ce usinée.
AVERTISSEMENT : Les mesures de sécurité
à prendre pour protéger l’ utilisateur doivent ê tre
basées sur une estimation de l’ exposition dans
des conditions réelles d’ utilisation (en tenant
compte de toutes les composantes du cycle
d’ utilisation, comme par exemple le moment de
sa mise hors tension, lorsqu’ il tourne à vide et le
moment de son déclenchement).
Déclaration de conformité CE
Pour les pays européens uniquement
L a d é c l a r a t i o n d e c o n f o r m i t é C E e s t f o u r n i e e n A n n e x e
A à c e m o d e d ’ e m p l o i .
CONSIGNES DE SÉ CURITÉ
Consignes de sécurité générales
pour outils électriques
AVERTISSEMENT : Veuillez lire les
consignes de sécurité, instructions, illustrations
et spécications ui accompagnent cet outil
électrique. L e n o n -r e s p e c t d e t o u t e s l e s i n s t r u c t i o n s
i n d i q u é e s c i -d e s s o u s p e u t e n t r a î n e r u n e é l e c t r o c u -
t i o n , u n i n c e n d i e e t / o u d e g r a v e s b l e s s u r e s .
Conservez toutes les mises en
garde et instructions pour réfé-
rence ultérieure.
L e t e r m e « o u t i l é l e c t r i q u e » d a n s l e s a v e r t i s s e m e n t s
f a i t r é f é r e n c e à l ’ o u t i l é l e c t r i q u e a l i m e n t é p a r l e s e c t e u r
( a v e c c o r d o n d ’ a l i m e n t a t i o n ) o u à l ’ o u t i l é l e c t r i q u e f o n c -
t i o n n a n t s u r b a t t e r i e ( s a n s c o r d o n d ’ a l i m e n t a t i o n ) .
Consignes de sécurité pour
visseuse sans l
1 . Tenez l’ outil électrique par des surfaces de
prise isolées lorsue vous eectuez une tche
au cours de lauelle lélément de xation
peut entrer en contact avec des ls cachés.
Le contact des éléments de xation avec un l
s o u s t e n s i o n p e u t t r a n s m e t t r e d u c o u r a n t d a n s l e s
pièces métalliques exposées de l’outil électrique
e t é l e c t r o c u t e r l ’ o p é r a t e u r .
2. Assurez-vous toujours d’ avoir une bonne
assise.
Veillez à ce que personne ne se trouve en
dessous de vous quand vous utilisez l’ outil en
hauteur.
3. Tenez l’ outil fermement.
4. Gardez vos mains à l’ écart des piè ces en
rotation.
5. Ne touchez pas l’ embout ou la piè ce immé-
diatement aprè s l’ exécution du travail ; ils
peuvent ê tre extrê mement chauds et vous
brû ler la peau.
6 . Immobilisez toujours la piè ce dans un étau ou
un dispositif de retenue similaire.
7. Assurez-vous uil ny a pas de cbles élec-
triques, de conduites d’ eau, de conduites
de gaz, etc., présentant un risque s’ ils sont
endommagés suite à l’ utilisation de l’ outil.
CONSERVEZ CES
INSTRUCTIONS.
AVERTISSEMENT : NE vous laissez PAS
tromper au l dune utilisation répétée par un
sentiment d’ aisance et de familiarité avec le
produit, en négligeant le respect rigoureux des
consignes de sécurité qui accompagnent le pro-
duit en question.
La MAUVAISE UTILISATION de l’ outil ou l’ igno-
rance des consignes de sécurité indiquées
dans ce mode d’ emploi peut entraî ner de graves
blessures.
Consignes de sécurité importantes
pour la batterie
1 . Avant d’ utiliser la batterie, lisez toutes les
instructions et précautions relatives (1) au
chargeur de batterie, (2) à la batterie, et (3) au
produit utilisant la batterie.
2. Ne désassemblez pas et ne modiez pas la
batterie. C e l a p o u r r a i t e n t r a î n e r u n i n c e n d i e , u n e
c h a l e u r e x c e s s i v e o u u n e e x p l o s i o n .
3. Cessez immédiatement l’ utilisation si le temps
de fonctionnement devient excessivement
court. Il y a risue de surchaue, de brlures,
voire d’ explosion.
4. Si l’ électrolyte pénè tre dans vos yeux, rin-
cez-les à l’ eau claire et consultez immédiate-
ment un médecin. Il y a risque de perte de la
vue.
5. Ne court-circuitez pas la batterie :
( 1 ) Ne touchez les bornes avec aucun maté-
riau conducteur.
( 2) É vitez de ranger la batterie dans un
conteneur avec d’ autres objets métal-
liques, par exemple des clous, des piè ces
de monnaie, etc.
( 3) N’ exposez pas la batterie à l’ eau ou à la
pluie.
Un court-circuit de la batterie peut provoquer
une intensité de courant élevée, une sur-
chaue, parfois des brlures et mme une
panne.

13 FRANÇAIS
6 . Ne rangez ni n’ utilisez l’ outil et la batterie dans
un endroit où la température risque d’ atteindre
ou de dépasser 50 ° C.
7.
Ne jetez pas la batterie au feu mê me si elle est
sérieusement endommagée ou complè tement épui-
sée. La batterie peut exploser au contact du feu.
8. Abstenez-vous de clouer, couper, écraser,
jeter, laisser tomber la batterie, ou de la heur-
ter contre un objet dur. C e l a p o u r r a i t e n t r a î n e r
u n i n c e n d i e , u n e c h a l e u r e x c e s s i v e o u u n e
e x p l o s i o n .
9. N’ utilisez pas la batterie si elle est
endommagée.
1 0. Les batteries au lithium-ion contenues sont
soumises aux exigences de la législation sur
les marchandises dangereuses.
L o r s d u t r a n s p o r t c o m m e r c i a l p a r d e s t i e r c e s
p a r t i e s o u d e s t r a n s i t a i r e s p a r e x e m p l e , d e s e x i -
gences spéciques en matière d’étiquetage et
d ’ e m b a l l a g e d o i v e n t ê t r e r e s p e c t é e s .
P o u r l a p r é p a r a t i o n d e l ’ a r t i c l e e x p é d i é , i l e s t
n é c e s s a i r e d e c o n s u l t e r u n e x p e r t e n m a t é r i a u
d a n g e r e u x . V e u i l l e z é g a l e m e n t r e s p e c t e r l e s
r é g l e m e n t a t i o n s n a t i o n a l e s s u s c e p t i b l e s d ’ ê t r e
p l u s d é t a i l l é e s .
R e c o u v r e z l e s c o n t a c t s e x p o s é s a v e c d u r u b a n
a d h é s i f o u d u r u b a n d e m a s q u a g e e t e m b a l l e z l a
b a t t e r i e d e t e l l e s o r t e q u ’ e l l e n e p u i s s e p a s b o u g e r
dans l’em ballage.
1 1 . Lors de la mise au rebut de la batterie, reti-
rez-la de l’ outil et jetez-la en lieu sû r. Suivez les
réglementations locales en matiè re de mise au
rebut des batteries.
1 2. Utilisez les batteries uniquement avec les
produits spéciés par Makita. L ’ i n s e r t i o n d e
b a t t e r i e s d a n s d e s p r o d u i t s n o n c o n f o r m e s p e u t
p r o v o q u e r u n i n c e n d i e , u n e c h a l e u r e x c e s s i v e ,
u n e e x p l o s i o n o u u n e f u i t e d e l ’ é l e c t r o l y t e .
1 3. Lorsque vous n’ utilisez pas l’ outil pendant une
période prolongée, la batterie doit ê tre retirée
de l’ outil.
1 4. Pendant et aprè s l’ utilisation, la batterie peut
chauer, ce ui peut entraîner des brlures, y
compris en cas de température relativement
basse. Manipulez les batteries chaudes avec
précaution.
1 5. Ne touchez pas la borne de l’ outil immédiate-
ment aprè s utilisation car elle peut ê tre assez
chaude pour provoquer des brû lures.
16. É vitez que des copeaux, de la poussiè re ou
du sol adhè rent aux bornes, aux trous et aux
rainures de la batterie. C e l a p e u t p r o v o q u e r u n
échauement, un incendie, une explosion ou un
d y s f o n c t i o n n e m e n t d e l ’ o u t i l o u d e l a b a t t e r i e , c e
q u i p e u t e n t r a î n e r d e s b r û l u r e s o u d e s b l e s s u r e s .
1 7. À moins que l’ outil prenne en charge un tel
usage, n’ utilisez pas la batterie à proximité de
lignes électriques haute tension. C e l a p o u r r a i t
e n t r a î n e r u n d y s f o n c t i o n n e m e n t o u c a s s e r l ’ o u t i l
o u l a b a t t e r i e .
1 8. Conservez la batterie hors de portée des
enfants.
CONSERVEZ CES
INSTRUCTIONS.
ATTENTION :
N’ utilisez que des batteries Makita
d’ origine. L ’ u t i l i s a t i o n d e b a t t e r i e s d e m a r q u e a u t r e q u e
Makita ou de batteries modiées peut provoquer l’explosion
d e s b a t t e r i e s , c e q u i p r é s e n t e u n r i s q u e d ’ i n c e n d i e , d e d o m -
m a g e s m a t é r i e l s e t c o r p o r e l s . C e l a a n n u l e r a é g a l e m e n t l a
g a r a n t i e M a k i t a p o u r l ’ o u t i l e t l e c h a r g e u r M a k i t a .
Conseils pour assurer la durée
de vie optimale de la batterie
1 . Chargez la batterie avant qu’ elle ne soit com-
plè tement déchargée. Arrê tez toujours l’ outil
et rechargez la batterie quand vous remarquez
que la puissance de l’ outil diminue.
2.
Ne rechargez jamais une batterie complè tement chargée.
La surcharge réduit la durée de service de la batterie.
3.
Chargez la batterie à une température ambiante
comprise entre 10 ° C et 40 ° C. Avant de charger
une batterie chaude, laissez-la refroidir.
4. Lorsque vous n’ utilisez pas la batterie, reti-
rez-la de l’ outil ou du chargeur.
5.
Rechargez la batterie si elle est restée inutilisée
pendant une période prolongée (plus de six mois).
DESCRIPTION DU
FONCTIONNEMENT
ATTENTION : Assurez-vous toujours que
l’ outil est hors tension et que sa batterie est
retirée avant de lajuster ou de vérier son
fonctionnement.
Insertion ou retrait de la batterie
ATTENTION : É teignez toujours l’ outil avant
de mettre en place ou de retirer la batterie.
ATTENTION : Tenez fermement l’ outil et la
batterie lors de la mise en place ou du retrait de
la batterie. S i v o u s n e t e n e z p a s f e r m e m e n t l ’ o u t i l
e t l a b a t t e r i e , i l s p e u v e n t v o u s g l i s s e r d e s m a i n s , e t
s ’ a b î m e r o u v o u s b l e s s e r .
Fig.1: 1. In d i c a t e u r r o u g e 2. B o u t o n 3. B a t t e r i e
P o u r r e t i r e r l a b a t t e r i e , f a i t e s -l a g l i s s e r h o r s d e l ’ o u t i l
t o u t e n f a i s a n t g l i s s e r l e b o u t o n à l ’ a v a n t d e l a b a t t e r i e .
P o u r m e t t r e l a b a t t e r i e e n p l a c e , a l i g n e z l a l a n g u e t t e d e l a b a t t e r i e
a v e c l a r a i n u r e d u c o m p a r t i m e n t p u i s i n s é r e z l a b a t t e r i e . In s é r e z -l a
entièrement jusqu’à entendre un léger déclic indiquant qu’elle
e s t b i e n e n p l a c e . S i v o u s p o u v e z v o i r l ’ i n d i c a t e u r r o u g e c o m m e
illustré sur la gure, c’est qu’elle n’est pas bien verrouillée.
ATTENTION : Insérez toujours complè tement
la batterie jusqu’ à ce que l’ indicateur rouge ne
soit plus visible. S i n o n , e l l e p o u r r a i t t o m b e r a c c i d e n -
t e l l e m e n t d e l ’ o u t i l , a u r i s q u e d e v o u s b l e s s e r o u d e
blesser quelqu’un se trouvant près de vous.
ATTENTION : N’ insérez pas la batterie de
force. S i e l l e n e g l i s s e p a s f a c i l e m e n t , c ’ e s t q u e v o u s
n e l ’ i n s é r e z p a s c o r r e c t e m e n t .

14 FRANÇAIS
Indication de la charge restante de
la batterie
Uniquement pour les batteries avec voyant lumineux
Fig.2: 1. T é m o i n s 2. Bouton de vérication
Appuyez sur le bouton de vérication sur la batterie
p o u r i n d i q u e r l a c h a r g e r e s t a n t e d e l a b a t t e r i e . L e s
t é m o i n s s ’ a l l u m e n t p e n d a n t q u e l q u e s s e c o n d e s .
Témoins Charge
restante
Allumé É teint Clignotant
75 % à 1 00 %
50 % à 75 %
25 % à 50 %
0 % à 25 %
C h a r g e z l a
b a t t e r i e .
A n o m a l i e
p o s s i b l e
d e l a b a t t e r i e .
NOTE : S e l o n l e s c o n d i t i o n s d ’ u t i l i s a t i o n e t l a t e m -
pérature ambiante, l’indication peut tre légèrement
diérente de la capacité réelle.
NOTE : Le premier témoin (complètement àgauche)
clignotera pendant le fonctionnement du système de
p r o t e c t i o n d e l a b a t t e r i e .
Systè me de protection de l’ outil/la batterie
L’outil est équipé d’un système de protection de l’outil/la batte-
rie. Ce système coupe automatiquement l’alimentation vers le
m o t e u r p o u r p r o l o n g e r l a d u r é e d e v i e d e l ’ o u t i l e t d e l a b a t t e -
r i e . S i l ’ o u t i l o u l a b a t t e r i e s e t r o u v e d a n s l ’ u n e d e s s i t u a t i o n s
s u i v a n t e s , l ’ o u t i l c e s s e r a a u t o m a t i q u e m e n t d e f o n c t i o n n e r .
Protection contre la surcharge
Lorsque l’outil/la batterie est utilisé(e) d’une manière
provoquantun appelde courantanorm alem entélevé,
l ’ o u t i l s ’ a r r ê t e a u t o m a t i q u e m e n t . Da n s c e c a s , é t e i g n e z
l ’ o u t i l e t a r r ê t e z l a t â c h e a y a n t p r o v o q u é l a s u r c h a r g e
d e l ’ o u t i l . P u i s r a l l u m e z l ’ o u t i l p o u r r e p r e n d r e l a t â c h e .
Protection contre la surchaue
En cas de surchaue de l’outil ou de la batterie, l’outil
s ’ a r r ê t e a u t o m a t i q u e m e n t . Da n s c e c a s , l a i s s e z l ’ o u t i l
o u l a b a t t e r i e r e f r o i d i r a v a n t d e r a l l u m e r l ’ o u t i l .
Protection contre la décharge totale
de la batterie
Lorsque la charge de la batterie est insusante, l’outil
s ’ a r r ê t e a u t o m a t i q u e m e n t . Da n s c e c a s , r e t i r e z l a b a t t e -
r i e d e l ’ o u t i l e t c h a r g e z -l a .
Protections contre d’ autres causes
Le système de protection est également conçu pour
d ’ a u t r e s c a u s e s q u i p o u r r a i e n t e n d o m m a g e r l ’ o u t i l
e t l u i p e r m e t d e s ’ a r r ê t e r a u t o m a t i q u e m e n t . S u i v e z
t o u t e s l e s é t a p e s c i -d e s s o u s p o u r é l i m i n e r l e s c a u s e s ,
l o r s q u e l ’ o u t i l a é t é a r r ê t é p r o v i s o i r e m e n t o u a c e s s é d e
f o n c t i o n n e r .
1 . É t e i g n e z l ’ o u t i l , p u i s r a l l u m e z -l e p o u r l e
r e d é m a r r e r .
2. C h a r g e z l a o u l e s b a t t e r i e s o u r e m p l a c e z -l e s p a r
d e s b a t t e r i e s r e c h a r g é e s .
3. L a i s s e z l ’ o u t i l e t l a o u l e s b a t t e r i e s r e f r o i d i r .
En l’absence d’amélioration après avoir rétabli le sys-
tème de protection, contactez votre centre de service
M a k i t a l o c a l .
onctionnement de la gchette
AVERTISSEMENT : Avant d’ insérer la batte-
rie dans loutil, vériez toujours ue la gchette
fonctionne bien et revient en position d’ arrê t
lorsue vous la relchez.
Pour démarrer l’outil, il sut d’enclencher la gchette.
P o u r a r r ê t e r l ’ o u t i l , r e l â c h e z l a g â c h e t t e .
Fig.3: 1. G â c h e t t e
Allumage de la lampe avant
Fig.4: 1. Lam pe
ATTENTION : É vitez de regarder directement
le faisceau lumineux ou sa source.
En c l e n c h e z l a g â c h e t t e p o u r a l l u m e r l a l a m p e . L a
l a m p e r e s t e a l l u m é e t a n t q u e l a g â c h e t t e e s t e n c l e n -
chée. La lampe s’éteint environ 1 secondes après
a v o i r r e l â c h é l a g â c h e t t e .
NOTE : R e t i r e z l a s a l e t é s u r l a l e n t i l l e d e l a l a m p e
avec un chion sec. Prenez soin de ne pas éraer
l a l e n t i l l e d e l a l a m p e s o u s p e i n e d e d i m i n u e r s o n
é c l a i r a g e .
Fonctionnement de l’ inverseur
Fig.5: 1. L e v i e r d e l ’ i n v e r s e u r
ATTENTION : Vériez toujours le sens de
rotation avant d’ utiliser l’ outil.
ATTENTION : N’ utilisez l’ inverseur qu’ une
fois que l’ outil est complè tement arrê té. S i v o u s
c h a n g e z l e s e n s d e r o t a t i o n a v a n t l ’ a r r ê t d e l ’ o u t i l ,
v o u s r i s q u e z d e l ’ e n d o m m a g e r .
ATTENTION : Lorsque vous n’ utilisez pas
l’ outil, placez toujours le levier de l’ inverseur en
position neutre.
L’outil possède un inverseur qui permet de changer
l e s e n s d e r o t a t i o n . En f o n c e z l e l e v i e r d e l ’ i n v e r s e u r
d u c ô t é A p o u r u n e r o t a t i o n d a n s l e s e n s d e s a i g u i l l e s
d ’ u n e m o n t r e , o u d u c ô t é B p o u r u n e r o t a t i o n d a n s l e
s e n s i n v e r s e d e s a i g u i l l e s d ’ u n e m o n t r e .
L a g â c h e t t e n e p e u t p a s ê t r e e n c l e n c h é e l o r s q u e l e
l e v i e r d e l ’ i n v e r s e u r s e t r o u v e e n p o s i t i o n n e u t r e .

15 FRANÇAIS
Frein électrique
C e t o u t i l e s t é q u i p é d ’ u n f r e i n é l e c t r i q u e . S i s y s t é m a t i -
quement l’outil n’arrive pas às’arrter rapidement après
l e r e l â c h e m e n t d e l a g â c h e t t e , f a i t e s r é p a r e r l ’ o u t i l d a n s
u n c e n t r e d e s e r v i c e M a k i t a .
NOTE : U n e f o n c t i o n d e f r e i n é l e c t r i q u e p e u t ê t r e a c t i -
v é e o u d é s a c t i v é e d a n s l e s p r é f é r e n c e s d e l ’ a p p l i c a -
t i o n . P o u r d e s i n f o r m a t i o n s d é t a i l l é e s , r e p o r t e z -v o u s
a u m a n u e l d ’ i n s t r u c t i o n s a c c o m p a g n a n t l e l o g i c i e l
d ’ a p p l i c a t i o n c o n ç u p o u r c e t o u t i l .
Témoin DEL/avertisseur sonore
Fig.6: 1. T é m o i n DEL
L e t é m o i n DEL / l ’ a v e r t i s s e u r s o n o r e s u r l ’ o u t i l i n d i q u e l e s f o n c t i o n s s u i v a n t e s .
Fonction É tat de l’ outil É tat du témoin DEL/de l’ avertisseur sonore Mesure à prendre
Témoin DEL Avertisseur sonore
Vérication du fonction-
n e m e n t d u t é m o i n DEL ,
d e l a l a m p e e t d e l ’ a v e r -
t i s s e u r s o n o r e
L o r s q u e l a b a t t e r i e e s t
en place, l’outil vérie le
t é m o i n DEL , l a l a m p e e t
l ’ a v e r t i s s e u r s o n o r e .
S ’ a l l u m e d ’ a b o r d e n v e r t ,
p u i s e n r o u g e .
( En s u i t e l a l a m p e
s ’ a l l u m e .)
Série de très courts
signaux sonores
-
Dé t e c t i o n d u f o n c t i o n n e -
m e n t d e l a g â c h e t t e l o r s
d e l a m i s e e n p l a c e d e l a
b a t t e r i e
L o r s q u e l a b a t t e r i e e s t
i n s é r é e a v e c l a g â c h e t t e
e n c l e n c h é e , l ’ o u t i l
s ’ a r r ê t e p o u r é v i t e r u n
d é m a r r a g e i n t e m p e s t i f .
C l i g n o t e a l t e r n a t i v e m e n t
e n r o u g e e t e n v e r t .
S é r i e d e c o u r t s s i g n a u x
sonores
R e l â c h e z l a g â c h e t t e .
A r r ê t a u t o m a t i q u e à l a
n du serrage
L e r é g l a g e d e l ’ o u t i l a é t é
o b t e n u e t l ’ o u t i l s ’ e s t a r r ê t é .
S ’ a l l u m e e n v e r t p e n d a n t
e n v i r o n u n e s e c o n d e .
- -
A l a r m e e n c a s d e s e r -
rage insusant
L’outil n’a pas eectué
l e r é g l a g e d e l ’ o u t i l , c a r
l a g â c h e t t e a é t é r e l â -
c h é e a v a n t d ’ a t t e i n d r e
les valeurs dénies.
A u t r e m e n t , l e s r é g l a g e s
du Critère d’échec de la
p h a s e » o n t é t é o b t e n u s .
S ’ a l l u m e e n r o u g e . L o n g s i g n a l s o n o r e R e s s e r r e z l a v i s .
In t e r r u p t i o n e n t r e l e s
phases
L ’ o u t i l e s t d a n s l a
p é r i o d e d ’ i n t e r r u p t i o n
congurée par le réglage
d e « P h a s e s u i v a n t e » .
S ’ a l l u m e o u c l i g n o t e e n
v e r t ( s e l o n l e s r é g l a g e s ) .
- -
Dé t e c t i o n d e d o u b l e
f r a p p e
L o r s q u e l ’ u t i l i s a t e u r s e
m e t à r e s e r r e r u n e v i s
d é j à s e r r é e , l ’ o u t i l l e
d é t e c t e e t s ’ a r r ê t e .
S ’ a l l u m e e n r o u g e . L o n g s i g n a l s o n o r e -
A l a r m e e n c a s d e f a i b l e
c h a r g e d e l a b a t t e r i e
L a p u i s s a n c e d e l a
b a t t e r i e d i m i n u e e t l e
m o m e n t e s t v e n u d e
c h a n g e r l a b a t t e r i e .
C l i g n o t e l e n t e m e n t e n
rouge.
S é r i e d e l o n g s s i g n a u x
sonores
R e m p l a c e z l a b a t t e r i e
par une autre complète-
m entchargée.
A r r ê t a u t o m a t i q u e e n
c a s d e f a i b l e c h a r g e
r e s t a n t e d e l a b a t t e r i e
L a b a t t e r i e e s t p r e s q u e
complètement épuisée
e t l ’ o u t i l s ’ e s t a r r ê t é .
S ’ a l l u m e e n r o u g e . L o n g s i g n a l s o n o r e R e m p l a c e z l a b a t t e r i e
par une autre complète-
m entchargée.
A n t i -r é i n i t i a l i s a t i o n d u
c o n t r ô l e u r
U n e b a i s s e a n o r m a l e
d e t e n s i o n e s t s u r v e n u e
s u r l a b a t t e r i e p o u r u n e
r a i s o n q u e l c o n q u e e t
l ’ o u t i l s ’ e s t a r r ê t é .
C l i g n o t e a l t e r n a t i v e m e n t
e n r o u g e e t e n v e r t .
S é r i e d e c o u r t s s i g n a u x
sonores
R e m p l a c e z l a b a t t e r i e
par une autre complète-
m entchargée.
P r o t e c t i o n c o n t r e l a
s u r c h a r g e
U n c o u r a n t a n o r m a l e -
m e n t é l e v é c o n t i n u a i t d e
c i r c u l e r d a n s l e c o n t r ô -
l e u r e t l ’ o u t i l s ’ e s t a r r ê t é .
C l i g n o t e a l t e r n a t i v e m e n t
e n r o u g e e t e n v e r t .
S é r i e d e c o u r t s s i g n a u x
sonores
É l i m i n e z l a c a u s e d e l a
s u r c h a r g e e t r e d é m a r r e z
l ’ o u t i l . En l ’ a b s e n c e
d’amélioration, conez la
r é p a r a t i o n à v o t r e c e n t r e
d e s e r v i c e M a k i t a l o c a l .
P r o t e c t i o n c o n t r e l a
surchaue
L e m o t e u r o u l e c o n t r ô -
l e u r o n t p r é s e n t é u n e
surchaue anormale et
l ’ o u t i l s ’ e s t a r r ê t é .
C l i g n o t e r a p i d e m e n t e n
rouge.
S é r i e d e c o u r t s s i g n a u x
sonores
R e t i r e z i m m é d i a t e m e n t
l a b a t t e r i e e t l a i s s e z
r e f r o i d i r l ’ o u t i l .
In c a p a c i t é à d é t e c t e r l a
surchaue du moteur
L ’ u n i t é d e d é t e c t i o n d u
m o t e u r n ’ a p a s p u d é t e c -
ter la surchaue, car le
c o r d o n e s t r o m p u o u
p o u r t o u t e a u t r e r a i s o n .
C l i g n o t e r a p i d e m e n t e n
rouge.
S é r i e d e c o u r t s s i g n a u x
sonores
R e t i r e z l a b a t t e r i e e t l a i s -
s e z r e f r o i d i r l ’ o u t i l . S i l e
v o y a n t n e s ’ a r r ê t e p a s ,
s o l l i c i t e z u n e r é p a r a t i o n
auprès du centre de
s e r v i c e M a k i t a .

16 FRANÇAIS
Fonction É tat de l’ outil É tat du témoin DEL/de l’ avertisseur sonore Mesure à prendre
Témoin DEL Avertisseur sonore
Dé t e c t i o n d e d é f a i l -
l a n c e d u m o t e u r o u d u
c o n t r ô l e u r
U n e d é f a i l l a n c e d u
m o t e u r o u d u c o n t r ô l e u r
a é t é d é t e c t é e . À c e
m o m e n t p r é c i s , l ’ o u t i l n e
f o n c t i o n n e p a s .
C l i g n o t e a l t e r n a t i v e m e n t
e n r o u g e e t e n v e r t .
S é r i e d e c o u r t s s i g n a u x
sonores
Conez la réparation à
v o t r e c e n t r e d e s e r v i c e
après-vente Makita
l o c a l .
A l a r m e p o u r l ’ e n t r e t i e n L e m o m e n t e s t v e n u d e
p r o c é d e r à l ’ e n t r e t i e n
d’après le nombre pré-
déni de vis serrées.
C l i g n o t e e n j a u n e . -R é i n i t i a l i s e z l ’ a l a r m e
a v e c l e l o g i c i e l
d ’ a p p l i c a t i o n .
A l a r m e e n c a s d e c o m -
m u n i c a t i o n d e d o n n é e s
n o n d i s p o n i b l e ( a v e c
l ’ o u t i l c o n n e c t é à u n
ordinateur)
Les données ne
p e u v e n t p a s ê t r e
é c h a n g é e s e n t r e l ’ o u t i l
e t l ’ o r d i n a t e u r m a l g r é l a
connexion.
C l i g n o t e e n j a u n e . -R e d é m a r r e z l e l o g i c i e l
d ’ a p p l i c a t i o n e t r e b r a n -
c h e z l e c â b l e U S B .
In d i c a t i o n q u e l a c o m -
m u n i c a t i o n d e d o n n é e s
e s t d i s p o n i b l e ( a v e c
l ’ o u t i l c o n n e c t é à u n
ordinateur)
L ’ o u t i l e s t c o n n e c t é à
l ’ o r d i n a t e u r e t l a c o m m u -
n i c a t i o n d e s d o n n é e s e s t
disponible.
C l i g n o t e e n v e r t . - -
Réglage du couple de serrage
P o u r s e r r e r d e s v i s m é c a n i q u e s , d e s b o u l o n s à s i x p a n s
c r e u x , e t c ., a v e c u n c o u p l e d e s e r r a g e d o n n é , p r o c é d e z
a u r é g l a g e d u c o u p l e d e s e r r a g e d e l a f a ç o n s u i v a n t e .
ATTENTION : Lors du réglage du couple de
serrage, retirez la batterie (sauf dans le cas de
tches nécessitant ue la batterie soit xée.
1. O u v r e z m a n u e l l e m e n t l a p l a q u e d e c h a n g e m e n t
d e s o r t e q u e v o u s p u i s s i e z v o i r u n t r o u .
Fig.7: 1. P l a q u e d e c h a n g e m e n t
2. En c l e n c h e z l a g â c h e t t e e t r e l â c h e z -l a d e s o r t e
q u e l a b a g u e d e r é g l a g e p i v o t e e t q u e l e t r o u d e v i e n n e
v i s i b l e . P u i s , r e t i r e z l a b a t t e r i e .
3. U t i l i s e z u n e p o i g n é e d e r é g l a g e e n o p t i o n p o u r
p r o c é d e r a u r é g l a g e d u c o u p l e d e s e r r a g e . In s é r e z l a
b r o c h e d e l a p o i g n é e d e r é g l a g e d a n s l e t r o u à l ’ a v a n t
d e l ’ o u t i l . T o u r n e z e n s u i t e l a p o i g n é e d e r é g l a g e d a n s
l e s e n s d e s a i g u i l l e s d ’ u n e m o n t r e p o u r a u g m e n t e r
l e c o u p l e d e s e r r a g e , e t d a n s l e s e n s i n v e r s e p o u r l e
r é d u i r e .
Fig.8: 1. P o i g n é e d e r é g l a g e 2. T r o u p o u r l a p o i -
gnée de réglage
4. In s é r e z l a b a t t e r i e e t a s s u r e z -v o u s q u e l e c o u p l e
d e s e r r a g e e s t b i e n r é g l é , a u m o y e n d ’ u n t e s t e u r d e
c o u p l e d e s e r r a g e .
ATTENTION : Retirez la poignée de réglage
avant de mettre l’ outil sous tension.
5. F e r m e z s o i g n e u s e m e n t l a p l a q u e d e c h a n g e m e n t
à l a m a i n .
Réglage de la vitesse à vide et de
l’ angle de rotation, etc.
V o u s p o u v e z r é g l e r l a v i t e s s e à v i d e , l e n o m b r e d e
t o u r s , e t c ., d e l ’ o u t i l a v e c v o t r e o r d i n a t e u r . In s t a l l e z l e
l o g i c i e l d ’ a p p l i c a t i o n s u r v o t r e o r d i n a t e u r e t c o n n e c -
t e z -l e à l ’ o u t i l a v e c u n c â b l e U S B .
Fig.9: 1. P o r t U S B 2. C a c h e U S B 3. C â b l e U S B
REMARQUE : A s s u r e z -v o u s q u e l e c a c h e U S B e s t
f e r m é l o r s d u s e r r a g e .
NOTE : U t i l i s e z l e c â b l e U S B M a k i t a d ’ o r i g i n e p o u r
r a c c o r d e r v o t r e o r d i n a t e u r à l ’ o u t i l . R e p o r t e z -v o u s à l a
s e c t i o n « S P É C IF IC A T IO N S » .
NOTE : V e u i l l e z c o n t a c t e r u n r e p r é s e n t a n t c o m m e r -
c i a l d e M a k i t a à p r o p o s d u l o g i c i e l d ’ a p p l i c a t i o n .
ASSEMBLAGE
ATTENTION : Assurez-vous toujours que
l’ outil est hors tension et que sa batterie est reti-
rée avant deectuer toute tche dessus.
Installation ou retrait de l’ embout de
vissage/embout à douille
Fig.10
U t i l i s e z e x c l u s i v e m e n t u n e m b o u t d e v i s s a g e / e m b o u t à
douille doté de la partie àinsérer indiquée sur la gure.
N ’ u t i l i s e z a u c u n a u t r e e m b o u t d e v i s s a g e / e m b o u t à
d o u i l l e .
Pour outil orice dembout de vissage peu
profond
A = 1 2 m m
B = 9 m m
U t i l i s e z e x c l u s i v e m e n t c e s
t y p e s d ’ e m b o u t d e v i s s a g e .
S u i v e z l a p r o c é d u r e 1 . ( N o t e )
P o r t e -e m b o u t n o n r e q u i s .

17 FRANÇAIS
Pour outil orice dembout de vissage profond
A = 1 7 m m
B = 1 4 m m
P o u r i n s t a l l e r c e s t y p e s
d ’ e m b o u t d e v i s s a g e , s u i v e z
l a p r o c é d u r e 1 .
A = 1 2 m m
B = 9 m m
P o u r i n s t a l l e r c e s t y p e s
d ’ e m b o u t d e v i s s a g e , s u i v e z
l a p r o c é d u r e 2. ( N o t e ) U n
p o r t e -e m b o u t e s t r e q u i s p o u r
i n s t a l l e r l ’ e m b o u t .
Procédure 1
Pour les outils sans manchon une pression
Fig.11: 1. Em b o u t d e v i s s a g e 2. M anchon
P o u r i n s t a l l e r l ’ e m b o u t d e v i s s a g e , t i r e z l e m a n c h o n
dans le sens de la èche et insérez l’embout de vissage
à f o n d d a n s l e m a n c h o n .
Libérez ensuite le manchon pour xer l’embout de
v i s s a g e .
Pour les outils avec manchon une pression
P o u r i n s t a l l e r l ’ e m b o u t d e v i s s a g e , i n t r o d u i s e z -l e à f o n d
d a n s l e m a n c h o n .
Procédure 2
En p l u s d e l a Procédure 1, i n s é r e z l e p o r t e -e m b o u t
d a n s l e m a n c h o n a v e c s o n b o u t p o i n t u t o u r n é v e r s
l ’ i n t é r i e u r .
Fig.12: 1. Em b o u t d e v i s s a g e 2. P o r t e -e m b o u t
3. M anchon
P o u r r e t i r e r l ’ e m b o u t d e v i s s a g e , t i r e z s u r l e m a n c h o n
dans le sens de la èche et enlevez l’embout de
v i s s a g e .
NOTE : S i l ’ e m b o u t d e v i s s a g e n ’ e s t p a s i n s é r é a s s e z
p r o f o n d é m e n t d a n s l e m a n c h o n , c e l u i -c i n e r e v i e n t
p a s à s a p o s i t i o n d ’ o r i g i n e e t l ’ e m b o u t d e v i s s a g e
ne se trouve pas bien xé. Dans ce cas, insérez à
n o u v e a u l ’ e m b o u t c o n f o r m é m e n t a u x i n s t r u c t i o n s
c i -d e s s u s .
NOTE : Si vous rencontrez des dicultés pour insérer
l ’ e m b o u t d e v i s s a g e , t i r e z s u r l e m a n c h o n e t i n s é r e z
l ’ e m b o u t à f o n d d a n s l e m a n c h o n .
NOTE : Après avoir inséré l’embout de vissage, assu-
rez-vous qu’il est fermement xé. Ne l’utilisez pas s’il
s o r t d u m a n c h o n .
Installation du crochet
Accessoire en option
Le crochet se révèle pratique pour accrocher l’outil.
In s t a l l e z l e c r o c h e t s u r l e s t r o u s s u r l e c o r p s d e l ’ o u t i l .
Fig.13: 1. C r o c h e t 2. T r o u
UTILISATION
Vissage
ATTENTION : Maintenez fermement l’ outil
et placez l’ embout de vissage/embout à douille
solidement sur la tê te de vis/la tê te de boulon
pendant l’ opération de serrage. L e n o n -r e s p e c t d e
c e t t e p r é c a u t i o n p o u r r a i t p r o v o q u e r u n e m a u v a i s e u t i -
l i s a t i o n d e l ’ o u t i l e n t r a î n a n t d e s b l e s s u r e s c o r p o r e l l e s .
ATTENTION : Assurez-vous que l’ embout est
inséré bien droit dans la tê te de vis sous peine
d’ endommager la vis et/ou l’ embout.
ATTENTION : Gardez les mains éloignées des
piè ces en rotation pendant le fonctionnement.
A u t r e m e n t , v o u s r i s q u e z d e v o u s c o i n c e r l e s m a i n s
dans les pièces mobiles et de vous blesser.
P l a c e z l a p o i n t e d e l ’ e m b o u t d e v i s s a g e d a n s l a t ê t e d e v i s
e t e x e r c e z u n e p r e s s i o n s u r l ’ o u t i l . M e t t e z e n s u i t e l ’ o u t i l
s o u s t e n s i o n . L o r s q u e l ’ e m b r a y a g e s ’ a c t i v e , l e m o t e u r
s ’ a r r ê t e a u t o m a t i q u e m e n t . R e l â c h e z e n s u i t e l a g â c h e t t e .
Fig.14
Limites de la capacité de serrage
U t i l i s e z l ’ o u t i l d a n s l e s l i m i t e s d e l a c a p a c i t é d e s e r r a g e . S i v o u s
u t i l i s e z l ’ o u t i l a u -d e l à d e c e s l i m i t e s , l ’ e m b r a y a g e n e f o n c t i o n n e r a
pas. Et l’outil ne pourra pas fournir un couple de serrage susant.
Pour le modè le DFT087F
38
4567
360°
300°
240°
180°
120°
60°
30°
1
3
2
N•m
1. P l a g e d e l a c a p a c i t é d e s e r r a g e 2. A n g l e d e r o t a t i o n 3. C o u p l e
Pour le modè le DFT129F
5867 9101112
360°
300°
240°
180°
120°
60°
30°
1
3
2
N•m
1. P l a g e d e l a c a p a c i t é d e s e r r a g e 2. A n g l e d e r o t a t i o n 3. C o u p l e

18 FRANÇAIS
NOTE : L ’ a n g l e d e r o t a t i o n c o r r e s p o n d à l ’ a n g l e
d e p u i s l e p o i n t o ù l e b o u l o n e s t s e r r é à 50 % d u
c o u p l e s o u h a i t é a u p o i n t o ù l e b o u l o n e s t s e r r é à 1 00
% d u c o u p l e .
NOTE : C e t t e v a l e u r d e r é f é r e n c e e s t m e s u r é e d a n s
les conditions de mesure spéciées par Makita.
NOTE : L ’ u t i l i s a t i o n d ’ u n e b a t t e r i e f r o i d e p e u t e n t r a î -
n e r u n a v e r t i s s e m e n t p o u r l a c h a r g e d e l a b a t t e r i e
v i a l e t é m o i n DEL e t l ’ a v e r t i s s e u r s o n o r e e t a r r ê t e r
immédiatement l’outil, mme si la batterie est complè-
t e m e n t c h a r g é e . Da n s c e c a s , l a c a p a c i t é d e s e r r a g e
peut tre inférieure aux spécications de ce mode
d ’ e m p l o i .
ENTRETIEN
ATTENTION : Assurez-vous toujours que
l’ outil est hors tension et que la batterie est reti-
rée avant dy eectuer tout travail dinspection ou
d’ entretien.
REMARQUE : N’ utilisez jamais d’ essence, ben-
zine, diluant, alcool ou autre produit similaire.
Cela risquerait de provoquer la décoloration, la
déformation ou la ssuration de loutil.
P o u r a s s u r e r l a S É C U R IT É e t l a F IA B IL IT É d u p r o d u i t ,
t o u t e r é p a r a t i o n , t o u t t r a v a i l d ’ e n t r e t i e n o u d e r é g l a g e
doivent tre eectués par un centre d’entretien Makita
agréé, avec des pièces de rechange Makita.
ACCESSOIRES EN
OPTION
ATTENTION : Ces accessoires ou piè ces
complémentaires sont recommandés pour l’ utili-
sation avec loutil Makita spécié dans ce mode
d’ emploi. L ’ u t i l i s a t i o n d e t o u t a u t r e a c c e s s o i r e o u
pièce complémentaire peut comporter un risque de
blessure. N’utilisez les accessoires ou pièces complé-
mentaires qu’aux ns auxquelles ils ont été conçus.
P o u r o b t e n i r p l u s d e d é t a i l s s u r c e s a c c e s s o i r e s ,
c o n t a c t e z v o t r e c e n t r e d ’ e n t r e t i e n l o c a l M a k i t a .
•P o i g n é e d e r é g l a g e
•Di s p o s i t i f d e p r o t e c t i o n ( n a t u r e l , r o u g e , b l e u ,
j a u n e , v e r t )
•C â b l e U S B
•C r o c h e t
•C o n t r e -é c r o u ( r o u g e , b l e u , j a u n e )
•B a t t e r i e e t c h a r g e u r M a k i t a d ’ o r i g i n e
NOTE : Il s e p e u t q u e c e r t a i n s é l é m e n t s d e l a l i s t e
s o i e n t c o m p r i s d a n s l ’ e m b a l l a g e d e l ’ o u t i l e n t a n t
q u ’ a c c e s s o i r e s s t a n d a r d . Il s p e u v e n t v a r i e r d ’ u n p a y s
à l ’ a u t r e .

19 DEUTSCH
DEUTSCH (Original-Anleitung)
TECHNISCHE DATEN
Modell: DFT087F DFT129F
A n z u g s m o m e n t H a r t v e r b i n d u n g 3 - 8 N • m 5 - 1 2 N • m
W eichverbindung 3 - 8 N • m 5 - 1 2 N • m
L e e r l a u f d r e h z a h l ( U / m i n ) 1 00 - 1 .250 m i n -1 70 - 900 m i n -1
A b m e s s u n g e n ( L × B × H ) m i t A k k u B L 1 81 5N 1 79 m m x 75 m m x 242 m m
m i t A k k u B L 1 86 0B 1 79 m m x 75 m m x 258 m m
N ennspannung 1 8 V G l e i c h s t r o m
N e t t o g e w i c h t 1 , 3 - 1 , 6 k g
G e e i g n e t e s U S B -K a b e l 6 6 1 432-2
•W i r b e h a l t e n u n s v o r , Ä n d e r u n g e n d e r t e c h n i s c h e n Da t e n i m Z u g e d e r En t w i c k l u n g u n d d e s t e c h n i s c h e n
F o r t s c h r i t t s o h n e v o r h e r i g e A n k ü n d i g u n g v o r z u n e h m e n .
•Di e t e c h n i s c h e n Da t e n k ö n n e n v o n L a n d z u L a n d u n t e r s c h i e d l i c h s e i n .
•Da s G e w i c h t k a n n a b h ä n g i g v o n d e m A u f s a t z ( d e n A u f s ä t z e n ) , e i n s c h l i e ß l i c h d e s A k k u s , u n t e r s c h i e d l i c h
s e i n . Di e l e i c h t e s t e u n d d i e s c h w e r s t e K o m b i n a t i o n , g e m ä ß d e m EP T A -V e r f a h r e n 01 / 201 4, s i n d i n d e r T a b e l l e
angegeben.
utreende Akkus und Ladegerte
A k k u B L 1 81 5N / B L 1 820B / B L 1 830B / B L 1 840B / B L 1 850B / B L 1 86 0B
Ladegerät DC 1 8R C / DC 1 8R D / DC 1 8R E / DC 1 8S D / DC 1 8S E / DC 1 8S F /
DC 1 8S H / DC 1 8W C
•Ei n i g e d e r o b e n a u f g e l i s t e t e n A k k u s u n d L a d e g e r ä t e s i n d j e n a c h Ih r e m W o h n g e b i e t e v e n t u e l l n i c h t e r h ä l t l i c h .
WARNUNG: Verenden Sie nur die oben aufgeführten Akkus und Ladegerte. B e i V e r w e n d u n g i r g e n d -
w e l c h e r a n d e r e r A k k u s u n d L a d e g e r ä t e b e s t e h t V e r l e t z u n g s - u n d / o d e r B r a n d g e f a h r .
Vorgesehene Verwendung
Da s W e r k z e u g i s t f ü r d a s Ei n d r e h e n v o n S c h r a u b e n i n
olz, Metall und Kunststo vorgesehen.
erusch
T y p i s c h e r A -b e w e r t e t e r G e r ä u s c h p e g e l e r m i t t e l t g e m ä ß
EN 6 2841 -2-2:
Modell DFT087F
S c h a l l d r u c k p e g e l ( L p A ) : 71 d B ( A )
M e s s u n s i c h e r h e i t ( K ) : 3 d B ( A )
Modell DFT129F
S c h a l l d r u c k p e g e l ( L p A ) : 71 d B ( A )
M e s s u n s i c h e r h e i t ( K ) : 3 d B ( A )
De r G e r ä u s c h p e g e l k a n n w ä h r e n d d e s B e t r i e b s 80 d B
( A ) ü b e r s c h r e i t e n .
HINW EIS: De r ( Di e ) a n g e g e b e n e ( n )
S c h a l l e m i s s i o n s w e r t ( e ) w u r d e ( n ) i m Ei n k l a n g m i t d e r
S t a n d a r d p r ü f m e t h o d e g e m e s s e n u n d k a n n ( k ö n n e n )
f ü r d e n V e r g l e i c h z w i s c h e n W e r k z e u g e n h e r a n g e z o -
gen w erden.
HINW EIS: De r ( Di e ) a n g e g e b e n e ( n )
S c h a l l e m i s s i o n s w e r t ( e ) k a n n ( k ö n n e n ) a u c h f ü r e i n e
V o r b e w e r t u n g d e s G e f ä h r d u n g s g r a d s v e r w e n d e t
w erden.
WARNUNG: Einen Gehörschutz tragen.
WARNUNG: Die Schallemission hrend der
tatschlichen Benutzung des Elektroerkzeugs
kann je nach der Benutzungsweise des
W erkzeugs, und speziell je nach der Art des bear-
beiteten W erkstücks, von dem (den) angegebenen
W ert(en) abweichen.
WARNUNG: Identizieren Sie
Sicherheitsmaß nahmen zum Schutz des
Benutzers anhand einer Schtzung des
efhrdungsgrads unter den tatsch-
lichen Benutzungsbedingungen (unter
Berücksichtigung aller Phasen des Arbeitszyklus,
wie z. B. Ausschalt- und Leerlaufzeiten des
Werkzeugs zustzlich zur Betriebszeit.
Schwingungen
S c h w i n g u n g s g e s a m t w e r t ( Dr e i -A c h s e n -V e k t o r s u m m e )
e r m i t t e l t g e m ä ß EN 6 2841 -2-2:
Modell DFT087F
A r b e i t s m o d u s : S c h r a u b b e t r i e b o h n e S c h l a g
S c h w i n g u n g s e m i s s i o n ( a h) : 2, 5 m / s 2oderw eniger
M e s s u n s i c h e r h e i t ( K ) : 1 , 5 m / s 2
Modell DFT129F
A r b e i t s m o d u s : S c h r a u b b e t r i e b o h n e S c h l a g
S c h w i n g u n g s e m i s s i o n ( a h) : 2, 5 m / s 2oderw eniger
M e s s u n s i c h e r h e i t ( K ) : 1 , 5 m / s 2

20 DEUTSCH
HINW EIS: De r ( Di e ) a n g e g e b e n e ( n )
V i b r a t i o n s g e s a m t w e r t ( e ) w u r d e ( n ) i m Ei n k l a n g m i t d e r
S t a n d a r d p r ü f m e t h o d e g e m e s s e n u n d k a n n ( k ö n n e n )
f ü r d e n V e r g l e i c h z w i s c h e n W e r k z e u g e n h e r a n g e z o -
gen w erden.
HINW EIS: De r ( Di e ) a n g e g e b e n e ( n )
V i b r a t i o n s g e s a m t w e r t ( e ) k a n n ( k ö n n e n ) a u c h f ü r e i n e
V o r b e w e r t u n g d e s G e f ä h r d u n g s g r a d s v e r w e n d e t
w erden.
WARNUNG: Die Vibrationsemission
hrend der tatschlichen Benutzung
des Elektrowerkzeugs kann je nach der
Benutzungsweise des W erkzeugs, und speziell
je nach der Art des bearbeiteten W erkstücks,
von dem (den) angegebenen Emissionswert(en)
abweichen.
WARNUNG: Identizieren Sie
Sicherheitsmaß nahmen zum Schutz des
Benutzers anhand einer Schtzung des
efhrdungsgrads unter den tatsch-
lichen Benutzungsbedingungen (unter
Berücksichtigung aller Phasen des Arbeitszyklus,
wie z. B. Ausschalt- und Leerlaufzeiten des
Werkzeugs zustzlich zur Betriebszeit.
E-Konformittserklrung
Nur für europäische Länder
Di e EG -K o n f o r m i t ä t s e r k l ä r u n g i s t a l s A n h a n g A i n d i e s e r
Bedienungsanleitung enthalten.
SICHERHEITSW ARNUNGEN
Allgemeine Sicherheitswarnungen
für Elektrowerkzeuge
WARNUNG: Lesen Sie alle mit die-
sem Elektrowerkzeug gelieferten
Sicherheitswarnungen, Anweisungen,
Abbildungen und technischen Daten durch. Ei n e
M i s s a c h t u n g d e r u n t e n a u f g e f ü h r t e n A n w e i s u n g e n
k a n n z u e i n e m e l e k t r i s c h e n S c h l a g , B r a n d u n d / o d e r
s c h w e r e n V e r l e t z u n g e n f ü h r e n .
Bewahren Sie alle W arnungen
und Aneisungen für sptere
Bezugnahme auf.
De r A u s d r u c k „ El e k t r o w e r k z e u g “ i n d e n W a r n h i n w e i s e n
b e z i e h t s i c h a u f Ih r m i t N e t z s t r o m ( m i t K a b e l ) o d e r A k k u
( o h n e K a b e l ) b e t r i e b e n e s El e k t r o w e r k z e u g .
Sicherheitswarnungen für
Akku-Schrauber
1 . Halten Sie das Elektrowerkzeug nur an den
isolierten richen, enn Sie Arbeiten
ausführen, bei denen die Gefahr besteht, dass
das Befestigungselement verborgene Kabel
kontaktiert. B e i K o n t a k t m i t e i n e m S t r o m f ü h r e n -
d e n K a b e l k ö n n e n d i e f r e i l i e g e n d e n M e t a l l t e i l e
d e s El e k t r o w e r k z e u g s e b e n f a l l s S t r o m f ü h r e n d
w e r d e n , s o d a s s d e r B e n u t z e r e i n e n e l e k t r i s c h e n
S c h l a g e r l e i d e n k a n n .
2. Achten Sie stets auf sicheren Stand.
Vergewissern Sie sich bei Einsatz des
Werkzeugs an hochgelegenen Arbeitspltzen,
dass sich keine Personen darunter aufhalten.
3. Halten Sie das Werkzeug mit festem ri.
4. Halten Sie Ihre Hnde von rotierenden Teilen
fern.
5. Vermeiden Sie eine Berührung des Einsatzes
oder des W erkstücks unmittelbar nach der
Bearbeitung, weil die Teile noch sehr heiß sind
und Hautverbrennungen verursachen können.
6 . Spannen Sie W erkstücke stets in einen
Schraubstock oder eine hnliche
Aufspannvorrichtung ein.
7. Vergewissern Sie sich, dass keine Stromkabel,
W asserrohre, Gasrohre usw. vorhanden sind,
die bei Beschdigung durch den Einsatz des
W erkzeugs eine Gefahr darstellen können.
DIESE ANW EISUNGEN
AUFBEW AHREN.
WARNUNG: Lassen Sie sich NICHT durch
Bequemlichkeit oder Vertrautheit mit dem Produkt
(durch wiederholten Gebrauch erworben) von der
strikten Einhaltung der Sicherheitsregeln für das
vorliegende Produkt abhalten.
MISSBRAUCH oder Missachtung der
Sicherheitsvorschriften in dieser Anleitung kön-
nen schwere Verletzungen verursachen.
W ichtige Sicherheitsanweisungen
für Akku
1 . Lesen Sie vor der Benutzung des Akkus alle
Anweisungen und W arnhinweise, die an (1)
Ladegert, 2 Akku und 3 Akkuerkzeug
angebracht sind.
2. Unterlassen Sie Zerlegen oder Manipulieren
des Akkus. Es k a n n s o n s t z u e i n e m B r a n d , ü b e r -
m ä ß i g e r H i t z e e n t w i c k l u n g o d e r e i n e r Ex p l o s i o n
k o m m e n .
3. alls die Betriebszeit betrchtlich kürzer
geworden ist, stellen Sie den Betrieb sofort
ein. Anderenfalls besteht die Gefahr von
Überhitzung, möglichen Verbrennungen und
sogar einer Explosion.
4. Falls Elektrolyt in Ihre Augen gelangt, waschen
Sie sie mit sauberem W asser aus, und
begeben Sie sich unverzüglich in rztliche
Behandlung. Anderenfalls können Sie Ihre
Sehkraft verlieren.
Other manuals for DFT087F
4
This manual suits for next models
3
Table of contents
Languages:
Other Makita Power Screwdriver manuals

Makita
Makita 6822 User manual

Makita
Makita BFR440X User manual

Makita
Makita DFR540 User manual

Makita
Makita 6801DB User manual

Makita
Makita BFR540 User manual

Makita
Makita DF001DW User manual

Makita
Makita BFR440 User manual

Makita
Makita BFR750 User manual

Makita
Makita 6823 Manual

Makita
Makita BFS440 User manual

Makita
Makita 6820V User manual

Makita
Makita BFR540 Manual

Makita
Makita FS4000 User manual

Makita
Makita DF001D User manual

Makita
Makita DFR540 User manual

Makita
Makita 6823 User manual

Makita
Makita 6807 User manual

Makita
Makita BFR440 User manual

Makita
Makita DDF485RAJ User manual

Makita
Makita DFL020F User manual