manuals.online logo
Brands
  1. Home
  2. •
  3. Brands
  4. •
  5. Makita
  6. •
  7. Rotary Hammer
  8. •
  9. Makita HR2430 Manual

Makita HR2430 Manual

Other manuals for HR2430

4

This manual suits for next models

1

Other Makita Rotary Hammer manuals

Makita HR3200C User manual

Makita

Makita HR3200C User manual

Makita HR2432 User manual

Makita

Makita HR2432 User manual

Makita DHR171 User manual

Makita

Makita DHR171 User manual

Makita BHR162 User manual

Makita

Makita BHR162 User manual
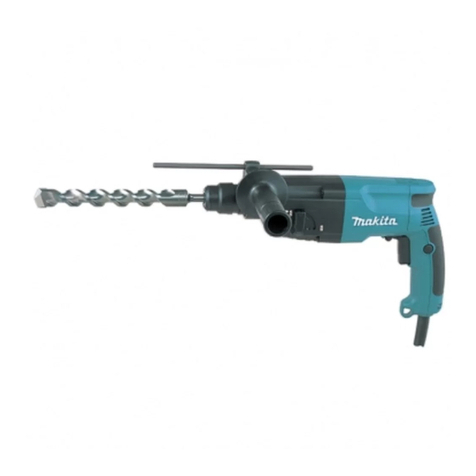
Makita HR2800 User manual

Makita

Makita HR2800 User manual

Makita HR4002 User manual

Makita

Makita HR4002 User manual

Makita DHR171 User manual

Makita

Makita DHR171 User manual

Makita HR160D User manual

Makita

Makita HR160D User manual

Makita HR2450F User manual

Makita

Makita HR2450F User manual
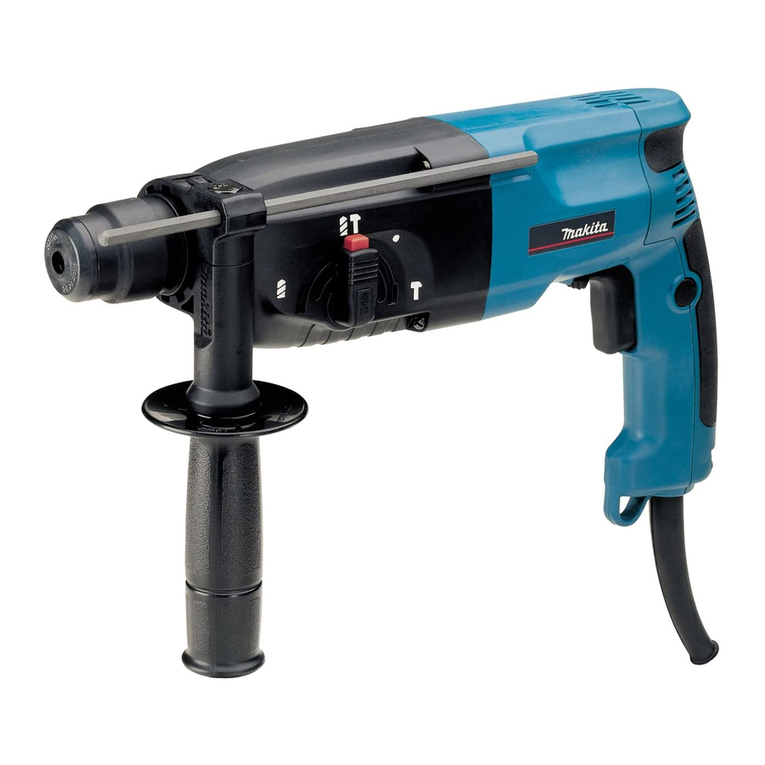
Makita HR2451 User manual

Makita

Makita HR2451 User manual

Makita BHR202 Quick start guide

Makita

Makita BHR202 Quick start guide

Makita HR4001C User manual

Makita

Makita HR4001C User manual

Makita BHR162 User manual

Makita

Makita BHR162 User manual
Makita HR2000 User manual

Makita

Makita HR2000 User manual

Makita HK1820 User manual

Makita

Makita HK1820 User manual

Makita HR1840 User manual

Makita

Makita HR1840 User manual

Makita HR2010 Manual

Makita

Makita HR2010 Manual

Makita HR2470F Quick start guide

Makita

Makita HR2470F Quick start guide

Makita HR2450/T User manual

Makita

Makita HR2450/T User manual

Makita HR2000 Manual

Makita

Makita HR2000 Manual

Makita HR4001C User manual

Makita

Makita HR4001C User manual

Makita HR166DSMJ User manual

Makita

Makita HR166DSMJ User manual

Makita HR5001C User manual

Makita

Makita HR5001C User manual

Makita HR2455 User manual

Makita

Makita HR2455 User manual

Popular Rotary Hammer manuals by other brands
Hilti TE 30-AVR Original operating instructions

Hilti

Hilti TE 30-AVR Original operating instructions

Hitachi DH 24VD instruction manual

Hitachi

Hitachi DH 24VD instruction manual

Panasonic EY7880 - 28.8V ROTARY HAMMER Service manual

Panasonic

Panasonic EY7880 - 28.8V ROTARY HAMMER Service manual

Bosch GSH 5 CE Original instructions

Bosch

Bosch GSH 5 CE Original instructions

Toya VOREL 81133 manual

Toya

Toya VOREL 81133 manual

Hilti TE15-C operating instructions

Hilti

Hilti TE15-C operating instructions

Hilti TE 2-A22 manual

Hilti

Hilti TE 2-A22 manual

EINHELL HEROCCO Original operating instructions

EINHELL

EINHELL HEROCCO Original operating instructions

YATO YT-82772 Original instructions

YATO

YATO YT-82772 Original instructions

BorMann BPH7000 Translation of the original instructions
BorMann

BorMann BPH7000 Translation of the original instructions

Metabo HPT DH 3628DD Safety instructions and instruction manual
Metabo HPT

Metabo HPT DH 3628DD Safety instructions and instruction manual

Black & Decker KD650 manual

Black & Decker

Black & Decker KD650 manual

Bosch GBH Professional 2-20 DRE Original instructions
Bosch

Bosch GBH Professional 2-20 DRE Original instructions

Bosch 2-26 E operating instructions

Bosch

Bosch 2-26 E operating instructions
BTI Profiline BTI-BH 24 VE operating instructions
BTI

BTI Profiline BTI-BH 24 VE operating instructions

Graphite 58G509 instruction manual

Graphite

Graphite 58G509 instruction manual

Bosch GBH 2-28 Professional Original instructions

Bosch

Bosch GBH 2-28 Professional Original instructions

MaxPro PROFESSIONAL MPRH1200/38V manual

MaxPro PROFESSIONAL

MaxPro PROFESSIONAL MPRH1200/38V manual

manuals.online logo
manuals.online logoBrands
  • About & Mission
  • Contact us
  • Privacy Policy
  • Terms and Conditions

Copyright 2025 Manuals.Online. All Rights Reserved.

Continuous Rating (W)
Voltage (V) Cycle (Hz) Input Output Max. Output(W)
100
110
120
230
Models No.
Description
PRODUCT
Current (A)
TECHNICAL INFORMATION
CONCEPTION AND MAIN APPLICATIONS
Specification
Standard equipment
Optional accessories
< Note > The standard equipment for the tool shown may be differ from country to country.
HR2430, HR2431
Rotary Hammer 24mm
These models are designed mainly for use in dust sensitive
environments.
With all the benefits of our existing Model HR2410/HR2420,
they feature efficient built-in Dust Extraction System,
which is especially convenient in overhead applications.
Model HR2431 is the "D"-handle version of HR2430.
Plastic carrying case ......... 1 pc.
Grease for bit .................... 1 pack.
Cap .................................. 1 pc.
W
W
L
L
H
H
CT
CT
HR2431
Dimensions : mm ( " )
Model No. HR2430 HR2431
Length (L)
Width (W)
Height (H)
Center Height(CH)
416 (16-3/8)
70 (2-3/4)
197 (7-3/4)
34 (1-5/16)
477 (18-3/4)
156 (6-1/8)
70 (2-3/4)
34 (1-5/16)
7.5(only HR2430)
6.8(only HR2430)
3.2
50 / 60
50 / 60
50 / 60
50 / 60
710
710
710
710 200
150
150
150
600
550
550
550
HR2430
No load speed : (min -1= rpm)
Blows per min. : (min -1= bpm)
Bit type SDS-plus 10mm (3/8") in dia.
Drilling
capacity : mm ( " )
in Steel
in Wood
in Concrete
Reversible switch
0 - 1,050
0 - 4,900
6.2
13 (1/2)
24 (15/16)
32 (1-1/4)
HR2430 for Canada : 25 (1)
HR2431 for U.S.A. : 25 (1)
HR2430 : 2.6 (5.7) HR2431: 2.8 (6.2)
Net weight : Kg ( lbs )
Cord length : m ( ft ) 2.5 (8.2)
T.C.T. drill bit 4.0 - 24 mm (5/32" - 15/16")
Drill chuck assembly
Chuck key S13
Anchor setting tool
Anchor setting rod No.2, No.2.5, No.3, No.4
Grease vessel
Blow out bulb
Depth gauge
Cuff 19-25
Available
Dust extraction fixture....... 1 pc.
Hose .................... 1 pc.
Dust bag ........................... 1 pc.
Durable Hose
Built-in Self Dust Extraction System
provides dust-free operation.
Especially convenient in overhead applications.
Dangling-free hose
is positioned parallel with
motor housing for less chance
of getting caught or damaged.
Never hangs loosely
even in overhead applications.
And durable.
Durable Dust Bag with Frame
Fastest drilling speed in its class
Numbers in chart below are relative values when setting HR2430
and HR2431's capacity as 100.
Testing bit : 12.5mm in diameter
MAKITA HR2430
Competitor A Mod. A
Competitor B Mod. B
Competitor C Mod. C
100
60
80
80
Cuff 19-25 (optional accessory)
for connection with vacuum cleaner.
HR2430
HR2431
Features and benefits
D-type handle
Pistol-type handle
COMPARISON CHART
Makita
Model No.
(1) Specifications
(2) Drilling Speed
HR2430
One-action bit change-over
24 [15/16"]
Continuous Rating Input (W)
Blows per minute (min-1)
Estimate
Mode Change
Center Height (mm)
Carrying
case
No load speed (min-1, rpm)
Material
can put the tool
with dust
extraction system
Energy of
blow (J)
*Net
weight (kg)
Catalogue
710
1-1,050
Yes
Standard Equipment
*Net weight does not include Dust extraction fixture, Hose, Dust bag and Side grip.
620
750
0-980
0-4,900
0-800
0-4,000
Plastics
Dimensions
2.6
(5.7lbs)
0-4,550
Capacity Concrete (mm)
Catalogue
Actual
HR2431
2.0
2.0
2
34 [1-5/16"]
Yes
2.66
(5.87lbs)
2.8
(6.2lbs)
2.8
(6.2lbs)
Makita
HR2410
Model A
Makita
HR2430/HR2431 Model B
Makita
Competitor A
Competitor B
HR2410
Model A
24 [15/16"] 24 [15/16"] 17.5 [11/16"] 22 [7/8"] 24 [15/16"]
500 500 680
1-1,050 1-1,100 1-1,050
0-4,900
0-3,900
0-4,400
2.0
2.0
2.0
2.0
2.0
2.0
1.8
2.0
1.8
2.0
2
2
2
2
3
37 [1-7/16"] 52 [2-1/16"] 30 [1-3/16"] 27 [1-1/16"] 30 [1-3/16"]
Yes
Yes
Yes No No
Plastics Plastics Plastics
Steel
Steel
Yes Yes
No No
416
197
70
477
156
70
185
220 192 208 197
3.3
(7.3lbs)
3.3
(7.3lbs)
2.69
(5.93lbs)
2.6
(5.9lbs)
2.6
(5.9lbs)
2.58
(5.85lbs)
3.6
(7.9lbs)
4.1
(9.0lbs)
2.3
(5.1lbs)
2.4
(5.29lbs)
Dust extraction
fixture
Dust bag
Cap
Bit grease
Carrying case
(plastic)
Depth gauge
Carrying case
(plastic)
Dust extraction
fixture
Dust bag(cloth)
Cap
Dust extraction
fixture
Dust bag(cloth)
Cap
Dust extraction
fixture
Dust container
Cap
Depth gauge
Grease
Suction head
Dust seal
Dust extraction
fixture
Dust bag(felt)
Dust bag(paper)
Cap
Bit grease
Paper bag
adapter
24mm(15/16") class 22mm(7/8") or under
Fast
Slow
120
100
80
60
40
20
0
Tested with Tungusten-carbide Tipped Bits ø8.0, ø10.0 and ø12.5mm and without using extension cord.
And we had the same result on each bit as illustrated below.
Numbers in chart below are relative values when setting HR2430's speed as 100.
100
80 80
100
60 60
L mm
H mm
W mm
410
116
374
76
340
70
388
78
371
70
Competitor
A
Competitor
C
Competitor
B
Model C Model B-2
Model B-2
Competitor B
Model C
Competitor C
Competitor
B
Model B
COMPARISON CHART
(4) Noise
Tested under loaded conditions in "drill with hammering" mode.
Measured and evaluated in conformity with CE Regulations.
Tested under loaded conditions in "drill with hammering" mode.
Measured and evaluated in conformity with CE Regulations.
(m/s2)
Makita
HR2430/HR2431 Model B
Makita
Competitor A HR2410
Model A Model B-2
24mm(15/16") class 22mm(7/8") or under
6
8
10
12
14
4
2
0
Makita
HR2410
9.3 10.6
8.8
10.1
6.8
11.8
89 89
94 93
84
91
Makita
HR2430/HR2431
24mm(15/16") class 22mm(7/8") or under
80
85
90
95
75
(dB)
(3) Vibration
Competitor B Competitor BCompetitor C
Model C
Model B
Competitor B Competitor A
Model A
Competitor C
Model C Model B-2
Competitor B
Repair
<1> Removing chuck section
1) Pull down chuck cover and remove cap 31. And then, remove chuck cover and compression spring 38
as illustrated in Fig.1.
Cap 31
Chuck cover
Compression
spring 38
Spring guide
Tool holder
Fig.1
Ring spring 17
Spring guide
Ring spring 30.5
Compression
spring 35
Leaf spring 26
Chuck ring
Guide washer
Tool holder
Pin 8
Steel ball 7.0
2) Remove ring spring 17. (See Fig.2.)
3) Remove ring spring 30.5 from chuck ring, and then, remove spring guide and compression spring 35.
(See Fig.2)
4) Take off leaf spring 26. And then, remove pin 8 from chuck ring. (See Fig.2)
Leaf spring 26 can be removed easily by expanding it with retaining ring plier for shaft .
5) Remove chuck ring , guide washer and steel ball 7.0 from tool holder. (See Fig.2)
<2> Removing gear housing section
Loosen pan head screw M4. But stop to loosen, when the screw
comes to the position as illustrated in Fig.3. Adjust change lever as illustrated
in Fig.3A and pull out it from gear housing.
Fig.2
Pan head screw M4
Fig.3
Approx.
4 - 5mm
Position of change lever
when removing.
Fig.3A
Repair
Remove tool holder with arbor press as illustrated in Fig.4.
Tool holder
Fig.4
<3> Removing impact bolt
1. Push impact bolt ahead with screwdriver
as illustrated in Fig.5.
Fig.5
Impact bolt
Steel ball 5.6
Fig.5A
Fig.5B
Fig.5C
4. Remove impact bolt by pushing it with
screwdriver as illustrated in Fig.5C.
3. Take off O ring 11 with a bodkin as illustrated in
Fig.5B.
2. Take off steel ball 5.6 by striking stool holder
with plastic hammer slightly as illustrated in
Fig.5A
O ring 11
Repair
<4> Removing crank section
A. Removing piston cylinder
Shift piston cylinder to tool holder side by
turning crank shaft as illustrated in Fig. 6.
Take off pin 6 with screwdriver from
piston cylinder. Pin 6
Connecting rod
Crank shaft
Crank housing
complete
Piston cylinder
Tool holder side
Fig. 6
Inner housing
complete side
B. Removing connecting rod
Remove inner housing complete
from crank housing complete by
taking off pan head screw M4x50 (3 pcs.).
Pan head screw M4x50 (3 pcs.)
Connecting rod
Crank housing complete
Crank shaft
Inner housing complete
Crank shaft
Connecting rod
Crank housing complete
Inner housing
complete side
Tool holder side
Bring connecting rod to the inner housing
complete side by turning crank shaft as
illustrated in Fig. 6B.
Fig. 6A
Fig. 6B
Inner housing
complete side
Tool holder side
Hold the inner housing complete
side of connecting rod. And take
off connecting rod by lifting
its tool holder side as illustrated
in Fig.6C.
Fig. 6C
Repair
C. Removing helical gear 31, straight bevel gear 14 and clutch cam
Take off pan head screw M4x16 ( 2 pcs.) from
crank housing complete. And then, remove gear
cover and the unit of spur gear 10 as illustrated
in Fig.6D.
Remove helical gear 31 by pressing it with
arbor press.
And then, the spare parts on spur gear 10
can be removed as illustrated in Fig.6E.
( It is recommended to use round bar for
arbor No.1R235 6mm in dia.,
when removing with arbor press.)
Crank housing
complete
Spur gear 10Spur gear 10
Spur gear 10
Straight bevel gear 14
Clutch cam
Helical gear 31
Gear cover
Pan head screw M4x16
( 2 pcs.)
Unit of
spur gear 10
Fig.6D
Crank shaft
Press spur gear 10
with arbor press.
Flat washer 12
Compression spring 12
Clutch cam
Straight bevel gear 14
Flat washer 8
Compression spring 8
Helical gear 31
Fig.6E
D. Removing crank shaft
Set crank housing complete on No.1R215: block A
for crank housing and set No.1R234:round bar for
arbor 5mm in dia. on crank shaft.
Remove crank shaft by pressing the round bar
for arbor with arbor press.
< Note > No.1R215 block A has to be set,
paying attention to the position of its
wide surface as illustrated in Fig.6F.
28mm
45mm
No.1R215 Block A
for crank housing
Wide surface
Narrow surface
Wide surface
Narrow
surface
Press with arbor press.
1R234
Round bar for arbor
1R234 Round bar for arbor
D = 5mm
D
100mm
Crank shaft Crank housing
complete
Straight bevel gear 12
Inner housing
complete side
Tool holder side
Fig.6F
Repair
<5> Removing armature section
1) Remove brush holder from motor housing
after taking off handle cover as illustrated in Fig 7.
2) Remove fan housing from motor housing as illustrated in Fig 7.
3) Remove armature assembly together with dust cover and fan 56 as illustrated in Fig 7A.
Handle cover
Fan housing
Brush holder
Dust cover
Motor housing
Fig. 7
Fan 56 Dust cover Armature assembly
Fig. 7A
Dust guard
Ball bearing
609LLU
4) Remove dust guard and ball bearing 609LLU from armature assembly. And then, remove retaining ring S-10
as illustrated in Fig 7B.
Bearing 609LLU
Dust guard
Retaining ring S-10
Armature assembly
Fig. 7B
1R258 V Block
5) Set armature unit ( fan 56, dust cover and fan 60 ) on the 2 V-blocks.
And remove fan 56 (aluminum made) and dust cover
by pressing armature shaft. Then armature can be separated
together with ball bearing 6000LLU,
flat washer 8 and fan 60, from
fan 56 and dust cover.
Press the armature shaft
after setting on the 2 V-blocks.
Fan 56
Dust cover
Armature
Fan 60
Fan 56
Dust cover
Fig. 8
Repair
1R022 Bearing extractor plate
Fan 60
Ball bearing 6000LLU
Flat washer 10
6) Hold fan 60 with No.1R022 bearing extractor plate, and
remove ball bearing 6000LLU, fan 60 and flat washer 10
by pressing armature shaft slowly as illustrated in Fig.9.
Armature
Armature shaft
<6> Assembling armature
(1) Press fan 60, ball bearing 6000LLU and flat washer 10
all together on armature shaft as illustrated in Fig.10.
Not press them individually on armature shaft.
Fig.9
In stead of individually,
they have to be pressed
all together.
Ball bearing 6000LLU Fan 60Fan 60
Flat washer 10
(2) Press dust cover. And then, press flat washer 10 as illustrated in Fig.11.
Apply MAKITA grease N No.2 in advance approx. by 1g. on
the flat washer's surface which contacts with ball bearing 6000LLU.
Apply MAKITA grease N.No.2
approx. by 1g. on this side.
Ball bearing 6000LLU
Flat washer 10
Dust cover
Flat washer 10
Armature
Fig.10
Fig.11
Fan 56
Dust cover
Fan 60
(3) Press fan 56 as illustrated in Fig.12.
Fig.12