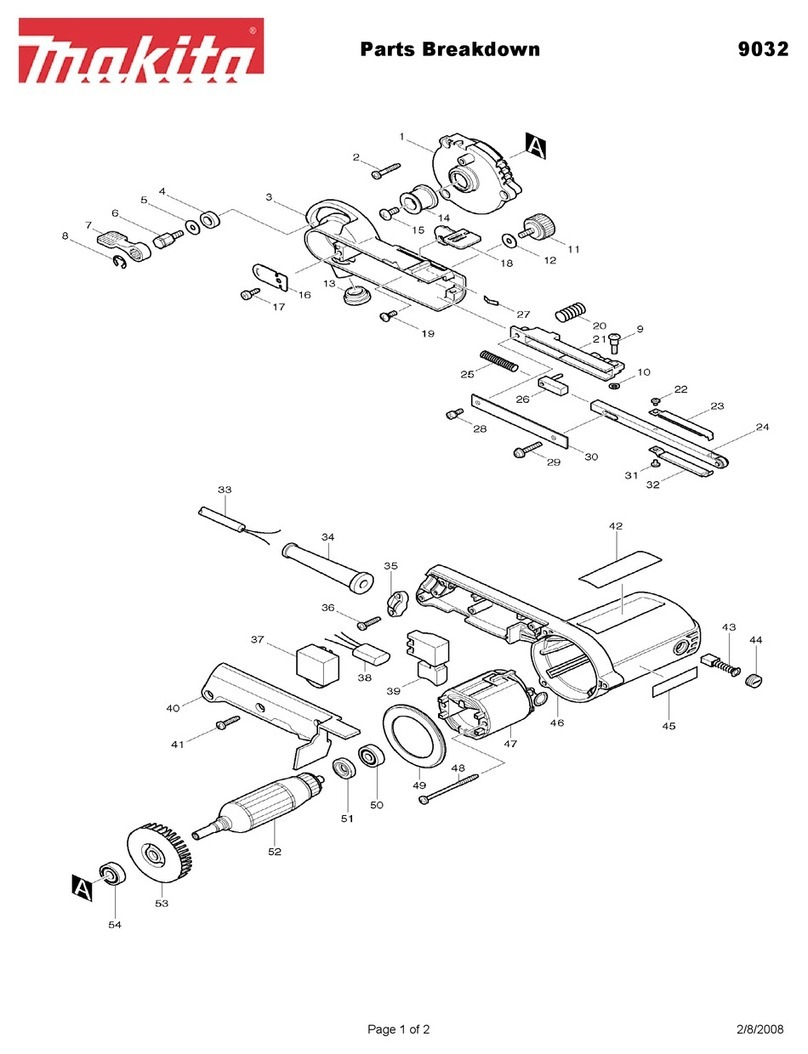
Makita DSL800 User manual

DSL800
EN Cordless Drywall Sander INSTRUCTION MANUAL 9
SL Brezžični brusilnik za mavčne
plošče NAVODILA ZA UPORABO 19
SQ Smerilues me bateri për
pllakë gipsi MANUALI I PËRDORIMIT 29
BG
Акумулаторна шлайфмашина
за гипсокартон
РЪКОВОДСТВО ЗА
ЕКСПЛОАТАЦИЯ 40
HR Bežična brusilica za gips-
kartonsku ploču PRIRUČNIK S UPUTAMA 52
МК Безжична шмиргла за
гипс-картон УПАТСТВО ЗА УПОТРЕБА 62
SR Бежична глачалица за
гипсане плоче УПУТСТВО ЗА УПОТРЕБУ 74
RO Mașină de șlefuit pereți de
rigips cu acumulator MANUAL DE INSTRUCŢIUNI 85
UK Акумуляторна шліфувальна
машина ІНСТРУКЦІЯ З
ЕКСПЛУАТАЦІЇ 96
RU Аккумуляторная
шлифовальная машина РУКОВОДСТВО ПО
ЭКСПЛУАТАЦИИ 108

12
3
Fig.1
1
2
Fig.2
1
AB
Fig.3
1
2
3
Fig.4
1
Fig.5
1
Fig.6
Fig.7
1
Fig.8
2

1
2
Fig.9
1
2
Fig.10
21
Fig.11
1
2
Fig.12
1
2
Fig.13
1
Fig.14
3

1
2
3
Fig.15
1 2
3
Fig.16
1
2
3
4
Fig.17
Fig.18
4

1
Fig.19
1
2
Fig.20
12
Fig.21
Fig.22
Fig.23
Fig.24
5

1
Fig.25
1
2
3
4
Fig.26
1
2
3
Fig.27
1
Fig.28
12
21
Fig.29
Fig.30
6

1
Fig.31
21
Fig.32
1
Fig.33
1
Fig.34
12
21
Fig.35
12
Fig.36
7

13
2
Fig.37
8

9ENGLISH
ENGLISH (Original instructions)
SPECIFICATIONS
Model: DSL800
Paper size 225 mm
Pad diameter 210 mm
Rated speed (n) 1,000 - 1,800 min-1
Dimensions 1,100 mm - 1,520 mm x 259 mm x 273 mm
Rated voltage D.C. 18 V
Net weight 4.5 - 5.7 kg
• Duetoourcontinuingprogramofresearchanddevelopment,thespecicationshereinaresubjecttochange
without notice.
• Specicationsmaydifferfromcountrytocountry.
• Theweightmaydifferdependingontheattachment(s),includingthebatterycartridge.Thelightestandheavi-
estcombination,accordingtoEPTA-Procedure01/2014,areshowninthetable.
Applicable battery cartridge and charger
Batterycartridge BL1815N/BL1820/BL1820B/BL1830/BL1830B/BL1840/
BL1840B/BL1850/BL1850B/BL1860B
Charger DC18RC/DC18RD/DC18RE/DC18SD/DC18SE/DC18SF
• Someofthebatterycartridgesandchargerslistedabovemaynotbeavailabledependingonyourregionof
residence.
WARNING: Only use the battery cartridges and chargers listed above.Useofanyotherbatterycartridges
andchargersmaycauseinjuryand/orre.
Intended use
Thetoolisintendedforsandingdrywallorceiling.
Noise
ThetypicalA-weightednoiseleveldeterminedaccord-
ingtoEN62841-2-4:
Sound pressure level (LpA):75dB(A)
Uncertainty(K):3dB(A)
Thenoiselevelunderworkingmayexceed80dB(A).
NOTE:
Thedeclarednoiseemissionvalue(s)hasbeen
measured in accordance with a standard test method
andmaybeusedforcomparingonetoolwithanother.
NOTE:
Thedeclarednoiseemissionvalue(s)may
alsobeusedinapreliminaryassessmentofexposure.
WARNING: Wear ear protection.
WARNING: The noise emission during actual
use of the power tool can differ from the declared
value(s) depending on the ways in which the
tool is used especially what kind of workpiece is
processed.
WARNING: Be sure to identify safety mea-
sures to protect the operator that are based on an
estimation of exposure in the actual conditions of
use (taking account of all parts of the operating
cycle such as the times when the tool is switched
off and when it is running idle in addition to the
trigger time).
Vibration
Thevibrationtotalvalue(tri-axialvectorsum)deter-
minedaccordingtoEN62841-2-4:
Workmode:discsanding
Vibrationemission(ah, DS):2.5m/s2or less
Uncertainty(K):1.5m/s2
NOTE:Thedeclaredvibrationtotalvalue(s)hasbeen
measured in accordance with a standard test method
andmaybeusedforcomparingonetoolwithanother.
NOTE:Thedeclaredvibrationtotalvalue(s)mayalso
beusedinapreliminaryassessmentofexposure.
WARNING:
The vibration emission during actual
use of the power tool can differ from the declared val-
ue(s) depending on the ways in which the tool is used
especially what kind of workpiece is processed.
WARNING: Be sure to identify safety mea-
sures to protect the operator that are based on an
estimation of exposure in the actual conditions of
use (taking account of all parts of the operating
cycle such as the times when the tool is switched
off and when it is running idle in addition to the
trigger time).
EC Declaration of Conformity
For European countries only
TheECdeclarationofconformityisincludedasAnnexA
to this instruction manual.

10 ENGLISH
SAFETY WARNINGS
General power tool safety warnings
WARNING: Read all safety warnings, instruc-
tions, illustrations and specications provided
with this power tool.Failuretofollowallinstructions
listedbelowmayresultinelectricshock,reand/or
seriousinjury.
Save all warnings and instruc-
tions for future reference.
Theterm"powertool"inthewarningsreferstoyour
mains-operated(corded)powertoolorbattery-operated
(cordless) power tool.
Cordless drywall sander safety warnings
Safety Warnings Common for Sanding Operations:
1.
This power tool is intended to function as a sander.
Read all safety warnings, instructions, illustrations
and specications provided with this power tool.
Failuretofollowallinstructionslistedbelowmayresult
inelectricshock,reand/orseriousinjury.
2.
Operations such as grinding, wire brushing,
polishing or cutting-off are not recommended
to be performed with this power tool. Operations
forwhichthepowertoolwasnotdesignedmay
createahazardandcausepersonalinjury.
3.
Do not use accessories which are not specically
designed and recommended by the tool manufac-
turer.Justbecausetheaccessorycanbeattachedto
yourpowertool,itdoesnotassuresafeoperation.
4. The rated speed of the accessory must be at
least equal to the maximum speed marked on
the power tool.Accessoriesrunningfasterthan
theirratedspeedcanbreakandyapart.
5. The outside diameter and the thickness of your
accessory must be within the capacity rating
of your power tool.Incorrectlysizedaccessories
cannotbeadequatelyguardedorcontrolled.
6.
Do not use a damaged accessory. Before each
use inspect the accessory such as pad for cracks,
tear or excess wear. If power tool or accessory is
dropped, inspect for damage or install an undam-
aged accessory. After inspecting and installing
an accessory, position yourself and bystanders
away from the plane of the rotating accessory and
run the power tool at maximum no-load speed
for one minute.Damagedaccessorieswillnormally
breakapartduringthistesttime.
7. Wear personal protective equipment.
Depending on application, use face shield,
safety goggles or safety glasses. As appro-
priate, wear dust mask, hearing protectors,
gloves and workshop apron capable of stop-
ping small abrasive or workpiece fragments.
Theeyeprotectionmustbecapableofstopping
yingdebrisgeneratedbyvariousoperations.
Thedustmaskorrespiratormustbecapableof
ltratingparticlesgeneratedbyyouroperation.
Prolongedexposuretohighintensitynoisemay
cause hearing loss.
8.
Keep bystanders a safe distance away from work
area. Anyone entering the work area must wear
personal protective equipment.Fragmentsof
workpieceorofabrokenaccessorymayyawayand
causeinjurybeyondimmediateareaofoperation.
9.
Position the cord clear of the spinning accessory. If
youlosecontrol,thecordmaybecutorsnaggedandyour
handorarmmaybepulledintothespinningaccessory.
10. Never lay the power tool down until the acces-
sory has come to a complete stop. The spinning
accessorymaygrabthesurfaceandpullthe
powertooloutofyourcontrol.
11. Do not run the power tool while carrying it at
your side.Accidentalcontactwiththespinning
accessorycouldsnagyourclothing,pullingthe
accessoryintoyourbody.
12. Do not operate the power tool near ammable
materials. Sparks could ignite these materials.
13. Do not use accessories that require liquid
coolants.Usingwaterorotherliquidcoolants
mayresultinelectrocutionorshock.
Kickback and Related Warnings
Kickbackisasuddenreactiontoapinchedorsnaggedrotat-
ingpadoranyotheraccessory.Pinchingorsnaggingcauses
rapidstallingoftherotatingaccessorywhichinturncauses
theuncontrolledpowertooltobeforcedinthedirectionoppo-
siteoftheaccessory’srotationatthepointofthebinding.
Forexample,ifapadissnaggedorpinchedbythe
workpiece, the edge of the pad that is entering into the
pinch point can dig into the surface of the material caus-
ingthepadtoclimboutorkickout.Thepadmayeither
jumptowardorawayfromtheoperator,dependingon
directionofthepad’smovementatthepointofpinching.
Padmayalsobreakundertheseconditions.
Kickbackistheresultofpowertoolmisuseand/or
incorrectoperatingproceduresorconditionsandcanbe
avoidedbytakingproperprecautionsasgivenbelow.
1. Maintain a rm grip on the power tool and
position your body and arm to allow you to
resist kickback forces. Always use auxiliary
handle, if provided, for maximum control over
kickback or torque reaction during start-up.
Theoperatorcancontroltorquereactionsorkick-
backforces,ifproperprecautionsaretaken.
2. Never place your hand near the rotating acces-
sory.Accessorymaykickbackoveryourhand.
3. Do not position your body in the area where
power tool will move if kickback occurs.
Kickbackwillpropelthetoolindirectionopposite
tothewheel’smovementatthepointofsnagging.
4. Use special care when working corners, sharp
edges etc. Avoid bouncing and snagging the
accessory.Corners,sharpedgesorbouncing
haveatendencytosnagtherotatingaccessory
andcauselossofcontrolorkickback.
5. Do not attach a saw chain woodcarving blade
or toothed saw blade.Suchbladescreatefre-
quentkickbackandlossofcontrol.
Safety Warnings Specic for Sanding Operations:
1. Do not use excessively oversized sanding
disc paper. Follow manufacturers recommen-
dations, when selecting sanding paper. Larger
sandingpaperextendingbeyondthesanding
padpresentsalacerationhazardandmaycause
snagging,tearingofthediscorkickback.
11 ENGLISH
Additional Safety Warnings:
1. Do not leave the tool running. Operate the tool
only when hand-held.
2. Check that the workpiece is properly
supported.
3. Pay attention that the pad continues to rotate
after the tool is switched off.
4. If working place is extremely hot and humid,
or badly polluted by conductive dust, use a
short-circuit breaker (30 mA) to assure opera-
tor safety.
5. Do not use the tool on any materials contain-
ing asbestos.
6. Do not use cloth work gloves during operation.
Fibersfromclothglovesmayenterthetool,which
causestoolbreakage.
7. Always work in well ventilated area.
8. When placing the tool, place it on a at and
stable surface.
9. When operating the tool, connect the tool to a
vacuum cleaner as much as possible to keep
the working area clean and prevent the oper-
ator from inhaling particles generated by the
operation.
SAVE THESE INSTRUCTIONS.
WARNING: DO NOT let comfort or familiarity
with product (gained from repeated use) replace
strict adherence to safety rules for the subject
product. MISUSE or failure to follow the safety
rules stated in this instruction manual may cause
serious personal injury.
Important safety instructions for
battery cartridge
1. Before using battery cartridge, read all instruc-
tions and cautionary markings on (1) battery
charger, (2) battery, and (3) product using
battery.
2. Do not disassemble battery cartridge.
3. If operating time has become excessively
shorter, stop operating immediately. It may
result in a risk of overheating, possible burns
and even an explosion.
4. If electrolyte gets into your eyes, rinse them
out with clear water and seek medical atten-
tion right away. It may result in loss of your
eyesight.
5. Do not short the battery cartridge:
(1) Do not touch the terminals with any con-
ductive material.
(2) Avoid storing battery cartridge in a con-
tainer with other metal objects such as
nails, coins, etc.
(3) Do not expose battery cartridge to water
or rain.
A battery short can cause a large current
ow, overheating, possible burns and even a
breakdown.
6. Do not store the tool and battery cartridge in
locations where the temperature may reach or
exceed 50 °C (122 °F).
7. Do not incinerate the battery cartridge even if
it is severely damaged or is completely worn
out. The battery cartridge can explode in a re.
8. Be careful not to drop or strike battery.
9. Do not use a damaged battery.
10.
The contained lithium-ion batteries are subject to
the Dangerous Goods Legislation requirements.
Forcommercialtransportse.g.bythirdparties,
forwardingagents,specialrequirementonpack-
agingandlabelingmustbeobserved.
Forpreparationoftheitembeingshipped,consult-
inganexpertforhazardousmaterialisrequired.
Pleasealsoobservepossiblymoredetailed
national regulations.
Tape or mask off open contacts and pack up the
batteryinsuchamannerthatitcannotmove
around in the packaging.
11. Follow your local regulations relating to dis-
posal of battery.
12. Use the batteries only with the products
specied by Makita.Installingthebatteriesto
non-compliantproductsmayresultinare,exces-
siveheat,explosion,orleakofelectrolyte.
SAVE THESE INSTRUCTIONS.
CAUTION: Only use genuine Makita batteries.
Useofnon-genuineMakitabatteries,orbatteriesthat
havebeenaltered,mayresultinthebatterybursting
causingres,personalinjuryanddamage.Itwill
alsovoidtheMakitawarrantyfortheMakitatooland
charger.
Tips for maintaining maximum
battery life
1. Charge the battery cartridge before completely
discharged. Always stop tool operation and
charge the battery cartridge when you notice
less tool power.
2. Never recharge a fully charged battery car-
tridge. Overcharging shortens the battery
service life.
3.
Charge the battery cartridge with room tempera-
ture at 10 °C - 40 °C (50 °F - 104 °F). Let a hot
battery cartridge cool down before charging it.
4. Charge the battery cartridge if you do not use
it for a long period (more than six months).
Important safety instructions for
wireless unit
1. Do not disassemble or tamper with the wire-
less unit.
2. Keep the wireless unit away from young chil-
dren. If accidentally swallowed, seek medical
attention immediately.
3. Use the wireless unit only with Makita tools.
4. Do not expose the wireless unit to rain or wet
conditions.
5. Do not use the wireless unit in places where
the temperature exceeds 50°C (122°F).
6. Do not operate the wireless unit in places
where medical instruments, such as heart
pace makers are nearby.

12 ENGLISH
7. Do not operate the wireless unit in places
where automated devices are nearby. If oper-
ated,automateddevicesmaydevelopmalfunction
or error.
8. Do not operate the wireless unit in places
under high temperature or places where
static electricity or electrical noise could be
generated.
9. The wireless unit can produce electromagnetic
elds (EMF) but they are not harmful to the
user.
10. The wireless unit is an accurate instrument. Be
careful not to drop or strike the wireless unit.
11. Avoid touching the terminal of the wireless
unit with bare hands or metallic materials.
12. Always remove the battery on the product
when installing the wireless unit into it.
13. When opening the lid of the slot, avoid the
place where dust and water may come into the
slot. Always keep the inlet of the slot clean.
14. Always insert the wireless unit in the correct
direction.
15. Do not press the wireless activation button
on the wireless unit too hard and/or press the
button with an object with a sharp edge.
16. Always close the lid of the slot when
operating.
17. Do not remove the wireless unit from the slot
while the power is being supplied to the tool.
Doingsomaycauseamalfunctionofthewireless
unit.
18. Do not remove the sticker on the wireless unit.
19. Do not put any sticker on the wireless unit.
20. Do not leave the wireless unit in a place where
static electricity or electrical noise could be
generated.
21. Do not leave the wireless unit in a place sub-
ject to high heat, such as a car sitting in the
sun.
22. Do not leave the wireless unit in a dusty or
powdery place or in a place corrosive gas
could be generated.
23. Sudden change of the temperature may bedew
the wireless unit. Do not use the wireless unit
until the dew is completely dried.
24. When cleaning the wireless unit, gently wipe
with a dry soft cloth. Do not use benzine, thin-
ner, conductive grease or the like.
25. When storing the wireless unit, keep it in the
supplied case or a static-free container.
26. Do not insert any devices other than Makita
wireless unit into the slot on the tool.
27. Do not use the tool with the lid of the slot dam-
aged.Water,dust,anddirtcomeintotheslotmay
cause malfunction.
28. Do not pull and/or twist the lid of the slot more
than necessary. Restore the lid if it comes off
from the tool.
29. Replace the lid of the slot if it is lost or
damaged.
SAVE THESE INSTRUCTIONS.
FUNCTIONAL DESCRIPTION
CAUTION: Always be sure that the tool is
switched off and the battery cartridge is removed
before adjusting or checking function on the tool.
Installing or removing battery cartridge
CAUTION: Always switch off the tool before
installing or removing of the battery cartridge.
CAUTION: Hold the tool and the battery car-
tridge rmly when installing or removing battery
cartridge.Failuretoholdthetoolandthebattery
cartridgermlymaycausethemtoslipoffyourhands
andresultindamagetothetoolandbatterycartridge
andapersonalinjury.
►Fig.1: 1. Red indicator 2. Button 3.Batterycartridge
Toremovethebatterycartridge,slideitfromthetool
whileslidingthebuttononthefrontofthecartridge.
Toinstallthebatterycartridge,alignthetongueonthe
batterycartridgewiththegrooveinthehousingandslip
itintoplace.Insertitallthewayuntilitlocksinplace
withalittleclick.Ifyoucanseetheredindicatoronthe
uppersideofthebutton,itisnotlockedcompletely.
CAUTION: Always install the battery cartridge
fully until the red indicator cannot be seen. If not,
itmayaccidentallyfalloutofthetool,causinginjuryto
youorsomeonearoundyou.
CAUTION: Do not install the battery cartridge
forcibly.Ifthecartridgedoesnotslideineasily,itis
notbeinginsertedcorrectly.
Indicating the remaining battery capacity
Only for battery cartridges with the indicator
►Fig.2: 1. Indicator lamps 2.Checkbutton
Pressthecheckbuttononthebatterycartridgetoindi-
catetheremainingbatterycapacity.Theindicatorlamps
light up for a few seconds.
Indicator lamps Remaining
capacity
Lighted Off Blinking
75% to 100%
50% to 75%
25% to 50%
0% to 25%
Charge the
battery.
Thebattery
mayhave
malfunctioned.

13 ENGLISH
NOTE: Depending on the conditions of use and the
ambienttemperature,theindicationmaydifferslightly
fromtheactualcapacity.
Tool / battery protection system
Thetoolisequippedwithatool/batteryprotectionsys-
tem.Thissystemautomaticallycutsoffpowertothe
motortoextendtoolandbatterylife.Thetoolwillauto-
maticallystopduringoperationifthetoolorbatteryis
placedunderoneofthefollowingconditions:
Overload protection
Whenthetoolorbatteryisoperatedinamannerthat
causesittodrawanabnormallyhighcurrent,thetool
automaticallystopsandthelampblinks.Inthissit-
uation, turn the tool off and stop the application that
causedthetooltobecomeoverloaded.Thenturnthe
tool on to restart.
Overheat protection
Whenthetoolorbatteryisoverheated,thetoolstops
automaticallyandthelamplightsup.Inthiscase,letthe
toolandbatterycoolbeforeturningthetoolonagain.
Overdischarge protection
Whenthebatterycapacityisnotenough,thetoolstops
automatically.Inthiscase,removethebatteryfromthe
toolandchargethebattery.
Switch action
CAUTION: Before installing the battery car-
tridge into the tool, always check to see that the
switch trigger actuates properly and returns to
the "OFF" position when released.
CAUTION: Switch can be locked in "ON" posi-
tion for ease of operator comfort during extended
use. Apply caution when locking tool in "ON"
position and maintain rm grasp on tool.
CAUTION: Do not install the battery cartridge
with the lock button engaged.
CAUTION: When not operating the tool,
depress the trigger-lock button from side to
lock the switch trigger in the OFF position.
►Fig.3: 1.Trigger-lockbutton
►Fig.4: 1. Switch trigger 2.Lockbutton3. Trigger-
lockbutton
Topreventtheswitchtriggerfromaccidentallypulled,
thetrigger-lockbuttonisprovided.Tostartthetool,
depressthetrigger-lockbuttonfromA( ) side and pull
the switch trigger. Release the switch trigger to stop.
Afteruse,depressthetrigger-lockbuttonfromB( )
side.
Forcontinuousoperation,depressthelockbuttonwhile
pulling the switch trigger, and then release the switch
trigger.Tostopthetool,pulltheswitchtriggerfully,then
release it.
Speed adjusting dial
►Fig.5: 1.Speedadjustingdial
Therotationspeedofthetoolcanbechangedbyturn-
ingthespeedadjustingdial.Thetablebelowshows
thenumberonthedialandthecorrespondingrotation
speed.
Number Speed
11,000 min-1
21,200 min-1
31,400 min-1
41,600min-1
51,800 min-1
NOTICE: When changing the speed dial from "5"
to "1", turn the dial counterclockwise. Do not turn
the dial clockwise forcibly.
Overload and overheat indicator
lamp
►Fig.6: 1. Indicator lamp
If the tool is operated with excessive load, the tool stops
automaticallyandtheindicatorlampblinksinred.Inthis
case, reduce the load on the tool.
Ifthetoolisoverheated,thetoolstopsautomatically
and the indicator lamp lights up in red. In this case, let
thetoolcooldownbeforeturningthetoolonagain.
Electronic function
Thetoolsequippedwithelectronicfunctionareeasyto
operatebecauseofthefollowingfeatures.
Constant speed control
Possibletogetnenish,becausetherotatingspeedis
kept constant even under the loaded condition.
Soft start feature
Softstartbecauseofsuppressedstartingshock.
ASSEMBLY
CAUTION: Always be sure that the tool is
switched off and the battery cartridge is removed
before carrying out any work on the tool.
Assembling the tool bag
1. Takeoutthetoolandthetoolbagfromthebox.
►Fig.7
2. Unfoldthetoolbag.
►Fig.8: 1.Toolbag
3. Inserttheinnertrayintothetoolbag,andthenx
theinnertraywithhookandloopfastenerasshownin
thegure.
►Fig.9: 1. Hook and loop fastener 2.Innertray

14 ENGLISH
Installing the abrasive disc
►Fig.10: 1.Abrasivedisc2. Pad
Removeanydirtorforeignmatterfromthepad,and
thenattachtheabrasivedisctothepadwhilealigning
theholesintheabrasivediscwiththoseinthepad.
Adjusting the pipe length
CAUTION: When adjusting the pipe length,
hold the tool horizontally. Otherwise, the pipe
lengthmaychangeunintentionallyanditmaycause
aninjuryormalfunctionofthetool.
NOTICE: Do not extend the pipe beyond the
limit.Failuretodosomaycauseamalfunctionof
the tool.
►Fig.11: 1. Sleeve 2. Pipe
Toadjustthepipelength,loosenthesleeve,thenadjust
the length of the pipe, and then tighten the sleeve.
Installing or removing the dust
collection brush
Before sanding operation, install the dust collection
brushtothesandingheadasshowninthegure.
►Fig.12: 1.Dustcollectionbrush2. Sanding head
Youcanremovethedustcollectionbrushforoperation
alongtheedgeofwallorceiling.Theremovedbrush
canbeattachedtothesandingheadasshowninthe
gure.
►Fig.13: 1.Dustcollectionbrush2. Sanding head
Hex wrench storage
►Fig.14: 1. Hex wrench
When not in use, store the hex wrench as shown in the
guretokeepitfrombeinglost.
Installing or removing the pad
►Fig.15: 1. Hex wrench 2. Bolt 3. Pad
Toremovethepad,removetheabrasivediscfromthe
pad,andthenturntheboltcounterclockwisewithahex
wrench. To install the pad, perform the removal proce-
dure in reverse.
CAUTION: Make sure that the pad is secured
properly.Looseattachmentwillrunoutofbalance
andcauseanexcessivevibrationwhichmaycause
loss of control.
Connecting a vacuum cleaner
Optional accessory
Whenyouwishtoperformoperationcleanly,connecta
Makitavacuumcleanertoyourtool.Connectahoseof
the vacuum cleaner to the dust nozzle using the front
cuff 24.
►Fig.16: 1. Hose of the vacuum cleaner 2.Frontcuff
24 3. Dust nozzle
Installing or removing the extension handle
Optional accessory
To install the extension handle, attach the extension handle to the
toolandsecureitwiththeknobrmly.Besuretoinserttheend
of the tool into the holder of the extension handle. To remove the
extension handle, perform the installation procedure in reverse.
►Fig.17:
1.Extensionhandle2.Knob3. Holder 4.Endoftool
OPERATION
CAUTION: Only use Makita genuine pads for
sanding (optional accessories).
CAUTION:
Make sure the work material is secured
and stable. Falling object may cause personal injury.
CAUTION: Hold the tool rmly with one hand
on the switch handle and the other hand on the
front grip when operating the tool.
CAUTION:
Do not run the tool at high load over
an extended time period.Itmayresultintoolmalfunction
whichcauseselectricshock,reand/orseriousinjury.
CAUTION:
Be careful not to touch the rotating part.
NOTICE: Never force the tool. Excessivepressure
mayleadtodecreasedsandingefciency,damaged
pad, or shorten tool life.
NOTICE: Continuous operation at high speed
may damage work surface.
1.
Positionthetoollightlyagainsttheworksurface.Applylight
pressure enough to align the sanding head with the work surface.
2.
Applyadditionalpressuretoengagethepadonthe
work surface. Move the tool in an overlapping pattern in
constantmotiontosmooththedrywallcompound.
►Fig.18
Operating the tool with the
extension handle
Optional accessory
CAUTION:
Hold the tool rmly with one hand on the
switch handle and the other hand on the extension handle
when operating the tool with the extension handle.
1.
Wearthebeltfortheextensionhandleasshowninthegure.
►Fig.19: 1. Belt
2. Attachtheholdertothebelt.
►Fig.20: 1. Holder 2. Belt
3. Put the end of the extension handle into the holder
to support the tool.
►Fig.21: 1.Endofextensionhandle2. Holder
Operatethetoolinthesamewayasthetoolwithoutthe
extension handle.
►Fig.22
Youcanalsooperatethetoolwithoutusingthebeltand
theholderasshowninthegure.
►Fig.23

15 ENGLISH
WIRELESS ACTIVATION
FUNCTION
Optional accessory
What you can do with the wireless
activation function
Thewirelessactivationfunctionenablescleanandcom-
fortableoperation.Byconnectingasupportedvacuum
cleanertothetool,youcanrunthevacuumcleaner
automaticallyalongwiththeswitchoperationofthetool.
►Fig.24
To use the wireless activation function, prepare follow-
ingitems:
• Awirelessunit(optionalaccessory)
• Avacuumcleanerwhichsupportsthewireless
activation function
The overview of the wireless activation function
setting is as follows. Refer to each section for detail
procedures.
1. Installing the wireless unit
2. Tool registration for the vacuum cleaner
3. Starting the wireless activation function
Installing the wireless unit
Optional accessory
CAUTION: Place the tool on a at and stable
surface when installing the wireless unit.
NOTICE:
Clean the dust and dirt on the tool before
installing the wireless unit.Dustordirtmaycause
malfunction if it comes into the slot of the wireless unit.
NOTICE:
To prevent the malfunction caused by static,
touch a static discharging material, such as a metal part
of the tool, before picking up the wireless unit.
NOTICE:
When installing the wireless unit, always
be sure that the wireless unit is inserted in the cor-
rect direction and the lid is completely closed.
1. Openthelidonthetoolasshowninthegure.
►Fig.25: 1. Lid
2.
Insert the wireless unit to the slot and then close the lid.
Wheninsertingthewirelessunit,aligntheprojections
with the recessed portions on the slot.
►Fig.26: 1. Wireless unit 2.Projection3. Lid
4. Recessed portion
Whenremovingthewirelessunit,openthelidslowly.
Thehooksonthebackofthelidwillliftthewirelessunit
asyoupullupthelid.
►Fig.27: 1. Wireless unit 2. Hook 3. Lid
Afterremovingthewirelessunit,keepitinthesupplied
case or a static-free container.
NOTICE: Always use the hooks on the back of
the lid when removing the wireless unit. If the
hooks do not catch the wireless unit, close the lid
completelyandopenitslowlyagain.
Tool registration for the vacuum
cleaner
NOTE:AMakitavacuumcleanersupportingthe
wirelessactivationfunctionisrequiredforthetool
registration.
NOTE:Finishinstallingthewirelessunittothetool
beforestartingthetoolregistration.
NOTE: During the tool registration, do not pull the
switch trigger or turn on the power switch on the
vacuum cleaner.
NOTE: Refer to the instruction manual of the vacuum
cleaner, too.
Ifyouwishtoactivatethevacuumcleaneralongwith
theswitchoperationofthetool,nishthetoolregistra-
tionbeforehand.
1. Installthebatteriestothevacuumcleanerandthe
tool.
2. Setthestand-byswitchonthevacuumcleanerto
"AUTO".
►Fig.28: 1.Stand-byswitch
3. Pressthewirelessactivationbuttononthevac-
uum cleaner for 3 seconds until the wireless activation
lampblinksingreen.Andthenpressthewirelessacti-
vationbuttononthetoolinthesameway.
►Fig.29: 1.Wirelessactivationbutton2. Wireless
activation lamp
If the vacuum cleaner and the tool are linked success-
fully,thewirelessactivationlampswilllightupingreen
for2secondsandstartblinkinginblue.
NOTE:Thewirelessactivationlampsnishblinking
in green after 20 seconds elapsed. Press the wireless
activationbuttononthetoolwhilethewirelessacti-
vationlamponthecleanerisblinking.Ifthewireless
activationlampdoesnotblinkingreen,pushthewire-
lessactivationbuttonbrieyandholditdownagain.
NOTE: When performing two or more tool registra-
tionsforonevacuumcleaner,nishthetoolregistra-
tiononebyone.
Starting the wireless activation
function
NOTE:Finishthetoolregistrationforthevacuum
cleaner prior to the wireless activation.
NOTE: Refer to the instruction manual of the vacuum
cleaner, too.
Afterregisteringatooltothevacuumcleaner,the
vacuumcleanerwillautomaticallyrunsalongwiththe
switch operation of the tool.
1. Install the wireless unit to the tool.
2. Connect the hose of the vacuum cleaner with the
tool.
►Fig.30
3. Setthestand-byswitchonthevacuumcleanerto
"AUTO".
►Fig.31: 1.Stand-byswitch

16 ENGLISH
4. Pushthewirelessactivationbuttononthetool
briey.Thewirelessactivationlampwillblinkinblue.
►Fig.32: 1.Wirelessactivationbutton2. Wireless
activation lamp
5. Pull the switch trigger of the tool. Check if the
vacuumcleanerrunswhiletheswitchtriggerisbeing
pulled.
To stop the wireless activation of the vacuum cleaner,
pushthewirelessactivationbuttononthetool.
NOTE: The wireless activation lamp on the tool will
stopblinkinginbluewhenthereisnooperationfor
2hours.Inthiscase,setthestand-byswitchonthe
vacuumcleanerto"AUTO"andpushthewireless
activationbuttononthetoolagain.
NOTE:Thevacuumcleanerstarts/stopswithadelay.
There is a time lag when the vacuum cleaner detects
a switch operation of the tool.
NOTE: The transmission distance of the wireless unit
mayvarydependingonthelocationandsurrounding
circumstances.
NOTE: When two or more tools are registered to one
vacuumcleaner,thevacuumcleanermaystartrun-
ningevenifyoudon'tpulltheswitchtriggerbecause
another user is using the wireless activation function.
Description of the wireless activation lamp status
►Fig.33: 1. Wireless activation lamp
Thewirelessactivationlampshowsthestatusofthewirelessactivationfunction.Refertothetablebelowforthe
meaning of the lamp status.
Status Wireless activation lamp Description
Color
On
Blinking
Duration
Standby Blue 2 hours Thewirelessactivationofthevacuumcleanerisavailable.The
lampwillautomaticallyturnoffwhennooperationisperformed
for 2 hours.
When
the tool is
running.
Thewirelessactivationofthevacuumcleanerisavailableandthe
tool is running.
Tool
registration
Green 20 seconds Readyforthetoolregistration.Waitingfortheregistrationbythe
vacuum cleaner.
2 seconds Thetoolregistrationhasbeennished.Thewirelessactivation
lampwillstartblinkinginblue.
Cancelling
tool
registration
Red 20 seconds Readyforthecancellationofthetoolregistration.Waitingforthe
cancellationbythevacuumcleaner.
2 seconds Thecancellationofthetoolregistrationhasbeennished.The
wirelessactivationlampwillstartblinkinginblue.
Others Red 3 seconds The power is supplied to the wireless unit and the wireless activa-
tion function is starting up.
Off - - The wireless activation of the vacuum cleaner is stopped.
Cancelling tool registration for the
vacuum cleaner
Perform the following procedure when cancelling the
tool registration for the vacuum cleaner.
1. Installthebatteriestothevacuumcleanerandthe
tool.
2. Setthestand-byswitchonthevacuumcleanerto
"AUTO".
►Fig.34: 1.Stand-byswitch
3. Pressthewirelessactivationbuttononthevac-
uumcleanerfor6seconds.Thewirelessactivation
lampblinksingreenandthenbecomered.Afterthat,
pressthewirelessactivationbuttononthetoolinthe
sameway.
►Fig.35: 1.Wirelessactivationbutton2. Wireless
activation lamp
Ifthecancellationisperformedsuccessfully,thewire-
less activation lamps will light up in red for 2 seconds
andstartblinkinginblue.
NOTE:Thewirelessactivationlampsnishblinkingin
red after 20 seconds elapsed. Press the wireless acti-
vationbuttononthetoolwhilethewirelessactivation
lamponthecleanerisblinking.Ifthewirelessacti-
vationlampdoesnotblinkinred,pushthewireless
activationbuttonbrieyandholditdownagain.

17 ENGLISH
Troubleshooting for wireless activation function
Beforeaskingforrepairs,conductyourowninspectionrst.Ifyoundaproblemthatisnotexplainedinthemanual,
donotattempttodismantlethetool.Instead,askMakitaAuthorizedServiceCenters,alwaysusingMakitareplace-
ment parts for repairs.
State of abnormality Probable cause (malfunction) Remedy
The wireless activation lamp does
notlight/blink.
The wireless unit is not installed into the tool.
Thewirelessunitisimproperlyinstalled
into the tool.
Installthewirelessunitcorrectly.
Theterminalofthewirelessunitand/or
theslotisdirty.
Gentlywipeoffdustanddirtontheterminalofthe
wireless unit and clean the slot.
Thewirelessactivationbuttononthe
toolhasnotbeenpushed.
Pushthewirelessactivationbuttononthetool
briey.
Thestand-byswitchonthevacuum
cleanerisnotsetto"AUTO".
Setthestand-byswitchonthevacuumcleanerto
"AUTO".
Nopowersupply
Supplythepowertothetoolandthevacuumcleaner.
Cannotnishtoolregistration/can-
cellingtoolregistrationsuccessfully.
The wireless unit is not installed into the tool.
Thewirelessunitisimproperlyinstalled
into the tool.
Installthewirelessunitcorrectly.
Theterminalofthewirelessunitand/or
theslotisdirty.
Gentlywipeoffdustanddirtontheterminalofthe
wireless unit and clean the slot.
Thestand-byswitchonthevacuum
cleanerisnotsetto"AUTO".
Setthestand-byswitchonthevacuumcleanerto
"AUTO".
Nopowersupply
Supplythepowertothetoolandthevacuumcleaner.
Incorrect operation
Pushthewirelessactivationbuttonbrieyandperform
thetoolregistration/cancellationproceduresagain.
Thetoolandvacuumcleanerareaway
from each other (out of the transmission
range).
Get the tool and vacuum cleaner closer to each other.
Themaximumtransmissiondistanceisapproximately10
mhoweveritmayvaryaccordingtothecircumstances.
Beforenishingthetoolregistration/
cancellation;
- the switch trigger on the tool is pulled or;
-thepowerbuttononthevacuum
cleaner is turned on.
Pushthewirelessactivationbuttonbrieyand
performthetoolregistration/cancellationprocedures
again.
The tool registration procedures for the
toolorvacuumcleanerhavenotnished.
Performthetoolregistrationproceduresforboththe
tool and the vacuum cleaner at the same timing.
Radiodisturbancebyotherappliances
whichgeneratehigh-intensityradiowaves.
Keepthetoolandvacuumcleanerawayfromtheappli-
ancessuchasWi-Fidevicesandmicrowaveovens.
The vacuum cleaner does not run
along with the switch operation of
the tool.
The wireless unit is not installed into the tool.
Thewirelessunitisimproperlyinstalled
into the tool.
Installthewirelessunitcorrectly.
Theterminalofthewirelessunitand/or
theslotisdirty.
Gentlywipeoffdustanddirtontheterminalofthe
wireless unit and clean the slot.
Thewirelessactivationbuttononthe
toolhasnotbeenpushed.
Pushthewirelessactivationbuttonbrieyandmake
surethatthewirelessactivationlampisblinkinginblue.
Thestand-byswitchonthevacuum
cleanerisnotsetto"AUTO".
Setthestand-byswitchonthevacuumcleanerto
"AUTO".
More than 10 tools are registered to the
vacuum cleaner.
Perform the tool registration again.
If more than 10 tools are registered to the vacuum
cleaner,thetoolregisteredearliestwillbecancelled
automatically.
The vacuum cleaner erased all tool
registrations.
Perform the tool registration again.
Nopowersupply
Supplythepowertothetoolandthevacuumcleaner.
Thetoolandvacuumcleanerareaway
from each other (out of the transmission
range).
Get the tool and vacuum cleaner closer each other. The
maximumtransmissiondistanceisapproximately10m
howeveritmayvaryaccordingtothecircumstances.
Radiodisturbancebyotherappliances
whichgeneratehigh-intensityradio
waves.
Keepthetoolandvacuumcleanerawayfromthe
appliancessuchasWi-Fidevicesandmicrowave
ovens.
The vacuum cleaner runs while the
tool'sswitchtriggerisnotpulled.
Other users are using the wireless
activation of the vacuum cleaner with
their tools.
Turnoffthewirelessactivationbuttonoftheother
tools or cancel the tool registration of the other
tools.

18 ENGLISH
MAINTENANCE
CAUTION: Always be sure that the tool is
switched off and the battery cartridge is removed
before attempting to perform inspection or
maintenance.
NOTICE: Never use gasoline, benzine, thinner,
alcohol or the like. Discoloration, deformation or
cracks may result.
TomaintainproductSAFETYandRELIABILITY,
repairs,anyothermaintenanceoradjustmentshould
beperformedbyMakitaAuthorizedorFactoryService
Centers,alwaysusingMakitareplacementparts.
Storing the tool in the tool bag
Whenstoringthetoolinthetoolbag,xitwiththehook
andloopfastenersasshowninthegure.
►Fig.36: 1. Hook and loop fastener 2. Tool
When storing the tool and the extension handle in the
toolbag,xthemwiththehookandloopfastenersas
showninthegure.
►Fig.37: 1. Hook and loop fastener 2.Extension
handle 3. Tool
OPTIONAL
ACCESSORIES
CAUTION: These accessories or attachments
are recommended for use with your Makita tool
specied in this manual.Theuseofanyother
accessories or attachments might present a risk of
injurytopersons.Onlyuseaccessoryorattachment
for its stated purpose.
Ifyouneedanyassistanceformoredetailsregard-
ingtheseaccessories,askyourlocalMakitaService
Center.
• Abrasivedisc
• Pad
• Extensionhandle(withbeltandholder)
• Wireless unit
• Makitagenuinebatteryandcharger
NOTE:Someitemsinthelistmaybeincludedinthe
toolpackageasstandardaccessories.Theymay
differfromcountrytocountry.

19 SLOVENŠČINA
SLOVENŠČINA (Originalna navodila)
TEHNIČNI PODATKI
Model: DSL800
Velikostpapirja 225 mm
Premerblazinice 210 mm
Nazivna hitrost (n) 1.000 – 1.800 min-1
Mere 1.100 mm – 1.520 mm x 259 mm x 273 mm
Nazivna napetost D.C. 18 V
Netoteža 4,5 – 5,7 kg
• Kernenehnoopravljamoraziskaveinrazvijamosvojeizdelke,selahkotehničnipodatkivtemdokumentu
spremenijobrezobvestila.
• Tehničnipodatkiselahkorazlikujejooddržavedodržave.
• Težaselahkorazlikujegledenapriključke,vključnozakumulatorskobaterijo.Najlažjainnajtežjakombinacijav
skladuspostopkomEPTA01/2014staprikazanivpreglednici.
Uporabna akumulatorska baterija in polnilnik
Baterijskivložek BL1815N/BL1820/BL1820B/BL1830/BL1830B/BL1840/
BL1840B/BL1850/BL1850B/BL1860B
Polnilnik DC18RC/DC18RD/DC18RE/DC18SD/DC18SE/DC18SF
• Nekaterezgorajnavedeneakumulatorskebaterijeinpolnilnikimordavvašidržaviprebivališčanisonavoljo.
OPOZORILO: Uporabljajte le zgoraj navedene akumulatorske baterije in polnilnike.Uporabadrugih
akumulatorskihbaterijinpolnilnikovlahkopovzročitelesnepoškodbein/alipožar.
Predvidena uporaba
Orodjejenamenjenobrušenjumavčnihploščalistropa.
Hrup
ObičajnaA-ovrednotenaravenhrupavskladuz
EN62841-2-4:
Ravenzvočnegatlaka(LpA):75dB(A)
Odstopanje(K):3dB(A)
Nivohrupameddelomlahkopreseže80dB(A).
OPOMBA:Navedenevrednostioddajanjahrupaso
bileizmerjenevskladusstandardnimimetodami
testiranjainselahkouporabljajozaprimerjavoorodij.
OPOMBA:Navedenevrednostioddajanjahrupa
selahkouporabljajotudipripredhodnioceni
izpostavljenosti.
OPOZORILO: Uporabljajte zaščito za sluh.
OPOZORILO: Oddajanje hrupa med dejansko
uporabo električnega orodja se lahko razlikuje od
navedenih vrednosti, odvisno od načina uporabe
orodja in predvsem vrste obdelovanca.
OPOZORILO: Upravljavec mora za lastno
zaščito poznati varnostne ukrepe, ki temeljijo
na oceni izpostavljenosti v dejanskih pogojih
uporabe (poleg časa proženja je treba upoštevati
celoten delovni cikel, vključno s časom, ko je
orodje izklopljeno, in časom, ko deluje v prostem
teku).
Vibracije
Skupnevrednostivibracij(vektorskavsotatrehosi)v
skladuzEN62841-2-4:
Delovninačin:brušenjesploščo
Oddajanjetresljajev(ah, DS):2,5m/s2alimanj
Odstopanje(K):1,5m/s2
OPOMBA:
Navedeneskupnevrednostioddajanjavibra-
cijsobileizmerjenevskladusstandardnimimetodami
testiranjainselahkouporabljajozaprimerjavoorodij.
OPOMBA:Navedeneskupnevrednostioddajanja
vibracijselahkouporabljajotudipripredhodnioceni
izpostavljenosti.
OPOZORILO:
Oddajanje vibracij med
dejansko uporabo električnega orodja se lahko raz-
likuje od navedenih vrednosti, odvisno od načina
uporabe orodja in predvsem vrste obdelovanca.
OPOZORILO:
Upravljavec mora za lastno
zaščito poznati varnostne ukrepe, ki temeljijo na
oceni izpostavljenosti v dejanskih pogojih upo-
rabe (poleg časa proženja je treba upoštevati celo-
ten delovni cikel, vključno s časom, ko je orodje
izklopljeno, in časom, ko deluje v prostem teku).
Izjava o skladnosti ES
Samo za evropske države
IzjavaESoskladnostijevključenavdodatkuA,kije
priložentemnavodilomzauporabo.

20 SLOVENŠČINA
VARNOSTNA OPOZORILA
Splošna varnostna opozorila za
električno orodje
OPOZORILO: Preberite vsa varnostna opo-
zorila in navodila s slikami in tehničnimi podatki,
ki so dobavljeni skupaj z električnim orodjem.
Obneupoštevanjuspodajnavedenihnavodilobstaja
nevarnostelektričnegaudara,požarain/alihudih
telesnihpoškodb.
Shranite vsa opozorila in navo-
dila za poznejšo uporabo.
Izraz„električnoorodje“vopozorilihsenanašanavaše
električnoorodje(skablom)alibaterijskoelektrično
orodje(brezkabla).
Varnostna opozorila za uporabo
brezžičnega brusilnika za mavčne plošče
Običajna varnostna opozorila za brušenje:
1. To električno orodje je po zasnovi namenjeno
brušenju. Preberite vsa varnostna opozorila
ter navodila s slikami in tehničnimi podatki,
ki so priloženi temu električnemu orodju.Ob
neupoštevanjuspodajnavedenihnavodilobstaja
nevarnostelektričnegaudara,požarain/alihudih
telesnihpoškodb.
2. To električno orodje ni primerno za izvajanje
del, kot so brušenje ostrine, žično brušenje,
poliranje ali rezanje.Izvajanjedel,zakatera
električnoorodjenibilozasnovano,jenevarnoin
lahkopovzročihudetelesnepoškodbe.
3. Uporabljajte le nastavke, ki jih je posebej za
to orodje zasnoval oz. jih priporoča proizvaja-
lec.Čejenastavekmogočepritrditinaelektrično
orodje,tošenepomeni,dajeuporabatega
nastavka varna.
4. Nazivno število vrtljajev nastavka mora ustre-
zati vsaj največjemu številu vrtljajev, ki je
označeno na električnem orodju. Nastavek,
kisevrtihitrejeodnazivnegaštevilavrtljajev,se
lahko zlomi in razleti.
5. Zunanji premer in debelina nastavka morata
ustrezati nazivni moči električnega orodja.
Nastavkaneustreznevelikostinimogočepravilno
zavarovatisščitnikialigapovsemnadzorovati.
6. Ne uporabljajte poškodovane dodatne opreme.
Pred vsako uporabo preverite, da dodatna
oprema, kot je brusilna blazinica, ni počena,
natrgana ali čezmerno obrabljena. Če pade
električno orodje ali dodatna oprema na tla,
preverite, ali so nastale poškodbe, in po pot-
rebi zamenjajte poškodovano dodatno opremo
z novo. Po pregledu in namestitvi dodatne
opreme se postavite izven ravnine vrtenja
dodatne opreme in opozorite osebe v vaši bli-
žini, naj se oddaljijo, ter vključite orodje in ga
pustite teči eno minuto brez obremenitve. Med
tempreizkusompoškodovanadodatnaoprema
običajnopoči.
7.
Uporabljajte osebna zaščitna sredstva. Odvisno
od dela, ki ga opravljate, uporabljajte zaščitno
masko za obraz in oči ali zaščitna očala. Če je
potrebno, uporabljajte zaščitno masko proti
prahu, glušnike, rokavice ali predpasnik za zaš-
čito pred drobci materiala.Zaščitazaočimora
zadržatiletečedrobce,kisoprisotniprirazličnih
načinihdela.Protiprašnamaskaalimaskazazaš-
čitodihalmorazadržatiprah,kinastajameddelom.
Izpostavljanjehrupulahkopovzročiizgubosluha.
8.
Pri delu poskrbite, da bodo druge osebe varno
oddaljene od delovnega območja. V delovno obmo-
čje lahko vstopajo samo osebe z ustrezno osebno
zaščitno opremo.Letečidrobcimaterialaobdelovanca
alipočeneganastavkasonevarniinlahkopovzročijo
poškodbetudiizvendelovnegaobmočja.
9. Pazite, da z vrtečimi se deli orodja ne poško-
dujete električnega kabla.Vprimeruizgube
nadzoranadelektričnimorodjemselahkokabel
prerežealizatakne,dlanalirokopavamlahko
potegnevvrtečisenastavek.
10.
Ne odlagajte električnega orodja iz rok, dokler se
nameščeni nastavek ne neha vrteti. Nastavek, ki se
ševednovrti,lahkopridevstikzodlagalnopovršino
inpovzročiizgubonadzoranadelektričnimorodjem.
11. Ne puščajte električnega orodja vključenega
brez nadzora.Vrtečisenastavekselahkonepri-
čakovanozapletevvašooblekoinvaspoškoduje.
12.
Ne uporabljajte električnega orodja v bližini gorljivih
snovi.Gorljivesnoviselahkovnamejozaradiiskrenja.
13. Ne uporabljajte nastavkov, ki so predvideni
za uporabo s tekočim hladilnim sredstvom.
Uporabavodealidrugihtekočinzahlajenjelahko
povzročielektričniudar.
Opozorila v zvezi s povratnim udarcem
Povratniudarecjenenadnareakcijaprizaskočenivrtečise
blazinicialidrugemkosudodatneopreme.Zagozdenjeali
blokiranjepovzročihitroustavitevvrtečihsepripomočkov,
karpovzročinenadzorovanipremikelektričnegaorodjav
nasprotnismerivrtenjapripomočkavtočkizagozditve.
Česeblazinicanaprimerzagozdializaskočivobdelovancu,
lahkorobblazinicevtrenutkuzagozdenjazareževpovršino,
pritempanastalasilablazinicoodbijeodmateriala.Blazinica
lahkoodskočibodisiprotivamalivnasprotnismeri,karje
odvisnoodsmeripremikanjablazinicevtrenutkuzagozdenja.
Blazinicaselahkovtakihokoliščinahtudizlomi.
Povratniudarecjeposledicanestrokovnegaravnanjaz
električnimorodjemalineugodnihokoliščin.Preprečite
galahkozupoštevanjemspodajnavedenihopozoril.
1.
Električno orodje držite s trdnim prijemom in se
postavite v takšen položaj, da lahko prestrežete
sile povratnega udarca. Če je na električno orodje
mogoče namestiti dodatni ročaj, ga tudi uporabljajte,
saj vam omogoča najboljši nadzor nad povratnimi
udarci ali reakcijskim vrtilnim momentom.Reakcijske
vrtilnemomentealipovratneudarcejemogočeučinko-
vitopreprečitizupoštevanjemprevidnostnihukrepov.
2. Ne približujte rok vrtečim se delom električ-
nega orodja.Nameščeninastaveklahkoudari
nazajprekvašeroke.
3. S telesom se postavite stran od smeri, v katero
orodje lahko skoči v primeru, da pride do
povratnega udarca. Povratni udarec sunkovito
potisneorodjevnasprotnismerivrtenjarezalne
ploščevtočkizagozdenja.
Other manuals for DSL800
6
This manual suits for next models
1
Table of contents
Languages:
Other Makita Sander manuals

Makita
Makita 9046 User manual

Makita
Makita M9204 User manual

Makita
Makita M9203 User manual

Makita
Makita DPO500 User manual

Makita
Makita 9032 User manual

Makita
Makita DBO380 User manual

Makita
Makita BO4900V User manual

Makita
Makita 9031 User manual

Makita
Makita 9207SPB User manual

Makita
Makita DBO481 User manual

Makita
Makita BO3700 User manual

Makita
Makita 9403 User manual

Makita
Makita BO5020 User manual

Makita
Makita 9902 User manual

Makita
Makita GV5010 User manual

Makita
Makita 9237CB User manual

Makita
Makita BO5020 User manual

Makita
Makita M9202 User manual

Makita
Makita DSL801 User manual

Makita
Makita DBS180 User manual