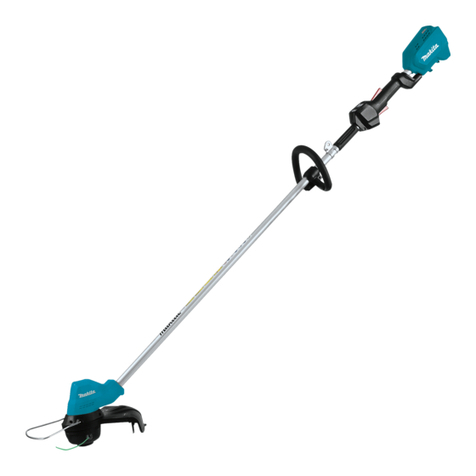
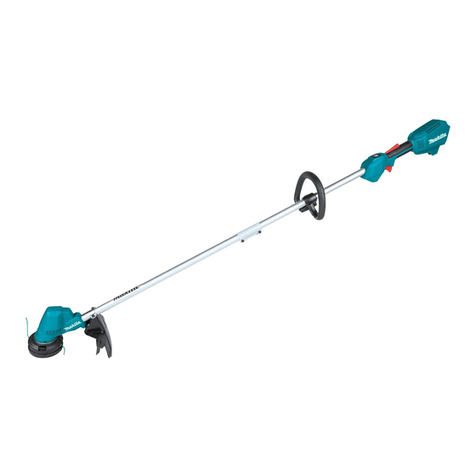
Makita UR2300 User manual

GB Electric Grass Trimmer Instruction Manual
FCoupe-Herbe Electrique Manuel d’instructions
DElektro-Trimmer Gebrauchsanleitung
ITosaerba elettrico Istruzioni per l’uso
NL Elektrische grastrimmer Gebruiksaanwijzing
ECortadora de Cesped Manual de instrucciones
PAparador de Grama Elétrico Manual de instruções
DK Elektrisk græstrimmer Brugervejledning
GR Ηλεκτρικό κουρευτικό γκαζόν Εγχειρίδιο οδηγιών
TR Elektrikli Çim Biçme Makinesi Kullanım Kılavuzu
PL Wykaszarka Elektryczna Instrukcja obsługi
SI Električna kosilnica na nitko Navodila za uporabo
AL Kositës Elektrik i Barit Manual Udhëzimi
BG Електрически тример за трева Упътване за работа
HR Električni trimer za travu Upute za korištenje
MK Електрични ножици за трева
(тример) Упатство за работа
RO Trimmer electric pentru iarbă Manual de instrucţiuni
RS Електрични тример за траву Упутство за употребу
RUS
Электрокоса Инструкция по эксплуатации
UA Електротример Інструкція з експлуатації
UR2300
UR3502

2
11
1
10
6
12
3
4
2
5
8
7
9
1
10
6
3
42
5
8
7
9
12
UR2300 UR3502
1
4
5
13
2 3

3
1
8
15
14
4 5
6 7
16 17
16
8 9
18
19
20
21
22
23
19 18
10 11

4
18
19
24
25
26
19 18
12 13
27
27
14 15
16 17
28
18 19

5
26
29
20

6
ENGLISH (Original instructions)
Explanation of general view
1 Cableholder
2 Powersupplycord(theshape
maydifferfromcountryto
country)
3 Rearhandle
4 Lock-offlever
5 Switchtrigger
6 Fronthandle
7 Hanger(suspensionpoint)
8 Barrier
9 Cuttingtoolguard(protector)
10 Cuttingtool
11 Shoulderharness
12 Cushion
13 Mosteffectivecuttingarea
14 Handle
15 Rubberpart
16 Innerprotector
17 Outerprotector
18 Receivewasher
19 Roundbar
20 Blade
21 Clampwasher
22 Cup
23 Nut
24 Nyloncuttinghead
25 Cordcutter
26 Cover
27 Hanger
28 80–100mm
29 Spool
SPECIFICATIONS
Model UR2300 UR3502
Typeofhandle Loophandle
Overalllength 1,630mm
Continuousratinginput 1,000W
Noloadspeed 5,700min–1 5,700min–1
Cuttingtool Cutterblade Nyloncuttinghead
Cuttingwidth 230mm 350mm
Netweight 4.7kg 4.9kg
Safetyclass /II
• Duetoourcontinuingprogramofresearchanddevelopment,thespecicationshereinaresubjecttochangewithout
notice.
• Specicationsmaydifferfromcountrytocountry.
• WeightaccordingtoEPTA-Procedure01/2003
Noise Soundpressurelevelaverage Soundpowerlevelaverage
Applicablestandard
Cuttingtool LPA(dB(A)) UncertaintyK
(dB(A)) LwA(dB(A)) UncertaintyK
(dB(A))
Cutterblade 80.8 2.5 93.45 1.23 EN60335-1,
EN50636-2-91,
ENISO11806
Nyloncutting
head 85.3 2.5 93.84 1.58
• Wearearprotection.
Vibration Frontgrip Reargrip
Applicablestandard
Cuttingtool ah(m/s2) UncertaintyK
(m/s2)ah(m/s2) UncertaintyK
(m/s2)
Cutterblade 2.856 1.5 2.712 1.5 EN60335-1,
EN50636-2-91,
ENISO11806
Nyloncutting
head 2.768 1.5 2.694 1.5
• Be sure to identify safety measures to protect the
operatorthatarebasedonanestimationofexposurein
theactualconditionsofuse(takingaccountofallparts
oftheoperatingcyclesuchasthetimeswhenthetool
isswitchedoffandwhenitisrunningidleinadditionto
thetriggertime).
• The declared vibration emission value has been
measuredinaccordancewiththestandardtestmethod
andmaybeusedforcomparingonetoolwithanother.
• The declared vibration emission value may also be
usedinapreliminaryassessmentofexposure.
WARNING:
• Thevibrationemissionduringactualuseofthepower
tool can differ from the declared emission value
dependingonthewaysinwhichthetoolisused.

7
Symbols
Thefollowingshowthesymbolsusedfortheequipment.
Besurethatyouunderstandtheirmeaningbeforeuse.
• Takeparticularcareandattention.
• Readinstructionmanual.
• Danger;beawareofthrownobjects.
• The distance between the tool and
bystandersmustbeatleast15m.
360°
• Keepbystandersaway.
• Wear a helmet, goggles and ear
protection.
• Wearprotectivegloves.
• Wear sturdy boots with nonslip
soles. Steeltoed safety boots are
recommended.
• Donotexposetomoisture.
• Disconnectthemainsplugifthecord
isdamagedorentangled.
• Avoidkickback.
15m(50FT)• Keepdistanceatleast15m.
• DOUBLEINSULATION
• OnlyforEUcountries
Donotdisposeofelectricequipment
together with household waste
material!
In observance of the European
Directive, on Waste Electric and
Electronic Equipment and its
implementation in accordance with
national law, electric equipment that
havereachedtheendoftheirlifemust
becollectedseparatelyandreturned
to an environmentally compatible
recyclingfacility.
EC DECLARATION OF CONFORMITY
For European countries only
TheECdeclarationofconformityisincludedasAnnexA
tothisinstructionmanual.

8
General Power Tool Safety Warnings
WARNING Read all safety warnings and all
instructions. Failure to follow the warnings and
instructions may result in electric shock, re and/or
seriousinjury.
Save all warnings and instructions for future
reference.
The term “power tool” in the warnings refers to your
mains-operated(corded)powertoolorbattery-operated
(cordless)powertool.
Work area safety
1. Keep work area clean and well lit. Cluttered or
darkareasinviteaccidents.
2. Do not operate power tools in explosive
atmospheres, such as in the presence of
ammable liquids, gases or dust. Power tools
createsparkswhichmayignitethedustorfumes.
3. Keep children and bystanders away while
operating a power tool. Distractionscancauseyou
tolosecontrol.
Electrical safety
4. Power tool plugs must match the outlet. Never
modify the plug in any way. Do not use any
adapter plugs with earthed (grounded) power
tools. Unmodied plugs and matching outlets will
reduceriskofelectricshock.
5. Avoid body contact with earthed or grounded
surfaces such as pipes, radiators, ranges and
refrigerators. Thereisanincreasedriskofelectric
shockifyourbodyisearthedorgrounded.
6. Do not expose power tools to rain or wet
conditions. Waterenteringapowertoolwillincrease
theriskofelectricshock.
7. Do not abuse the cord. Never use the cord for
carrying, pulling or unplugging the power tool.
Keep cord away from heat, oil, sharp edges
or moving parts. Damaged or entangled cords
increasetheriskofelectricshock.
8. When operating a power tool outdoors, use an
extension cord suitable for outdoor use. Useof
acordsuitableforoutdoorusereducestheriskof
electricshock.
9. If operating a power tool in a damp location is
unavoidable, use a residual current device (RCD)
protected supply. UseofanRCDreducestherisk
ofelectricshock.
10. Use of power supply via a RCD with a rated
residual current of 30 mA or less is always
recommended.
Personal safety
11. Stay alert, watch what you are doing and use
common sense when operating a power tool. Do
not use a power tool while you are tired or under
the inuence of drugs, alcohol or medication. A
moment of inattention while operating power tools
mayresultinseriouspersonalinjury.
12. Use personal protective equipment. Always wear
eye protection. Protectiveequipmentsuchasdust
mask, non-skid safety shoes, hard hat, or hearing
protectionusedforappropriateconditionswillreduce
personalinjuries.
13. Prevent unintentional starting. Ensure the
switch is in the off-position before connecting
to power source and/or battery pack, picking up
or carrying the tool. Carryingpowertoolswithyour
ngeronthe switch orenergising power toolsthat
havetheswitchoninvitesaccidents.
14. Remove any adjusting key or wrench before
turning the power tool on. Awrenchorakeyleft
attached to a rotating part of the power tool may
resultinpersonalinjury.
15. Do not overreach. Keep proper footing and
balance at all times. Thisenablesbettercontrolof
thepowertoolinunexpectedsituations.
16. Dress properly. Do not wear loose clothing or
jewellery. Keep your hair, clothing, and gloves
away from moving parts. Looseclothes,jewellery
orlonghaircanbecaughtinmovingparts.
17. If devices are provided for the connection of dust
extraction and collection facilities, ensure these
are connected and properly used. Use of dust
collectioncanreducedust-relatedhazards.
Power tool use and care
18. Do not force the power tool. Use the correct
power tool for your application. Thecorrectpower
tool will do the job better and safer at the rate for
whichitwasdesigned.
19. Do not use the power tool if the switch does not
turn it on and off. Any powertoolthat cannotbe
controlledwiththeswitchisdangerousandmustbe
repaired.
20. Disconnect the plug from the power source and/
or the battery pack from the power tool before
making any adjustments, changing accessories,
or storing power tools. Such preventive safety
measuresreducetheriskofstartingthepowertool
accidentally.
21. Store idle power tools out of the reach of children
and do not allow persons unfamiliar with the
power tool or these instructions to operate the
power tool. Powertoolsaredangerousinthehands
ofuntrainedusers.
22. Maintain power tools. Check for misalignment or
binding of moving parts, breakage of parts and
any other condition that may affect the power
tool’s operation. If damaged, have the power tool
repaired before use. Manyaccidentsarecausedby
poorlymaintainedpowertools.
23. Keep cutting tools sharp and clean. Properly
maintainedcuttingtoolswithsharpcuttingedgesare
lesslikelytobindandareeasiertocontrol.
24. Use the power tool, accessories and tool bits
etc. in accordance with these instructions,
taking into account the working conditions and
the work to be performed. Useofthepowertoolfor
operationsdifferentfromthoseintendedcouldresult
inahazardoussituation.
Service
25. Have your power tool serviced by a qualied
repair person using only identical replacement
parts. Thiswillensurethatthesafetyofthepower
toolismaintained.
26. Follow instruction for lubricating and changing
accessories.
27. Keep handles dry, clean and free from oil and
grease.


9
IMPORTANT SAFETY INSTRUCTIONS
WARNING! Read all safety warnings and all
instructions. Failure to follow the warnings and
instructions may result in electric shock, re and/or
seriousinjury.
Save all warnings and instructions for future
reference.
Intended use
1. The grass trimmer/ brushcutter/ string trimmer is
onlyintendedforcuttinggrass,weeds,bushesand
undergrowth. It should not be used for any other
purposesuchasedgingorhedgecuttingasthismay
causeinjury.
General instructions
1. Neverallowpeopleunfamiliarwiththeseinstructions,
people (including children) with reduced physical,
sensoryormentalcapabilities,orlackofexperience
andknowledgetousethetool.Childrenshouldbe
supervisedtoensurethattheydonotplaywiththe
tool.
2. Beforestartingthetool,readthisinstructionmanual
tobecomefamiliarwiththehandlingofthetool.
3. Do not lend the tool to a person with insufcient
experience or knowledge regarding handling of
brushcuttersandstringtrimmers.
4. Whenlendingthetool,alwaysattachthisinstruction
manual.
5. Handlethetoolwiththeutmostcareandattention.
6. Neverusethetoolafterconsumingalcoholordrugs,
oriffeelingtiredorill.
7. Neverattempttomodifythetool.
8. Take care against injury from any device tted for
trimmingthelamentlinelength.Afterextendingnew
cutterlinealways returnthemachine to itsnormal
operatingpositionbeforeswitchingon.
9. Followtheregulationsabouthandlingofbrushcutters
andstringtrimmersinyourcountry.
Personal protective equipment
1. Wearsafetyhelmet,protectivegogglesandprotective
glovestoprotectyourselffromyingdebrisorfalling
objects.
2. Wear ear protection such as ear muffs to prevent
hearingloss.
3. Wearproperclothingandshoesforsafeoperation,
suchasaworkoveralland sturdy,non-slipshoes.
Donotwearlooseclothingorjewelry.Looseclothes,
jewelryorlonghaircanbecaughtinmovingparts.
4. When touching the cutting blade, wear protective
gloves.Cuttingbladescancutbarehandsseverely.
Work area safety
1. Operate the tool under good visibility and daylight
conditionsonly.Donotoperatethetoolindarkness
orfog.
2. Do not operate the tool in explosive atmospheres,
suchasinthepresenceofammableliquids,gases
ordust.Thetoolcreatessparkswhichmayignitethe
dustorfumes.
3. During operation, never stand on an unstable or
slippery surface or a steep slope. During the cold
season,bewareoficeandsnowandalwaysensure
securefooting.
4. During operation, keep bystanders or animals at
least15mawayfromthetool.Stopthetoolassoon
assomeoneapproaches.
5. Beforeoperation,examinetheworkareaforstones
orothersolidobjects.Theycanbethrownorcause
dangerouskickbackandresultinseriousinjuryand/
orpropertydamage.
6. WARNING:Useofthisproductcancreatedust
containingchemicalswhichmaycauserespiratoryor
otherillnesses.Someexamplesofthesechemicals
are compounds found in pesticides, insecticides,
fertilizers and herbicides. Your risk from these
exposuresvaries, depending onhow often youdo
thistypeofwork.Toreduceyourexposuretothese
chemicals:workinawellventilatedarea,andwork
with approved safety equipment, such as those
dustmasksthatarespeciallydesignedtolterout
microscopicparticles.
Electrical safety
1. Power tool plugs must match the outlet. Never
modify the plug in any way. Do not use any
adapter plugs with earthed (grounded) power
tools. Unmodied plugs and matching outlets will
reduceriskofelectricshock.
2. Avoid body contact with earthed or grounded
surfaces such as pipes, radiators, ranges and
refrigerators. Thereisanincreasedriskofelectric
shockifyourbodyisearthedorgrounded.
3. Do not expose the tool to rain or wet conditions.
Water entering the tool will increase the risk of
electricshock.
4. Do not abuse the cord. Never use the cord for
carrying, pulling or unplugging the power tool.
Keep cord away from heat, oil, sharp edges
or moving parts. Damaged or entangled cords
increasetheriskofelectricshock.
5. Donotusethetooliftheswitchdoesnotturniton
andoff.Anytoolthatcannotbecontrolledwiththe
switchisdangerousandmustberepaired.
6. When operating a power tool outdoors, use an
extension cord suitable for outdoor use.Useof
acordsuitableforoutdoorusereducestheriskof
electricshock.
7. If operating a power tool in a damp location is
unavoidable, use a residual current device (RCD)
protected supply.UseofanRCDreducestherisk
ofelectricshock.
8. Use of power supply via a RCD with a rated
residual current of 30 mA or less is always
recommended.
9. Preventunintentionalstarting.Ensuretheswitchisin
theoff-positionbeforeconnectingtopowersource,
pickinguporcarryingthetool.Carryingpowertools
withyour ngeron theswitch or energising power
toolsthathavetheswitchoninvitesaccidents.

10
10. Beforeuse,checkthesupplyandextensioncordfor
signsofdamageorageing.
11. Ifthecordbecomesdamagedduringuse,disconnect
thecordfromthesupplyimmediately.Do not touch
the cord before disconnecting the supply.
12. Do not use the tool if the cords are damaged or
worn.
13. Keepextensioncordawayfromcuttingelements.
Putting into operation
1. Beforeassemblingoradjustingthetool,disconnect
theplugfromthepowersource.
2. Before handling the cutter blade, wear protective
gloves.
3. Before plugging in, inspect the tool for damages,
loose screws/nuts or improper assembly. Sharpen
blunt cutter blade. If the cutter blade is bent or
damaged, replace it. Check all control levers and
switchesforeasyaction.Cleananddrythehandles.
4. Neverattempttoswitchonthetoolifitisdamaged
ornotfullyassembled.Otherwiseseriousinjurymay
result.
5. Removeanyadjustingkeyorwrenchbeforeturning
the tool on. A wrench or a key left attached to a
rotatingpartofthetoolmayresultinpersonalinjury.
6. Adjusttheshoulderharnessandhandgriptosuitthe
operator’sbodysize.
7. Whenpluggingin,keepthecuttingattachmentclear
ofyourbodyandotherobject,includingtheground.
Itmayrotatewhenstartingandmaycauseinjuryor
damagetothetooland/orproperty.
Operation
1. In the event of an emergency, switch off the tool
immediately.
2. Ifyoufeelanyunusualcondition(e.g.noise,vibration)
duringoperation,switchoffthetool.Donotusethe
tooluntilthecauseisrecognizedandsolved.
3. Warning.Thecuttingattachmentcontinuestorotate
forashortperiodafterturningthetooloff.Don’trush
tocontactthecuttingattachment.
4. During operation, use the shoulder harness. Keep
thetoolonyourrightsidermly.
5. Donotoverreach.Keepproperfootingandbalance
atalltimes.Watchforhiddenobstaclessuchastree
stumps,rootsandditchestoavoidstumbling.
6. Never work on a ladder or tree to avoid loss of
control.
7. Before using the machine and after any heavy
impactorfall,checktheconditionbeforecontinuing
work. Check the controls and safety devices for
malfunction. If there is any damage or doubt, ask
ourauthorizedservicecenterfortheinspectionand
repair.
8. Donottouchthegearcase.Thegearcasebecomes
hotduringoperation.
9. Take a rest to prevent loss of control caused by
fatigue. We recommend taking a 10 to 20-minute
resteveryhour.
10. Whenyouleavethetool,evenifitisashorttime,
always withdraw the mains plug. The unattended
tool with the mains plugged in may be used by
unauthorizedpersonandcauseseriousaccident.
11. Ifgrassorbranchesgetcaughtbetweenthecutting
attachmentandguard,alwaysturnthetooloffand
withdrawthemainsplugbeforecleaning.Otherwise
the cutting attachment may rotate unintentionally
andcauseseriousinjury.
12. If the cutting attachment hits stones or other hard
objects,immediatelyturnthetooloff.Thenwithdraw
themainsplugandinspectthecuttingattachment.
13. Check the cutting attachment frequently during
operation for cracks or damages. Before the
inspection, withdraw the mains plug and wait until
the cutting attachment stops completely. Replace
damagedcuttingattachmentimmediately,evenifit
hasonlysupercialcracks.
14. Nevercutabovewaistheight.
15. Before starting the cutting operation, wait until the
cutting attachment reaches a constant speed after
turningthetoolon.
16. Whenusingmetalblades,swingthetoolevenlyin
half-circlefromrighttoleft,likeusingascythe.
17. Hold the tool by insulated gripping surfaces only,
becausethecutterblademaycontacthiddenwiring.
Cutter blades contacting a “live” wire may make
exposedmetalpartsofthetool“live”andcouldgive
theoperatoranelectricshock.
18. Always ensure that ventilation openings are kept
clearofdebris.
Cutting attachments
1. Useanapplicablecuttingattachmentforthejobin
hand.
− Nylon cutting heads (string trimmer heads) are
suitablefortrimminglawngrass.
− Metalbladesaresuitableforcuttingweeds,high
grasses, bushes, shrubs, underwood, thicket,
andthelike.
− Never use other blades including metal multi-
piece pivoting chains and ail blades. It may
resultinseriousinjury.
2. Always use the cutting attachment guard properly
suitedforthecuttingattachmentused.
3. Never t metal cutting elements with nylon cutting
models.
4. When using metal blades, avoid “kickback” and
alwaysprepareforanaccidentalkickback.Seethe
section“Kickback.”
Kickback (Blade thrust)
1. Kickback (blade thrust) is a sudden reaction to a
caughtorboundcuttingblade.Onceitoccurs,the
toolisthrownsidewayortowardtheoperatoratgreat
forceanditmaycauseseriousinjury.
2. Kickbackoccursparticularlywhenapplyingtheblade
segmentbetween12and2o’clocktosolids,bushes
andtreeswith3cmorlargerdiameter.

11
3. Toavoidkickback:
− Applythesegmentbetween8and11o’clock.
− Never apply the segment between 12 and 2
o’clock.
− Never apply the segment between 11 and 12
o’clockandbetween2and5o’clock,unlessthe
operator is well trained and experienced and
doesitathis/herownrisk.
− Neverusecuttingbladesclosetosolids,suchas
fences,walls,treetrunksandstones.
− Never use cutting blades vertically, for such
operationsasedgingandtrimminghedges.
Vibration
1. People with poor circulation who are exposed to
excessivevibrationmayexperience injurytoblood
vesselsorthenervoussystem.Vibrationmaycause
thefollowingsymptomstooccurinthengers,hands
or wrists: “Falling asleep” (numbness), tingling,
pain,stabbingsensation,alterationofskincoloror
oftheskin.Ifanyofthesesymptomsoccur,seea
physician!
2. To reduce the risk of “white nger disease”, keep
yourhandswarmduringoperationandwellmaintain
thetoolandaccessories.
Transport
1. Beforetransportingthetool,turnitoffandwithdraw
the mains plug. Attach the cover to the cutting
blade.
2. When transporting the tool, carry it in a horizontal
positionbyholdingtheshaft.
3. When transporting the tool in a vehicle, properly
secureittoavoidturnover.Otherwisedamagetothe
toolandotherbaggagemayresult.
Maintenance
1. Have your tool serviced by our authorized service
center, always using only genuine replacement
parts. Incorrect repair and poor maintenance can
shortenthelifeofthetoolandincreasetheriskof
accidents.
2. Before doing any maintenance or repair work or
cleaningthetool,alwaysturnitoffandwithdrawthe
mainsplug.
3. Always wear protective gloves when handling the
cuttingblade.
4. Always clean dust and dirt off the tool. Never use
gasoline,benzine,thinner,alcoholorthelikeforthe
purpose.Discoloration,deformationorcracksofthe
plasticcomponentsmayresult.
5. Aftereachuse,tightenallscrewsandnuts.
6. Do not attempt any maintenance or repair not
described in the instruction manual. Ask our
authorizedservicecenterforsuchwork.
7. Alwaysuseourgenuinesparepartsandaccessories
only.Usingpartsoraccessoriessuppliedbyathird
party may result in the tool breakdown, property
damageand/orseriousinjury.
8. Requestourauthorizedservicecentertoinspectand
maintainthetoolatregularinterval.
Storage
1. Before storing the tool, perform full cleaning and
maintenance.Withdraw themains plug.Attach the
covertothecuttingblade.
2. Storethetoolinadryandhighorlockedlocationout
ofreachofchildren.
3. Donotpropthetoolagainstsomething,suchasa
wall. Otherwise it may fall suddenly and cause an
injury.
First aid
1. Always have a rst-aid kit close by. Immediately
replaceanyitemtakenfromtherstaidkit.
2. Whenaskingforhelp,givethefollowinginformation:
− Placeoftheaccident
− Whathappened
− Numberofinjuredpersons
− Natureoftheinjury
− Yourname
SAVE THESE INSTRUCTIONS.
WARNING:
DO NOT let comfort or familiarity with product (gained
from repeated use) replace strict adherence to safety
rules for the subject product. MISUSE or failure
to follow the safety rules stated in this instruction
manual may cause serious personal injury.
PARTS DESCRIPTION (Fig. 1)
FUNCTIONAL DESCRIPTION
WARNING:
• Always be sure that the tool is switched off and
unplugged before adjusting or checking the
functions on the tool.Failuretoswitchoffandunplug
may result in serious personal injury from accidental
start-up.
Power switch action (Fig. 2)
WARNING:
• Before plugging in, always check to see that the
switch trigger actuates properly and returns to
the “OFF” position when released. Do not pull the
switch trigger hard without sliding the lock-off
lever. This can cause switch breakage.Operatinga
tool with a switch that does not actuate properly can
leadtolossofcontrolandseriouspersonalinjury.
To prevent the switch trigger from being accidentally
pulled,alock-offleverisprovided.
Tostartthetool,slidethelock-offleverforwardandthen
pulltheswitchtrigger.Releasetheswitchtriggertostop.

12
Nylon cutting head (Fig. 3)
NOTICE:
• Donotattempttobumpfeedtheheadwhilethetoolis
operatingatahighRPM.BumpfeedingatahighRPM
maycausedamagetothenyloncuttinghead.
• Thebumpfeedwillnotoperateproperlyiftheheadis
notrotating.
NOTE:
• Standard accessory varies depending on the model
andcountry.
The nylon cutting head is a dual grass trimmer head
providedwithabump&feedmechanism.
Tofeedoutthenyloncord,bumpthecuttingheadagainst
thegroundwhilethecuttingheadisrotating.
NOTE:
• Ifthenyloncorddoesnotfeedoutwhilebumpingthe
head, rewind/replace the nylon cord by following the
proceduresdescribedunder“Maintenance.”
Cable holder (Fig. 4)
Makeasmallloopofpowercable,andhangitontothe
cableholder.
ASSEMBLY
WARNING:
• Always be sure that the tool is switched off and
unplugged before carrying out any work on the tool.
Failuretoswitchoffandunplugmayresultinserious
personalinjuryfromaccidentalstart-up.
• Never start the tool unless it is completely
assembled. Operation of the tool in a partially
assembledstatemayresultinseriouspersonalinjury
fromaccidentalstart-up.
Installing the handle (Fig. 5)
WARNING:
• Do not remove or shrink the spacer or cushion. The
spacerkeepsacertaindistancebetweenbothhands.
Setting the grip/barrier assembly close to the other
gripbeyondthelengthofthespacermaycauselossof
controlandseriouspersonalinjury.
Fitthehandleandthebarrierontotherubberpartonthe
shaft pipe.Adjust the location of the handle, and then
tightenthemwithfourbolts.
Approved combination of cutting tool and
protector
WARNING:
• Always use the tool with the approved combination
of the safety equipments. Otherwise contact with a
cuttingtoolmaycauseseriousinjury.
• Never use the tool without the guard illustrated in
place. Failure to do so can cause serious personal
injury.
NOTE:
• Standard accessory varies depending on the model
andcountry.
For cutter blade (Fig. 6)
For nylon cutting head (Fig. 7)
Installing the protector for cutter blade (Fig. 8)
1. Aligntheholesontheinnerprotectorandtheholes
ofthegearcase.
2. Thentightenthemwiththreebolts.
Installing the protector for nylon head
CAUTION:
• Takecarenottoinjureyourselfonthecutterforcutting
thenyloncord.
• Do not forget to remove the cutter protector before
using.
1. Alignthefourboltsontheouterprotectoralongthe
holesontheinnerprotector.(Fig. 9)
2. Tightenthemwiththefourbolts.
3. Aligntheholesontheinnerprotectorandtheholes
ofthegearcase.
4. Tightenthemwithbolts.(Fig. 10)
Installing the cutter blade
WARNING:
• The outside diameter of the cutter blade must be
230 mm.Neveruseanybladeexceeding230mmin
outsidediameter.
CAUTION:
• Thecutterblademustbewellpolished,freeofcracksor
breakage.Polishorreplacethecutterbladeeverythree
hoursofoperation.
• Alwaysweargloveswhenhandlingthecutterblade.
• Alwaysattachthebladecoverwhenthetoolisnotin
useorisbeingtransported.
• The cutter blade-fastening nut wears out in course
oftime.Ifthereappearsanywearordeformationon,
replace the nut. Ask your local authorized service
centertoorderit.
NOTICE:
• Besuretousegenuinecutterblade.
Turn thetool upside downso that youcan replace the
cutterbladeeasily.(Fig. 11)
1. Fitthereceivewasherontheaxis.
2. Turnthereceivewasheruntilthenotchonthereceive
washercomesonthenotchofthegearcase.
3. Insert the round bar through both notches so that
receivewashercannotbeturned.
4. Putthebladeonthereceivewasher.
5. Puttheclampwasherontheblade.
6. Putthecupontheblade.
7. Tighten them with the nut by turning it
counterclockwisewhileholdingtheroundbar.
To remove the blade, perform the above steps in
reverse.
Installing nylon cutting head (Fig. 12)
NOTICE:
• Besuretousegenuinenyloncuttinghead.
Turn thetool upside downso that youcan replace the
nyloncuttingheadeasily.
NOTE:
• Removethecoveronthecordcutterbeforeuse.
1. Fitthereceivewasherontheaxis.
2. Turnthereceivewasheruntilthenotchonthereceive
washercomesonthenotchofthegearcase.
3. Insert the round bar through both notches so that
receivewashercannotbeturned.
4. Fit the nylon cutting head by turning it
counterclockwise.
5. Remove the round bar after installing the nylon
cuttinghead.
Toremove thenylonhead, perform theabovesteps in
revere.

13
OPERATION
Correct handling of tool (Fig. 13)
Correct posture
WARNING:
• Always position the tool on your right-hand side
so that the barrier is always in front of your body.
Correct positioning of the tool allows for maximum
control and will reduce the risk of serious personal
injurycausedbykickback.
CAUTION:
• If during operation the cutting tool accidentally
impacts a rock or hard object, stop the tool and
inspect for any damage. If the cutting tool is
damaged, replace it immediately.Useofadamaged
cuttingtoolcouldresultinseriouspersonalinjury.
Puttheshoulderharnessonyourleftshoulderbyputting
yourheadandrightarmthroughitandkeepthetoolon
yourrightsidewhilealwayskeepingthebarrierinfront
ofyourbody.
Attachment of shoulder harness (Fig. 14)
Adjusttheharnesslengthsothatthecuttingtooliskept
parallelwiththeground.
Connectthehangerandtheharness.
WARNING:
• Be extremely careful to maintain control of the tool
at all times. Do not allow the tool to be deected
toward you or anyone in the work vicinity.Failureto
keepcontrolofthetoolcouldresultinseriousinjuryto
thebystanderandtheoperator.
Adjustment of the hanger position and shoulder
harness (Fig. 15)
Adjustthehangerpositionasillustrated.(Fig. 16)
To change the hanger position, loosen the bolt on the
hanger.Thenmovethehanger.
Afteradjustingthehangerposition,tightentheboltwith
thewrenchsecurely.
MAINTENANCE
WARNING:
• Always be sure that the tool is switched off and
unplugged before attempting to perform inspection
or maintenance on the tool. Failure to switch off
andunplugmayresultinseriouspersonalinjuryfrom
accidentalstart-up.
NOTICE:
• Never use gasoline, benzine, thinner, alcohol or the
like.Discoloration,deformationorcracksmayresult.
Replacing the nylon cord (Fig. 17)
WARNING:
• Make sure that the nylon cutting head is secured to
the tool properly before operation.Failuretoproperly
securethenyloncuttingheadmaycauseittoyapart
resultinginseriouspersonalinjury.
1. Removethenyloncuttinghead.
2. Takeoffthe cover,pressing two latcheswhich are
slottedsectionoppositelyonsideofthecup.
3. Removethespool.Andremovetheoldnyloncord
fromthespool.
4. Cutanylonlinein3–6m.Foldthecuttinglineintwo
halves,leaveoneofhalflonger80–100mmthan
another. (Fig. 18)
5. Hookthemiddleofthenewnyloncordtothenotch
locatedatthecenterofthespoolbetweenthetwo
channelsprovidedforthenyloncord. (Fig. 19)
6. Wind both ends rmly along the channels in the
direction indicated by arrow mark on the spool.
(Fig. 20)
7. Putthenyloncordsthroughtheeyeletstocomeout
ofthecup.
8. Align the protrusion on the underside of the cover
with the slots of the eyelets. Then push the cover
rmly onto the cup to secure it. Make sure the
latchesfullyspreadinthecover.
To maintain product SAFETY and RELIABILITY,
repairs,anyothermaintenanceoradjustmentshouldbe
performedbyMakitaAuthorizedServiceCenters,always
usingMakitareplacementparts.

14
MAINTENANCE INTERVAL
Parts: Interval: Howto:
Powercord Everytimebeforeusing Visuallyinspectwhetheritisnotbadlywornor
damaged.Ifitisdamaged,askyourlocalservicecenter
forrepair.
Auxiliaryhandlescrew Everytimebeforeusing Checkwhetherscrewisnotloose.Tightenthescrewif
itisloose.Replacethescrewifitisdamaged.
Cuttingtoolguard
(protector) Everytimebeforeusing Checkwhetherscrewisnotloose,whetherprotectoris
notdamaged.Tightenthescrewifitisloose.Replace
theprotectorifitisdamaged.
Cutterblade Every10h Lubricatewithanticorrosiveoilaftereachuse.Check
whetheritisnotdamaged.Replaceitifitisdamaged.
Nyloncuttinghead Every10h Visuallyinspectwhetheritisnotbadlywornor
damaged.Replaceitifitisdamaged.
Gearshaft Every10h Lubricatewithanticorrosiveoil.
TROUBLESHOOTING
Beforeaskingforrepairs,conductyourowninspectionrst.Ifyoundaproblemthatisnotexplainedinthemanual,
donotattempttodismantlethetool.Instead,askMakitaAuthorizedServiceCenters,alwaysusingMakitareplacement
partsforrepairs.
Malfunctionstatus Cause Action
Motordoesnotrun.
Powermainsisnotpluggedin. Pluginthemains.
Powercablebroken. Ask your local authorized service
centerforrepair.
The drive system does not work
correctly.
Motorstopsrunningafteralittleuse. Overheating. Stopusingoftooltoallowittocool
down.
ItdoesnotreachmaximumRPM. The drive system does not work
correctly. Ask your local authorized service
centerforrepair.
Cuttingtooldoesnotrotate:
stopthemachineimmediately!
Foreign object such as a branch is
jammedbetweentheguardandthe
cuttingtool. Removetheforeignobject.
Cutterbladefasteningnutisloose. Tightenthenutproperlyasdescribed
inthismanual.
Thecutterbladeisbended. Replacethecutterblade.
The drive system does not work
correctly. Ask your local authorized service
centerforrepair.
Abnormalvibration:
stopthemachineimmediately!
Oneendofthenyloncordhasbeen
broken.
Bumpthenyloncuttingheadagainst
the ground while it is rotating to
causethecordtofeed.
Thecutterbladeisbended,cracked
orworn. Replacethecutterblade.
Cutterbladefasteningnutisloose. Tightenthenutproperlyasdescribed
inthismanual.
Cutterbladeisfastenedimproperly.
The drive system does not work
correctly. Ask your local authorized service
centerforrepair.
Cuttingtoolandmotorcannotstop:
Disconnect the mains plug
immediately! Electricorelectronicmalfunction. Disconnectthemainsplugandask
yourlocalauthorizedservicecenter
forrepair.

15
OPTIONAL ACCESSORIES
CAUTION:
• Theseaccessoriesor attachmentsarerecommended
forusewithyourMakitatoolspeciedinthismanual.
Theuseofanyotheraccessoriesorattachmentsmight
presentariskofinjurytopersons.Onlyuseaccessory
orattachmentforitsstatedpurpose.
If you need any assistance for more details regarding
theseaccessories,askyourlocalMakitaServiceCenter.
• Cutterblade
• Nyloncuttinghead
• Nyloncord(cuttingline)
• Shoulderharness
NOTE:
• Some items in the list may be included in the tool
packageasstandardaccessories.Theymaydifferfrom
countrytocountry.

16
FRANÇAIS (instructions originales)
Descriptif
1 Supportdecâble
2 Cordond’alimentation(laforme
peutvarierd’unpaysàl’autre)
3 Poignéearrière
4 Boutondesécurité
5 Gâchette
6 Poignéeavant
7 Anneaudesuspension
8 Protection
9 Déecteurdel’outildecoupe
10 Outildecoupe
11 Harnais
12 Amortisseur
13 Zonedecoupelaplusefcace
14 Poignée
15 Partierecouvertede
caoutchouc
16 Déecteurintérieur
17 Déecteurextérieur
18 Rondelled’appui
19 Tigeronde
20 Lame
21 Rondelledeserrage
22 Coupelle
23 Écrou
24 Têtedecoupeàlnylon
25 Coupe-l
26 Cachedeprotection
27 Anneaudesuspension
28 80–100mm
29 Bobine
SPÉCIFICATIONS
Modèle UR2300 UR3502
Typedepoignée Poignéecirculaire
Longueurtotale 1630mm
Puissanceenrégimecontinu 1000W
Vitesseàvide 5700min–1 5700min–1
Outildecoupe Lamedecoupe Têtedecoupeàlnylon
Largeurdecoupe 230mm 350mm
Poidsnet 4,7kg 4,9kg
Catégoriedesécurité /II
• Étantdonnél’évolutionconstantedenotreprogrammederechercheetdéveloppement,lesspécicationscontenues
danscemanuelsontmodiablessanspréavis.
• Lesspécicationspeuventvariersuivantlespays.
• PoidsselonlaprocédureEPTA01/2003
Niveau sonore Niveaudepressionacoustique
moyen Niveaudepuissanceacoustique
moyen Normeapplicable
Outildecoupe LPA(dB(A)) IncertitudeK
(dB(A)) LwA(dB(A)) IncertitudeK
(dB(A))
Lamedecoupe 80,8 2,5 93,45 1,23 EN60335-1,
EN50636-2-91,
ENISO11806
Têtedecoupeà
lnylon 85,3 2,5 93,84 1,58
• Portezdesprotecteursd’oreilles.
Vibrations Poignéeavant Poignéearrière
Normeapplicable
Outildecoupe ah(m/s2) IncertitudeK
(m/s2)ah(m/s2) IncertitudeK
(m/s2)
Lamedecoupe 2,856 1,5 2,712 1,5 EN60335-1,
EN50636-2-91,
ENISO11806
Têtedecoupeà
lnylon 2,768 1,5 2,694 1,5
• Lavaleurd’émissiondevibrationdéclaréeaétémesurée
conformémentàlaméthoded’essainormaliséeetpeut
êtreutiliséepourcomparerdifférentsoutils.
• Lavaleurd’émissiondevibrationdéclaréepeutaussi
êtreutiliséepourréaliseruneévaluationpréliminairede
l’exposition.
AVERTISSEMENT :
• L’émission de vibration pendant l’utilisation réelle de
l’outil électrique peut différer de la valeur d’émission
déclaréeenfonctiondelafaçondontl’outilestutilisé.
• Assurez-vous que les mesures de sécurité visant à
protégerl’opérateursontbaséessuruneestimationde
l’expositiondansles conditionsnormalesd’utilisation,
(en tenant compte de toutes les phases du cycle de
fonctionnement, y compris les périodes d’arrêt et de
fonctionnementàvide).

17
Symboles
Lessymbolessuivantsvoussignalentdesinformations
importantesrelativesàl’équipement.Assurez-vousque
vouscomprenezleursignicationavantutilisation.
• Soyezvigilant.
• Lisezlemanueld’instruction.
• Danger,risquedeprojectiond’objets.
• Distanceminimumentre l’outil etles
personnesprésentes15m.
360°
• Éloignezlespersonnesprésentes.
• Portez un casque, des lunettes de
sécuritéetdesprotecteursd’oreilles.
• Portezdesgantsdeprotection.
• Portez des chaussures solides à
semelles antidérapantes. Le port de
chaussuresdesécuritéàembouten
acierestrecommandé.
• N’exposezpasl’outilàl’humidité.
• Débranchezlaprisedel’alimentation
si le cordon est endommagé ou
emmêlé.
• Évitezleschocsenretour.
15m(50FT)• Restez à une distance de 15m
minimum.
• DOUBLEISOLATION
• Pourl’UEuniquement
Ne jetez pas les équipements
électriques dans les ordures
ménagères!
Conformément à la directive
européenne relative aux déchets
d’équipements électriques et
électroniques (DEEE) et à sa
transposition dans la législation
nationale, les équipements
électriquesquiontatteintlandeleur
duréedeservicedoiventêtrecollectés
àpartetêtresoumisàunrecyclage
respectueuxdel’environnement.
DÉCLARATION DE CONFORMITÉ CE
Pour les pays d’Europe uniquement
LadéclarationdeconformitéCEestfournieenAnnexeA
àcemoded’emploi.

18
Consignes de sécurité générales des outils
électriques
AVERTISSEMENT Veuillez lire toutes les
consignes de sécurité et les instructions. Il y a un
risquedechocélectrique,d’incendieet/oudeblessure
grave si les consignes et les instructions ne sont pas
toutesrespectées.
Conservez toutes les consignes et
instructions pour référence ultérieure.
Leterme«outilélectrique»,danstouteslesmisesen
garde ci-dessous, désigne un outil électrique alimenté
surlesecteur(avecuncordond’alimentation)ouparpile
(sanscordond’alimentation).
Sécurité de l’aire de travail
1. Maintenez l’aire de travail propre et bien éclairée.
Des zones sombres ou encombrées peuvent
entraînerdesaccidents.
2. N’utilisez pas les outils électriques dans
les atmosphères explosives, par exemple
en présence de liquides, gaz ou poussières
inammables. Lesoutilsélectriquesproduisentdes
étincellesaucontactdesquelleslapoussièreoules
vapeurspeuvents’enammer.
3. Assurez-vous qu’aucun enfant ou passant ne
s’approche pendant que vous utilisez un outil
électrique. Ilyarisquedepertedemaîtrisedel’outil
sivotreattentionestdétournée.
Sécurité en matière d’électricité
4. La che des outils électriques doit être conçue
pour la prise de courant utilisée. Ne modiez
jamais la che de quelque façon que ce soit.
N’utilisez aucun adaptateur de che sur les outils
électriques avec mise à la terre. L’utilisation de
chesnonmodiéesaveclesprisesdecourantpour
lesquellesellesontétéprévuesréduiralesrisques
dechocélectrique.
5. Évitez tout contact corporel avec les surfaces
mises à la terre, telles que tuyaux, radiateurs,
cuisinières et réfrigérateurs. Le risque de choc
électrique augmente si votre corps est mis à la
terre.
6. N’exposez pas les outils électriques à la pluie
ou à des conditions d’humidité. Lerisquedechoc
électriqueaugmentelorsquedel’eaupénètredans
unoutilélectrique.
7. Ne maltraitez pas le cordon. N’utilisez jamais le
cordon pour transporter un outil électrique, pour
tirer dessus ou pour le débrancher. Maintenez le
cordon à l’écart de la chaleur, de l’huile, des objets
à bords tranchants et des pièces en mouvement.
Lerisquedechocélectriqueaugmentelorsqueles
cordonssontendommagésouenchevêtrés.
8. Lorsque vous utilisez un outil électrique à
l’extérieur, utilisez un cordon prolongateur conçu
à cette n. Le risque de choc électrique diminue
lorsqu’uncordonconçupourl’extérieurestutilisé.
9. Si l’utilisation d’un outil électrique dans un
endroit humide est inévitable, utilisez une
alimentation protégée par un dispositif pour
courant résiduel (DCR). L’utilisation d’un DCR
réduitlerisqued’électrocution.
10. Il est recommandé d‘utiliser une alimentation via
un DCR dont le courant résiduel nominal est de
30 mA au maximum.
Sécurité personnelle
11. Restez alerte, attentif à vos gestes, et faites
preuve de bon sens lorsque vous utilisez un outil
électrique. Évitez d’utiliser un outil électrique
lorsque vous êtes fatigué, avez consommé de
l’alcool ou pris un médicament. Tout moment
d’inattentionpendantl’utilisationd’unoutilélectrique
comporteunrisquedeblessuregrave.
12. Utilisez l’équipement de protection personnel.
Portez toujours des protections oculaires.
L’équipement de protection tels que les masques
antipoussières, les chaussures à semelles
antidérapantes,lescasquesdursoulesprotections
utilisés dans des conditions appropriées réduiront
lesblessurespersonnelles.
13. Prévenez tout démarrage accidentel. Assurez-
vous que l’interrupteur se trouve en position
d’arrêt avant de brancher à la source
d’alimentation et/ou au blocbatterie, de ramasser
ou de porter l’outil. Vous ouvrez la porte aux
accidents si vous transportez les outils électriques
avec votre doigt sur la gâchette ou si vous les
brancheztandisquel’interrupteurestenpositionde
marche.
14. Retirez toute clé de réglage ou autre clé avant
de mettre l’outil sous tension. Touteclélaisséeen
placesurunepiècerotativedel’outilélectriquepeut
causeruneblessure.
15. Maintenez une bonne position. Assurez-vous
d’une bonne prise au sol et d’une bonne position
d’équilibre en tout temps. Cela vous permettra
d’avoir une meilleure maîtrise de l’outil dans les
situationsimprévues.
16. Portez des vêtements adéquats. Évitez de porter
des vêtements amples et des bijoux. Assurez-
vous que vos cheveux, vêtements et gants
demeurent à l’écart des pièces en mouvement.
Les vêtements amples, bijoux et cheveux longs
peuventêtrehappésparlespiècesenmouvement.
17. Si des accessoires sont fournis pour le
raccordement d’un appareil d’aspiration et de
collecte de la poussière, assurez-vous de les
raccorder et utiliser correctement. L’utilisation
d’unappareildecollectedespoussièrespeutréduire
lesdangerscausésparlapoussière.
Utilisation et entretien des outils électriques
18. Ne forcez pas l’outil électrique. Utilisez l’outil
électrique qui convient au travail à effectuer. Si
vousutilisez lebon outilélectrique et respectez le
régime pour lequel il a été conçu, il effectuera un
travaildemeilleurequalité,etcedefaçonplussûre.
19. N’utilisez pas l’outil électrique si sa gâchette
ne peut pas être activée et désactivée. Toutoutil
électrique dont l’interrupteur ne fonctionne pas est
dangereuxetdoitêtreréparé.
20. Débranchez la che de la source d’alimentation
et/ou retirez le bloc-pile de l’outil électrique
avant d’effectuer tout réglage, de changer un
accessoire ou de ranger l’outil électrique. De
tellesmesurespréventivesréduisentlesrisquesde
démarrageaccidenteldel’outilélectrique.

19
21. Une fois terminée l’utilisation d’un outil électrique,
rangez-le dans un endroit hors de portée des
enfants, et ne laissez aucune personne l’utiliser
si elle n’est pas familiarisée avec l’outil électrique
ou n’a pas pris connaissance des présentes
instructions. Les outils électriques représentent
un danger entre les mains de personnes qui n’en
connaissentpaslemoded’utilisation.
22. Entretien des outils électriques. Vériez que
les pièces mobiles ne sont pas désalignées
ou coincées, qu’aucune pièce n’est cassée ou
toute autre condition qui pourrait affecter le
bon fonctionnement de l’outil électrique. S’il
est endommagé, faites réparer l’outil électrique
avant de l’utiliser. De nombreux accidents sont
causéspardesoutilsélectriquesmalentretenus.
23. Maintenez les outils tranchants bien aiguisés
et propres. Un outil tranchant dont l’entretien est
effectué correctement et dont les bords sont bien
aiguisésrisquemoinsdesecoinceretestplusfacile
àmaîtriser.
24. Utilisez l’outil électrique, ses accessoires, ses
embouts, etc., en respectant les présentes
instructions et en tenant compte des conditions
de travail ainsi que du type de travail à effectuer.
L’utilisation d’un outil électrique à des ns autres
quecellesprévuescomporteunrisquedesituation
dangereuse.
Service
25. Faites réparer votre outil électrique par un
réparateur qualié qui utilise des pièces de
rechange identiques aux pièces d’origine. Cela
permettrad’assurerlemaintiendelasûretédel’outil
électrique.
26. Suivez les instructions pour graisser l’outil et
changer les accessoires.
27. Maintenez les poignées sèches, propres et
exemptes d’huile ou de graisse.
IMPORTANTES CONSIGNES DE SÉCURITÉ
AVERTISSEMENT ! Veuillez lire toutes les
consignes de sécurité et instructions. Lenon-respect
desmisesengardeetdesinstructionspeutentraînerun
chocélectrique,unincendieet/oudesblessuresgraves.
Conservez toutes les mises en garde et
instructions pour référence ultérieure.
Utilisation prévue
1. Le coupe-herbe/débroussailleuse est prévu
uniquement pour couper l’herbe, les mauvaises
herbes,lesbuissonsetlesbroussailles.Ilnedoitpas
être utilisé à d’autres ns, par exemple l’entretien
deborduresouletaillagedehaies,souspeinede
blessure.
Généralités
1. Ne laissez jamais des personnes (notamment
des enfants) présentant des capacités physiques,
sensorielles ou mentales réduites, des personnes
dénuéesd’expérienceetdeconnaissancesoudes
personnes non familiarisées avec les présentes
instructions utiliser l’outil. Les enfants doivent être
surveillés pour s’assurer qu’ils ne jouent pas avec
l’outil.
2. Avantdedémarrerl’outil,lisezlemanueld’instruction
pourvousfamiliariseraveclamanipulationdel’outil.
3. Ne prêtez pas l’outil à une personne manquant
d’expérience et de connaissances relatives à la
manipulation des débroussailleuses et coupe-
herbes.
4. Lorsque vous prêtez l’outil, joignez toujours le
présentmanueld’instruction.
5. Manipuleztoujoursl’outilavecprudence.
6. N’utilisez jamais l’outil lorsque vous êtes malade,
fatigué ou sous l’inuence d’alcool ou de
médicaments.
7. N’essayezjamaisdemodierl’outil.
8. Veillez à ne pas vous blesser avec le coupe-l
(miseà la bonne longueur du l de coupe).Après
allongementduldecoupe,remetteztoujoursl’outil
en position de fonctionnement normal avant de le
mettreenmarche.
9. Respectezlaréglementationrelativeàlamanipulation
des débroussailleuses et coupe-herbes en vigueur
dansvotrepays.
Équipement de protection personnelle
1. Portez un casque, des lunettes de sécurité et des
gantspourvousprotégerdelaprojectiondedébris
etdeschutesd’objets.
2. Portez un dispositif de protection (protecteurs
d’oreilles) an de réduire les risques de perte
d’audition.
3. Portez des vêtements (bleu de travail) et des
chaussures appropriés (chaussures solides à
semellesantidérapantes)pourunfonctionnementen
toutesécurité.Neportezpasdevêtementsamples
ni de bijoux. Les pièces en mouvement peuvent
happer les vêtements amples, les bijoux et les
cheveuxlongs.
4. Portez des gants de protection lorsque vous
manipulez la lame de coupe. La manipulation des
lamesdecoupeàmainsnuesprésentedesrisques
decoupuregrave.
Sécurité de la zone de travail
1. Utilisez l’outil uniquement dans des endroits bien
éclairés, où la visibilité est bonne. N’utilisez pas
l’outildansl’obscuritéoulebrouillard.
2. N’utilisez pas l’outil dans des atmosphères
explosives, par exemple en présence de liquides,
gazoupoussièresinammables.L’outilproduitdes
étincellesquipeuventenammerlespoussièresou
émanations.
3. N’utilisezjamaisl’outilsurunesurfaceglissanteou
instableousurunepenteabrupte.Pendantlasaison
froide, faites attention au verglas et à la neige, et
conserveztoujoursunbonappuiausol.
4. Pendantl’utilisation,veillezàcequelespersonnes
etlesanimauxrestentàunedistanceminimumde
15m de l’outil. Arrêtez l’outil dès que quelqu’un
s’approche.

20
5. Avant de commencer à travailler, assurez-vous
que la zone de travail est exempte de pierres ou
autresobjetsdurs.Ilsrisquentd’êtreprojetésoude
causerunchocenretour,cequipeutentraînerdes
blessuresgravesoudesdommagesmatériels.
6. AVERTISSEMENT : L’utilisation de ce produit
peutgénérerdespoussièrescontenantdesproduits
chimiques pouvant des maladies respiratoires ou
autres affections. Ces produits chimiques peuvent
êtreparexempledescomposésprésentsdansles
pesticides, insecticides, engrais et herbicides. Le
risque présenté par l’exposition à ces composés
varie en fonction de la fréquence de ce type de
travail.Pourréduirevotreexpositionàcesproduits
chimiques, travaillez dans une zone bien aérée et
portez des protections agréées, par exemple un
masque anti-poussière spécialement conçu pour
ltrerlesmicroparticules.
Sécurité électrique
1. Le type de che de l’outil électrique doit
correspondre à celui de la prise de courant. Ne
modiez jamais la che, de quelque façon que
ce soit. N’utilisez pas de che d’adaptation avec
les outils électriques mis à la terre (masse).
L’utilisation de ches non modiées et de prises
du type correspondant réduit les risques de choc
électrique.
2. Évitez tout contact avec les surfaces mises à la
terre ou à la masse, telles que tuyaux, radiateurs,
cuisinières et réfrigérateurs. Lesrisquesdechoc
électriqueaugmententsivotrecorpssetrouvemisà
laterreouàlamasse.
3. Évitezd’exposerl’outilàlapluieouàl’humidité.La
pénétrationd’eaudansl’outilaugmentelesrisques
dechocélectrique.
4. Ne maltraitez pas le cordon. Ne transportez
jamais l’outil électrique par le cordon, et ne
tirez pas sur le cordon pour déplacer l’outil ou
débrancher la che. Tenez le cordon à l’écart
des sources de chaleur, de l’huile, des objets
tranchants et des pièces en mouvement. Les
cordonsendommagésouemmêlésaugmententles
risquesdechocélectrique.
5. N’utilisez pas l’outil si son interrupteur est
défectueux. Tout outil qui ne peut pas être mis
en marche et arrêté à l’aide de l’interrupteur est
dangereuxetdoitêtreréparé.
6. Lorsque vous utilisez un outil électrique à
l’extérieur, utilisez une rallonge conçue pour
l’extérieur.L’utilisationd’unerallongeconçuepour
l’extérieurréduitlesrisquesdechocélectrique.
7. Si l’utilisation d’un outil électrique dans un
emplacement humide est inévitable, utilisez une
source d’alimentation protégée par un disjoncteur
différentiel.L’utilisationd’undisjoncteurdifférentiel
réduitlesrisquesdechocélectrique.
8. Nous vous recommandons d’utiliser une
alimentation protégée par un disjoncteur
différentiel dont le courant de déclenchement est
inférieur ou égal à 30 mA.
9. Prévenezlesdémarragesaccidentels.Assurez-vous
que l’interrupteur est en position d’arrêt avant de
brancherl’outil,etavantdesaisiroudetransporter
l’outil. Vous ouvrez la porte aux accidents si vous
transportez un outil électrique avec le doigt sur
l’interrupteurousivouslemettezsoustensionalors
quel’interrupteurestenpositiondemarche.
10. Avant toute utilisation, inspectez le cordon
d’alimentation et la rallonge pour vérier qu’ils ne
présentent aucun signe de détérioration ou de
vieillissement.
11. Si le cordon d’alimentation est endommagé en
coursd’utilisation,débranchez-leimmédiatementde
l’alimentation.Ne touchez pas le cordon avant de
l’avoir débranché de l’alimentation.
12. N’utilisezpasl’outilsilescordonssontendommagés
ouusés.
13. Tenezlarallongeàl’écartdesélémentsdecoupe.
Mise en service
1. Avantdemonterouderéglerl’outil,débranchezla
chedelasourced’alimentation.
2. Portez des gants de protection lorsque vous
manipulezlalamedecoupe.
3. Avant de brancher l’outil, vériez qu’il n’est pas
endommagé, que les vis/écrous sont serrés et
que le montage est correct. Affûtez les lames de
coupeémoussées.Silalamedecoupeesttordue
ou endommagée, remplacez-la. Vériez le bon
fonctionnementdetouslesboutonsetinterrupteurs
decommande.Nettoyezetséchezlespoignées.
4. N’essayezjamais de démarrer l’outil si celui-ci est
endommagéoupartiellementmonté.Lenon-respect
de cette consigne peut entraîner des blessures
graves.
5. Avant de mettre l’outil sous tension, retirez toute
clé ou clé de réglage. Une clé de réglage ou une
clélaisséesurunepièceenrotationdel’outilpeut
entraîneruneblessure.
6. Ajustez le harnais et la poignée en fonction de la
tailledel’utilisateur.
7. Lorsque vous branchez l’outil, éloignez l’outil de
coupe de votre corps et de tout objet, y compris
le sol. L’outil de coupe risque de tourner lors du
démarrage,cequipeutentraînerdesblessures,une
détériorationdel’outiloudesdommagesmatériels.
Fonctionnement
1. Encasd’urgence,arrêtezimmédiatementl’outil.
2. Encasdefonctionnementanormal(bruit,vibrations),
arrêtez l’outil. N’utilisez pas l’outil avant d’avoir
identiéetrésoluleproblème.
3. Avertissement. L’outil de coupe continue à tourner
pendantunecourteduréeaprèsmisehorstension
del’outil.Attendezavantdetoucherl’outildecoupe.
4. Utilisezl’outilavecleharnais.Maintenezfermement
l’outilàvotredroite.
5. Nevouspenchezpastropenavant.Conservezun
bonappuietgardezvotreéquilibreenpermanence.
Faitesattentionànepastrébuchersurlesobstacles
cachés(souchesetracines,fossés).
6. N’utilisezjamaisl’outil sur uneéchelle ou dansun
arbre.Vousrisquezd’enperdrelecontrôle.
7. Vériez l’état de l’outil avant de l’utiliser. Si l’outil
subit un choc important ou tombe, vériez son
état avant de continuer à travailler. Vériez le bon
fonctionnement des commandes et des dispositifs
de sécurité. En cas de détérioration ou de doute,
demandezàuncentretechniqueagrééderéaliser
l’inspectionetlesréparations.
8. Ne touchez pas le carter d’engrenage. Le carter
d’engrenagedevientchaudpendantl’utilisation.
9. Faites des pauses an d’éviter toute perte de
contrôledueàlafatigue.Nousvousrecommandons
unepausede10à20minutestouteslesheures.
Other manuals for UR2300
1
This manual suits for next models
1
Table of contents
Languages:
Other Makita Trimmer manuals

Makita
Makita UH 5530, UH 6330 Instruction Manual

Makita
Makita UH422D Manual

Makita
Makita EN4950H User guide

Makita
Makita RU03 User manual

Makita
Makita 3709 User manual

Makita
Makita DUR141 User manual

Makita
Makita UH4510A User manual

Makita
Makita UH013G User manual

Makita
Makita RT0700C User manual

Makita
Makita DUR361U Manual

Makita
Makita DUH751 User manual

Makita
Makita UH6570 User manual

Makita
Makita EY2650H User guide

Makita
Makita RBC201 Quick start guide

Makita
Makita UH004G User manual

Makita
Makita EN401MP User manual

Makita
Makita RT0700C User manual

Makita
Makita DUR190U User manual

Makita
Makita DUR141 User manual

Makita
Makita CRU03 User manual