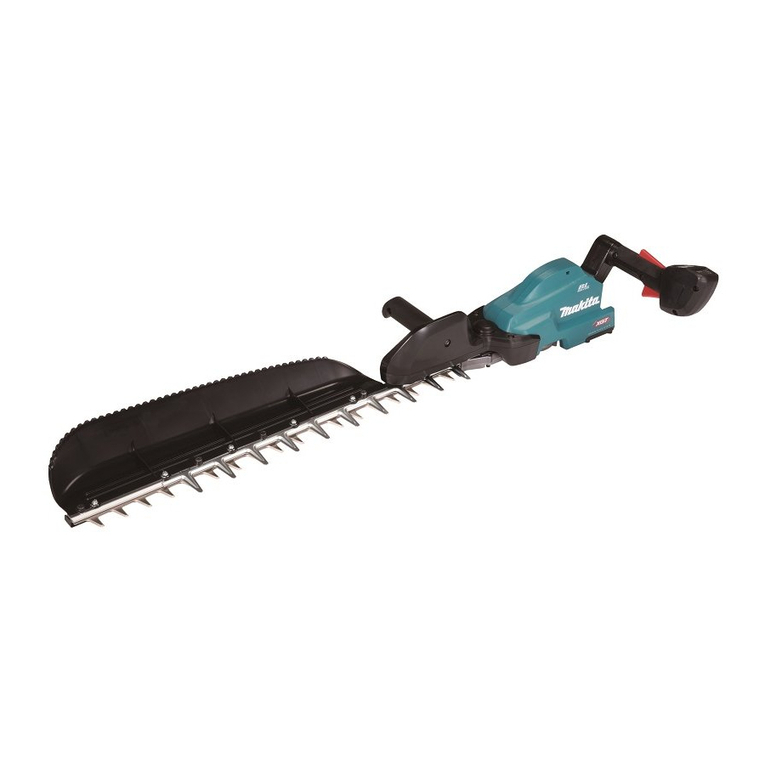
Makita DUN461W User manual

INSTRUCTION MANUAL
MANUEL D'INSTRUCTION
MANUAL DE INSTRUCCIONES
Cordless Pole Hedge Trimmer
Taille Haie Sur Perche Sans-Fil
Cortasetos de Extensión Inalámbrico
DUN461W
IMPORTANT: Read Before Using.
IMPORTANT : Lire avant usage.
IMPORTANTE: Lea antes de usar.

2ENGLISH
ENGLISH (Original instructions)
SPECIFICATIONS
Model: DUN461W
Blade length 460 mm (18-1/8")
Strokes per minute 3,600 /min
Cutting blade angle 135° (up 60°, down 75°)
Overall length 1,889 - 2,511 mm (74-1/2" - 99")
Rated voltage D.C. 18 V
Net weight 3.0 - 3.3 kg (6.6 - 7.3 lbs)
•
Due to our continuing program of research and development, the specications herein are subject to change without notice.
• Specications may dier from country to country.
• The weight may dier depending on the attachment(s), including the battery cartridge. The lightest and heavi-
est combination, according to EPTA-Procedure 01/2014, are shown in the table.
Applicable battery cartridge, battery adapter and charger
Battery cartridge
BL1815N / BL1820B / BL1830 / BL1830B / BL1840B / BL1850B / BL1860B
Battery adapter PDC01
Charger
DC18RC / DC18RD / DC18RE / DC18SD / DC18SE / DC18SF / DC18SH
• Some of the battery cartridges, battery adapters and chargers listed above may not be available depending on
your region of residence.
• Before using the battery adapter, read instruction and cautionary markings on the battery adapter.
WARNING: Only use the battery cartridges, battery adapters and chargers listed above. Use of any
other battery cartridges,battery adapters and chargers may cause injury and/or re.
SAFETY WARNINGS
General power tool safety warnings
WARNING: Read all safety warnings, instruc-
tions, illustrations and specications provided
with this power tool. Failure to follow all instructions
listed below may result in electric shock, re and/or
serious injury.
Save all warnings and instruc-
tions for future reference.
The term "power tool" in the warnings refers to your
mains-operated (corded) power tool or battery-operated
(cordless) power tool.
Work area safety
1. Keep work area clean and well lit. Cluttered or
dark areas invite accidents.
2. Do not operate power tools in explosive atmo-
spheres, such as in the presence of ammable
liquids, gases or dust. Power tools create sparks
which may ignite the dust or fumes.
3. Keep children and bystanders away while
operating a power tool. Distractions can cause
you to lose control.
Electrical Safety
1. Power tool plugs must match the outlet. Never
modify the plug in any way. Do not use any
adapter plugs with earthed (grounded) power
tools. Unmodied plugs and matching outlets will
reduce risk of electric shock.
2. Avoid body contact with earthed or grounded
surfaces, such as pipes, radiators, ranges and
refrigerators. There is an increased risk of elec-
tric shock if your body is earthed or grounded.
3. Do not expose power tools to rain or wet con-
ditions. Water entering a power tool will increase
the risk of electric shock.
4.
Do not abuse the cord. Never use the cord for carrying,
pulling or unplugging the power tool. Keep cord away
from heat, oil, sharp edges or moving parts. Damaged
or entangled cords increase the risk of electric shock.
5.
When operating a power tool outdoors, use an
extension cord suitable for outdoor use. Use of a cord
suitable for outdoor use reduces the risk of electric shock.
6. If operating a power tool in a damp location is
unavoidable, use a ground fault circuit inter-
rupter (GFCI) protected supply. Use of a GFCI
reduces the risk of electric shock.
7.
Power tools can produce electromagnetic elds
(EMF) that are not harmful to the user. However,
users of pacemakers and other similar medical
devices should contact the maker of their device and/
or doctor for advice before operating this power tool.

3ENGLISH
Personal Safety
1. Stay alert, watch what you are doing and use
common sense when operating a power tool.
Do not use a power tool while you are tired or
under the inuence of drugs, alcohol or med-
ication. A moment of inattention while operating
power tools may result in serious personal injury.
2. Use personal protective equipment. Always
wear eye protection. Protective equipment such
as dust mask, non-skid safety shoes, hard hat, or
hearing protection used for appropriate conditions
will reduce personal injuries.
3. Prevent unintentional starting. Ensure the
switch is in the o-position before connecting
to power source and/or battery pack, picking
up or carrying the tool. Carrying power tools with
your nger on the switch or energising power tools
that have the switch on invites accidents.
4. Remove any adjusting key or wrench before
turning the power tool on. A wrench or a key left
attached to a rotating part of the power tool may
result in personal injury.
5. Do not overreach. Keep proper footing and
balance at all times. This enables better control
of the power tool in unexpected situations.
6. Dress properly. Do not wear loose clothing or
jewellery. Keep your hair, clothing and gloves
away from moving parts. Loose clothes, jewel-
lery or long hair can be caught in moving parts.
7. If devices are provided for the connection of
dust extraction and collection facilities, ensure
these are connected and properly used. Use of
dust collection can reduce dust-related hazards.
8.
Do not let familiarity gained from frequent use
of tools allow you to become complacent and
ignore tool safety principles. A careless action can
cause severe injury within a fraction of a second.
9. Always wear protective goggles to protect
your eyes from injury when using power tools.
The goggles must comply with ANSI Z87.1 in
the USA.
It is an employer's responsibility to enforce the
use of appropriate safety protective equipment
by the tool operators and by other persons in
the immediate working area.
Power tool use and care
1. Do not force the power tool. Use the correct
power tool for your application. The correct
power tool will do the job better and safer at the
rate for which it was designed.
2. Do not use the power tool if the switch does
not turn it on and o. Any power tool that cannot
be controlled with the switch is dangerous and
must be repaired.
3. Disconnect the plug from the power source
and/or remove the battery pack, if detachable,
from the power tool before making any adjust-
ments, changing accessories, or storing power
tools. Such preventive safety measures reduce
the risk of starting the power tool accidentally.
4. Store idle power tools out of the reach of chil-
dren and do not allow persons unfamiliar with
the power tool or these instructions to operate
the power tool. Power tools are dangerous in the
hands of untrained users.
5.
Maintain power tools and accessories. Check for
misalignment or binding of moving parts, break-
age of parts and any other condition that may
aect the power tool’s operation. If damaged, have
the power tool repaired before use. Many accidents
are caused by poorly maintained power tools.
6. Keep cutting tools sharp and clean. Properly
maintained cutting tools with sharp cutting edges
are less likely to bind and are easier to control.
7. Use the power tool, accessories and tool bits
etc. in accordance with these instructions, tak-
ing into account the working conditions and
the work to be performed. Use of the power tool
for operations dierent from those intended could
result in a hazardous situation.
8.
Keep handles and grasping surfaces dry, clean
and free from oil and grease. Slippery handles
and grasping surfaces do not allow for safe handling
and control of the tool in unexpected situations.
9. When using the tool, do not wear cloth work
gloves which may be entangled. The entangle-
ment of cloth work gloves in the moving parts may
result in personal injury.
Battery tool use and care
1. Recharge only with the charger specied by
the manufacturer. A charger that is suitable for
one type of battery pack may create a risk of re
when used with another battery pack.
2. Use power tools only with specically desig-
nated battery packs. Use of any other battery
packs may create a risk of injury and re.
3. When battery pack is not in use, keep it away
from other metal objects, like paper clips,
coins, keys, nails, screws or other small metal
objects, that can make a connection from one
terminal to another. Shorting the battery termi-
nals together may cause burns or a re.
4. Under abusive conditions, liquid may be
ejected from the battery; avoid contact. If con-
tact accidentally occurs, ush with water. If
liquid contacts eyes, additionally seek medical
help. Liquid ejected from the battery may cause
irritation or burns.
5. Do not use a battery pack or tool that is dam-
aged or modied. Damaged or modied batteries
may exhibit unpredictable behaviour resulting in
re, explosion or risk of injury.
6. Do not expose a battery pack or tool to re or
excessive temperature. Exposure to re or tem-
perature above 130 °C may cause explosion.
7. Follow all charging instructions and do not
charge the battery pack or tool outside the
temperature range specied in the instruc-
tions. Charging improperly or at temperatures
outside the specied range may damage the
battery and increase the risk of re.
Service
1. Have your power tool serviced by a qualied
repair person using only identical replacement
parts. This will ensure that the safety of the power
tool is maintained.
2. Never service damaged battery packs. Service
of battery packs should only be performed by the
manufacturer or authorized service providers.

4ENGLISH
3. Follow instruction for lubricating and chang-
ing accessories.
4. Do not modify or attempt to repair the appli-
ance or the battery pack except as indicated in
the instructions for use and care.
Cordless Pole Hedge Trimmer
Safety Warnings
1. Keep all parts of the body away from the blade.
Do not remove cut material or hold material
to be cut when blades are moving. Blades
continue to move after the switch is turned o. A
moment of inattention while operating the hedge
trimmer may result in serious personal injury.
2. Carry the hedge trimmer by the handle with the
blade stopped and taking care not to operate
any power switch. Proper carrying of the hedge
trimmer will decrease the risk of inadvertent start-
ing and resultant personal injury from the blades.
3. When transporting or storing the hedge trim-
mer, always t the blade cover. Proper handling
of the hedge trimmer will decrease the risk of
personal injury from the blades.
4. When clearing jammed material or servicing
the unit, make sure all power switches are o
and the battery pack is removed or discon-
nected. Unexpected actuation of the hedge trim-
mer while clearing jammed material or servicing
may result in serious personal injury.
5. Hold the hedge trimmer by insulated gripping
surfaces only, because the blade may contact
hidden wiring. Blades contacting a "live" wire
may make exposed metal parts of the hedge trim-
mer "live" and could give the operator an electric
shock.
6. Keep all power cords and cables away from
cutting area. Power cords or cables may be hid-
den in hedges or bushes and can be accidentally
cut by the blade.
7. Do not use the hedge trimmer in bad weather
conditions, especially when there is a risk of
lightning. This decreases the risk of being struck
by lightning.
8. To reduce the risk of electrocution, never use
the pole hedge trimmer near any electrical
power lines. Contact with or use near power lines
may cause serious injury or electric shock result-
ing in death.
9. Always use two hands when operating the pole
hedge trimmer. Hold the pole hedge trimmer with
both hands to avoid loss of control.
10. Always use head protection when operating
the pole hedge trimmer overhead. Falling debris
can result in serious personal injury.
Additional Safety Instructions
Preparation
1. THIS HEDGE TRIMMER CAN CAUSE SERIOUS
INJURIES. Read the instructions carefully
for the correct handling, preparation, main-
tenance, starting and stopping of the tool.
Become familiar with all controls and the
proper use of the tool.
2. Check the hedges and bushes for foreign
objects, such as wire fences or hidden wiring
before operating the tool.
3. The tool must not be used by children or
young persons under 18 years of age. Young
persons over 16 years of age may be exempted
from this restriction if they are undergoing training
under the supervision of an expert.
4.
In the event of an emergency, switch o the tool
and remove the battery cartridge immediately.
5.
DANGER - Keep hands away from blade. Contact
with blade will result in serious personal injury.
6. First-time users should have an experienced
user show them how to use the tool.
7. Before operation, examine the work area for
wire fences, stones, or other solid objects.
They can damage the blades.
8.
Use the tool only if you are in good physical
condition. If you are tired, your attention will be
reduced. Be especially careful at the end of a work-
ing day. Perform all work calmly and carefully. The
user is responsible for all damages to third parties.
9. Before starting work, check to make sure that
the tool is in good and safe working order.
Ensure guards are tted properly. The tool
must not be used unless fully assembled.
10.
Avoid dangerous environment. Don't use the tool in
damp or wet locations or expose it to rain. Water enter-
ing the tool will increase the risk of electric shock.
Personal protective equipment
1. Work gloves of stout leather are part of the
basic equipment of the tool and must always
be worn when working with it. Also wear
sturdy shoes with anti-skid soles.
2. Wear ear protection such as ear mus to pre-
vent hearing loss.
3. Wear protective goggles, safety helmet and
protective gloves to protect yourself from
ying debris or falling objects.
4. When touching blades or adjusting the blade
angle, wear protective gloves. Blades can cut
bare hands severely.
Operation
1. Always use two hands to operate the tool.
Using one hand could cause loss of control and
result in serious personal injury.
2. While operating the tool, always ensure that
the operating position is safe and secure.
Overreaching with the tool, particularly from
a ladder, is extremely dangerous. Do not work
from anything wobbly or inrm.
3.
Do not simultaneously wear multiple belt harnesses
and/or shoulder harnesses when operating the tool.
4. During operation, keep bystanders or animals
at least 15 m (50 ft.) away from the tool. Stop
the tool as soon as someone approaches.
5. If cutting tool strikes any object or the tool
starts making unusual noise or vibration,
switch o the tool and remove the battery car-
tridge immediately and allow the tool to stop.
And then take the following steps:
• inspect for damage
• check for, and tighten, any loose parts

5ENGLISH
• have any damaged parts replaced or
repaired with genuine spare parts.
6. Only use the tool for its intended purpose. Do
not use the tool for any other purpose.
7. Switch o the tool and remove the battery
cartridge before:
• cleaning or when clearing a blockage,
• checking, carrying out maintenance or
working on the tool,
• adjusting the working position of the
shear blades,
• leaving the tool unattended.
8. Ensure that the tool is correctly located in a
designated working position before starting
the tool.
9. Do not operate the tool with a damaged or
excessively worn shear blades.
10. Always be aware of your surroundings and
stay alert for possible hazards of which you
may not be aware due to the noise of the tool.
11. Be careful not to accidentally contact a metal
fence or other hard objects during operation.
The blade will break and may cause serious injury.
12. Avoid unintentional starting. Do not carry the
tool when the battery cartridge is installed
and with nger on the switch. Make sure that
the switch is o when installing the battery
cartridge.
13. Do not grasp the exposed cutting blades or
cutting edges when picking up or holding the
tool.
14. Do not force the tool. It will do the job better and
with less likelihood of a risk of injury at the rate for
which it was designed.
15. Do not use the tool in the rain or in wet or
very damp conditions. The electric motor is not
waterproof.
16. Hold the tool rmly when using the tool.
17. Do not operate the tool at no-load
unnecessarily.
18. Before checking the shear blades, taking care
of faults, or removing foreign objects caught
in the shear blades, always switch o the tool
and remove the battery cartridge.
19. Never point the shear blades to yourself or
others.
20. If the blades stop moving due to the stuck of
foreign objects between the blades during
operation, switch o the tool and remove the
battery cartridge, and then remove the foreign
objects using tools such as pliers. Removing
the foreign objects by hand may cause an injury
for the reason that the blades may move in reac-
tion to removing the foreign objects.
Electrical and battery safety
1. Avoid dangerous environment. Don't use the
tool in dump or wet locations or expose it to
rain. Water entering the tool will increase the risk
of electric shock.
2. Do not dispose of the battery(ies) in a re.
The cell may explode. Check with local codes for
possible special disposal instructions.
3. Do not open or mutilate the battery(ies).
Released electrolyte is corrosive and may cause
damage to the eyes or skin. It may be toxic if
swallowed.
4. Do not charge battery in rain, or in wet
locations.
5. Do not charge the battery outdoors.
6. Do not handle charger, including charger plug,
and charger terminals with wet hands.
Maintenance and storage
1. When the tool is stopped for servicing, inspec-
tion or storage, switch o the tool and remove
the battery cartridge, and make sure all mov-
ing parts have come to a stop. Allow the tool
to cool before making any inspections, adjust-
ment, etc.
2.
Always allow the tool to cool down before storing.
3. When not in use, attach the blade cover to the
tool and store the tool indoors in dry, and high
locked-up place, out of reach of children.
4.
Maintain the tool with care. Keep cutting edge
sharp and clean for best performance and to
reduce the risk of injury. Follow instructions
for lubricating and changing accessories. Keep
grips dry, clean, and free from oil and grease.
5. Check damaged parts. Before further use of
the tool, any part which is damaged should be
carefully checked to determine that it will oper-
ate properly and perform its intended function.
Check for alignment of moving parts, binding
of moving parts, breakage of parts, mounting
and any other condition that may aect its
operation. A guard or other part that is damaged
should be properly repaired or replaced by your
authorized service center.
6. Use genuine spare parts only.
7. When moving the tool to another location,
including during work, always remove the
battery cartridge and put the blade cover on
the shear blades. Never carry or transport the
tool with the blades running. Never grasp the
blades with your hands.
8. Clean the tool and especially the shear blades
after use, and before putting the tool into stor-
age for extended periods. Lightly oil the shear
blades and put on the blade cover.
9. Do not dispose of the battery(ies) in a re. The
cell may explode. Check with local codes for
possible special disposal instructions.
10. Do not open or mutilate the battery(ies).
Released electrolyte is corrosive and may
cause damage to the eyes or skin. It may be
toxic if swallowed.
11. Do not charge battery in rain, or in wet
locations.
SAVE THESE INSTRUCTIONS.
WARNING: DO NOT let comfort or familiarity
with product (gained from repeated use) replace
strict adherence to safety rules for the subject
product. MISUSE or failure to follow the safety
rules stated in this instruction manual may cause
serious personal injury.

6ENGLISH
WARNING: Use of this product can create
dust containing chemicals which may cause
respiratory or other illnesses. Some examples of
these chemicals are compounds found in pesti-
cides, insecticides, fertilizers and herbicides.
Your risk from these exposures varies, depending
on how often you do this type of work. To reduce
your exposure to these chemicals: work in a well
ventilated area, and work with approved safety
equipment, such as those dust masks that are spe-
cially designed to lter out microscopic particles.
Symbols
The followings show the symbols used for tool.
volts
direct current
no load speed
revolutions or reciprocation per minute
Important safety instructions for
battery cartridge
1.
Before using battery cartridge, read all instruc-
tions and cautionary markings on (1) battery
charger, (2) battery, and (3) product using battery.
2. Do not disassemble or tamper with the battery
cartridge. It may result in a re, excessive heat,
or explosion.
3. If operating time has become excessively
shorter, stop operating immediately. It may
result in a risk of overheating, possible burns
and even an explosion.
4.
If electrolyte gets into your eyes, rinse them out
with clear water and seek medical attention right
away. It may result in loss of your eyesight.
5. Do not short the battery cartridge:
(1) Do not touch the terminals with any con-
ductive material.
(2) Avoid storing battery cartridge in a con-
tainer with other metal objects such as
nails, coins, etc.
(3) Do not expose battery cartridge to water
or rain.
A battery short can cause a large current ow,
overheating, possible burns and even a breakdown.
6. Do not store and use the tool and battery car-
tridge in locations where the temperature may
reach or exceed 50 °C (122 °F).
7. Do not incinerate the battery cartridge even if
it is severely damaged or is completely worn
out. The battery cartridge can explode in a re.
8. Do not nail, cut, crush, throw, drop the battery
cartridge, or hit against a hard object to the
battery cartridge. Such conduct may result in a
re, excessive heat, or explosion.
9. Do not use a damaged battery.
10.
The contained lithium-ion batteries are subject to
the Dangerous Goods Legislation requirements.
For commercial transports e.g. by third parties,
forwarding agents, special requirement on pack-
aging and labeling must be observed.
For preparation of the item being shipped, consulting an
expert for hazardous material is required. Please also
observe possibly more detailed national regulations.
Tape or mask o open contacts and pack up the
battery in such a manner that it cannot move
around in the packaging.
11. When disposing the battery cartridge, remove
it from the tool and dispose of it in a safe
place. Follow your local regulations relating to
disposal of battery.
12. Use the batteries only with the products
specied by Makita. Installing the batteries to
non-compliant products may result in a re, exces-
sive heat, explosion, or leak of electrolyte.
13. If the tool is not used for a long period of time,
the battery must be removed from the tool.
14. During and after use, the battery cartridge may
take on heat which can cause burns or low
temperature burns. Pay attention to the han-
dling of hot battery cartridges.
15. Do not touch the terminal of the tool imme-
diately after use as it may get hot enough to
cause burns.
16. Do not allow chips, dust, or soil stuck into the
terminals, holes, and grooves of the battery
cartridge. It may result in poor performance or
breakdown of the tool or battery cartridge.
17. Unless the tool supports the use near
high-voltage electrical power lines, do not use
the battery cartridge near high-voltage electri-
cal power lines. It may result in a malfunction or
breakdown of the tool or battery cartridge.
18. Keep the battery away from children.
SAVE THESE INSTRUCTIONS.
CAUTION: Only use genuine Makita batteries.
Use of non-genuine Makita batteries, or batteries that
have been altered, may result in the battery bursting
causing res, personal injury and damage. It will
also void the Makita warranty for the Makita tool and
charger.
Tips for maintaining maximum
battery life
1. Charge the battery cartridge before completely
discharged. Always stop tool operation and
charge the battery cartridge when you notice
less tool power.
2.
Never recharge a fully charged battery cartridge.
Overcharging shortens the battery service life.
3.
Charge the battery cartridge with room tempera-
ture at 10 °C - 40 °C (50 °F - 104 °F). Let a hot
battery cartridge cool down before charging it.
4. When not using the battery cartridge, remove
it from the tool or the charger.
5. Charge the battery cartridge if you do not use
it for a long period (more than six months).

7ENGLISH
PARTS DESCRIPTION
13
5
6
7
8
10
9
42
1Head 2Angle adjustment button 3Lock-lever 4Thumb nut
5Front grip 6Rear grip 7Battery cartridge 8Switch trigger
9Lock-o button 10 Shear blades ----
FUNCTIONAL
DESCRIPTION
CAUTION: Always be sure that the tool is
switched o and the battery cartridge is removed
before adjusting or checking function on the tool.
Installing or removing battery
cartridge
CAUTION: Always switch o the tool before
installing or removing of the battery cartridge.
CAUTION: Hold the tool and the battery car-
tridge rmly when installing or removing battery
cartridge. Failure to hold the tool and the battery
cartridge rmly may cause them to slip o your hands
and result in damage to the tool and battery cartridge
and a personal injury.
1
2
3
► 1. Red indicator 2. Button 3. Battery cartridge
To remove the battery cartridge, slide it from the tool
while sliding the button on the front of the cartridge.
To install the battery cartridge, align the tongue on the
battery cartridge with the groove in the housing and slip
it into place. Insert it all the way until it locks in place
with a little click. If you can see the red indicator as
shown in the gure, it is not locked completely.
CAUTION: Always install the battery cartridge
fully until the red indicator cannot be seen. If not,
it may accidentally fall out of the tool, causing injury to
you or someone around you.
CAUTION: Do not install the battery cartridge
forcibly. If the cartridge does not slide in easily, it is
not being inserted correctly.
Indicating the remaining battery
capacity
Only for battery cartridges with the indicator
1
2
► 1. Indicator lamps 2. Check button
Press the check button on the battery cartridge to indi-
cate the remaining battery capacity. The indicator lamps
light up for a few seconds.

8ENGLISH
Indicator lamps Remaining
capacity
Lighted O Blinking
75% to 100%
50% to 75%
25% to 50%
0% to 25%
Charge the
battery.
The battery
may have
malfunctioned.
NOTE: Depending on the conditions of use and the
ambient temperature, the indication may dier slightly
from the actual capacity.
NOTE: The rst (far left) indicator lamp will blink when
the battery protection system works.
Tool / battery protection system
The tool is equipped with a tool/battery protection system. This
system automatically cuts o power to the motor to extend tool
and battery life. The tool will automatically stop during operation if
the tool or battery is placed under one of the following conditions:
Overload protection
When the tool or battery is operated in a manner that causes it to
draw an abnormally high current, the tool automatically stops. In
this situation, turn the tool o and stop the application that caused
the tool to become overloaded. Then turn the tool on to restart.
Overheat protection
When the tool or battery is overheated, the tool stops
automatically. In this case, let the tool and battery cool
before turning the tool on again.
Overdischarge protection
When the battery capacity is not enough, the tool stops automatically.
In this case, remove the battery from the tool and charge the battery.
Switch action
WARNING: Before installing the battery car-
tridge into the tool, always check to see that the
switch trigger actuates properly and returns to
the "OFF" position when released.
WARNING:
For your safety, this tool is equipped
with the lock-o button which prevents the tool from
unintended starting. Never use the tool if it starts when
you pull the switch trigger without pressing the lock-
o button. Ask your local Makita Service Center for repairs.
WARNING: Never disable the lock function or
tape down the lock-o button.
NOTICE: Do not pull the switch trigger forcibly
without pressing the lock-o button. The switch
may break.
1
2
► 1. Lock-o button 2. Switch trigger
To prevent the switch trigger from being accidentally
pulled, a lock-o button is provided.
To start the tool, press the lock-o button and pull the
switch trigger. Release the switch trigger to stop. The lock-
o button can be pressed from either the right or left side.
Adjusting the cutting angle
CAUTION: Always be sure that the tool is
switched o before folding or unfolding the head.
CAUTION: When folding the head for carrying
the tool or after using the tool, be sure to attach
the blade cover before folding the head.
CAUTION: When folding the head, be careful
not to pinch your ngers between the head and
the tool body.
The angle of the head can be adjusted in 10 steps. To
change the angle of the head, follow the steps below.
1. Hold the head and the tool body as shown in the
gure.
1
2
► 1. Head 2. Angle adjustment button
2. Adjust the angle of the head while holding down
the angle adjustment button, and then release the angle
adjustment button.
3. Move the head slightly until it is locked with a click.
NOTE: Make sure that the head is securely locked
before operating the tool.

9ENGLISH
Adjusting the pipe length
CAUTION: Always be sure that the tool is
switched o before adjusting the pipe length.
CAUTION: When adjusting the pipe length,
be sure to attach the blade cover before adjusting
the pipe length.
CAUTION: When adjusting the pipe length, be
careful not to pinch your ngers.
CAUTION: Make sure that the lock-lever is
locked securely.
Loosen the lock-lever, then adjust the length of the pipe,
and then lock the lock-lever.
1
► 1. Lock-lever
Adjusting the front grip position
CAUTION: Always be sure that the tool is
switched o before adjusting the position of the
front grip.
CAUTION: When adjusting the position of the
front grip, be careful not to pinch your ngers.
CAUTION: Make sure that the thumb nut is
tightened securely.
CAUTION: Do not move the front grip beyond
the arrow mark.
To adjust the position of the front grip, loosen the thumb
nut by turning it counterclockwise, then adjust the posi-
tion of the front grip, and then tighten the thumb nut by
turning it clockwise.
1
2
► 1. Thumb nut 2. Arrow mark
ASSEMBLY
CAUTION: Always be sure that the tool is
switched o and the battery cartridge is removed
before carrying out any work on the tool.
CAUTION: When replacing the shear blades,
always wear gloves so that your hands do not
directly contact the blades.
Installing or removing the shear
blades
CAUTION: Attach the blade cover before
removing or installing the shear blades.
NOTICE: When replacing the shear blades, do
not wipe o grease from the gear and crank.
NOTE: Before installing or removing the shear
blades, unfold the head of the tool so that the head is
straight to the tool body.
1. Place the tool upside down.
2. Remove 4 screws with a screwdriver and remove
the shear blades.
1
► 1. Screw
3. Remove the crank from the shear blades.
1
► 1. Crank
NOTE: The crank may remain in the tool.

10 ENGLISH
4. Prepare the crank and new shear blades.
1
2
► 1. Crank 2. Shear blades
5. Remove the blade cover, and then attach it to the
new shear blades.
6. Apply a small amount of grease to the periphery of
the crank. Attach the washer, gear, and the crank to the
pin in order.
1
2
3
4
► 1. Crank 2. Gear 3. Washer 4. Pin
7.
Adjust the crank so that the 2 small holes on the crank
are lined up on the alignment line as shown in the gure.
1
2
► 1. Alignment line 2. Small hole
8. Slide the shear blades so that the hole on the
guide plate is positioned at the center of the rings of
blades.
1
► 1. Guide plate
9. Insert the screw removed in step 2 into the hole on
the shear blades through the hole on the blade cover.
1
► 1. Hole

11 ENGLISH
10. Attach the shear blades to the tool, and then
tighten 3 screws with the screwdriver.
1
► 1. Screw
11. Remove the screw inserted into the hole on the
shear blades in step 9, and then tighten it to x the
shear blades.
NOTICE: If the shear blades do not operate prop-
erly, the blades are not engaging the crank prop-
erly. Remove the blades and install them again.
NOTICE: If the parts other than the shear blades
such as the crank are worn out, ask Makita
Authorized Service Centers for parts replacement
or repairs.
Installing or removing the chip
receiver
Optional accessory
CAUTION: When installing or removing the
chip receiver, always wear gloves so that your
hands do not directly contact the shear blades.
CAUTION: Attach the blade cover before
installing or removing the chip receiver.
The chip receiver gathers discarded leaves and makes
clean-up afterward much easier. It can be installed on
either side of the tool.
1. Align the holes on the chip receiver with the nuts
on the shear blades.
1
► 1. Nut
2. Hook the claws of the chip receiver to the groove
on the shear blades.
1
2
► 1. Claw 2. Groove
3. Press the levers on the chip receiver, and then
hook the claws on the other side to the groove on the
shear blades.
1
► 1. Lever
To remove the chip receiver, press the levers to release
the claws.
1
► 1. Lever

12 ENGLISH
NOTICE: Never try to remove the chip receiver
by an excessive force with its claws locked in the
grooves of the shear blades.
OPERATION
Operating the tool
WARNING: Do not use the tool near any
electrical power lines. Contacting with power lines
or using the tool near power lines may cause serious
injury or electric shock resulting in death.
WARNING:
Keep hands away from shear blades.
WARNING:
Be extremely careful to maintain
control of the tool at all times. Do not allow the tool
to be deected toward you or anyone in the work
vicinity. Failure to keep control of the tool could result
in serious injury to the bystander and the operator.
CAUTION: Avoid operating the tool in very
hot weather as much as practicable. When operat-
ing the tool, be careful of your physical condition.
CAUTION:
Be careful not to accidentally con-
tact a metal fence or other hard objects while trim-
ming. The shear blades may break and cause an injury.
CAUTION:
Be careful not to allow the shear blades
to contact the ground. The tool may recoil and cause an injury.
CAUTION:
Overreaching with a hedge trimmer,
particularly from a ladder, is extremely dangerous.
Do not work while standing on anything wobbly or inrm.
NOTICE: Do not attempt to cut branches thicker
than 10 mm (3/8") in diameter with the tool. Cut
branches to 10 cm (4") lower than the cutting height
using branch cutters before using the tool.
(1)
(2)
► (1) Cutting height (2) 10 cm (4")
NOTICE: Do not cut down dead trees or similar
hard objects. Doing so may damage the tool.
NOTICE: Do not trim the grass or weeds while
using the shear blades. The shear blades may
become tangled in the grass or weeds.
Hold the tool with both hands by holding the front grip
and the rear grip.
12
► 1. Front grip 2. Rear grip
Pull the switch trigger while pressing the lock-o button,
and then move the tool forward.
15 m
(50 ft)
For basic operation, tilt the shear blades toward the
trimming direction and move it calmly and slowly at the
speed rate of 3 to 4 seconds per meter.
15 m
(50 ft)

13 ENGLISH
To cut a hedge side evenly, cut from the bottom to top.
15 m
(50 ft)
When trimming to make a round shape (trimming boxwood or rho-
dodendron, etc.), trim from the root to the top for a beautiful nish.
15 m
(50 ft)
If the chip receiver is attached to the shear blades, it gathers
discarded leaves and makes clean-up afterward much easier.
15 m
(50 ft)
MAINTENANCE
CAUTION:
Always be sure that the tool is
switched o and the battery cartridge is removed before
attempting to perform inspection or maintenance.
CAUTION:
When inspecting or maintaining the
tool, always put the tool down. Assembling or adjusting
the tool in an upright position may result in serious injury.
To maintain product SAFETY and RELIABILITY,
repairs, any other maintenance or adjustment should
be performed by Makita Authorized or Factory Service
Centers, always using Makita replacement parts.
Cleaning the tool
Clean the tool by wiping o dust with a dry cloth or one
dipped in soapy water and wrung out.
NOTICE: Never use gasoline, benzine, thinner,
alcohol or the like. Discoloration, deformation or
cracks may result.
Shear blade maintenance
Before the operation or once per hour during operation,
apply low-viscosity oil (machine oil, or spray-type lubri-
cating oil) to the shear blades.
After operation, remove dust from both sides of the
shear blades with a wired brush, wipe it o with a cloth
and then apply low-viscosity oil (machine oil, or spray-
type lubricating oil) to the shear blades.
NOTICE: Do not wash the shear blades in water.
Doing so may cause rust or damage to the tool.
NOTICE: Dirt and corrosion cause excessive
blade friction and shorten the operating time per
battery charge.
Storage
Attach the blade cover to the shear blades so that the
blades are not exposed. Store the tool out of the reach
of children. Store the tool in a place not exposed to
moisture or rain.

14 ENGLISH
TROUBLESHOOTING
Before asking for repairs, conduct your own inspection rst. If you nd a problem that is not explained in the manual,
do not attempt to dismantle the tool. Instead, ask Makita Authorized Service Centers, always using Makita replace-
ment parts for repairs.
State of abnormality Probable cause (malfunction) Remedy
Motor does not run. Battery cartridge is not installed. Install the battery cartridge.
Battery problem (under voltage) Recharge the battery. If recharging is not eective,
replace battery.
The drive system does not work
correctly.
Ask your local authorized service center for repair.
Motor stops running after a little use. Battery's charge level is low. Recharge the battery. If recharging is not eective,
replace battery.
Overheating. Stop using of tool to allow it to cool down.
Tool does not reach maximum RPM. Battery is installed improperly. Install the battery cartridge as described in this
manual.
Battery power is dropping. Recharge the battery. If recharging is not eective,
replace battery.
The drive system does not work
correctly.
Ask your local authorized service center for repair.
Shear blades do not move:
stop the machine immediately!
Inappropriate angle of shear blades. Make sure that the head is properly xed in the
operational angle.
Foreign objects are caught between the
shear blades.
Switch o the tool and remove the battery cartridge,
and then remove the foreign objects using tools
such as pliers.
The drive system does not work
correctly.
Ask your local authorized service center for repair.
Abnormal vibration:
stop the machine immediately!
Shear blades are broken, bent or worn. Replace the shear blades.
The drive system does not work
correctly.
Ask your local authorized service center for repair.
Shear blades and motor cannot stop:
Remove the battery immediately!
Electric malfunction. Remove the battery and ask your local authorized
service center for repair.
OPTIONAL
ACCESSORIES
CAUTION: These accessories or attachments
are recommended for use with your Makita tool
specied in this manual. The use of any other
accessories or attachments might present a risk of
injury to persons. Only use accessory or attachment
for its stated purpose.
If you need any assistance for more details regard-
ing these accessories, ask your local Makita Service
Center.
• Shear blade assembly
• Chip receiver
• Grease vessel
• Makita genuine battery and charger
NOTE: Some items in the list may be included in the
tool package as standard accessories. They may
dier from country to country.
MAKITA LIMITED WARRANTY
Please refer to the annexed warranty sheet for the
most current warranty terms applicable to this product.
If annexed warranty sheet is not available, refer to the
warranty details set forth at below website for your
respective country.
United States of America: www.makitatools.com
Canada: www.makita.ca
Other countries: www.makita.com

15 FRANÇAIS
FRANÇAIS (Mode d’emploi original)
SPÉCIFICATIONS
Modèle : DUN461W
Longueur de lame 460 mm (18-1/8″)
Cisaillements par minute 3 600 /min
Angle de la lame de coupe 135° (vers le haut 60°, vers le bas 75°)
Longueur totale 1 889 - 2 511 mm (74-1/2″ - 99″)
Tension nominale C.C. 18 V
Poids net 3,0 - 3,3 kg (6,6 - 7,3 lbs)
• Étant donné l’évolution constante de notre programme de recherche et développement, les spécications
contenues dans ce manuel sont sujettes à modication sans préavis.
• Les spécications peuvent varier suivant les pays.
• Le poids peut varier selon les accessoires, y compris la batterie. La plus légère et la plus lourde combinaisons,
selon la procédure EPTA 01/2014, sont indiquées dans le tableau.
Batteries, adaptateurs de batteries et chargeur applicables
Batterie
BL1815N / BL1820B / BL1830 / BL1830B / BL1840B / BL1850B / BL1860B
Adaptateur de batterie PDC01
Chargeur
DC18RC / DC18RD / DC18RE / DC18SD / DC18SE / DC18SF / DC18SH
• Suivant la région où vous habitez, il se peut que certains ne soient pas disponibles parmi les batteries, adapta-
teurs de batterie et chargeurs énumérés ci-dessus.
• Avant d’utiliser l’adaptateur de batterie, lisez les instructions et indications de mise en garde sur l’adaptateur de
batterie.
MISE EN GARDE : Utilisez exclusivement les batteries, les adaptateurs de batterie et les chargeurs
énumérés ci-dessus. L’utilisation de toute autre batterie ou de tout autre adaptateur de batterie ou chargeur peut
entraîner une blessure et/ou un incendie.
CONSIGNES DE SÉCURITÉ
Consignes de sécurité générales
pour outils électriques
MISE EN GARDE : Lisez toutes les mises en
garde, instructions, illustrations et spécications
qui accompagnent cet outil électrique. Il y a risque
de décharge électrique, d’incendie et/ou de blessure
grave si les instructions ci-dessous ne sont pas
toutes respectées.
Conservez toutes les mises en
garde et instructions pour réfé-
rence future.
Le terme « outil électrique » qui gure dans les avertis-
sements fait référence à un outil électrique branché sur
une prise de courant (par un cordon d’alimentation) ou
alimenté par batterie (sans l).
Sécurité de la zone de travail
1. Maintenez la zone de travail propre et bien
éclairée. Les zones de travail encombrées ou
sombres ouvrent grande la porte aux accidents.
2.
N’utilisez pas les outils électriques dans les atmos-
phères explosives, par exemple en présence de
liquides, gaz ou poussières inammables. Les outils
électriques produisent des étincelles au contact des-
quelles la poussière ou les vapeurs peuvent s’enammer.
3. Assurez-vous qu’aucun enfant ou curieux ne
s’approche pendant que vous utilisez un outil
électrique. Vous risquez de perdre la maîtrise de
l’outil si votre attention est détournée.
Sécurité en matière d’électricité
1. Les ches d’outil électrique sont conçues pour
s’adapter parfaitement aux prises de courant.
Ne modiez jamais la che de quelque façon
que ce soit. N’utilisez aucun adaptateur de
che sur les outils électriques avec mise à
la terre. En ne modiant pas les ches et en les
insérant dans des prises de courant pour les-
quelles elles ont été conçues, vous réduirez les
risques de choc électrique.
2.
Évitez tout contact corporel avec les surfaces
mises à la terre, telles que tuyaux, radiateurs, cuisi-
nières et réfrigérateurs. Le risque de choc électrique
est plus élevé si votre corps se trouve mis à la terre.
3. N’exposez pas les outils électriques à la pluie
ou à l’eau. La présence d’eau dans un outil élec-
trique augmente le risque de choc électrique.

16 FRANÇAIS
4. Ne maltraitez pas le cordon. N’utilisez jamais
le cordon pour transporter, tirer ou débrancher
l’outil électrique. Maintenez le cordon à l’écart
des sources de chaleur, de l’huile, des objets à
bords tranchants et des pièces en mouvement.
Le risque de choc électrique est plus élevé lorsque
les cordons sont endommagés ou enchevêtrés.
5.
Lorsque vous utilisez un outil électrique à l’extérieur,
utilisez un cordon prolongateur conçu pour l’usage
extérieur. Les risque de choc électrique est moindre
lorsqu’un cordon conçu pour l’usage extérieur est utilisé.
6. Si vous devez utiliser un outil électrique dans
un endroit humide, utilisez une source d’ali-
mentation protégée par un disjoncteur de fuite
à la terre. L’utilisation d’un disjoncteur de fuite à la
terre réduit le risque de choc électrique.
7. Les outils électriques peuvent produire des
champs électromagnétiques (CEM) qui ne sont
pas préjudiciables à l’utilisateur. Les utilisa-
teurs de stimulateur cardiaque ou autres appareils
médicaux similaires doivent toutefois demander
conseil au fabricant et/ou à leur médecin avant
d’utiliser cet outil électrique.
Sécurité personnelle
1. Restez alerte, attentif à vos mouvements et
faites preuve de bon sens lorsque vous utili-
sez un outil électrique. N’utilisez pas les outils
électriques si vous êtes fatigué ou avez pris
une drogue, de l’alcool ou un médicament. Un
moment d’inattention pendant l’utilisation d’un
outil électrique peut entraîner une grave blessure.
2.
Portez des dispositifs de protection personnelle.
Portez toujours une protection oculaire. Les risques
de blessure seront moins élevés si vous utilisez des
dispositifs de protection tels qu’un masque anti-pous-
sière, des chaussures à semelle antidérapante, une
coiure résistante ou une protection d’oreilles.
3.
Évitez les démarrages accidentels. Assurez-
vous que l’interrupteur est en position d’arrêt
avant de brancher l’outil à la prise de courant
et/ou au bloc-piles, et avant de prendre ou de
transporter l’outil. Vous ouvrez la porte aux acci-
dents si vous transportez les outils électriques avec
le doigt sur l’interrupteur ou si vous les branchez
alors que l’interrupteur est en position de marche.
4. Retirez toute clé de réglage ou de serrage
avant de mettre l’outil électrique sous tension.
Toute clé laissée en place sur une pièce rotative
de l’outil électrique peut entraîner une blessure.
5.
Ne vous étirez pas exagérément. Assurez-vous d’une
bonne prise au sol et d’un bon équilibre en tout
temps. Cela vous permettra d’avoir une meilleure maî-
trise de l’outil électrique dans les situations imprévues.
6.
Portez des vêtements adéquats. Ne portez ni
vêtements amples ni bijoux. Gardez vos cheveux,
vêtements et gants à l’écart des pièces en mouve-
ment. Les vêtements amples, bijoux ou cheveux longs
peuvent être happés par les pièces en mouvement.
7. Si des accessoires sont fournis pour raccorder
un appareil d’aspiration et de collecte de la
poussière, assurez-vous qu’ils sont correc-
tement raccordés et qu’ils sont utilisés de
manière adéquate. L’utilisation d’un appareil de
collecte permet de réduire les risques liés à la
présence de poussière dans l’air.
8. Évitez d’être complaisant et d’ignorer les
principes de sécurité de l’outil en raison de la
familiarité acquise par un usage fréquent des
outils. Un geste imprudent peut entraîner une
grave blessure en une fraction de seconde.
9. Portez toujours des lunettes à coques de pro-
tection pour protéger vos yeux contre les bles-
sures lors de l’utilisation d’outils électriques.
Les lunettes à coques doivent être conformes
à ANSI Z87.1 aux États-Unis.
L’employeur a la responsabilité d’imposer
l’utilisation d’équipements de protection de
sécurité adéquats aux utilisateurs des outils
électriques et à toute autre personne se trou-
vant dans la zone de travail immédiate.
Utilisation et entretien des outils électriques
1. Ne forcez pas l’outil électrique. Utilisez l’outil
électrique adéquat suivant le type de travail à
eectuer. Si vous utilisez l’outil électrique adé-
quat et respectez le régime pour lequel il a été
conçu, il eectuera un travail de meilleure qualité
et plus sécuritaire.
2.
N’utilisez pas l’outil électrique s’il n’est pas pos-
sible de l’allumer et de l’éteindre avec son inter-
rupteur. Un outil électrique dont l’interrupteur est
défectueux représente un danger et doit être réparé.
3. Avant d’eectuer tout réglage, de remplacer
un accessoire ou de ranger l’outil électrique,
débranchez la che de la source d’alimenta-
tion et/ou retirez la batterie de l’outil électrique
si elle est amovible. Ces mesures préventives de
sécurité réduisent les risques de démarrage acci-
dentel de l’outil électrique.
4.
Après l’utilisation d’un outil électrique, rangez-le
hors de portée des enfants et ne laissez aucune
personne l’utiliser si elle n’est pas familiarisée
avec l’outil électrique ou les présentes instruc-
tions d’utilisation. Les outils électriques repré-
sentent un danger entre les mains de personnes qui
n’en connaissent pas le mode d’utilisation.
5. Eectuez l’entretien des outils électriques et
des accessoires. Assurez-vous que les pièces
mobiles ne sont pas désalignées ou coincées,
qu’aucune pièce n’est cassée et que l’outil
électrique n’a subi aucun dommage aectant
son bon fonctionnement. Le cas échéant,
faites réparer l’outil électrique avant de l’utili-
ser. De nombreux accidents sont causés par des
outils électriques mal entretenus.
6.
Maintenez les outils tranchants bien aiguisés et
propres. Un outil tranchant dont l’entretien est eectué
correctement et dont les bords sont bien aiguisés ris-
quera moins de se coincer et sera plus facile à maîtriser.
7.
Utilisez l’outil électrique, ses accessoires, ses
embouts, etc., en respectant les présentes ins-
tructions, en tenant compte des conditions de
travail et du type de travail à eectuer. L’utilisation
d’un outil électrique pour d’autres usages que ceux
prévus peut entraîner une situation dangereuse.
8. Gardez les poignées et surfaces de saisie
sèches, propres et exemptes d’huile et de
graisse. Les poignées et surfaces de saisie glis-
santes ne permettent pas une manipulation sûre
et une bonne maîtrise de l’outil dans les situations
inattendues.

17 FRANÇAIS
9. Lors de l’utilisation de l’outil, ne portez pas
de gants de travail en tissu qui risquent de
s’enchevêtrer dans l’outil. L’enchevêtrement de
gants de travail en tissu dans les pièces en mou-
vement peut entraîner une blessure.
Utilisation et entretien des outils alimentés par
batterie
1. Pour recharger, utilisez uniquement le char-
geur spécié par le fabricant. L’utilisation d’un
chargeur conçu pour un type donné de bloc-piles
comporte un risque d’incendie lorsqu’il est utilisé
avec un autre type de bloc-piles.
2. N’utilisez un outil électrique qu’avec le bloc-
piles conçu spéciquement pour cet outil. Il y a
risque de blessure ou d’incendie si un autre bloc-
piles est utilisé.
3. Lorsque vous n’utilisez pas le bloc-piles, ran-
gez-le à l’écart des objets métalliques tels que
trombones, pièces de monnaie, clés, clous,
vis ou autres petits objets métalliques qui
risqueraient d’établir une connexion entre les
bornes. La mise en court-circuit des bornes de
batterie peut causer des brûlures ou un incendie.
4. Dans des conditions d’utilisation inadéquates
de la batterie, il peut y avoir fuite d’électrolyte;
évitez tout contact avec ce liquide. En cas
de contact accidentel, rincez avec beaucoup
d’eau. Si le liquide pénètre dans vos yeux, il
faut aussi consulter un médecin. L’électrolyte
qui s’échappe de la batterie peut causer des
irritations ou des brûlures.
5. N’utilisez pas une batterie ou un outil s’il est
endommagé ou modié. Les batteries endom-
magées ou modiées peuvent avoir un comporte-
ment imprévisible dont peut résulter un incendie,
une explosion ou un risque de blessure.
6. N’exposez pas une batterie ou un outil au feu
ou à une température excessive. L’exposition
au feu ou à une température supérieure à 130 °C
peut entraîner une explosion.
7. Suivez toutes les instructions de charge et ne
chargez pas la batterie ou l’outil à l’extérieur
de la plage de température spéciée dans les
instructions. Charger de manière inadéquate
ou à des températures hors de la plage spéciée
peut endommager la batterie et augmenter le
risque d’incendie.
Réparation
1. Faites réparer votre outil électrique par un
réparateur qualié qui utilise des pièces de
rechange identiques aux pièces d’origine. Le
maintien de la sûreté de l’outil électrique sera ainsi
assuré.
2. N’essayez jamais de réparer les batteries
endommagées. La réparation des batteries ne
doit être eectuée que par le fabricant ou par un
fournisseur de service après-vente agréé.
3. Suivez les instructions de lubrication et de
remplacement des accessoires.
4. Ne modiez pas ou n’essayez pas de réparer
l’appareil ou la batterie autrement que tel
qu’indiqué dans les instructions d’utilisation
et d’entretien.
Consignes de sécurité pour taille
haie sur perche sans l
1. Gardez toutes les parties de votre corps à
l’écart de la lame. Pendant que les lames sont
en mouvement, évitez de retirer le matériau
coupé ou de tenir le matériau à couper. Les
lames continuent de bouger une fois l’interrupteur
en position d’arrêt. Tout moment d’inattention
pendant l’utilisation du taille-haie peut entraîner
une grave blessure.
2. Transportez le taille-haie par la poignée alors
que la lame est arrêtée et prenez soin de ne
pas actionner l’interrupteur. Si vous transpor-
tez correctement le taille-haie, cela diminuera le
risque d’un démarrage inopportun et les blessures
corporelles conséquentes pouvant être causées
par les lames.
3. Avant de transporter ou de ranger le taille-haie,
mettez toujours en place le couvre-lames. La
manipulation adéquate du taille-haie réduira le
risque de blessure au contact des lames.
4. Lorsque vous retirez une matière coincée ou
procédez à un entretien, assurez-vous que
tous les interrupteurs sont en position d’arrêt
et que la batterie est retirée ou déconnectée.
L’actionnement inopportun du taille-haie lors du
retrait d’une matière coincée ou de l’entretien peut
entraîner des blessures corporelles graves.
5. Ne tenez le taille-haie que par ses surfaces
de prises isolées, car la lame peut toucher un
câblage dissimulé. Au contact d’un l sous ten-
sion, les lames peuvent mettre sous tension les
pièces métalliques découvertes du taille-haie et
transmettre une décharge électrique à l’utilisateur.
6. Gardez tous les cordons d’alimentation et
câbles à l’écart de la zone de coupe. Les cor-
dons d’alimentation ou les câbles pourraient être
cachés dans les haies ou les buissons et pour-
raient être accidentellement coupés par la lame.
7. N’utilisez pas le taille-haie sous de mauvaises
conditions météo, et tout spécialement lors-
qu’il y a risque de foudre. Cela réduit le risque
d’être frappé par la foudre.
8. Pour réduire le risque d’électrocution, n’utili-
sez jamais de taille-haie sur perche près des
lignes électriques. Le contact avec des lignes
électriques ou l’utilisation près de celles-ci peut
causer des blessures graves ou une décharge
électrique pouvant entraîner la mort.
9. Utilisez toujours vos deux mains pour faire
fonctionner le taille-haie sur perche. Tenez le
taille-haie sur perche à deux mains pour éviter
d’en perdre le contrôle.
10. Portez toujours un casque de sécurité lorsque
vous utilisez le taille-haie sur perche au-des-
sus de votre tête. La chute de débris peut entraî-
ner de graves blessures.

18 FRANÇAIS
Consignes de sécurité additionnelles
Préparation
1. CE TAILLE-HAIE PEUT CAUSER DES
BLESSURES GRAVES. Lisez les instructions
avec soin pour la manipulation, la préparation,
l’entretien, le démarrage et l’arrêt adéquats de
l’outil. Familiarisez-vous avec toutes les com-
mandes et l’usage adéquat de l’outil.
2. Avant d’utiliser l’outil, assurez-vous qu’il n’y a
pas de corps étrangers tels que clôtures gril-
lagées ou câblage dissimulé dans les haies et
buissons.
3. Le taille-haie ne doit pas être utilisé par les
enfants ou par les jeunes de moins de 18 ans.
Les jeunes de 16 ans et plus peuvent faire excep-
tion à cette restriction s’ils reçoivent une formation
sous la supervision d’un expert.
4. Dans l’éventualité d’une urgence, débranchez
l’outil et retirez la batterie immédiatement.
5. DANGER - Gardez les mains à l’écart de la
lame. Le contact avec la lame entraînera une
grave blessure.
6. Les nouveaux utilisateurs doivent se faire
expliquer l’utilisation de l’outil par un utilisa-
teur expérimenté.
7. Avant l’exécution du travail, vériez l’absence
de clôtures grillagées et de pierres ou autres
objets solides dans la zone de travail. Ils
peuvent endommager les lames.
8. Utilisez le taille-haie seulement si vous êtes
en bon état physique. Si vous êtes fatigué, votre
concentration sera moindre. Soyez tout spécia-
lement prudent à la n de la journée de travail.
Eectuez le travail calmement et prudemment.
L’utilisateur est responsable de tout dommage
encouru par des tiers.
9. Avant de commencer le travail, assurez-vous
que le taille-haie est sécuritaire et en bon état
de marche. Assurez-vous que les gardes sont
bien installés. Le taille-haie ne doit être utilisé
qu’une fois complètement assemblé.
10. Évitez les environnements dangereux.
N’utilisez pas l’outil dans les endroits humides
ou mouillés, et ne l’exposez pas à la pluie.
L’inltration d’eau dans l’outil accroît le risque
de décharge électrique.
Équipement de protection individuelle
1. Les gants de travail en cuir résistant font
partie de l’équipement de base du taille-haie
et doivent toujours être portés pendant son
utilisation. Portez également des chaussures
robustes à semelle antidérapante.
2. Portez une protection d’oreilles telle qu’un
protège-oreilles pour prévenir les lésions de
l’ouïe.
3. Portez des lunettes à coques, un casque de
sécurité et des gants protecteurs pour vous
protéger contre les projections de débris ou la
chute d’objets.
4. Pour toucher les lames ou pour ajuster l’angle
d’une lame, portez des gants de protection.
Les lames peuvent couper sévèrement les mains
nues.
Utilisation
1. Utilisez toujours deux mains pour opérer l’ou-
til. Si vous utilisez une main, cela pourrait causer
une perte de contrôle et entraîner des blessures
corporelles graves.
2. Lorsque vous utilisez l’outil, assurez-vous
toujours que la position d’opération est sécu-
ritaire. Il est extrêmement dangereux de trop
tendre les bras avec l’outil, et ce tout particu-
lièrement sur une échelle. Ne travaillez pas à
partir d’un endroit branlant ou instable.
3. Ne portez pas simultanément plusieurs
bretelles de ceinture et/ou sangles d’épaule
lorsque vous utilisez l’outil.
4. Pendant l’exécution du travail, ne laissez pas
les curieux ou les animaux approcher à moins
de 15 m (50 pi) de l’outil. Arrêtez l’outil dès que
quelqu’un approche.
5. Si un outil tranchant frappe tout objet ou si
l’outil commence à produite un bruit ou une
vibration inhabituelle, arrêtez l’outil et retirez
la batterie immédiatement, puis laissez-le s’im-
mobiliser. Puis, faites les étapes suivantes :
• assurez-vous qu’il n’y a pas de
dommages
• s’il y a des pièces mal serrées,
resserrez-les
• faites remplacer ou réparer toute pièce
endommagée par des pièces de rechange
d’origine.
6. Utilisez l’outil uniquement aux ns pour les-
quelles il est conçu. N’utilisez l’outil à aucune
autre n.
7. Éteignez l’outil et retirez la batterie avant de :
• nettoyer ou retirer un blocage;
• vérier, réaliser un entretien ou travailler
sur l’outil;
• régler la position de travail des lames de
cisaillement;
• laisser l’outil sans surveillance.
8. Avant de démarrer l’outil, assurez-vous
qu’il est dans la position de travail adéquate
désignée.
9. N’utilisez pas l’outil avec des lames de cisaille-
ment endommagées ou trop usées.
10. Soyez toujours conscient de votre entourage
et soyez à l’aût des dangers potentiels dont
vous pourriez ne pas être conscient grâce au
bruit de l’outil.
11. Prenez garde de toucher accidentellement une
clôture métallique ou autre objet dur pendant
l’exécution du travail. En cassant, la lame peut
causer une grave blessure.
12. Évitez le démarrage accidentel. Ne transportez
pas l’outil avec la batterie installée et le doigt
sur l’interrupteur. Avant d’installer la batterie,
assurez-vous que l’interrupteur est en position
d’arrêt.
13. Lorsque vous prenez ou tenez l’outil, ne le sai-
sissez pas par les lames de coupe dénudées
ou par les bords tranchants.

19 FRANÇAIS
14. Ne forcez pas l’outil. Il fonctionnera mieux et
présentera moins de risques de blessure si vous
respectez la vitesse de travail pour laquelle il a été
conçu.
15. N’utilisez pas l’outil sous la pluie ou dans
des conditions mouillées ou très humides. Le
moteur électrique n’est pas imperméable à l’eau.
16. Tenez l’outil fermement pendant l’utilisation.
17. Ne faites pas inutilement tourner l’outil à vide.
18. Avant de vérier les lames de cisaillement,
d’en faire l’entretien ou d’enlever des corps
étrangers coincés, éteignez toujours l’outil et
retirez la batterie.
19. Ne pointez jamais les lames de cisaillement
vers vous-même ou d’autres personnes.
20. Si les lames cessent de bouger en raison de la
présence de corps étrangers entre les lames
pendant l’utilisation, éteignez l’outil et retirez
la batterie, puis enlevez les corps étrangers
à l’aide d’une pince ou autre outil. En retirant
les corps étrangers avec la main, vous risquez de
vous blesser car les lames peuvent bouger lors du
retrait des corps étrangers.
Consignes de sécurité concernant l’électricité et la
batterie
1. Évitez les environnements dangereux.
N’utilisez pas l’outil dans les endroits humides
ou mouillés, et ne l’exposez pas à la pluie.
L’inltration d’eau dans l’outil accroît le risque de
décharge électrique.
2. Ne jetez pas la/les batterie(s) au feu. L’élément
pourrait exploser. Vériez la réglementation locale
pour savoir s’il existe des directives particulières
sur l’élimination.
3. N’ouvrez pas et n’endommagez pas la/les
batterie(s). L’électrolyte qui s’échappe est corrosif
et peut provoquer des dommages aux yeux ou à
la peau. Il peut être toxique s’il est ingéré.
4. Ne chargez pas la batterie sous la pluie ou
dans les emplacements humides.
5. Ne chargez pas la batterie à l’extérieur.
6. Ne manipulez pas le chargeur, y compris sa
che et ses bornes, avec les mains mouillées.
Entretien et remisage
1. Lorsque l’outil est arrêté pour un entretien,
une inspection ou le remisage, mettez-le à
l’arrêt et retirez la batterie, puis assurez-vous
que toutes les pièces mobiles se sont arrêtées.
Laissez l’outil se refroidir avant de procéder à
toute inspection, tout réglage, etc.
2. Laissez toujours refroidir l’outil avant de le
remiser.
3. Lorsque vous n’utilisez pas l’outil, xez-y le
couvre-lames et rangez l’outil à l’intérieur,
dans un emplacement sec, élevé, verrouillé et
hors de portée des enfants.
4. Entretenez soigneusement l’outil. Gardez les
bords tranchants aûtés et propres pour un
rendement optimal et pour réduire les risques
de blessure. Suivez les instructions concer-
nant le graissage et le remplacement des
accessoires. Gardez les poignées de l’outil
sèches, propres et sans traces d’huile ou de
graisse.
5.
Vériez s’il y a des pièces endommagées.
Avant de réutiliser l’outil, vériez soigneuse-
ment toute pièce endommagée an de vous
assurer qu’elle fonctionne correctement et
qu’elle remplit sa fonction prévue. Vériez
que les pièces mobiles sont bien alignées et
qu’elles ne sont pas coincées, qu’il n’y a pas de
pièces cassées ou mal montées, et toute autre
condition pouvant aecter le bon fonctionne-
ment. Toute pièce endommagée (protecteur, etc.)
doit être correctement réparée ou remplacée par
un centre de service après-vente agréé.
6. Utilisez toujours exclusivement des pièces de
rechange d’origine.
7. Lorsque vous déplacez l’outil vers un autre
emplacement, y compris pendant l’exécution
du travail, retirez toujours la batterie et mettez
le couvre-lames sur les lames de cisaillement.
Ne transportez ou déplacez jamais l’outil
pendant que les lames tournent. Ne saisissez
jamais les lames avec les mains.
8. Nettoyez l’outil et tout spécialement les
lames de cisaillement après l’utilisation, ainsi
qu’avant de ranger l’outil pour une période
prolongée. Huilez légèrement les lames de
cisaillement et mettez le couvre-lames.
9. Ne jetez pas la/les batterie(s) au feu. L’élément
pourrait exploser. Vériez la réglementation
locale pour savoir s’il existe des directives
particulières sur l’élimination.
10. N’ouvrez pas et n’endommagez pas la/les
batterie(s). L’électrolyte qui s’échappe est
corrosif et peut provoquer des dommages aux
yeux ou à la peau. Il peut être toxique s’il est
ingéré.
11. Ne chargez pas la batterie sous la pluie ou
dans les emplacements humides.
CONSERVEZ CES
INSTRUCTIONS.
MISE EN GARDE : NE vous laissez PAS
tromper (au l d’une utilisation répétée) par un
sentiment d’aisance ou de familiarité avec le
produit en négligeant les consignes de sécurité
qui accompagnent le produit. UNE UTILISATION
INCORRECTE ou le non-respect des règles de
sécurité énoncées dans le présent manuel d’ins-
tructions peut provoquer des blessures graves.
MISE EN GARDE : L’utilisation de ce pro-
duit peut générer des poussières contenant des
substances chimiques, lesquelles peuvent causer
des problèmes respiratoires ou autres maladies.
Parmi ces substances chimiques gurent les
composés que l’on retrouve dans les pesticides,
insecticides, fertilisants et herbicides.
Les risques liés à l’exposition varient suivant la
fréquence d’exécution du type de travail en ques-
tion. Pour réduire votre exposition à ces subs-
tances chimiques : travaillez dans un emplace-
ment bien aéré et avec des dispositifs de sécurité
approuvés, tels que les masques antipoussières
spécialement conçus pour ltrer les particules
microscopiques.

20 FRANÇAIS
Symboles
Les symboles utilisés pour l’outil sont indiqués
ci-dessous.
volts
courant continu
vitesse à vide
tours ou alternances par minute
Consignes de sécurité importantes
pour la batterie
1. Avant d’utiliser la batterie, lisez toutes les
instructions et les mises en garde apposées
sur (1) le chargeur de batterie, (2) la batterie et
(3) le produit utilisant la batterie.
2. Ne démontez pas et ne modiez pas la batte-
rie. Cela peut entraîner un incendie, une chaleur
excessive ou une explosion.
3. Cessez immédiatement l’utilisation si le temps
de fonctionnement devient excessivement
court. Il y a risque de surchaue, de brûlures,
voire d’explosion.
4.
Si l’électrolyte pénètre dans vos yeux, rincez-les
à l’eau claire et consultez immédiatement un
médecin. Il y a risque de perte de la vue.
5. Ne court-circuitez pas la batterie :
(1) Ne touchez les bornes avec aucun maté-
riau conducteur.
(2)
Évitez de ranger la batterie dans un conte-
neur avec d’autres objets métalliques tels
que clous, pièces de monnaie, etc.
(3) Évitez d’exposer la batterie à l’eau ou à la
pluie.
Un court-circuit de la batterie pourrait provo-
quer un fort courant, une surchaue, parfois
des brûlures et même une panne.
6.
Ne rangez pas et n’utilisez pas l’outil ou la bat-
terie dans des emplacements où la température
peut atteindre ou dépasser 50 °C (122 °F).
7. Ne jetez pas la batterie au feu même si elle est
sérieusement endommagée ou complètement
épuisée. La batterie peut exploser au contact
du feu.
8. Évitez de clouer, de couper, d’écraser, de lan-
cer ou d’échapper la batterie, ou de heurter un
objet dur contre la batterie. Cela peut entraî-
ner un incendie, une chaleur excessive ou une
explosion.
9. N’utilisez pas une batterie si elle est
endommagée.
10. Les batteries lithium-ion fournies sont sou-
mises aux exigences de la législation sur les
marchandises dangereuses.
Des exigences particulières sur l’emballage et
l’étiquetage doivent être respectées lors du trans-
port commercial par des tiers, des transitaires, etc.
Pour préparer la marchandise à expédier, consul-
tez un expert en matériaux dangereux si néces-
saire. Respectez aussi les éventuelles réglemen-
tations nationales plus détaillées.
Recouvrez de ruban isolant les contacts exposés,
et emballez la batterie de sorte qu’elle ne puisse
pas se déplacer à l’intérieur de l’emballage.
11.
Lors de l’élimination de la batterie, retirez-la de l’outil et
éliminez-la dans un endroit sûr. Respectez la réglemen-
tation locale concernant l’élimination de la batterie.
12.
N’utilisez les batteries qu’avec les produits spéci-
és par Makita. Installer les batteries sur des produits
non conformes peut entraîner un incendie, une chaleur
excessive, une explosion ou une fuite d’électrolyte.
13. Si l’outil reste inutilisé pour une période pro-
longée, la batterie doit en être retirée.
14. Pendant et après l’utilisation, la batterie peut
accumuler de la chaleur, ce qui peut causer
des brûlures ou des brûlures à basse tempé-
rature. Faites attention lors de la manipulation
des batteries chaudes.
15. Ne touchez pas la borne de l’outil immédiate-
ment après l’utilisation, car elle peut être assez
chaude pour causer des brûlures.
16.
Ne laissez pas les copeaux, les poussières ou la
terre se coincer dans les bornes, les trous et les rai-
nures de la batterie. Cela peut entraîner un fonctionne-
ment médiocre ou une panne de l’outil ou de la batterie.
17. À moins que l’outil ne soit compatible avec
l’utilisation à proximité des lignes électriques
haute tension, n’utilisez pas la batterie à
proximité d’une ligne électrique haute tension.
Cela peut entraîner un dysfonctionnement ou une
panne de l’outil ou de la batterie.
18. Gardez la batterie à l’écart des enfants.
CONSERVEZ CES
INSTRUCTIONS.
ATTENTION : Utilisez exclusivement les bat-
teries fabriquées par Makita. Les batteries autres
que celles fabriquées par Makita ou les batteries
modiées peuvent exploser et causer un incendie,
une blessure ou des dommages. Cela annule aussi la
garantie Makita de l’outil et du chargeur Makita.
Conseils pour maintenir la durée
de service maximale de la batterie
1. Rechargez la batterie avant qu’elle ne soit
complètement déchargée. Arrêtez toujours
l’outil et rechargez la batterie quand vous
remarquez que la puissance de l’outil diminue.
2. Ne rechargez jamais une batterie complète-
ment chargée. La surcharge réduit la durée de
service de la batterie.
3. Chargez la batterie à une température
ambiante comprise entre 10 °C et 40 °C (50 °F
et 104 °F). Si la batterie est chaude, laissez-la
refroidir avant de la charger.
4. Lorsque vous n’utilisez pas la batterie, reti-
rez-la de l’outil ou du chargeur.
5. Chargez la batterie si elle est restée inutilisée
pendant une période prolongée (plus de six
mois).
Other manuals for DUN461W
4
Table of contents
Languages:
Other Makita Trimmer manuals

Makita
Makita LXT XRU16 Series User manual

Makita
Makita DUR365U User manual

Makita
Makita DUR361U User manual

Makita
Makita XRU15PT User manual

Makita
Makita RBC221 User manual

Makita
Makita DUR365UPT2 User manual

Makita
Makita EN5950SH User guide

Makita
Makita DUR142L Manual

Makita
Makita EE400MP User manual

Makita
Makita DBC260U User guide

Makita
Makita 3712 User manual

Makita
Makita DUR190U User manual

Makita
Makita DUH551 User manual

Makita
Makita DUR365U User manual

Makita
Makita EH5000W User manual

Makita
Makita EH6000S User manual

Makita
Makita EN4951SH User manual

Makita
Makita DRT50 User manual

Makita
Makita DUH523RT User manual

Makita
Makita DUH604S User manual