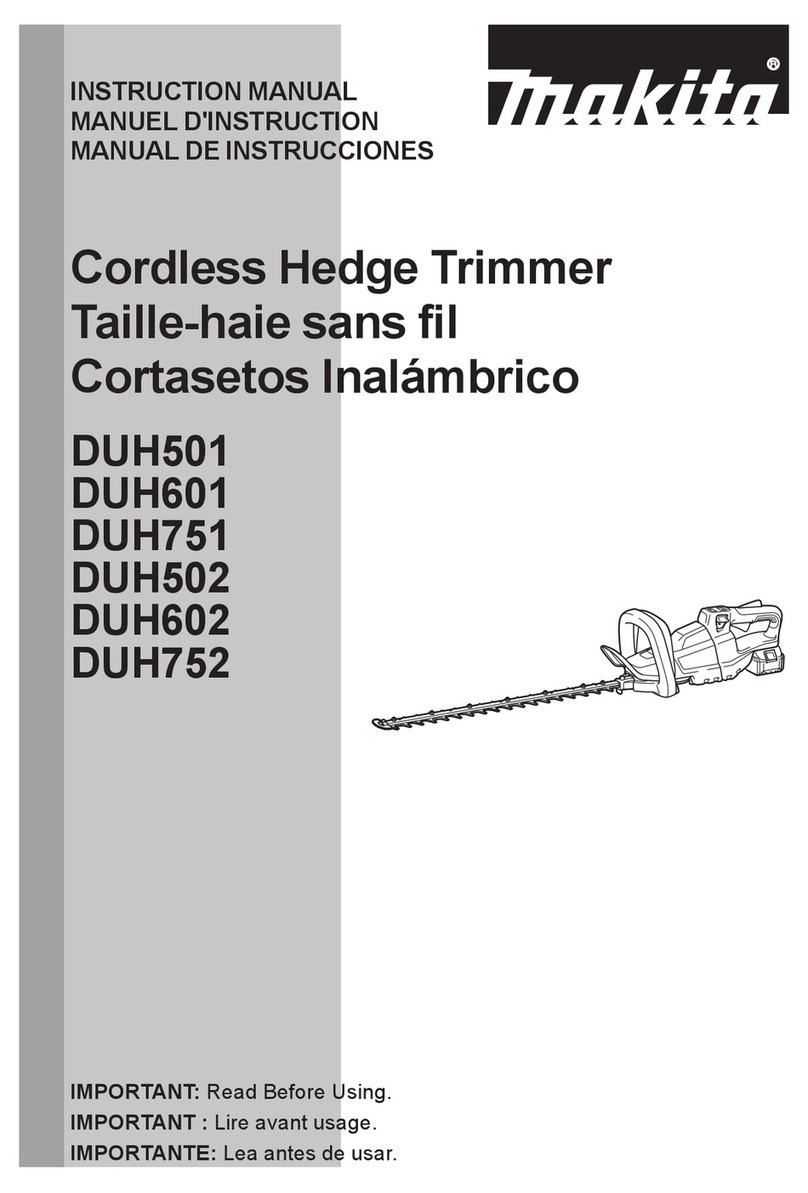
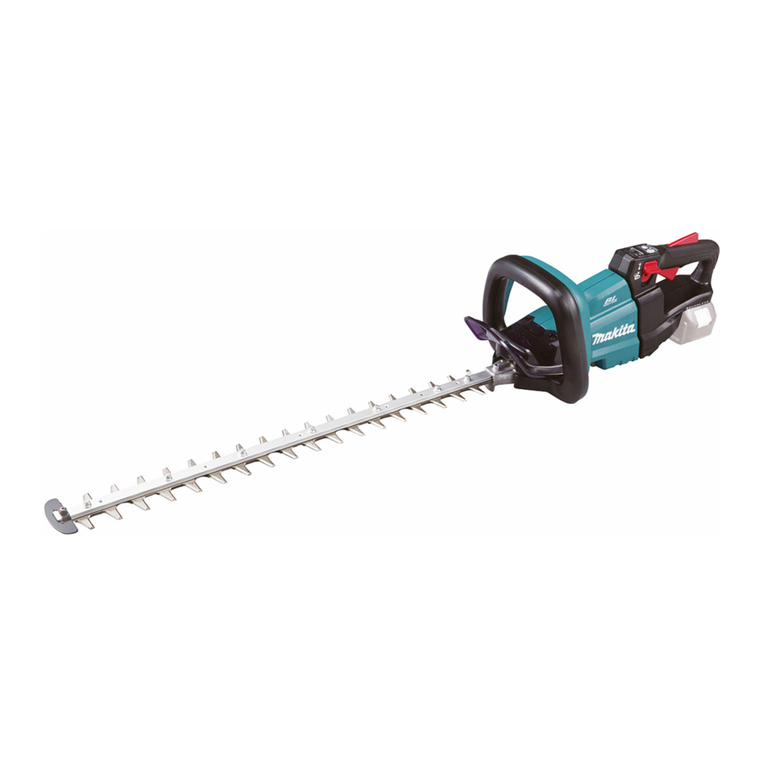
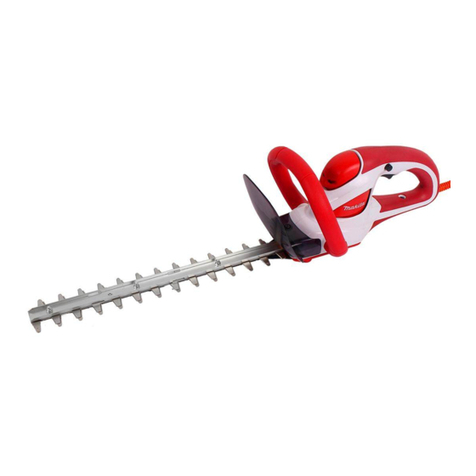
Makita DUH651 User manual

INSTRUCTION MANUAL
MANUEL D'INSTRUCTION
MANUAL DE INSTRUCCIONES
Cordless Hedge Trimmer
Taille-haie sans l
Cortasetos Inalámbrico
DUH551
DUH651
IMPORTANT: Read Before Using.
IMPORTANT : Lire avant usage.
IMPORTANTE: Lea antes de usar.

2ENGLISH
ENGLISH (Original instructions)
SPECIFICATIONS
Model DUH551 DUH651
Blade length 550 mm (21-5/8") 650 mm (25-1/2")
Strokes per minute (RPM) 1,000 /min - 1,800 /min
Overall length 1,065 mm (42") 1,135 mm or 1,233 mm
(44-3/4"or 48-1/2")
(country specic)
Rated voltage D.C. 36 V
Standard battery cartridge(s)
Warning: Use only the battery(ies) described.
BL1815N/
BL1820/
BL1820B
BL1830/
BL1830B/
BL1840/
BL1840B/
BL1850/
BL1850B/
BL1860B
BL1815N/
BL1820/
BL1820B
BL1830/
BL1830B/
BL1840/
BL1840B/
BL1850/
BL1850B/
BL1860B
Net weight
4.6 kg (10.2 lbs) 5.1 kg (11.3 lbs) 4.7 kg (10.3 lbs) 5.2 kg (11.4 lbs)
• Due to our continuing program of research and development, the specications herein are subject to change with-
out notice.
• Specications and battery cartridge may differ from country to country.
• Weight, with battery cartridge, according to EPTA-Procedure 01/2003
General Power Tool Safety Warnings
WARNING Read all safety warnings and all
instructions. Failure to follow the warnings and instruc-
tions may result in electric shock, re and/or serious
injury.
Save all warnings and instruc-
tions for future reference.
The term "power tool" in the warnings refers to your
mains-operated (corded) power tool or battery-operated
(cordless) power tool.
Work area safety
1. Keep work area clean and well lit. Cluttered or
dark areas invite accidents.
2. Do not operate power tools in explosive atmo-
spheres, such as in the presence of ammable
liquids, gases or dust. Power tools create sparks
which may ignite the dust or fumes.
3. Keep children and bystanders away while
operating a power tool. Distractions can cause
you to lose control.
Electrical safety
4. Power tool plugs must match the outlet. Never
modify the plug in any way. Do not use any
adapter plugs with earthed (grounded) power
tools. Unmodied plugs and matching outlets will
reduce risk of electric shock.
5. Avoid body contact with earthed or grounded
surfaces such as pipes, radiators, ranges and
refrigerators. There is an increased risk of elec-
tric shock if your body is earthed or grounded.
6. Do not expose power tools to rain or wet con-
ditions. Water entering a power tool will increase
the risk of electric shock.
7. Do not abuse the cord. Never use the cord for
carrying, pulling or unplugging the power tool.
Keep cord away from heat, oil, sharp edges
or moving parts. Damaged or entangled cords
increase the risk of electric shock.
8. When operating a power tool outdoors, use an
extension cord suitable for outdoor use. Use of
a cord suitable for outdoor use reduces the risk of
electric shock.
9. If operating a power tool in a damp location is
unavoidable, use a ground fault circuit inter-
rupter (GFCI) protected supply. Use of an GFCI
reduces the risk of electric shock.
Personal safety
10. Stay alert, watch what you are doing and use
common sense when operating a power tool.
Do not use a power tool while you are tired or
under the inuence of drugs, alcohol or med-
ication. A moment of inattention while operating
power tools may result in serious personal injury.
11. Use personal protective equipment. Always
wear eye protection. Protective equipment such
as dust mask, non-skid safety shoes, hard hat, or
hearing protection used for appropriate conditions
will reduce personal injuries.
12. Prevent unintentional starting. Ensure the
switch is in the off-position before connecting
to power source and/or battery pack, picking
up or carrying the tool. Carrying power tools with
your nger on the switch or energising power tools
that have the switch on invites accidents.
13. Remove any adjusting key or wrench before
turning the power tool on. A wrench or a key left
attached to a rotating part of the power tool may
result in personal injury.
14. Do not overreach. Keep proper footing and
balance at all times. This enables better control
of the power tool in unexpected situations.

3ENGLISH
15. Dress properly. Do not wear loose clothing or
jewellery. Keep your hair, clothing, and gloves
away from moving parts. Loose clothes, jewel-
lery or long hair can be caught in moving parts.
16. If devices are provided for the connection of
dust extraction and collection facilities, ensure
these are connected and properly used. Use of
dust collection can reduce dust-related hazards.
Power tool use and care
17. Do not force the power tool. Use the correct
power tool for your application. The correct
power tool will do the job better and safer at the
rate for which it was designed.
18. Do not use the power tool if the switch does
not turn it on and off. Any power tool that cannot
be controlled with the switch is dangerous and
must be repaired.
19. Disconnect the plug from the power source
and/or the battery pack from the power tool
before making any adjustments, changing
accessories, or storing power tools. Such pre-
ventive safety measures reduce the risk of starting
the power tool accidentally.
20. Store idle power tools out of the reach of chil-
dren and do not allow persons unfamiliar with
the power tool or these instructions to operate
the power tool. Power tools are dangerous in the
hands of untrained users.
21. Maintain power tools. Check for misalignment
or binding of moving parts, breakage of parts
and any other condition that may affect the
power tool’s operation. If damaged, have the
power tool repaired before use. Many accidents
are caused by poorly maintained power tools.
22. Keep cutting tools sharp and clean. Properly
maintained cutting tools with sharp cutting edges
are less likely to bind and are easier to control.
23. Use the power tool, accessories and tool bits
etc. in accordance with these instructions, tak-
ing into account the working conditions and
the work to be performed. Use of the power tool
for operations different from those intended could
result in a hazardous situation.
Battery tool use and care
24. Recharge only with the charger specied by
the manufacturer. A charger that is suitable for
one type of battery pack may create a risk of re
when used with another battery pack.
25. Use power tools only with specically desig-
nated battery packs. Use of any other battery
packs may create a risk of injury and re.
26. When battery pack is not in use, keep it away
from other metal objects, like paper clips,
coins, keys, nails, screws or other small metal
objects, that can make a connection from one
terminal to another. Shorting the battery termi-
nals together may cause burns or a re.
27. Under abusive conditions, liquid may be
ejected from the battery; avoid contact. If con-
tact accidentally occurs, ush with water. If
liquid contacts eyes, additionally seek medical
help. Liquid ejected from the battery may cause
irritation or burns.
Service
28. Have your power tool serviced by a qualied
repair person using only identical replacement
parts. This will ensure that the safety of the power
tool is maintained.
29. Follow instruction for lubricating and chang-
ing accessories.
30. Keep handles dry, clean and free from oil and
grease.
HEDGE TRIMMER SAFETY
WARNINGS
1. Keep all parts of the body away from the cut-
ter blade. Do not remove cut material or hold
material to be cut when blades are moving.
Make sure the switch is off when clearing
jammed material. Blades coast after turn off. A
moment of inattention while operating the hedge
trimmer may result in serious personal injury.
2. Carry the hedge trimmer by the handle with
the cutter blade stopped. Proper handling of the
hedge trimmer will reduce possible personal injury
from the cutter blades.
3. Hold the power tool by insulated gripping
surfaces only, because the cutter blade may
contact hidden wiring. Cutter blades contacting
a "live" wire may make exposed metal parts of the
power tool "live" and could give the operator an
electric shock.
4. DANGER - Keep hands away from blade.
Contact with blade will result in serious personal
injury.
5. Do not use the hedge trimmer in the rain or in wet
or very damp conditions. The electric motor is not
waterproof.
6. First-time users should have an experienced
hedge trimmer user show them how to use the
trimmer.
7. The hedge trimmer must not be used by children
or young persons under 18 years of age. Young
persons over 16 years of age may be exempted
from this restriction if they are undergoing training
under the supervision of an expert.
8. Use the hedge trimmer only if you are in good
physical condition. If you are tired, your attention
will be reduced. Be especially careful at the end of
a working day. Perform all work calmly and care-
fully. The user is responsible for all damages to
third parties.
9. Never use the trimmer when under the inuence
of alcohol, drugs or medication.
10. Work gloves of stout leather are part of the basic
equipment of the hedge trimmer and must always
be worn when working with it. Also wear sturdy
shoes with anti-skid soles.
11. Before starting work check to make sure that the
trimmer is in good and safe working order. Ensure
guards are tted properly. The hedge trimmer
must not be used unless fully assembled.
12. Make sure you have a secure footing before start-
ing operation.
13. Hold the tool rmly when using the tool.
14. Do not operate the tool at no-load unnecessarily.
4ENGLISH
15. Immediately switch off the motor and remove the
battery cartridge if the cutter should come into
contact with a fence or other hard object. Check
the cutter for damage, and if damaged repair
immediately.
16. Before checking the cutter, taking care of faults,
or removing material caught in the cutter, always
switch off the trimmer and remove the battery
cartridge.
17. Switch off the trimmer and remove the battery
cartridge before doing any maintenance work.
18. When moving the hedge trimmer to another loca-
tion, including during work, always remove the
battery cartridge and put the blade cover on the
cutter blades. Never carry or transport the trimmer
with the cutter running. Never grasp the cutter with
your hands.
19. Clean the hedge trimmer and especially the cut-
ter after use, and before putting the trimmer into
storage for extended periods. Lightly oil the cutter
and put on the cover. The cover supplied with the
unit can be hung on the wall, providing a safe and
practical way to store the hedge trimmer.
20. Store the hedge trimmer with the cover on, in a dry
room. Keep it out of reach of children. Never store
the trimmer outdoors.
SAVE THESE INSTRUCTIONS.
WARNING: DO NOT let comfort or famil-
iarity with product (gained from repeated
use) replace strict adherence to safety
rules for the subject product. MISUSE or
failure to follow the safety rules stated in
this instruction manual may cause serious
personal injury.
WARNING: Use of this product can create
dust containing chemicals which may cause
respiratory or other illnesses.
Some examples of these chemicals are compounds
found in pesticides, insecticides, fertilizers and
herbicides.
Your risk from these exposures varies, depending on
how often you do this type of work. To reduce your
exposure to these chemicals: work in a well ventilated
area, and work with approved safety equipment, such
as those dust masks that are specially designed to
lter out microscopic particles.
Symbols
The followings show the symbols used for tool.
volts
direct current
no load speed
revolutions or reciprocation per minute
IMPORTANT SAFETY
INSTRUCTIONS
FOR BATTERY CARTRIDGE
1. Before using battery cartridge, read all instruc-
tions and cautionary markings on (1) battery
charger, (2) battery, and (3) product using
battery.
2. Do not disassemble battery cartridge.
3. If operating time has become excessively
shorter, stop operating immediately. It may
result in a risk of overheating, possible burns
and even an explosion.
4. If electrolyte gets into your eyes, rinse them
out with clear water and seek medical atten-
tion right away. It may result in loss of your
eyesight.
5. Do not short the battery cartridge:
(1) Do not touch the terminals with any con-
ductive material.
(2) Avoid storing battery cartridge in a con-
tainer with other metal objects such as
nails, coins, etc.
(3) Do not expose battery cartridge to water
or rain.
A battery short can cause a large current
ow, overheating, possible burns and even a
breakdown.
6. Do not store the tool and battery cartridge in
locations where the temperature may reach or
exceed 50°C (122°F).
7. Do not incinerate the battery cartridge even if
it is severely damaged or is completely worn
out. The battery cartridge can explode in a re.
8. Be careful not to drop or strike battery.
9. Do not use a damaged battery.
10. Follow your local regulations relating to dis-
posal of battery.
SAVE THESE INSTRUCTIONS.
CAUTION: Only use genuine Makita batteries.
Use of non-genuine Makita batteries, or batteries that
have been altered, may result in the battery burst-
ing causing res, personal injury and damage. It will
also void the Makita warranty for the Makita tool and
charger.
Tips for maintaining maximum
battery life
1. Charge the battery cartridge before completely
discharged.
Always stop tool operation and charge the bat-
tery cartridge when you notice less tool power.
2. Never recharge a fully charged battery car-
tridge.
Overcharging shortens the battery service life.
3. Charge the battery cartridge with room tem-
perature at 10°C - 40°C (50°F - 104°F). Let a hot
battery cartridge cool down before charging it.
4. Charge the battery cartridge if you do not use
it for a long period (more than six months).

5ENGLISH
FUNCTIONAL
DESCRIPTION
CAUTION:
• Always be sure that the tool is switched off and
the battery cartridge is removed before adjust-
ing or checking function on the tool.
Installing or removing battery
cartridge
1
2
3
► 1. Red indicator 2. Button 3. Battery cartridge
CAUTION:
• Always switch off the tool before installing or
removing of the battery cartridge.
• Hold the tool and the battery cartridge rmly
when installing or removing battery car-
tridge. Failure to hold the tool and the battery
cartridge rmly may cause them to slip off your
hands and result in damage to the tool and
battery cartridge and a personal injury.
To remove the battery cartridge, slide it from the tool
while sliding the button on the front of the cartridge.
To install the battery cartridge, align the tongue on the
battery cartridge with the groove in the housing and slip
it into place. Insert it all the way until it locks in place
with a little click. If you can see the red indicator on the
upper side of the button, it is not locked completely.
CAUTION:
• Always install the battery cartridge fully until the
red indicator cannot be seen. If not, it may acci-
dentally fall out of the tool, causing injury to you
or someone around you.
• Do not install the battery cartridge forcibly. If the
cartridge does not slide in easily, it is not being
inserted correctly.
NOTE:
• The tool does not work with only one battery
cartridge.
Tool/ battery protection system
The tool is equipped with a tool/battery protection sys-
tem. This system automatically cuts off power to the
motor to extend tool and battery life.
The tool will automatically stop during operation if the
tool or battery are placed under one of the following
conditions. In some conditions, the indicators light up.
Overload protection
When the tool is operated in a manner that causes it to
draw an abnormally high current, the tool automatically
stops without any indication. In this situation, turn the
tool off and stop the application that caused the tool to
become overloaded. Then turn the tool on to restart.
Overheat protection for tool/ battery
When the tool/ battery is overheated, the tool stops
automatically without any indication. The tool does not
start even if pulling the switch trigger. In this situation,
let the tool/ battery cool before turning the tool on again.
NOTE: The battery overheat protection works only
with a battery cartridge with a star marking.
1
► 1. Star marking
Indicating the remaining battery capacity
(Only for battery cartridges with "B" at the end of the
model number.)
1
2
► 1. Indicator lamps 2. CHECK button
Press the check button on the battery cartridge to indi-
cate the remaining battery capacity. The indicator lamps
light up for few seconds.

6ENGLISH
Off BlinkingLighted
Indicator lamps
Charge the
battery.
0% to 25%
25% to 50%
50% to 75%
75% to 100%
Remaining
capacity
The battery
may have
malfunctioned.
NOTE:
• Depending on the conditions of use and the
ambient temperature, the indication may differ
slightly from the actual capacity.
Overdischarge protection
1
► 1. Battery indicator
When the remaining battery capacity gets low, the
battery indicator blinks on the applicable battery side.
By further use, the tool stops and the battery indicator
lights up about 10 seconds. In this situation, charge the
battery cartridge.
Handle mounting positions
CAUTION:
• Always make sure that the handle is locked in
the desired position before operation.
12
► 1. Knob 2. Housing
Depending on the operations, you can set the angle of
the handle either 45°or 90°position on left or right. To
turn the handle, pull the knob and turn the handle as
shown in the gure. The handle is locked in 45°position.
To turn the handle to 90°position, pull the knob again
and turn the handle more.
Switch action
CAUTION:
• Before inserting the battery cartridge into the
tool, always check to see that the switch trigger
actuates properly and returns to the "OFF"
position when released.
1
2
3
► 1. Switch trigger B 2. Switch trigger A 3. Lock-off
button
For your safety, this tool has a dual switching system.
To turn on the tool, press the lock-off button and press
the switch trigger A and B. To turn off the switch, release
either one of the switch triggers. The tool only starts
when pulling the both switch triggers.

7ENGLISH
Speed change
1
► 1. Adjusting dial
The strokes per minute can be adjusted just by turning
the adjusting dial. This can be done even while the tool
is running. The dial is marked 1 (lowest speed) to 6 (full
speed).
Refer to the table below for the relationship between the
number settings on the adjusting dial and the strokes
per minute.
Number on adjusting dial Strokes per minute (min )
-1
6
5
4
3
2
1
1,800
1,750
1,650
1,500
1,300
1,000
CAUTION:
• The speed adjusting dial can be turned only as
far as 6 and back to 1. Do not force it past 6 or
1, or the speed adjusting function may no longer
work.
• The strokes per minute vary by the conditions of
battery cartridge and shear blades.
OPERATION
CAUTION:
• Be careful not to accidentally contact a metal
fence or other hard objects while trimming. The
blade will break and may cause serious injury.
• Overreaching with a hedge trimmer, particularly
from a ladder, is extremely dangerous. Do not
work from anything wobbly or inrm.
NOTICE: Do not attempt to cut branches thicker
than 10 mm (3/8") in diameter with the tool. Cut
branches to 10 cm (4") lower than the cutting height
using branch cutters before using the tool.
(1)
(2)
► (1) Cutting height (2) 10 cm (4")
CAUTION:
• Do not cut off dead trees or similar hard objects.
Failure to do so may damage the tool.
Hold the trimmer with both hands and pull the switch
trigger A or B and then move it in front of your body.
1
2
3
► 1. Trimming direction 2. Hedge surface to be
trimmed 3. Tilt the blades.
As a basic operation, tilt the blades towards the trim-
ming direction and move it calmly and slowly at the
speed rate of 3 - 4 seconds per meter.

8ENGLISH
To cut a hedge top evenly, it helps to tie a string at the
desired hedge height and to trim along it, using it as a
reference line.
Attaching the chip receiver (optional accessory) on the
tool when trimming the hedge straight can avoid cut off
leaves’ being thrown away.
Rotate the handle for your easy handling before oper-
ation. Refer to the section titled “Handle mounting
position”.
To cut a hedge side evenly, it helps to cut from the
bottom upwards.
Trim boxwood or rhododendron from the base toward
the top for a nice appearance and good job.
Installing or removing chip receiver
(optional accessory)
CAUTION:
• Always be sure that the tool is switched off and
the battery cartridge is removed before installing
or removing chip receiver.
NOTE:
• When replacing the chip receiver, always wear
gloves so that hands and face does not directly
contact the blade. Failure to do so may cause
personal injury.
• Always be sure to remove the blade cover
before installing the chip receiver.
• The chip receiver receives cut-off leaves and
alleviates collecting thrown-away leaves. This
can be installed on either side of the tool.
1
2
3
4
► 1. Press 2. Chip receiver 3. Nut 4. Shear blade
Press the chip receiver on the shear blades so that its
slits overlap with the nuts on the shear blades. At this
time, make sure that the chip receiver does not contact
branch catcher at the top of the shear blades.

9ENGLISH
1
2
► 1. Nut 2. Branch catcher
At this time, the chip receiver needs to be installed so
that its hooks t into grooves in the shear blade unit.
1
2
3
► 1. Hooks 2. Fit the hooks into groove 3. Grooves
To remove the chip receiver, press its lever on both
sides so that the hooks are unlocked.
1
2
► 1. Press the levers on both sides 2. Unlock the
hooks
CAUTION:
• The blade cover cannot be installed on the tool
with the chip receiver being installed. Before
carrying or storing, uninstall the chip receiver
and then install the blade cover to avoid blade
exposure.
NOTE:
• Check the chip receiver for secure installment
before use.
• Never try to uninstall the chip receiver by an
excessive force with its hooks locked in the
blade unit grooves. Using the excessive force
may damage it.
MAINTENANCE
CAUTION:
• Always be sure that the tool is switched off and
the battery cartridge is removed before attempt-
ing to perform inspection or maintenance.
• Never use gasoline, benzine, thinner, alcohol
or the like. Discoloration, deformation or cracks
may result.
Cleaning the tool
Clean out the tool by wiping off dust with a dry or soap-
dipped rag.
Blade maintenance
Smear the blade before and once per hour during oper-
ation using machine oil or similars.
NOTE:
• Before smearing the blade, remove the chip
receiver.
After operation, remove dust from both sides of the
blade with wired brush, wipe it off with a rag and then
apply enough low-viscosity oil, such as machine oil etc.
and spray-type lubricating oil.
CAUTION:
• Do not wash the blades in water. Failure to do
so may cause rust or damage on the tool.
Removing or installing shear blade
CAUTION:
• Before removing or installing shear blade,
always be sure that the tool is switched off and
the battery cartridge is removed.
• When replacing the shear blade, always wear
gloves without removing blade cover so that
hands and face does not directly contact the
blade. Failure to do so may cause personal
injury.
NOTE:
• Do not wipe off grease from the gear and crank.
Failure to do so may cause damage to the tool.
• For specic way of removing and installing
shear blades refer to the reverse of a package
for accessory shear blades.

10 ENGLISH
Removing the shear blades
Reverse the tool and loosen four screws.
12
► 1. Blade cover 2. Screws
NOTE:
• Be careful not to get your hands dirty as grease
is applied in the shear blade driving area.
Remove the under cover.
1
2
3
► 1. Under cover 2. Blade cover 3. Screws
Remove the plate.
1
► 1. Plate
Set the crank at the angle as shown in the gure with a
slotted screwdriver.
1
► 1. Crank
Remove two screws from the shear blades and the
shear blade unit will be taken out.
1
2
► 1. Screws 2. Shear blade
CAUTION:
• Return the gear to the original position in such
a manner as it was installed if it should be taken
away by mistake.

11 ENGLISH
Installing the shear blades
Prepare 4 removed screws (For under cover), 2 screws
(For shear blade), plate, under cover, and new shear
blades.
Adjust the crank position as shown in the gure. At
this time, apply some grease provided with new shear
blades to the periphery of the crank.
1
► 1. Crank
Overlap the oval hole in the upper blade with that in the
lower one.
1
► 1. Oval hole of shear blade
Take out the blade cover from the old shear blades and
t it onto the new ones for easy handling during the
replacement of blades.
Place the new shear blades on the tool so that the oval
holes in the shear blades t onto the crank. Overlap the
holes in the shear blades with the screw holes in the
tool and then secure them with two screws.
1
2
3
► 1. Oval hole of shear blade 2. Crank 3. Screws
Check the crank for smooth turn with a slotted
screwdriver.
1
► 1. Crank
Install the plate, under cover on the tool. Tighten the
screw rmly.
NOTE:
• There is no distinction between the top and
bottom of the plate.
Remove the blade cover and then turn on the tool to
check it for proper movement.
NOTE:
• When the shear blades does not operate prop-
erly, there is a poor t between the blades and
crank. Redo from the beginning.

12 ENGLISH
Replacing carbon brushes
1
► 1. Limit mark
Remove and check the carbon brushes regularly.
Replace when they wear down to the limit mark. Keep
the carbon brushes clean and free to slip in the holders.
Both carbon brushes should be replaced at the same
time. Use only identical carbon brushes.
12
► 1. Holder cap cover 2. Slotted screwdriver
Insert the top end of slotted screwdriver into the notch in
the tool and remove the holder cap cover by lifting it up.
1
2
► 1. Brush holder cap 2. Slotted screwdriver
Use a slotted screwdriver to remove the brush holder
caps. Take out the worn carbon brushes, insert the new
ones and secure the brush holder caps.
Reinstall the holder cap cover on the tool.
Storage
The hook hole in the bottom of the blade cover is con-
venient for hanging the tool from a nail or screw on the
wall.
Remove the battery cartridge and put the blade cover
on the shear blades so that the blades are not exposed.
Store the tool out of the reach of children carefully.
Store the tool in the place not exposed to water and
rain.
To maintain product SAFETY and RELIABILITY,
repairs, any other maintenance or adjustment should
be performed by Makita Authorized or Factory Service
Centers, always using Makita replacement parts.

13 ENGLISH
OPTIONAL
ACCESSORIES
CAUTION:
• These accessories or attachments are recom-
mended for use with your Makita tool specied
in this manual. The use of any other accessories
or attachments might present a risk of injury to
persons. Only use accessory or attachment for
its stated purpose.
If you need any assistance for more details regard-
ing these accessories, ask your local Makita Service
Center.
• Blade cover
• Shear blade assembly
• Makita genuine battery and charger
• Chip receiver
NOTE:
• Some items in the list may be included in the
tool package as standard accessories. They
may differ from country to country.
MAKITA LIMITED WARRANTY
Please refer to the annexed warranty sheet for the
most current warranty terms applicable to this product.
If annexed warranty sheet is not available, refer to the
warranty details set forth at below website for your
respective country.
United States of America: www.makitatools.com
Canada: www.makita.ca
Other countries: www.makita.com

14 FRANÇAIS
FRANÇAIS (Mode d’emploi original)
SPÉCIFICATIONS
Modèle DUH551 DUH651
Longueur de la lame 550 mm (21-5/8") 650 mm (25-1/2")
Nombre d'impacts par minute (RPM) 1 000 /min - 1 800 /min
Longueur totale 1 065 mm (42") 1 135 mm ou 1 233 mm
(44-3/4"ou 48-1/2")
(en fonction du pays)
Tension nominale C.C. 36 V
Batterie(s) standard
Avertissement : Utilisez seulement la/les batterie(s) décrite(s).
BL1815N/
BL1820/
BL1820B
BL1830/
BL1830B/
BL1840/
BL1840B/
BL1850/
BL1850B/
BL1860B
BL1815N/
BL1820/
BL1820B
BL1830/
BL1830B/
BL1840/
BL1840B/
BL1850/
BL1850B/
BL1860B
Poids net
4,6 kg (10,2 lbs) 5,1 kg (11,3 lbs) 4,7 kg (10,3 lbs) 5,2 kg (11,4 lbs)
• Étant donné l'évolution constante de notre programme de recherche et de développement, les spécications conte-
nues dans ce manuel sont sujettes à modication sans préavis.
• Les caractéristiques techniques et la batterie peuvent varier suivant les pays.
• Poids, batterie comprise, conforme à la procédure EPTA de 01/2003
Consignes de sécurité générales
pour outils électriques
MISE EN GARDE Veuillez lire toutes les mises en
garde de sécurité et toutes les instructions. L'ignorance
des mises en garde et des instructions comporte un risque
de choc électrique, d'incendie et/ou de blessure grave.
Conservez toutes les mises en
garde et instructions pour réfé-
rence future.
Le terme « outil électrique » qui gure dans les avertis-
sements fait référence à un outil électrique branché sur
une prise de courant (par un cordon d'alimentation) ou
alimenté par batterie (sans l).
Sécurité de la zone de travail
1. Maintenez la zone de travail propre et bien
éclairée. Les zones de travail encombrées ou
sombres ouvrent grande la porte aux accidents.
2.
N'utilisez pas les outils électriques dans les atmos-
phères explosives, par exemple en présence de
liquides, gaz ou poussières inammables. Les outils
électriques produisent des étincelles au contact des-
quelles la poussière ou les vapeurs peuvent s'enammer.
3. Assurez-vous qu'aucun enfant ou curieux ne
s'approche pendant que vous utilisez un outil
électrique. Vous risquez de perdre la maîtrise de
l'outil si votre attention est détournée.
Sécurité en matière d'électricité
4.
Les ches d'outil électrique sont conçues pour
s'adapter parfaitement aux prises de courant. Ne
modiez jamais la che de quelque façon que ce
soit. N'utilisez aucun adaptateur de che sur les
outils électriques avec mise à la terre. En ne modi-
ant pas les ches et en les insérant dans des prises
de courant pour lesquelles elles ont été conçues vous
réduirez les risques de choc électrique.
5. Évitez tout contact corporel avec les surfaces
mises à la terre, telles que les tuyaux, radia-
teurs, cuisinières et réfrigérateurs. Le risque
de choc électrique est plus élevé si votre corps se
trouve mis à la terre.
6. N'exposez pas les outils électriques à la pluie
ou à l'eau. La présence d'eau dans un outil élec-
trique augmente le risque de choc électrique.
7. Ne maltraitez pas le cordon. N'utilisez jamais
le cordon pour transporter, tirer ou débrancher
l'outil électrique. Maintenez le cordon à l'écart
des sources de chaleur, de l'huile, des objets à
bords tranchants et des pièces en mouvement.
Le risque de choc électrique est plus élevé lorsque
les cordons sont endommagés ou enchevêtrés.
8.
Lorsque vous utilisez un outil électrique à l'exté-
rieur, utilisez un cordon prolongateur prévu à cette
n. Les risques de choc électrique sont moindres
lorsqu'un cordon conçu pour l'extérieur est utilisé.
9. Si vous devez utiliser un outil électrique dans
un endroit humide, utilisez une source d'ali-
mentation protégée par un disjoncteur de fuite
à la terre. L'utilisation d'un disjoncteur de fuite à la
terre réduit le risque de choc électrique.
Sécurité personnelle
10. Restez alerte, attentif à vos mouvements et
faites preuve de bon sens lorsque vous utili-
sez un outil électrique. Évitez d'utiliser un outil
électrique si vous êtes fatigué ou si vous avez
pris une drogue, de l'alcool ou un médicament.
Un moment d'inattention pendant l'utilisation d'un
outil électrique peut entraîner une grave blessure.
11. Portez des dispositifs de protection person-
nelle. Portez toujours un protecteur pour la
vue. Les risques de blessure seront moins élevés
si vous utilisez des dispositifs de protection tels
qu'un masque antipoussières, des chaussures à
semelle antidérapante, une coiffure résistante ou
une protection d'oreilles.

15 FRANÇAIS
12. Évitez les démarrages accidentels. Assurez-
vous que l’interrupteur soit en position d'arrêt
avant de brancher l'outil à la prise électrique
et/ou au bloc-piles, avant de prendre ou de
transporter l’outil. Vous ouvrez la porte aux
accidents si vous transportez les outils électriques
avec le doigt sur l’interrupteur ou si vous les bran-
chez alors que l’interrupteur est en position de
marche.
13. Retirez toute clé de réglage ou de serrage
avant de mettre l'outil sous tension. Toute clé
laissée en place sur une pièce rotative de l'outil
électrique peut entraîner une blessure.
14. Maintenez une bonne position. Assurez-vous
d'une bonne prise au sol et d'une bonne
position d'équilibre en tout temps. Cela vous
permettra d'avoir une meilleure maîtrise de l'outil
dans les situations imprévues.
15. Portez des vêtements adéquats. Ne portez ni
vêtements amples ni bijoux. Vous devez main-
tenir cheveux, vêtements et gants à l'écart des
pièces en mouvement. Les pièces en mouve-
ment peuvent happer les vêtements amples, les
bijoux et les cheveux longs.
16. Si des accessoires sont fournis pour raccor-
der un appareil d'aspiration et de collecte
de la poussière, assurez-vous qu'ils sont
correctement raccordés et qu'ils sont utilisés
de manière adéquate. L'utilisation d'un appareil
d'aspiration permet de réduire les risques liés à la
présence de poussière dans l'air.
Utilisation et entretien des outils électriques
17.
Ne forcez pas l'outil électrique. Utilisez l'outil élec-
trique adéquat suivant le type de travail à effectuer.
Si vous utilisez l'outil électrique adéquat et respectez le
régime pour lequel il a été conçu, il effectuera un travail
de meilleure qualité et de façon plus sécuritaire.
18. N'utilisez pas l'outil électrique s'il n'est pas
possible de mettre sa gâchette en position de
marche et d'arrêt. Un outil électrique dont l'inter-
rupteur est défectueux représente un danger et
doit être réparé.
19. Débranchez la che de la source d'alimen-
tation et/ou retirez le bloc-piles de l'outil
électrique avant d'effectuer tout réglage, de
changer un accessoire ou de ranger l'ou-
til électrique. De telles mesures préventives
réduisent les risques de démarrage accidentel de
l'outil électrique.
20. Après l'utilisation d'un outil électrique,
rangez-le hors de portée des enfants et ne
laissez aucune personne l'utiliser si elle n'est
pas familiarisée avec l'outil électrique ou les
présentes instructions d'utilisation. Les outils
électriques représentent un danger entre les
mains de personnes qui n'en connaissent pas le
mode d'utilisation.
21. Veillez à l’entretien des outils électriques.
Assurez-vous que les pièces mobiles ne sont
pas désalignées ou coincées, qu’aucune pièce
n’est cassée et que l’outil électrique n’a subi
aucun dommage affectant son bon fonction-
nement. Le cas échéant, faites réparer l'outil
électrique avant de l'utiliser. De nombreux
accidents sont causés par des outils électriques
mal entretenus.
22. Maintenez les outils tranchants bien aiguisés
et propres. Un outil tranchant dont l'entretien est
effectué correctement et dont les bords sont bien
aiguisés risquera moins de se coincer et sera plus
facile à maîtriser.
23.
Utilisez l'outil électrique, ses accessoires, ses
embouts, etc., en respectant les présentes ins-
tructions, en tenant compte des conditions de
travail et du type de travail à effectuer. L'utilisation
d'un outil électrique à des ns autres que celles
prévues peut entraîner une situation dangereuse.
Utilisation et entretien des outils alimentés par batterie
24. Pour recharger, utilisez uniquement le char-
geur spécié par le fabricant. L'utilisation d'un
chargeur conçu pour un type donné de bloc-piles
comporte un risque d'incendie lorsqu'il est utilisé
avec un autre type de bloc-piles.
25. N'utilisez un outil électrique qu'avec le bloc-
piles conçu spéciquement pour cet outil. Il y a
risque de blessure ou d'incendie si un autre bloc-
piles est utilisé.
26. Lorsque vous n'utilisez pas le bloc-piles,
rangez-le à l'écart des objets métalliques tels
que trombones, pièces de monnaie, clés,
clous, vis ou autres petits objets métalliques
qui risquent d'établir une connexion entre les
bornes. La mise en court-circuit des bornes de
batterie peut causer des brûlures ou un incendie.
27. Dans des conditions d'utilisation inadéquates
de la batterie, il peut y avoir fuite d'électrolyte;
évitez tout contact avec ce liquide. En cas
de contact accidentel, rincez avec beaucoup
d’eau. Si le liquide pénètre dans vos yeux, il
faut aussi consulter un médecin. L'électrolyte
qui s'échappe de la batterie peut causer des irrita-
tions ou des brûlures.
Réparation
28. Faites réparer votre outil électrique par un
réparateur qualié qui utilise des pièces de
rechange identiques aux pièces d'origine. Le
maintien de la sûreté de l'outil électrique sera ainsi
assuré.
29. Suivez les instructions de lubrication et de
changement des accessoires.
30. Maintenez les poignées de l'outil sèches,
propres et exemptes d'huile ou de graisse.
CONSIGNES DE SÉCURITÉ POUR
LE TAILLE-HAIE
1.
Toutes les parties du corps doivent être
tenues à l’écart de la lame. N’enlevez pas le
matériau coupé et ne tenez pas le matériau à
couper lorsque les lames sont en mouvement.
Assurez-vous que l’interrupteur est à la posi-
tion d’arrêt lorsque vous devez enlever le maté-
riau coincé dans les lames. Les lames conti-
nuent de tourner après l’arrêt de l’appareil.
Tout moment de distraction durant l’utilisation du
taille-haie peut provoquer des blessures graves.
2. Transportez le taille-haie en le tenant par la
poignée, seulement lorsque la lame est arrê-
tée. En manipulant le taille-haie adéquatement,
vous réduisez le risque de blessures causées par
les lames.

16 FRANÇAIS
3. Tenez l'outil par ses surfaces de prise isolées
seulement, car la lame pourrait entrer en
contact avec un câblage dissimulé. En cas
de contact avec un conducteur sous tension, les
pièces métalliques à découvert de l'outil pour-
raient conduire le courant et risqueraient de trans-
mettre une décharge électrique à l'utilisateur.
4. DANGER - Gardez les mains à l’écart de la
lame. Le contact avec la lame peut provoquer des
blessures graves.
5. Ne pas utiliser le taille-haie sous la pluie ou dans
des conditions très humides. Le moteur électrique
n’est pas résistant à l’eau.
6. Il est recommandé aux personnes utilisant le
taille-haie pour la première fois de demander à un
utilisateur expérimenté de leur montrer comment
l’utiliser.
7. Le taille-haie ne doit pas être utilisé par des
enfants ou des mineurs. Les mineurs de plus
de 16 ans ne sont pas soumis à cette restriction
s’ils suivent une formation supervisée par un
spécialiste.
8. Utilisez le taille-haie seulement si vous êtes en
bonne forme physique. Si vous êtes fatigué, vous
serez moins attentif. Soyez tout particulièrement
prudent après une journée de travail. Manipulez
délicatement et soigneusement la machine.
L'utilisateur est responsable pour tout dommage
causé à un tiers.
9. Ne jamais utiliser le taille-haie sous l’emprise de
l’alcool, de drogues ou de médicaments.
10. Des gants de travail en cuir épais font partie de
l’équipement de base du taille-haie et vous devez
toujours les porter lorsque vous travaillez avec cet
outil. Portez également des chaussures robustes
avec des semelles anti-dérapantes.
11. Avant de commencer le travail, assurez-vous que
le taille-haie est en bon état pour une utilisation en
toute sécurité. Assurez-vous que les protections
sont xées correctement. Le taille-haie ne doit pas
être utilisé s’il n’est pas entièrement monté.
12. Assurez-vous d’être bien stable sur vos pieds
avant de commencer.
13. Tenez fermement l’outil lorsque vous l’utilisez.
14. Ne faites pas tourner inutilement l'outil à vide.
15. Éteignez immédiatement le moteur et retirez la
batterie si la lame doit entrer en contact avec
une clôture ou tout autre objet dur. Vériez si la
lame est endommagée, si c’est le cas, réparez-la
immédiatement.
16. Avant de contrôler la lame, s’occuper des défauts
ou retirer tout matériau coincé dans la lame, étei-
gnez toujours le taille-haie et retirez la batterie.
17. Éteignez le taille-haie et retirez la batterie avant
d'effectuer tout travail de maintenance.
18. Lorsque vous transportez le taille-haie d’un
endroit à l’autre, même en cours de travail, retirez
toujours la batterie et placez le couvercle de lame
sur les lames. Ne transportez ou ne déplacez
jamais le taille-haie lorsque les lames sont en
mouvement. Ne prenez jamais la lame avec les
mains.
19. Nettoyez le taille-haie, et tout particulièrement la
lame, après utilisation et avant de le ranger pour
des périodes prolongées. Huilez légèrement la
lame et mettez la protection. La protection fournie
avec l’outil peut être accrochée au mur, offrant une
manière pratique et sûre de ranger le taille-haie.
20. Rangez le taille-haie avec la protection, dans
une pièce sèche. Placez-le hors de portée des
enfants. N'entreposez jamais le taille-haie dehors.
CONSERVEZ CE MODE
D'EMPLOI.
MISE EN GARDE : NE VOUS LAISSEZ
PAS tromper (au l d'une utilisation répé-
tée) par un sentiment d'aisance ou de
familiarité avec le produit en négligeant les
consignes de sécurité qui accompagnent
le produit. L'utilisation non sécuritaire ou
incorrecte de cet outil comporte un risque
de blessure grave.
MISE EN GARDE : L'utilisation de ce produit
peut lever une poussière contenant des produits
chimiques susceptibles d'entraîner des troubles
respiratoires ou d'autres maladies.
Parmi ces produits chimiques, on trouve des com-
posants de pesticides, insecticides, engrais et
herbicides.
Les risques varient en fonction de la fréquence à
laquelle vous utilisez l'outil. Pour réduire les risques
liés à l'exposition à ces produits chimiques : travaillez
dans une pièce bien ventilée et portez des disposi-
tifs de sécurité homologués, tels que des masques
antipoussières spécialement conçus pour ltrer les
particules microscopiques.
Symboles
Les symboles utilisés pour l'outil sont indiqués
ci-dessous.
volts
courant continu
vitesse à vide
tours ou alternances par minute
CONSIGNES DE SÉCURITÉ
IMPORTANTES
POUR LA BATTERIE
1. Avant d'utiliser la batterie, lisez toutes les
instructions et précautions relatives (1) au
chargeur de batterie, (2) à la batterie, et (3) à
l'outil utilisant la batterie.
2. Ne démontez pas la batterie.

17 FRANÇAIS
3. Cessez immédiatement l'utilisation si le temps
de fonctionnement devient excessivement
court. Il y a risque de surchauffe, de brûlures,
voire d'explosion.
4. Si l'électrolyte pénètre dans vos yeux, rin-
cez-les à l'eau claire et consultez immédiate-
ment un médecin. Il y a risque de perte de la
vue.
5. Ne court-circuitez pas la batterie :
(1) Ne touchez les bornes avec aucun maté-
riau conducteur.
(2) Évitez de ranger la batterie dans un
conteneur avec d'autres objets métal-
liques, par exemple des clous, des pièces
de monnaie, etc.
(3) Évitez d'exposer la batterie à l'eau ou à la
pluie.
Un court-circuit de la batterie pourrait provo-
quer un fort courant, une surchauffe, parfois
des brûlures et même une panne.
6. Ne rangez pas l'outil ou la batterie dans des
endroits où la température risque d'atteindre
ou de dépasser 50°C (122°F).
7. Ne jetez pas la batterie au feu même si elle est
sérieusement endommagée ou complètement
épuisée. La batterie peut exploser au contact
du feu.
8. Prenez garde d'échapper ou de heurter la
batterie.
9. N'utilisez pas une batterie si elle est
endommagée.
10. Suivez la réglementation locale concernant la
mise au rebut de la batterie.
CONSERVEZ CE MODE
D'EMPLOI.
ATTENTION : Utilisez uniquement des batteries
Makita d'origine.
L'utilisation de batteries autres que les batteries d'ori-
gine Makita ou de batteries qui ont été modiées peut
entraîner l'explosion de la batterie et provoquer des
incendies, blessures et autres dommages. Cela annu-
lerait également la garantie de Makita s'appliquant à
l'outil Makita et au chargeur.
Conseils pour obtenir la durée de
service maximale de la batterie
1. Rechargez la batterie avant qu'elle ne soit
complètement déchargée.
Arrêtez toujours l'outil et rechargez la batterie
quand vous remarquez que la puissance de
l'outil diminue.
2. Ne rechargez jamais une batterie complète-
ment chargée.
La surcharge réduit la durée de service de la
batterie.
3. Rechargez la batterie à une température
ambiante comprise entre 10°C et 40°C (50°F
- 104°F). Si la batterie est chaude, laissez-la
refroidir avant de la recharger.
4. Rechargez la batterie si vous ne l'utilisez pas
pendant une période prolongée (plus de six
mois).
DESCRIPTION DU
FONCTIONNEMENT
ATTENTION :
• Assurez-vous toujours que l'outil est hors
tension et que sa batterie est retirée avant de
l'ajuster ou de vérier son fonctionnement.
Installation ou retrait de la batterie
1
2
3
► 1. Indicateur rouge 2. Bouton 3. Batterie
ATTENTION :
• Mettez toujours l'appareil hors tension avant
d'installer ou de retirer la batterie.
• Tenez fermement l'outil et la batterie lors de
l'installation ou du retrait de cette dernière.
Sinon, l'outil et la batterie pourraient vous glis-
ser des mains, ce qui risque d'endommager
l'outil et la batterie, ou encore de provoquer des
blessures.
Pour retirer la batterie, faites-la glisser de l'outil tout en
faisant glisser le bouton se trouvant à l'avant.
Pour installer la batterie, alignez sa languette sur la
rainure pratiquée dans le boîtier, et glissez la batterie en
place. Insérez-la à fond jusqu'à ce que vous entendiez
un clic. Si vous pouvez voir l'indicateur rouge situé sur
le dessus du bouton, la batterie n'est pas complètement
verrouillée.
ATTENTION :
• Installez toujours la batterie à fond jusqu’à
ce que vous ne puissiez plus voir l’indicateur
rouge. Dans le cas contraire, elle pourrait tom-
ber de l'outil et entraîner des blessures.
• Ne forcez pas sur la batterie pour l'installer. Si
la batterie ne glisse pas facilement, c'est qu'elle
n'est pas insérée correctement.
NOTE :
• L’outil ne fonctionne pas lorsqu’une seule batte-
rie est en place.

18 FRANÇAIS
Système de protection de l’outil/de
la batterie
L’outil est équipé d’un système de protection de l’outil/
de la batterie. Ce système coupe automatiquement
l’alimentation du moteur pour augmenter la durée de vie
de l’outil et de la batterie.
L’outil s’arrête automatiquement pendant l’utilisation
lorsque l’outil ou la batterie est dans l’une des situations
suivantes. Dans certaines conditions, les indicateurs
s’allument.
Protection contre les surcharges
Lorsque l'outil est actionné de sorte qu'il utilise un
courant élevé anormal, l'outil s'arrête automatiquement
sans indication. Dans cette situation, éteignez l'outil et
arrêtez l’application qui a causé la surcharge de l’outil.
Puis rallumez l'outil pour recommencer.
Protection contre les surchauffes
pour l’outil/la batterie
Lorsque l’outil/la batterie surchauffe, l’outil s’arrête
automatiquement sans aucune indication. L’outil ne
démarre pas, même lorsque la gâchette est actionnée.
Dans cette situation, laissez refroidir l’outil/la batterie
avant de l’allumer de nouveau.
NOTE : La protection de surchauffe de la batterie
fonctionne uniquement avec les batteries comportant
un repère en forme d’étoile.
1
► 1. Étoile
Afche la capacité restante de la
batterie
(Uniquement pour les batteries dont le numéro de
modèle se termine par « B ».)
1
2
► 1. Témoins 2. Bouton CHECK
Appuyez sur le bouton de vérication sur la batterie
pour afcher la capacité résiduelle de la batterie. Les
témoins s'allument pendant quelques secondes.
ARRÊT ClignotementAllumé
Témoins
Chargez la
batterie.
0 % à 25 %
25 % à 50 %
50 % à 75 %
75 % à 100 %
Capacité
résiduelle
La batterie peut
avoir présenté
un défaut de
fonctionnement.
NOTE :
• Selon les conditions d'utilisation et la tempé-
rature ambiante, il est possible que la capacité
relevée soit légèrement différente par rapport à
la capacité réelle.

19 FRANÇAIS
Protection contre les décharges
accélérées
1
► 1. Indicateur de batterie
Lorsque la capacité restante de la batterie est faible,
l’indicateur de la batterie clignote à côté de la batterie
concernée. Si l’utilisation est poursuivie, l’outil s’arrête
et l’indicateur de la batterie s’allume pendant environ 10
secondes. Dans cette situation, rechargez la batterie.
Positions de montage de la poignée
ATTENTION :
• Avant d'utiliser l'outil, assurez-vous toujours que
la poignée est verrouillée sur la position désirée.
12
► 1. Bouton 2. Carter
Selon les utilisations, vous pouvez régler l’angle de
la poignée à 45° ou à 90° à gauche ou à droite. Pour
tourner la poignée, tirez sur le bouton et tournez la
poignée de la façon illustrée. La poignée est verrouillée
à la position 45°. Pour tourner la poignée à la position
90°, tirez à nouveau sur le bouton et tournez ultérieure-
ment la poignée.
Interrupteur
ATTENTION :
• Avant d'insérer la batterie dans l'outil, vériez
toujours que la gâchette fonctionne bien et
revient en position d'arrêt lorsque relâchée.
1
2
3
► 1. Gâchette B 2. Gâchette A 3. Bouton de sécurité
Par mesure de protection, cet outil présente un système
de mise en marche à deux interrupteurs. Pour actionner
l’outil, appuyez sur le bouton de sécurité et appuyez sur
les gâchettes A et B. Pour désactiver, relâchez une des
deux gâchettes. L’outil se met en marche uniquement si
les deux gâchettes sont enfoncées.
Changement de vitesse
1
► 1. Cadran de réglage
Le nombre d’impacts par minute peut être réglé en tour-
nant simplement le cadran de réglage. Cette opération
peut être réalisée même lorsque l’outil est en marche.
Le cadran est marqué de 1 (vitesse la plus faible) à 6
(pleine vitesse).
Consultez le tableau ci-dessous pour voir la relation
entre le nombre sur le cadran de réglage et le nombre
d’impacts par minute.

20 FRANÇAIS
Numéro sur le cadran de réglage Nombre d'impacts par minute (min )
-1
6
5
4
3
2
1
1 800
1 750
1 650
1 500
1 300
1 000
ATTENTION :
• Le cadran de réglage de la vitesse ne peut pas
dépasser le 6 et le 1. Ne le forcez pas à dépas-
ser le 6 ou le 1, sinon la fonction de réglage de
la vitesse risque de ne plus fonctionner.
• Le nombre d’impacts par minute varie en fonc-
tion des conditions de la batterie et des lames
de cisaillement.
UTILISATION
ATTENTION :
• Prenez soin de ne pas heurter accidentellement
une clôture de métal ou d'autres objets durs
avec l'outil. La lame se briserait et risquerait de
provoquer des blessures graves.
• Il est extrêmement dangereux de travailler
dans une position d'extension excessive avec
un taille-haie, particulièrement si l'utilisateur
se trouve sur une échelle. Ne travaillez pas
debout sur un objet instable ou qui risque de
s'effondrer.
AVIS : N’essayez pas de couper des branches
d’un diamètre supérieur à 10 mm (3/8″) avec l’ou-
til. Avant d’utiliser l’outil, coupez d’abord les branches
10 cm (4″) plus bas que la hauteur de coupe, à l’aide
d’un ébrancheur.
(1)
(2)
► (1) Hauteur de coupe (2) 10 cm (4″)
ATTENTION :
• N'utilisez pas l'outil pour couper des arbres
morts ou d'autres objets durs du même genre.
Dans le cas contraire, l'outil pourraient être
endommagé.
Tenez le taille-haie en utilisant les deux mains, tirez sur
les gâchettes A ou B puis déplacez l'outil devant votre
corps.
1
2
3
► 1. Sens de la coupe 2. Surface de la haie à tailler
3. Abaissez les lames.
L'opération de base consiste à abaisser les lames vers
la direction de coupe, et à déplacer l'outil calmement et
lentement, au rythme de trois ou quatre secondes par
mètre.
Pour tailler le dessus d'une haie de façon égale, il peut
être utile d'installer une celle à la hauteur désirée et de
tailler la haie en l'utilisant comme ligne de référence.
This manual suits for next models
1
Table of contents
Languages:
Other Makita Trimmer manuals

Makita
Makita BUR181 User manual

Makita
Makita UR002G User manual

Makita
Makita DUH754SZ User manual

Makita
Makita DUR141 User manual

Makita
Makita DUR188L User manual

Makita
Makita DUH481 User manual

Makita
Makita UH303D User manual

Makita
Makita RT001G User manual

Makita
Makita DUH507 User manual

Makita
Makita DUX60 User manual

Makita
Makita DUR36UZ User manual

Makita
Makita 3710 User manual

Makita
Makita DUR142L User manual

Makita
Makita GRU05 User manual

Makita
Makita UH200D Manual

Makita
Makita XHU02M1 User manual

Makita
Makita UM600D User manual

Makita
Makita DUH483 User manual

Makita
Makita DUR364L User manual

Makita
Makita XRU23 User manual