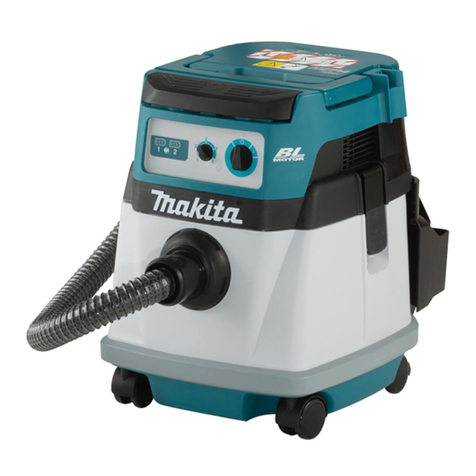
Makita VC006GM User manual

VC006GM
EN Cordless Vacuum Cleaner INSTRUCTION MANUAL 10
ZHCN 充电式小型集尘器 使用说明书 24
ID Pengisap Debu Tanpa Kabel PETUNJUK PENGGUNAAN 40
MS Pembersih Hampagas Tanpa
Wayar MANUAL ARAHAN 56
VI Máy Hút Bụi Cầm Tay Hoạt
Động Bằng Pin TÀI LIỆU HƯỚNG DẪN 73
TH 88

2
1
2
Fig.1
1
2
Fig.2
1
2
Fig.3
12
3
Fig.4
Fig.5
1
2
43
Fig.6
1
Fig.7
1
Fig.8

3
1
Fig.9
12
3
4
Fig.10
Fig.11
Fig.12
Fig.13

4
1
Fig.14
1
2
3
4
5
Fig.15
1
2
3
Fig.16
1
2
Fig.17
1
Fig.18
1
2
Fig.19
1
2
34
Fig.20

5
Fig.21
1
Fig.22
1
2
Fig.23
315mm
Fig.24
Fig.25
1
2
Fig.26
1
4
32
Fig.27

6
1
Fig.28
1
2
12
Fig.29
Fig.30
1
Fig.31
12
Fig.32
1
Fig.33

7
1
2
12
Fig.34
1
2
3
Fig.35
1
2
Fig.36
1
2
Fig.37
1
2
3
Fig.38
1
2
Fig.39

8
1
2
3
Fig.40
Fig.41
2
1
Fig.42
1
2
3
Fig.43
12
2
3
Fig.44
Fig.45

9
1
Fig.46
1
2
Fig.47
2
1
Fig.48
Fig.49
Fig.50

10 ENGLISH
ENGLISH (Original instructions)
WARNING
• Thismachineisnotintendedforusebypersonsincludingchildrenwithreducedphysical,sensoryormental
capabilities,orlackofexperienceandknowledge.
• Childrenshouldbesupervisedtoensurethattheydonotplaywiththecleaner.
• Seethechapter“SPECIFICATIONS”forthetypereferenceofthebattery.
• Seethesection“Installingorremovingbatterycartridge”forhowtoremoveorinstallthebattery.
• Whendisposingthebatterycartridge,removeitfromthetoolanddisposeofitinasafeplace.Followyourlocal
regulationsrelatingtodisposalofbattery.
• Ifthetoolisnotusedforalongperiodoftime,thebatterymustberemovedfromthetool.
• Donotshortthebatterycartridge.
• Seethechapter“MAINTENANCE”fortheappropriatedetailsofprecautionsduringusermaintenance.
SPECIFICATIONS
Model: VC006GM
Maximumair
volumeatthe
endofhose
WithBL4050F,
ø28mmx3.5mhose
2.0m3/min
WithBL4050F,
ø38mmx2.5mhose
3.7m3/min
Maximumairvolumeatturbine(withBL4050F) 4.9m3/min
Vacuum(withBL4050F) 18kPa
Recoverable
capacity
Dust 40L
Water 30L
Dimensions(LxWxH) 586mmx385mmx598mm
Ratedvoltage D.C.72V-80Vmax
Netweight 18.4-20.8kg
Protectiondegree IPX4
• Duetoourcontinuingprogramofresearchanddevelopment,thespecicationshereinaresubjecttochange
withoutnotice.
• Specicationsmaydierfromcountrytocountry.
• Theweightdoesnotincludeaccessoriesbutbatterycartridge(s).Thelightestandheaviestcombinations
weightoftheapplianceandbatterycartridge(s)areshowninthetable.
Applicable battery cartridge and charger
Batterycartridge BL4020/BL4025/BL4040*/BL4050F*/BL4080F*
*:Recommendedbattery
Charger DC40RA/DC40RB/DC40RC
• Someofthebatterycartridgesandchargerslistedabovemaynotbeavailabledependingonyourregionof
residence.
WARNING: Only use the battery cartridges and chargers listed above.Useofanyotherbatterycartridges
andchargersmaycauseinjuryand/orre.
Symbols
Thefollowingsshowthesymbolswhichmaybeused
fortheequipment.Besurethatyouunderstandtheir
meaningbeforeuse.
Readinstructionmanual.
Takeparticularcareandattention.
Warning!Thecleanermaycontainhazard-
ousdust.
Neverstandonthecleaner.
Max
20kg
44lbs
Neverputanythingheavierthan20kg
(44lbs)onthecleaner.

11 ENGLISH
DustclassM(medium):forseparatingdust
withalimitvalueofoccupationalexposure
notlessthan0.1mg/m3.Thecleanersare
capableofpickingupdustclassLandM.
Followyourcountry'sregulationsrelating
todustsandtooccupationalhealthand
safety.
Ni-MH
Li-ion
OnlyforEUcountries
Duetothepresenceofhazardouscom-
ponentsintheequipment,wasteelectrical
andelectronicequipment,accumulators
andbatteriesmayhaveanegativeimpact
ontheenvironmentandhumanhealth.
Donotdisposeofelectricalandelectronic
appliancesorbatterieswithhousehold
waste!
InaccordancewiththeEuropeanDirective
onwasteelectricalandelectronicequip-
mentandonaccumulatorsandbatteries
andwasteaccumulatorsandbatteries,
aswellastheiradaptationtonationallaw,
wasteelectricalequipment,batteriesand
accumulatorsshouldbestoredseparately
anddeliveredtoaseparatecollectionpoint
formunicipalwaste,operatinginaccor-
dancewiththeregulationsonenvironmen-
talprotection.
Thisisindicatedbythesymbolofthe
crossed-outwheeledbinplacedonthe
equipment.
Intended use
Theapplianceisintendedforcollectingbothwetand
drydust.Theapplianceissuitableforcommercialuse,
forexampleinhotels,schools,hospitals,factories,
shops,ocesandrentalbusinesses.
SAFETY WARNINGS
Cordless vacuum cleaner safety
warnings
WARNING: IMPORTANT! READ CAREFULLY
all safety warnings and all instructions BEFORE
USE.Failuretofollowthewarningsandinstructions
mayresultinelectricshock,reand/orseriousinjury.
1. Before use, make sure that this cleaner must
be used by people who have been adequately
instructed on the use of this cleaner.
2. Before use, operators shall be provided with
information, instruction and training for the
use of the machine and the substances for
which it is to be used, including the safe
method of removal and disposal of the mate-
rial collected.
3. If foam/liquid comes out, switch o
immediately.
4. Clean the water level limiting device regularly
and examine it for signs of damage.
5. Always make sure that lters are correctly
installed before use. Do not use the cleaner
without lters in place. Replace a damaged
lter immediately. It is recommended to have
some spares as lters are consumable items.
6. AVOID UNINTENTIONAL STARTING. Be sure
switch is OFF when installing battery(ies).
7. Do not attempt to pick up ammable materi-
als, reworks, lighted cigarettes, hot ashes,
hot metal chips, and sharp materials such as
razors, needles, broken glass or the like.
8. NEVER USE THE CLEANER IN THE VICINITY
OF GASOLINE, GAS, PAINT, ADHESIVES OR
OTHER HIGHLY EXPLOSIVE SUBSTANCES.
The switch emits sparks when turned ON
and OFF. And so does the motor commutator
during operation. A dangerous explosion may
result.
9. Never vacuum up toxic, carcinogenic, com-
bustible or other hazardous materials such
as asbestos, arsenic, barium, beryllium,
lead, pesticides, or other health endangering
materials.
10. Always place the cleaner on a horizontal at
surface to prevent it from falling or moving
unintentionally.
11. Never use the cleaner outdoors in the rain.
12. For Finland, this machine is not to be used
outdoors at low temperature.
13. Do not use close to heat sources (stoves, etc.).
14. If the exhaust air is returned to the room, it
is necessary to provide for an adequate air
change rate in the room. Reference to National
regulations is necessary.
15. Do not block suction inlet/outlet/cooling vents.
These vents permit cooling of the motor.
Blockage should be carefully avoided other-
wise the motor will burn out due to a lack of
ventilation.
16. Keep proper footing and balance at all times.
17. Do not fold, tug or step on the hose.
18. Stop the cleaner immediately if you notice
poor performance or anything abnormal
during operation.
19. REMOVE THE BATTERY(IES). When not in
use, before servicing, and when changing
accessories.
20. Clean and service the cleaner immediately
after each use to keep it in tiptop operating
condition.
21. MAINTAIN THE CLEANER WITH CARE. Keep
the cleaner clean for better and safer per-
formance. Follow instructions for changing
accessories. Keep handles dry, clean, and free
from oil and grease.
22. CHECK DAMAGED PARTS. Before further use
of the cleaner, a guard or other part that is
damaged should be carefully checked to deter-
mine that it will operate properly and perform
its intended function. Check for alignment of
moving parts, binding of moving parts, break-
age of parts, mounting, and any other condi-
tions that may aect its operation. A guard or
other part that is damaged should be properly
repaired or replaced by an authorized service
center unless otherwise indicated elsewhere
in this instruction manual. Have defective
switches replaced by authorized service cen-
ter. Don’t use the cleaner if switch does not
turn it on and o.

12 ENGLISH
23. For user servicing, the machine shall be dis-
mantled, cleaned and serviced, as far as is
reasonably practicable, without causing risk to
the maintenance sta and others.
24. The machine should be technically inspected
by the manufacturer, or an instructed person,
at least annually, consisting of, for example,
inspection of lters for damage, air tightness
of the machine and proper function of the
control mechanism.
25. When carrying out service or repair opera-
tions, all contaminated items which cannot be
satisfactorily cleaned are to be disposed of;
such items shall be disposed of in impervious
bags in accordance with any current regula-
tion for the disposal of such waste.
26. REPLACEMENT PARTS. When servicing, use
only identical replacement parts.
27. When not in use, always store the cleaner
indoors.
28. Wet lters and the interior part of the liquid
container shall be dried before storage.
29. Be kind to your cleaner. Rough handling can
cause breakage of even the most sturdily built
cleaner.
30. Do not attempt to clean the exterior or interior
with benzine, thinner or cleaning chemicals.
Cracks and discoloration may be caused.
31. Do not use cleaner in an enclosed space where
ammable, explosive or toxic vapors are given
o by oil-based paint, paint-thinner, gasoline,
some mothproong substances, etc., or in
areas where ammable dust is present.
32. Do not operate the cleaner or any tool while
under the inuence of drugs or alcohol.
33. As a basic rule of safety, use safety goggles or
safety glasses with side shields.
34. Use a dust mask in dusty work conditions.
35. This machine is not intended for use by per-
sons including children with reduced physical,
sensory or mental capabilities, or lack of expe-
rience and knowledge.
36. Children should be supervised to ensure that
they do not play with the cleaner.
37. Never handle battery(ies) and cleaner with wet
hands.
38. Use extreme caution when cleaning on stairs.
39. Do not use the cleaner as a stool or work
bench. The machine may fall down and may
result in personal injury.
Battery tool use and care
1. Recharge only with the charger specied by
the manufacturer.Achargerthatissuitablefor
onetypeofbatterypackmaycreateariskofre
whenusedwithanotherbatterypack.
2. Use power tools only with specically desig-
nated battery packs.Useofanyotherbattery
packsmaycreateariskofinjuryandre.
3. When battery pack is not in use, keep it away
from other metal objects, like paper clips,
coins, keys, nails, screws or other small metal
objects, that can make a connection from one
terminal to another.Shortingthebatterytermi-
nalstogethermaycauseburnsorare.
4. Under abusive conditions, liquid may be
ejected from the battery; avoid contact. If con-
tact accidentally occurs, ush with water. If
liquid contacts eyes, additionally seek medical
help.Liquidejectedfromthebatterymaycause
irritationorburns.
5. Do not use a battery pack or tool that is dam-
aged or modied.Damagedormodiedbatteries
mayexhibitunpredictablebehaviourresultingin
re,explosionorriskofinjury.
6. Do not expose a battery pack or tool to re or
excessive temperature.Exposuretoreortem-
peratureabove130°Cmaycauseexplosion.
7. Follow all charging instructions and do not
charge the battery pack or tool outside the
temperature range specied in the instruc-
tions.Chargingimproperlyorattemperatures
outsidethespeciedrangemaydamagethe
batteryandincreasetheriskofre.
SAVE THESE INSTRUCTIONS.
WARNING: DO NOT let comfort or familiarity
with product (gained from repeated use) replace
strict adherence to safety rules for the subject
product. MISUSE or failure to follow the safety
rules stated in this instruction manual may cause
serious personal injury.
Important safety instructions for
battery cartridge
1. Before using battery cartridge, read all instruc-
tions and cautionary markings on (1) battery
charger, (2) battery, and (3) product using
battery.
2. Do not disassemble or tamper with the battery
cartridge.Itmayresultinare,excessiveheat,
orexplosion.
3. If operating time has become excessively
shorter, stop operating immediately. It may
result in a risk of overheating, possible burns
and even an explosion.
4. If electrolyte gets into your eyes, rinse them
out with clear water and seek medical atten-
tion right away. It may result in loss of your
eyesight.
5. Do not short the battery cartridge:
(1) Do not touch the terminals with any con-
ductive material.
(2) Avoid storing battery cartridge in a con-
tainer with other metal objects such as
nails, coins, etc.
(3) Do not expose battery cartridge to water
or rain.
A battery short can cause a large current
ow, overheating, possible burns and even a
breakdown.
6. Do not store and use the tool and battery car-
tridge in locations where the temperature may
reach or exceed 50 °C (122 °F).
7. Do not incinerate the battery cartridge even if
it is severely damaged or is completely worn
out. The battery cartridge can explode in a re.

13 ENGLISH
8. Do not nail, cut, crush, throw, drop the battery
cartridge, or hit against a hard object to the
battery cartridge.Suchconductmayresultina
re,excessiveheat,orexplosion.
9. Do not use a damaged battery.
10. The contained lithium-ion batteries are subject
to the Dangerous Goods Legislation require-
ments.
Forcommercialtransportse.g.bythirdparties,
forwardingagents,specialrequirementonpack-
agingandlabelingmustbeobserved.
Forpreparationoftheitembeingshipped,consult-
inganexpertforhazardousmaterialisrequired.
Pleasealsoobservepossiblymoredetailed
nationalregulations.
Tapeormaskoopencontactsandpackupthe
batteryinsuchamannerthatitcannotmove
aroundinthepackaging.
11. When disposing the battery cartridge, remove
it from the tool and dispose of it in a safe
place. Follow your local regulations relating to
disposal of battery.
12. Use the batteries only with the products
specied by Makita.Installingthebatteriesto
non-compliantproductsmayresultinare,exces-
siveheat,explosion,orleakofelectrolyte.
13. If the tool is not used for a long period of time,
the battery must be removed from the tool.
14. During and after use, the battery cartridge may
take on heat which can cause burns or low
temperature burns. Pay attention to the han-
dling of hot battery cartridges.
15. Do not touch the terminal of the tool imme-
diately after use as it may get hot enough to
cause burns.
16. Do not allow chips, dust, or soil stuck into the
terminals, holes, and grooves of the battery
cartridge.Itmaycauseheating,catchingre,
burstandmalfunctionofthetoolorbatterycar-
tridge,resultinginburnsorpersonalinjury.
17. Unless the tool supports the use near
high-voltage electrical power lines, do not use
the battery cartridge near a high-voltage elec-
trical power lines.Itmayresultinamalfunction
orbreakdownofthetoolorbatterycartridge.
18. Keep the battery away from children.
SAVE THESE INSTRUCTIONS.
CAUTION: Only use genuine Makita batteries.
Useofnon-genuineMakitabatteries,orbatteriesthat
havebeenaltered,mayresultinthebatterybursting
causingres,personalinjuryanddamage.Itwill
alsovoidtheMakitawarrantyfortheMakitatooland
charger.
Tips for maintaining maximum
battery life
1. Charge the battery cartridge before completely
discharged. Always stop tool operation and
charge the battery cartridge when you notice
less tool power.
2. Never recharge a fully charged battery car-
tridge. Overcharging shortens the battery
service life.
3. Charge the battery cartridge with room tem-
perature at 10 °C - 40 °C (50 °F - 104 °F). Let
a hot battery cartridge cool down before
charging it.
4. When not using the battery cartridge, remove
it from the tool or the charger.
5. Charge the battery cartridge if you do not use
it for a long period (more than six months).
Important safety instructions for
wireless unit
1. Never open the lid of the slot by yourself once
installing the wireless unit.
2. Do not disassemble or tamper with the wire-
less unit.
3. Keep the wireless unit away from young chil-
dren. If accidentally swallowed, seek medical
attention immediately.
4. Use the wireless unit only with Makita tools.
5. Do not expose the wireless unit to rain or wet
conditions.
6. Do not use the wireless unit in places where
the temperature exceeds 50 °C (122 °F).
7. Do not operate the wireless unit in places
where medical instruments, such as heart
pace makers are nearby.
8. Do not operate the wireless unit in places
where automated devices are nearby.Ifoper-
ated,automateddevicesmaydevelopmalfunction
orerror.
9. Do not operate the wireless unit in places
under high temperature or places where
static electricity or electrical noise could be
generated.
10. The wireless unit can produce electromagnetic
elds (EMF) but they are not harmful to the
user.
11. The wireless unit is an accurate instrument. Be
careful not to drop or strike the wireless unit.
12. Avoid touching the terminal of the wireless
unit with bare hands or metallic materials.
13. Always remove the battery on the product
when installing the wireless unit into it.
14. When opening the lid of the slot, avoid the
place where dust and water may come into the
slot. Always keep the inlet of the slot clean.
15. Always insert the wireless unit in the correct
direction.
16. Do not press the wireless activation button
on the wireless unit too hard and/or press the
button with an object with a sharp edge.
17. Always close the lid of the slot when
operating.
18. Do not remove the wireless unit from the slot
while the power is being supplied to the tool.
Doingsomaycauseamalfunctionofthewireless
unit.
19. Do not remove the sticker on the wireless unit.
20. Do not put any sticker on the wireless unit.
21. Do not leave the wireless unit in a place where
static electricity or electrical noise could be
generated.

14 ENGLISH
22. Do not leave the wireless unit in a place sub-
ject to high heat, such as a car sitting in the
sun.
23. Do not leave the wireless unit in a dusty or
powdery place or in a place corrosive gas
could be generated.
24. Sudden change of the temperature may bedew
the wireless unit. Do not use the wireless unit
until the dew is completely dried.
25. When cleaning the wireless unit, gently wipe
with a dry soft cloth. Do not use benzine, thin-
ner, conductive grease or the like.
26. When storing the wireless unit, keep it in the
supplied case or a static-free container.
27. Do not insert any devices other than Makita
wireless unit into the slot on the tool.
28. Do not use the tool with the lid of the slot dam-
aged.Water,dust,anddirtcomeintotheslotmay
causemalfunction.
29. Do not pull and/or twist the lid of the slot more
than necessary.Restorethelidifitcomeso
fromthetool.
30. Replace the lid of the slot if it is lost or
damaged.
SAVE THESE INSTRUCTIONS.
FUNCTIONAL
DESCRIPTION
CAUTION: Always be sure that the appliance
is switched o and the battery cartridges are
removed before adjusting or checking function on
the appliance.
Installing or removing battery
cartridge
CAUTION: Always switch o the tool before
installing or removing of the battery cartridge.
CAUTION: Hold the cleaner and the battery
cartridge rmly when installing or removing bat-
tery cartridge.Failuretoholdthecleanerandthe
batterycartridgermlymaycausethemtoslipo
yourhandsandresultindamagetothecleanerand
batterycartridgeandapersonalinjury.
CAUTION: Be careful not to pinch your n-
gers when opening or closing the battery cover.
Failuretodosomaycausepersonalinjury.
Toinstallthebatterycartridge,releasethelockrst,and
thenopenthebatterycover.Afterthat,insertthebattery
cartridge.
►Fig.1: 1.Lock2.Batterycover
Alignthetongueonthebatterycartridgewiththegroove
inthehousingandslipitintoplace.Insertitalltheway
untilitlocksinplacewithalittleclick.Thenlockthe
batterycover.
►Fig.2: 1.Batterycartridge2.Button
Toremovethebatterycartridge,slideitfromthetool
whileslidingthebuttoninfrontofthecartridge.
CAUTION: Always install the battery cartridge
fully.Ifnot,itmayaccidentallyfalloutofthecleaner,
causinginjurytoyouorsomeonearoundyou.
CAUTION: Do not install the battery cartridge
forcibly.Ifthecartridgedoesnotslideineasily,itis
notbeinginsertedcorrectly.
NOTE:Thecleanerdoesnotworkwithonlyone
batterycartridge.
Indicating the remaining battery
capacity
Pressthecheckbuttononthebatterycartridgetoindi-
catetheremainingbatterycapacity.Theindicatorlamps
lightupforafewseconds.
►Fig.3: 1.Indicatorlamps2.Checkbutton
Indicator lamps Remaining
capacity
Lighted O Blinking
75%to100%
50%to75%
25%to50%
0%to25%
Chargethe
battery.
Thebattery
mayhave
malfunctioned.
NOTE:Dependingontheconditionsofuseandthe
ambienttemperature,theindicationmaydierslightly
fromtheactualcapacity.
NOTE:Therst(farleft)indicatorlampwillblinkwhen
thebatteryprotectionsystemworks.
Battery indicators on control panel
Theremainingbatterycapacitycanbereadonthe
controlpanelatanytime.Pressthecheckbutton,and
theleftandrightindicatorswillshowthebatterycharge
levelscorrespondingly.
►Fig.4: 1.Leftbatteryindicator2.Rightbatteryindi-
cator3.Checkbutton
►Fig.5

15 ENGLISH
Battery indicator status Remaining
battery
capacity
On O Blinking
50%to100%
20%to50%
0%to20%
Chargethe
battery
Batterynot
inserted
NOTE:Batteryindicatorworkswhiletwobatteriesare
inserted.
NOTE:Thebatteryindicatorswillalsobeactivated
whenthecleanerstartsfunctioning.
Appliance / battery protection
system
Theapplianceisequippedwithanappliance/battery
protectionsystem.Thissystemautomaticallycutso
powertothemotortoextendapplianceandbatterylife.
Theappliancewillautomaticallystopduringoperation
iftheapplianceorbatteryisplacedunderoneofthe
followingconditions:
Overload protection
Whentheappliance/batteryisoperatedinamanner
thatcausesittodrawanabnormallyhighcurrent,the
applianceautomaticallystops.Inthissituation,turnthe
applianceoandstoptheapplicationthatcausedthe
appliancetobecomeoverloaded.Thenturntheappli-
anceontorestart.
Overheat protection
On Blinking
Whentheapplianceisoverheated,theappliancestops
automatically,andbothleftandrightbatteryindicators
blink.Inthissituation,lettheappliancecooldownand
cleanouttheltersbeforeturningtheapplianceon
again.
On Blinking
Whenthebatteryisoverheated,theappliancestops
automatically,andoneoftheindicatorsforoverheated
batteryblinks.Inthissituation,letthebatterycooldown
beforeturningtheapplianceonagain.
Overdischarge protection
Whenthebatterycapacitybecomeslow,theappliance
stopsautomatically.Iftheappliancedoesnotrunalong
withtheswitchoperation,removethebatteriesfromthe
applianceandrechargethem.
Protections against other causes
Protectionsystemisalsodesignedforothercausesthat
coulddamagetheapplianceandallowstheapplianceto
stopautomatically.Takeallthefollowingstepstoclear
thecauses,whentheappliancehasbeenbroughttoa
temporaryhaltorstopinoperation.
1. Turntheapplianceo,andthenturnitonagainto
restart.
2. Chargethebattery(ies)orreplaceit/themwith
rechargedbattery(ies).
3. Lettheapplianceandbattery(ies)cooldown.
Ifnoimprovementcanbefoundbyrestoringprotection
system,thencontactyourlocalMakitaServiceCenter.
Switch action
Turning cleaner on
1. Turnthestand-byswitchinthe“I”(ON)or“AUTO”
(ON)positiontohavethecleanerreadyin
stand-bymode.
2. Pressthepowerbutton.
Toswitchbacktostand-bymode,pressthepower
buttonagain.
Turning cleaner o
Performoneofthefollowingsteps.
• Pressthepowerbuttontosetthecleanerbackin
stand-bymode.
• Turnthestand-byswitchinthe“O”(OFF)position.
Adjusting suction power
Thesuctionpowercanbeadjustedaccordingtoyour
workneeds.
• Turnthesuctionforceadjustingknobtotheleftto
reducethesuctionpower.
• Turnthesuctionforceadjustingknobtotheright
toincreasethesuctionpower.
Hose diameter selection
Turnthehosediameterselectiondialtothehose's
diameterthatyouaregoingtouse.
NOTE:Donotturnthedialtoagapbetweenthe
numbers.Alwaysturnthedialaccordingtothehose
diameter.
►Fig.6: 1.Stand-byswitch2.Suctionforceadjust-
ingknob3.Hosediameterselectiondial
4.Powerbutton
NOTICE:Alwayssetthestand-byswitchtothe“O”
sidewhennotusingthecleanerforlongtime.The
cleanerconsumespowerduringstand-bystate.

16 ENGLISH
Warning beep
Therearetwotypesofbeepingsound.Oneisshort
beeps,andtheotheriscontinuousbeeps.
• Whentheairowspeedfallsunder20m/s,the
cleaneremitsshortwarningbeepsforsafetyrea-
sons.Whenitsounds,checkthehosediameter
selectiondialorifthesuctionforceisnottoolow.
Ifthebeepskeepsounding,performmaintenance
oraskyourlocalservicecenter.
• Whenthetankislledwithliquid,thecleaner
emitscontinuouswarningbeepsandstops
automatically.
Afterthecleanerstops,switchothecleanerand
emptythetank.
Auto-suction stop during wet
suction operation
WARNING: Do not pick up foam or soapy
liquid.Itcancausefoamtocomeoutofairexit.
Continuoususeundersuchconditionsmaycausean
electricshockandbreakageofthecleaner.
Thecleanerhasamechanismthatpreventswaterfrom
immersingintothemotorwhenpickingupmorethana
certainamountofwater.
Whenthetankisfullwithliquid,thecleaneremitscon-
tinuouswarningbeepsandstopsautomatically.After
thecleanerstops,switchothecleanerandemptythe
tank.
Filter cleaning system
Thisappliancehasltercleaningsystem.Duringthe
useoftheappliance,ltercleaningsystemduststhe
ltersautomaticallytopreventthesuctionforcelower-
ingbecauseofcloggingoflters.
Iftheappliancesucksupthelargequantityofdustallat
once,suctionforcemaydecrease.Inthatcase,manual
ltercleaningisrecommended.
1. Switchotheappliance.
2. Setthesuctionpowertomaximum,andthenclose
thesuctionhoseopeningwithyourpalm.
3. Switchontheapplianceandoperateforapprox-
imately15secondswiththesuctionhoseopening
closed.
►Fig.7: 1.Suctionhoseopening
NOTE:Airvolumemaychangewhilethelter
cleaningsystemisbeingactivatedbutitisnot
malfunctioned.
Water drain
Whenthetankisfullwithliquid,switchothecleaner
andopenthewaterdraincaptoemptythetank.
►Fig.8: 1.Waterdraincap
Cap
Thecapissuppliedwiththeappliance.Mountingthe
caponthehoseconnectingportpreventsthevacu-
umeddustfromgettingoutfromthecleaner.
►Fig.9: 1.Cap
Locking and unlocking casters
Frontcasterscanbelockedwithstopperstohelpthe
cleanerstandstill.
Lowerthestopperleverbyhandtolockthecaster,and
raiseituptorelease.
►Fig.10: 1.Caster2.Stopperlever3.Unlocked
position4.Lockedposition
NOTE:Whenmovingthecleaner,makesurethatthe
casterisunlocked.Movingthecleanerwiththecaster
inalockedpositionmaycausedamagetothecaster.
Carriage handle
CAUTION: Lift and carry the appliance with
due care.Failingtodosomayresultinpersonal
injuryordamagetotheappliance.
Whencarryingthecleaner,carryitbyholdingthehan-
dleontheheadunit.Thehandleisretractableonthe
headunitwhennotinuse.
►Fig.11
Ifitisdiculttocarrytheappliancebyyourself,carryit
bytwopeopleasshowninthegure.
►Fig.12
►Fig.13
ASSEMBLY
WARNING: This unit may contain hazardous
dust. When replacing lter elements and dust bag
or maintenance, always use a P2-respirator.
CAUTION: Always be sure that the appliance
is switched o and the battery cartridges are
removed before carrying out any work on the
appliance.
Installing and disposing lter bag
WARNING: Always use a P2-respirator.
WARNING: Before using a lter bag, make
sure that the lter unit is used together.Failureto
usethelterunittogethermaycauseunusualnoise
andheat,resultinginare.
WARNING: When using the appliance as dust
class M, always make sure to use lter bag.
NOTICE: Never pick up water or other liquids or
wet dusts when using a lter bag.Pickingupsuch
thingsmaycausethelterbagbreakage.

17 ENGLISH
1. Releasethelockinghooksandlifttheheadunitup
othetank.
►Fig.14: 1.Lockinghook
2. Unfoldalterbag.
3. Alignthelterbagopeningwiththedustintakeof
thetank.
4. Insertthecardboardofthelterbagontothetool
sothatitispositionedattheendbeyondthedetent
protrusion.
►Fig.15: 1.Filterbag2.Cardboardopening3.Filter
bagholder4.Dustintake5.Edge
Whendisposingthelterbag,pulltheedgeonthelter
bag'smouthsothatthemouthisclosedbyapaper.
Installing polyethylene bag
Optional accessory
Layapolyethylenebagoverthetank,andsliponeside
ofthetopedgeofthebagatitsopenendinbetween
theholderplateandthefrontwallofthetank.
Then,spreadtheothertopedgesofthebagoutwards
overthetoprimsofthetank.
Polyethylenebagcanbeusedwithlterbag.
►Fig.16: 1.Holderplate2.Frontwalloftank
3.Polyethylenebag
NOTE:Apolyethylenebagavailableonthemarket
canbeused.Thethicknessisover0.04mmandthe
perimeterisover2,000mmoneisrecommended.
NOTE:Toomuchdustwilltearthepolyethylenebag
easily,sodonotoverllthebag.Disposingtheheavy
bagmaybeaburdenonahumanbody.
Emptying tank with
polyethylene bag
WARNING: Always make sure that the cleaner
is switched o and the battery cartridges are
removed before emptying the tank.Failuretodo
somaycauseanelectricshockandseriouspersonal
injury.
NOTICE: Empty the tank at least once a day
although this depends on picked-up dust volume
in the tank.Or,thesuctionforcewillweakenandthe
motormaybebroken.
NOTICE: Do not grab the locking hooks when
emptying the tank.Grabbingthelockinghooksmay
causethemtobreak.
1. Releasethelockinghooksandlifttheheadunitup
othetank.
2. Removethepolyethylenebagoutofthetank,
closingtheopeningofthebagbyhand.
►Fig.17: 1.Polyethylenebag2.Tank
NOTE:Takethepolyethylenebagoutofthetank
carefullytoavoiditfrombeingscratchedandtornby
theedgesinsidethetank.
NOTE:Emptythepolyethylenebagbeforeit
becomesfull.Toomuchdustinthetankmaycause
thepolyethylenebagtobetorn.
Installing hose
NOTICE: Never force the hose for bending or
stamp it. Never move the cleaner by pulling the
hose.Forcing,stampingandpullingthehosemay
causeabreakageordeformationofthehose.
NOTICE: When picking up large wastes such as
planer carvings, concrete dusts or similar other
than small wastes, use the 38 mm inner diameter
hose (optional accessory).Usingthe28mminner
diameterhose(optionalaccessory)maycausea
hosestunganddamage.
NOTICE: Always put the cap on the mounting
port whenever you remove the hose from the
cleaner.
Connection to cleaner
Removethecapfromthemountingport.Thecapcan
bestoredattherearofthecleanerwhilethehoseis
connectedtothecleaner.
►Fig.18: 1.Cap
Insertthehoseendtothedustintake(hoseinlet)ofthe
cleaner,thenturnitclockwiseuntilitlocksinplace.
►Fig.19: 1.Hose2.Dustintake(hoseinlet)
Connections with your work tools
(Country specic)
Byconnectingthevacuumcleanertoanyavailable
worktoolscompatiblewiththecleaner,itworksasa
dustextractorforyourpowertools.
Selectoneofthefrontcusorjoints(optionalacces-
sories)asmostsuitableforyourtoolmodel.Placethe
cusorjoint,asnecessary,betweenthefrontendofthe
cleanerhoseandadustextractionportofyourtool.
►Fig.20: 1.Frontcusorjoint2.Cleanerhose
3.Powertool4.Vacuumcleaner
Installing or removing cleaner
attachments
CAUTION: After installing an attachment,
check if it is securely installed.Iftheattachment
isinstalledimperfectly,itmaycomeoandcause
personalinjury.
Attachments without lock function
Optional accessory
Insertanattachmentintothesuctioninletofthecleaner
bypushingandhandscrewingitinplace.
Handtwistandpulltheattachmentapartfromthesuc-
tioninletafteruse.
►Fig.21

18 ENGLISH
Installing MAKPAC
Optional accessory
CAUTION: Do not stand on or sit on the top of
the appliance.Itmayfalldownbecauseofinstability.
CAUTION: Be careful with the operation when
installing MAKPAC.Failingtodosomayresultin
personalinjuryordamagetotheappliance.
CAUTION: When MAKPAC is installed on the
appliance, do not lift the appliance with the han-
dle of MAKPAC.
CAUTION: When moving the appliance which
is installed MAKPAC, do not push MAKPAC but
the body of appliance. PushingMAKPACmaybreak
thelatchesanddropMAKPAC,whichmayresultin
personalinjury.
ConnectableandstackableMAKPACstoragecases
canbeinstalledontopofthecleaner.Thecases
areavailableinmanysizesandstylestosuityour
preferences.
1. Unfoldthelatchesontopsurfaceofthecleaner.
►Fig.22: 1.Latch
2. MounttheMAKPACcasesontopofthecleaner
andxitwithlatches.
►Fig.23: 1.Latch2.MAKPAC
MaximumheightandweightofinstallingMAKPACare
315mmand20kgrespectively.
►Fig.24
OPERATION
WARNING: Always use a P2-respirator.
CAUTION: If foam or liquid escapes from the
tool, switch o immediately. Continuing to using
in this condition may cause an electric shock and
breakage of the cleaner.
WIRELESS ACTIVATION
FUNCTION
Optional accessory
What you can do with the wireless
activation function
Thewirelessactivationfunctionenablescleanand
comfortableoperation.Byconnectingasupportedtool
tothecleaner,youcanrunthecleanerautomatically
alongwiththeswitchoperationofthetool.
►Fig.25
NOTICE: Be sure to refer to the instruction man-
ual of the tool when using the cleaner with wire-
less activation function.
NOTICE: Do not disassemble or tamper with the
wireless unit.
NOTICE: To prevent dust coming into the slot
of the wireless unit, always close the lid securely
during operation and storage.
NOTICE: Do not press the wireless activation
button too hard and/or press the button with an
object with a sharp edge.
NOTE:WirelessactivationneedsMakitatools
equippedwiththewirelessunit.
NOTE:Priortotheinitialuseofthewirelessactiva-
tionfunctionwitheachtool,thetoolregistrationis
required.Oncetheregistrationisnishedwiththe
tool,there-registrationisnotrequiredunlessitis
cancelled.
NOTE:Beforeregistration,besurethatthewireless
unitisproperlyinserted.
NOTE:Onewirelessunitcanregisterupto10links
withotherwirelessunits.Ifmorethan10otherwire-
lessunitsareregisteredtoonewirelessunit,theone
registeredearliestwillbecancelledautomatically.
NOTE:Thepositionofthewirelessactivationbutton
variesdependingonthetool.
NOTE:Thecleaneralsostartsbypressingthepower
buttonwhenthestand-byswitchissetto“AUTO”.
Howeverthepowerbuttonwillnotactuatewhenthe
wirelessactivationfunctionisused.
Installing the wireless unit
WARNING: Open the lid when you install the
wireless unit at the rst time only. Never open the
lid after installing it.
CAUTION: Place the cleaner on a at and
stable surface when installing the wireless unit.
NOTICE: Clean the dust and dirt on the cleaner
before installing the wireless unit.Dustordirt
maycausemalfunctionifitcomesintotheslotofthe
wirelessunit.
NOTICE: To prevent the malfunction caused by
static, touch a static discharging material, such
as a metallic part, before picking up the wireless
unit.
NOTICE: When installing the wireless unit,
always be sure that the wireless unit is inserted
in the correct direction and the lid is completely
closed.

19 ENGLISH
1. Loosenthescrewtoopenthelidonthecleaneras
showninthegure.
►Fig.26: 1.Lid2.Screw
2. Insertthewirelessunittotheslot.
Wheninsertingthewirelessunit,aligntheprojections
withtherecessedportionsontheslot.
►Fig.27: 1.Wirelessunit2.Projection3.Lid
4.Recessedportion
3. Tightenthescrewcompletelytoclosethelid.
Tool registration for the cleaner
NOTE:AMakitatoolsupportingthewirelessactiva-
tionfunctionisrequiredforthetoolregistration.
NOTE:Finishinstallingthewirelessunittothetool
beforestartingthetoolregistration.
NOTE:Duringthetoolregistration,donotpullthe
switchtriggeronthetoolorturnonthepowerswitch
onthecleaner.
NOTE:Refertotheinstructionmanualofthetool,too.
Ifyouwishtoactivatethecleaneralongwiththe
switchoperationofthetool,nishthetoolregistration
beforehand.
1. Installthewirelessunitstothecleanerandthe
tool,respectively.
2. Installthebatteriestothecleanerandthetool.
3. Setthestand-byswitchonthecleanerto“AUTO”.
►Fig.28: 1.Stand-byswitch
4. Pressthewirelessactivationbuttononthecleaner
for3secondsuntilthewirelessactivationlampblinksin
green.Andthenpressthewirelessactivationbuttonon
thetoolinthesameway.
►Fig.29: 1.Wirelessactivationbutton2.Wireless
activationlamp
Ifthecleanerandthetoolarelinkedsuccessfully,the
wirelessactivationlampswilllightupingreenfor2sec-
ondsandstartblinkinginblue.
NOTE:Thewirelessactivationlampsnishblinking
ingreenafter20secondselapsed.Pressthewireless
activationbuttononthetoolwhilethewirelessacti-
vationlamponthecleanerisblinking.Ifthewireless
activationlampdoesnotblinkingreen,pushthewire-
lessactivationbuttonbrieyandholditdownagain.
NOTE:Whenperformingtwoormoretoolregistration
forthecleaner,nishthetoolregistrationonebyone.
Starting the wireless activation
function
NOTE:Finishthetoolregistrationforthecleanerfor
wirelessactivation.
NOTE:Alwaysplacethecleanersothatyoucansee
thestatusofthewirelessactivationlamp.
NOTE:Refertotheinstructionmanualofthetool,too.
Afterregisteringatooltothecleaner,thecleanerwill
automaticallyrunsalongwiththeswitchoperationof
thetool.
1. Installthewirelessunitstothecleanerandthe
tool,respectively.
2. Installthebatteriestothecleanerandthetool.
3. Connectthehoseofthecleanerwiththetool.
►Fig.30
4. Setthestand-byswitchonthecleanerto“AUTO”.
►Fig.31: 1.Stand-byswitch
5. Pushthewirelessactivationbuttononthetool
briey.Thewirelessactivationlampwillblinkinblue.
►Fig.32: 1.Wirelessactivationbutton2.Wireless
activationlamp
6. Turnonthetool.Checkifthecleanerrunswhile
thetoolisoperating.
CAUTION: Always check if the wireless acti-
vation function works before starting a work with
the tool.
Tostopthewirelessactivation,pushthewirelessactiva-
tionbuttononthetool,orsetthestand-byswitchonthe
cleanerto“I”or“O”.
NOTE:Thewirelessactivationlamponthetoolwill
stopblinkinginbluewhenthereisnooperationfor
2hours.Inthiscase,setthestand-byswitchonthe
cleanerto“AUTO”andpressthewirelessactivation
buttononthetoolagain.
NOTE:Thecleanerstarts/stopswithadelay.Thereis
atimelagwhenthecleanerdetectsaswitchopera-
tionofthetool.
NOTE:Thetransmissiondistanceofthewirelessunit
mayvarydependingonthelocationandsurrounding
circumstances.
NOTE:Whentwoormoretoolsareregisteredtoone
cleaner,thecleanermaystartrunningevenifyoudo
notturnonthetoolbecauseotheruserisusingthe
wirelessactivationfunction.
Cancelling tool registration for the
cleaner
Performthefollowingprocedurewhencancellingthe
toolregistrationforthecleaner.
1. Installthewirelessunitstothecleanerandthe
tool,respectively.
2. Installthebatteriestothecleanerandthetool.
3. Setthestand-byswitchonthecleanerto“AUTO”.
►Fig.33: 1.Stand-byswitch
4. Pressthewirelessactivationbuttononthecleaner
for6seconds.Thewirelessactivationlampblinksin
greenandthenbecomered.Afterthat,pressthewire-
lessactivationbuttononthetoolinthesameway.
►Fig.34: 1.Wirelessactivationbutton2.Wireless
activationlamp
Ifthecancellationisperformedsuccessfully,thewire-
lessactivationlampswilllightupinredfor2seconds
andstartblinkinginblue.

20 ENGLISH
NOTE:Thewirelessactivationlampsnishblinkingin
redafter20secondselapsed.Pressthewirelessacti-
vationbuttononthetoolwhilethewirelessactivation
lamponthecleanerisblinking.Ifthewirelessacti-
vationlampdoesnotblinkinred,pushthewireless
activationbuttonbrieyandholditdownagain.
Erasing all tool registrations
Youcanerasealltoolregistrationsfromthecleaneras
follows.
►Fig.35: 1.Stand-byswitch2.Wirelessactivation
button3.Wirelessactivationlamp
1. Installthewirelessunittothecleaner.
2. Installthebatteriestothecleaner.
3. Setthestand-byswitchto“AUTO”.
4. Holddownthewirelessactivationbuttonforabout
6secondsuntilthewirelessactivationlampblinksinred
(abouttwiceperonesecond).
5. Whenthewirelessactivationlampstartsblinking
inred,releaseyourngerfromthewirelessactivation
button.Thereafter,holddownthewirelessactivation
buttonagainforabout6seconds.
6. Whenthewirelessactivationlampstartsblinking
fast(about5timesperonesecond)inred,releaseyour
ngerfromthewirelessactivationbutton.Whenthe
wirelessactivationlamplightsupinredandlaterlights
o,alltoolregistrationsareerased.
NOTE:Ifthewirelessactivationlampdoesnotblink
inred,pressthewirelessactivationbuttonbrieyand
tryagain.
Description of the wireless activation lamp status
►Fig.36: 1.Wirelessactivationbutton2.Wireless
activationlamp
Thewirelessactivationlampshowsthestatusofthewirelessactivationfunction.Refertothebelowtableforthe
meaningofthelampstatus.
Status Wireless activation lamp Description
Color
On
Blinking
Duration
(approximate)
Standby Blue Cleaner:con-
tinuing
Tool:2hours
Waitingforthetoolregistrationorthewirelessactivationfunction
isavailable.
Thelamponthecleanerblinkswhenthestand-byswitchissetin
AUTO.Thelamponthetoolblinkswhenthewirelessactivation
buttonispushed.Thelamponthetoolwillautomaticallyturno
whennooperationisperformedfor2hours.
Whenthetoolis
running.
Thewirelessactivationofthecleanerisavailableandthetoolis
running.
Tool
registration
Green 20seconds Readyforthetoolregistration.Searchingthetooltoberegistered.
2seconds Thetoolregistrationhasbeennished.Thewirelessactivation
lampwillstartblinkinginblue.
Cancelling/
erasing
tool
registration
Red
(slow:2times/sec.)
20seconds Readyforthecancellationofthetoolregistration.Searchingthe
tooltobecancelled.
(fast:5times/sec.)
Whenthe
wirelessacti-
vationbuttonis
presseddown.
Readytoerasealltoolregistrations.
2seconds Thetoolregistrationhasbeencancelled/erased.Thewireless
activationlampwillstartblinkinginblue.
Others Red 3seconds Thepowerissuppliedtothewirelessunitandthewirelessactiva-
tionfunctionisstartingup.
O - - Thestand-byswitchisnotsetto“AUTO”.
Other manuals for VC006GM
7
Table of contents
Languages:
Other Makita Vacuum Cleaner manuals

Makita
Makita BVC340 User manual

Makita
Makita DRC200 User manual

Makita
Makita XCV11 User manual

Makita
Makita CL001G User manual

Makita
Makita DVC156L User manual

Makita
Makita DCL140 User manual

Makita
Makita DVC261Z User manual

Makita
Makita DVC860L User manual

Makita
Makita DVC866L User manual

Makita
Makita DCL142 User manual

Makita
Makita VC3012L User manual

Makita
Makita DVC860L User manual

Makita
Makita VC008G User manual

Makita
Makita DUB187 User manual

Makita
Makita DVC866L User manual

Makita
Makita DVC867L User manual

Makita
Makita VC002GL User manual

Makita
Makita 4013D User manual

Makita
Makita BVC350 Series Manual

Makita
Makita HANDY VAC II 4071D User manual