manuals.online logo
Brands
  1. Home
  2. •
  3. Brands
  4. •
  5. Manfrotto
  6. •
  7. Camera Accessories
  8. •
  9. Manfrotto 724B User manual

Manfrotto 724B User manual

Cod. 724,18 - 09/04 Copyright © 2004 Manfrotto Bassano Italy
ED
EINLEITUNG
Leichtes Stativ für Digitalkameras.
HAUPTMERKMALE
• Umkehrbare Mittelsäule
• Bein-Schnellklemmung
• Kugelkopf mit Einhebelklemmung für sowohl Kugel- als auch
Panorama-Bewegungen
AUFSTELLUNG
Öffnen Sie die drei Stativbeine.
Zur Höheneinstellung des Stativs sind die drei Stativbeine nach Lösen
der Klemme "A" am Klemmring "B" ausziehbar.
HÖHENEINSTELLUNG DER MITTELSÄULE
Zum Lösen der Mittelsäule "C" lösen Sie Klemme "D".
Danach kann die Höhe der Säule wie gewünscht eingestellt werden.
Klemmen Sie die Säule mit "D".
UMKEHRUNG DER MITTELSÄULE
Die Mittelsäule ist umkehrbar.
Entfernen Sie die Gummikappe "E" (Abb. 2), lösen Sie Klemme "D", und
entnehmen Sie die Mittelsäule, indem Sie sie nach oben aus dem Stativ
ziehen. Kehren Sie die Säule "C" um, und schieben Sie sie von unten
(Abb. 3) in das Stativ ein. Klemmen Sie "D", und setzen Sie die
Gummikappe "E" wieder auf.
ANBRINGUNG DER KAMERA AUF DEM STATIVKOPF
Bringen Sie die Kamera mit der 1/4"-Stativschraube "H" auf dem Stativ
an.
EINSATZ DES STATIVKOPFES
Aus Sicherheitsgründen sollte die Kamera beim Lösen des
Kugelkopfes stets gut festgehalten werden.
Der Hebel "F" dient zur Klemmung der Panorama- und Kugelbewegung.
Zum Lösen des Kugelkopfes "G" zum Ausrichten der Kamera drehen Sie
den Hebel "F" entgegen dem Uhrzeigersinn.
Nach Erreichen der gewünschten Stellung klemmen Sie die Kugel "G"
durch volle Rechtsdrehung des Hebels "F".
Anmerkung:
Der Winkel von Klemme "F" ist ohne Einfluss auf die Klemmwirkung frei
einstellbar. Ziehen Sie die Klemme nach außen, drehen Sie sie wie
gewünscht, und lassen Sie sie los. Sie rastet in der neuen Stellung ein.
INTRODUCCIÓN
De peso ligero, ideal para cámars digitales.
CARACTERISTICAS
• Columna central reversible
• Bloqueos rápidos de palanca para las patas
• Rótula de bola con bloqueos de palanca individuales para los
movimientos de bola y panorámicos
PREPARACIÓN
Abran las 3 patas del trípode.
Para ajustar la altura del trípode cada pata dispone de un expansor
telescópico que puede soltarse por medio de una palanca de giro “A”
en la embrazadera de bloqueo “B”.
UTILIZACIÓN
AJUSTE DE LA ALTURA DE LA COLUMNA CENTRAL
Para soltar la columna central “C”, desbloquéen la palanca “D” y
ajusten la altura de la columna según su necesidad.
Aprieten la palanca “D” para bloquear la columna en su posición.
INVERSIÓN COLUMNA CENTRAL
La columna central puede ser invertida.
Quiten la goma “E” (fig. 2), desbloquéen la palanca “D” y remuevan la
columna “C”
ajalandola hacia arriba, afuera entre las espaldas del trípode.
Inviertan la columna “C” e introduzcanla (fig. 3) en las espaldas desde
abajo. Aprieten la palanca “D” y recoloquen el mando de bloqueo “F”.
ACOPLAR LA CÁMARA A LA RÓTULA
Acoplen la cámara a la rótula utilizando la rosca macho 1/4” “H”.
UTILIZACIÓN DE LA RÓTULA
Para una utilización segura de la rótula de bola, mientras sueltan
la bola sujeten siempre la cámara con una mano.
El mando de bloqueo “F” bloquea los movimientos panorámicos y de la
bola.
Para soltar la bola “G” para colocar la cámara, desbloquéen la palanca
“F” rodeando en sentido antihorario.
Una vez conseguida la posición deseada, bloquéen la bola “G” girando
completamente la palanca “F” en sentido hórario.
Nota:
el ángulo de la palanca del mando “F” puede ser recolocado como
requerido sin afectar el mismo bloqueo.
Empujen la palanca hacia el externo, rodéen como requerido y suelten:
la palanca se colocará en la nueva posición.
164 cm 1.4 kg 3.5 kg
64.5” 3.1 lbs 7.7 lbs
INSTRUCTIONS
724B
1
2
3
4
4
1
2
3
4
4
GB
INTRODUCTION
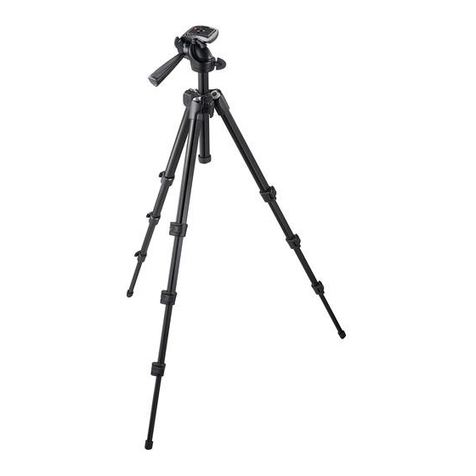
Lightweight tripod designed for digital cameras.
KEY FEATURES
• Reversible centre column
• Rapid action lever leg extension locks
• Ball head with single lever locking for both ball and panoramic
movements
SET UP
Open the 3 tripod legs.
To adjust the height of the tripod, each leg has telescopic extensions that
can be released by rotating lever “A” on the locking collar “B”.
USE
CENTRE COLUMN HEIGHT ADJUSTMENT
To release the central column “C”, unlock lever “D” and adjust the height
of the column as required. Tighten lever “D” to lock in position.
INVERTING THE CENTRAL COLUMN
The centre column can be inverted.
Remove the rubber cap “E” (fig. 2), unlock lever “D” and remove the
column “C” pulling it upward out of the shoulder of the tripod.
Invert the column “C” and insert it (fig. 3) into the shoulder from below.
Tighten lever “D” and replace the rubber cap “E”.
MOUNTING THE CAMERA ON HEAD
Mount the camera on the head using 1/4” male thread “H”
USE OF THE HEAD
To ensure that the ball head is used safety, always hold the
camera with one hand while releasing the ball.
The lever "F” locks the panoramic and ball movements.
To release the ball “G” for positioning the camera, unlock lever “F” by
rotating anticlockwise
Once the desired position is achieved, lock the ball “G” by turning lever
"F" fully in a clockwise direction.
Note
The angle of the lever on the ratchet knob “F” can be repositioned as
required without effecting the lock itself. Pull the lever outwards, rotate as
required and release and it will locate in the new position.
FI
INTRODUCTION
Trépied léger conçu pour les appareils photo numériques.
CARACTÉRISTIQUES PRINCIPALES
• Colonne centrale réversible
• Leviers de blocage rapide des jambes
• Rotule ball avec levier unique de blocage des mouvements
panoramiques et de bascule
INSTALLATION
Ouvrez les 3 jambes du trépied.
Pour régler la hauteur du trépied, vous pouvez déployer les sections
téléscopiques des jambes en déverrouillant les leviers de blocage "A"
situés sur les bagues "B".
UTILISATION
RÉGLAGE DE LA HAUTEUR DE LA COLONNE CENTRALE
Pour libérer la colonne centrale "C", débloquez le levier "D" et réglez la
hauteur de la colonne comme vous le souhaitez.
Rebloquez le levier "D" pour verrouiller la colonne à la hauteur choisie.
RETOURNER LA COLONNE CENTRALE
La colonne centrale est réversible.
Dévissez et retirez le bouchon "E" (fig. 2), débloquez le levier "D" et
retirez la colonne "C" en la sortant par le haut du trépied. Retournez la
colonne "C" et insérez-la dans cette position (fig. 3) par en-dessous.
Rebloquez le levier "D" et remettez le bouchon "E" en place.
FIXATION DE L'APPAREIL A LA ROTULE
Fixez l'appareil photo à la rotule avec la vis 1/4" "H".
UTILISATION DE LA ROTULE
Pour utiliser la rotule ball de manière sûre, tenez toujours votre
appareil photo d'une main lorsque vous inclinez la rotule.
Le levier "F" permet de bloquer les mouvements panoramiques et de
bascule.
Pour débloquer la rotule "G" et pouvoir ainsi changer la position de votre
appareil, débloquez le levier "F" en le tournant dans le sens inverse des
aiguilles d'une montre.
Une fois que vous avez placé la rotule "G" dans la position souhaitée,
bloquez-la en tournant le levier de blocage "F" dans le sens des aiguilles
d'une montre.
Remarque :
Le levier "F" est indexé de façon à pouvoir être positionné différemment
sans que cela ait d'incidence sur le système de blocage. Tirez le levier
vers vous, tournez-le dans le sens souhaité, puis relâchez-le et il se
mettra automatiquement dans cette nouvelle position.
INTRODUZIONE
Treppiede leggero studiato per le fotocamere digitali..
CARATTERISTICHE PRINCIPALI
• Colonna centrale reversibile
• Bloccaggio rapido degli allungamenti delle gambe
• Testa a sfera con blocco a leva singola dei movimenti della sfera e
panoramici
PREPARAZIONE
Divaricare le 3 gambe.
Per regolare l’altezza del treppiede, ogni gamba dispone di
allungamenti telescopici che si possono liberare ruotando la leva “A”
sul manicotto “B”.
USO
REGOLAZIONE DELL’ALTEZZA DELLA COLONNA CENTRALE
Per liberare la colonna centrale “C”, sbloccare la leva “D” e regolare a
piacere l’altezza della colonna.
Per bloccare la colonna in posizione stringere la leva “D”.
INVERSIONE DELLA COLONNA CENTRALE
La colonna centrale è reversibile.
Rimuovere la protezione in gomma “E” (fig.2), sbloccare la leva “D” e
rimuovere la colonna “C” tirandola verso l’alto per estrarla dalla
crociera del treppiede. Invertire la colonna “C” e reinserirla nella
crociera dal basso (fig. 3). Serrare la leva “D” e rimettere in posizione la
protezione in gomma “E”.
MONTAGGIO DELLA FOTOCAMERA SULLA TESTA
Montare la fotocamera sulla testa usando l’attacco filettato maschio
“H” da 1/4”.
USO DELLA TESTA
Per un utilizzo sicuro della testa a sfera, reggere sempre la
fotocamera con una mano mentre si sblocca la sfera.
La leva “F” blocca il movimento panoramico e la sfera.
Per liberare il movimento della sfera “G” per posizionare la fotocamera,
sbloccare la leva “F” ruotandola in senso antiorario.
Una volta raggiunta la posizione desiderata, bloccare la sfera “G”
ruotando a fondo la leva “F” in senso orario.
Nota
L’angolazione della leva a ripresa “F” può essere riposizionata a
piacere, senza influire sul blocco stesso. Tirare la leva verso l’esterno,
effettuare la rotazione voluta e rilasciare la leva, che rientrerà
automaticamente in sede nella nuova posizione.
1
2
3
4
4
B
A
D
C
E
G
H
F
E
C
D
B
A
B
A
2
1
1
2
3
1 2
3 4
1
2
3
4
4
1
2
3
4
4
Other Manfrotto Camera Accessories manuals

Manfrotto 269HDB-3U User manual

Manfrotto

Manfrotto 269HDB-3U User manual

Manfrotto 515MV User manual

Manfrotto

Manfrotto 515MV User manual

Manfrotto 338 User manual

Manfrotto

Manfrotto 338 User manual

Manfrotto MT190GOA4 User manual

Manfrotto

Manfrotto MT190GOA4 User manual

Manfrotto 351MV User manual

Manfrotto

Manfrotto 351MV User manual

Manfrotto 143 User manual

Manfrotto

Manfrotto 143 User manual

Manfrotto 7302YB User manual

Manfrotto

Manfrotto 7302YB User manual

Manfrotto MT290DUA3 User manual

Manfrotto

Manfrotto MT290DUA3 User manual

Manfrotto MVM450A User manual

Manfrotto

Manfrotto MVM450A User manual

Manfrotto PRO LIGHT 3N1-36 User manual

Manfrotto

Manfrotto PRO LIGHT 3N1-36 User manual

Manfrotto 482LCD User manual

Manfrotto

Manfrotto 482LCD User manual

Manfrotto 532 ART User manual

Manfrotto

Manfrotto 532 ART User manual

Manfrotto 547B User manual

Manfrotto

Manfrotto 547B User manual

Manfrotto 554 User manual

Manfrotto

Manfrotto 554 User manual

Manfrotto 535 User manual

Manfrotto

Manfrotto 535 User manual

Manfrotto 468MGRC4 User manual

Manfrotto

Manfrotto 468MGRC4 User manual

Manfrotto MVG220 User manual

Manfrotto

Manfrotto MVG220 User manual

Manfrotto Lastolite XpoBalance User manual

Manfrotto

Manfrotto Lastolite XpoBalance User manual

Manfrotto MKCOMPACTLT-BK User manual

Manfrotto

Manfrotto MKCOMPACTLT-BK User manual

Manfrotto 131D User manual

Manfrotto

Manfrotto 131D User manual

Manfrotto 745XB User manual

Manfrotto

Manfrotto 745XB User manual

Manfrotto 322RS User manual

Manfrotto

Manfrotto 322RS User manual

Manfrotto MKBFR1A4B-BH User manual

Manfrotto

Manfrotto MKBFR1A4B-BH User manual

Manfrotto MVR901ECEX User manual

Manfrotto

Manfrotto MVR901ECEX User manual

Popular Camera Accessories manuals by other brands

Primaluce ARCO 2 user manual

Primaluce

Primaluce ARCO 2 user manual

Oben AC-1300 series user manual

Oben

Oben AC-1300 series user manual

Gitzo G1258LVL parts list

Gitzo

Gitzo G1258LVL parts list

Growatt GBLI6531 quick guide

Growatt

Growatt GBLI6531 quick guide

Shape FS72BT Assembly plan

Shape

Shape FS72BT Assembly plan

Nauticam 37304 instruction manual

Nauticam

Nauticam 37304 instruction manual

X4-Life 701446 instruction manual

X4-Life

X4-Life 701446 instruction manual

Briggs & Stratton VANGUARD Operator's manual

Briggs & Stratton

Briggs & Stratton VANGUARD Operator's manual

Kodak Leaf Aptus-II Brochure & specs

Kodak

Kodak Leaf Aptus-II Brochure & specs

Dynex DX-TRPFLX Guide d'installation rapide

Dynex

Dynex DX-TRPFLX Guide d'installation rapide

Gitzo GS5511S parts list

Gitzo

Gitzo GS5511S parts list

Bresser GM-300 instruction manual

Bresser

Bresser GM-300 instruction manual

Stanley IntelliSensor Pro instruction manual

Stanley

Stanley IntelliSensor Pro instruction manual

NOVOFLEX MiniConnect MR user manual

NOVOFLEX

NOVOFLEX MiniConnect MR user manual

Recsea CWOP-SH2 manual

Recsea

Recsea CWOP-SH2 manual

MARELUX SOFT Lite user manual

MARELUX

MARELUX SOFT Lite user manual

GoPro Light Mod user guide

GoPro

GoPro Light Mod user guide

IMEON ENERGY 4850 installation guide

IMEON ENERGY

IMEON ENERGY 4850 installation guide

manuals.online logo
manuals.online logoBrands
  • About & Mission
  • Contact us
  • Privacy Policy
  • Terms and Conditions

Copyright 2025 Manuals.Online. All Rights Reserved.