4
CONTRAINDICATIONS |
Do not use Marc Pro Plus if you have one or more of the
following medical conditions:
1. This device must not be used on persons with cardiac pacemakers,
defibrillators; or other implanted metallic electronic devices.
2. Epilepsy
3. Following acute trauma or fracture
4. Following recent surgical procedures
5. Critical ischemia of lower limbs
6. Abdominal or inguinal hernia
7. Stimulation should not be applied over, or in proximity to, cancer or
cancerous lesions
PRECAUTIONS |
1. Some persons may experience skin irritation or hypersensitivity due to the
electrical stimulation or electrical conductive medium (gel).
2. This device should be kept out of the reach of children.
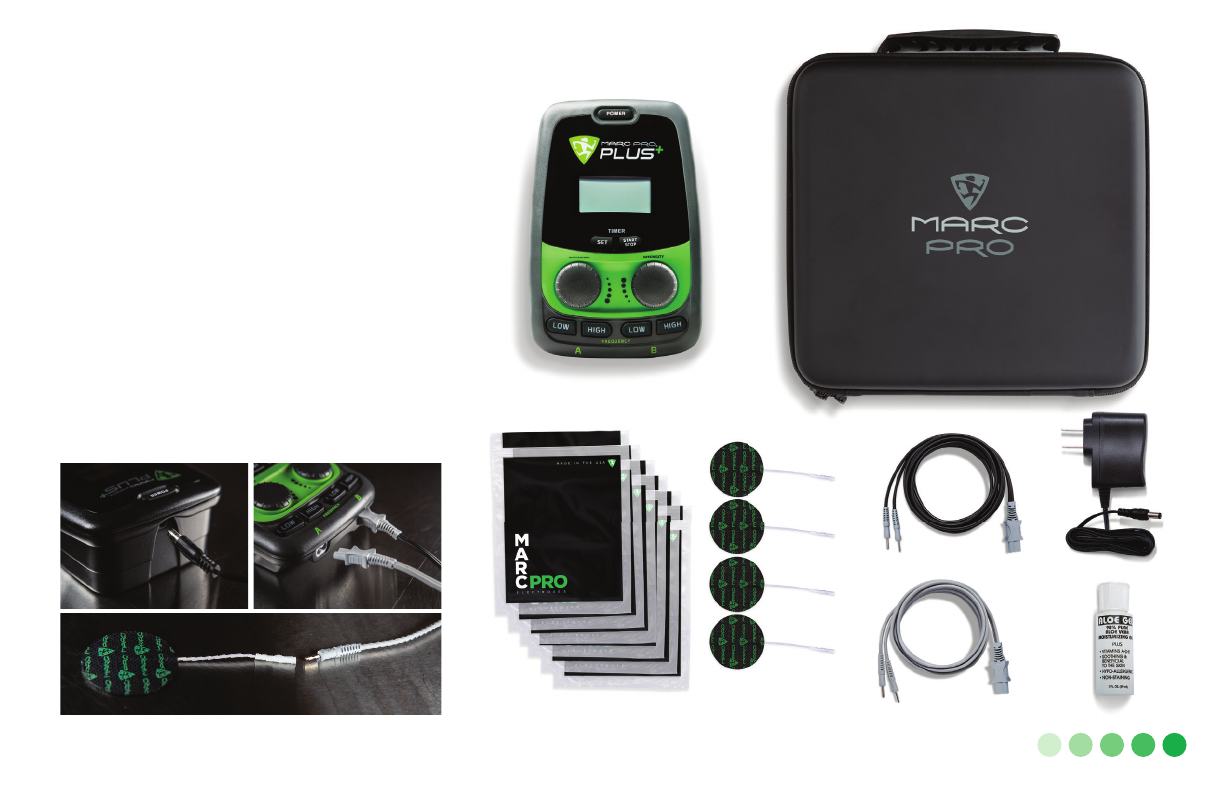
3. This device should be used only with the leads, electrodes, and accessories
recommended for use by the manufacturer.
4. Caution should be used when there is a tendency to hemorrhage following
acute trauma or fracture.
5. Transcutaneous Electrical Nerve Stimulation is not effective for pain of central
origin, including headache.
6. Transcutaneous Electrical Nerve Stimulation is not a substitute for pain
medications and other pain management therapies.
7. Transcutaneous Electrical Nerve Stimulation devices have no curative value.
8. Transcutaneous Electrical Nerve Stimulation is a symptomatic treatment
and, as such, suppresses the sensation of pain that would otherwise serve as a
protective mechanism.
9. This Marc Pro Plus should not be used while driving, operating machinery, or
during any activity in which involuntary muscle contractions may put the user at
undue risk of injury.
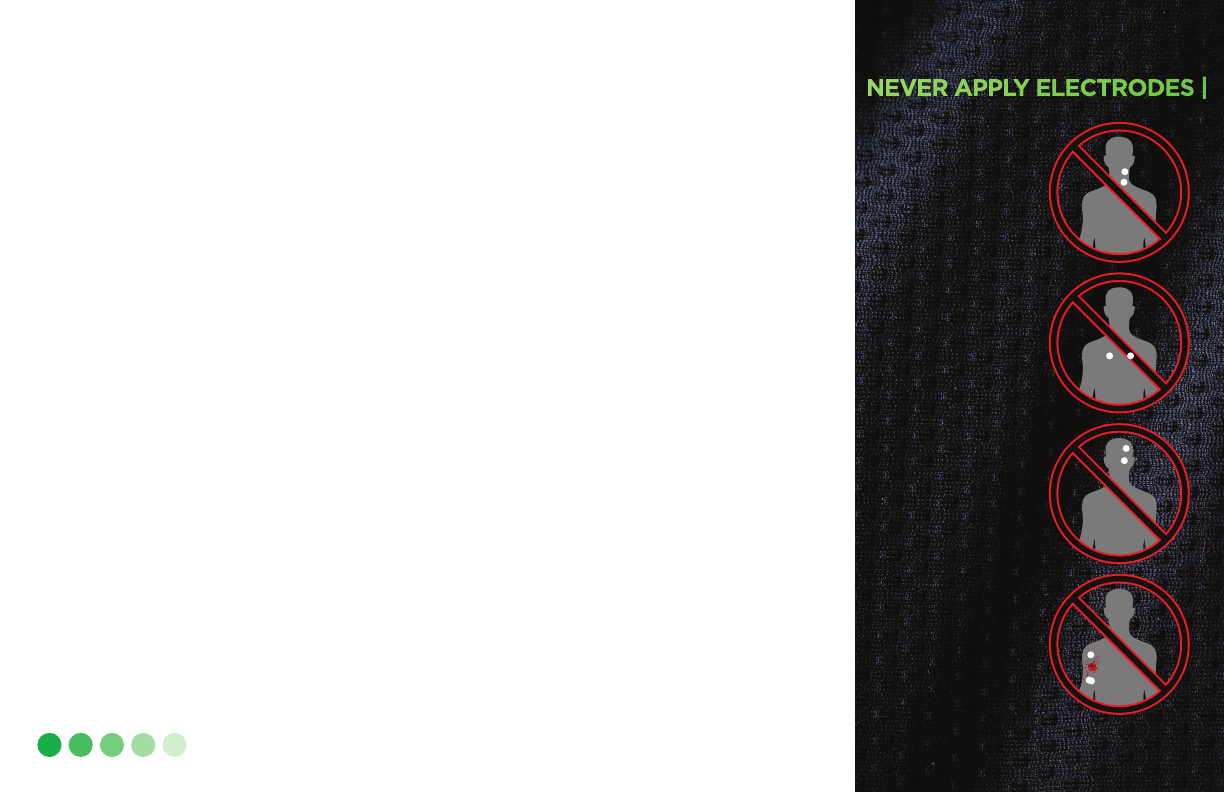
WARNINGS |
1. The long term effects of prolonged use of electrical stimulation are unknown.
2. Stimulation should not be applied over the neck. Severe spasm of the muscles
may occur and the contractions may be strong enough to close the airway or
cause difficulty in breathing. Stimulation over the neck could also have adverse
effects on the heart rhythm or blood pressure.
3. Stimulation should not be applied over the carotid sinus nerves, particularly in
patients with a known sensitivity to the carotid sinus nerve.
4. Stimulation should not be applied transthoracically in that the introduction of
electrical current into the heart may cause cardiac arrhythmias.
5. The effects of stimulation of the brain are unknown. Therefore, stimulation
should not be applied across the head and electrodes should not be placed on
opposite sides of the head.
6. Stimulation should not be applied transcerebrally.
7. Electrodes should be applied only to normal, intact, clean skin. Electrodes
should not be applied over open wounds or over swollen, infected, or inflamed
areas or skin eruptions, e.g., phlebitis, thrombophlebitis, varicose veins, etc.
8. Electrodes should not be shared with other persons. Each person should have
their own set of electrodes; otherwise, undesirable skin reactions may occur.
9. Self-adhesive electrodes should be replaced if they no longer stick firmly to
the skin.
MPRO_19-003_MPP_MANUAL_FINAL_IMAGES_C8.5.indd 4MPRO_19-003_MPP_MANUAL_FINAL_IMAGES_C8.5.indd 4 9/1/20 5:43 AM9/1/20 5:43 AM