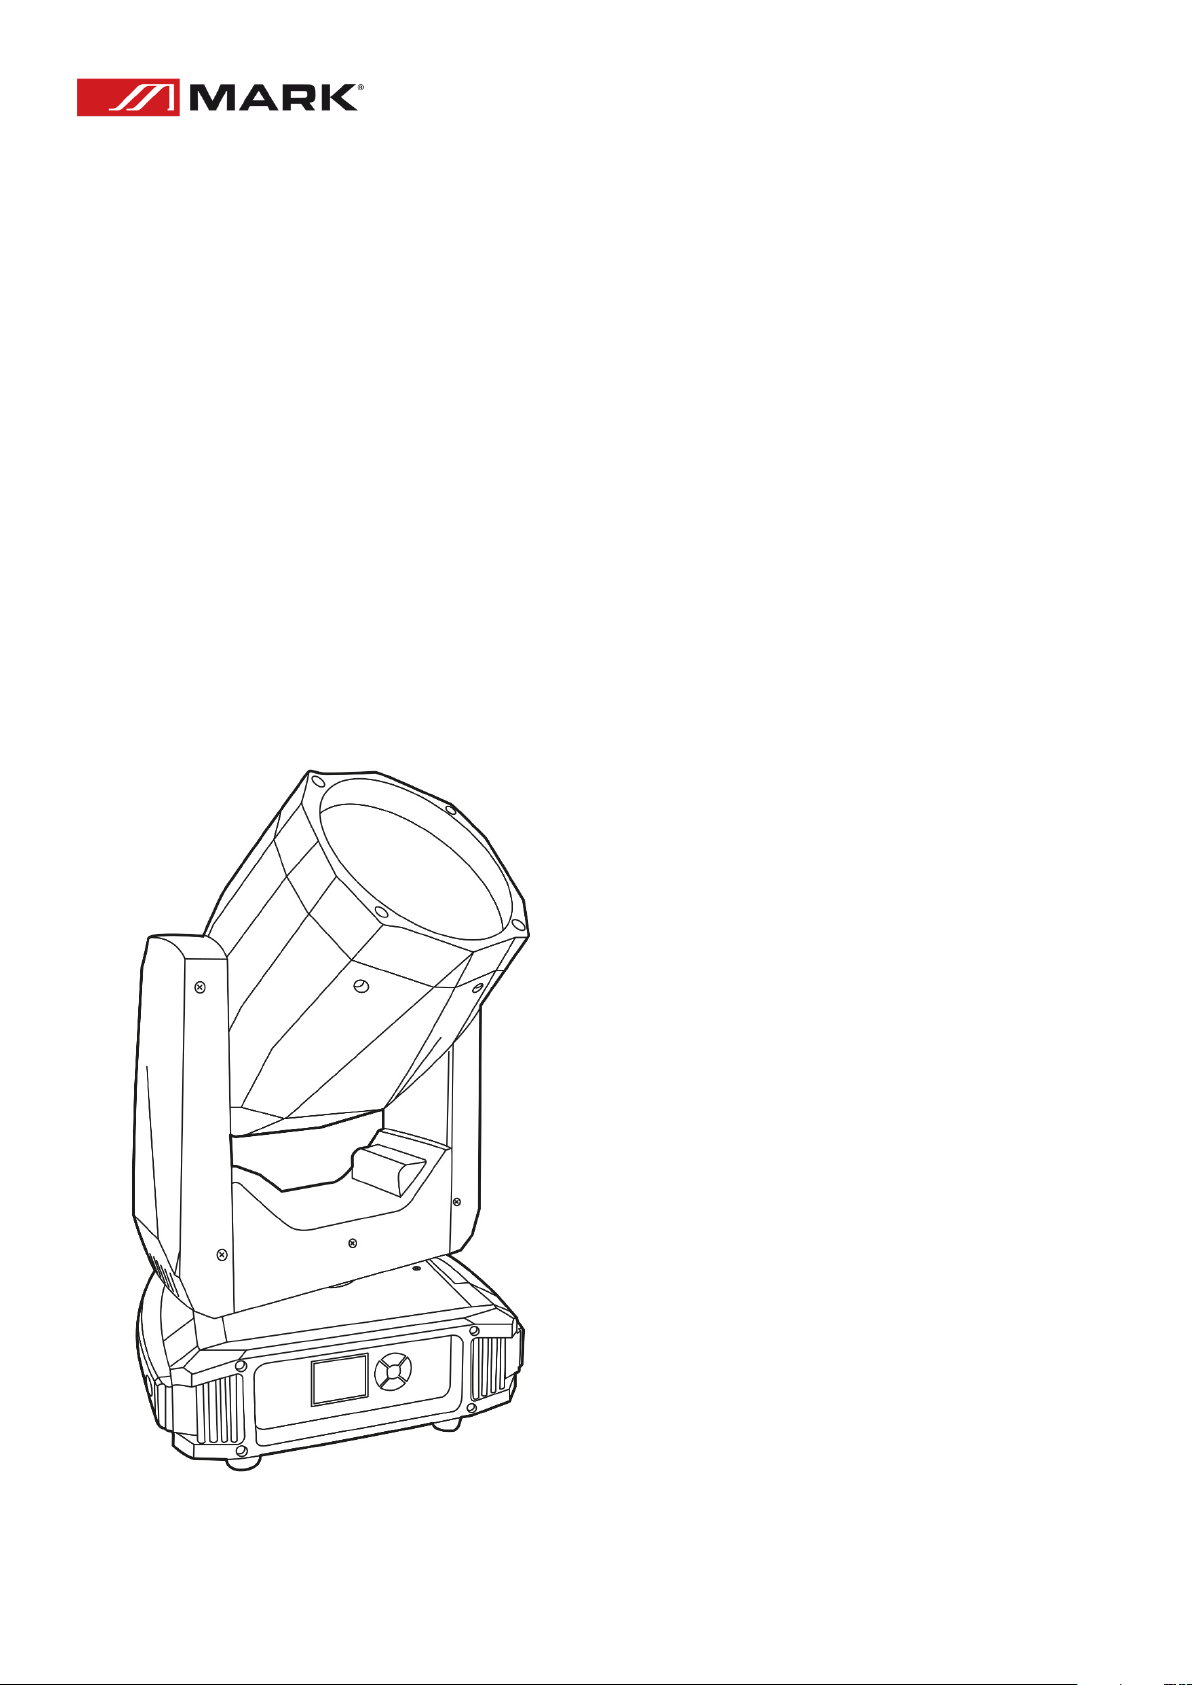
Mark BEAM LED 150 User manual

BEAM LED 150
User Manual – Version 1.2

1
SAFETY INSTRUCTIONS
1. Read the instructions of this manual.
2. Keep these instructions in a safety place.
3. Heed all warnings.
4. Follow all instructions.
5. When the installation of this device, please, respect your country safety regulations.
6. Don’t use this device close to the water or high humidity places. Clean only with dry cloth.
7. Don’t install near any heat sources such as radiators, heat registers, stoves, or other apparatus
(including amplifiers) that produce heat. Make certain that the equipment is always installed so that is
cooled and can’t overheat.
8. Don’t block any ventilation openings. Install in accordance with the manufacturer’s instructions.
9. Protect the power cord from being walked on or pinched, particularly at plugs, convenience
receptacles, and the point where they exit from the apparatus.
10. Only use attachments/accessories specified by MARK.
11. Unplug this device during lightning storms or when unused for long periods of time.
12. The technical service is required when the device has been damaged in any way, such as power
supply cord or plug is damaged, liquid has been spilled or objects have fallen into the device, doesn’t
operate normally or has been dropped.
13. To completely disconnect this apparatus from the AC mains, disconnect the power supply cord
plug from the AC receptacle.
14. The mains plug of the power supply cord shall remain readily operable.
15. WARNING – to reduce the risk of fire or electric shock, don’t expose this device to rain or humidity.
16. Don’t expose this equipment to dripping or splashing and ensure that no objects filled with liquids,
such as vases, are placed on the equipment.

2
OVERVIEW
BEAM LED 150 is a moving head that combines advanced technology and a wide range of
functionalities for the creation of all kinds of lighting events.
BEAM LED 150 has 1 colour wheel with 13 colours + white, and 1 gobo wheel (11 gobos + spot) with
shaking function.
BEAM LED 150 integrates 2 rotary prisms, functions as strobe and focus. Its touch LCD allows to
navigate through a complete menu system, including operating modes, device information, display
control (internal temperature, motor checking, axis inversion, etc.)
Technical Data:
Power Supply
100-240 V 50/60 Hz
Consumption
120 W
Lamp type
80W White LED
Beam angle
0° - 4°
Dimmer
0-100 Linear Adjustment
Pan
540º 8-16 bit
Tilt
270º 8-16 bit
Operating modes
DMX, Manual, Master/Slave
DMX Channels
16/20 channels
Colour wheel
13 colours + white
Gobo wheel
11 gobos + spot. Static + shake function
Input
XLR 3-pin
Output
XLR 3-pin
Dimensions (WxHxD)
285x490x230 mm
Weight
7 Kg
Features:
- Moving head with spot functionality.
- 16/20 DMX channels.
- 13 colours + white.
- 11 gobos + spot. Static and shake function.
- 2 rotary prisms.
- Touch buttons & LCD display.

3
INSTALLATION
This product is only suitable for professional use and does not apply to security for other purposes.
This product is designed for indoor use, it is IP20 protection class. Lamps should be kept dry to avoid
moisture, overheating or dusty environment.
Prevent lamps get in contact with water or any other liquid in order to avoid problems as: fire,
overheating, electric shock or lamp explosion, causing serious injuries.
Be sure that when you install the unit in a truss system, all the truss clamps are well close and pressed.
All the structure where the devices are installed must perfectly support all the weight.
Anti-high temperature
Please don’t use the equipment if the temperature is above 40℃.
Rupture prevention
The lens should be replaced when they are damaged or present any problem. Replace always with an
original lamp from MARK.
To prevent falling wounding
If the device is going to be transported, please don’t move the package by one person only. Please,
verify that the facilities can withstand the weight of the units at least 10 times more. Use always a steel
wire as auxiliary security between the device and the structure.
UA protection and bulb explosion
Do not view the beam directly. Do not use the equipment without the lens. The lens and the light head
covers should be timely replaced if appears any sign of damage or rupture. The device should be used
with the protection screen together.
Prevention of electric shock
The electrical connection must only be carried out by qualified personal. Before installing, be sure to
connect it to an electrical network that works under the same parameters.
The device must be properly grounded, installed in accordance with the relevant standards. Turn off
the power when stalling or replacing the lamp and the fuse. Don’t use the device during a lightning
storm or wet environment.

4
To prevent burning of fire
1. Never install the device directly on the surface of ordinary combustible material.
2. Do not short-circuit the temperature protection switch or fuse and use the specified type of fuse in
case of replacement.
3. The equipment must be installed away from inflammable and explosive materials.
4. The equipment must have about 3 meters around free space.
5. Fans or ventilation must not be covered.
6. Do not place any object on the lens.
7. Allow the device to cool 20 minutes before storing.
8. Do not replace with non-original spare parts. Contact your MARK dealer.
Transport protect lock
In order to protect the equipment, the device has a vertical lock to avoid unwanted movements.
During the transport, the lock must remain closed.
About packing
1. Before storing the device, make sure the power is off and wait for at least 20 minutes to cool it down.
2. Before cleaning the lens, make sure X, Y axis are locked.
3. After packing it in its plastic bag, carry and move it using the two handles besides the product and
put the product into the flightcase.
Unpacking
Note: Before unpacking, check it for any visible damage due to the transportation. If you find any
damage, please contact with the MARK dealer.
1. Open the flightcase and take out the inside plastic bag.
2. High lift the product by two handles beside the bottom base and move it out.
3. Make sure you have opened the X, Y axis lock and, after that, power on the unit.
Attention
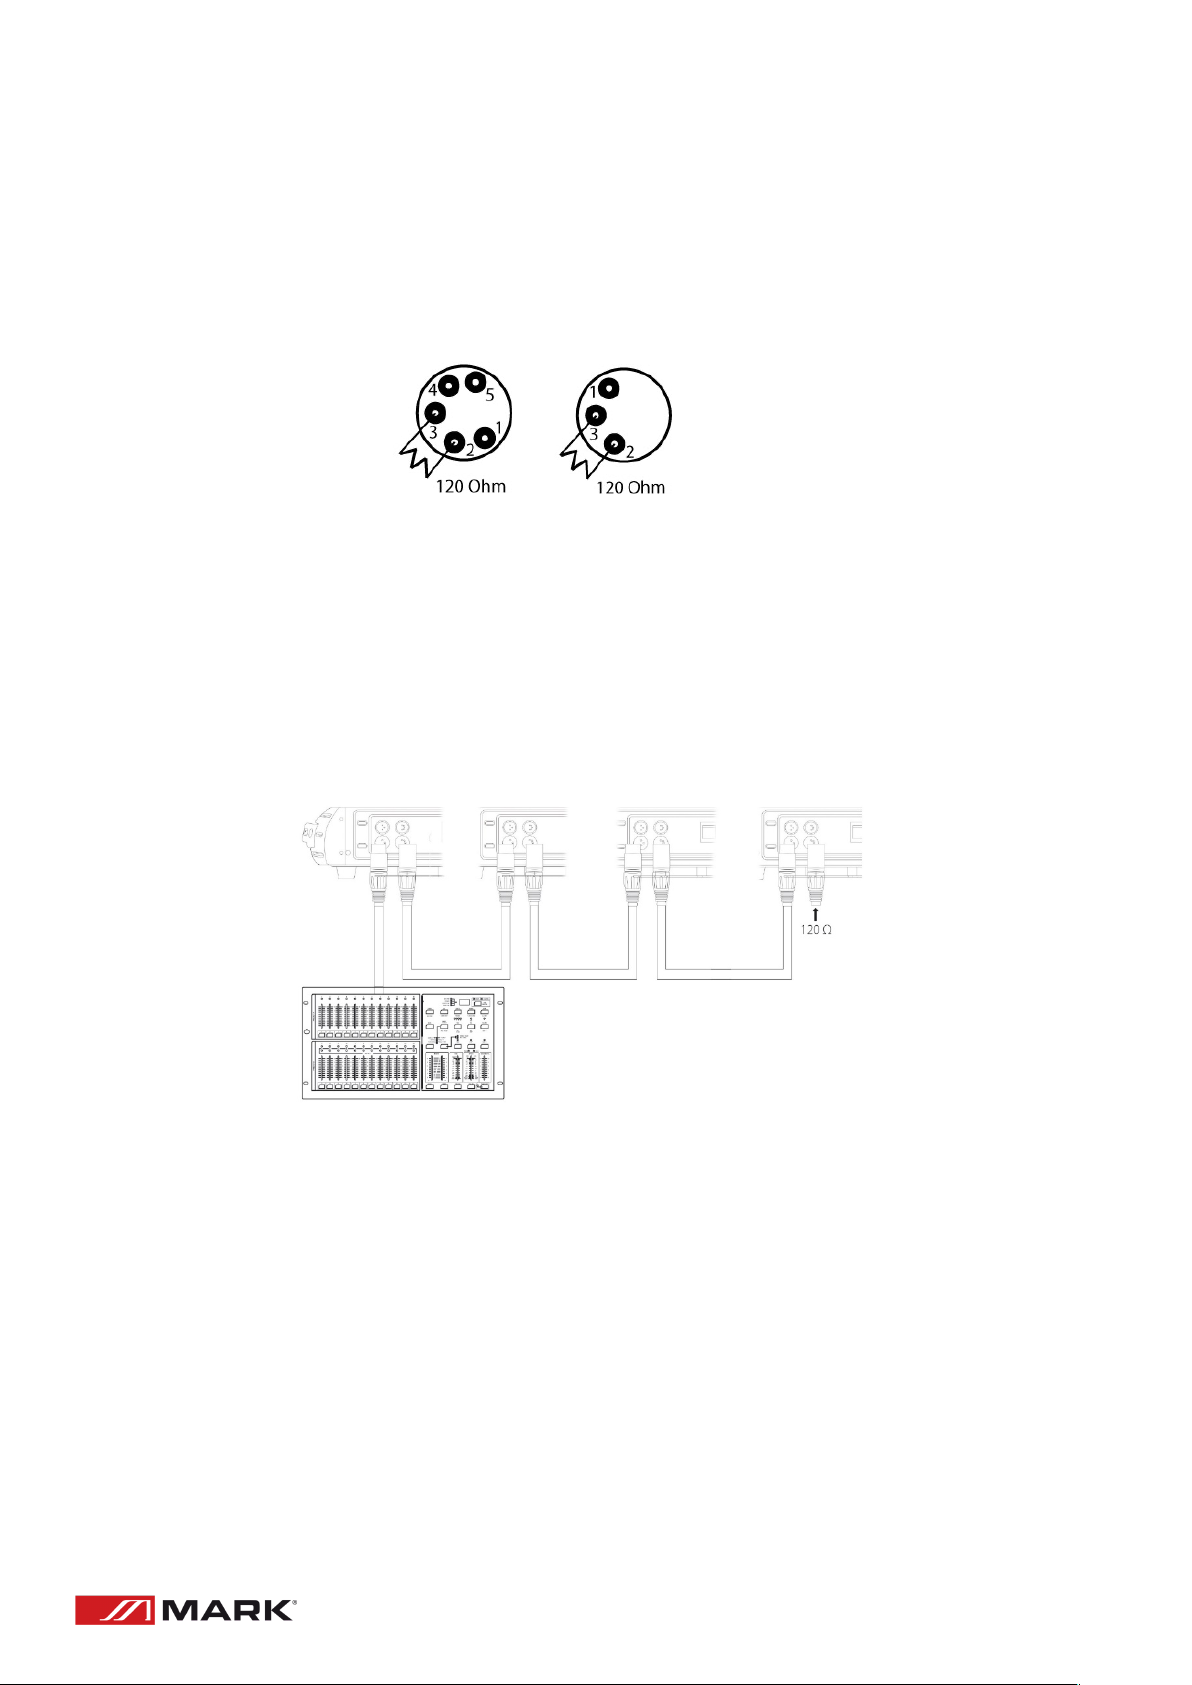
BEAM LED 150 includes a DMX cable with 3 contact pins:
Pin 1: Ground
Pin 2: Connect it to the negative pin
Pin 3: Connect it to the positive pin
The DMX cable must use the professional shielded twisted pair cable. Standard loudspeaker cable is
not reliable to control the long-range data. 24AWG cable is suitable. For more than 300 meters long-
distance signal transmission a \ DMX 512 signal amplifier must be added.
Don’t overload the connection. One continuous connection can only support up to 30 devices.

5
If a DMX512 splitter is used, follow these instructions:
At first, connect the DMX512 terminal from the controller to the DMX input in the first device. Use
another cable to connect the DMX output to the DMX input of the second device, and so on. To prevent
system errors, the last device in a DMX chain needs to be equipped with a terminating resistor (120
ohm, 1/4 Watt).
BEAM LED 150 has on its front panel a touch display in order to navigate through several menus and
select functions, settings or information. Before turning on the device, make sure the PAN and TILT
locks ARE UNLOCKED. Connect the device to an adequate power supply point and the DMX signal from
a console.
To connect more than one unit in parallel, please, follow this draw. The output of the first unit must
provide to the next DMX input of the signal, this way it is possible to send the signal to all the devices
in the chain.

6
ADVANCED USE
Control touch menus
MAIN MENU
SUBMENU 1
SUBMENU 2
DMX ADDRESS
1-512
FIXTURE
DMX MODE
STD/EXT (16/20 CH)
RUN MODE
DMX/HOST/SOUND
PAN INVERT
CLOSE/OPEN
TILT INVERT
CLOSE/OPEN
MANUAL
PAN
0 - 255
PAN FINE
0 - 255
TILT
0 - 255
TILT FINE
0 - 255
……
0 - 255
RESET
0 - 255
INFORMATION
TIME
CURRENT TIME:xxx H
SHOW TIME:xxx H
Power Count: xxx
SENSOR
Sensor information
TEMPERATURE
Head Temp: xxx C
Fan Speed: xxxx RPM
SOFTWARE VERSION
Panel: Vx.xxx
XY Motor: Vx.xxx
Motor: Vx.xxx
FACTORY
PASSWORD
0 - 255
PAN
0 - 255
TILT
0 - 255
DIMMER
0 - 255
COLOR
0 - 255
FIXGOBO
0 - 255
COLORFUL
0 - 255
FROST
0 - 255
PRISM1
0 - 255
PRISM2
0 - 255
ZOOM
0 - 255
RESET
ALL RESET
CANCEL/RUN
FACTORY
CANCEL/RUN
DISPLAY
LANGUAGE
EN
DISPLAY FLIP
CLOSE/OPEN
DISPLAY MODE
SHOW/60 s

7
DMX Channels
20 CH mode
16 CH mode
Function
Value
Explanation
1
1
PAN
0-255
Pan 0-540º
2
2
PAN FINE
0-255
Pan Fine
3
3
TILT
0-255
Tilt 0-270º
4
4
TILT FINE
0-255
Tilt fine
5
*
PANT/TILT
SPEED
0-255
PAN/TILT movement speed
6
5
STROBE
0-3
Closed
4-103
From slow to fast strobe
104-107
On
108-207
From slow to fast strobe pulse
208-212
On
213-225
Random strobe (slow(
226-238
Random strobe (medium)
239-251
Random strobe (Fast)
252-255
On
7
6
DIMMER
0-255
From minimum to maximum
8
*
DIMMER FINE
0-255
From minimum to maximum
9
7
COLOR
0-4
White
5-9
White+Red
10-14
Red
15-19
Red+Amber
20-24
Amber
25-29
Amber+Cyan
30-34
Cyan
35-39
Cyan+CTO
40-44
CTO
45-49
CTO+Frost white
50-54
Frost white
55-59
Frost white+Magenta
60-64
Magenta
65-69
Magenta+Dark Green
70-74
Dark Green
75-79
Dark Green+Blue
80-84
Blue
85-89
Blue+UV Blue
90-94
UV Blue
95-99
UV Blue+Yellow
100-104
Yellow
105-109
Yellow+Light Green
110-114
Light Green
115-119
Light Green+Pink
120-124
Pink
125-129
Pink+Light Yellow
130-134
Light Yellow
135-139
Light Yellow+white
140-149
White
150-199
From fast to slow rainbow
200-205
Stop
206-255
From slow to fast rainbow
10
*
COLOR FINE
0-255
From minimum to maximum
11
8
GOBO
0-9
Spot
10-19
Gobo 1
20-29
Gobo 2
30-39
Gobo 3

8
20 CH mode
16 CH mode
Function
Value
Explanation
40-49
Gobo 4
50-59
Gobo 5
60-69
Gobo 6
70-79
Gobo 7
80-89
Gobo 8
90-99
Gobo 9
100-109
Gobo 10
110-119
Gobo 11
120-127
Slow to fast gobo 1 shaking
128-135
Slow to fast gobo 2 shaking
136-143
Slow to fast gobo 3 shaking
144-151
Slow to fast gobo 4 shaking
152-159
Slow to fast gobo 5 shaking
160-167
Slow to fast gobo 6 shaking
168-175
Slow to fast gobo 7 shaking
176-183
Slow to fast gobo 8 shaking
184-191
Slow to fast gobo 9 shaking
192-199
Slow to fast gobo 10 shaking
200-207
Slow to fast gobo 11 shaking
208-230
Gobo running (Fast to slow)
231-232
Stop
233-255
Gobo running (Slow to fast)
12
9
ZOOM
0-255
Near to Far
13
*
ZOOM FINE
0-255
Near to Far
14
10
COLOR FILTER
0-127
Off
128-255
From minimum to maximum
15
11
FROST
0-255
Linear frost from minim to maximum
16
12
PRISM 1
0-127
OFF
128-255
Prism 1 ON
17
13
PRISM 1
ROTATION
0-63
PRISM 1 Positioning
64-126
From fast to slow forward rotation
127-128
Stop
129-191
From slow to fast backward rotation
192-255
From slow to fast backward/forward rotation
18
14
PRISM 2
0-127
OFF
128-255
Prism 2 ON
19
15
PRISM 2
ROTATION
0-63
PRISM 2 Positioning
64-126
From fast to slow forward rotation
127-128
Stop
129-191
From slow to fast backward rotation
192-255
From slow to fast backward/forward rotation
20
16
RESET
0-199
NO RESET
200-255
RESET

9
TROUBLESHOOTING
This short guide is meant to help and try to solve simple problems. If they continue and the device
cannot operate, please, don’t try to repair it by yourself, return the device to your MARK dealer.
No Light -The power supply.
1- Check that the unit is plugged into an appropriate power supply.
2- Check if the fuse is not blown, if it is, change it with one that keeps the same technical features.
If once the fuse is ok the device again blown it, please, don’t change it again, contact the MARK
technical service.
3- If you are unable to determine the cause of the problem, do not open the device, as this may
damage the unit and the warranty will become void.
4- Return the device to your MARK dealer.
No DMX - Response: Verify that the DMX connection cable is correctly inserted in the device, verify
that the cable itself is not defective, or that the controller is operating correctly.
1- Check the DMX setting. Make sure that DMX addresses are correct.
2- Check the DMX cable: Unplug the unit; change the DMX cable; then reconnect to electrical
power. Try your DMX control again.
3- Determine whether the controller or light effect is at fault. Does the controller operate properly
with other DMX products? If not, take the controller in for repair. If so, take the DMX cable and
the light effect to a qualified technician.

10
INDICACIONES DE SEGURIDAD
1. Lea detenidamente las siguientes instrucciones y preste atención a estas.
2. Guarde en un lugar seco y seguro este manual.
3. Siga una a una todas estas instrucciones.
4. Respete las instrucciones de seguridad de su país cuando instales este dispositivo.
5. No use este dispositivo cerca del agua o zonas altamente húmedas. A la hora de limpiarlo, utilice un
paño seco.
6. No instale el dispositivo cerca de ninguna fuente de calor o fuego tales como calefactores, estufas o
incluso amplificadores que produzcan calor. Asegúrese de que, una vez instalado el dispositivo, esté
en un lugar fresco y seco.
7. No obstruya ninguna de las salidas. Cuando instale el dispositivo hágalo tal y como lo indican estas
instrucciones.
8. Proteja el cable de alimentación para no ser pisado o manipulado.
9. Instale y sitúe el dispositivo con garras, abrazaderas o de forma soldada entre su base y la sujeción.
10. Únicamente utilice accesorios especificados por MARK.
11. Desenchufe el dispositivo si no va a ser utilizado en largos periodos de tiempo.
12. El dispositivo será reparado por el servicio técnico oficial cuando esté dañado, tal como el cable
este deteriorado o el conector esté estropeado, así como si el dispositivo ha sufrido contacto con
líquidos o no opera correctamente.
13. No exponga este equipo a líquidos, gotas, ni salpicaduras, así como su ubicación cerca de
recipientes o posibles fuentes de líquidos.
14. Para desconectar totalmente la unidad de la red eléctrica principal, desconecte el cable de la propia
red eléctrica.
15. El conector principal debe poder conectarse y desconectarse de la red eléctrica de manera fácil, si
no es así, no intente manipular ni el cable ni la conexión bajo la red eléctrica.
16. ATENCIÓN. Para reducir el riesgo de fuego o shock eléctrico, no exponga este dispositivo bajo la
lluvia o la humedad.

11
DESCRIPCIÓN GENERAL
BEAM LED 150 es una cabeza móvil que combina una tecnología avanzada y un amplio rango de
funcionalidades para la creación de todo tipo de eventos de iluminación.
BEAM LED 150 dispone de 1 rueda de color con 13 colores + blanco, y una rueda de 11 gobos + spot,
incluyendo la función shaking.
BEAM LED 150 integra 2 prismas rotativos, funciones tales como estrobo, y enfoque. Su pantalla LCD
y botones, permiten navegar a través de un sistema de menú completo, incluida la información del
dispositivo (temperatura interna, chequeo de motores, inversión de ejes, etc.)
Datos Técnicos:
Alimentación
100-240 V 50/60 Hz
Consumo
120 W
Tipo de lámpara
LED Blanco de 80W
Ángulo del haz
0° - 4°
Dimmer
0-100 Ajuste lineal
Pan
540º 8-16 bit
Tilt
270º 8-16 bit
Modos de funcionamiento
DMX, Auto, Master/Slave
Canales DMX
16/20 canales
Ruedas de color
13 colores + blanco
Ruedas de gobos
11 gobos + spot. Estáticos y función shaking
Entrada
XLR 3-pin
Salida
XLR 3-pin
Dimensiones (AnxAlxPr)
285x490x230 mm
Peso
7 Kg
Características:
- Cabeza móvil con funcionalidad spot.
- 16/20 canales DMX.
- 13 colores + blanco.
- 11 gobos + spot. Estáticos y función shaking.
- 2 prismas rotativos.
- Pantalla LCD y botones de configuración.

12
USO E INSTALACIÓN
Este producto es sólo para uso profesional y no debe utilizarse para un propósito diferente.
El producto está diseñado para su uso en interior, con un grado de protección IP 20. La lámpara debe
mantenerse seca, evitando ambientes húmedos, polvorientos o de excesivo calor.
Evite que la lámpara entre en contacto con agua o cualquier otro líquido para evitar problemas como:
fuego, sobrecalentamiento, descargas eléctricas o que la lámpara estalle, pudiendo causar daños
serios.
Asegúrese de que cuando está siendo instalado en una estructura de truss, las garras que sujetan el
dispositivo están correctamente cerradas. Toda estructura donde vayan a ser instalados estos
dispositivos debe ser capaz de soportar su peso.
Sobrecalentamiento
No ponga en marcha la unidad si la temperatura ambiente es superior a los 40º C.
Prevención de rotura
Las lentes deben ser reemplazadas cuando estén dañadas o presenten algún tipo de problema.
Reemplace siempre las partes dañadas por unas originales suministradas por su proveedor MARK.
Prevención ante posibles daños
Si el dispositivo necesita ser transportado, por favor, evite que lo haga una sola persona. Por favor,
verifique que el lugar de instalación es capaz de soportar hasta 10 veces el peso de la unidad y utilice
siempre un cable de acero como medida auxiliar de seguridad entre el dispositivo y la estructura.
Protección frente a una rotura de la lámpara
Se recomienda no mirar fijamente de manera directa al haz de luz. Nunca ponga en marcha la unidad
sin las lentes. Las lentes y cubierta superior deben ser periódicamente sustituidas si se aprecia algún
daño o rotura. El dispositivo debe utilizarse con la cubierta de protección superior colocada.
Prevención frente a shock eléctrico
La conexión eléctrica al dispositivo debe ser realizada sólo por personal cualificado. Antes de instalar,
asegúrese de conectarla a una red eléctrica que trabaje bajo los mismos parámetros.
Cada dispositivo debe ser conectado a tierra e instalado de acuerdo con los estándares vigentes.
Desconecte la alimentación cuando reemplace la lámpara o el fusible. No use el dispositivo durante
tormentas eléctricas o ambientes húmedos.

13
Prevención frente incendios
1. Nunca instale el dispositivo directamente a una superficie de material combustible.
2. No cortocircuite el sensor de temperatura ni el fusible y utilice el fusible especificado en caso de
sustitución.
3. El equipo debe instalarse lejos de materiales inflamables y explosivos.
4. El equipo debe tener unos 3 metros alrededor de espacio libre.
5. Los ventiladores o tomas de ventilación no pueden ser cubiertos.
6. No cubra la lente.
7. Antes de guardar el dispositivo permita que se enfríe durante unos 20 minutos.
8. Si cambia alguno de los elementos del dispositivo hágalo siempre con repuestos originales. Para
ello contacte con su proveedor MARK.!
Transporte seguro
Con el fin de proteger la unidad, este dispositivo cuenta con un bloqueo vertical del brazo para detener
los movimientos no deseados. Durante el transporte, el bloqueo debe permanecer activado
salvaguardando el dispositivo de movimientos indeseados.
Guardado
1. Antes de guardar el dispositivo, asegúrese de que la unidad esté apagada y espere al menos 20
minutos para que se enfríe.
2. Antes de limpiar la lente, asegúrese de que tanto el eje vertical como el eje horizontal están
bloqueados.
3. Después de guardarlo en su bolsa de plástico, coja la unidad por las asas y guárdela dentro del
flightcase.
Desempaquetado
Nota: Antes de desembalar compruebe si hay daños y se han debido al transporte. Si encuentra algún
daño, no utilice este artículo y póngase en contacto con el distribuidor de MARK.
1. Abra el flightcase y saque la bolsa de plástico interior.
2. Levante el producto por sus dos asas junto a la base inferior y extráigala.
3. Asegúrese de haber abierto el bloqueo del eje vertical y horizontal, y después encienda la unidad.
Atención
BEAM LED 150 incluye un cable DMX con 3 pines de contacto:
Pin 1: Tierra
Pin 2: Conéctelo al pin negativo
Pin 3: Conéctelo al pin positivo
El cable DMX debe usar el cable de par trenzado blindado profesional. El cable de altavoz estándar no
es fiable para controlar los datos de largo alcance. El cable 24AWG es adecuado para una transmisión
de señal. Con distancias de más de 300 metros, debe agregar un amplificador de señal \ DMX 512.

14
No sobrecargue la conexión. Una conexión continua sólo puede soportar hasta 30 dispositivos.
Si se utiliza un splitter DMX512, siga esta instrucción:
En primer lugar, conecte el cable DMX512 desde la salida del controlador a la entrada DMX del primer
dispositivo. Use otro cable para conectar la salida DMX a la entrada DMX del segundo dispositivo, y así
sucesivamente. Para evitar errores del sistema, el último dispositivo en una cadena DMX necesita estar
equipado con una resistencia de terminación (120 ohm, 1/4 vatios).
BEAM LED 150 tiene en su panel frontal una pantalla para navegar por el menú y la selección de
funciones, efectos y ajustes. Para encender la unidad, por favor, conéctela primero a la red, asegúrese
de que todo esté conectado correctamente en el dispositivo y, si no presenta ningún problema,
encienda el dispositivo.
Para conectar más de una unidad en modo esclavo siga el siguiente esquema. La salida de la primera
unidad debe proporcionar a la siguiente entrada DMX de la señal, de esta manera es posible enviar la
señal a todos los dispositivos de la cadena.

15
USO AVANZADO
Menús accesibles desde el panel y teclado:
MENÚ PRINCIPAL
SUBMENU 1
SUBMENU 2
DMX ADDRESS
1-512
FIXTURE
DMX MODE
STD/EXT (16/20 CH)
RUN MODE
DMX/HOST/SOUND
PAN INVERT
CLOSE/OPEN
TILT INVERT
CLOSE/OPEN
MANUAL
PAN
0 - 255
PAN FINE
0 - 255
TILT
0 - 255
TILT FINE
0 - 255
……
0 - 255
RESET
0 - 255
INFORMATION
TIME
CURRENT TIME:xxx H
SHOW TIME:xxx H
Power Count: xxx
SENSOR
Sensor information
TEMPERATURE
Head Temp: xxx C
Fan Speed: xxxx RPM
SOFTWARE VERSION
Panel: Vx.xxx
XY Motor: Vx.xxx
Motor: Vx.xxx
FACTORY
PASSWORD
0 - 255
PAN
0 - 255
TILT
0 - 255
DIMMER
0 - 255
COLOR
0 - 255
FIXGOBO
0 - 255
COLORFUL
0 - 255
FROST
0 - 255
PRISM1
0 - 255
PRISM2
0 - 255
ZOOM
0 - 255
RESET
ALL RESET
CANCEL/RUN
FACTORY
CANCEL/RUN
DISPLAY
LANGUAGE
EN/CH
DISPLAY FLIP
CLOSE/OPEN
DISPLAY MODE
SHOW/60 s

16
Canales DMX
20 canales
16 canales
Función
Valor
Explicación
1
1
PAN
0-255
Pan 0-540º
2
2
PAN FINO
0-255
Pan Fino
3
3
TILT
0-255
Tilt 0-270º
4
4
TILT FINO
0-255
Tilt fino
5
*
VELOC. PAN/TILT
0-255
Velocidad movimiento PAN/TILT
6
5
STROBO
0-3
Cerrado
4-103
Strobo de lento a rápido
104-107
On
108-207
Strobo modo pulso de rápido a lento
208-212
On
213-225
Strobo random (lento)
226-238
Strobo random (medio)
239-251
Strobo random (Rápido)
252-255
On
7
6
DIMMER
0-255
De mínimo a máximo
8
*
DIMMER FINO
0-255
De mínimo a máximo
9
7
COLOR
0-4
Blanco
5-9
Blanco+Rojo
10-14
Rojo
15-19
Rojo+Ambar
20-24
Ambar
25-29
Ambar+Cyan
30-34
Cyan
35-39
Cyan+CTO
40-44
CTO
45-49
CTO+Blanco Frost
50-54
Blanco Frost
55-59
Blanco Frost +Magenta
60-64
Magenta
65-69
Magenta+Verde oscuro
70-74
Verde oscuro
75-79
Verde oscuro +Azul
80-84
Azul
85-89
Azul+Azul UV
90-94
Azul UV
95-99
Azul UV +Amarillo
100-104
Amarillo
105-109
Amarillo +Verde claro
110-114
Verde claro
115-119
Verde claro +Rosa
120-124
Rosa
125-129
Rosa+Amarillo claro
130-134
Amarillo claro
135-139
Amarillo claro +Blanco
140-149
Blanco
150-199
Efecto rainbow de rápido a lento
200-205
Stop
206-255
Efecto rainbow de lento a rápido
10
*
COLOR FINO
0-255
De mínimo a máximo
11
8
GOBO
0-9
Spot
10-19
Gobo 1
20-29
Gobo 2
30-39
Gobo 3
40-49
Gobo 4
50-59
Gobo 5
60-69
Gobo 6

17
20 canales
16 canales
Función
Valor
Explicación
70-79
Gobo 7
80-89
Gobo 8
90-99
Gobo 9
100-109
Gobo 10
110-119
Gobo 11
120-127
Efecto shaking de gobo 1 de lento a rápido
128-135
Efecto shaking de gobo 2 de lento a rápido
136-143
Efecto shaking de gobo 3 de lento a rápido
144-151
Efecto shaking de gobo 4 de lento a rápido
152-159
Efecto shaking de gobo 5 de lento a rápido
160-167
Efecto shaking de gobo 6 de lento a rápido
168-175
Efecto shaking de gobo 7 de lento a rápido
176-183
Efecto shaking de gobo 8 de lento a rápido
184-191
Efecto shaking de gobo 9 de lento a rápido
192-199
Efecto shaking de gobo 10 de lento a rápido
200-207
Efecto shaking de gobo 11 de lento a rápido
208-230
Cambio de gobo (Rápido a lento)
231-232
Stop
233-255
Cambio de gobo (Lento a rápido)
12
9
ZOOM
0-255
Cerca a lejos
13
*
ZOOM FINO
0-255
Cerca a lejos
14
10
COLOR FILTER
0-127
Off
128-255
De mínimo a máximo
15
11
FROST
0-255
Frost lineal de mínimo a máximo
16
12
PRISMA 1
0-127
OFF
128-255
Prism 1 ON
17
13
ROTACION
PRISMA 1
0-63
Posicionado PRISMA 1
64-126
Rotación hacia adelante de rápido a lento
127-128
Stop
129-191
Rotación hacia atrás de lento a rápido
192-255
Rotación Adelante/atrás de lento a rápido
18
14
PRISMA 2
0-127
OFF
128-255
Prism 1 ON
19
15
ROTACION
PRISMA 2
0-63
Posicionado PRISMA 1
64-126
Rotación hacia adelante de rápido a lento
127-128
Stop
129-191
Rotación hacia atrás de lento a rápido
192-255
Rotación Adelante/atrás de lento a rápido
20
16
RESET
0-199
NO RESET
200-255
RESET

18
POSIBLES PROBLEMAS Y SOLUCIÓN
Esta guía pretende ayudar a resolver problemas simples y comunes que pueden aparecer en el uso del
dispositivo. Si los problemas persisten, no intente abrir y reparar la unidad por sí solo, contacte con su
distribuidor MARK más cercano.
Si el dispositivo no se ilumina: Posibles problemas: Fuente de alimentación
1- Asegúrese de que la unidad esté correctamente conectada.
2- Compruebe que el fusible no está dañado. En caso de estarlo, reemplácelo por uno de las
mismas características. Si una vez reemplazado vuelve a fundirse y la unidad sigue sin funcionar
contacte el servicio técnico de MARK.
3- Si todo lo anterior parece que no está dañado, puede conectar la unidad a la red eléctrica.
4- Si usted no puede determinar la causa de los problemas que presenta la unidad, no la desmonte
o intente reparar por sí mismo ya que perderá la garantía.
5- Devuelva la unidad a servicio técnico de MARK.
Si no responde el protocolo DMX: Posibles problemas: Verifique que el cable de conexión DMX está
correctamente insertado en el dispositivo, verifique que el propio cable no está defectuoso, o que el
controlador funciona correctamente.
1- Verifique las características DMX y que la dirección asignada es correcta.
2- Verifique el cable DMX: Desinstale la unidad, cambie el cable DMX y vuelva a conectar el
dispositivo a la red eléctrica, verifique de nuevo el control DMX.
3- Determine si el control está defectuoso. ¿El dispositivo opera correctamente con otras unidades
DMX? Si no es así, lleve la unidad a ser reparada al servicio técnico oficial o a un técnico
cualificado.

19
Table of contents
Languages:
Other Mark Dj Equipment manuals

Mark
Mark SUPERPARLED 136 User manual

Mark
Mark Superparled 355 IP User manual

Mark
Mark DecoPAR DPR36 User manual

Mark
Mark BEAM 350 User manual

Mark
Mark MOVILED 183 W User manual

Mark
Mark BEAM 190 User manual

Mark
Mark MINI BEAM 101 User manual

Mark
Mark MMC 2000 User manual

Mark
Mark BEAM 198 MKII User manual

Mark
Mark MRACK 12E User manual