OPERATION:
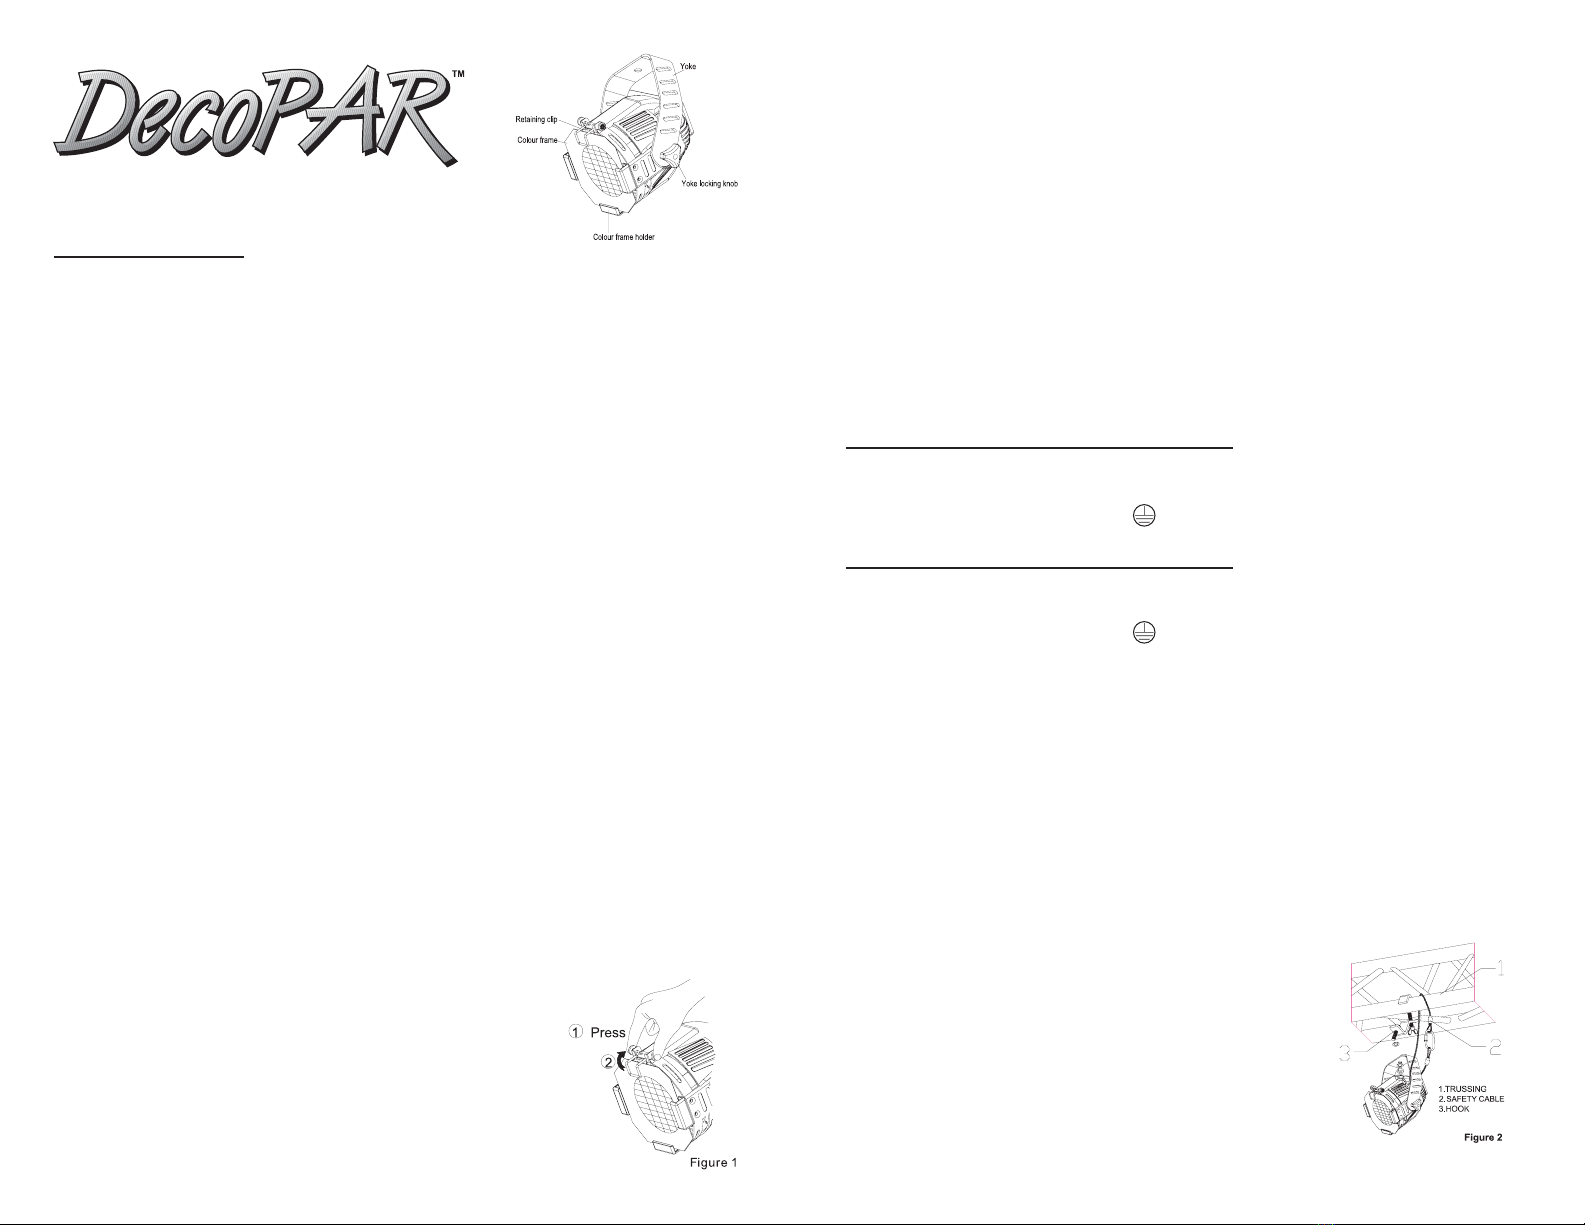
Installation With Clam
Select n ppropri te cl mp from your de ler to tt ch the fixture to mounting pipe
(e.g. truss system) nd djust the position of the fixture once it is mounted (Figure 2).
1. Tightly f sten the cl mp to the yoke with the provided
yoke bolt nd lock w sher.
2. Pl ce the cl mp on mounting pipe; tighten the pipe bolt
to secure it.
3. Loosen the cl mp p n screw nd rot te the yoke to the
desired position.
4. Tighten the p n screw to lock the fixture into position.
5. Adjust the desired inclin tion ngle vi the yoke nd
fix the yoke locking knob.
6. Alw ys use ppropri te s fety c ble.
Model No: DPR30
IMPORTANT SAFETY INSTRUCTIONS.
1. Prior to initi l st rt-up, m ke sure th t there is no shipping d m ge. Should there
be ny, consult your de ler nd do not use the device.
2. CAUTION! High volt ge c n inflict d ngerous electric shock when touching
uninsul ted wires! Keep w y from he ters nd other he ting sources!
3. Do not mount the device on or ne r combustible surf ces.
4. Alw ys inst ll the device with the color fr me ret ining clip in the locked position.
5. This device f lls under protection-cl ss I, therefore it is essenti l th t the yellow/green
conductor get connected to ground. The electric connection must be c rried out by
qu lified person
6. M ke sure th t the power cord is not crimped or d m ged by sh rp edges.
Periodic lly inspect the device nd the power cord for d m ge.
8. If the extern l flexible c ble or cord of this lumin ire is d m ged, must be exclusively
repl ced by qu lified de ler.
9. Never let the power cord come into cont ct with other c bles! H ndle the power
cord nd ll connections with the m ins with p rticul r c ution!
10. Alw ys disconnect from the m ins when the device is not in use or before cle ning
it. Only h ndle the power cord by the plug. Never pull out the plug by tugging the
power cord.
11. During the initi l st rtup some smoke or odor m y rise. This is norm l process
due to new p int nd m teri ls nd does not necess rily me n th t the device is
defective.
12. DANGER OF BURNS! Never touch the device during oper tion! The housing
he ts up to m x. temper ture (Ts) of 100°C / 212°F.
13. Do not switch the device on nd off in short interv ls s this will reduce the life sp n
of the l mp.
14. HEALTH HAZARD! Never look directly into the light source. Sensitive persons
m y suffer n epileptic shock
15. Children nd inexperienced personnel should not oper te this device.
16. There re no end-user service ble p rts inside the device. M inten nce nd service
oper tions re only to be c rried out by qu lified de ler.
Installing / Connection with the Mains
1. ELECTRICAL SHOCK HAZARD! The electric connection must only be c rried
out by qu lified electrici n!
2. In order to connect the device to the m ins, power-plug must be inst lled.
3. Configur tion of connection-c bles is s follows:
US
C ble Pin Intern tion l
Bl ck Live L
White Neutr l N
Green Ground
IEC
C ble Pin Intern tion l
Brown Live L
Blue Neutr l N
Yellow/Green Ground
4. The ground must be connected!
5. Connect the device to the m ins with the power-plug.
6. If the device will be directly connected with the loc l power supply network,
disconnection switch with minimum opening of 3 mm t every pole must be
included in the perm nent electric l inst ll tion.
Installing the Iam
Alw ys repl ce the l mp if it becomes d m ged or deformed.
Caution! Operating lamps above their rated voltage reduces
lamp life and can cause premature lamp failure. For the
installation, you need one PAR30 or J R lamp up to max.
75W.
1. Disconnect the unit from power before inst lling the l mp.
WARNING! Let lamp cool before changing.
2. Remove the color fr me from its holder (Figure 1). Note: To avoid premature lamp
failure, do not touch the lamp glass with your fingers. If you touch the lamp during
installation, clean it carefully with 90% or better isopropyl alcohol and a clean lint-
free cloth before operation.
3. Unscrew the old l mp from the housing; screw the new l mp into the socket.
4. Repl ce the color fr me into the holder.


