manuals.online logo
Brands
  1. Home
  2. •
  3. Brands
  4. •
  5. Martec
  6. •
  7. Fan
  8. •
  9. Martec VIPER DC Series User manual

Martec VIPER DC Series User manual

E: [email protected] | P: 02 8778 7500
www.martecaustralia.com.au
VIPER DC Series Installation Guide
Thanks for choosing our VIPER DC Series ceiling fan.
We strongly recommend that you read this manual carefully before installation.
Models Parameters (Fan Only):-
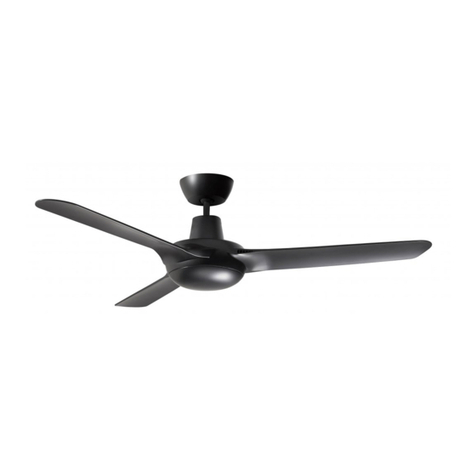
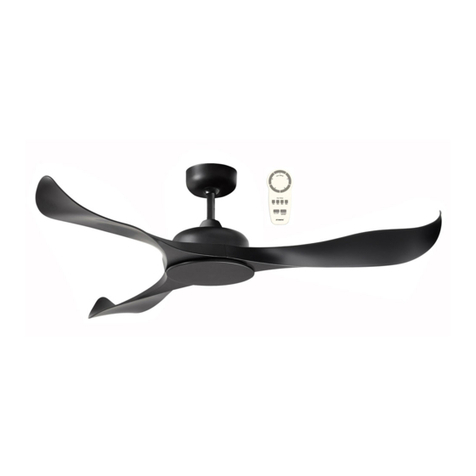
MVDC133MMR 1320mm 3 Blade Ceiling Fan Matt Black with remote control
MVDC133WSR 1320mm 3 Blade Ceiling Fan White Satin with remote control
Models Parameters (Fan and Light):-
MVDC1333MMR 1320mm 3 Blade Ceiling Fan Matt Black, 18W Tricolour LED Light with remote control
MVDC1333WSR 1320mm 3 Blade Ceiling Fan White Satin, 18W Tricolour LED Light with remote control
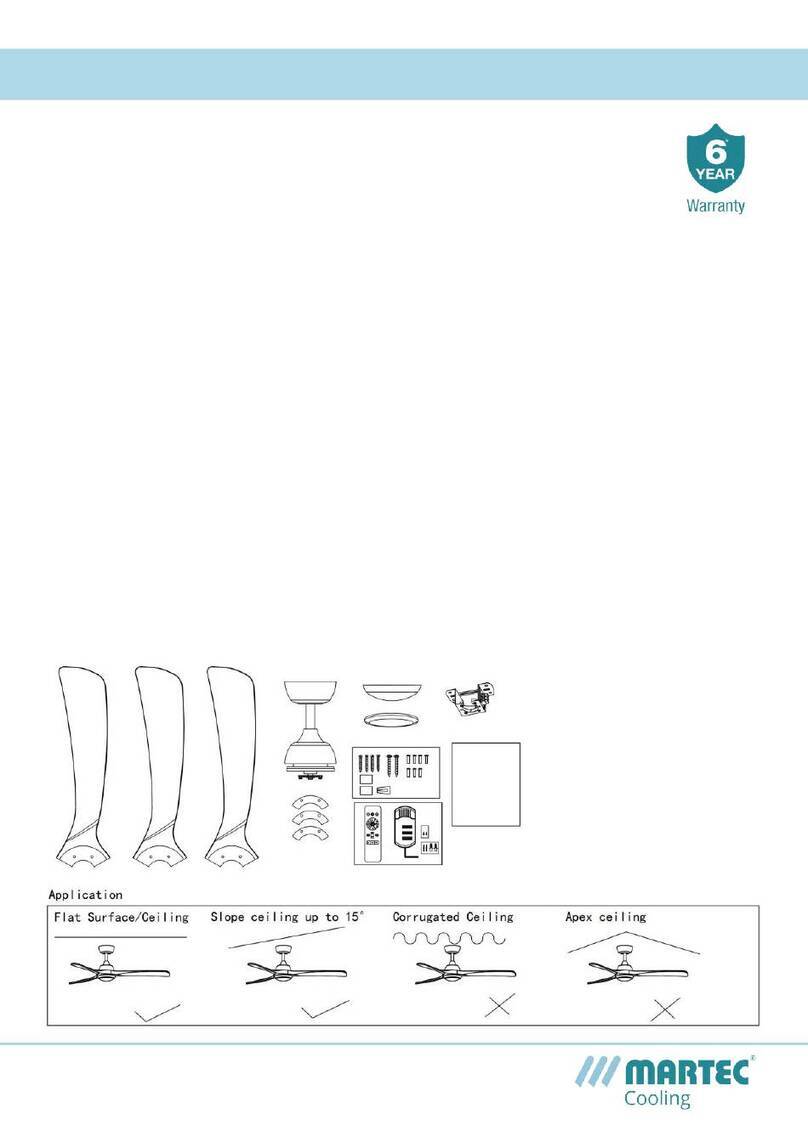
Part List:
Qty 1x motor assembly Qty 1x instruction manual Qty 1x screw kit Qty 3x blades
Qty 1x balancing kit Qty 1x hanging bracket Qty 1x remote control kit
Application
Flat Surface / Ceiling Corrugated Ceiling Apex Ceiling
Slope Ceiling up to 15°
How to Assemble
Secure the hanger bracket
to ceiling beam or a suitable
piece of timber inserted
between the ceiling beams
using the two long screws
supplied with the package.
(See Fg.1)
Place circular shockproof
gasket above the hanger
bracket. Align the bracket
and screw the hanger
bracket to the ceiling tightly.
(See Fg.2)
Place fan into hanger
bracket and align Ball Joint
Slot with hanger bracket as
illustrated.(See Fg.3)
After wiring is completed,
attach the canopy to the
hanger bracket by pushing
upwards and twisting anti-
clockwise. Tighten screws
and ensure canopy is not
touching the ball joint.
(See Fg.4)
Fg.1 Fg.2 Fg.3 Fg.4
Ball seat
rubber
cover
(packed
with
hanger
bracket)
Anti-vibration
washer
E: [email protected] | P: 02 8778 7500
www.martecaustralia.com.au
WARNING Installation MUST carry out by a qualied and licensed electrician.
How to Install Blades
How to Install / Remove the Cover
Connect the 2-pin
connectors from motor
housing with the light kit
plate.
Install the light kit plate
to the motor using screw
provided.
Slot the plastic cover into the
light kit. (See Fg.6)
Fg.6
CCT (Colour Changeable Temperature)
Fg.8
NB: Ensure the blades do not get damaged or bent during the
installation process while the fan maybe on the ground, this will aect
the performance and balance of the fan and this is NOT covered under
warranty.
Attach the blade to the top of the motor. Tighten and secure blade
with screws and washers provided. Repeat this procedure until all
blades are installed. (See Fg.5)
Fg.5
Install the shade cover into
the bottom of ceiling fan
(See Fg.7)
Fg.7Model shown with light Model shown fan only
Choose colour temperature by icking the switch in the
LED (See Fg.8)
C = 5000K cool white
N = 4000K neutral white
W = 3000K warm white
Dimming
The VIPER ceiling fan has a smart 3 step dimming LED light module which doesn’t require a dimmable remote control or a wall dimmer.
It only requires a remote control kit supplied with the product.
Turn the switch on and the light will turn on. Flick the switch on/o within 1 second and the light output will dim down to approx. 50%.
Flick the switch on/o again and the light output will dim down to approximately 15%. The light kit has memory function.
E: [email protected] | P: 02 8778 7500
www.martecaustralia.com.au
WARNING Installation MUST carry out by a qualied and licensed electrician.
Instructions and Functions of Transmitter
1. LED indicator light
2. Light ON/OFF
(Use to dim light within 1s)
3. Speed of the fan
(1 high speed - 5 low speed)
4. Timing control of the fan
5. Direction of the fan (reverse
switch)
6. Fan ON/OFF
7. 12v battery to be used
in transmitter
NB: Remote shown fan and light NB: Remote shown fan only 1. LED indicator light
2. Speed of the fan
(1 high speed - 5 low speed)
3. Timing control of the fan
4. Direction of the fan (reverse
switch)
5. Fan ON/OFF
6. 12v battery to be used in
transmitter
Installing Receiver Remote Control
Pairing Instructions
• Turn “ON” the power supply and within 30 seconds
• Press and hold the transmitters “FAN ON/OFF” button for 5 seconds and a “beep” will be heard
• Pairing initial step must be performed within 30 seconds of power being turned on
i) ensure the isolation switch or power supply to the rst installed fan is turned o prior to pairing futher fans
ie. pair one fan at a time
ii) ensure isolation switch is kept to the ON position, the isolation switch is not to be used as a light switch as
this will damage and make the remote recevier inoperable
Important Reminders
• Receiver must be correctly installed in the mounting bracket
• When the transmitter cannot control the receiver, please check
i) has sucient battery in the transmitter
ii) any existence of similar remote controlled products nearby that cause interference
• Replace battery if getting low as this will aect sensitivity of the transmitter
• Take the battery out from the transmitter when leaving used for a long time to avoid battery leaks
• Support up to 200W lighting power
• Isolation switch MUST be connected in the line
• Dimming switch on the light models is operated by tuning the light ON/OFF button within 1s. Light output will dim in
stages from 18W to 9W to 3W approximately
E: [email protected] | P: 02 8778 7500
www.martecaustralia.com.au
WARNING Installation MUST carry out by a qualied and licensed electrician.
Wire Connections
CARE INSTRUCTIONS
• Ensure the ceiling fan is disconnected before any cleaning or maintenance work is carry out.
• LED lights are not detachable nor replaceable. It can only be supplied with the ceiling fan as one unit.
WARNING
• Installation of fans MUST follow SAA standards and meet local authority regulations.
• Installation MUST be carried out by a qualied and licensed electrician.
• Fan and light MUST be earthed.
• Bracket MUST be rmly attached to a at solid structure or timber frame.
• DO NOT mix blades from one model to another, all blades MUST be replaced if damaged.
• The warranty is VOID if product is not installed according to this installation guide.
6* Year Warranty
Visit our website for details https://www.martecaustralia.com.au/warranty-statement/
NB: Remote Control fan and light NB: Remote Control fan only

This manual suits for next models

4

Other Martec Fan manuals

Martec Scorpion MSF133 User manual

Martec

Martec Scorpion MSF133 User manual

Martec Newport Series User manual

Martec

Martec Newport Series User manual

Martec Ariel Series User manual

Martec

Martec Ariel Series User manual

Martec Governer Series User manual

Martec

Martec Governer Series User manual

Martec AVOCA DC Series User manual

Martec

Martec AVOCA DC Series User manual

Martec METRO DC Series User manual

Martec

Martec METRO DC Series User manual

Martec Lifestyle series User manual

Martec

Martec Lifestyle series User manual

Martec LINK AC Series User manual

Martec

Martec LINK AC Series User manual

Martec Albatross Series User manual

Martec

Martec Albatross Series User manual

Martec MR0124 User manual

Martec

Martec MR0124 User manual

Martec Razor MRF134 User manual

Martec

Martec Razor MRF134 User manual

Martec Liberty Series User manual

Martec

Martec Liberty Series User manual

Martec Flush AC Series User manual

Martec

Martec Flush AC Series User manual

Martec FOURSEASONS Link DC Series User manual

Martec

Martec FOURSEASONS Link DC Series User manual

Martec Lifestyle series User manual

Martec

Martec Lifestyle series User manual

Martec DLS1043 User manual

Martec

Martec DLS1043 User manual

Martec Norfolk Aero DC Smart Series User manual

Martec

Martec Norfolk Aero DC Smart Series User manual

Martec Albatross Mini Series User manual

Martec

Martec Albatross Mini Series User manual

Martec IMPERIAL SERIES User manual

Martec

Martec IMPERIAL SERIES User manual

Martec Cruise Series User manual

Martec

Martec Cruise Series User manual

Martec LIFESTYLE MINI User manual

Martec

Martec LIFESTYLE MINI User manual

Martec Beret Series Guide

Martec

Martec Beret Series Guide

Martec DISCOVERY II AC Series User manual

Martec

Martec DISCOVERY II AC Series User manual

Martec Elite Series User manual

Martec

Martec Elite Series User manual

Popular Fan manuals by other brands

Stadler Form Leo operating instructions

Stadler Form

Stadler Form Leo operating instructions

Rotel U753CH3 Instructions for use

Rotel

Rotel U753CH3 Instructions for use

Myria MY4208 operating instructions

Myria

Myria MY4208 operating instructions

emerio FN-114201 instruction manual

emerio

emerio FN-114201 instruction manual

SMART SBBF3000 instruction manual

SMART

SMART SBBF3000 instruction manual

Thermador VM-410 installation instructions

Thermador

Thermador VM-410 installation instructions

Turn of the century 355-6776 installation instructions

Turn of the century

Turn of the century 355-6776 installation instructions

Harbor Breeze 40101 manual

Harbor Breeze

Harbor Breeze 40101 manual

Swegon GOLD RX Series installation instructions

Swegon

Swegon GOLD RX Series installation instructions

Clatronic VL 3741 S instruction manual

Clatronic

Clatronic VL 3741 S instruction manual

WAFE 200 E user manual

WAFE

WAFE 200 E user manual

Honeywell PERFECT WINDOW ER150C owner's manual

Honeywell

Honeywell PERFECT WINDOW ER150C owner's manual

iLiving ILG8CF52B owner's manual

iLiving

iLiving ILG8CF52B owner's manual

HUNTAIR FANWALL Technology Retrofit Installation & maintenance guide

HUNTAIR

HUNTAIR FANWALL Technology Retrofit Installation & maintenance guide

Intertek 51014 owner's manual

Intertek

Intertek 51014 owner's manual

TICA TRV015 Series Installation & operation manual

TICA

TICA TRV015 Series Installation & operation manual

ZIEHL-ABEGG ZETATOP SM 225.60B Mounting instructions

ZIEHL-ABEGG

ZIEHL-ABEGG ZETATOP SM 225.60B Mounting instructions

Cumberland PNEG-1872 installation manual

Cumberland

Cumberland PNEG-1872 installation manual

manuals.online logo
manuals.online logoBrands
  • About & Mission
  • Contact us
  • Privacy Policy
  • Terms and Conditions

Copyright 2025 Manuals.Online. All Rights Reserved.