Masterclock NTDS 16 User manual

Masterclock NTDS Series User Manual –v2 –December 2012
1

Masterclock NTDS Series User Manual –v2 –December 2012
2
Table of Contents
Introduction ......................................................................... 3
Features ............................................................................... 4
Mounting ............................................................................. 6
Mounting Diagram ............................................................... 7
Configuration Checklist ....................................................... 8
Configuration ..................................................................... 10
WinDiscovery - Installation and Configuration ................ 14
NTP Addressing Modes ..................................................... 19
Telnet.................................................................................. 21
Specifications...................................................................... 22
Trouble Shooting ............................................................... 24
Care and Cleaning .............................................................. 29
Limited Warranty .............................................................. 32
Service Information............................................................ 33
Health and Safety ............................................................... 34
Compliance ........................................................................ 35
Contact Information........................................................... 38
Thank you for your purchase of a NTDS
digital clock from Masterclock. Here you’ll
find instructions for unpacking and installing
your clock(s), including suggestions for
proper care and configuration.
We are here to help.
You can reach us using various contact
methods (phone, email, etc.) found at our
website: www.masterclock.com.
Before calling, please attempt to find the
answer to your situation here. You’ll find this
user manual will handle virtually all of your
questions.
Disclaimer - The material in this document is
for information only and subject to change
without notice. While reasonable efforts
have been made in the preparation of this
document to assure its accuracy,
Masterclock, Inc. assumes no liability
resulting from errors or omissions in this
document, or from the use of the
information contained herein. Masterclock,
Inc. reserves the right to make changes or
revisions in the product design or the
product manual without reservation and
without obligation to notify any person of
such revisions and changes
The NTDS series of digital clocks contains
microprocessor control electronics designed to operate
indoors between 32˚ to 140°F (0˚ to 60˚C) with 0-90%
relative humidity, non-condensing.
The NTDS series of digital clocks is not water- or
moisture-proof. Treat it as you would any other delicate
electronic device and do not expose it to water,
excessive heat or physical abuse

Masterclock NTDS Series User Manual –v2 –December 2012
3
Introduction
NTDS
(NETWORK TIME DISPLAY SLIMLINE)
DIGITAL CLOCKS
Masterclock NTDS digital clocks are designed
to display accurate time referenced from an
NTP time server, or one located on the
Internet. The wide variety of sizes (illustrated
to scale at left), are designed for a wide variety
of applications and mounts. The built-in NTP
client can set time from one or two NTP
servers.
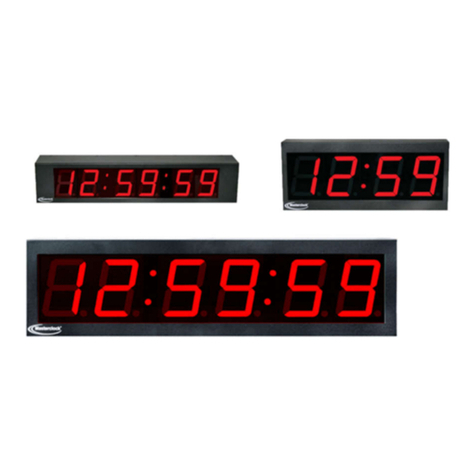
Masterclock produces a full line
of NTDS clocks including:
NTDS 16 Desktop
NTDS16, NTDS19, NTDS112 Rack Mount
NTDS24, NTDS24, NTDS26, NTDS29
Rack and Wall Mount
NTDS44, NTDS46, NTDS84, NTDS86 NTDS4626
Wall Mount
NTDS4626-3AL, NTDS4626-12AL, NTDS8646
Wall Mount
Many of these include dual face models.
All may be ordered in your choice of four LED
colors (blue, amber, green, red) and several
metal case styles.
Please refer to the “Specifications” section of
this document (p. 24) for additional details on
each model. For available options visit
Masterclock’s website:
www.masterclock.com.

Masterclock NTDS Series User Manual –v2 –December 2012
4
Features
Your new NTDS digital clock features:
RTC (Real Time Clock) back-up maintains time during loss of
power and/or loss of NTP reference
Time Zone offsets (to one second resolution)
supports any biasing requirements
Operates on WAN or LAN at 10/100 Mbps
Complete flexibility in Daylight Savings
Time configurations
Fully configurable network settings,
including DHCP/BOOTP support
Primary and secondary NTP reference
with fault-tolerant switching
Supports NTP Broadcast, Multicast and
query (Unicast) modes
Security features include password protected
communication and the ability to disable
Telnet management access
Status display to remotely view, adjust and configure
devices with WinDiscovery app
Rechargeable maintenance-free battery retains
configuration settings and time for at least two weeks after
power loss
Six-digit models: six-digit time or date display
Nine-digit models: six-digit time display
plus three-digit DOY (Day of Year)
Twelve-digit models: six-digit time display
plus six-digit date display
12- or 24-hour display formats
One year warranty from date of sale
Just one of our many NTDS desktop,
rack mountable and wall mountable
digital clocks, the NTDS26 features six
2.3” (5.8cm) LED digits in a sturdy
attractive powder-coated steel case.

Masterclock NTDS Series User Manual –v2 –December 2012
5
Power, Accessories and Software
Due to the large variety of clocks covered in this User Manual,
the list of accessories below is for illustrative purposes. Refer to
your sales order for actual items shipped.
NTDS digital time display (clock)
Mounting bracket
Cat 5 patch cable
CD-ROM (with WinDiscovery software application and
User Manual pdf)
Power cord –note Cloverleaf (“Mickey Mouse”)
C5 style plug (below) is model specific
PoE (Power over Ethernet) models require an IEEE 802.3af
compliant PoE injector or switch with +48VDC output on
spare pairs of the network cable conductor 4 and 5, with
corresponding 48 VDC returns on pins 7 and 8 or by sharing
the data pins and their returns. This single network cable
carries both data and power. Maximum cable distance is
328 feet (100m).
RELAY OPTION
When the NTDS digital display is not locked to a NTP
reference, the dry contact relay will actuate.
The NTDS request time from the primary NTP time server.
If no response, then it will send a request to the secondary
NTP time server. If the NTDS is unable to communicate
with either NTP time servers, the NTDS will change its
Current Reference from “NTP” to “Internal Osc
(oscillator)”. This is considered an un-locked condition and
the dry contact relay will actuate.
Cat5 patch cable CD-ROM IEC power cord
(select power option when ordering)
Above left: AC power –Insert the IEC AC
power cord (included) into the IEC socket
located on the back panel.
Above right: Ethernet PoE –Insert the CAT5
Ethernet patch cable (included into the RJ45
socket.
TERMINAL BLOCK
Top: Pin 1 –NO (Normally Open)
Middle: Pin 2 –COM (Common)
Bottom: Pin 3 –NC (Normally Closed)

Masterclock NTDS Series User Manual –v2 –December 2012
6
Mounting
DESIGNED FOR WALL, RACK OR TABLE MOUNT
Your NTDS clock is designed to fit a variety of surfaces and
environments supported by these sturdy brackets.
WALL MOUNT BRACKET
For the smaller NTDS clocks a single wall mounting bracket is
supplied which has been designed to fit on either a standard 2”x
4” or 4” x 4” conduit box. Mount the bracket on the wall/conduit
box, attach the power cord and CAT5 Ethernet patch cable and
secure the NTDS to the bracket using the supplied retaining
screws. See page 7 for a plan view with measurements.
Larger clocks require two such brackets.
PLAN VIEW OF WALL MOUNTING BRACKET
(see page 7)
Designed to fit on either a standard 2”x 4” or 4” x 4” conduit
box. Mount the bracket on the wall/conduit box, attach the
power cord and CAT5 Ethernet patch cable and secure the NTDS
to the bracket using the supplied retaining screws.
RACK MOUNT BRACKET
Attach the Cat 5 cable and/or power cord, and then secure the
clock to the equipment rack, cabinet or wall.
SWIVEL MOUNT BRACKET
Mount both swivel brackets to the wall, attach the Cat 5 cable
and/or power cord and secure the clock to the brackets using
the supplied retaining screws. Adjust the angle to provide the
best viewing.
TAKE CARE DURING INSTALLATION
Power and low voltage signal wiring should be installed
according to local electrical codes and to enable access to the
back of this device.
Do not route power or signal cables between the case and the
wall (along the exterior of the wall), which may pinch the power
or signal cable and create a hazardous condition.

Masterclock NTDS Series User Manual –v2 –December 2012
7
Plan View of Wall Mounting Bracket

Masterclock NTDS Series User Manual –v2 –December 2012
8
Configuration Checklist
Our NTDS clocks get their time signals from the Ethernet.
Therefore, before installing this device, one should be prepared
with the following basic configuration information that the
device will require. It may be necessary to obtain some or all of
this information from a network administrator in your
organization.
STATIC NETWORKING CONFIGURATION
__ IP address and netmask designation for device
__ Primary and secondary DNS (Domain Name Server)
__ Gateway/router
__ Primary and secondary NTP time references
DYNAMIC NETWORKING CONFIGURATION
__ Confirm that a DHCP/BOOTP service is accessible on the local
network
__ Determine if DHCP server will provide NTP server configuration
__ Determine if DHCP server will provide Time Zone configuration
NTP ADDRESSING MODE
__ Determine if this device (client) will query the NTP server
(Unicast mode), listen for NTP broadcast messages (Broadcast
mode), or listen to NTP as part of a Multicast group.
NAMING
All NTP devices can be provided with a verbose name. The name
is arbitrary and may be useful for organizing and managing
devices once installed. By default, device names are the product
name abbreviation followed by the device’s MAC address.
Customers should designate their own custom names relating to
their own organizational requirements, 32 characters max.
INITIAL OPERATION / SERVER ACQUISITION
After receiving power, the NTDS clock will go through an internal
check. Time from the RTC backup will be applied until the NTDS
server signal is acquired.
Default
Recommendation
(Examples)
SL26-21:4B
Bldg101-Rm121
SL29-45:8A
Conference_Room-342

Masterclock NTDS Series User Manual –v2 –December 2012
9
STATUS LED (LIGHT EMITTING DIODE)
The LED colons on the display will follow the following
protocol after power is applied:
TIME ZONE OFFSETS
The NTDS digital time display maintains time as UTC initially.
A Time Zone offset or bias can be provided to adjust the time
for display purposes. A bias can be set as a positive (+) or
negative (-) value. Expect a resolution of one second.
DAYLIGHT SAVING TIME
An automatic Daylight Saving Time (DST) adjustment can be
configured separately and in addition to a Time Zone offset.
DST begins on the second Sunday of March at 2:00 AM (Local
Time) and ends the first Sunday of November at 2:00 AM
(Local Time).
EU STANDARD –EUROPEAN UNION
In the European Union, daylight change times are defined
relative to the UTC time of day. Summertime Period begins at
1:00 AM, UTC on the last Sunday of March and ends at 1:00
AM, UTC on the last Sunday of October.
FREEWHEELING ACCURACY
The NTDS has built-in provisions to allow it to freewheel and
maintain accuracy for extended periods in the absence of
Time Code. These features also allow the unit to be set
manually and run without Time Code with precision.
TCXO AND RTC CIRCUIT
The NTDS contains a precision TCXO (Temperature
Compensated Crystal Oscillator) and RTC (Real Time Clock)
circuit allowing the clock to maintain an accuracy of ± 1
minute per year to the last known Time Code input (±165
mSec per day) when Time Code is not present or cannot be
decoded (i.e. freewheeling mode)
MAINTENANCE-FREE RECHARGEABLE BATTERY
The RTC and TCXO are maintained continuously from a
rechargeable battery circuit during periods of power outage.
Minimum holdover period is two weeks with a fully-charged
battery under constant drain.
If the Time Code input is different from
UTC, do not adjust the Time Zone and/or
DST offset. These will adjust automatically.
European customers: Please carefully
consult the section entitled “Device
Settings”for details on setting your
“Summertime Period.”
Daylight Savings Time (DST) adjustments
must be configured using the daylight time
option and not with the Time Zone offset
option in order to ensure proper year-
around operation.
LED
STATE
STATUS INDICATION
Flashing
No Reference: The NTDS is not
able to reference NTP
On Solid
Referenced Time: The NTDS is
receiving time referenced from
a NTP server

Masterclock NTDS Series User Manual –v2 –December 2012
10
DEFAULT CONFIGURATION
The factory defaults may be restored by using the WinDiscovery
program, Telnet or by using the reset button at the rear of each
clock. On dual face clocks, the reset button is located on the top.
Your NTDS clock/device ships from the factory with the following
configuration as defined below. The NTDS firmware interprets
the incoming time as UTC.
Configuration
Masterclock NTDS clocks maintain their configuration data in
non-volatile flash memory, even when the power is off. Our
NTDS clocks are configured on screen using either Telnet, or
WinDiscovery software.
The factory default configuration:
SETTING
CONFIGURATION SELECTION
Enabled
DHCP/BootP provided network configuration
Enabled
DHCP provided NTP server address entry
Enabled
Query (Unicast) NTP client
Disabled
Time Zone offset
Disabled
Automatic Daylight Savings Time adjustment
Enabled
Telnet access
DHCP/BOOTP AUTO-CONFIGURATION
DHCP (Dynamic Host Configuration Protocol) is a mechanism
for automating the configuration of network devices that use
TCP/IP. When DHCP is enabled, DHCP configuration acquisition
will overwrite any manual configuration items.
Factory default: DHCP enabled.
BOOTP was a precursor to DHCP. The network device can obtain
configuration from a BOOTP server when no DHCP server is
present.
SETTING
CONFIGURATION
SELECTION
Disabled
Time Zone Offset
Disabled
Daylight Savings Time
Enabled
NTP Client with DHCP
Enabled
24 Hour format

Masterclock NTDS Series User Manual –v2 –December 2012
11
The following RFC2132 DHCP options defined configuration
items are, when available, used by the network device for
configuration purposes:
OPTION
#
COMMENTS
Time Offset
2
The value provided will be used for the Time Zone offset configuration, unless it
is defined as zero in which case it will be ignored and the network device will
rely on internal configuration. Note: this option does not provide information
appropriate for dynamic Daylight Savings Time use.
Router
3
The first IP address provided will be used for router/gateway configuration.
Domain Name Server
6
Up to two server IP addresses may be specified. Network device will treat
addresses as primary and secondary DNS servers.
Network Time Protocol Server
42
Up to two server IP addresses may be specified. Network device will treat
addresses as primary and secondary NTP servers.
DEVICE NAME/DHCP NAME REGISTRATION
As mentioned earlier, all network devices should be provided
with a custom name (e.g. “reception-north-wall”). By default,
device names are the product name abbreviation followed by
the last octet of the device’s MAC (Media Access Control)
address (e.g. NTDS12-04:F7).
If a DHCP server is networked when the NTP device is installed,
the unit will be auto-registered with the DHCP server. The
network system administrator can then view this DHCP name
registration and the currently assigned IP address, at the DHCP
server.
DEFAULT PASSWORD
The factory-default password for the network device is: public.
Please use lower case.
RESET FACTORY DEFAULT CONFIGURATION
In some situations (such as a lost password) it may be necessary
to return your device to its factory default configuration. A
[RESET] button is located either on the clock’s rear cover (on
single-face clocks) or on top (on dual-face clocks).
To reset the configuration to factory default:
Press and hold the reset button for 10 seconds (until dashes
appear on the digits) and then release. The configuration will
now be reset, including the password. The unit will need to be
reconfigured to your custom settings.
The factory default displaying local time is
disabled. You must enable and configure
that setting to display local time.
We suggest you use an NTP time server
with a UTC reference to configure the
offset for your Time Zone and DST.
To ensure proper year-around operation,
the automatic DST adjustments must be
configured using the “Daylight Saving
Time” option and not with the “Time Zone”
option.
European customers, please refer to the
“WinDiscovery, DST Settings” section of
this document for additional details on,
setting daylight saving time.
A network device will not function properly
if configured to use DHCP services when no
DHCP server is available on the network.

Masterclock NTDS Series User Manual –v2 –December 2012
12
MULTICAST
The network device also supports Multicast Addressing of NTP
packets. Multicasting is useful because it conserves bandwidth.
Multicasting replicates only the necessary packets and only as
needed to send them only to clients that want them.
The concept of a group, and group membership, is crucial to
multicasting. Every multicast requires a multicast group; the
sender transmits to the group address, and only members of the
group can receive the multicast data. A group is defined by a
Class D address.
The network device does not restrict the use of the multicast
address assignment and supports the full range of class D
multicast addresses or groups from “224.0.0.0” to
“239.255.255.255”. These are defined and governed by
RFC3171, IANA IPv4 Multicast Guidelines.
Typically, the multicast address range “224.0.1.0” to
“224.0.1.255” (Internetwork Control Block) is used for NTP
traffic. However, please refer to the RFC3171 for your specific
application and implementation.
The IGMP (Internet Group Management Protocol) controls
group membership for individual hosts. This protocol only
operates in a LAN setting, but is required if you wish to be able
to join a multicast group on a host. IGMP is defined in RFC 2236.
ANYCAST
The network device does not currently provide Anycast
capability.
STATIC IP
To use a static IP address, de-select the checkbox for
“Automatically obtain network configure tion from
DHCP/BOOTP.” You must enter the IP address, netmask,
gateway, primary DNS and also a secondary DNS.
Devices which have been assigned a fallback IP address of
“169.254.xxx.xxx” will be displayed in the main WinDiscovery
window with RED text, indicating a problem with the
configuration.
NTP CLIENT AUTHENTICATION SETTINGS
The NTDS series uses the MD5 Message Digest Algorithm, which
is a widely used cryptographic hash function that produces a
128-bit hash value.
IGMP
Use of the multicast addressing method
requires the use of routers and switches and
other network devices which support the
Internet Group Management Protocol
(IGMP).
In addition, the IGMP mode must be enabled
and configured for multicast addressing to be
implemented properly. Please ensure that
your network system components are capable
of, and configured properly for, IGMP before
utilizing the multicast addressing feature.
Consult you network administrator for
assistance in utilizing the multicast addressing
feature.
FIREWALLS
Check with your firewall vendor to determine
how to enable multicast traffic through a
firewall. In addition, you may want to read
RFC 2588: IP Multicast and Firewalls.
Port 123
Some NTP/SNTP servers will expect NTP
clients to operate on port 123.
If the advanced settings have been altered for
your clock and you begin experiencing
difficulty in getting your clock to synchronize
to the NTP time server, or the clock begins
acting erratically, try returning the advanced
settings to the default values: “123.”
NTP CLIENT ADVANCED SETTINGS
From the NTP Client window, the [NTP Client
Advanced Settings] button allows for the
adjustment of additional network
communication settings. Under most
operating circumstances it is not necessary
to change these settings.
The factory-default TCP/UDP port for NTP
service is: “123”

Masterclock NTDS Series User Manual –v2 –December 2012
13
WinDiscovery
The WinDiscovery software application is a clock setup and
configuration program that operates in the Microsoft Windows
operating system and is supplied FREE with your NTDS device.
INSTALLING WINDISCOVERY
To install the WinDiscovery complete the following steps:
Insert the CD that shipped with your network device.
1. Run the “setup.exe” application from the CD.
2. By default, the setup utility will suggest installing files to
C:\Program Files\Masterclock\WinDiscovery. Click OKAY.
USING WINDISCOVERY
Open WinDiscovery from the “Start Menu” or by double-clicking
the shortcut icon on the desktop.
Once you open WinDiscovery, all devices will automatically
announce their presence and the status bar will display the
count of devices found (usually takes a few seconds for search to
complete). When complete, a list of device families and groups
will be displayed in the left pane of the WinDiscovery window.
Each device is configured with a device name from the factory.
This name includes the model name and a MAC address
extension. You should change the device name to one that can
identify the location of the device.
It is highly recommended that only one user opens
WinDiscovery at a time. Other methods should not be used to
manage the network devices while using this software
application.
Click on the plus [+] sign to the left of any family or group to
open and view device types that were found.
Click on the minus [-] sign to collapse these files.
Click on any device group and it will list the devices in the right
pane with all devices of that type found. To configure another
device group, click on the device name in the left window and
the device names will then appear in the right window, ready to
be managed.
To configure and manage a device, right click the device name
and a drop-down menu appears. The top item is a [Properties]
button. This may take a few seconds to appear.
To open the “Device Settings” window, double click the NTDS
clock name. The top left item is labeled “Configurable Options.”

Masterclock NTDS Series User Manual –v2 –December 2012
14
WITHIN THE DROP-DOWN WINDOW:
Click on a menu choice to open the window for that function.
[PROPERTIES] BUTTON
“MASTERCLOCK INC. NTDS CLOCKS” WINDOW
The “Masterclock Inc. NTDS Clocks” window lists the name,
model, firmware and network configuration of your NTDS clock.
These configurations may be changed in other windows, but not
in this one. Click [OK] to exit.
[NETWORK CONFIGURATION] BUTTON
The “Network Configuration” window (left) lists the device
name and offers a checkbox to “Automatically obtain network
configuration from DHCP/BOOTP” or not. If not, you may
manually fill in the IP address, Netmask, Gateway and DNS.
DEVICE SETTINGS BUTTON
The “Device Settings” window is the same one that appears with
a left double-click of the device on the “Network Discovery”
window and is detailed on page 17.Note: There are several
buttons (Save, Status and Administrative Functions) that will be
grayed out for a few seconds before you’re able to select them.
SET PASSWORD BUTTON
The “Set Password” window permits the user to enter a unique
password for either a single device or all devices. The factory
default password is set as, “public”.
A password is one to eleven characters and is case-sensitive. For
added password strength, you should use a combination of
alphanumeric and special ASCII characters. The [Change
Password] boxes will be grayed out until the Old and New
passwords are filled in.
Fill in the old password, “public” then enter the new password
twice. Click [Change Password] to save to either a “Single
Device”or “All Devices”.If all devices are chosen, then all
discovered devices will have same password. If after you have
saved to all devices and you change a single device password,
the group password will be broken and not all devices will have
same password.
When a password is set for a single device, each time you click
[Change Password (Single Device)]; you will be changing the
password for that specific device. You can select the [Change
Password (All Devices)] box if you wish to make all discovered
devices have the same password and eliminate single device
passwords.
If you enter the wrong password, you can select “Cancel” and no
configuration changes will be made. You can close the
WinDiscovery session to forget the wrong password(s), however
this will require entering the passwords again for each device.

Masterclock NTDS Series User Manual –v2 –December 2012
15
[SET TIME/DATE] BUTTON
Here you may break the link to UTC time to create a custom
time. Click this button to reveal a preliminary warning. Read the
warning and continue if you wish to create a custom time for
your NTDS clock by unclicking the [UTC] button. By clicking the
[UTC] button you will return to UTC time.
[STATUS] BUTTON
The “Status” window includes a “Display snapshot” of the
clock’s face. On the right are constantly updated listings of the
UTC Time, Local Time, Current Reference, Reference Status, Last
Time Lock Lost (UTC) and Last Time Lock Restored (UTC). Below
are Network and NTP tabs. The first lists the name and model
number of the unit followed by the network configuration
numbers. These would echo the “Network Configuration”
window figures (page 15). The NTP tab lists whether or not the
server and/or client is enabled and various stats about each.
[RESET DEVICE] BUTTON
This button brings up the “Are you sure?” window. Press the
[Yes] button and you will “soft reset” your clock to allow the
device to clear its current communications buffer and re-
initialize its processing, which includes re-requesting of a DHCP
address. This feature is intended to allow the user to remotely
reset the unit and does not restore the factory default state.
[SET TO DEFAULT CONFIGURATION] BUTTON
This button brings up another “Are you sure?” window. Press
the [Yes] button and you will reset your clock back to the factory
defaults. No further window will appear.
[SET RELAY SCHEDULE AND VIEW RELAY SCHEDULE]
These buttons are only used with the MCR 1000, MCR 5000 and
the CRL 1000, which have scheduling functions.
[FORGET MEMORIZED PASSWORD] BUTTON
Click this (if present) and the memorized password will be
forgotten. There is no window associated with this button. The
password reverts to the factory default password: “public”.

Masterclock NTDS Series User Manual –v2 –December 2012
16
GLOBAL PASSWORD
The Global Password feature allows the user to enter a single
password for all NTP devices using the same password. During
this session and subsequent sessions of WinDiscovery, you will
not have to enter the password.
1. Check [Enable Global Password].
2. Type your password.
3. Click [OK]
To disable the Global Password, de-select the [Enable Global
Password] checkbox and click [OK].
[DEVICE SETTINGS] BUTTON
The “Device Settings” window includes three
sections. In “Configurable options” the [Input
Control] button takes you to a [NTP button].
Clicking it permits the user to enable or disable the
NTP client. If enabled, you can choose Query,
Broadcast or Multicast services to receive Time
Code.
The [Nework Configuration] button and window
are detailed on page 15.
The [Display Properties] button and window (at
left) permits the user to change the brightness of
the LEDs, to change the Time/Date presentation
order, to choose 12 or 24-hour time formats with
leading zeroes on or off and to choose UTC or local
time (once local time offsets have been input).
The [Communications Control] button and window
enable or disable Telnet.
The “Local Time Settings” section includes two
buttons for [Daylight Savings Time] and [Time
Zone/Time Offset] to offset your displayed time
from UTC to Local time.
The [Save] and [Save and Close] buttons must be
clicked before hitting the [Exit] button. Otherwise
any entered changes will not take effect.
T
The Global Password being used must
match the password on all the devices
being administered. On any new system
being installed, the factory default
password on all devices is “public”.

Masterclock NTDS Series User Manual –v2 –December 2012
17
The following pertains only
to NTDS models with
alphanumeric characters.
DAY OF THE WEEK
LANGUAGE CHOICE
The language (English, Spanish,
etc.) for the day of the week
display is selected from a
drop-down menu on the “Display
Properties” window.
ALPHA MESSAGE DISPLAY FOR THE NTDS46-12AL
To edit the alpha message display on the NTDS46-12AL, go to
the “Device Settings” window and click [12Alpha Configuration]
(at left). That will reveal the window below.
The Alpha message display can cycle through up to three
messages (up to 100 characters per message) and can provide a
date in one of four display modes:
1. Scrolling with unabridged month/day-of-week, date and
year
2. Static abbreviated month/day-of-week plus date (no year)
3. Static abbreviated month, date and year (no day-of-week)
4. Static numeric showing month, day and year.
Check the [Enable] box adjacent to your choice.
Scroll speed (the rate at which a message propagates right to
left across the display) is adjustable in eight steps from slow to
fast.
Static hold duration (the time a static message/date remains on
the display) is adjustable in three steps from shorter to longer.
Messages longer than
12 characters will
scroll.
All other messages
will center-justify and
hold.
Allowable characters:
ABCDEFGHIJKLMNOPQRSTUVWXYZ
0123456789@$%&*^()[]{}_-+=\'/?.,
[space]
Date display configurations:
MM/DD/YY, DD/MM/YY or YY/MM/DD.

Masterclock NTDS Series User Manual –v2 –December 2012
18
ADMINISTRATIVE FUNCTIONS
From the “Device Settings” window, click [Administrative
Functions].
SET TIME AND DATE
This feature may be most useful for demonstration, in lab
situations, environments where an external reference time
signal is not available, when the built-in NTP client is disabled or
when a network connection to an NTP server is not available.
SET PASSWORD
See page 15.
RESET DEVICE
See page 16.
INSTALL NEW OPTION
This window will ask you to “Paste the Option Key you received
here. Then click Install.” Not available in all applications.
LEAP SECOND DATE
This window enables the placement of a leap second when it
occurs. Enter the date and polarity ahead of time.
EMAIL CONFIGURATION
Click the [Email Configuration] button to generate email alerts
when certain conditions are met.
AUXILIARY CONTROL
This window (at left) enables the addition of an auxiliary control
source (input the source ID). You will be asked to input the
[Multicast IP Address] and [Port]. Then you will need to set the
number of seconds (if any) in a Communication Timeout.
SET TO DEFAULT CONFIGURATION
Click this button to set your clock back to the factory defaults.
The password will revert to “public”.

Masterclock NTDS Series User Manual –v2 –December 2012
19
NTP Addressing Modes
Setting up to receive NTP is
relatively easy to do once you
known what you want.
UNICAST (QUERY)
NTPS clocks and devices support the
Unicast Method of NTP (Network
Time Protocol) packets transfer. The
unicast method involves direct
transfer of requested information
from the NTP server to the NTP
client (clock or other device) based
on an automatically generated
electronic query or NTP time
request. The Unicast method is
supported simultaneously when
either the Broadcast or Multicast
modes are selected.
BROADCAST
UDP (User Datagram Protocol) Broadcasts
Some firewalls and routers will not forward
UDP broadcasts by default. Security
configurations may need to be adjusted to
allow the UDP broadcast packets to pass
on the configured port.

Masterclock NTDS Series User Manual –v2 –December 2012
20
NTPS clocks and devices also support the broadcasting of NTP
packets. The broadcast mode is a widespread or open-ended
broadcast, not intended for any specific IP address. Broadcast
packets are useful in situations where network administrators
may wish to avoid heavy network traffic created by periodic NTP
requests. Often such periodic requests end up synchronized,
which can exceed the time server’s ability to reply promptly.
The network device listens for NTP using the
UDP (User Datagram Protocol) broadcasts using
the broadcast address “255.255.255.255”.
“SOFT”RESTARTS
A soft restart may periodically be performed by the network
device to automatically attempt to rectify a problem it may be
experiencing.
The network device will perform a soft restart under the
following conditions:
1. If the device is not receiving an NTP poll response or an NTP
broadcast response depending on which mode the NTDS is
in.
2. If the NTDS device is set to use DHCP and no DHCP server
can be found.
The timeout before doing a soft restart is not less than ten
minutes.
Note: Several factors can increase the time between these soft
restarts.
1. The soft restart will be delayed by two hours if a connection
is made by Telnet or WinDiscovery.
2. The soft restart could be delayed if the user changes the
default parameters for NTP poll retries/timeouts or the NTP
broadcast times out. For example, if the NTP broadcast
timeout is increased to 60 minutes the soft restart timeout
will also be increased to 60 minutes.
Special Error Indicator
In addition to the standard status
indications, the network clock will
display a special error indicator under
the status window if either a DHCP
server cannot be located, or if the
device has an IP address conflict due to
either DHCP or Static IP addressing.
Under these conditions the unit will
also be assigned a fallback IP address of
“169.254.xxx.xxx”, and appear in RED
text under the main “WinDiscovery”
window. To determine the cause of
why the clock received a
“169.254.xxx.xxx” address the user
should display the status of the clock.
Near the bottom of the “Status”
window the error will be displayed.
This manual suits for next models
15
Table of contents
Other Masterclock Clock manuals

Masterclock
Masterclock NTD200 User manual

Masterclock
Masterclock CLKTCD12 User manual

Masterclock
Masterclock CLKTCD Series User manual

Masterclock
Masterclock TCDS Series User manual

Masterclock
Masterclock CLDNTD12 User manual

Masterclock
Masterclock CLDTCD12 User manual

Masterclock
Masterclock RC1000 Manual
Popular Clock manuals by other brands

La Crosse Technology
La Crosse Technology BBB85654 manual

Sapling
Sapling Prayer Clock installation manual

Conrad
Conrad 67 14 49 operating instructions

La Crosse Technology
La Crosse Technology WT-3181X1 manual

Hyundai
Hyundai AC 321 W instruction manual

La Crosse Technology
La Crosse Technology Payton 404-3015CC manual