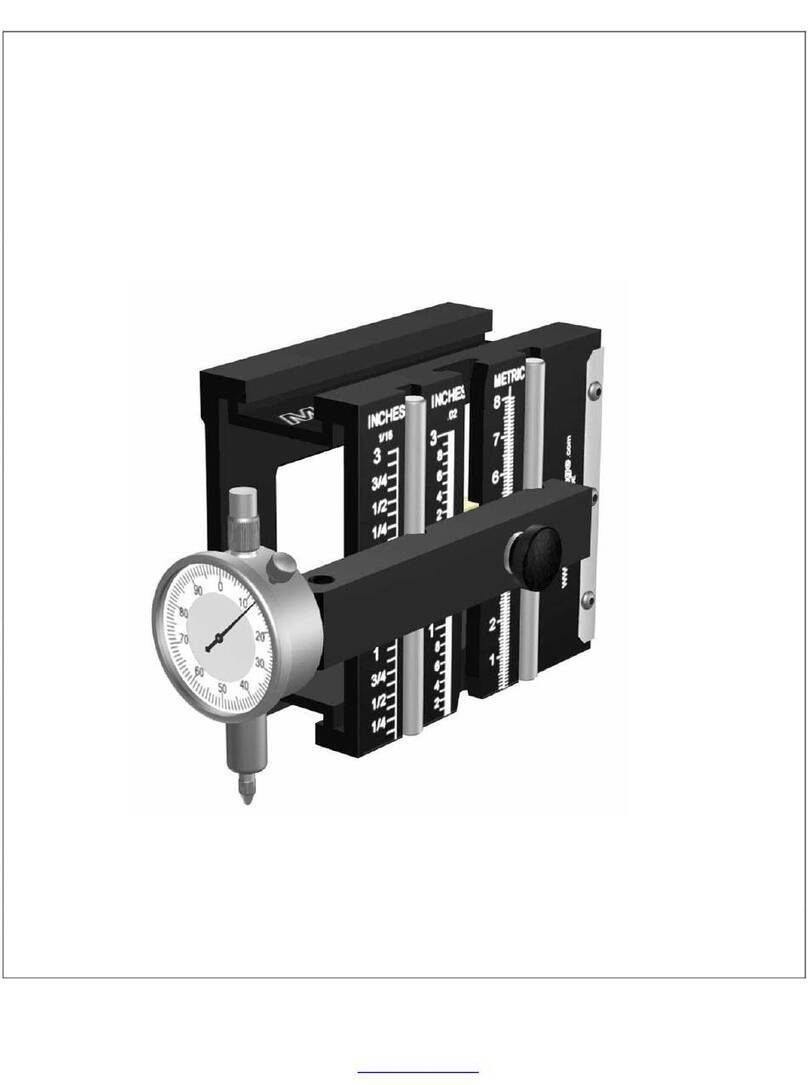
MasterGage Professional User manual

MasterGage/Professional
Manual
Getting control of all of your woodworking equipment with the
powerful features of the MasterGage/Professional
MasterGage Corporation, 560 N. Moorpark Road, Thousand Oaks, California 91360 USA
August, 2002 Edition

Your MasterGage/Professional Package
This package contains the following:
1. The MasterGage/Professional
2. The MasterGage/Professional Manual
3. A precision Dial Indicator, .001 [1/1000 inch] with 1/4 inch travel
4. A 2.0 inch dial indicator extension –extends the reach of the Dial Indicator
5. A ¼ inch diameter flat Dial Indicator tip–perfect for adjusting and replacing
knives on jointers and planers
6. Dial Indicator Adapter Assembly –allows you to position the Dial Indicator in different
directions for maximum versatility.
7. Two Memory Links plus hardware. One Memory Link for the Protractor and the other
for the Height Gauge
8. A ¼ inch diameter precision Index Pin for use on the “Instant Recall” feature
on both the Protractor for angles and the Depth Gauge for heights.
The Index Pin also doubles as a Depth Gauge Rod for measuring dado
mortise slots and blind drilled holes depths.
9. Hex wrench for recalibrating the Protractor and cursor.
10. A hardened Precision Dowel Rod, ½ inch diameter x 4 inches long.Perfect for
calibrating drill presses, routers, horizontal mortisers and lathes.
11. A Miter Slot Cradle Bar –Attaches to the bottom [and top] of the Professional. The
Cradle Bar lets you align the table saw rip fence and blade easily.
12. Hex wrench for the Miter Slot Cradle Bar course and fine adjustment
13. A custom foam fitted box for maximum protection of your Professional. As an
added feature, the foam is removable –to allow you to store your MasterPlate
safely on the bottom of the box.
14. An enclosed stamped self addressed Post Card, asking you to supply us with
a name. We will engrave the name into a solid brass name plate, ready for
mounting onto the MasterGage/Professional–free of charge.
A nice way to personalize your Professional.
15. A 30 day Money Back Guarantee plus a Lifetime Guarantee on materials and
workmanship –including the dial indicator
MasterGage.com

Note of Introduction
Dear Customer:
I’d like to welcome you into our family of valued customers. MasterGage Corporation is a
manufacturer of high quality, precision tooling for those who demand the very best tools.
All of our products are innovative and original. Thus, most of our products are patented or in the
patent pending stage with the United States Patent Office. The tools that we present to you are
the result of my 40+ years as a practicing mechanical engineer involved in many industries
developing precision tools and mechanisms.
The MasterGage/Professional is a powerful tool, as this Manual will show, it will allow you to
calibrate, tune up and set up any piece of equipment found in the wood shop.
With the MasterGage/Professional you have control over any machine you presently own -or any
you plan to acquire in the future. Easily portable, you can use the Professional on any machine,
in the home shop, in the field or at the production shop. No need to rely on any machine scales.
You are always reading the laser precision scales on the MasterGage/Professional or the super
accurate Dial Indicator. You will also get automatic conversions of any dimension from one system to
another, whether it is in fractions, decimals inches, millimeters, centimeters or degrees of
angles. Now you are in control of all of your equipment and projects.
This Manual guides you through most of the woodworking equipment alignment, calibration
tune-up and troubleshooting. Once all your equipment is tuned with the
MasterGage/Professional, keep in mind that you must check your equipment on a regular basis to
keep them tuned. The MasterGage/Professional really shines when it comes to setup and re-
setup of projects on your machinery. Machine setup that took hours will now only take minutes.
This allows you to get right to the fun/business of woodworking fast.
For even more versatility and usefulness, I’ve designed many optional Accessories that allow you
to “customize” the MasterGage/Professional to your particular needs. I have developed the
MasterGage products in a “modular” fashion insuring you will never outgrow this System. As you
grow in your measurement and calibration needs, you will always find a MasterGage Accessory
to fit your requirements.
Craftsmen involved in any of the following disciplines will find our tools invaluable.
1. Woodworkers 7. Machinists
2. Model makers 8. Tool makers
3. Pattern makers 9. Sheet metal workers
4. Finish carpenters 10. Boat builders
5. Furniture makers 11. Serious hobbyists
6. Cabinet makers 12. And many, many others
I thank you for your business.
Paul Reilly
President & Founder
MasterGage.com

MasterGage/Professional System A
SECTION TABLE OF CONTENTS
A Getting acquainted with your MasterGage/Professional
1. Features of the MasterGage/Professional
2. Illustrated Features
3. Measuring and Reference Surfaces Defined
4. Description of the Four Measuring Scales
5. Protractor “Instant Recall” feature
6. Height Gauge “Instant Recall” feature
7. Using the Depth Gauge Rod
8. Mounting the MasterGage/Professional to the Miter Slot Cradle Bar
9. Attaching the Dial Indicator
10. Using the Dial Indicator
B Table Saw + Sliding Table Panel Saw + Add-on Sliding Table Kit
CRadial Arm Saw + Chop Saw + Sliding Compound Saw
DRouter + Router Table + Shaper
E Drill Press
F Band Saw
GJointer
HPlaner
ISanding Machines –stationary Drum Roller Sanders + Disk Sanders
J Horizontal Mortiser + Doweler
K Protractor Calibration and Maintenance
L Accessories
M Ordering information
N Lifetime Guarantee
MasterGage.com
SAFETY INSTRUCTIONS
ALWAYS TURN OFF AND UNPLUG the tool/machinery BEFORE
using
the MasterGage/Professional System on any power tool/machinery

MasterGage/Professional Features A1
Your MasterGage/Professional is packed with exciting patented features that are built to last! The
body of the Professional is fabricated from rugged aircraft quality extruded aluminum. All sides
are ground flat, square and parallel to each other to within 0.001 inches [as a reference, the
human hair is 0.001 inch]. Once ground, the body is then machined to exacting tolerances
[0.0002 inches] on computer controlled [CNC] machinery, the surface is then plated with a
protective black anodized finish that also presents a superb black non-glare surface for easy
reading.
The unit is then precisely and permanently laser etched with scales that are in inches,
millimeters and degrees. This allows the Professional to be used on any equipment worldwide -
regardless of the measurement standards used.
The Professional has a new patent pending feature called Instant Recall™ that allows you to
recapture any height or angle very precisely. By aligning the location hole in the Memory Link™
to the precision hole of either the Protractor or Level Arm you can recall the angle or height with
remarkable accuracy and speed. There is capacity for three Memory Links on both the
Protractor and the Level Arm height gage.
The Professional body has extruded “T” slots in both the top and bottom surfaces, allowing the
owner to attach special magnets. These magnet accessories are very powerful rare earth
[neodymium boron] magnets that fit into the “T” slots. A valuable Accessory that insures rock
solid rigidity while making critical measurements.
The Protractor is high quality aluminum, red anodized plating with a hairline cursor for easy
reading of the laser-etched angles. The actual red hairline is only 0.003 from the laser angular
markings, thus eliminating any parallax difficulties. The angular markings are in ½ degree
increments. A ¼ degree can easily be read. The Protractor hasa stainless steel working edge
called a “knife edge”. This 1/16 thick piece of steel allows easy angular measurement, since it
easily fits between the carbon tips on the saw blade. By doing so, the knife-edge fits flat against
the body of the saw blade giving you an exact angular reading. The Protractor can measure
both acute angles [less than 90 degrees] and obtuse angles [greater than 90 degrees]. The
illustrations in this Manual will describe this feature.
The Level Arm is made of ½” x ¾” x 3 3/8 inch aircraft quality aluminum, hard anodized for
durability [hardness equal to sapphire]. The arm is spring loaded so that it automatically levels
itself for precise measuring. It never goes out of alignment. The Level Arm is self cleaning, it
glides through sawdust with ease and never clogs up.
Since all parts are so precisely made and interchangeable, a part made last year will fit a
Professional made today, next year and years to come! If a part is lost or damaged, it can be
quickly replaced by our factory.
We have made a great effort to present you with a truly remarkable tooling system that will
serve you and yours for generations to come.
MasterGage.com

A2
ILLUSTRATED FEATURES
MasterGage.com
“T” SLOTS BOTH TOP AND
BOTTOM ACCEPT
POWERFUL RARE EARTH
MAGNET ACCESSORIES
BLACK ANODIZED
PROTECTIVE
FINISH
AIRCRAFT QUALITY
ALUMINUM
1/16 INCH THICK
STAINLESS
STEEL “KNIFE
EDGE”
LEVEL ARM
“INSTANT
RECALL”
FEATURE
BORED HOLE
ACCCEPTS MANY
ACCESSORIES
HARD
ANODIZE
FINISH
LOCK
KNOB
ALL SCALES
ARE LASER
ETCHED
STAINLESS
STEEL
RODS
PROTRACTOR
“INSTANT RECALL”
FEATURE
RED ANODIZED
PROTECTIVE
FINISH
LOCK
KNOB

A3
MEASURING AND REFERENCE SURFACES DEFINED
YOU CAN MEASURE AND CALIBRATE FROM ANY ONE OF SEVEN REFERENCE
SURFACES SHOWN BELOW. ALSO ILLUSTRATED ARE THE SURFACES THAT
GIVE YOU USE OF THE “INSTANT RECALL” FEATURE
“INSTANT RECALL”
“INSTANT
RECALL”
“INSTANT RECALL” “INSTANT RECALL”
MasterGage.com
TOP #2
BACK #3
PROTRACTOR
EDGE #4
TOP OF LEVEL ARM #5
BOTTOM OF LEVEL ARM #6
DIAL INDICATOR TIP #7
BASE #1

A3.1
PROTRACTOR MEASURING/REFERENCE
SURFACES DEFINED
0/90 degree
45 degrees
RESTING ON THE BASE
0/90 degrees
135 degrees
RESTING ON THE TOP
MasterGage.com
POSITIONED ON BASE
SURFACE –Ability to
measure acute angles
[less than 90 degrees]
in the VERTICAL plane
POSITIONED ON
TOP SURFACE-
Ability to measure
obtuse angles
[greater than 90
degrees] in the
VERTICAL plane
This position is
best for measuring
blade angle –the
full length of the
“Knife Edge” is in
contact with the
saw blade -
giving
you the most
accurate angular
readings.

A3.2
PROTRACTOR MEASURING/REFERENCE
SURFACES DEFINED
45 degrees
0/90 degrees
RESTING ON BACK SURFACE
0/90 degrees
RESTING ON BACK SURFACE 135 degrees
MasterGage.com
POSITIONED ON
BACK SURFACE –
Ability to measure
acute angles [less
than 90 degrees] in
HORIZONTAL plane
POSITIONED ON
BACK SURFACE -
Ability to measure
obtuse angles [greater
than 90 degrees] in
HORIZONTAL plane

A4
Description of the Four Measuring Scales
All scales on the MasterGage/Professional are precision laser etched into anti-glare black surface.
Notice that both the Fractional and Millimeter scales are specially designed, with each having a vertical
line separating the course readings on the left from the fine readings on the right of the vertical line.
Another innovative feature.-with the fractional, decimal and millimeter scales side by side -you can
automatically translate and/or compare one scale reading to another scale.
Example: 1. 23 millimeters = .91 inches
2. ¾ of an inch = 19 millimeters
The Level Arm is spring activated and automatically aligns itself level to all scales, and never
needs calibration. Readings can be taken from the top or bottom surface of the Level Arm -–
depending on the machine you are working with.
Measurements can be read in either the vertical or horizontal position.
MasterGage.com
Fraction
Scale Decimal
Scale Millimeter
Scale
Centimeter
marking
Measure and read
any Scale at Top
of Level Arm for
the following:
*Drill Press
*Radial Arm Saw
*Chop Saw
*Compound Miter
Level
Arm
Measure and
Read any Scale at
Bottom of Level
Arm for the
following:
*Table Saw
*Sliding Table Saw
*Router
*Router Table Unit
*Shaper
*Horizontal
Mortiser
1/16 of
an inch
divisions
1/32 of
an inch
divisions
.02 inch
divisions
1 millimeter
divisions
½ millimeter
divisions
Angular
Scale
Measure
or Set at
90
degrees
relative
to the
Top or
Bottom
of the
Pro
½ degree
divisions

A5
PROTRACTOR “INSTANT RECALL” FEATURE
USING THE PROTRACTOR “INSTANT RECALL” FEATURE:
1. Determine the angle needed to recall and lock the Protractor knob.
2. Pass the locating pin through the Protractor bushing –align the Memory Link so
that the pin will pass through the Memory Link precision hole.
3. Once this is done, tighten the Memory Link thumb screw, remove the precision pin
and use the Protractor as normal.
TO PERFORM THE “INSTANT RECALL” ON DESIRED ANGLE[S]
1. Align the Protractor locating bushing hole to the Memory Link hole and pass the
locating pin through the Protractor and Memory Link.
2. Lock the Protractor knob and retract the locating pin.
YOU HAVE NOW “INSTANTLY RECALLED” THE DESIRED ANGLE!
REAR VIEW
MasterGage.com
INDEX PIN
INDEX PIN
MEMORY LINK

A6
HEIGHT GAUGE “INSTANT RECALL” FEATURE
PROCEDURE:
1. LOCK LEVEL ARM
AT DESIRED HEIGHT
2. PASS LOCATING PIN
THROUGH MEMORY LINK
INTO HOLE IN LEVEL ARM
3. LOCK MEMORY LINK SCREW
AND REMOVE LOCATING PIN
YOU CAN NOW “INSTANTLY RECALL”
THAT HEIGHT -AT ANY TIME!
MasterGage.com
“INSTANT RECALL” can
be
used with or without the
Dial Indicator mounted.
LEVEL ARM
MEMORY LINK
INDEX PIN
LEVEL ARM

A7
Using the Depth Gauge Rod
.
The following three illustrations show how the Depth Gauge Rod can be used to determine dado
depth, mortise depth or a blind-drilled hole. It then becomes easy to measure and cut the
required tenon or mating part.
Depth Gauge Rod
Level Arm
MasterGage.com
The ¼ inch diameter x 4-inch long rod serves two purposes. The FIRST is as an Index
Pin for use in the “Instant Recall” feature. The SECOND as a Depth Gauge Rod.
Move the Level Arm down against
the wood [zero position] and
tighten the Lock Screw. Insert
the Depth Gauge Rod leaving the
Lock Screw loose.
The following illustrations show how the Depth Gauge Rod adds
additional capabilities to your MasterGage/Professional. Keep in
mind that this feature can be used in all X, Y and Z. axis
. A typical
use in the Z axis would be checking/setting the infeed/outfeed
offset on a split fence for a Shaper or Router Table system.

A7.1
Using the Depth Gauge Rod
.
Read scale[s] for groove/slot/hole depth dimension
MasterGage.com
The ¼ inch diameter x 4 inch long rod serves two purposes. TheFIRST is as an Index
Pin for use in the “Instant Recall” feature. The SECOND as a Depth Gauge Rod.
Move the Depth Gauge Rod
over the groove/slot/hole and
allow it to bottom out.
Tighten the Lock Screw.
Reposition the Professional to a
flat surface.
Raise the Level Arm
and bottom out the Depth Gauge
Rod on the flat surface. Then
simply read the selected scale
under the Level Arm for the
groove/slot/hole depth.

A8
MOUNTING THE MasterGage/Pro ON
TO THE MITER SLOT CRADLE BAR
FOR USE ON THE TABLE SAW
Bottom View
Miter Slot Cradle Bar
MasterGage.com
The Miter Slot Cradle Bar attaches to both the
bottom and top surface of the Pro
. Simply position
the Cradle Bar at the desired position and tighten
the “jack screw” [by hand –do not use pliers, etc.]
Then place the assembled unit in the miter slot and
proceed with the desired measurements.
FIRST, place Cradle
Bar in miter slot and
turn course adjustment
set screws to take out
maximum play in miter
slot.
SECOND, once the
maximum play is taken
out of the miter slot, turn
the spring loaded, fine
adjustment set screw to
give a silk smooth motion
within the miter slot.
THIRD, attach the Cradle Bar on to
the Pro by tightening the “jack “
screw -with finger pressure only.

A9
ATTACHING THE DIAL INDICATOR
ATTACH DIAL INDICATOR WITH
THE STEM IN EITHER DOWN POSITION
[SHOWN] OR UP POSITION WITH THIS
LOCK KNOB
ATTACH DIAL INDICATOR IN
THE HORIZONTAL POSITION
[SHOWN] USING THE DIAL
INDICATOR ADAPTER HARDWARE
AS ILLUSTRATED
MasterGage.com

A10
USING THE DIAL INDICATOR
BEZEL LOCK KNOB
ROTATING
BEZEL
INTERCHANGABLE
ROUND AND FLAT TIPS
USE FLAT TIPS WHEN
MEASURING BLADES
SUCH AS JOINTERS,
PLANERS, SHAPERS
OR ROUND SURFACES
AS ILLUSTRATED
DIAL INDICATOR INFORMATION
THE DIAL INDICATOR IS VERY EASY TO USE
•THE DIAL INDICATOR HAS A TRAVEL RANGE OF .25 INCHES [1/4 INCH]
•THE BLACK NUMBERS ON THE DIA REPRESENT .010 [TEN THOUSANDTHS OF AN INCH]
•EACH BLACK GRADUATION ON THE DIAL REPRESENTS .001 INCH [ONE THOUSANDTHS OF AN INCH]
•EACH TIME THE INDICATOR ARM ROTATES 360 DEGREES [.100 INCH TRAVEL] THE SMALL DIAL MOVES TO A
NUMBER ON THE SMALL DIAL.
•EXAMPLE: WHEN THE LARGE INDICATOR ARM ROTATES TWO TIMES, THE SMALL DIAL ARM WILL INDICATE 2,
WHICH IS .100 TIMES 2 OR .2 INCHES.
PROCEDURE FOR USING THE DIAL INDICATOR
•MOVE THE DIAL INDICATOR SO THAT THE TIP OF THE INDICATOR IS TOUCHING THE DESIRED SURFACE.
•ALLOW THE TIP TO DEFLECT THE DIAL INDICATOR ARM SLIGHTLY. THIS IS CALLED “PRELOADING” THE DIAL
INDICATOR
•LOOSEN THE BEZEL LOCK SCREW AND ROTATE THE BEZEL SO THAT THE “0” ON THE DIAL LINES UP WITH THE
INDICATOR ARM -LOCK THE BEZEL KNOB.
•YOU ARE NOW CALIBRATED TO MEASURE FROM THE DESIRED SURFACE.
MasterGage.com

B1
TABLE SAW
MasterGage.com
Use 2.0 inch dial indicator
extension with ¼ inch dial indicator
flat tip. Contact arbor shaft on
smooth surface [not threads].
Rotate arbor by hand. Readings
should be in the .001 inch range.
Wipe face flange clean and run fingers
across flange to insure there are no burrs.
If there are –carefully remove them with
a
file.
HINT: Remove Level Arm, with dial
indicator attached and relocate below
table and clamp on a part of the structure.
Direct dial indicator perpendicular to flange
face for the most accurate readings.
Using the round tip on the dial
indicator, make contact with the
saw blade near the top of blade.
Rock the blade gently side to side
to check bearing wear. Check
with the saw manufacturer for
bearing wear allowances.

B2
TABLE SAW
MasterGage.com
Fence alignment: Attach the Miter Slot
Cradle Bar to the MasterGage/Pro.
Traverse the length of the fence and
adjust parallel to the miter slot. Check
for any fence warpage.
HINT: Adjust the fence so that the
fence is .004 to .006 further away from
the back of the fully extended blade,
relative to the front of the blade.
Square the rip fence with the MasterGage/Pro
protractor. Some European systems have
fences that tilt to any desired angle. These
fences can be easily set to any angle with the
MasterGage/Pro Protractor.
HINT: Use the Protractor “INSTANT RECALL”
feature
Square the miter gauge to the saw blade
using the MasterGage/Pro Protractor.
HINT: Use the MasterPlate for this
calibration. It will give you a
precision flat surface to accurately
establish squareness and set any
desired angle very accurately.
HINT: Use the Protractor “INSTANT
RECALL” feature.

TABLE SAW B3
MasterGage.com
OPTION 1: Use the MasterPlate
to
square the miter gauge
HINT: Use the Protractor “INSTANT
RECALL
” feature to recall any
miter angle accurately
OPTION 2: Use a machinist
square to square
the miter gauge
Square saw blade to table top –set
table saw blade tilt pointer to zero.
HINT: Set any bevel angle required
to within ¼ degree
HINT: Use the Protractor “INSTANT
RECALL” feature to recall
any bevel angle accurately
OPTION: Use the MasterPlate to
establish squareness to
table top.
HINT: MasterPlate is perfect for
setting any bevel angle
extremely accurately. Also
great for using the
“INSTANT RECALL”
feature.
Table of contents
Other MasterGage Measuring Instrument manuals
Popular Measuring Instrument manuals by other brands

PTI
PTI TorqTraQ Operator's manual

Eclipse
Eclipse EGA2 Combustion instruction manual

OPTILAB
OPTILAB TWL-C-M Series user manual

PeakTech
PeakTech 5220 Operation manual

PCB Piezotronics
PCB Piezotronics 351B31 Installation and operating manual

Xylem
Xylem Sensus Residia-M Installation and operating instructions