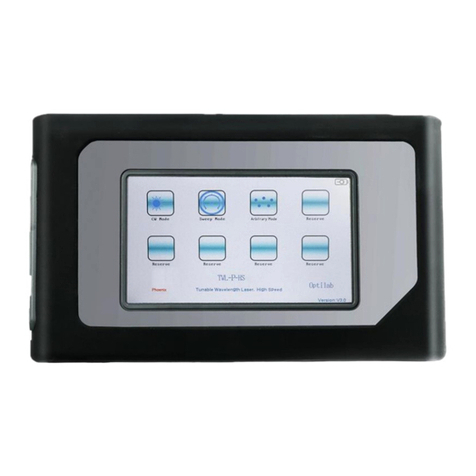
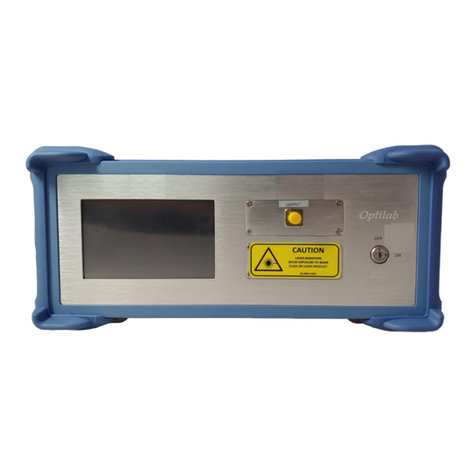
OPTILAB TWL-C-M Series User manual

TWL-C-M Series Module User’s Manual
Tunable Wavelength Laser, C-Band Module
Caution: The user must read this manual before operating the TWL-C-M unit. Operations other
than those described in this manual may result in personal injury and/or damage to
the unit.
Note that any attempt to open or fix the equipment without prior approval by
Optilab, LLC voids the warranty.
Ver. 1.6
May 25th 2021

TWL-C-M User’s Manual
Page ii of iii
Optilab, LLC
600 E. Camelback Road, Phoenix, AZ 85012
Phone: (602) 343-1496, Fax: (602) 343-1489, Email: sales@oequest.com
Revision History
Version
Date
Summary
1.0
9/03/15
Manual introduced.
1.1
02/06/18
Housing and PS revision
1.2
02/01/19
Logo change
1.3
11/04/19
GUI Software revision
1.4
12/11/19
GUI Software v1.0.1 revision
1.5
7/27/2020
Added note: Scan mode available for HP version only
1.6
05/25/2021
Software User Manual Updated
Copyright ©2021 by Optilab, LLC
All rights reserved.
This document is copyrighted property of Optilab, LLC. It may not be used in whole or in part for
manufacture, sale, or design of items without the written permission of Optilab, LLC.
Information herein is preliminary and subject to change without any notices.

TWL-C-M User’s Manual
Page iii of iii
Optilab, LLC
600 E. Camelback Road, Phoenix, AZ 85012
Phone: (602) 343-1496, Fax: (602) 343-1489, Email: sales@oequest.com
Table of Contents
1. GENERAL INFORMATION 1
1.1. INTRODUCTION 1
1.2. PRODUCT OVERVIEW 1
1.3. FEATURES 1
1.4. USER SAFETY 2
2. OPERATION 2
2.1. INTRODUCTION 2
2.2. INITIAL INSPECTION 2
2.3. CONTROLS 3
2.4. OPERATION INSTRUCTIONS 6
3. SOFTWARE 7
3.1. SOFTWARE INTERFACE AND CONTROL 7
3.2. GENERAL 8
3.3. LASER SETTING 9
3.4. SCAN MODE 11
5. TROUBLESHOOTING 13
6. TECHNICAL SPECIFICATIONS 14
7. MECHANICAL SPECIFICATIONS 14
8. SERVICE AND SUPPORT 15
8.1. WARRANTY 15
8.2. SERVICE AND CALIBRATION 15
8.3. CARE OF FIBER-OPTIC CONNECTORS 16

TWL-C-M User’s Manual
Page 1 of 16
Optilab, LLC
600 E. Camelback Road, Phoenix, AZ 85012
Phone: (602) 343-1496, Fax: (602) 343-1489, Email: sales@oequest.com
1. General Information
1.1. Introduction
This manual contains information on the installation and operation of the TWL-C-M
C-band tunable wavelength laser source.
1.2. Product Overview
The TWL-C-M is a wavelength tunable laser module in C band based on integrated
tunable laser assembly (ITLA). The TWL-C-M alleviates inventory and costs in high-
channel-count DWDM systems by allowing a single device to replace each of the
single-channel devices. Full-band tunable assemblies also enable system
functionality such as hot back-up and dynamic provisioning in addition to applications
of optical regeneration and wavelength conversion, with the HP version also
including a built-in sweep function for continuous scanning applications. The TWL-C-
M has a low Relative Intensity Noise (RIN), a high Side-Mode Suppression Ratio
(SMSR), an ultra-narrow linewidth, and excellent wavelength accuracy. Its RS232
control complies to OIF ITLA Multi Source Agreement (MSA) standard, with a
provided GUI software for intuitive control of the wavelength and optical power. The
TWL-C-M can be used for Dense Wavelength Division Multiplexing (DWDM) optical
transceivers and DWDM discrete line card designs.
1.3. Features
•Wide wavelength tuning range from 1527.6nm to 1567.13nm
•Precise Wavelength step resolution of 1 MHz
•High optical output power of 50 mW
•Ultra narrow laser line width <10 kHz
•Continuous wavelength sweeping function
•Linewidth broadening to 750 MHz
•Excellent Side Mode Suppression Ratio of 55 dB
•Polarization Maintaining (PM) Output
•Intuitive and easy to use USB interface

TWL-C-M User’s Manual
Page 2 of 16
Optilab, LLC
600 E. Camelback Road, Phoenix, AZ 85012
Phone: (602) 343-1496, Fax: (602) 343-1489, Email: sales@oequest.com
1.4. User Safety
1. The TWL-C-M unit uses high intensity invisible light from the optical output
receptacle. Avoid direct exposure to skin and eyes.
2. The equipment case is fully certified for EMS protection. The user should never
open the equipment case; any attempt will void the warranty and may result in
electric shock and EMS attack to equipment in the vicinity.
3. The user should avoid using any solvent or vaporizing chemical to clean the
equipment panel or case. It may result in damage to the surface and internal
circuits.
2. Operation
2.1. Introduction
This chapter describes how to operate the TWL-C-M unit, and discusses the location
and function of the controls and connectors.
2.2. Initial Inspection
Your TWL-C-M unit was carefully inspected before it left the manufacturer. It should
be in proper working order upon receipt. You should, however, inspect the unit for
any damage that may have occurred in transit. If the shipping container or the
packing material is damaged, keep it until the contents of the shipment have been
checked to be free of mechanical and electrical damages. Notify Optilab, LLC
promptly if any notable damage is found.
Each TWL-C-M shipment should include the following:
•TWL-C-M module unit
•User Manual
•Test Datasheet
•AC/DC Power Supply with Power Cords
•USB Cable

TWL-C-M User’s Manual
Page 3 of 16
Optilab, LLC
600 E. Camelback Road, Phoenix, AZ 85012
Phone: (602) 343-1496, Fax: (602) 343-1489, Email: sales@oequest.com
2.3. Controls
FEATURE
FUNCTION
OPTICAL OUTPUT
PORT
This receptacle accepts the indicated fiber-optic connector for
the tuned optical output, which is polarization-maintaining
type (PM).
DB15 ELECTRICAL
PORT
This port connects directly to the included power supply unit,
which relays the ±5VDC and RS232 pin terminals for remote
interfacing. Please refer to the pin-out diagram below.
LED INDICATORS
These LED indicators provide the status of the TWL-C-M.
The “Power” indicator will illuminate blue when the device has
received proper DC and the power supply AC switch is
enabled. The “Laser” indicator will illuminate blue when the
laser is enabled for operation, as set by the Laser Enable
Switch.
④SRQ OUTPUT
Used to externally synchronize the lasers high performance
scanning function. Only functional with the HP model
firmware upgrade.
TWL-C-M Laser Module
1
2
3
4

TWL-C-M User’s Manual
Page 4 of 16
Optilab, LLC
600 E. Camelback Road, Phoenix, AZ 85012
Phone: (602) 343-1496, Fax: (602) 343-1489, Email: sales@oequest.com
DB15 Pin-Out Diagram

TWL-C-M User’s Manual
Page 5 of 16
Optilab, LLC
600 E. Camelback Road, Phoenix, AZ 85012
Phone: (602) 343-1496, Fax: (602) 343-1489, Email: sales@oequest.com
FEATURE
FUNCTION
ACPOWER SOCKET
This receptacle accepts the electrical input for the
110/220VAC source
AC POWER SWITCH
Enables / disables the AC electrical power to the module
unit.
LED INDICATORS
These LED indicators provide the status of the TWL-C-M.
The ‘Power” indicator will illuminate green when the device
has received proper AC power connections and the rear
panel AC switch is enabled. The “Laser”indicator will
illuminate green when the laser is enabled for operation, as
set by the Laser Enable Switch.
LASER ENABLE
SWITCH
This key switch toggles the internal TWL-C-M laser source
ON and OFF
USB /DB9
COMMUNICATION
PORTS
These ports are used to send the software commands for
proper interface and control. Using the switch selects
between either USB or DB9 as the primary interface.
DB15 ELECTRICAL
PORT
This port connects directly to the TWL-C-M laser unit, which
relays the ±5VDC and RS232 pin terminals for remote
interfacing.
MOLEX DC OUT
This four-pin output port is used as an alternative to the DB-
15 port, and is not necessary for the TWL-C-M operation.
TWL-C-M Power Supply
1
2
4
3
5
6
7

TWL-C-M User’s Manual
Page 6 of 16
Optilab, LLC
600 E. Camelback Road, Phoenix, AZ 85012
Phone: (602) 343-1496, Fax: (602) 343-1489, Email: sales@oequest.com
2.4. Operation Instructions
Start-up Procedure
1. Insert the AC power cord into an appropriate AC power supply source and the
power supply AC Power Socket on the TWL-C-M unit.
2. Make the proper PC communication port connection, either USB or DB9 via serial
cable, ensuring the communication switch is set to the intended primary control
method.
3. To ensure proper remote communication, ensure the Laser Enable button is in the
enabled (inward) position prior to switching the AC Power Switch to the on
position.
4. Once all proper communication and optical connections are made, enable the rear
panel AC Power Switch to the On position; the Power LED should enable green
on the DC supply (blue on the TWL unit), and the Laser LED should also enable
green (blue on the TWL unit).
5. The TWL-C-M unit is now fully operational; please refer to the Software Interface
and Control section for more adjustment and operation details.
Patchcord Swapping Procedure
1. Toggle the AC Power Switch to the OFF position to disable the TWL-C-M module
output.
2. Swap patchcords as desired. Only connect the indicated connector patchcords to
the optical input/output receptacles, cleaning them as necessary.
3. Toggle the AC Power Switch to the ON position; refer back to the Start-Up
procedure to resume operation.

TWL-C-M User’s Manual
Page 7 of 16
Optilab, LLC
600 E. Camelback Road, Phoenix, AZ 85012
Phone: (602) 343-1496, Fax: (602) 343-1489, Email: sales@oequest.com
3. Software
‘Optilab TWL GUI’ is provided to control TWL-C-M. There are main three categories
in software, ‘General’, ‘Laser Setting’, and ‘Scan Mode’ depends on usage. Please
refer to following instruction for more detail.
3.1. Software Interface and Control
For the standard TWL-C-M, connecting the rackmount unit to an external PC will
allow for parameter monitoring and power and wavelength adjustments.
Using the front panel USB 2.0 port and an appropriate Optilab TWL software
(Provided by Optilab), connect the TWL-C-M to a PC using the following connection
diagram and serial port settings:
Computer
USB 2.0 Port
on Computer
Standard
USB Cable
Serial Port Settings
Baud Rate: 9600 bps
Data Bits: 8
Stop bits: 1
Parity: None
Flow Control: None
TWL-C-M
USB 2.0 Port
Front Panel

TWL-C-M User’s Manual
Page 8 of 16
Optilab, LLC
600 E. Camelback Road, Phoenix, AZ 85012
Phone: (602) 343-1496, Fax: (602) 343-1489, Email: sales@oequest.com
3.2. General
This is first tab of software for connection between software and TWL-C-M unit
through RS232.
<General Tab>
COMMAND
DESCRIPTION
①COM PORT SETTING
Select the appropriate COM Port for the TWL-C-M. Then click
‘Connect’ to connect
Please ‘Refresh’ if your COM port is not listed
②DEVICE INFORMATION
'Device Information' section will be activated if RS232
connection has been successfully completed. It read & display
information from laser.
③CLOSE/EXIT
‘Close’ button will disconnect RS232 connection.
‘Exit’ button will close application completely.
1
2
3

TWL-C-M User’s Manual
Page 9 of 16
Optilab, LLC
600 E. Camelback Road, Phoenix, AZ 85012
Phone: (602) 343-1496, Fax: (602) 343-1489, Email: sales@oequest.com
3.3. Laser Setting
This tab is for CW setting of laser. User can control power, frequency, wavelength or
channel and observe status of TWL-C-M.
[Note that Interlock should be shorted and key should be positioned at ‘ON’ to fully
utilize current tab]
<Laser Setting Tab>
2
3
4
1

TWL-C-M User’s Manual
Page 10 of 16
Optilab, LLC
600 E. Camelback Road, Phoenix, AZ 85012
Phone: (602) 343-1496, Fax: (602) 343-1489, Email: sales@oequest.com
COMMAND
DESCRIPTION
①LASER DIODE POWER
AND WAVELENGTH
SETTING
On ‘Setting’, these boxes are for entering in the desired laser
diode driving power and wavelength values.
Adjusting ‘Power (in terms of ‘dBm’)’ will increase or decrease
the optical output power. Please refer to ‘General’ tab for
available range of power level.
Adjusting ‘Wavelength’ will set TWL-C-M wavelength to desired
point. There are three independent options for this setting,
which are ‘Frequency (THz)’, ‘Wavelength (nm)’, and ‘Channel’.
For ‘Frequency’ and ‘Wavelength’ options, you can set its value
up to MHz point (i.e. 193.312435). Please refer to ‘General’ tab
for available range of wavelength. ‘Channel’ option follows ITU-
Grid. Please refer to ‘ITU-Grid’ tab under ‘Help’ page for more
detail.
②ENABLE/DISABLE
LASER
Click on ‘Enable’ to turn on the laser. Once Laser is on, ‘Disable’
will be visible on same button. You can disable laser with
‘Disable’ button.
③DEVICE STATUS
This box will display unit’s current status of ‘Power’, ‘Frequency’,
‘Wavelength’, and ‘Temperature’.
‘Status Update’ button will update status of laser diode one time.
‘Real Time’ button will enable real-time status update. Once it
real-time update starts, ‘Stop’ will be visible on same button.
You can stop this function with ‘Stop’ button.
[Once ‘Stop’ button has clicked, please allow ‘~ 2 second’ to
fully stop]
‘Save Data’ button will save and extract current values on
‘Device Status’ to excel file, named as ‘saved data.csv’
④OPTION
‘Low Noise Mode’ button will enable low noise mode of laser.
Once it is on, ‘OFF’ will be visible on same button. User can
disable with ‘OFF’ button.
‘Dither’ is for dithering laser. Enter value (GHz) and click ‘Set’
button to set the amount of dithering. Then click ‘ON’ will enable
dither mode. Once enabled, ‘OFF’ will be visible on same
button. User can disable with ‘OFF’ button.

TWL-C-M User’s Manual
Page 11 of 16
Optilab, LLC
600 E. Camelback Road, Phoenix, AZ 85012
Phone: (602) 343-1496, Fax: (602) 343-1489, Email: sales@oequest.com
3.4. Scan Mode
This tab is for TWL-C/L-R-CUST’s scanning function. It provides several options
such as scan range, sweep range and target power for user with status display.
[Note that Interlock should be shorted and key should be positioned at ‘ON’ to fully
utilize current tab]
<Scan Mode Tab>
1
2
3
SCAN MODE AVAILABLE FOR HP VERSION ONLY

TWL-C-M User’s Manual
Page 12 of 16
Optilab, LLC
600 E. Camelback Road, Phoenix, AZ 85012
Phone: (602) 343-1496, Fax: (602) 343-1489, Email: sales@oequest.com
COMMAND
DESCRIPTION
①SCAN MODE
SETTING
On ‘Scan Setting’, these boxes are for entering/selecting in the
desired scan mode values.
First, user needs to enter ‘Serial Number’ on text field. User
can find such information on module or test report.
[Note that selecting wrong ‘Serial Number’ and proceeding
scan function may cause laser damage of TWL-C-M unit]
‘Scan Range’ needs to be entered by user. It provides two
options, ‘Entire Scan Range’ or ‘Manual Range Setting’. If
‘Entire Scan Range’ box has checked, scanning range will be
set from first to last available frequency of unit. If checkbox
remains unchecked, user needs to enter desired range of
scanning. Available range can be observed from the ‘Scan
Range : “ or ‘General’ tab.
‘Sweep Range’ needs to be entered by user within the range of
’50 ~ 250’ in terms of GHz. This range defines center
frequency of one sweep among total sweeps (Clean Scan).
[We recommend 100 GHz for optimal speed and coverage]
‘Target Power’ needs to be selected by user from dropdown
menu. It is limited to 10 dBm (Optilab TWL GUI v1.0).
②ENABLE/DISABLE
SCAN MODE
‘Scan’ button will initiate scanning of laser. Once it starts
scanning, you can stop scan function at any point with ‘Stop’
button
[Once ‘Stop’ button has clicked, please allow ‘~ 3 second’ to
fully stop]
③DEVICE STATUS
This box will display unit’s ‘Center Frequency’ of sweep and
current status of scanning
‘Current Center Frequency’ will display center frequency of
current sweep range (range defined by ‘Sweep Range’) in
terms of ‘THz’
‘Status box’ tells user the current status of scanning such as
start, cancel or stop. User can delete record with ‘Clear’ button

TWL-C-M User’s Manual
Page 13 of 16
Optilab, LLC
600 E. Camelback Road, Phoenix, AZ 85012
Phone: (602) 343-1496, Fax: (602) 343-1489, Email: sales@oequest.com
5. Troubleshooting
SYMPTOM
POSSIBLE CAUSE AND SOLUTION
OPTICAL OUTPUT POWER
NOT HIGH ENOUGH.
C: Optical input / output connector is dirty.
S: Disable optical output to seed laser and clean optical
connectors.
C: Use of incorrect optical adapter or connector.
S: Use only the indicated optical adapter and connector. If
measurement instruments accept different connector type, then
use a hybrid patchcord.
C: Optical input / output connector damaged.
S: Measure optical output power with power meter and compare
with original test data. Return to Optilab for repair if the difference
is high (>4 dB) and cannot be corrected by cleaning or replacing
the optical connectors. Always apply dust cover plugs to unused
optical receptacles to prevent the damage of internal optical
connectors.
OPTICAL OUTPUT POWER
UNSTABLE.
C: Insufficient optical output isolation.
S: Connect isolator of corresponding wavelength to optical output
connector.
UNIT DOES NOT POWER
UP.
C: Blown fuse.
S: Contact Optilab, LLC to replace fuse.
C: Insufficient electrical voltage.
S: Check that the electrical supply is 110 / 220 VAC.
C: Power cord is loose.
S: Plug power cord is firmly into the unit.
UNIT RESETS OR BLINKS
ON AND OFF
C: Insufficient electrical voltage.
S: Check that the electrical supply is at least 100 VAC.

TWL-C-M User’s Manual
Page 14 of 16
Optilab, LLC
600 E. Camelback Road, Phoenix, AZ 85012
Phone: (602) 343-1496, Fax: (602) 343-1489, Email: sales@oequest.com
6. Technical Specifications
Optical Specifications
Operating Wavelength
1527.6nm to 1567.13nm
Wavelength Accuracy
± 1.5 GHz
Wavelength Stability
± 1pm over 24 hours
Output Power
50mW max.
Output Stability
0.02 dB over 8 hours
Linewidth (FWHM)
< 10 kHz w/o SBS
< 750 MHz w/ SBS
Carrier to Noise Ratio (CNR)
50 dBc typ. @ -5 dBm
Side Mode Suppression Ratio
55 dB typ.
Relative Intensity Noise (RIN)
-145dB/Hz
Polarization Extinction Ratio
20 dB min.
Optical Isolation
30 dB min.
Fiber Type
Panda 1550 PM Fiber
7. Mechanical Specifications
Power Supply Requirements
100-240 VAC
Optical Connectors
PM Narrow Key FC/APC
Standard, additional types available
Operating Temperature
0°C to +40°C
Storage Temperature
-40°C to +70°C
Control
Output Power Level, Wavelength
Communication Interface
RS232, via DB9 serial or USB 2.0
Dimensions
120mm x 112mm x 32mm

TWL-C-M User’s Manual
Page 15 of 16
Optilab, LLC
600 E. Camelback Road, Phoenix, AZ 85012
Phone: (602) 343-1496, Fax: (602) 343-1489, Email: sales@oequest.com
8. Service and Support
8.1. Warranty
Optilab, LLC guarantees its TWL-C-M unit to be free of defects for 1 year from the
date of shipment. The guarantee does not cover any damages resulting from the
misuse or improper handling of the equipment, or any incidental or consequential
loss. Note that the warranty will be void upon any attempt to open or to fix the
equipment by the user without prior approval of Optilab, LLC
8.2. Service and Calibration
Your TWL-C-M unit has been designed to provide years of trouble-free operation.
No internal maintenance is required provided that the equipment is properly
handled, operated and kept away from contamination. For any questions regarding
the operation and performance of the unit, please contact Optilab, LLC at:
Optilab, LLC
600 E. Camelback Road
Phoenix, AZ 85012
Phone: (602) 343-1496
Fax: (602) 343-1489
Email: sales@oequest.com

TWL-C-M User’s Manual
Page 16 of 16
Optilab, LLC
600 E. Camelback Road, Phoenix, AZ 85012
Phone: (602) 343-1496, Fax: (602) 343-1489, Email: sales@oequest.com
8.3. Care of Fiber-optic Connectors
Damage to optical connectors account for more than 70 percent of equipment
performance degradation. To avoid such damage, the user should use only industrial
grade 99% pure isopropyl alcohol and follow the procedures below to keep the
connectors, adaptors and receptacles clean.
Cleaning Optical Connector End-face with Wipe and Alcohol
To properly clean optical connectors utilizing lens tissue grade wipes and alcohol
follow the procedure below. The moist wipe removes dust particles, oil and
contaminants that may damage or blot the end-face of the connector during
connection. The dry wipe removes residual alcohol that may be ignited by optical
emission.
1. Disable the optical output and turn off unit to prevent accidental exposure or
damage to the optical connector by optical emission.
2. Moisten a wipe with alcohol by placing on top of the alcohol dispenser and push
down to saturate the wipe.
3. Place the moist wipe on a work surface, and place a second dry wipe next to it.
4. Wipe the optical connector, end-face down on the moist wipe 3 times and then
repeat on the dry wipe.
5. Visually inspect the end-face of the optical connector with an optical microscope
to verify cleanliness. Repeat steps 2 to 5 as needed.
Cleaning Optical Connector Sides, Receptacles, Adaptors with Swab and Alcohol
Dust or particles can adhere to the insides of receptacles and adaptors or the sides
of the optical connector ferrule. Their presence can affect the alignment of the optical
fiber connectors and increase connection loss. To properly clean optical connectors,
receptacles, and adaptors utilizing a swab and alcohol follow the procedure below:
1. Disable the optical output and turn off unit to prevent accidental exposure or
damage to the optical connector by optical emission.
2. Moisten the swab by placing it on top of the alcohol dispenser and push down to
saturate the swab.
3. For receptacles, adapters, or other connection points, insert the moistened swab
and rotate the tip 1/2 turn clockwise and counter-clockwise 6 times while applying
light but firm pressure.
4. For fiber connectors, rotate the tip of the moistened swab 5 revolutions around the
connector while applying light but firm pressure.
5. Visually inspect the end face of the connector with an optical microscope to verify
cleanliness. Clean end-face as needed.
Table of contents
Other OPTILAB Measuring Instrument manuals
Popular Measuring Instrument manuals by other brands

YOKOGAWA
YOKOGAWA Power Series Plus instruction manual

Endress+Hauser
Endress+Hauser Solicap M FTI55 Safety instructions

Emerson
Emerson Rosemount 3814 Maintenance and troubleshooting manual

Penpower
Penpower Picasso manual

EKO Instruments
EKO Instruments MS-01 instruction manual

Apogee Instruments
Apogee Instruments SIF-131 owner's manual