NOTA: Si consiglia di non mantenere il cibo a contatto con fonti di calore una volta completato il ciclo
di cottura.
ISTRUZIONI PER L’USO
1. Mettere del cibo già condito in un sacchetto sigillabile.
2. Prima di sigillare, è necessario eliminare il più possibile l’aria all’interno del sacchetto. Si consiglia
di utilizzare un sacchetto sottovuoto per ottenere risultati migliori.
3. Riempire d’acqua il Cestello Interno facendo attenzione a non superare la linea FULL CUP del
livello massimo una volta che vengono immersi i sacchetti.
NOTA: E’ possibile posizionare prima i sacchetti nel Cestello Interno e poi aggiungere l’acqua per
essere sicuri di non oltrepassare il livello massimo FULL CUP. Successivamente, rimuovere i
sacchetti prima di iniziare il ciclo di cottura e riscaldare l’acqua.
4. Premere il Tasto Cottura Sottovuoto e utilizzare la Manopola del Programma per selezionare il
tempo di cottura preimpostato ideale. E’ possibile scegliere tra le Impostazioni di Default LOW, MED,
o HIGH.
Oppure, è possibile premere il Tasto Timer per modificare il tempo di cottura. Successivamente,
premere il Tasto Temperatura per selezionare la temperatura di cottura desiderata.
NOTA: I tempi LOW, MED, e HIGH sono delle opzioni preimpostate, quindi è necessario modificare
la temperatura in base al grado di cottura che si vuole ottenere.
5. Premere la Manopola del Programma per iniziare il ciclo di cottura. Il Display LCD diventerà
arancione. Una volta raggiunta la temperatura di cottura ideale, il Robot emetterà un “bip” e il timer
avvierà il conto alla rovescia.
6. Immergere delicatamente in acqua il sacchetto con il cibo evitando di lasciarlo cadere.
7. Non appena il timer ha terminato il conto alla rovescia, il Display LCD diventa blu e il Robot
mantiene automaticamente la temperatura ideale (NON premere il Tasto Mantenimento Calore).
Utilizzare delle pinze per togliere dall’acqua il sacchetto sottovuoto con dentro il cibo. Non utilizzare
le mani nude perché l’acqua sarà bollente.
CONSIGLI PER LA COTTURA SOTTOVUOTO
NOTA: Non mettere in acqua nessun cibo senza averlo prima chiuso all’interno di un sacchetto sigillabile.
• Si consiglia di condire il cibo prima di chiuderlo nel sacchetto.
• Per la cottura, utilizzare sempre un sacchetto sottovuoto BPA-free o dei sacchetti sigillabili per la
conservazione del cibo.
• Il tempo di cottura sarà determinato dallo spessore della carne o del pesce. Utilizzare un termometro
da cucina per verificare la corretta temperatura di cottura una volta tolto il cibo dal sacchetto.
• Per ragioni di salute e sicurezza, aggiungere 30 minuti al tempo di cottura se non si è sicuri del
grado di cottura (ad esempio per pastorizzare le uova o il pollo).
• Una scottata in pentola dopo il ciclo di cottura dona al cibo il giusto aspetto, temperatura e
consistenza.
• Mettere del burro o dell’olio in una padella già riscaldata e scottare velocemente la carne appena
cotta per 30 secondi da ogni lato.
• Assicurarsi che il sacchetto sigillabile con dentro il cibo sia costantemente immerso in acqua
affinché la cottura sia completa.
NOTA: Ogni metodo di cottura richiede l’aggiunta di una qualche forma di liquido (acqua, brodo,
etc.). Qualora non si abbia una buona conoscenza del processo di cottura a pressione, seguire
attentamente i suggerimenti delle ricette prima di aggiungere liquidi.
NOTA: E’ necessario almeno 1 bicchiere di sostanza liquida per generare pressione.
COTTURA SOTTOVUOTO
• Il Sous-vide è un metodo di cottura in cui il cibo viene messo all’interno di un sacchetto di plastica o
di un barattolo di vetro e viene cotto a bagnomaria più a lungo rispetto al normale tempo di cottura
(solitamente da 1 a 7 ore e in alcuni casi fino a 48 ore) ad una temperatura da regolare con cura.
Questa temperatura è molto più bassa di quella usata tradizionalmente per cuocere ed è di 55-60°C
per la carne, mentre è più alta per le verdure. La funzione è quella di cuocere in maniera uniforme,
garantendo che l’interno sia cotto correttamente, che l’esterno non sia troppo cotto e trattenendo
l’umidità necessaria alla cottura.
• Con i metodi di cucina tradizionali, il calore viene trasferito dal fornello o dal forno a una pentola o a
una teglia riscaldando il cibo dall’esterno verso l’interno. Con il metodo di cottura sottovuoto, è
possibile ottenere una buona cottura, ma molto spesso il cibo è troppo cotto all’esterno e poco cotto
all'interno. Il calore generato da una pentola o all’interno di un forno è generalmente molto maggiore
del necessario. Se il cibo non viene rimosso al momento giusto, i risultati saranno inconsistenti.
• Il metodo di Cottura Sottovuoto utilizza un preciso controllo della temperatura, permettendo il
raggiungimento di risultati impensabili attraverso altre tecniche di cottura. Basta semplicemente
impostare il Robot da Cucina come spiegato in questo manuale, richiudere il cibo già condito in un
sacchetto sigillabile o sottovuoto, posizionare il sacchetto nell’acqua e selezionare il tempo e la
temperatura. Il cibo si cuocerà ogni volta alla perfezione grazie al Robot da Cucina. Una volta
terminata la cottura, è possibile lasciare il cibo immerso in acqua finché non è ora di servire.
IT
PARTI ED ACCESSORI
COPERCHIO FRIGGITRICE AD
ARIA (CON VISTA DA SOTTO)
COPERCHIO FRIGGITRICE AD
ARIA (CON VISTA DA SOPRA)
COPERCHIO FRIGGITRICE
(CON VISTA DA DIETRO)
ALLINEAMENTO COPERCHIO
FRIGGITRICE
Tappi di accoppiamento
Ventola (posizionata
dietro la protezione)
Maniglie
Elemento riscaldante Presa d’aria
Scarico
05
MALFUNZIONAMENTO. Contattare il Servizio Clienti per assistenza.
• Per prevenire il rischio di esplosione ed infortunio, sostituire solamente le Guarnizioni in silicone
(anello di tenuta) come consigliato dal produttore.
• Scollegare il cavo del Robot quando non è in uso o prima del lavaggio. Lasciar raffreddare il Robot
prima di montare o rimuovere delle parti.
• NON IMMERGERE L’APPARECCHIO IN ACQUA.
SE IL ROBOT CADE O SI TROVA ACCIDENTALMENTE IMMERSO IN ACQUA, SCOLLEGARE
IMMEDIATAMENTE IL CAVO DALLA PRESA ELETTRICA. NON TOCCARE IL LIQUIDO SE IL
ROBOT E’ COLLEGATO E ANCORA IMMERSO IN ESSO. NON IMMERGERE O SCIACQUARE IL
CAVO E LA SPINA CON ACQUA O ALTRI LIQUIDI.
CONSERVA QUESTE ISTRUZIONI - SOLO PER USO DOMESTICO
ATTENZIONE: Collegare il Cavo di Alimentazione
• Collegare sempre il cavo di alimentazione prima al Robot da Cucina e successivamente alla presa
elettrica. Collegare ad una presa a 3 poli assicurandosi che non vi siano attaccati altri dispositivi.
Collegare altri dispositivi alla presa potrebbe causare un sovraccarico del circuito.
• NON UTILIZZARE MAI UNA PROLUNGA PER QUESTO PRODOTTO.
• Il Robot da Cucina è stato progettato esclusivamente per prese elettriche a muro a 3 poli di 120V
esclusivamente dedicate.
NON UTILIZZARE ALTRI TIPI DI PRESE ELETTRICHE e non modificare la spina.
• Per evitare il rischio di inciampare o rimanere impigliati su un cavo troppo lungo, è in dotazione una
spina con un cavo di alimentazione più corto.
• Per spegnere, impostare ogni controllo su “off”, quindi rimuovere la spina dalla presa elettrica.
CARATTERISTICHE & BENEFICI
A. DISPOSITIVI DI SICUREZZA INTEGRATI
1. COPERCHIO CON CHIUSURA DI SICUREZZA: Le estremità del Coperchio e della Base del
Robot combaciano perfettamente in modo da sigillare il Coperchio alla Base quando è chiuso
completamente.
2. MECCANISMO DI RILEVAMENTO DELLA PRESSIONE (VALVOLA GALLEGGIANTE): Quando
la pressione raggiunge il livello previsto, la Valvola Galleggiante si solleva e raggiunge il Perno di
Fissaggio.
3. SENSORE DI RILEVAMENTO DEL COPERCHIO: Un sensore magnetico indica quando il
Coperchio è completamente chiuso. Il Robot emetterà un “bip” e sul display apparirà la scritta “LID”
quando il Coperchio non è chiuso bene o non è necessario per il programma selezionato.
NOTA: I programmi di Cottura Sottovuoto, Cottura a Vapore, Rosolare, Cottura Lenta, e Yogurt non
possono essere avviati se il Coperchio è chiuso. Si raccomanda di utilizzare il Coperchio in Vetro per
prevenire gli schizzi e mantenere una temperatura corretta durante i cicli di cottura dei programmi di
Cottura Sottovuoto, Cottura a Vapore, Cottura Lenta, e Yogurt. Si raccomanda inoltre di lasciare
sempre il Coperchio in Vetro durante la cottura lenta per prevenire gli schizzi.
4. SISTEMA DI PROTEZIONE ALL’INTERNO DEL COPERCHIO: L’interno del Coperchio impedisce
al cibo di fuoriuscire dalla parte superiore del Coperchio intasando così la Valvola Galleggiante e le
camere per il Rilascio della Pressione.
5. PROTEZIONE ANTIBLOCCAGGIO: Controlla la parte inferiore della Valvola di Rilascio della
Pressione.
6. INTERRUTTORE A DUE FASI PER IL RILASCIO RAPIDO IN SICUREZZA: L’Interruttore per il
Rilascio del Vapore deve essere fatto scattare una volta per rilasciare il vapore e poi lasciato andare
per aprire il Coperchio. Se del vapore sta uscendo dalla Valvola di Rilascio della Pressione o la mano
dell’utente è ancora a contatto con l’Interruttore per il Rilascio del Vapore in posizione aperta (Open),
allora il Coperchio non si aprirà.
7. SISTEMA DI RILASCIO DELLA PRESSIONE IN ECCESSO: La Valvola di Rilascio della
Pressione è calibrata per mantenere un certo livello di pressione e permette alla pressione di
formarsi solo fino ad un certo livello. Quando la pressione è troppo alta, il vapore viene rilasciato
finché la pressione non scende sotto il livello sostenibile.
8. CONTROLLO AUTOMATICO DELLA TEMPERATURA: La temperatura è regolata tramite i vari
programmi in modo da essere mantenuta automaticamente.
9. CONTROLLO DELLA PRESSIONE: Il Coperchio Interno è poggiato su di un piatto di pressione.
Quando si forma troppa pressione all’interno della pentola, il piatto fa spegnere il generatore di
calore impedendo alla pressione di aumentare ulteriormente.
10. DISPOSITIVO DI PROTEZIONE ELETTRICA: Il sensore di temperatura segnala quando la
temperatura è superiore rispetto alle impostazioni programmate, facendo spegnere il generatore di
calore in modo da mantenere la temperatura corretta.
11. INDICATORE CICLI DI COTTURA (DISPLAY LCD): Il display LCD cambia colore e sullo
schermo appare un conto alla rovescia.
12. SISTEMA DI PROTEZIONE DELLA VALVOLA GALLEGGIANTE: Uno schermo sul Coperchio
protegge la Valvola Galleggiante in modo che non possa essere manomessa.
B. CARATTERISTICHE SPECIALI
1. DISPLAY LCD: Il Display LCD del Robot da Cucina offre un’ampia gamma di 44 programmi
preimpostati. Il tempo di cottura può essere modificato per qualsiasi ricetta in base alle preferenze
personali. Il display cambia colore a seconda del tipo di attività.
2. MODALITA’ MANTENIMENTO DEL CALORE: Al termine di ogni ciclo di cottura, il Robot passerà
automaticamente alla modalità di Mantenimento del Calore per mantenere il cibo caldo. La modalità
di Mantenimento del Calore può rimanere attiva fino a 24 ore.
NOTA: Il cibo conservato in modalità di Mantenimento del Calore per più di 6-8 ore potrebbe perdere
di sapore e consistenza, quindi fare attenzione a non utilizzare la modalità troppo a lungo.
3. INTERRUTTORE PER IL RILASCIO DEL VAPORE: Permette di abbassare velocemente la
pressione. Far scattare l’Interruttore per il Rilascio situato nella parte superiore del Coperchio dalla
posizione chiusa ad aperta (da Closed a Open) per aprire la Valvola di Rilascio della Pressione.
ATTENZIONE: Vapore bollente viene rilasciato attraverso la Valvola di Rilascio della Pressione.
NON APRIRE A MANI NUDE la Valvola di Rilascio della Pressione.
4. TECNOLOGIA COOKSMART: Con 44 programmi preimpostati, i vostri piatti preferiti possono
essere cucinati alla perfezione in maniera facile e veloce all’interno di una sola pentola semplicemente
premendo un bottone e girando una manopola.
5. MANICO DEL COPERCHIO ANTI- SCOTTATURA: Il Manico è anti-scottatura, quindi è possibile
aprire il coperchio anche quando c’è del cibo all’interno della pentola. Si raccomanda di utilizzare
sempre dei guanti da forno per aprire il Coperchio al termine di un ciclo di cottura.
6. CESTELLO INTERNO IN ACCIAIO INOSSIDABILE: Il Cestello Interno è in acciaio inossidabile,
quindi completamente privo di PTFE e PFOA.
RILASCIARE LA PRESSIONE
RILASCIO NATURALE E RILASCIO RAPIDO
• Il rilascio naturale e il rilascio rapido sono due metodi comunemente usati per depressurizzare una
pentola a pressione una volta terminata la cottura. Le pentole a pressione utilizzano la pressione del
vapore che si crea all’interno della pentola chiusa per cuocere il cibo. Man mano che la pentola si
riscalda, il liquido produce del vapore che innalza la pressione all’interno della pentola e permette al
cibo di cuocersi fino a tre volte più velocemente.
• Una volta terminata la cottura, la pressione che si è creata all’interno della pentola deve essere
rilasciata.
• Il Robot da Cucina dispone di un meccanismo di sicurezza che impedisce di aprire il Coperchio
finché la pressione non si è abbassata. Ci sono due metodi per rilasciare la pressione all’interno del
Robot: rilascio naturale e rilascio rapido. Entrambi servono a depressurizzare il Robot, ma seguono
processi diversi e ogni processo ha un effetto differente sul cibo all’interno del Robot.
COME FUNZIONA IL RILASCIO NATURALE E QUANDO UTILIZZARLO
• Il rilascio naturale fa sì che la pressione si riduca lentamente da sola. Una volta che il ciclo attivo di
cottura è terminato, premere il Tasto Cancel nel Pannello di Controllo e la pressione all’interno della
pentola si abbasserà lentamente. A causa di questo lento abbassamento della pressione e della
temperatura, il cibo continuerà a cuocersi anche se il ciclo attivo di cottura è terminato.
• Si consiglia di utilizzare questo metodo di rilascio della pressione quando si cucinano carni, cibi che
aumentano di volume, zuppe o qualsiasi altro piatto a base principalmente liquida.
• La durata del rilascio naturale varia in base al tipo e alla quantità di cibo cucinato.
Generalmente, il rilascio naturale impiega tra i 20 e i 60 minuti.
• NOTA: Per assicurarsi che sia stata rilasciata tutta la pressione, far scattare l’Interruttore per il
Rilascio del Vapore in posizione aperta (Open) e lasciarlo in azione. Il Robot non dovrebbe rilasciare
alcun vapore.
COME FUNZIONA IL RILASCIO RAPIDO E QUANDO UTILIZZARLO
• Per utilizzare il rilascio rapido, una volta che il ciclo attivo di cottura è terminato, è necessario
cancellare il ciclo di cottura premendo il Tasto Cancel. Successivamente, bisogna far scattare
l’Interruttore per il Rilascio del Vapore in posizione aperta (Open), lasciarlo in azione ed attendere
che il vapore si dissolva. Una volta che il vapore è stato rilasciato, il Coperchio normalmente.
si aprirà.
• Il processo di rilascio rapido richiede una maggiore attenzione poiché la Valvola di Rilascio della
Pressione emette una scarica di vapore. Il rilascio rapido impiega solo pochi minuti ed è consigliato
per cibi come uova e verdure o ingredienti particolarmente delicati che non necessitano di un
maggior tempo di cottura. Questo metodo, inoltre, è molto utile quando si desidera saggiare il grado
di cottura del cibo o per aggiungere degli ingredienti all’interno del Robot da Cucina (ad esempio
quando si cucina uno stufato).
• Non utilizzare il rilascio rapido quando si cucinano cibi che generano schiuma o che aumentano di
volume durante la cottura come i legumi; oppure con cibi a base principalmente liquida come le
zuppe, poiché il liquido potrebbe andare in ebollizione e fuoriuscire dalla Valvola di Rilascio della
Pressione.
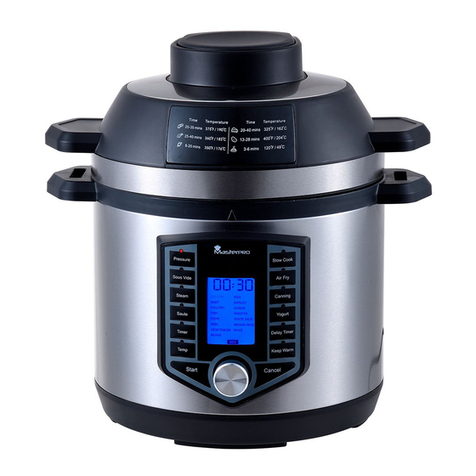
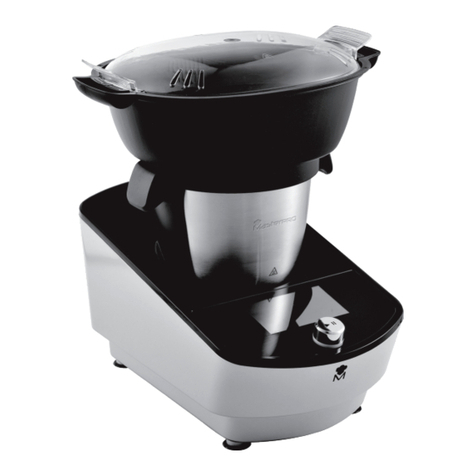
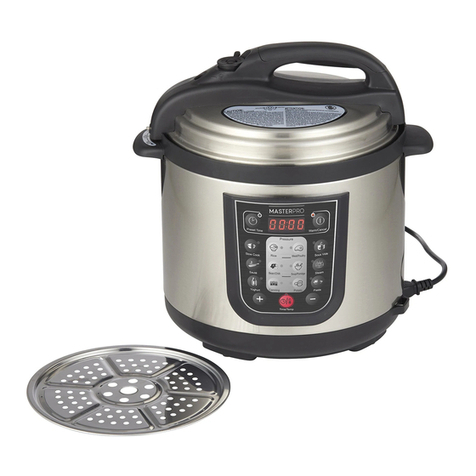
ROBOT DA CUCINA FRYCOOK 12 IN 1
PER SAPERNE DI PIU’
Il Robot da Cucina permette di cucinare dei piatti deliziosi per tutta la famiglia. Prima dell’uso, è
necessario leggere attentamente questo manuale, assicurandosi di aver compreso a fondo gli usi e
le precauzioni relativi all’utilizzo di questo apparecchio.
BENVENUTO
• La cottura in pentola a pressione permette di preparare velocemente dei piatti molto più appetitosi
rispetto ai metodi tradizionali di cucina. E’ veramente così.
• Nell’ultimo decennio abbiamo inventato alcuni degli elettrodomestici da cucina più famosi, utilizzati
in tutto il mondo. Il Robot da Cucina è l’ultimo della nostra fantastica linea.
• Con una serie di impostazioni che ti permetteranno di migliorare la tua esperienza in cucina:
friggitrice ad aria, vaporiera, pentola a cottura lenta, pentola a pressione, yogurt maker e cottura
sottovuoto; il Robot da Cucina è molto più di una pentola a pressione.
• Il prodotto è stato studiato e testato e garantirà ottimi risultati in cucina per tutta la famiglia. Una
volta che si è presa confidenza con il Sistema Pre-Set del Robot da Cucina, scoprirete che molti dei
vostri piatti preferiti possono essere cucinati alla perfezione in molto meno tempo rispetto al solito.
• La camera di cottura sigillata permette di innalzare il calore e la pressione favorendo il risparmio
energetico, un migliore mantenimento dei sapori e diminuendo il tempo di cottura. Il processo di
cottura “sigillato” permette di eliminare lo sporco che si crea sui fornelli, rendendo molto più semplice
la pulizia della cucina.
AVVERTENZE D’USO
ATTENZIONE
PREVENIRE INFORTUNI! LEGGERE ATTENTAMENTE LE ISTRUZIONI PRIMA DELL’USO!
Quando si utilizzano dispositivi elettrici, seguire sempre queste norme basiche di sicurezza.
• Leggere attentamente le istruzioni per prevenire infortuni.
• Questo dispositivo non è progettato per l’utilizzo da parte di persone con ridotte capacità fisiche,
sensoriali o mentali o con scarsa esperienza; a meno che non siano sotto la supervisione di un
responsabile o non sia stata data loro esplicita autorizzazione ad utilizzare l’apparecchio. Non
lasciare incustodito in presenza di bambini o animali. Tenere il dispositivo e il cavo lontani dalla
portata dei bambini. Chiunque non abbia letto e compreso tutte le istruzioni operative e di sicurezza
contenute in questo manuale non è qualificato per utilizzare o pulire l’apparecchio.
• Poggiare sempre l’apparecchio su di una superficie piana e resistente al calore. Progettato
per utilizzo su superfici piane. NON avviare l’apparecchio su superfici instabili. Non posizionare
sopra o vicino a fornelli o piastre da cucina, o all’interno di un forno riscaldato. Non avviare l’apparec-
chio in uno spazio chiuso o sotto ad armadietti pensili. Si necessitano spazi ed una ventilazione
adeguata per prevenire eventuali danni dovuti al rilascio di calore durante l’utilizzo. Mai avviare
l’apparecchio nelle vicinanze di materiali infiammabili come tovaglioli, carta da cucina, tende o piatti
di carta. Non lasciare il cavo sospeso ai lati del tavolo o a contatto con superfici calde.
• MAI FORZARE L’APERTURA DEL COPERCHIO. Mai cercare di aprire il Coperchio se l’apparecchio è
attivato in modalità pentola a pressione. Qualsiasi tipo di pressione all’interno della pentola può essere
pericoloso. Non aprire la pentola a pressione finché il Robot non si è raffreddato e tutta la pressione
interna non è stata rilasciata. Se non si riesce ad aprire il coperchio, ciò significa che il Robot è
IT
06
ancora soggetto a pressione - non forzare per aprire. Una volta che la pressione è stata rilasciata,
seguire le istruzioni per aprire il Coperchio. Aprire sempre il Coperchio portandolo lontano dal viso e
dal corpo per evitare bruciature (vedi ISTRUZIONI PER L’USO).
• Il Coperchio deve poter ruotare liberamente e qualsiasi resistenza indica che è posizionato in
maniera errata o soggetto a pressione.
• Collegare sempre il cavo prima all’apparecchio e poi alla presa elettrica. Per scollegare, spegnere
l’apparecchio, quindi staccare la spina.
• Questo è un apparecchio per cucina a pressione. Un utilizzo errato potrebbe causare ustioni.
Assicurarsi che il Robot sia chiuso correttamente prima di metterlo in funzione e che la Valvola di
Rilascio della Pressione sia pulita.
• E’ necessaria la massima cautela nello spostare un apparecchio contenente olio bollente o altri
liquidi ad alta temperatura. SI CONSIGLIA DI: NON SOLLEVARE O MUOVERE IL ROBOT quando
soggetto a pressione o quando contiene liquido bollente. Il cibo bollente può causare gravi ustioni!
Per rimuovere il cibo dalla pentola, utilizzare il mestolo in dotazione.
• Prima dell’uso, controllare sempre che gli strumenti per il rilascio della pressione non siano otturati.
• ATTENZIONE ALLE SUPERFICI CALDE: Questo apparecchio genera una grande quantità di
calore e di vapore durante l’utilizzo. Non toccare la superficie esterna quando è calda. Servirsi di
guanti o presine. Per prevenire infortuni, durante l’utilizzo non toccare le superfici calde o la Valvola
di Rilascio della Pressione presente nel Coperchio. E’ necessario prendere le adeguate precauzioni
al fine di evitare infortuni, incendi o danni a cose.
• Non utilizzare questo apparecchio per funzioni alternative a quelle previste da questo manuale.
• Non utilizzare il Manico del Coperchio per sollevare o spostare la pentola. Utilizzare esclusiva-
mente le maniglie ai lati del Robot per spostare o sollevare il Robot (vedi APRIRE IL COPERCHIO in
PREPARAZIONE ALL’USO).
• Mai riempire la Pentola al di sopra della linea che indica il livello massimo di riempimento (FULL
CUP). Riempire eccessivamente la Pentola potrebbe portare all’ostruzione della Valvola di Rilascio
della Pressione, provocando un aumento eccessivo della pressione.
• ATTENZIONE: per ridurre il rischio di scosse elettriche, cucinare esclusivamente all’interno del
Cestello Interno rimovibile fornito in dotazione.
• Alcuni cibi come riso, fagioli, salsa di mele, mirtilli, orzo perlato, farina d’avena o altri cereali, piselli,
noodles, maccheroni, rabarbaro e spaghetti, aumentano di volume e generano schiuma durante la
cottura, pertanto necessitano di istruzioni di cottura particolari.Prestare molta attenzione alle quantità
dei liquidi. Mai riempire il Cestello Interno oltre la METÀ quando si cucinano questi cibi.
• NON riempire mai il Robot al di sopra della linea dei 2/3 del livello massimo di riempimento.
Quando si cucinano cibi come riso o verdure essiccate che aumentano il proprio volume durante la
cottura, non riempire mai il Robot oltre il livello consigliato, ossia la metà. Riempire eccessivamente
la Pentola potrebbe portare all’ostruzione della Valvola di Rilascio della Pressione, provocando un
aumento eccessivo della pressione.
• Non riempire mai con olio e non utilizzare per friggere in profondità. Non utilizzare questa pentola a
pressione per friggere a pressione con olio.
• L’utilizzo di accessori non consigliati dal produttore dell’apparecchio potrebbe causare infortuni.
• Non utilizzare prese elettriche al di sotto del livello del tavolo.
• Non attivare mai utilizzando una prolunga.
• Non utilizzare il Robot all’esterno.
• Non avviare se il cavo o la spina sono danneggiati.
Se l’apparecchio da segni di malfunzionamento durante l’utilizzo, scollegare immediatamente il cavo
di alimentazione. NON UTILIZZARE O CERCARE DI RIPARARE L’APPARECCHIO IN CASO DI

