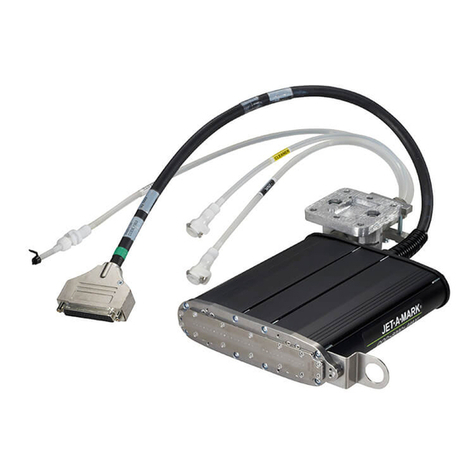
Matthews L Series User manual


i
Table of Contents
L-Series PTM - User Guide - Version 1 Issue 2
Table of Contents
Introduction . . . . . . . . . . . . . . . . . . . 1
Conditions. . . . . . . . . . . . . . . . . . . . . . . 1
Safety Considerations . . . . . . . . . . . . . 1
Certification. . . . . . . . . . . . . . . . . . . . . . 2
About this Manual. . . . . . . . . . . . . . . . . 2
Technical Support. . . . . . . . . . . . . . . . . 2
Safety Requirements . . . . . . . . . . . . 3
Handling the Equipment . . . . . . . . . . . . 3
General Considerations . . . . . . . . . . . . 3
Overview. . . . . . . . . . . . . . . . . . . . . . 5
In the Box . . . . . . . . . . . . . . . . . . . . . . . 5
Additional Equipment . . . . . . . . . . . . . . 5
PTM Description . . . . . . . . . . . . . . . . . . 5
External Components . . . . . . . . . . . . 6
Labeling . . . . . . . . . . . . . . . . . . . . . . 8
Operating Requirements. . . . . . . . . . 8
System Overview . . . . . . . . . . . . . . . . . 9
Dimensions. . . . . . . . . . . . . . . . . . . . . . 10
Mounting Holes . . . . . . . . . . . . . . . . . 13
Installation . . . . . . . . . . . . . . . . . . . . 15
Mounting a PTM . . . . . . . . . . . . . . . . . . 15
Vertical or Horizontal Mounting. . . . . 15
Print Target Guide. . . . . . . . . . . . . . . 16
Installing a Photocell. . . . . . . . . . . . . . . 17
Installing an Encoder . . . . . . . . . . . . . . 17
Connecting to a PCM . . . . . . . . . . . . . . 17
Installing Ink-Cartridges . . . . . . . . . . . . 18
Nozzle Alignment . . . . . . . . . . . . . . . . . 19
Initial Installation . . . . . . . . . . . . . . . . 19
Nozzle Alignment Settings . . . . . . . . 20
Maintenance and Handling . . . . . . . 23
PTM Cleaning. . . . . . . . . . . . . . . . . . . . 23
Replacing an Ink-Cartridge. . . . . . . . . . 24
Storage . . . . . . . . . . . . . . . . . . . . . . . . . 24
More than Three Days . . . . . . . . . . . 24
Purging the Nozzles . . . . . . . . . . . . . . . .25
Appendix . . . . . . . . . . . . . . . . . . . . . .27
Technical Specifications . . . . . . . . . . . . .27
Documentation History . . . . . . . . . . . . . .28
Notes . . . . . . . . . . . . . . . . . . . . . . . . . . .29

1
Introduction
L-Series PTM - User Guide - Version 1 Issue 2
Introduction
© Copyright Matthews Swedot AB, Gothenburg 2013.
Conditions
Matthews Marking Products reserves the right to change specifications in both the text and
illustrations without prior notice. The contents of this publication may not be copied, either
wholly or in part, without permission.
Matthews Marking Products can not be held responsible for any direct, indirect, specific,
accidental or resultant injuries caused by a fault with the machine system or software, or by
an error in the accompanying documentation. In particular, Matthews Marking Products can
not be held responsible for any program or data stored or used with Matthews’ products,
including the cost of recovering such programs or data.
Safety Considerations
Safety considerations specific to the operation of the L-Series PTMs are provided under the
section “Safety Requirements” on page 3. Before installing or operating a L-Series PTM read
and adhere to all of the safety instructions. Failure to read all safety instructions could lead to
death, personnel injury, or damage to equipment.
The following paragraph formats are used throughout this manual to highlight safety issues
and risk of damage to the equipment.
Warning
This symbol and text format is used throughout the manual to highlight warnings. A
Warning is provided where circumstances could lead to personal injury or death.
Caution
This symbol and text format is used throughout the manual to highlight cautions. A
caution is provided in circumstances where damage could occur to the equipment.
The following paragraph format is used throughout this manual to draw the reader to points
of interest or notes.
Note
This symbol and text format is used throughout this manual to draw your attention to
important information and tips.
Contact details - Manufacturer
Sweden
Matthews Swedot
Möbelgatan 4
431 33 Mölndal
Phone: +46 (0)31 338 79 00
Fax: +46 (0)31 84 51 17
USA
Matthews Marking Products
6515 Penn Avenue
Pittsburgh, PA 15206
Phone: +1 412 665-2500
Fax: +1 412 665-2550
China
Kenuohua Matthews
Building C, Jinri Science Park
No.26 Jinyuan Road
Daxing Industrial Development Zone
Beijing 102600
Phone: +86 10 88796525
Fax: +86 10 88796526

Introduction
L-Series PTM - User Guide - Version 1 Issue 2
2
Certification
The L-Series PTMs are certified in accordance with the requirements for CE marking. The
equipment complies with the EMC Rules for a Class A (industrial environment) computing
device.
Operation of the equipment in a residential area may cause unacceptable interference to radio
and TV reception.
Matthews Marking Products disclaims all responsibility regarding the CE directive if the
printer is used, altered, or installed in any way other than described in this manual.
About this Manual
This manual contains technical information with regard to safety, installation, and printer
settings for the L-Series PTMs. It is important that all information regarding safety is read
and adhered to. It is recommended that the reader begins by reading the section named
’Safety Requirements’
For information regarding the creation of messages, please refer also to the Operator’s quick
reference guide that is delivered with the L-Series PTMs.
Technical Support
For technical support within the USA call:
Table 1 - - Technical support details
Time Telephone number
8:00 AM to 5:00 PM Eastern Time
USA–weekdays 1+ 412 665-2500
5:00 PM to 8:00 AM Eastern Time
USA–and weekends 1+ 412 365-8324

3
Safety Requirements
L-Series PTM - User Guide - Version 1 Issue 2
Safety Requirements
The following safety requirements are important. Read and adhere to the safety
requirements before installing or operating a L-Series PTM.
Failure to read the safety requirements can lead to death, personal injury, or damage to the
equipment.
Handling the Equipment
Warning
• To avoid injury to personnel or damage to equipment, always use proper lifting and
carrying techniques with the equipment.
• The L-Series PTMs must be properly mounted. There is a risk of injury to personnel
or damage to the equipment if they are mounted incorrectly.
• Safety glasses and solvent resistant gloves must be used when contact with ink or
solvent liquids is possible. If cleaning solution comes in contact with skin, wash
immediately. If contact is made with eyes or mouth, wash them for at least 15 minutes
and seek medical advice.
• All cables connected to a PTM must be located out of travel zones. They must be free
from potential damage.
• Do not expose a PTM to smoke or naked flames. Ink and cleaner are flammable
substances.
• If equipment is used in a manner not specified by Matthews Marking, the protection
provided by the equipment may be impaired.
• Never ship or transport a PTM without following the procedures outlined in the main-
tenance section. Failure to correctly prepare a PTM can cause damage or injury.
• Do not open or interfere with a PTM’s internal components. Only Matthews certified
technicians are permitted to service the PTM.
General Considerations
Caution
• Use only Matthew’s inks and cleaners. Use of other inks and cleaners could cause
damage to the PTM or pose safety hazards and void the warranty.
• In the event of either a spillage or leak, PTMs must be shutdown immediately and
isolated from any sources of heat, spark, or flames. Refer to ink MSDS for cautions,
warnings, and appropriate clean up procedures.
• Good housekeeping practices and proper containment of ink, ink residuals, and
incidental line leakage is critical. The customer is responsible for ensuring proper
!

Safety Requirements
L-Series PTM - User Guide - Version 1 Issue 2
4
care and procedures are followed to ensure that PTMs and ancillary equipment are
kept clean and well maintained.
• In accordance with applicable federal and state environmental laws, the customer is
responsible for properly disposing of the waste generated by the printing equipment.
Refer to the relevant ink and cleaner MSDS sheets for cautions, warnings, and proper
handling procedures.

5
Overview
L-Series PTM - User Guide - Version 1 Issue 2
Overview
In the Box
Carefully remove the L-Series Print Technology Module (PTM) from its packaging and
inspect it to make sure that no damage has occurred as a result of shipping. If there are any
discrepancies, please contact you local Matthews dealer for further advice.
Ink-Cartridges and additional equipment, as shown below, are ordered separately to the
PTMs.
Additional Equipment
The following equipment can be ordered separately to the PTM. For further information
contact your local dealer.
Figure 1 - Additional equipment
PTM Description
The L-Series PTMs are high resolution, thermal ink-jet print heads. The three models: L12,
L25, and the L50 are named in relation to the number of Ink-Cartridges they contain and the
maximum print height, as listed below in Table 1.
Table 1 - L-Series model specification
Model Number of Ink-CartridgesMaximum Print Height
L12 112,7 mm
L25 2 25,4 mm
L50 450,8 mm
Ethernet cable/switch for connecting
PTMs to a Viacode PCM
Ink Cartridges PTM Power-Supply-Pack
AC to DC
Head Mounting Bracket
and Post clamp

Overview
L-Series PTM - User Guide - Version 1 Issue 2
6
Each Ink-Cartridge has 320 nozzles, although only 300 are used for printing. The remaining
twenty are used for head adjustment purposes. All models have the same resolution (600 dpi),
it is simply the print height that differs. The L25 and the L50 are the same in all other respects
as the L12.
Figure 2 - L-Series models
External Components
Provided below is an overview of the L12 PTM and its main components. A description of
the connections on the PTM are also provided.
The external parts are the same for all models, it is only the number of Ink-Cartridges that
differ.
Figure 3 - External components
LEDs – All PTMs have a Status LED and a LED for every Ink-Cartridge. The
L12 has one Ink-Cartridge LED, as shown above. The L25 has two Ink-Cartridge LEDs, and
the L50 has four.
The Status LED is lit green whenever power is supplied to a PTM — it will blink when
printing. The Ink-Cartridge LEDs have the following states:
Table 2 - Ink-Cartridge LED states
LED State Meaning
Not lit The Ink-Cartridge is OK.
Constant red There is no Ink-Cartridge.
L12 L50L25
12,7 mm 25,4 mm 50,8 mm
Power supply
Ethernet
Encoder
Photocell & I/O
Nozzles
Ink-Cartridge-Cover
(Ink-Cartridge)
Status & Ink-
Cartridge LEDs

7
L-Series PTM - User Guide - Version 1 Issue 2
Overview
Each Ink-Cartridge, in the L25 and in the L50, is identified by a green rectangle below its
corresponding LED, as shown below.
Figure 4 - Ink-Cartridge numbering (L25)
The left most green rectangle, under the first Ink-Cartridge LED, as shown above,
corresponds to Ink-Cartridge number one.
The Ink-Cartridge nearest the PTM’s circuit board, as shown above, is always number one.
All other Ink-Cartridges are numbered consecutively, downwards.
As there is only one Ink-Cartridge in the L12, there is only one Ink-Cartridge LED, that is
simply named PEN.
PHOTOCELL & I/O – Used to connect a photocell. A photocell detects an approaching
print target on a production line and sends a signal to the PTM. The PTM will then print the
selected message one or more times as specified in the PCM’s (Print Control Module)
installation settings.
The connection can also be used for an output signal — typically a warning beacon that is
used to signal low ink. Configuration of the output signal is done in the PCM’s Configuration
menu under External I/O. Refer to the PCM’s Technical Manual for further information.
ENCODER – Used to connect a Matthews speed encoder. An encoder monitors the speed of
the print target on a production line and sends a signal to the PTM. The signal from the
encoder ensures that the speed of printing corresponds to the print target’s speed.
ETHERNET – Used to connect PTMs to a PCM. The PCM is used to configure PTM
installations and the messages they will print. Matthews Ethernet cable is used to connect the
PTMs to the PCM and create a dedicated network. If more than one PTM is used, they must
be connected to a Matthews Ethernet switch first.
Fast blinking red There is a fault with the Ink-Cartridge.
Slow blinking red Low ink — approximately 10% remaining.
Two-pulse blinking red The Ink-Cartridge is empty.
Table 2 - Ink-Cartridge LED states
LED State Meaning
A
A
Ink-Cartridge 1
Ink-Cartridge 2 PTM’s
circuit board
Ink-Cartridge 1
Ink-Cartridge 2
Green rectangle

Overview
L-Series PTM - User Guide - Version 1 Issue 2
8
POWER SUPPLY – Used to connect the Power-Supply-Pack to a PTM.
Labeling
A PTM’s serial number is located on the side of it, as shown below.
Figure 5 - Serial number
Operating Requirements.
Before installing or operating a PTM, read and adhere to all of the safety instructions as
provided under “Safety Requirements” on page 3.
The operating and power supply requirements for the L-Series are provided below in Table 3.
Strictly obey the electrical specifications provided in this manual.
Table 3 - Operating requirements
Feature Specification
Operating Temperature: 50°F – 104°F (10°C – 40°C)
Main power supply
Matthews power supply pack used:
Single phase 110 – 240 VAC, 50 – 60 Hz, 0.8 A
Direct connection:
24 VDC ± 0,5 V, 90 W, filtered DC
Enclosure Classification: None
Operating Environment: The PTM must be free from vibration or the possibility of being hit. It must be cor-
rectly mounted as described in this manual.
S/N: 00125S/N: 00125
Mfd by: Matthews Swedot ABMfd by: Matthews Swedot AB
www.matthewsmarking.comwww.matthewsmarking.com
A

9
L-Series PTM - User Guide - Version 1 Issue 2
Overview
System Overview
The L-Series PTMs are configured and controlled using a Matthews Viacode PCM (Print
Control Module), which is sold separately. Communication with PTMs is done over a
Viacode dedicated Ethernet network. A single PTM can be connected to the PCM either
directly or via a Matthews Ethernet switch. If more than one PTM is installed they must be
connected to a switch first and then to a PCM.
Figure 6 - System overview – typical set up
Message creation and editing is done in the graphical user interface (GUI) of the PCM.
Information regarding the control and creation of messages can be found in the Technical
Manual for the Viacode PCM.
A typical print system for a production line would consist of one or more PTMs, an encoder,
and a photocell, as shown above.
In the example shown above there are two Markers: Marker 1 and Marker 2. Each Marker
prints the text Matthews on to the respective side of the print target. Both Markers are
controlled by the same photocell and the same encoder, which are connected to Marker 1. All
configuration settings for the two markers are managed from within the Configuration menu
of the PCM.
The photocell and the encoder are sold separately and can be purchased from Matthews. The
photocell is used to detect an approaching print target and signal that a printout should be
made.
An encoder is used to monitor the speed of an approaching print target. The signal from the
encoder is used to ensure that the print speed is matched to the print target’s. An encoder is
particularly important in installations where the speed of the production line (print target) is
unpredictable. Matthews Marking recommends that an encoder is always used.
Encoder
Photocell
L-Series PTM
(Marker 1)
Viacode
PCM
Marker 2

Overview
L-Series PTM - User Guide - Version 1 Issue 2
10
Dimensions
Provided below are the external dimensions of the L-Series PTMs. All dimensions are
provided in [inches] and mm.
•L12 PTM
Figure 7 - L12 dimensions
5,070
128,78
3,417
86,79
2,731
69,37
1,191
30,25
1,000
25,40
2,910
73,91
8,265
209,94
7,205
183,01
3,744
95,10
52
3,1
56,33
0,816
20,73
1,909
48,49

13
L-Series PTM - User Guide - Version 1 Issue 2
Overview
Mounting Holes
The L-Series PTMs have mounting holes that are intended for use with a Matthews:
photocell, mounting-bracket, or mounting-post. The pre-manufactured M4 holes are the same
for all models. The holes are hidden behind the labels that are stuck on to the sides of a PTM.
Simply pierce the labels to access them.
Provided below is an overview of the L12 model, however the mounting holes are the same
for all models.
Figure 10 - Mounting holes
M4 bolts must be used in the mounting holes. The bolts must not protrude more than 1 cm in
to the holes.
C
A
A
B
B
C

15
Installation
L-Series PTM - User Guide - Version 1 Issue 2
Installation
Mounting a PTM
Before installing or operating a L-Series PTM read and adhere to all safety warnings, as
provided under “Safety Requirements” on page 3.
Caution
The L-Series PTMs must be installed as described below. Failure to install them
correctly can lead to poor print quality.
For best results the L-Series PTMs should be mounted so that they are free from vibration. In
addition, the following must be adhered to when mounting a L-Series PTM. Make sure that:
• The PTM cables are secure and safely routed.
• The PTM is protected from contact with the print target. If necessary, install guard rails to
protect the PTM from impact.
• The PTM’s nozzles are positioned so that they are perpendicular to the print target’s face.
The nozzles should be at zero degrees in the X, Y, and Z axis, as shown below.
Figure 11 - Mounting a PTM
• The nozzles are as close as possible (distance D) to the print target but not in contact.
Refer also to “Print/throw distance” on page 27 for specific guidelines.
Vertical or Horizontal Mounting
The L-Series PTMs can be mounted either horizontally or vertically so that the nozzles are
pointing downwards, as shown in Figure 12 below. However, they must not be mounted so
that the nozzles point upwards. The PTM will fail to print properly if the nozzles are mounted
pointing upwards.
Matthews Marking can supply a mounting bracket and a post clamp, as shown below, that are
specifically designed for the L-Series PTMs. These allow for easy mounting and adjustment
of the PTMs.
D
X = 0°
Y = 0°
Z = 0°
Print-Target-Guide

Installation
L-Series PTM - User Guide - Version 1 Issue 2
16
They are designed to be attached to either the sides or the bottom of a PTM. The
corresponding (M4) mounting holes for the bracket and post are hidden behind the Viacode
labels, as shown. Refer to “Mounting Holes” on page 13.
Figure 12 - PTM mounting bracket
The mounting bracket is spring loaded and allows for fine adjustment. For further
information regarding this and other additional equipment please contact your local
Matthews distributor.
Print Target Guide
The L-Series PTMs are supplied with a Print-Target-Guide plate. This is used to prevent the
PTM from being impacted and guide the print target correctly in front of the nozzles.
The Print-Target-Guide should be mounted either to the right or to the left of the PTM’s
nozzles, dependent upon the direction of the moving print target.
If the print target travels from right-to-left, when standing behind the PTM, the Print-Target-
Guide must be fitted to the right of the nozzles, as shown below. Likewise if the print target
travels from left-to-right it should be fitted to the left of the nozzles.
Figure 13 - Mounting the Print-Target-Guide
Mounting
Adjustment
knob
bracket (optional)
Vertical mounting Horizontal mounting
Post clamp
Bracket/Post
mounting
holes (M4) (optional)
Print targetPrint target
Print-Target-Guide
Right-to-left
print direction Left-to-right
print direction
This manual suits for next models
3
Table of contents
Other Matthews Printer Accessories manuals