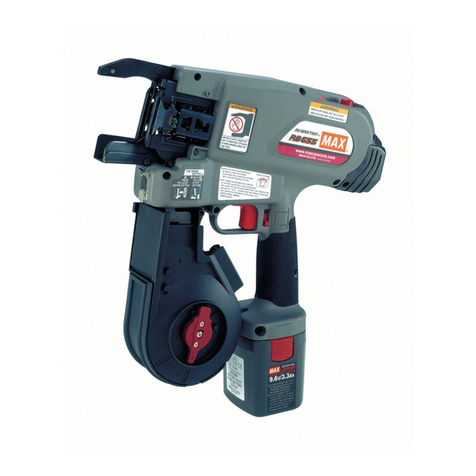
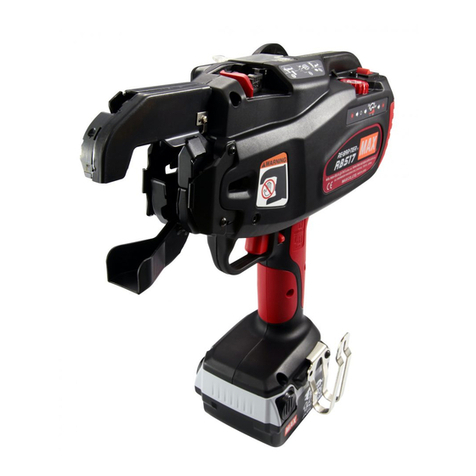
Max RE-BAR-TIER RB397CE Operating instructions

RB397(CE)
RE-BAR TYING TOOL
OPERATING and MAINTENANCE MANUAL
ENGLISH
WARNING
BEFORE USING THIS TOOL, STUDY THIS MANUAL TO ENSURE SAFETY
WARNING AND INSTRUCTIONS.
KEEP THESE INSTRUCTIONS WITH THE TOOL FOR FUTURE REFERENCE.

DEFINITIONS OF SIGNAL WORDS
WARNING: Indicates a potentially hazardous situation which, if not avoided, could result in
death or serious injury.
CAUTION: Indicates a potentially hazardous situation which, if not avoided, may result in
minor or moderate injury.
NOTE: Emphasizes essential information.
INDEX
1. SAFETY INSTRUCTIONS..................................................2
2. SAFETY FEATURES .........................................................7
3. SPECIFICATIONS AND TECHNICAL DATA.....................9
4. BATTERY INSTRUCTIONS.............................................12
5. OPERATING INSTRUCTIONS ........................................16
6. MAINTENANCE...............................................................23
7. Cleaning Manual.............................................................23
8. STORAGE........................................................................25
9. TROUBLE SHOOTING/REPAIRS ...................................26
1. SAFETY INSTRUCTIONS
WARNING
TO AVOID SEVERE PERSONAL INJURY OR
PROPERTY DAMAGE
BEFORE USING THE TOOL, READ CARE-
FULLYAND UNDERSTAND THE FOLLOW-
ING "SAFETY INSTRUCTIONS":
PRECAUTIONS ON USING THE TOOL
This equipment is a tool for use in tying re-bars.
Using this equipment for other applications or in
ways not specified in the manual may lead to
serious accident. Be sure to strictly observe the
items written in this manual. Persons not con-
cerned with the work, particularly children,
should be kept away from the work site and
should not be allowed to touch this equipment.
2

1. WEAR SAFETY GLASSES OR GOGGLES
The employer and the user must make sure
that proper eye protection is worn when the
tool is being used. Eye protection equip-
ment must conform to the requirements of
the American National Standards Institute,
ANSI Z87.1 (Council Directive 89/686/EEC
of 21 DEC. 1989) and it must provide frontal
and side protection.
NOTE: Nonside-shielded spectacles and
face shields alone do not provide adequate
protection.
2. EAR PROTECTION MAY BE REQUIRED
IN SOME ENVIRONMENTS
Because working conditions may include
exposure to high noise levels that could lead
to hearing damage, the employer and the
user should make sure that necessary
hearing protection is provided and used by
the operator and others in the work area.
3. DO NOT ALLOW CHILDREN NEAR THE
TOOL
Allow no bystanders, especially children,
near the tool during its operation.
4. DO NOT USE THE TOOL IN THE RAIN,
WHERE WATER IS SPLASHING, IN A
WET PLACE, OR IN A DAMP PLACE
Using the tool in these or similar conditions
will increase the risk of electric shock, dan-
gerous malfunction, and overheating.
Examine tightness
5. INSPECT THE PARTS BEFORE MOUNT-
ING THE BATTERY PACK
•Examine the screws to make sure they
are securely tightened.
Incomplete tightening may result in an
accident or breakage. If a screw is loose,
retighten it completely.
•Inspect parts for damage.
Parts will wear over periods of use. Look
also for missing and defective parts and
for parts of poor quality. If a part must be
replaced or repaired, purchase the re-
placement part at an authorized MAX Co.,
Ltd. distributor.
Use only genuine authorized replacement
parts.
OFF
LOCK
6. BE SURE TO SET THE MAIN SWITCH TO
OFF, TO LOCK THE TRIGGER, AND DE-
TACH THE BATTERY PACK WHEN
CHANGING THE BATTERY PACK, WHEN
REPLACING OR ADJUSTING THE
TIE-WIRE, WHEN ABNORMALITIES
OCCUR, AND WHEN THE EQUIPMENT IS
NOT BEING USED
Leaving the equipment switched on in these
situations may cause breakdowns or dam-
age.
7. KEEP FINGERS AND BODY PARTS
CLEAR OF THE FEEDER ARM AND
CURL GUIDE AT ALL TIMES
Failure to do so may result in serious injury.
3
12. AFTER BATTERY INSTALLATION IF THE
13. NEVER MODIFY THE TOOL rformance
14. MAINTAIN THE TOOL IN GOOD OPE
d
8. KEEP FINGERS AND BODY PARTS
AWAY FROM THE TIE-WIRE REEL WHEN
TOOL IS IN OPERATION
Failure to do so may result in serious injury.
9. DO NOT POINT THE TOOL AT ANYONE
Personal injury may result if the tool catches
an operator or anyone working near him.
While working with the tool, be extremely
careful not to bring hands, legs, and other
body parts near the arm of the tool.
10. WHEN THE TOOL IS NOT IN OPERATION
KEEP YOUR FINGERS OFF THE TRIG-
GER
Failure to do so may cause accidental tying,
leading to serious injury.
11. NEVER OPERATE THE TOOL UNDER
ANY ABNORMAL CONDITION
If the tool is not in good working order, or if
any abnormal condition is noticed, switch it
off immediately (set the Main switch at OFF),
lock the Trigger and have it examined and
repaired.
TOOL OPERATES WITHOUT THE TRIG-
GER BEING PULLED OR THE OPERA-
TOR NOTICES UNUSUAL HEAT, SMELL,
OR SOUND, DISCONTINUE OPERATION
Failure to do so may lead to serious injury.
Return to dealer for safety inspection.
Modifying the tool will impair pe
and operating safety. Any modification may
lead to serious injury and void the tool war-
ranty.
R-
ATING CONDITION
To secure operating safety and ensure top
performance, keep the tool free of wear an
damage. Also keep the tool's hand grip dry
and clean, especially free of oil and grease.
4

JPL914
15. USE ONLY THE AUTHORIZED BATTERY
PACK
Use only MAX JPL914 battery pack. If the
tool is connected to a power supply other
than the authorized pack, such as a re-
chargeable battery, a dry cell, or a storage
battery for use in automobiles, the tool may
be damaged, break down, overheat, or even
catch on fire. Do not connect this tool to any
power supply except the MAX JPL914 bat-
tery pack.
JC928
16. TO ENSURE MAXIMUM PERFORMANCE,
FULLY CHARGE THE BATTERY BEFORE
USE
A new battery pack or one not used for ex-
tended periods may have self-discharged
and thus may need recharging to restore it
to a fully charged condition. Before operat-
ing the tool, make sure to charge the Battery
pack with the designated MAX Battery
charger JC928.
JC928
17. BATTERY CHARGING PRECAUTION
1 Use only MAX Battery charger JC928
and Battery Pack JPL914
Failure to do so may cause the Battery to
overheat or catch fire leading to serious
injury.
A
C
100~240V
2 Charge the Battery from AC between
100V and 240V wall sockets
Failure to do so may result in overheating,
or inadequate charging possibly causing
serious injury.
3 Never use a transformer
4 Never connect the Battery charger to
an engine generator direct-current
power supply
The charger will break down or be dam-
aged from burning.
5 Avoid charging the Battery pack in the
rain, in a damp place, or where water
is splashing
Charging a damp or wet Battery pack will
cause an electric shock or a short circuit
that may lead to damage from burning
and even the tool catching on fire.
5

6 Do not touch the power cord or plug
with a wet hand or glove
This may cause injury from electric shock.
7 Do not put a cloth or any other cover
on the Battery charger while the Bat-
tery pack is being charged
This will cause overheating and damage
from burning, or the Charger may even
catch fire.
8 Keep the Battery pack and Battery
charger away from heat and flames
9 Do not charge the Battery pack near
flammable materials
ll
10Charge the Battery pack in a we ven-
tilated place
Avoid charging the Battery pack where it
will be in direct sunlight.
11 Charge the Battery pack in a tem-
perature range of 5°C (41°F) to 40°C
(104°F)
12Avoid continual use of the Battery
charger
Rest the Charger for 15 minutes between
charges to avoid functional trouble with
the unit.
13Any objects that block the ventilation
holes or Battery pack receptacle may
cause electric shock or functional
troubles
Operate the charger free of dust or other
foreign materials.
14Handle the power cord carefully
Do not carry the Battery charger by its
power cord. Do not use the power cord to
disconnect it from a wall socket; this will
damage the cord and break the wires or
cause a short circuit. Do not let the power
cord contact sharp edged tools, hot ma-
terials, oil, or grease. A damaged cord
must be repaired or replaced.
15Do not charge non rechargeable bat-
teries with this charger.
6

16This charger is not intended for use
by children or disabled persons
without supervisor.
17Children should be supervised to en-
sure that they do not play with the
charger.
18Put a pack cap on the terminal of the
Battery pack
When the Battery pack is not in use, put a
pack cap on its terminal to prevent short
circuits.
19Do not let the terminal (metal compo-
nent) of the Battery pack short-circuit
A short circuit in the terminal will gener-
ate a large current, causing to overheat
the Battery pack and become damaged.
20Do not leave or store the tool in a ve-
hicle or in direct sunlight during
summer. Leaving the tool in high
temperature conditions may cause the
battery pack to deteriorate.
21Do not store a fully discharged battery
pack. If a fully discharged battery pack
is removed from the system and left
for a long period of time, it may be-
come damaged. Recharge the battery
immediately when it has been dis-
charged.
18. WEAR SAFETY GLOVES WHILE OPER-
ATING THE TOOL
The finish tie has sharp edges. To avoid se-
rious injures, be careful not to touch the
sharp edges. MAX recommends wearing
safety gloves while operating the tool.
2. SAFETY FEATURES
In order to ensure safety during operation, the
RB397 has the following safety features.
•Prior to using the tool, make sure that the
safety features function properly. If they do
not, avoid using the tool.
Trigger
Trigger Lock
Trigger Lock
The Trigger can be locked preventing the tool
from operating for safety. Always keep the
Trigger locked when not in use.
Unless you are at tying work, set the trigger lock
to the position of LOCK and remove a battery
pack. When you start tying work, set it to the
position of UNLOCK.
Pull to the left slightly and upwards to UNLOCK.
WARNING
7

Curl Guide
Curl Guide
When the Curl Guide is opened, it will emit a
beeping sound and the tool does not operate.
8

3. SPECIFICATIONS AND TECHNICAL DATA
1. NAME OF PARTS
Window
Release lever
Release stopper
Arm
Curl guide
Trigger
Latch
Belt hook
Tightening
Torque 150cNm
(13.1lbF.inch)
Torque dial
LED
Main
switch
Trigger lock
Grip
Battery pack
(JPL914)
Reel stopper
Production
number
Reel holder
Tie-Wire
Terminal
Pack cap
Battery pack (JPL914)
LED lamp (Orange)
Charging status indicator lamp
Battery pack
entry point
Power cord
CE (VDE) Power plug
Power cord of JC928(CE) is removable from the charger.
LED lamps (Red and Green)
Charging status indicator lamps
2. TOOL SPECIFICATIONS
PRODUCT NO. RB397 <Battery charger>
WEIGHT 2.4kg(Battery included) Product name MAX lithium ion battery charger
HEIGHT 305mm (12") Product code JC928(CE)
WIDTH 105mm (4-1/8") Input AC100-240V 50/60Hz 1.62-0.68A
LENGTH 290mm (11-3/8")
WRAPS PER TIE 3wraps/tie Output DC 7.2/10.8/14.4V 7A
DC 18/21.6/25.2/28.8V 3.9A
BATTERY Li-ion14.4V/(JPL914) Weight 1.6kg
Operating tem-
perature range 5°C to 40°C
(41°F to 104°F)
Humidity 80% RH or less
ACCESSORIES
Battery pack JPL914 (1pc.)
Battery Charger JC928
Carrying case, Belt hook
Instruction video and instruction
manual DVD
Operating temperature -10°C to 40°C (14°F to 104°F)
Humidity 80% RH or less
9

<Battery pack>
Product name MAX lithium ion battery pack
Product code JPL914
Battery type Lithium ion battery
Nominal voltage DC14.4 V (3.6V x 4 cells)
Nominal capacity 3.0 Ah (3,000 mAh)
Charging time
(When charger JC928 is used) Quick charging -Approximately 30 minutes (Approximately 90% of
capacity)
Full charging -Approximately 45 minutes at 25°C (100% of capacity)
Accessories Pack cap (For preventing short circuit)
Weight 0.5 kg
Charging temperature 5°C to 40°C
Operating temperature -10°C to 40°C
Operating humidity 80% RH or less
3. WIRE SPECIFICATIONS
NAME MAX TIE-WIRE
MODEL TW897A
DIAMETER 0.8 mm
LENGTH 95 m/coil
TIES PER COIL RB397 Approx. 120 ties/coil
TIES PER CHARGE Approx. 1400 ties/charge
BATTERY CHARGER:
Use only an authorized Battery charger, MAX JC928.
4. TECHNICAL DATA
1NOISE
A-weighted single-event ------ LWA, 1s, d 86 dB
sound power level
A-weighted single event ------ LpA, 1s, d 76 dB
emission sound pressure
level at work station
These values are determined and documented in accordance to EN12549 : 1999.
2VIBRATION
Vibration characteristic value - 1.8 m/s2
These values are determined and documented in accordance to ISO 8662-11.
This value is a tool-related characteristic value and does not represent the influence to the
hand-arm-system when using the tool. An influence to the hand-arm-system when using the tool
will, for example, depend on the gripping force, the contact pressure force, the working direction,
the adjustment of main supply, the workpiece, the workpiece support.
3RADIATED EMISSION 30-1000 MHZ
Class B
4Overvoltage category
category 1 according to IEC 60664-1
5Pollution degree
degree 4 according to IEC 60664-1
6Design guidelines
Machinery directive Annex 1, EN 60745-1, EN 60745-2-18
10

5. APPLICATIONS
∗Precast plants
∗Commercial buildings
∗Foundations
∗Road & bridge
6. APPLICABLE BAR SIZES
Minimum Maximum
RB397 D10 ×D10 D16 ×D19
7. ABOUT PRODUCTION YEAR
This product bears production number in the body. The two digits of the number from left indicates
the production year.
(Example)
08826035D
Year 2008
11

4. BATTERY INSTRUCTIONS
1. Charging
OFF
LOCK
•Before removing the Battery pack from the
tool, set the Main switch at OFF and lock
the Trigger.
Pack cap
1A Pack cap that is used to prevent short
circuits must be removed from the terminal
of the Battery pack.
Battery pack
Latch
When charging the Battery pack, remove it by
pushing on its latches from both sides while
firmly holding the grip of the tool.
Red charging lamp
Charger Orange standby lamp
WARNING
2Plug the charger into a wall socket (100V -
-carrying indicator,
When the orange standby light is lit
240V).
The red light, a current
will flash on and off with two short (Pipi)
beep sounds.
When the Battery pack is hot (after continuous
use or exposure to direct sunlight) the Charger
will automatically switch to standby to protect
the Battery. The orange standby light will be lit
until the Battery's temperature lowers to a safe
level, The Battery will then be charged auto-
matically.
12

When the Battery pack is at low tem-
perature
When the Battery pack is at low temperature, its
charging is automatically suspended until its
temperature increases (higher than 5°C (41°F)),
in order to protect it, even if it is set in the
Charger.
Leave the Battery pack at normal temperature in
the room for some time, and then, charge it
again.
When the orange standby light blinks
This indicates the Battery cannot be charged.
Unplug the Charger and check the charging
receptacle. If there are any foreign objects,
remove them with a soft dry cloth. If the orange
light still blinks or there are no foreign objects,
there may be a problem with the battery or
charger. Return to dealer for service.
The green lamp blinks.
Battery has been recharged 90%
Battery pack
Charger Orange standby lamp
Red charging lamp
3Charge the Battery pack.
(1) Fully insert the Battery into the receptacle
on the Charger until it sits securely on the
end.
(2) Charging will start automatically and will be
indicated by the red charging light with
beeps.
(3) Charging time is approximately 30 minutes
(90% capacity). This will vary by tempera-
ture and source voltage.
(4) For batteries those are at low temperatures
(10°C (50°F) or lower), charging time must
be extended longer. When charging at low
temperatures, both of the red and the or-
ange charging light will be lit.
4When the battery pack has been recharged,
the "red" lamp turns off and the "green"
lamp blinks.
The "green" LED lamp blinks slowly and a
long beep sounds for approximately 2 sec-
onds. Now, the battery has been recharged
to approximately 90% of its capacity. Quick
charging takes approximately 30 minutes
(however, the recharging time and capacity
slightly change depending on the ambient
temperature and power voltage).
The green lamp
remains lit.
Battery has been "fully" recharged.
You can use the battery pack when quick
charging is complete. However, if you leave
the battery pack on the charger, recharging
will continue. When the battery is fully re-
charged (to 100% capacity), the "green"
LED lamp lights up (and a long beep sounds
for approximately 2 seconds).
13

(1) After you have recharged the battery pack,
remove it from the charger.
(2) Unplug the charger power cord from the wall
socket.
Regarding tying times per charge, a brand-new
battery ties approximately 1600 times per
charge. The tying times per charge will be de-
creased gradually by repeated re-charge until
the Battery becomes unusable. The tying times
per charge depend on temperature and the
Battery condition.
•When the battery pack is fully discharged, do
not leave it for a long time without recharging.
If the fully discharged battery pack is removed
from the system and left for a long period of
time, the battery pack may become damaged.
Recharge the battery immediately when it has
been discharged.
•Do not leave the battery pack on the charger.
If the above is not observed, a weak current
will continue to flow and the battery pack may
become damaged. When recharging is com-
plete, always remove the battery pack from
the charger.
Battery pack breakdowns
If the following conditions occur, bring the Bat-
tery and Charger to your dealer.
•The red charging lamp does not flash when
the charger plug is inserted into main power
source outlet (When the Battery pack is not
inserted in the charger.)
•Neither the red charging lamp nor the orange
standby lamp lights or flashes when the Bat-
tery pack is inserted in the charger.
•The orange standby lamp does not change to
the red charging lamp even after more than 1
hour.
•The red charging lamp does not change from
constant to flashing light even after more than
90 minutes. (except at low temperatures)
CAUTION
14

Indication of Quick Charger Lamps
Charger LED lamp Buzzer sound Recharging status
Red lamp blinks.
It blinks every second.
The power cord is plugged
into the receptacle.
Two short beeps (Pi, pi)
The charger is
powered. The charger power cord is plugged
into a wall socket.
Red lamp lights.
It remains lit.
The battery pack is mounted.
One short beep (Pi) The battery is being
recharged. Quick recharging continues.
The green lamp blinks.
It blinks every second.
The battery has been re-
charged.
A long beep for approx. 2
seconds (Piii...)
The battery has
been recharged.
The battery has been recharged to
approx. 90% of its capacity.
If you leave the battery pack on the
charger, recharging will continue.
The green lamp lights up.
It remains lit.
Fully recharged.
A long beep for approx. 2
seconds (Piii...)
Battery is "fully"
recharged. Recharged to 100% capacity.
The red lamp lights up.
The orange lamp lights up.
They remain lit.
⎯Protective charging The battery is recharged with a low
current to protect the charger and
battery.
The orange lamp lights up.
It blinks every second.
⎯Standby
If the temperature of the battery
pack is too high: Battery recharging
starts automatically when the tem-
perature drops below the limit.
If the temperature of the battery
pack is too low: Place the battery
pack in a room temperature location
for a while, then retry recharging it.
The orange lamp blinks.
It blinks quickly (0.1 sec
ON and 0.1 sec OFF).
Not possible to recharge.
Short continuous beeps for
approx. 10 seconds
(Pi, pi, pi, pi,...)
Not possible to
recharge.
Unable to recharge the battery.
The battery pack slot is contami-
nated, or the battery pack has failed.
∗For batteries those are at low temperatures (10°C (50°F) or lower), charging time must be extended
longer.
For the JC928 lithium ion battery charger (CE)
"Power Supply Cord: Use UL Listed and CSACertified detachable power supply cord, 18 AWG, two
conductors, cord rated VW-1, 105°C, cord external length minimum 1.8m.
One end terminates in a molded-on attachment plug with a 15 A, 125 V (NEMA 1-15P) or 15 A, 250 V
(NEMA 2-15P) type configuration.
Other end terminates in a molded-on connector which mates with the Power Appliance Inlet.
If a flexible power supply cord is required, the appropriate cord (see below) must be used.
The SP-2, SPE-2, SV, SVE, or SVT flexible power supply cord can be used."
15

Service Life of the Battery Pack
If any condition described below is observed,
the battery pack is at the end of its service life.
Replace it with a new one.
•Although the battery pack has been properly
charged (fully charged), a great drop in tying
time has been noticed.
Do not charge the battery pack when this
happens. If the motor's rotational speed
slows down, the power of the battery pack is
considered to be nearly depleted. Using the
tool more will cause it to overdischarge,
resulting in a shortened service life of the
battery pack and also in functional trouble of
the tool's main body.
Do not use a battery pack when its service
life is finished.
This will cause functional trouble in the
tool's main body. Also charging a battery
pack that is out of service life will lead to
functional trouble in the battery charger.
Recycling a Li-ion Battery
The MAX battery pack uses a Li-ion battery, it
may be illegal to dispose of this battery into the
municipal waste system. Check with your local
solid waste officials for details in your area for
recycling options or proper disposal.
When disposing of the battery pack, make
sure to put a pack cap on its terminal (with
insulating tape securing it) to prevent short
circuits.
5. OPERATING INSTRUC-
TIONS
OFF
LOCK
WARNING
1. How to set the Tie-Wire
WARNING
•Be sure to set the Main switch to off, to
lock the Trigger, and detach the Battery
pack.
CAUTION
Release Lever
Release Stopper
1Press the Release Lever of this equipment,
and confirm that the Release Lever is
caught in the Release Stopper.
CAUTION
16

Tie-Wire
2Peel off the tape fixing Tie-Wire by about
5cm (2"). Stretch out the tip of the wound
Tie-Wire.
BE SURE TO USE ONLY THE SPECI-
FIED TIE-WIRE (MAX TW897A).
Tie-Wire
Reel Stopper
Reel
holder
The use of binding wire that has not been
specified may cause breakdown of this equip-
ment. Therefore, be sure only to use the speci-
fied MAX TW897A. Do not use binding wire that
has become rusted, since the use of rusted wire
will cause equipment breakdown.
∗TW897 cannot be used for RB397.
Reel stopper
Reel holder
3Push the reel stopper to release the reel
holder.
4Set the Tie-Wire in the tool by matching the
side of the Tie-Wire as shown in the picture.
Then slide the Reel stopper so that the Reel
Holder can be pushed in the Reel. Then
push the Reel Holder and fix it by sliding the
Reel stopper.
Feeding gears
Pipe
Wire guide
5Insert the tip of the stretched out Tie-Wire
into the Wire Guide. Then put it into the
Pipe.
•Put the Wire around 10cm (4") inside the
Pipe.
•The tip of the Tie-Wire should be straight-
ened out to allow it to pass through the
wire feeding mechanism.
When mounting the Tie-Wire, the wire may
become jammed inside the machine if the
wire tip is bent.
WARNING
17

If the window is dirty and the pipe
position can not be confirmed
Open the window and wipe off the dirt on the
inside of the window with a soft cloth, etc. Close
the window again after cleaning to ensure that
foreign objects will not be able to enter the ma-
chine.
Feeding gears
Tie-Wire
Release lever
Release stopper
6Release the release stopper, and confirm
that the release lever has returned to its
original position and that the feeding gears
are clamping the Tie-Wire. This completes
the Tie-Wire mounting operation.
Tie-Wire
7Remove the tape from the tie-wire com-
pletely.
8Remove slack from wire spool.
Make sure the Tie-Wire does not get caught
behind the wire spool .This could lead to
jamming.
•When setting the main switch to ON, ab-
solutely do not bring your fingers close to
the binding part and rotating part of the
tool's tip.
•Do not switch the main switch ON and OFF
in rapid succession, since this operation
will cause machine breakdowns.
•Do not touch the Tie-Wire during the tying
work (while the machine is operating).
9Mount the battery pack on the tool's main
body until a click is heard. Turn the Main
Switch on.
WARNING
18

Trigger lock
Trigger
0Unlock the Trigger before using the tool.
2. How to remove the Tie-Wire
OFF
LOCK
•Be sure to turn the Main switch OFF, lock
the Trigger, and remove the Battery pack.
Release Stopper Release Lever
1Press the release lever, and confirm that the
release lever is caught in the release stop-
per.
Wire guide
Tie-Wire
WARNING
19

2Remove the Tie-Wire from the wire guide.
Tie-Wire
Reel
stopper
3Slide the Reel stopper to release the Reel
holder and remove the Tie-Wire.
4Mount the new Tie-Wire. (Refer to the
Tie-Wire mounting method explanation.)
When the Tie-Wire runs out of binding wire
There should be around 300 mm (12") of the
Tie-Wire left at end of the spool. This should be
discharged with the old spool and be replaced
with a new one.
3. Auto Power-off feature
This Re-bar Tier have "Auto Power-off" fea-
ture, which saves the power consumption of
the Li-ion battery when the tool is not oper-
ated.
If the tool is not operated for 30 minutes, the tool
is automatically turned off. This is "Auto
Power-off".
When the power is turned off automatically, turn
the main switch OFF, then turn ON the switch
again to operate the tool.
4. Tension adjustment
OFF
1Be sure to turn the Main switch OFF, to lock
the Trigger and detach the Battery pack.
20
This manual suits for next models
1
Table of contents
Other Max Power Tools manuals

Max
Max RB655 Operating instructions

Max
Max HN75 User manual

Max
Max TA116/21-13 Operating instructions

Max
Max BH-11F User manual

Max
Max PowerLite HN65 Instruction Manual

Max
Max PowerLite HN65 Operating instructions

Max
Max EH-70F User manual

Max
Max SN883RH Operating instructions

Max
Max PowerLite HS130 Instruction Manual

Max
Max 61018 User manual

Max
Max CN55 Operating instructions

Max
Max 56015 User manual

Max
Max CN890B Operating instructions

Max
Max 45505 User manual

Max
Max RB518 CE Operating instructions

Max
Max 71311 User manual

Max
Max 61011 User manual

Max
Max HN100(CE) Operating instructions

Max
Max GS690RH Operating instructions

Max
Max CN565S Operating instructions