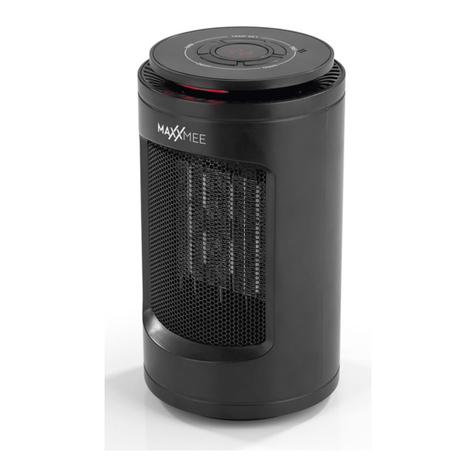
MAXXMEE PNH-2000DI User manual

Infrarot-Heizstrahler DE
1
INHALTSVERZEICHNIS
Lieferumfang 1
Auf einen Blick 1
Symbole 2
Signalwörter 2
Bestimmungsgemäßer Gebrauch 3
Sicherheitshinweise 3
Montage 6
Benutzung 7
Reinigung und Lagerung 8
Problembehebung 8
Entsorgung 8
Technische Daten 9
LIEFERUMFANG
1 x Heizstrahler mit Anschlussleitung
1 x Obere Stange mit Teleskopstange
1 x Mittelstange
1 x Untere Stange
1 x Standfuß inkl. 4 x Schraube
M6x30mm
1 x Abdeckung
2 x Große Kabelklemme
1 x kleine Kabelklemme
6x Schraube M 5 x 6 mm
4 x Schraube M4x35mm
4 x Dübel
1 x Gebrauchsanleitung
Den Lieferumfang auf Vollständigkeit
und die Bestandteile auf Transport-
schäden überprüfen. Bei Schäden nicht
verwenden, sondern den Kundenservice
kontaktieren. Eventuelle Folien, Aufkle-
ber oder Transportschutz vom Gerät ab-
nehmen. Niemals das Typenschild und
eventuelle Warnhinweise entfernen!
AUF EINEN BLICK
(Bild A)
1 Heizstrahler
2 Wandhalterung
3 Feststellschraube
4 Teleskopstange
5 Anschlussleitung
6 Obere Stange des Standbeines
7 3 x Schrauben M5x6mm
8 Mittelstange des Standbeines
9 3 x Schrauben M5x6mm
10 Untere Stange des Standbeines
11 4 x Schraube M6x30mm
12 Standfuß
13 Abdeckung
14 Große Kabelklemme
15 Große Kabelklemme
16 Feststellmutter der Teleskopstange
17 Kleine Kabelklemme
18 Seilzugschalter
19 Aufnahme der Teleskopstange
20 Anzeige der Heizstufe: 0 = Aus,
1 = 650W, 2 = 1300W, 3 = 2000W
21 Heizfläche
05100_Inlay_A5_de-en-fr-nl_V1.indb 105100_Inlay_A5_de-en-fr-nl_V1.indb 1 01.12.2020 10:25:1401.12.2020 10:25:14

DE
2
SYMBOLE
Gefahrenzeichen: Diese Symbole
zeigen mögliche Gefahren an.
Die dazugehörenden Sicherheits-
hinweise aufmerksam lesen und
befolgen.
Ergänzende Informationen
Gebrauchsanleitung vor Benut-
zung lesen!
Vorsicht: heiße Oberflächen!
Das Gerät während des Betriebs
nicht abdecken!
Symbol für Wechselspannung
SIGNALWÖRTER
Signalwörter bezeichnen Gefährdungen
bei Nichtbeachtung der dazugehörigen
Hinweise.
GEFAHR – hohes Risiko, hat schwere
Verletzung oder Tod zur Folge
WARNUNG – mittleres Risiko, kann
schwere Verletzung oder Tod zur Folge
haben
VORSICHT – niedriges Risiko, kann ge-
ringfügige oder mäßige Verletzung zur
Folge haben
HINWEIS – kann Risiko von Sachschäden
zur Folge haben
Liebe Kundin, lieber Kunde,
wir freuen uns, dass du dich für den MAXXMEE Infrarot-Heizstrahler entschieden
hast. Mit diesem Gerät spürst du sofort die Wärme ohne lange Aufwärmzeit. Du
kannst zwischen drei Heizstufen auswählen und die ausgestrahlte Infrarot-Wärme
ermöglicht dann gemütliche Stunden bis in die kalte Nacht hinein. Der Heizstrahler
kann geneigt werden und sein Standbein ist höhenverstellbar. Der stabile Standfuß
sorgt zudem für eine sichere Anwendung. Alternativ kann der Heizstrahler auch an
der Wand befestigt werden.
Solltest du Fragen zum Gerät sowie zu Ersatz- / Zubehörteilen haben, kontaktiere
den Kundenservice über unsere Website: www.dspro.de/kundenservice
Wir wünschen dir viel Freude an deinem MAXXMEE Infrarot-Heizstrahler.
Informationen zur Gebrauchsanleitung
Lies vor dem ersten Gebrauch des Gerätes diese Gebrauchsanleitung sorgfältig
durch und bewahre sie für spätere Fragen und weitere Nutzer auf. Sie ist ein Be-
standteil des Gerätes. Hersteller und Importeur übernehmen keine Haftung, wenn
die Angaben in dieser Gebrauchsanleitung nicht beachtet werden.
WICHTIGE HINWEISE!
UNBEDINGT AUFBEWAHREN!
05100_Inlay_A5_de-en-fr-nl_V1.indb 205100_Inlay_A5_de-en-fr-nl_V1.indb 2 01.12.2020 10:25:2101.12.2020 10:25:21

Infrarot-Heizstrahler DE
3
BESTIMMUNGSGEMÄßER GEBRAUCH
■Dieses Gerät ist zum Heizen in
überdachten Außenbereichen (z.B.
Terrassen) bestimmt.
■Dieses Gerät ist für den gelegentli-
chen Gebrauch und nicht für Dauer-
betrieb geeignet.
■Das Gerät ist für den privaten Ge-
brauch, nicht für eine gewerbliche
Nutzung bestimmt.
■Das Gerät nur für den angegebenen
Zweck und nur wie in der Gebrauchs-
anleitung beschrieben nutzen. Jede
weitere Verwendung gilt als bestim-
mungswidrig.
■Von der Gewährleistung ausge-
schlossen sind alle Mängel, die
durch unsachgemäße Behandlung,
Beschädigung oder Reparaturversu-
che entstehen. Dies gilt auch für den
normalen Verschleiß.
SICHERHEITSHINWEISE
WARNUNG: Alle Sicherheitshinweise, Anweisungen,
Bebilderungen und technischen Daten, mit denen dieses
Gerät versehen ist, beachten. Versäumnisse bei der Einhal-
tung der Sicherheitshinweise und Anweisungen können elek-
trischen Schlag, Brand und/oder Verletzungen verursachen.
■VORSICHT! Einige Teile des Gerätes können sehr
heiß werden und Verbrennungen verursachen.
Besondere Vorsicht ist geboten, wenn Kinder und
schutzbedürftige Personen anwesend sind.
■WARNUNG! NICHT ABDECKEN!Um eine Über-
hitzung des Heizgerätes zu vermeiden, darf es nicht
abgedeckt werden.
■WARNUNG: Dieses Gerät nicht in der Nähe von
Badewannen, Duschwannen oder anderen Gefäßen
benutzen, die Wasser enthalten.
■WARNUNG: Dieses Gerät ist nicht mit einer Einrichtung zur
Regelung der Raumtemperatur ausgerüstet. Das Heizgerät
darf nicht in kleinen Räumen benutzt werden, die von Per-
sonen bewohnt werden, die nicht selbstständig den Raum
verlassen können, es sei denn, eine ständige Überwachung ist
gewährleistet.
05100_Inlay_A5_de-en-fr-nl_V1.indb 305100_Inlay_A5_de-en-fr-nl_V1.indb 3 01.12.2020 10:25:2401.12.2020 10:25:24

DE
4
■Das Heizgerät darf nicht unmittelbar unterhalb einer Wand-
steckdose angebracht werden.
■Dieses Gerät kann von Personen mit reduzierten physischen,
sensorischen oder mentalen Fähigkeiten oder Mangel an
Erfahrung und/oder Wissen benutzt werden, wenn sie beauf-
sichtigt oder bezüglich des sicheren Gebrauchs des Gerätes
unterwiesen wurden und die daraus resultierenden Gefahren
verstanden haben, vorausgesetzt, dass das Gerät in seiner
normalen Gebrauchslage platziert oder installiert ist.
■Kinder jünger als 3 Jahre sind vom Gerät fernzuhalten; es sei
denn sie werden ständig überwacht.
■Kinder zwischen 3 und 8 Jahren dürfen das Gerät aus-
schließlich ein- und ausschalten, wenn sie beaufsichtigt oder
bezüglich des sicheren Gebrauchs des Gerätes unterwiesen
wurden und die daraus resultierenden Gefahren verstanden
haben, vorausgesetzt, dass das Gerät in seiner normalen
Gebrauchslage platziert oder installiert ist.
■Das Anschließen sowie die Regulierung, Reinigung und
Benutzer-Wartung dürfen nicht durch Kinder zwischen 3
und 8 Jahren durchgeführt werden.
■Kinder dürfen nicht mit dem Gerät spielen.
■VORSICHT: Das Gerät ist nicht dazu bestimmt, mit einer
externen Zeitschaltuhr oder einem separaten Fernwirksystem
betrieben zu werden.
■Das Gerät ist bei nicht vorhandener Aufsicht und vor dem Rei-
nigen stets vom Netz zu trennen.
■Das Gerät vollständig abkühlen lassen, bevor es gereinigt oder
verstaut wird.
■Keine Veränderungen am Gerät vornehmen. Auch die An-
schlussleitung nicht selbst austauschen. Wenn das Gerät oder
seine Anschlussleitung beschädigt sind, müssen diese durch
den Hersteller, Kundenservice oder eine Fachwerkstatt ersetzt
werden, um Gefährdungen zu vermeiden.
05100_Inlay_A5_de-en-fr-nl_V1.indb 405100_Inlay_A5_de-en-fr-nl_V1.indb 4 01.12.2020 10:25:2401.12.2020 10:25:24

Infrarot-Heizstrahler DE
5
GEFAHR – Stromschlaggefahr
■Das Gerät und die Anschlussleitung
niemals in Wasser oder andere Flüs-
sigkeiten eintauchen und sicherstel-
len, dass diese nicht ins Wasser fallen
oder nass werden können.
■Sollte das Gerät ins Wasser fallen,
während es an das Stromnetz ange-
schlossen ist, sofort den Netzste-
cker aus der Steckdose ziehen! Erst
danach das Gerät aus dem Wasser
holen und entsorgen.
■Das Gerät und die Anschlussleitung
niemals mit feuchten Händen berüh-
ren, wenn das Gerät an das Strom-
netz angeschlossen ist.
■Das Gerät nur in geschlossenen Räu-
men lagern.
■Das Gerät nicht in Räumen mit hoher
Luftfeuchtigkeit benutzen und lagern.
Vor lang anhaltender Feuchtigkeit
schützen.
WARNUNG – Brandgefahr
■Das Gerät nur benutzen, wenn es an
seinem Standbein oder ordnungs-
gemäß an der Wand angebracht ist.
Niemals direkt auf den Boden oder
andere Untergründe legen! Die Hitze
könnte einen Materialschaden oder
einen Brand verursachen.
■Das Gerät nicht zusammen mit
anderen Verbrauchern mit hoher
Wattleistung an einen Stromkreis
anschließen, um eine Überlastung
und ggf. einen Kurzschluss (Brand)
zu vermeiden. Sicherstellen, dass
der Stromkreis für die Leistung des
Gerätes ausgelegt ist.
■Keine Mehrfachsteckdosen, Verlän-
gerungskabel über 3m Länge und
Kabeltrommeln verwenden.
■Das Gerät von Vorhängen, Einrich-
tungsgegenständen und sonstigen
brennbaren Materialien fernhalten
und es nicht auf diese ausrichten.
Mindestens 1,5m Abstand von der
Heizfläche halten.
■Keine Gegenstände auf das Gerät
legen, wenn es eingeschaltet ist.
■Das Gerät nicht zum Trocknen von
Wäsche benutzen.
■Im Brandfall: Nicht mit Wasser
löschen! Flammen mit einer feuerfes-
ten Decke oder einem geeigneten
Feuerlöscher ersticken.
WARNUNG – Verletzungs-
gefahr
■Kinder und Tiere von Verpackungs-
material fernhalten. Es besteht Ersti-
ckungsgefahr.
■Sicherstellen, dass die Anschluss-
leitung stets außer Reichweite von
Kleinkindern und Tieren ist. Es be-
steht Strangulationsgefahr.
■Die Anschlussleitung so verlegen,
dass sie keine Stolpergefahr darstellt.
HINWEIS – Risiko von Material- und
Sachschäden
■Das Gerät immer zuerst ausschalten,
bevor der Netzstecker aus der Steck-
dose gezogen wird.
■Vor einem Gewitter, den Netzstecker
aus der Steckdose ziehen.
■Das Gerät niemals am Netzkabel zie-
hen oder tragen. Beim Herausziehen
aus der Steckdose immer am Netz-
stecker und nie am Netzkabel ziehen!
■Die Anschlussleitung so verlegen,
dass sie nicht gequetscht oder
geknickt wird und nicht mit heißen
Flächen in Berührung kommt.
■Das Gerät keinen Stößen aussetzen.
■Das Gerät vor Feuer, anderen Wär-
mequellen und Minustemperaturen
schützen.
■Nur Original-Zubehörteile des
Herstellers verwenden, um die
05100_Inlay_A5_de-en-fr-nl_V1.indb 505100_Inlay_A5_de-en-fr-nl_V1.indb 5 01.12.2020 10:25:2501.12.2020 10:25:25

DE
6
Funktionsweise des Gerätes nicht
zu beeinträchtigen und eventuelle
Schäden zu verhindern.
■Keine schweren Gegenstände auf
das Gerät sowie die Anschlussleitung
legen oder stellen.
MONTAGE
Beachten!
■Der Mindestabstand des Heizstrah-
lers zum Boden muss 180cm und zu
den übrigen Seiten 40cm betragen,
um einen ausreichenden Abstand
von Personen und Tieren zum Gerät
zu gewährleisten und Verbrennungen
zu vermeiden.
Diese Abstände bei der Wandmonta-
ge berücksichtigen und bei Verwen-
dung des Standbeines unbedingt alle
3 Stangen benutzen.
Der Heizstrahler(1) kann sowohl am zu-
gehörigen Standfuß(12) als auch an der
Wand angebracht werden.
An den Standfuß montieren
L Es wird ein Kreuzschlitzschrauben-
dreher benötigt.
Untere Stange des Standbeines (BildC):
1. Den Standfuß(12) auf den Boden
stellen und die untere Stange(10) in
die Mitte des Standfußes stecken.
2. Die untere Stange so drehen, dass
die 4Bohrungen in der Stangen-
platte genau auf den 4 zugehörigen
Schrauben(11) liegen.
3. Diese Schrauben aus dem Standfuß
herausdrehen. (Dazu die Stange
abnehmen.)
4. Die Stange wieder einsetzen und mit
den Schrauben befestigen.
5. Zuerst die Abdeckung(13) und dann
eine große Kabelklemme(14) auf die
untere Stange stecken.
Mittelstange des Standbeines:
6. Die Mittelstange(8) auf die untere
Stange stecken und mit den kurzen
M5x6mm-Schrauben(9) befestigen.
Obere Stange des Standbeines:
7. Die obere Stange(6) auf die Mittel-
stange stecken und mit den kurzen
M5x6mm-Schrauben(7) befestigen.
8. Eine große Kabelklemme(15) auf die
Stange stecken.
9. In der oberen Stange befindet sich
die Teleskopstange(4). Soll die Höhe
des Heizstrahlers vergrößert wer-
den, die Teleskopstange so weit wie
gewünscht herausziehen. Dazu die
Feststellmutter(16) zunächst lockern
und nach der Höheneinstellung wie-
der festziehen.
10. Bei Bedarf die kleine Kabelklem-
me(17) auf die Teleskopstange
stecken.
Heizstrahler:
11. Den Heizstrahler auf die Teleskop-
stange stecken und die Feststell-
schraube(3) festdrehen.
12. Die Anschlussleitung(5) in die Kabel-
klemmen stecken.
Wandmontage
Beachten!
■Sicherstellen, dass der Untergrund,
auf den das Gerät montiert wird,
stabil ist und geeignete Schrauben
sowie Dübel verwendet werden. Die
mitgelieferten Schrauben und Dübel
sind für gemauerte Wände vorge-
sehen. Für weichere Untergründe
könnte anderes Befestigungsmaterial
erforderlich sein. Im Zweifel im Fach-
handel beraten lassen.
05100_Inlay_A5_de-en-fr-nl_V1.indb 605100_Inlay_A5_de-en-fr-nl_V1.indb 6 01.12.2020 10:25:2501.12.2020 10:25:25

Infrarot-Heizstrahler DE
7
■Vor dem Bohren sicherstellen, dass
hinter der beabsichtigten Bohrstelle
keine Rohre oder Leitungen verlaufen.
■Bei der Wahl der Montagestelle be-
rücksichtigen, dass die Anschlusslei-
tung bis zu einer Steckdose reichen
muss und das Gerät nicht berühren
oder der Hitze des Gerätes ausge-
setzt sein darf.
L Benötigt werden eine Wasser-
waage, eine Bohrmaschine, ein
Kreuzschlitzschraubendreher und
ein Stift.
Auf der Rückseite hat der Heizstrahler(1)
eine Wandhalterung(2). Er wird ohne das
Standbein an die Wand gehängt.
1. Die Abstände der vier Bohrungen in
der Wandhalterung ausmessen und
mit einem Stift an der Wand markie-
ren. Dabei möglichst eine Wasser-
waage benutzen.
2. 8mm-Löcher für die mitgelieferten
Dübel bohren. Bei anderem Befesti-
gungsmaterial die Größe der Bohrun-
gen entsprechend anpassen.
3. Die Dübel in die Bohrungen stecken.
4. Die Schrauben (M4x35mm) in die
Dübel drehen, jedoch nicht bis zum
Anschlag. Sie müssen ein Stück her-
ausragen, damit die Wandhalterung
eingehängt werden kann.
5. Die Wandhalterung auf die Schrau-
ben hängen und ein Stück nach
rechts schieben, bis sie einrastet.
6. Die Anschlussleitung(5) so verlegen,
dass sie das Gerät nicht berührt.
BENUTZUNG
Beachten!
■Das Gerät nur an eine vorschrifts-
mäßig installierte Steckdose, die mit
den technischen Daten des Gerätes
übereinstimmt, anschließen. Die
Steckdose muss auch nach dem An-
schließen gut zugänglich sein, damit
die Netzverbindung schnell getrennt
werden kann.
■Bei Schäden / Störungen das Gerät
sofort ausschalten und den Netz-
stecker aus der Steckdose ziehen.
■Den Heizstrahler niemals berühren,
wenn er eingeschaltet ist. Er muss
ausgeschaltet und abgekühlt sein (ca.
15Minuten nach dem Aussschalten),
wenn der Neigungswinkel eingestellt
wird. Es besteht Verbrennungsgefahr.
■Das Gerät vor dem Schlafengehen
ausschalten. Es darf nicht ohne Auf-
sicht eingeschaltet sein, um im Falle
von Störungen sofort eingreifen zu
können.
■Das Gerät verfügt über eine Sicher-
heitsabschaltung, die es ausschaltet,
wenn das Gerät umfällt.
1. Vor dem Einschalten den Neigungs-
winkel des Heizstrahlers einstellen.
Er kann bis zu 45° geneigt werden
(BildB). Ist er an der Wand mon-
tiert, nicht auf die Decke richten!
2. Den Netzstecker in eine Steckdose
stecken.
3. Am Seilzugschalter(18) ziehen, um
den Heizstrahler einzuschalten, die
Heizstufe zu erhöhen und ihn wieder
auszuschalten.
05100_Inlay_A5_de-en-fr-nl_V1.indb 705100_Inlay_A5_de-en-fr-nl_V1.indb 7 01.12.2020 10:25:2501.12.2020 10:25:25

DE
8
REINIGUNG UND
LAGERUNG
Beachten!
■Es darf keine Flüssigkeit in das Gerät
eindringen. Niemals in Wasser tau-
chen!
■Das Gerät vor jeder Reinigung abküh-
len lassen.
■Zum Reinigen nicht Alkohol oder
sonstige ätzende bzw. scheuernde
Reiniger oder raue Schwämme ver-
wenden. Diese können die Oberflä-
chen beschädigen.
• Das Gerät regelmäßig abstauben.
• Das Gerät bei Bedarf mit einem
feuchten Tuch abwischen. An-
schließend mit einem weichen Tuch
abtrocknen.
• Soll das Gerät längere Zeit nicht ver-
wendet werden, vor Staub geschützt,
kühl und trocken außerhalb der
Reichweite von Kindern und Tieren
lagern.
PROBLEMBEHEBUNG
Sollte das Gerät nicht ordnungsgemäß
funktionieren, überprüfen, ob ein Prob-
lem selbst behoben werden kann. Lässt
sich mit den nachfolgenden Schritten
das Problem nicht lösen, den Kundenser-
vice kontaktieren.
Nicht versuchen, ein elektrisches
Gerät selbst zu reparieren!
Das Gerät funktioniert nicht. Es lässt
sich nicht einschalten.
Der Netzstecker steckt nicht richtig in
der Steckdose.
►Den Sitz des Netzsteckers korrigie-
ren.
Die Sicherheitsabschaltung ist aktiviert,
weil das Gerät zu sehr geneigt ist.
►Das Gerät auf einen stabilen, ebe-
nen Untergrund stellen.
Die Steckdose ist defekt.
►Eine andere Steckdose probieren.
Es ist keine Netzspannung vorhanden.
►Die Sicherung des elektrischen Vertei-
lers (Sicherungskasten) überprüfen.
Die Sicherung im Sicherungskasten
wurde ausgelöst.
Zu viele Geräte in einem Stromkreis
angeschlossen.
►Anzahl der angschlossenen Geräte
reduzieren.
Während des Gebrauchs lässt sich
ein unangenehmer Geruch feststel-
len.
Das Gerät ist verstaubt bzw. verschmutzt.
►Das Gerät reinigen.
Das Gerät wird zum ersten Mal verwen-
det. Es befinden sich Produktionsrück-
stände in/am Gerät. Dies ist normal und
tritt später nicht mehr auf.
►Für einen gut durchlüfteten Raum
sorgen!
ENTSORGUNG
Das Verpackungsmaterial um-
weltgerecht entsorgen und der
Wertstoffsammlung zuführen.
Dieses Gerät unterliegt der euro-
päischen Richtlinie 2012/19/EU für
Elektro- und Elektronik-Altgeräte
(WEEE). Dieses Gerät nicht als
normalen Hausmüll, sondern um-
weltgerecht über einen behördlich
zugelassenen Entsorgungsbetrieb
entsorgen.
05100_Inlay_A5_de-en-fr-nl_V1.indb 805100_Inlay_A5_de-en-fr-nl_V1.indb 8 01.12.2020 10:25:2601.12.2020 10:25:26

Infrarot-Heizstrahler DE
9
TECHNISCHE DATEN
Artikelnummer: 05100
Modellnummer: PNH-2000DI
Stromversorgung: Gerät: 220 – 240V~; 50 – 60Hz
Leistung:
Heizstufe 1: 650W
Heizstufe 2: 1300 W
Heizstufe 3: 2000W
Höhe: 180 – 210cm
Schutzklasse: I
Schutzart: IPX4
ID Gebrauchsanleitung: Z 05100 M DS V1 1120 md
Alle Rechte vorbehalten.
05100_Inlay_A5_de-en-fr-nl_V1.indb 905100_Inlay_A5_de-en-fr-nl_V1.indb 9 01.12.2020 10:25:2701.12.2020 10:25:27

EN
10
LIST OF CONTENTS
Items Supplied 10
At A Glance 10
Symbols 11
Signal Words 11
Intended Use 12
Safety Notices 12
Assembly 14
Use 16
Cleaning and Storage 16
Troubleshooting 16
Disposal 17
Technical Data 17
ITEMS SUPPLIED
1 x radiant heater with connecting cable
1 x top rod with telescopic rod
1 x middle rod
1 x bottom rod
1 x base incl. 4 x screw M 6 x 30 mm
1 x cover
2 x large cable clamp
1 x small cable clamp
6x screw M5x6mm
4 x screw M4x35mm
4 x anchors
1 x operating instructions
Check the items supplied for complete-
ness and the components for transport
damage. If you find any damage, do not
use the device but contact our customer
service department. Remove any possible
films, stickers or transport protection from
the device. Never remove the rating
plate and any possible warnings!
AT A GLANCE
(Picture A)
1 Radiant heater
2 Wall mounting bracket
3 Locking screw
4 Telescopic rod
5 Connecting cable
6 Top rod of the supporting leg
7 3 x screws M5x6mm
8 Middle rod of the supporting leg
9 3 x screws M5x6mm
10 Bottom rod of the supporting leg
11 4 x screw M6x30mm
12 Base
13 Cover
14 Large cable clamp
15 Large cable clamp
16 Locking nut of the telescopic rod
17 Small cable clamp
18 Pull-cord switch
19 Mount of the telescopic rod
20 Heat level display: 0 = Off,
1 = 650W, 2 = 1300W, 3 = 2000 W
21 Heating surface
05100_Inlay_A5_de-en-fr-nl_V1.indb 1005100_Inlay_A5_de-en-fr-nl_V1.indb 10 01.12.2020 10:25:2901.12.2020 10:25:29

Infrared Radiant Heater EN
11
SYMBOLS
Danger symbols: These symbols
indicate possible dangers. Read
the associated safety notices care-
fully and follow them.
Supplementary information
Read the operating instructions
before use!
Caution: hot surfaces!
Do not cover the device during
operation!
Symbol for AC voltage
SIGNAL WORDS
Signal words indicate hazards if the asso-
ciated notices are not followed.
DANGER – high risk, results in serious
injury or death
WARNING – medium risk, may result in
serious injury or death
CAUTION – low risk, may result in minor
or moderate injury
NOTICE – may result in risk of damage to
material
Dear Customer,
We are delighted that you have chosen the MAXXMEE infrared radiant heater. This
device allows you to feel the warmth without having to wait long for it to heat up. You
can choose from three heat levels and the infrared heat which is emitted then allows
you to snuggle up warm on cold nights. The radiant heater can be tilted and its sup-
porting leg is height-adjustable. The stable supporting leg also ensures the device is
safe to use. Alternatively, the radiant heater can also be attached to the wall.
If you have any questions about the device and about spare parts/accessories, contact
the customer service department via our website: www.dspro.de/kundenservice
We hope you have a lot of fun with your MAXXMEE infrared radiant heater.
Information About the Operating Instructions
Before using the device for the first time, please read through these operating in-
structions carefully and keep them for future reference and other users. They form an
integral part of the device. The manufacturer and importer do not accept any liability if
the information in these operating instructions is not complied with.
IMPORTANT NOTICES!
PLEASE KEEP FOR REFERENCE!
05100_Inlay_A5_de-en-fr-nl_V1.indb 1105100_Inlay_A5_de-en-fr-nl_V1.indb 11 01.12.2020 10:25:3401.12.2020 10:25:34

EN
12
INTENDED USE
■This device is intended to be used
to heat covered outdoor areas (e.g.
patios).
■This device is for occasional use and
is not suitable for constant opera-
tion.
■The device is for personal use only
and is not intended for commercial
applications.
■Use the device only for the specified
purpose and as described in the
operating instructions. Any other use
is deemed to be improper.
■The warranty does not cover faults
caused by incorrect handling, damage
or attempted repairs. The same ap-
plies to normal wear and tear.
SAFETY NOTICES
WARNING: Note all safety notices, instructions, illustra-
tions and technical data provided with this device. Failure
to follow the safety notices and instructions may result in
electric shock, fire and / or injuries.
■CAUTION! Some parts of the device may get very
hot and cause burns. Special care must be taken in
the presence of children or vulnerable persons.
■WARNING! DO NOT COVER! To prevent the heater
from overheating, it must not be covered.
■WARNING: Do not use this device near a bathtub,
shower or any vessel containing water.
■WARNING: This device is not equipped with a facility to reg-
ulate the room temperature. The heater must not be used in
small rooms inhabited by people who are unable to leave the
room without help, unless constant supervision is guaranteed.
■The heater must not be mounted directly beneath a wall socket.
■This device may be used by people with reduced physical,
sensory or mental abilities or a lack of experience and/or
knowledge if they are supervised or have received instruction
on how to use the device safely and have understood the re-
05100_Inlay_A5_de-en-fr-nl_V1.indb 1205100_Inlay_A5_de-en-fr-nl_V1.indb 12 01.12.2020 10:25:3701.12.2020 10:25:37

Infrared Radiant Heater EN
13
sulting dangers, provided that the device is placed or installed
in its normal position of use.
■Children under three years of age must be kept away from the
device, unless they are under constant supervision.
■Children between 3 and 8 years of age may only ever switch
the device on and off if they are supervised or have received
instruction on how to use the device safely and have un-
derstood the resulting dangers, provided that the device is
placed or installed in its normal position of use.
■Connection as well as regulation, cleaning and user mainte-
nance may not be carried out by children between 3 and 8
years of age.
■Children must not play with the device.
■CAUTION: The device is not designed to be operated with an
external timer or a separate remote control system.
■The device must always be disconnected from the mains pow-
er when left unattended and before cleaning it.
■Allow the device to cool down completely before it is cleaned
or stored away.
■Do not make any modifications to the device. Also do not
replace the connecting cable yourself. If the device or its
connecting cable are damaged, they must be replaced by
the manufacturer, customer service department or a specialist
workshop in order to avoid any hazards.
DANGER – Danger of Electric
Shock
■Never immerse the device and the
connecting cable in water or other
liquids and ensure that they cannot
fall into water or become wet.
■If the device falls into water while it is
connected to the mains power, pull
the mains plug out of the plug socket
immediately! Only after this should
you pull the device out of the water
and dispose of it.
■Never touch the device and the con-
necting cable with wet hands when
the device is connected to the mains
power.
■Store the device only in closed rooms.
■Do not use and store the device in
rooms with high humidity. Protect the
device from persistent moisture.
WARNING – Danger of Fire
■Only use the device if it is on its
supporting leg or has been attached
to the wall properly. Never place it
directly on the floor or other surfaces!
The heat could cause material dam-
age or a fire.
05100_Inlay_A5_de-en-fr-nl_V1.indb 1305100_Inlay_A5_de-en-fr-nl_V1.indb 13 01.12.2020 10:25:3801.12.2020 10:25:38

EN
14
■Do not connect the device along with
other consumers with a high wattage to
a circuit in order to prevent overload-
ing and a possible short circuit (fire).
Make sure that the circuit is designed
to handle the power of the device.
■Do not use any multiple sockets,
extension cables more than 3m long
or cable extension reels.
■Keep the device away from curtains,
furnishings and other combustible
materials and do not direct it towards
them. Maintain a gap of at least 1.5m
from the heating surface.
■Do not place any objects on the de-
vice when it is switched on.
■Do not use the device for drying
laundry.
■In the event of a fire: Do not extin-
guish with water! Smother the flames
with a fireproof blanket or a suitable
fire extinguisher.
WARNING – Danger of Injury
■Keep children and animals away from
the packaging material. There is a
danger of suffocation.
■Make sure that the connecting cable
is always kept out of the reach of
small children and animals. There is a
danger of strangulation.
■Lay the connecting cable in such a
way that it does not present a trip
hazard.
NOTICE – Risk of Damage to
Material and Property
■Always switch off the device first
before the mains plug is pulled out of
the plug socket.
■Pull the mains plug out of the plug
socket before a thunderstorm.
■Never pull or carry the device by the
mains cable. When you pull the mains
plug out of the plug socket, always
pull on the mains plug and never the
mains cable!
■Lay the connecting cable in such
a way that it does not become
squashed or bent and does not come
into contact with hot surfaces.
■Do not subject the device to any
impacts.
■Protect the device from fire, other
heat sources and sub-zero tempera-
tures.
■Use only original accessories from the
manufacturer in order to guarantee
that there is no interference that may
prevent the device from working and
to avoid possible damage.
■Do not lay or place any heavy objects
on the device or the connecting
cable.
ASSEMBLY
Please Note!
■The minimum distance of the radi-
ant heater from the ground must
be 180 cm and from the other sides
must be 40cm in order to guarantee
a sufficient distance between peo-
ple and animals and the device and
prevent burns.
Consider these distances for wall
mounting and make sure you use all
three rods when using the supporting
leg.
The radiant heater(1) can be installed
both on the associated supporting
leg(12) and on the wall.
05100_Inlay_A5_de-en-fr-nl_V1.indb 1405100_Inlay_A5_de-en-fr-nl_V1.indb 14 01.12.2020 10:25:3801.12.2020 10:25:38

Infrared Radiant Heater EN
15
Mounting on the Supporting Leg
L A cross-head screwdriver is
required.
Bottom rod of the supporting leg
(PictureC):
1. Place the base(12) on the ground
and plug the bottom rod(10) into the
middle of the supporting leg.
2. Twist the bottom rod so that the 4
holes in the rod plate are precisely
over the 4 associated screws(11).
3. Unscrew these screws from the sup-
porting leg. (Remove the rod to do
this.)
4. Reinsert the rod and fix it with the
screws.
5. First place the cover(13) and then a
large cable clamp(14) on the bottom
rod.
Middle rod of the supporting leg:
6. Place the middle rod(8) on the bot-
tom rod and fix it in place with the
short M5x6mm screws(9).
Top rod of the supporting leg:
7. Place the top rod(6) on the middle
rod and fix it in place with the short
M5x6mm screws(7).
8. Place a large cable clamp(15) on the
rod.
9. In the top rod you will find the tele-
scopic rod(4). If you want to extend
the height of the radiant heater, pull
the telescopic rod out as far as you
want. To do this, first loosen the lock-
ing nut(16) and tighten it again once
you have adjusted the height.
10. If necessary, place the small cable
clamp(17) on the telescopic rod.
Radiant heater:
11. Place the radiant heater on the
telescopic rod and twist the locking
screw(3) to tighten it.
12. Plug the connecting cable(5) into the
cable clamps.
Wall Mounting
Please Note!
■Make sure that the surface on which
the device is mounted is stable and
that suitable screws and anchors are
used. The screws and anchors which
are supplied are designed for brick
walls. Different fixings might be re-
quired for softer surfaces. Seek advice
from a specialist retailer if in doubt.
■Before drilling, ensure that there are
no pipes or cables behind the intend-
ed drilling point.
■When choosing the mounting loca-
tion, bear in mind that the connecting
cable needs to reach to a plug socket
and must not touch the device or be
exposed to the heat of the device.
L A spirit level, a drill, a cross-
head screwdriver and a pen are
required.
On the back, the radiant heater(1) has a
wall mounting bracket(2). It is hung on
the wall without the supporting leg.
1. Measure out the gaps between the
four drill holes in the wall mounting
bracket and mark them out on the
wall with a pen. Use a spirit level to
do this if possible.
2. Drill 8mm holes for the anchors which
are supplied. With different fixings,
adjust the size of the drill holes ac-
cordingly.
3. Plug the anchors into the holes.
4. Twist the screws (M4x35mm) into the
anchors, but not all the way in. They
need to stick out a little so that the
wall mounting bracket can be hung
on.
5. Hang the wall mounting bracket on
the screws and slide it a little to the
right until it engages.
6. Lay the connecting cable(5) in such a
way that it is not touching the device.
05100_Inlay_A5_de-en-fr-nl_V1.indb 1505100_Inlay_A5_de-en-fr-nl_V1.indb 15 01.12.2020 10:25:3801.12.2020 10:25:38

EN
16
USE
Please Note!
■Only connect the device to a plug
socket that is properly installed and
matches the technical data of the
device. The plug socket must also be
readily accessible after connection so
that the connection to the mains can
quickly be isolated.
■If the device has any damage / faults,
switch it off immediately and pull the
mains plug out of the plug socket.
■Never touch the radiant heater when
it is switched on. It needs to be
switched off and cooled down (ap-
prox. 15minutes after switching off)
when the tilt angle is adjusted. There
is a danger of burns.
■Switch off the device before going
to sleep. It must not be switched on
without supervision so that you can
intervene immediately if there are any
faults.
■The device has a safety shutoff which
switches off the device if it topples
over.
1. Set the tilt angle of the radiant heater
before switching it on. It can be tilted
up to 45° (PictureB). If it is mounted
on the wall, do not direct it towards
the ceiling!
2. Plug the mains plug into a plug
socket.
3. Pull on the pull-cord switch(18) to
switch on the radiant heater, increase
the heat level and switch it off again.
CLEANING AND STORAGE
Please Note!
■No liquid must get into the device.
Never immerse it in water!
■Allow the device to cool down before
cleaning it.
■Do not use alcohol or other caustic or
abrasive cleaners or rough sponges to
clean the device. These may damage
the surfaces.
• Regularly dust the device.
• Wipe down the device with a damp
cloth if necessary. Then dry with a soft
cloth.
• If the device is not going to be used
for a prolonged period, store it in a
cool and dry place protected from
dust out of the reach of children and
animals.
TROUBLESHOOTING
If the device does not work properly,
check whether you are able to rectify the
problem yourself. If the problem cannot
be solved with the steps below, contact
the customer service department.
Do not attempt to repair an elec-
trical device yourself!
The device does not work. It cannot
be switched on.
The mains plug is not inserted in the plug
socket correctly.
►Correct the fit of the mains plug.
The safety shutoff has been activated
because the device is tilted too much.
►Place the device on a stable, flat
surface.
The plug socket is defective.
►Try another plug socket.
05100_Inlay_A5_de-en-fr-nl_V1.indb 1605100_Inlay_A5_de-en-fr-nl_V1.indb 16 01.12.2020 10:25:3801.12.2020 10:25:38

Infrared Radiant Heater EN
17
There is no mains voltage.
►Check the fuse of the electrical dis-
tributor (fuse box).
The fuse in the fuse box has been
triggered.
Too many devices connected in one
circuit.
►Reduce the number of connected
devices.
During use, an unpleasant smell is
detected.
The device is dusty or dirty.
►Clean the device.
The device is being used for the first
time. There are production residues
in/on the device. This is normal and will
not occur again later.
►Make sure that the room is well
ventilated!
DISPOSAL
Dispose of the packaging material
in an environmentally friendly man-
ner so that it can be recycled.
This device is governed by the
European Directive 2012/19/EU
on waste electrical and electron-
ic equipment (WEEE). Do not
dispose of this device as normal
domestic waste, but rather in an
environmentally friendly manner
via an officially approved waste
disposal company.
TECHNICAL DATA
Article number: 05100
Model number: PNH-2000DI
Power supply: Device: 220 – 240V~; 50 – 60Hz
Power:
Heat level 1: 650W
Heat level 2: 1300W
Heat level 3: 2000W
Height: 180 – 210cm
Protection class: I
Type of protection: IPX4
ID of operating instructions: Z 05100 M DS V1 1120 md
All rights reserved.
05100_Inlay_A5_de-en-fr-nl_V1.indb 1705100_Inlay_A5_de-en-fr-nl_V1.indb 17 01.12.2020 10:25:4001.12.2020 10:25:40

FR
18
SOMMAIRE
Composition 18
Aperçu général 18
Symboles 19
Mentions d’avertissement 19
Utilisation conforme 20
Consignes de sécurité 20
Montage 23
Utilisation 24
Nettoyage et stockage 25
Résolution des problèmes 25
Mise au rebut 25
Caractéristiques techniques 26
COMPOSITION
1x chauffage radiant avec cordon de
raccordement
1 x barre supérieure avec barre télesco-
pique
1 x barre médiane
1x barre inférieure
1 x socle avec 4 x vis M6x30mm
1x cache
2x grand serre-câble
1x petit serre-câble
6x vis M5x6mm
4x vis M4x 35mm
4x chevilles
1x mode d'emploi
S’assurer que l’ensemble livré est complet
et que les composants ne présentent pas
de dommages imputables au transport.
En cas de dommages, ne pas utiliser
l’appareil et contacter le service après-
vente. Enlever de l’appareil les éventuels
films protecteurs, adhésifs ou protections
de transport. Ne jamais ôter la plaque
signalétique de l'appareil ni les éven-
tuelles mises en garde apposées.
APERÇU GÉNÉRAL
(IllustrationA)
1 Chauffage radiant
2 Support mural
3 Vis de fixation
4 Barre télescopique
5 Cordon de raccordement
6 Barre supérieure du pied
7 3 x vis M5x6mm
8 Barre médiane du pied
9 3 x vis M5x6mm
10 Barre inférieure du pied
11 4x vis M6x 30mm
12 Socle
13 Cache
14 Grand serre-câble
15 Grand serre-câble
16 Écrou de blocage de la barre télesco-
pique
17 Petit serre-câble
18 Interrupteur à tirette
19 Réception de la barre télescopique
20 Affichage du niveau de chauffe:
0 = arrêt, 1 = 650W, 2 = 1300W,
3 = 2000W
21 Surface chauffante
05100_Inlay_A5_de-en-fr-nl_V1.indb 1805100_Inlay_A5_de-en-fr-nl_V1.indb 18 01.12.2020 10:25:4201.12.2020 10:25:42

Chauffage radiant infrarouge FR
19
SYMBOLES
Symboles de danger: ces sym-
boles signalent des possibles
dangers. Lire et observer attenti-
vement les consignes de sécurité
correspondantes.
Informations complémentaires
Consulter le mode d'emploi avant
utilisation!
Attention: surfaces chaudes!
Ne pas couvrir l'appareil pendant
son fonctionnement.
Symbole pour le courant alternatif
MENTIONS
D’AVERTISSEMENT
Les mentions d’avertissement désignent
les risques qu’implique le non respect
des consignes correspondantes.
DANGER– Risque accru induisant des
blessures graves, voire mortelles
AVERTISSEMENT– Risque moyen pou-
vant induire des blessures graves, voire
mortelles
ATTENTION– Risque faible pouvant
induire des blessures bénignes ou de
moyenne gravité
AVIS– Risque de dégâts matériels
Chère cliente, cher client,
Nous vous félicitons d'avoir fait l'acquisition du chauffage radiant infrarouge
MAXXMEE. Cet appareil vous dispensera immédiatement de la chaleur sans grande
latence de préchauffage. Vous pouvez choisir entre trois niveaux de chaleur et la cha-
leur infrarouge émise vous assurera des heures conviviales jusqu’aux heures tardives
et fraîches. Ce chauffage radiant peut s’incliner et son pied est réglable en hauteur.
Le socle stable garantit par ailleurs une application sûre. En alternative, le chauffage
radiant peut également être fixé au mur.
Pour toute question concernant cet appareil et ses pièces de rechange et accessoires,
veuillez contacter le service après-vente à partir de notre site Internet:
www.dspro.de/kundenservice
Nous espérons que votre chauffage radiant infrarouge MAXXMEE vous donnera
entière satisfaction!
Informations sur le mode d'emploi
Veuillez lire attentivement le présent mode d’emploi avant la première utilisation de
l’appareil et le conserver précieusement pour toute question ultérieure ainsi que pour
les autres utilisateurs. Il fait partie intégrante de l’appareil. Le fabricant et l’importateur
déclinent toute responsabilité en cas de non-observation des instructions consignées
dans le mode d’emploi.
AVIS IMPORTANTS!
À CONSERVER IMPÉRATIVEMENT!
05100_Inlay_A5_de-en-fr-nl_V1.indb 1905100_Inlay_A5_de-en-fr-nl_V1.indb 19 01.12.2020 10:25:4701.12.2020 10:25:47

FR
20
UTILISATION CONFORME
■Cet appareil sert à chauffer les es-
paces abrités à l’air libre (par ex. les
terrasses).
■Cet appareil est conçu pour un
usage occasionnel et n’est pas pré-
vu pour fonctionner en continu.
■Cet appareil est conçu pour un usage
domestique, non professionnel.
■Utiliser cet appareil uniquement dans
le but indiqué et tel que stipulé dans
le présent mode d’emploi. Toute autre
utilisation est considérée comme non
conforme.
■Tout défaut imputable à une utilisa-
tion non conforme, à une détériora-
tion ou à des tentatives de réparation
est exclu de la garantie. L’usure
normale est également exclue de la
garantie.
CONSIGNES DE SÉCURITÉ
AVERTISSEMENT: prière d’observer l'intégralité des
consignes de sécurité, des instructions, des illustrations et
des caractéristiques techniques dont est doté cet appa-
reil. Tout manquement aux consignes de sécurité et aux ins-
tructions données peut provoquer une décharge électrique,
un incendie et/ou des blessures.
■ATTENTION! Certaines parties de l'appareil
peuvent devenir très chaudes et causer des brû-
lures. Une vigilance particulière est requise en
présence d'enfants et de personnes vulnérables.
■AVERTISSEMENT! NE PAS COUVRIR! Afin d'éviter
toute surchauffe de l'appareil de chauffage, celui-ci
ne doit pas être couvert.
■AVERTISSEMENT: ne pas utiliser cet appareil à
proximité de baignoires, bacs à douche ou autres
récipients contenant de l'eau.
■AVERTISSEMENT: cet appareil n'est pas équipé d'un dis-
positif de réglage de la température ambiante. L'appareil
de chauffage ne doit pas être utilisé dans des petites pièces
occupées par des personnes incapables de quitter la pièce
par elles-mêmes sauf si leur surveillance est assurée en per-
manence.
05100_Inlay_A5_de-en-fr-nl_V1.indb 2005100_Inlay_A5_de-en-fr-nl_V1.indb 20 01.12.2020 10:25:4901.12.2020 10:25:49
This manual suits for next models
1
Table of contents
Languages:
Other MAXXMEE Heater manuals
Popular Heater manuals by other brands

Haverland
Haverland RCW Instruction & installation manual

Frico
Frico Tiger 2 9 kW Original instructions

Quest Engineering
Quest Engineering 208414 instructions

EQUATION
EQUATION Cube AC100-20AR Assembly, Use, Maintenance Manual

Bimar
Bimar Calidea S314 Instruction booklet

Plen Air
Plen Air Infra Mini instruction manual

BVF
BVF REMINA Installation and user manual

Smith's Heating First
Smith's Heating First Caspian EC Series Installation, commissioning and user manual

Jetfire
Jetfire IP32 operating & maintenance manual

Cadet
Cadet Apex72 HW162 owner's guide

SOLIS
SOLIS MINI CUBE HEATER user manual

Technotherm
Technotherm VPS-Design B 1000 Installation and technical manual