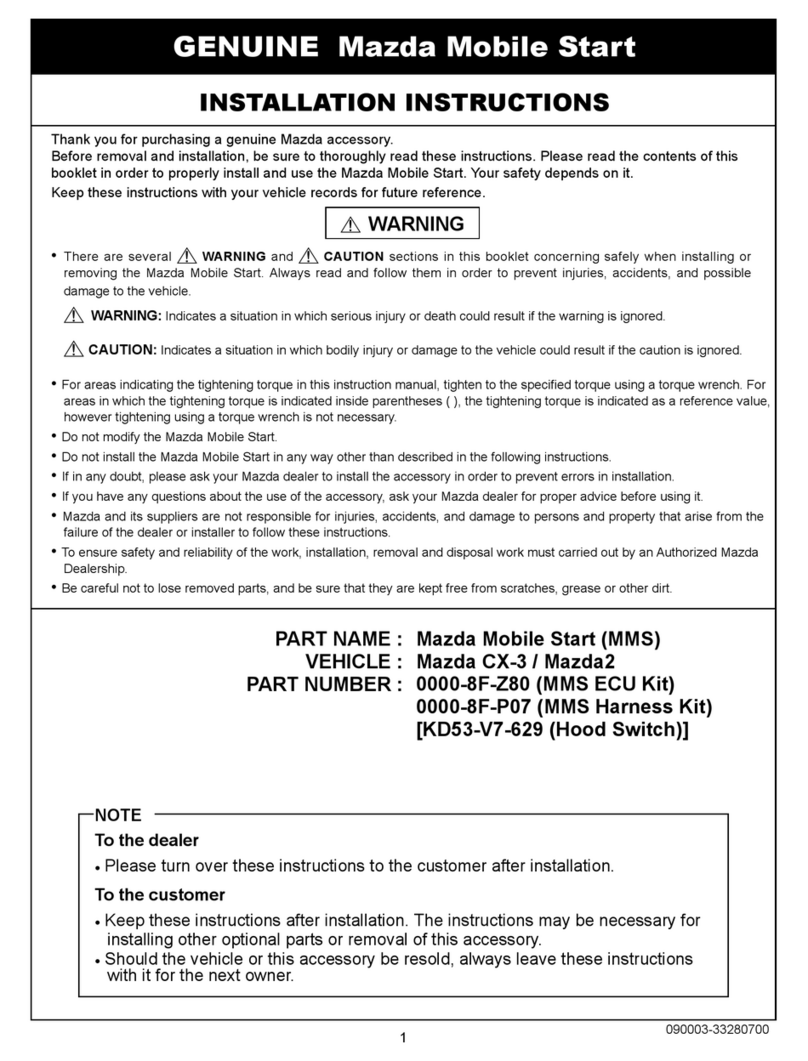
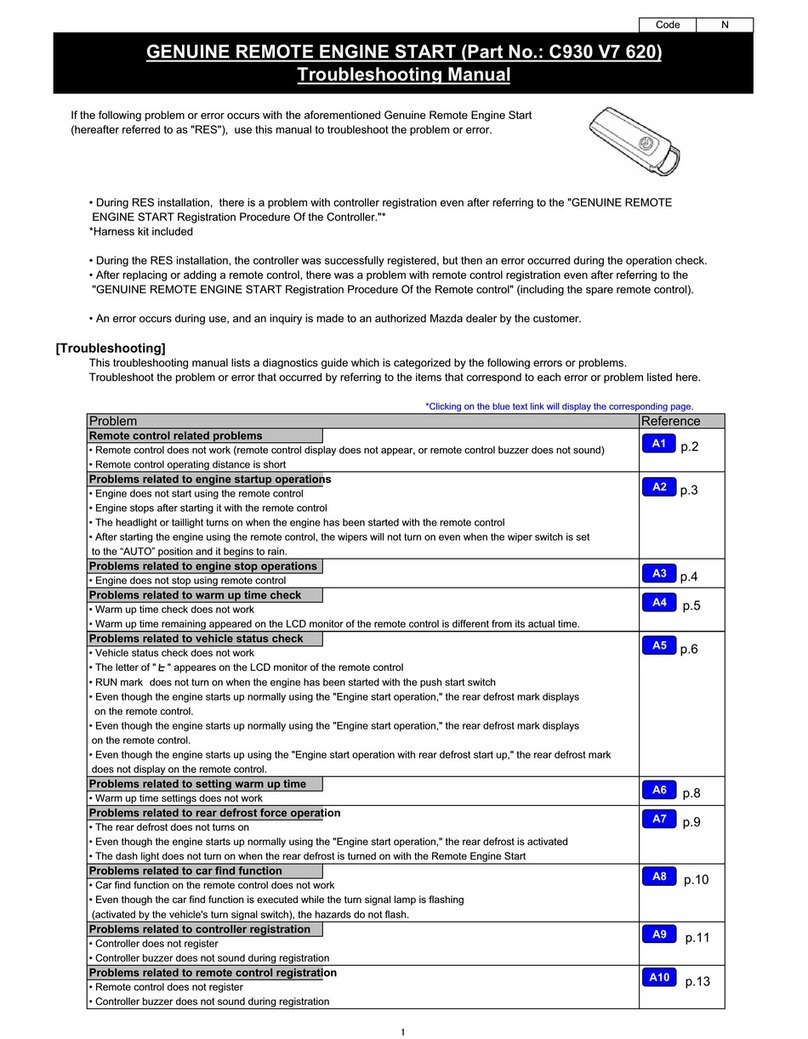
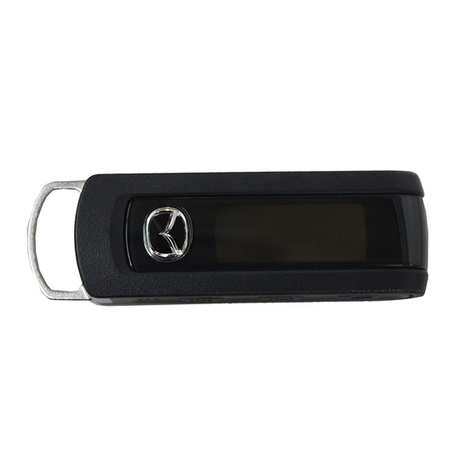
Mazda 0000-8F-N02B User manual

14280159 Rev. A 10/10
PART NUMBER (s):
0000-8F-N02B
APPLICABLE MODELS:
2007 > MAZDA CX-9
ALL MODELS
REMOTE START SYSTEM
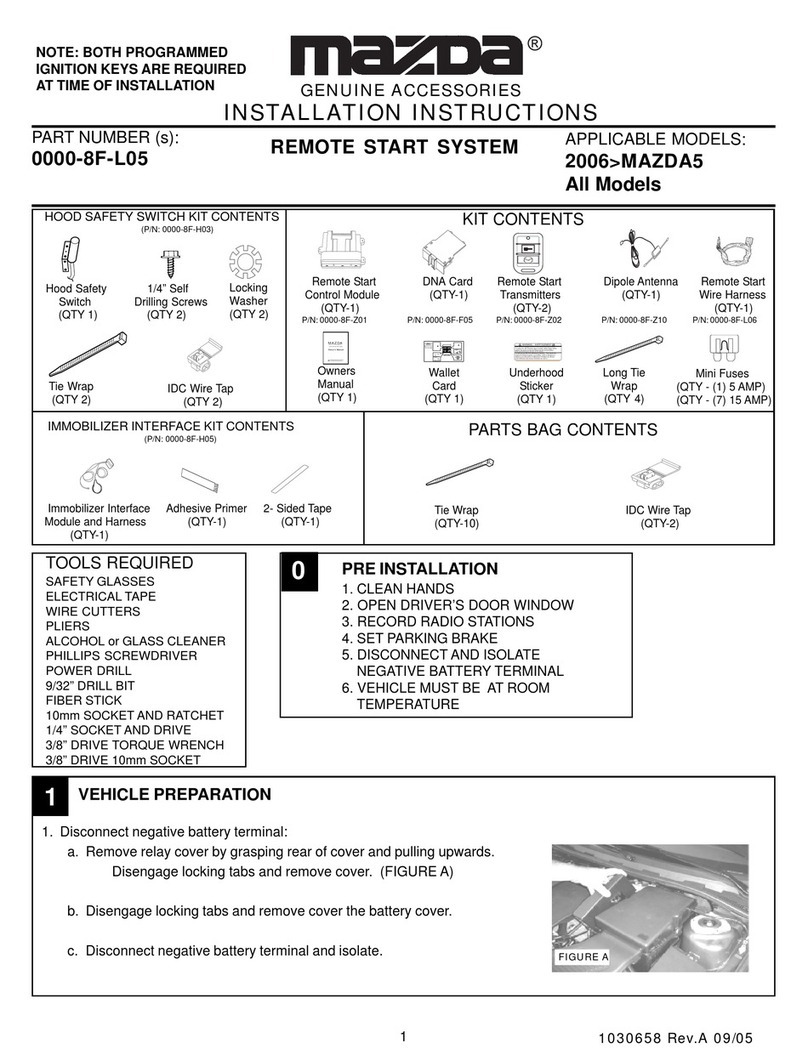
KIT CONTENTS
Remote Start DNA Card Remote Start Dipole Antenna Remote Start
Control Module (QTY-1) Transmitters (QTY-1) Wire Harness
(QTY-1) (QTY-2) (QTY-1)
P/N: 0000-8F-Z01 P/N: 0000-8F-M21 P/N: 0000-8F-Z02 P/N: 0000-8F-Z10 P/N: 0000-8F-N18A
GENUINE ACCESSORIES
INSTALLATION INSTRUCTIONS
®
Owner's Manual
VehicleRemote Start System
TM
FeaturingPowerCodeTechnology
FortheUltimateinComfort, Convenience and Security
TM
MAZDA
GENUINEACCESSORIES
WARNING: / AVERTISSEMENT
This vehicle is equipped with a remote controlled engine starter.
To reduce the risk of serious Injury or death, switch engine starter
system into service mode and disconnect the vehicle battery
before performing any service on the vehicle.
Ce véhicule est doté d'un démarreur à distance. Pourréduire les
risques de blessures graves ou mortelles, mettre le démarreur à
distance en mode service et débrancher la batterie du véhicule
avant d'effectuer des travaux d'entretien sur celui-ci.
30
sec.
2sec.
5X
2sec.
Immobilizer Interface Adhesive Primer 2- Sided Tape
Module and Harness (QTY-1) (QTY-1)
(QTY-1)
Wire Tie
(QTY 2)
IDC Wire Tap
(QTY 2)
Hood Safety
Switch
(QTY 1)
Owners
Manual
(QTY 1)
Wallet
Card
(QTY 1)
Underhood
Sticker
(QTY 1)
Long Wire
Tie
(QTY 4)
Mini Fuses
(QTY - (1) 5 AMP)
(QTY - (7) 15 AMP)
1/4” Self
Drilling Screws
(QTY 2)
PARTS BAG CONTENTS
HOOD SAFETY SWITCH KIT CONTENTS
P/N: 0000-8F-H03
Locking
Washer
(QTY 2)
SAFETY GLASSES
ELECTRICAL TAPE
WIRE CUTTERS
PLIERS
ALCOHOL or GLASS CLEANER
#2 PHILLIPS SCREWDRIVER
POWER DRILL
9/32” DRILL BIT
FIBER STICK
10 mm SOCKET AND RATCHET
1/4” SOCKET AND DRIVE
3/8” DRIVE TORQUE WRENCH
3/8” DRIVE 10mm SOCKET
HI-TEMPERATURE SILICONE
0
IMMOBILIZER INTERFACE KIT CONTENTS
P/N: 0000-8F-H05A
1. CLEAN HANDS
2. OPEN DRIVER’S DOOR WINDOW
3. RECORD RADIO STATION PRESETS
4. SET PARKING BRAKE
5. ENSURE VEHICLE WILL START UTILIZING THE IGNITION KNOB & VALET
KEY (SMART-KEY EQUIPPED VEHICLES ONLY)
6. DISCONNECT AND ISOLATE NEGATIVE BATTERY TERMINAL
7. VEHICLE MUST BE AT ROOM TEMPERATURE
Wire Tie
(QTY-10)
NOTE: BOTH VEHICLE IGNITION KEYS ARE REQUIRED AT TIME OF
INSTALLATION. DO NOT BEGIN INSTALLATION WITHOUT BOTH
KEYS.
P/N: 0000-8F-Z12
Programming
Button
(QTY 1)
P/N: 0000-8F-Z03
VEHICLE PREPARATION
IDC Wire Tap
(QTY-8)
TOOLS REQUIRED

24280159 Rev. A 10/10
ELECTRICAL SYSTEM GENERAL PROCEDURES
0
C
onn
ec
t
o
r
di
a
g
r
a
m
s
Connector diagrams show connectors on the harness
side. The terminal indicates the view from the harness
side.
(Example)
Unused terminals are indicated by
∗
.
Connector on harness side
View from harness side
D
i
sc
onn
ec
t
ing
C
onn
ec
t
o
r
s
When disconnecting connector, grasp the connectors,
not the wires.
N
OGOO
D
L
o
ck
ing
C
onn
ec
t
o
r
When locking connectors, listen for a click indicating
they are securely locked.
W
i
r
e
c
olo
r
c
od
e
Two-color wires are indicated by a two-letter
symbol.The first indicates the base color of the
wire, the second the color of the stripe.
For example:
W/R is a white wire with a red strip
BR/Y is a brown wire with a yellow strip
Symbol
(Example)
Solid color wire Striped wire
BW/R
White
(
base color
)
Red
(
stripe
)
Black
IDC Wire Tap Procedure
Place IDC on vehicle
wire.
Close side of IDC. Insert remote start
wire into IDC.
Crimp IDC metal tab
over both wires until
flush with top of IDC.
Close top of IDC.
NO GOOD

34280159 Rev. A 10/10
VEHICLE PREPARATION
1. Disconnect and Remove Battery
a. Disconnect and isolate the negative and positive battery
terminals. (FIGURE A)
b. Remove battery hold-down bracket assembly by loosen-
ing both 10 mm nuts and pivoting lower retainers toward
vehicle dashwall. (FIGURE A)
c. Carefully remove the battery from vehicle.
2. Remove the following components:
a. Using a fiber stick, remove the driver’s side scuff plate.
The scuff plate is held by 3 clips. (FIGURE B)
1
10 mm
Socket
FIGURE A
FIGURE B
0ELECTRICAL SYSTEM GENERAL PROCEDURES; continued
Wire Tie Procedure
Tapered End
Wire Tie Head
1.Wrap wire tie around
the harnesses you
wish to secure
together.
2.Insert the Tapered
End of the wire tie
into the Wire Tie
Head.
3.Pull the Tapered End
through the Wire Tie Head
until the wire tie is snug.
4.Trim wire tie end
after tightening.

44280159 Rev. A 10/10
VEHICLE PREPARATION; continued
b. Remove the driver’s side kick panel by removing the plas-
tic nut. (FIGURE C) Partially peel back the rubber
weatherstrip away from the kick panel. Insert a fiber stick
between the body and kick panel to disengage the re-
taining clip. Gently pull the kick panel toward the
passenger’s side of the vehicle to remove.
c. Remove the black, lower dash panel by using a fiber stick
to pull the plastic center button of both plastic fasteners
out to disengage. Use a fiber stick to disengage the single
clip located at the front, center of the panel and remove.
(FIGURE D)
d. Smart-Key equipped vehicles only - Remove the ignition
knob by depressing both buttons on either side of knob
and pulling away from ignition switch.
e. Remove the three (3) phillips head screws from the lower
steering column cover. (FIGURE E)
f. Insert a fiber stick between the combination switch and
the lower cover. Gently rotate the fiber stick until top and
bottom covers separate. (FIGURE E)
g. Retractable Key equipped vehicles only - Gently unclip
the ignition key light and remove the lower cover.
1
FIGURE D
Plastic Nut
Fig. 1-4
Plastic Nut
FIGURE C
FIGURE E

54280159 Rev. A 10/10
REMOTE START CONTROL MODULE PREPARATION
1. Insert the supplied fuses into the remote start control module as shown below. (FIGURE F)
The fuses fit tightly, so use the flat tip of a fiber stick to push them in place, if necessary.
2. Install DNA card into the remote start control module as shown below. (FIGURE G)
CAUTION: Use care to assure that both rows of the multi-pin connector are aligned and
seated properly or the remote start system will NOT operate properly.
3. Plug the supplied wire harness 10-pin and 24-pin connectors into the remote start control mod-
ule. (FIGURE H) Make sure the connectors are seated completely. NOTE: The connectors will
only plug into the remote start control module one way.
4. Plug the supplied immobilizer interface 4-pin connector into the remote start control module.
(FIGURE H)
NOTE: TAPE OFF THE WHITE WIRE (IF EQUIPPED) COMING FROM THE 4-WAY
CONNECTOR (THIS WIRE IS NOT USED ON THIS SYSTEM).
2
FIGURE F FIGURE G
REMOTE ENGINE START MODULE AND IMMOBILIZER INTERFACE MOUNTING
3
REMOTE ENGINE STARTMODULE MOUNTING
1. Locate the two large wire harnesses high up under the
dashboard running near the vehicle dashwall.
2. Using (3) supplied, long wire ties, secure the remote start
control module to the wire harnesses. (FIGURE I)
NOTE:EXTREME CARE MUST BE TAKEN TO ROUTE
THE REMOTE START WIRING HARNESS AWAY
FROM ANY EXISTING INSTALLED
ACCESSORIES.
IMMOBILIZER INTERFACE MODULE MOUNTING
1. Locate the large wire harness routed between the steer-
ing column and diagnostic connector. (FIGURE J)
2. Using (1) supplied, long wire tie, secure the immobilizer
interface to the wire harness. (FIGURE J)
Tie Wraps
5
15
15
15
15
15
15
5
15
15
15
15
15
15
-+
-+
15
HVAC 1
HVAC 2
MAIN B+
IGNITION
DOME LIGHT PK LIGHTS
DOOR LOCKS
15
TRUNK RELEASE
FIGURE I
FIGURE H
!
4-pin
10-pin
24-pin
FIGURE J
Wire
Harness
Wire
Tie
Diagnostic
Connector
Remote Start
Wire Harness
Immobilizer
Wire Harness
Wire Tie
Wire Tie

64280159 Rev. A 10/10
1. Driver’s A-Pillar Trim Removal/Installation
a. Partially peel back the rubber weatherstrip away from the
A-pillar trim.
b. Pull the A-pillar trim, then disengage clips A. (FIGURE K)
c. Pull the A-pillar trim, then disengage clip B (Picture 1).
d. Pull the A-pillar trim upward, then disengage clip B from
the A-pillar trim (Picture 2).
e. Disengage the tabs from the dashboard, then remove the
A-pillar trim.
f. Pull clip B out, then rotate 45 degrees. (FIGURE L)
g. Remove clip B from the grommet by pulling it outward and
replace clip B into A-pillar trim for reassembly.
2. Clean mounting spot with an alcohol pad prior to mounting.
Mount the dipole antenna to the windshield 220 mm to the
right of the center of the mirror base on the windshield, di-
rectly below the black windshield frit. (FIGURE M)
CAUTION: Mounting dipole antenna on black windshield
frit will result in reduced operating range.
3. Run the antenna wire above the headliner to the driver’s A-
pillar, using a fiber stick to secure under the headliner.
(FIGURE M)
4. Route the antenna wire down the A-pillar, securing it to the
existing wire harness with (3) supplied, short wire ties.
(FIGURE N)
CAUTION: Do not secure antenna wire to the moonroof
drain tube, if equipped, or to any airbag components.
5. Route the antenna wire behind the left side of the dashboard
and over to the remote start control module. Plug the 2-pin
antenna connector into the 2-pin port on the bottom of the re-
mote start control module. (FIGURE O)
6. Re-install the driver’s side A-pillar panel and re-install the rub-
ber weatherstrip along the A-pillar.
A-PILLAR
UPPER TRIM
TAB
B
A
A
CLIP A
CLIP B
A-PILLAR
UPPER TRIM
GROMMET
(1) (2)
DIPOLE ANTENNA MOUNTING
4
FIGURE M
FIGURE K
FIGURE L
FIGURE O
CLIP B
GROMMET
45
2-pin
FIGURE N
!
220 mm
Wire
Ties
220 mm
!

74280159 Rev. A 10/10
HOOD SAFETY SWITCH MOUNTING
1. Using (2) supplied, 1/4” self drilling screws and (2) supplied lock washers, secure the hood safety
switch to the drivers side of the vehicle’s hood 105 mm above the top of the hood mounting bracket
and 70 mm from the side edge of the hood. (FIGURE P & Q)
2. Route the hood safety switch wiring down into the engine compartment along the inside of the
hood hinge and secure using (1) supplied, short wire tie. (FIGURE Q)
3. Remove the plastic phillips screw in cowl panel to route the hood safety switch wiring underneath.
Gently lift the cowl panel and tuck hood safety switch wiring under the cowl panel and into the
engine compartment. Continue routing toward the main wire harness grommet in the vehicle
dashwall. (FIGURE P & R)
5
FIGURE P
FIGURE R
FIGURE Q
Hood Safety
Switch Wiring
Hood Safety
Switch Wiring
Phillips
Screw
Wire
Tie
105 mm
70 mm

84280159 Rev. A 10/10
Hood Safety
Switch Wiring
Main Wire
Harness Grommet
HOOD SAFETY SWITCH MOUNTING, continued
4. Using fish wire, pull the hood safety switch wiring and WHITE/BLACK tach wire from the re-
mote start harness through the main wire harness grommet:
a. From inside of the vehicle, bend approximately three (3) inches of tach wire at wire end.
b. Using electrical tape, secure fish wire to tach wire as shown. (FIGURE S)
c. Insert the fish wire along with tach wire through the main wire harness grommet into the
engine compartment. (FIGURE T & U)
CAUTION: Do not pierce the main wire harness with fish wire when pulling through
main grommet.
d. Disconnect tach wire from fish wire and pull remaining slack of tach wire from the inside
of the vehicle out into the engine compartment.
e. Bend approximately three (3) inches of hood safety switch wiring at wire end.
f. Using electrical tape, secure fish wire to hood safety switch wiring as shown.
(FIGURE S)
g. Pull fish wire and hood safety switch wiring back through main wire harness grommet
into the vehicle. (FIGURE T & U)
h. Disconnect hood safety switch wiring from fish wire and pull remaining slack of hood
safety switch wiring from the engine compartment into the vehicle.
NOTE: Ensure the tach wire does not get pulled back into the vehicle.
5
FIGURE S
!
FIGURE T
Main Wire
Harness Grommet
Hood Safety
Switch Wiring
FIGURE U

94280159 Rev. A 10/10
GROUND CONNECTION
1. Locate the 10 mm factory bolt, mounted high up under the dash, near the vehicle dashwall,
supporting the factory “Unit - Light Auto Off” module. (FIGURE V)
2. Using a 10 mm ratchet, remove the 10 mm bolt.
3. Using the 10 mm bolt just removed, secure the remote start harness BLACK/ORANGE ground
wire with ringlet and tighten with a 10 mm ratchet.
NOTE: USING A 3/8” DRIVE TORQUE WRENCH, MAKE SURE THAT THE 10 mm GROUND
BOLT IS SECURELY TIGHTENED TO 78-121 INCH/POUNDS.
7
HOOD SAFETY SWITCH WIRE CONNECTIONS
1. Locate the BLACK and GRAY/RED wires from the remote start harness.
2. Using the (2) supplied IDC wire taps (in hood safety switch parts bag), connect the wires listed
below together and crimp the IDC wire taps in place using pliers. Ensure that a complete and
secure connection is made.
6
HOOD SAFETY SWITCH WIRE REMOTE START HARNESS WIRE
Dark GRAY GRAY/RED
Dark GRAY BLACK
NOTE: Switch is not polarity sensitive.
NOTE: Refer to Page 2 for IDC Wire Tap Procedure and Wire color code information.
FIGURE V
Unit-Light Auto Off
Module
Steering
Column
10 mm
Factory Bolt

10 4280159 Rev. A 10/10
IGNITION SWITCH CONNECTOR
1. Route the remote start ignition harness with 6-pin male and fe-
male ignition connectors over the factory harness, along the
left side of the steering column. Do not secure harness at this
time.
CAUTION: EXTREME CARE MUST BE TAKEN TO ROUTE THE
REMOTE START HARNESS AWAY FROM THE
STEERING COLUMN ADJUSTER SPRING.
2. Locate the 6-pin WHITE ignition connector, on the left side of
the steering column.
3. Release the red secondary lock and disconnect the 6-pin WHITE
ignition connector by pulling outward. ( CAUTION: DO NOT
PULL ON WIRES TO DISCONNECT CONNECTOR.)
4. Plug the 6-pin female remote start harness connector into the
factory ignition switch and engage the red secondary lock.
(FIGURE W)
5. Plug the 6-pin male remote start harness connector into the 6-
pin female factory ignition connector and engage the red sec-
ondary lock. (FIGURE W)
WIRE HARNESS CONNECTIONS - STEERING COLUMN
8
!
PARKING LIGHT CONNECTION
1. Locate the 17-pin WHITE multifunction switch connector on the
left side of the steering column (plugged into the turn signal
assembly). (FIGURE X)
2. Using a razor knife carefully cut back 1”-2” of the electrical tape
to expose the wiring. ( CAUTION: BE EXTREMELY CARE-
FUL NOT TO DAMAGE ANY OF THE WIRES.)
3. Using (1) supplied IDC wire tap, connect the wires listed below
and crimp the IDC wire tap in place using pliers. Ensure that a
complete and secure connection is made. Refer to FIGURE X
& Y for proper connector and pin location.
!
FIGURE X
VIEW FROM HARNESS SIDE
FIGURE Y
FIGURE W
VEHICLE’S PARKING LIGHT WIRE REMOTE START HARNESS WIRE
BROWN (RETRACTABLE KEY) BROWN/WHITE
BROWN/WHITE (SMART-KEY) BROWN/WHITE
NOTE: Refer to Page 2 for IDC Wire Tap Procedure and Wire color code information.
6-pin female
6-pin male
17-pin
BR
BR/W : WITH SMART KEY
*
*****
Q
J
C
!

11 4280159 Rev. A 10/10
KEY-IN-SENSE & PUSH WIRE ROUTING
1. Route the remote start harness YELLOW/BLUE and BROWN/BLACK wires along with the im-
mobilizer interface ribbon cable behind the vehicle’s steering column harness to protect the
wires from any potential damage from the steering column cover and tilt and telescopic steer-
ing wheel mechanism. (FIGURE Z)
2. Using (2) supplied, short wire ties, secure the remote start harness wires to the vehicle’s har-
ness. (FIGURE Z)
CAUTION: EXTREME CARE MUST BE TAKEN TO ROUTE THE REMOTE START HARNESS
AWAY FROM THE STEERING COLUMN ADJUSTER SPRING.
WIRE HARNESS CONNECTIONS - STEERING COLUMN, continued
8
!
FIGURE Z
Wire Tie
Wire Tie
Ignition
Switch
Ignition
Connector
CAUTION: FAILURE TO ROUTE THE REMOTE START HARNESS WIRES PROPERLY COULD
RESULT IN DAMAGE TO THE WIRES DURING RE-ASSEMBLY. IF THE YELLOW/BLUE OR
BROWN/BLACK WIRES ARE SHORTED TO GROUND, THE SMART-KEY SUBSET WILL GET
DAMAGED AND NEED TO BE REPLACED.
!
Lower Steering Column
Cover Screw Hole

12 4280159 Rev. A 10/10
BR/B
CI G
A
E
BDFHJL
K
WIRE HARNESS CONNECTIONS - STEERING COLUMN, continued
KEY-IN-SENSE CONNECTION
1. Locate the 12-pin (Smart-Key equipped) or 2-pin (Retractable
Key equipped) WHITE key-in-sense connector under the igni-
tion switch. (FIGURE AA)
2. Using a razor knife carefully cut back 1”-2” of the electrical tape
to expose the wiring. ( CAUTION: BE EXTREMELY CARE-
FUL NOT TO DAMAGE ANY OF THE WIRES.)
3. Using (1) supplied IDC wire tap, connect the wires listed below
and crimp the IDC wire tap in place using pliers. Ensure that a
complete and secure connection is made. Refer to FIGURE
AA & BB for proper connector and pin location.
!
FIGURE CC
FIGURE DD
VIEW FROM HARNESS SIDE
FIGURE AA
FIGURE BB
VIEW FROM HARNESS SIDE
VEHICLE’S PUSH WIRE REMOTE START HARNESS WIRE
BROWN/BLACK BROWN/BLACK
NOTE: Refer to Page 2 for IDC Wire Tap Procedure and Wire color code information.
PUSH-WIRE CONNECTION (Smart-Key equipped vehicles only)
NOTE: If performing the installation on a Retractable Key equipped
vehicle, cut off the remote start harness BROWN/BLACK wire and
insulate with electrical tape. (This wire is not used on this vehicle
but does carry +12 volts through it during remote start operation).
1. Locate the 12-pin WHITE key-in-sense connector under the igni-
tion switch. (FIGURE CC)
2. Using a razor knife carefully cut back 1”-2” of the electrical tape
to expose the wiring. ( CAUTION: BE EXTREMELY CARE-
FUL NOT TO DAMAGE ANY OF THE WIRES.)
3. Using (1) supplied IDC wire tap, connect the wires listed below
and crimp the IDC wire tap in place using pliers. Ensure that a
complete and secure connection is made. Refer to FIGURE CC
& DD for proper connector and pin location.
!
8
VEHICLE’S KEY-IN-SENSE WIRE REMOTE START HARNESS WIRE
YELLOW/BLUE YELLOW/BLUE
NOTE: Refer to Page 2 for IDC Wire Tap Procedure and Wire color code information.
12-pin/2-pin
12-pin
Y/L
CI G
A
E
BDFHJL
K

13 4280159 Rev. A 10/10
Ribbon Cable
Non-conductor
side
Conductor
side
IMMOBILIZER INTERFACE RIBBON CABLE MOUNTING
9
1. Route the immobilizer interface ribbon cable to the ignition switch.
2. Following the instructions on the supplied adhesive primer stick,
apply a thin coating to the outer surface of the immobilizer antenna
coil (black plastic ring around ignition switch) and to the ribbon
cable.
CAUTION: Avoid primer contact to visible areas of the immobi-
lizer antenna coil and ignition switch to prevent possible discol-
oration of any plastic components.
3. Remove the backing from one side of the supplied 2-way tape and
apply tape around the immobilizer antenna coil (black plastic ring
around ignition switch) keeping the tape off of the rounded part of
the ignition switch face by trimming excess 2-way tape, if neces-
sary. (FIGURE EE & FF)
4. Remove the remaining backing on the 2-way tape and position the
2-conductor ribbon cable around the immobilizer antenna coil, with
the gray or black non-conductor side facing away from the ignition
key opening. (FIGURE GG, HH & JJ)
5. Separate approximately 100 mm of the twisted red or black ribbon
cable and create a second loop around the immobilizer antenna
coil directly in front (toward the ignition key opening) of the first
loop. (FIGURE GG, II & JJ)
6. Using (1) supplied, short wire tie, secure the antenna coil.
(FIGURE GG, II & JJ)
FIGURE EE
Smart-Key
CAUTION: THIS IS A CRITICAL STEP THAT MUST BE FOLLOWED
PRECISELY FOR PROPER REMOTE START OPERATION.
FIGURE FF
Retractable Key
FIGURE GG Smart-Key
Retractable Key
FIGURE HH
First Loop Second Loop
Wire Tie
FIGURE II
Retractable Key
Wire Tie
First Loop Second Loop
FIGURE JJ
Retractable Key
First Loop
Second Loop
Wire Tie
!
!

14 4280159 Rev. A 10/10
VEHICLE’S HORN WIRE REMOTE START HARNESS WIRE
GREEN/RED GREEN/RED
NOTE: Refer to Page 2 for IDC Wire Tap Procedure and Wire color code information.
WIRE HARNESS CONNECTIONS - BRAKE SWITCH
BRAKE SWITCH CONNECTION
1. Locate the 4-pin WHITE brake switch connector at the top of the
brake pedal. (FIGURE LL)
2. Using a razor knife carefully cut back 1”-2” of the electrical tape to
expose the wiring. ( CAUTION: BE EXTREMELY CAREFUL
NOT TO DAMAGE ANY OF THE WIRES.)
3. Using (1) supplied IDC wire tap, connect the wires listed below
and crimp the IDC wire tap in place using pliers. Ensure that a
complete and secure connection is made. Refer to FIGURE LL &
MM for proper connector and pin location.
11
FIGURE LL
12 WIRE HARNESS CONNECTIONS - DRIVER’S KICK PANEL
FIGURE MM
VIEW FROM HARNESS SIDE
!
10
1. Using (2) supplied, short wire ties, secure the remote start harness
and immobilizer interface harness to the vehicle’s factory ignition
wire harness. (FIGURE KK)
NOTE: IT IS EXTREMELY IMPORTANT THAT THE WIRING
IS SECURED IN A MANNER THAT WILL ALLOW THE TILT
AND TELESCOPIC STEERING WHEEL TO MOVE FREELY
AND STILL ALLOW FOR REASSEMBLY OF THE STEERING
COLUMN SHROUD. CHECK FUNCTIONALITY OF THE TILT
STEERING WHEEL PRIOR TO REASSEMBLY.
FIGURE KK
WIRE HARNESS CONNECTIONS - SECURING
VEHICLE’S BRAKE WIRE REMOTE START HARNESS WIRE
GREEN/YELLOW GREEN/YELLOW
NOTE: Refer to Page 2 for IDC Wire Tap Procedure and Wire color code information.
HORN CONNECTION
1. Locate the 30-pin WHITE connector at the Body Control Module
mounted in the left kick panel area. (FIGURE NN)
2. Using a razor knife carefully cut back 1”-2” of the electrical tape to
expose the wiring. ( CAUTION: BE EXTREMELY CAREFUL
NOT TO DAMAGE ANY OF THE WIRES.)
3. Using (1) supplied IDC wire tap, connect the wires listed below
and crimp the IDC wire tap in place using pliers. Ensure that a
complete and secure connection is made. Refer to FIGURE NN
& OO for proper connector and pin location.
!
G/Y
G/R
***
3AB
3AB 3AA 3X 3U 3R 3O 3L 3I 3F 3C
3W 3T 3Q 3N 3K 3H 3E 3B
3AY
3AZ
3AC
3Z 3V 3S 3P 3J 3G
3A3D
VIEW FROM HARNESS SIDE
FIGURE OO
4-pin
30-pin
FIGURE NN

15 4280159 Rev. A 10/10
DOOR LOCK CONNECTION
1. Locate the 30-pin WHITE connector at the Body Control Module
mounted in the left kick panel area. (FIGURE RR)
2. Using a razor knife carefully cut back 1”-2” of the electrical tape
to expose the wiring. ( CAUTION: BE EXTREMELY CARE-
FUL NOT TO DAMAGE ANY OF THE WIRES.)
3. Using (1) supplied IDC wire tap, connect the wires listed below
and crimp the IDC wire tap in place using pliers. Ensure that a
complete and secure connection is made. Refer to FIGURE RR
& SS for proper connector and pin location.
30-pin
VEHICLE’S DOME LIGHT WIRE REMOTE START HARNESS WIRE
YELLOW/RED YELLOW/RED
1. Locate the 6-pin WHITE connector at the Body Control Module
mounted in the left kick panel area. (FIGURE PP)
2. Using a razor knife carefully cut back 1”-2” of the electrical tape
to expose the wiring. ( CAUTION: BE EXTREMELY CARE-
FUL NOT TO DAMAGE ANY OF THE WIRES.)
3. Using (1) supplied IDC wire tap, connect the wires listed below
and crimp the IDC wire tap in place using pliers. Ensure that a
complete and secure connection is made. Refer to FIGURE
PP & QQ for proper connector and pin location.
WIRE HARNESS CONNECTIONS - DRIVER’S KICK PANEL, continued
DOME LIGHT CONNECTION
12
VIEW FROM HARNESS SIDE
VEHICLE’S DOOR LOCK WIRE REMOTE START HARNESS WIRE
VIOLET/WHITE VIOLET/WHITE
FIGURE QQ
VIEW FROM HARNESS SIDE
FIGURE SS
NOTE: Refer to Page 2 for IDC Wire Tap Procedure and Wire color code information.
!
!
V/W ***
3AB
3AB 3AA 3X 3U 3R 3O 3L 3I 3F 3C
3W 3T 3Q 3N 3K 3H 3E 3B
3AY
3AZ
3AC
3Z 3V 3S 3P 3J 3G
3A3D
6-pin
FIGURE RR
FIGURE PP
Y/R
4E 4A

16 4280159 Rev. A 10/10
TACHOMETER CONNECTION
1. Locate the upper 66-pin BLACK (2007 - 2010 Models) or the middle 70-pin BLACK
(2011 Models) connector at the Powertrain Control Module mounted to the backside of the driver’s
side strut tower in the engine compartment. (FIGURE TT)
2. Using a razor knife carefully cut back 1”-2” of the electrical tape to expose the wiring.
( CAUTION: BE EXTREMELY CAREFUL NOT TO DAMAGE ANY OF THE WIRES.)
3. Using (1) supplied IDC wire tap, connect the wires listed below and crimp the IDC wire tap in
place using pliers. Ensure that a complete and secure connection is made. Apply silicone to
both ends of IDC wire tap to seal the connections from potential moisture. Using (1) supplied,
short wire tie, secure the remote start harness wire to the vehicle wire harness. Refer to FIG-
URE TT & UU for proper connector and pin location.
VEHICLE’S TACHOMETER WIRE REMOTE START HARNESS WIRE
WHITE/BLACK WHITE/BLACK
WIRE HARNESS CONNECTIONS - ENGINE COMPARTMENT
13
VIEW FROM HARNESS SIDE
NOTE: Refer to Page 2 for IDC Wire Tap Procedure and Wire color code information.
!
66-pin
Battery
Tray
PCM
VIEW FROM HARNESS SIDE
FIGURE TT
2007 - 2010 Models 2011 Models
FIGURE UU
2007 - 2010 Models 2011 Models
PCM
70-pin
Battery
Tray
W/B
2BQ 2BL 2BG 2BC 2AY 2AY 2AQ 2AM 2AI 2AE 2AA 2W 2S 2O 2K 2F 2A
2BN 2BI 2BE 2BA 2AW 2AS 2AO 2AK 2AG 2AC 2Y 2U 2Q 2M 2H
2C
2BR 2BM 2BH 2BD 2AZ 2AV 2AR 2AN 2AJ 2AF 2AB 2X 2T 2P 2L
2G 2B
2BO 2BJ 2BF 2BB 2AX 2AT 2AP 2AL 2AH 2AD 2Z 2V 2R 2N 2I 2D
2J 2E2BK2BP

17 4280159 Rev. A 10/10
RE-ASSEMBLY
1. Re-install the following components:
a. Plug the ignition key light back into the lower steering
column cover (Retractable Key equipped vehicles only)
and carefully snap the steering column cover halves back
together. (FIGURE WW)
b. Re-install the (3) phillips head screws. Verify operation
of the tilt steering wheel.
CAUTION: Do not pierce the remote start wiring with the
steering column cover halves or phillips head screws dur
ing reassembly.
c. Replace the ignition knob by pushing toward the ignition
switch until it snaps in place. (Smart-Key equipped ve-
hicles only)
d. Re-install the black, lower dash panel by engaging the
single clip located at the front, center of the panel. Re-
install both plastic fasteners and push the plastic center
button down until flush with fastener to engage.
(FIGURE XX)
e. Re-install the driver’s side kick panel by engaging the
retaining clip on the panel. Re-install the plastic nut and
rubber weatherstrip on the kick panel. (FIGURE YY)
15
FIGURE XX
FIGURE WW
!
Plastic Nut
FIGURE YY
95 mm
12 mm
EMERGENCY OVERRIDE/PROGRAMMING BUTTON MOUNTING
1. Locate the previously removed driver’s side kick panel cover.
2. Drill a 9/32” hole at the top of the panel, exactly 12 mm down and 95 mm from the far edge.
3. Route the emergency override/programming button from the remote start harness down to the kick
panel.
4. Mount the emergency override/programming button in the drilled hole from behind and screw the mounting
cap in place. (FIGURE VV)
NOTE: DISCARD THE LOCK WASHER FROM THE EMERGENCY OVERRIDE/PROGRAMMING
BUTTON, IT IS NOT USED ON THIS MODEL.
14
FIGURE VV

18 4280159 Rev. A 10/10
RE-ASSEMBLY, continued
f. Re-install the driver’s side scuff plate by engaging all three
clips. (FIGURE ZZ)
2. Re-install and Reconnect Battery:
a. Carefully re-install battery into vehicle’s battery tray.
b. Re-install battery hold-down bracket by engaging lower
retainers into battery tray, away from vehicle dashwall and
tightening both 10 mm nuts to 78-121 inch/pounds.
(FIGURE AAA)
c. Reconnect the positive battery terminal only, at this time.
(FIGURE AAA)
15
10 mm
Socket
FIGURE AAA
FIGURE ZZ
SYSTEM POWER-UP
1. Verify that all connections are secure as per installation instructions.
2. Ensure 15 amp Room fuse is properly installed in dash fuse panel.
3. Turn the ignition key to the RUN position.
4. Reconnect the negative battery terminal.
5. Turn the ignition key to the OFF position.
16
WARNING: / AVERTISSEMENT
This vehicle is equipped with a remote controlled engine starter.
To reduce the risk of serious Injury or death, switch engine starter
system into service mode and disconnect the vehicle battery
before performing any service on the vehicle.
Ce véhicule est doté d'un démarreur à distance. Pour réduire les
risques de blessures graves ou mortelles, mettre le démarreur à
distance en mode service et débrancher la batterie du véhicule
avant d'effectuer des travaux d'entretien sur celui-ci.
1. Open the engine hood and locate the open area on the plasitc core support cover, above the
hood latch. (FIGURE BBB)
2. Using an alcohol pad, clean the mounting surface thoroughly.
3. Remove the backing on the underhood sticker and mount in place.
4. Close engine hood.
UNDERHOOD WARNING LABEL MOUNTING
17
FIGURE BBB

19 4280159 Rev. A 10/10
18 TACHOMETER PROGRAMMING
1. Tachometer Programming - Make sure engine hood is closed!
a. Turn the ignition key to the RUN position.
b. Press and hold the programming button. After 10 seconds the horn will beep 3 times.
c. Release the programming button.
d. Press and release the programming button a second time.
The horn will beep 4 times, indicating that the system has entered option learn mode.
e. Press and release the brake pedal. The horn will beep 1 time indicating that the system has
entered tachometer learn mode.
f. Start the vehicle with the ignition key and let engine warm up to a normal idle rate. (Less than
1000 RPMs)
The horn will beep 1 time every 3 seconds indicating the system is monitoring the idle rate.
g. Once the vehicle’s engine has warmed up, press and release the programming button.
The horn will beep 4 times, indicating that the system has learned the current idle rate.
h. Turn the ignition key to the OFF position.

20 4280159 Rev. A 10/10
IMMOBILIZER INTERFACE PROGRAMMING
NOTE: THE TACHOMETER SIGNAL MUST BE PROGRAMMED TO THE DNA CARD FOR THE REMOTE ENGINE
START FUNCTION TO OPERATE. (READ ENTIRE PROGRAMMING PROCEDURE PRIOR TO PROGRAMMING.)
1. Transponder interface programming:
NOTE: Two programmed ignition keys are required for this step and engine hood must be closed.
For Smart-Key equipped vehicles, remove keys from Smart-Key transmitters and place transmit
ters at least 10 feet away from vehicle during programming.
a. Sitting in the driver seat, be prepared to press the brake pedal to shut down the remote start
system.
b. Using the first key, turn the ignition on, wait for the THEFT light to turn off, then turn the ignition off and
remove key from the ignition switch.
c. Using the second key within 5 seconds, turn the ignition on, wait for the THEFT light to turn off, then
turn the ignition off and remove key from the ignition switch.
d. Activate the remote start function by pressing the START button (2) times within 5 seconds.
The system should flash the parking lights and chirp the horn one time, pause for four seconds
and start the engine.If the engine fails to start and the THEFT light is flashing rapidly, see
Troubleshooting Guide (Section 22).
e. After the engine has started, press the brake pedal to shut down the engine. The Immobilizer
interface is now programmed.
f. Attach new Remote Engine Start transmitters to the keys.
19
TRANSMITTER PROGRAMMING
20
NOTE: THE FOLLOWING STEPS ARE ONLY NECESSARY IF YOU NEED TO PROGRAM ADDITIONAL
TRANSMITTERS.
1. Transmitter Programming
NOTE: The transmitters shipped with the remote engine start system are pre-programmed to
the DNA card and do not need to be reprogrammed.
a. Turn the ignition key to the RUN position.
b. Press and hold the programming button.
After 10 seconds the horn will beep 3 times, indicating that the system is now in transmitter learn
mode.
c. Release the programming button.
d. Press the START button once on each transmitter to be programmed.
The horn will beep 1 time to indicate that the transmitter has been learned.
NOTE: Up to a total of 8 transmitters can be programmed to the DNA card.
Table of contents
Other Mazda Remote Starter manuals

Mazda
Mazda 2007 CX-7 User manual

Mazda
Mazda 0000-8F-Z80 User manual

Mazda
Mazda C960 V7 620 User manual
Mazda
Mazda GENUINE C930 V7 620 User manual

Mazda
Mazda 0000-8F-H28 User manual

Mazda
Mazda GENUINE C930 V7 620 Programming manual

Mazda
Mazda Remote Start System User manual

Mazda
Mazda 6 2006 User manual

Mazda
Mazda BCKA V7 620 User manual

Mazda
Mazda MAZDA5 2006 User manual
Popular Remote Starter manuals by other brands

Soundstream
Soundstream TARANTULA RS.2 installation guide

KBi
KBi KrankingKART Operation manual

Rac
Rac RAC-HP082 manual

CompuSTAR
CompuSTAR 1000AS user guide

Autostart
Autostart Two-way 6-Button LCD Automatic Transmission Remote Starter with Full Alarm... Quick installation guide

Omegalink
Omegalink OL-RS-NI5 install guide