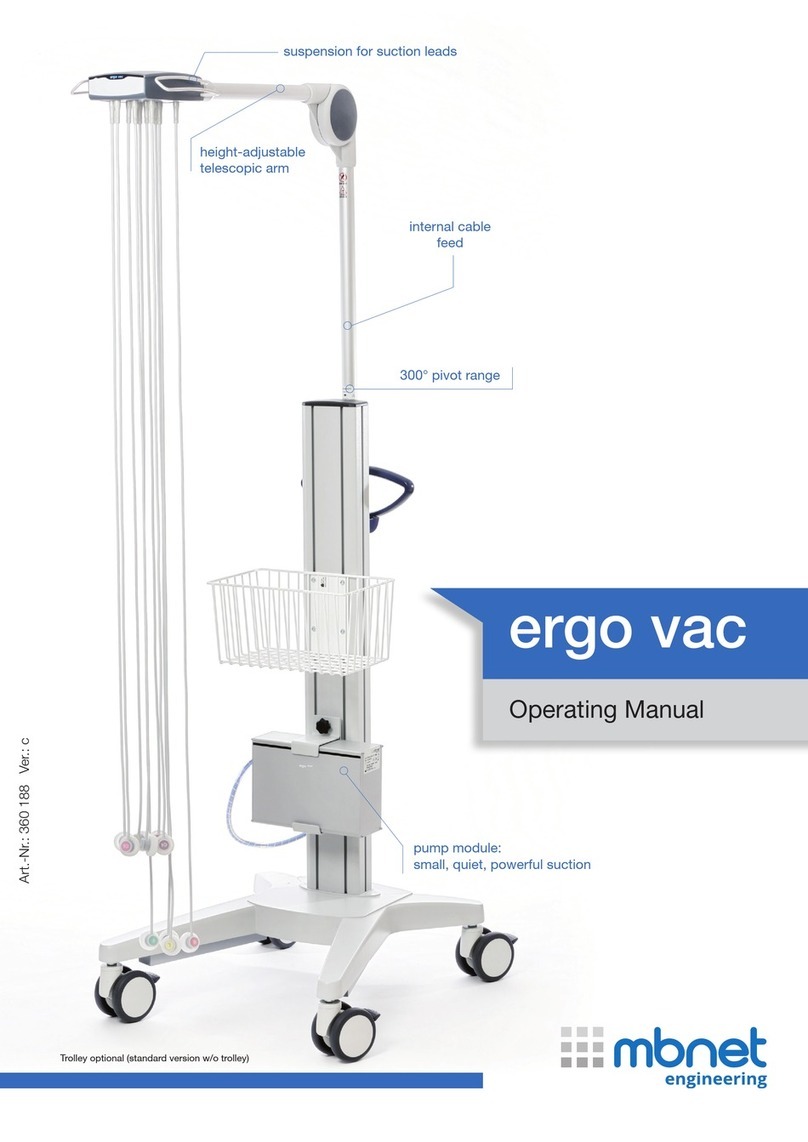
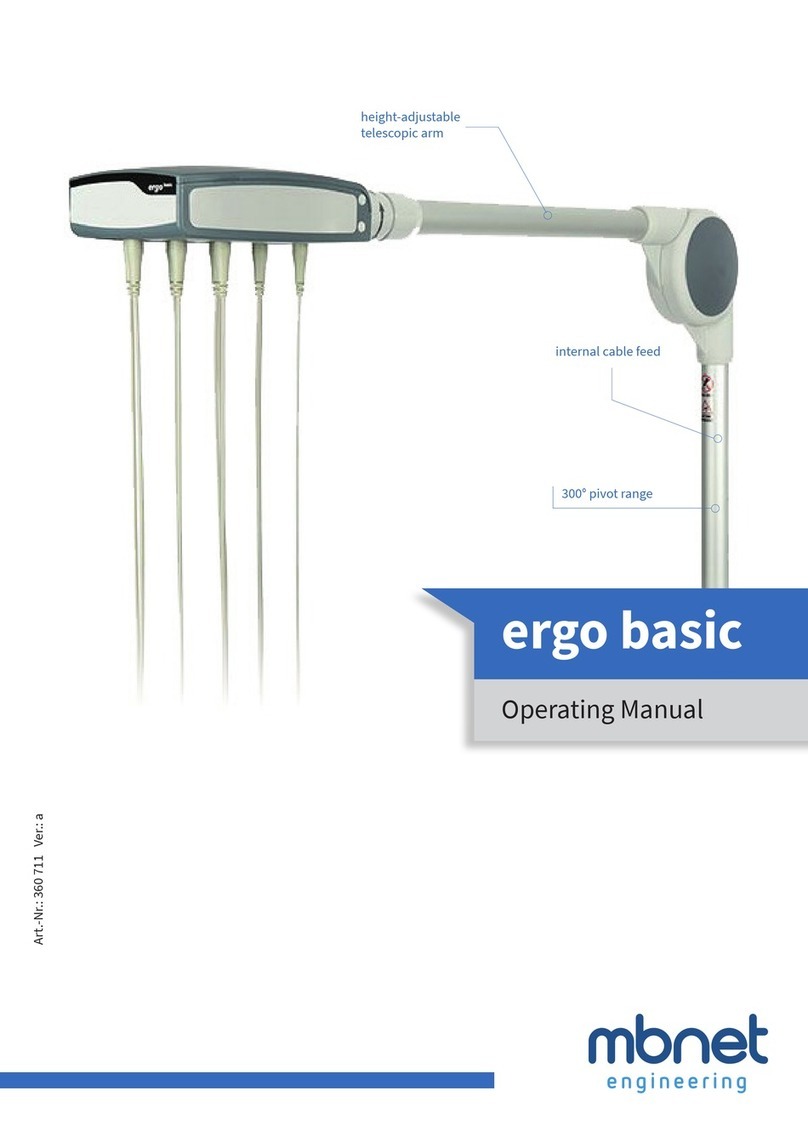
mbnet Engineering ergo vac compact User manual

Art.-no.: 360904 Ver.: c
Operating Manual
ergo vac compact
300° Pivot Range
Internal Cable
Feed
Height-adjustable
Telescopic Arm
Trolley optional (standard version w/o trolley)
Control with Keyboard

Sales and Service Information
The latest version of this instruction of use can be found at www.mbnet.de.
Sales information can also be obtained from: info@mbnet.de
ergo vac compact bears the mark, indicating its compliance with the essential general Safety and Perfo-
mance requirements of Annex I of the Medical Device Regulation 2017/745/EU. The requirements apply to pa-
tients, users and third persons who come into contact with this device within the scope of its intended use.
Date of issue: 26.05.2021
ergo vac compact
User Guide
mbnet Engineering Gmbh
Kirschauer Strasse 37a
OT Callenberg
D-02681 Schirgiswalde-Kirschau
Telephone +49 (0)3592 34 83 0
Fax +49 (0)3592 34 34 4
E-Mail [email protected]
Internet www.mbnet.de
Art.-no.: 360901 Ver.: c
Date of issue:: 26.05.2021
Original

User guide ergo vac compact
Table of Contents
1 Safety Notes ............................................................................. 4
1.1 Responsibility of the User ....................................................... 4
1.2 Organisational Measures.......................................................... 4
1.3 Indications for Use ................................................................... 4
1.4 Contra-indication ..................................................................... 4
1.5 Safety-conscious Operation .................................................... 5
1.6 Safe Use with Electronics ........................................................ 5
1.7 Operation with other Devices .................................................. 5
1.8 Maintenance ............................................................................ 5
1.9 Terms of Warranty ................................................................... 6
1.10 Symbols and Pictograms ......................................................... 7
1.10.1 Symbols Used in this Document ............................................. 7
1.10.2 Symbols Used on the Device.................................................... 8
2 Introduction ............................................................................. 9
2.1 Elements of the Suction Device ............................................... 9
2.2 Patient Module with Control Panel ....................................... 10
2.3 Joint ....................................................................................... 10
2.4 Cable Arm ............................................................................... 11
2.5 Suction Electrode Leads ........................................................ 11
2.6 Fixation of Cable arm ............................................................ 12
2.7 Label ....................................................................................... 12
2.8 Scope of delivery ................................................................... 12
3 Operation ............................................................................... 13
3.1 Getting Started ...................................................................... 13
3.2 On/Off .................................................................................... 13
3.3 Power Supply.......................................................................... 14
3.3.1 Power Supply and Battery Level Indicators .................. 14 – 16
3.3.2 Isolating the Device from the Mains ..................................... 16
4 Controls .................................................................................. 16
4.1 Suction Levels ........................................................................ 17
4.2 Blowing out Air ...................................................................... 17
4.3 Cleaning ................................................................................. 17
5 Possible Errors during the Suction Process ........................... 18
5.1 Placement of Electrodes ....................................................... 18
5.2 Possible Sources of Errors during the Suction Process ....... 19
5.2.1 Preparation............................................................................. 19
5.2.2 Application of Electrodes....................................................... 19
5.2.3 During the Recording ............................................................. 19
5.2.4 Removal of Electrodes from the Skin ................................... 19
5.3 Electrode Identification and Colour Code ........................... 19
6 Application ............................................................................. 20
6.1 Operating Conditions ............................................................ 20
6.2 Starting a Recording .............................................................. 20
7 Maintenance and Care ........................................................... 21
7.1 Visual Inspection .................................................................... 21
7.2 Cleaning the Housing and Cables.......................................... 22
7.2.1 Cleaning and Storing the Electrodes..................................... 23
7.2.2 Recommended Cleaning and
Disinfection Methods for Electrodes .............................. 24 - 28
7.2.3 Cleaning the Suction Hoses................................................... 29
7.2.4 Cleaning ECG Connection Cables .......................................... 29
7.2.5 Admissible Disinfectants........................................................ 29
7.2.6 Non-admissible Detergents ................................................... 29
7.3 Disinfection............................................................................. 30
7.3.1 Admissible Disinfectants........................................................ 30
7.3.2 Non-admissible Disinfectants................................................ 30
7.4 Battery .................................................................................... 30
7.4.1 Charging the Battery .............................................................. 30
7.4.2 Battery Disposal ..................................................................... 31
7.5 Inspection Report .................................................................. 31
7.5.1 Inspection Protocol ................................................................ 31
7.5.2 Replacement of Parts with a Limited Life,
every 3 – 5 Years...................................................................... 32
7.6 Accessories and Consumables............................................... 32
7.7 Replacement of ECG Leads .................................................... 33
8 Troubleshooting .................................................................... 33
8.1 Possible Errors ....................................................................... 33
8.2 Preventing Electromagnetic Interference ....................... 33-34
9 Technical Data ....................................................................... 35
9.1 Power Supply ......................................................................... 35
9.2 Patient Module ....................................................................... 35
9.3 System Cable ......................................................................... 35
9.4 Electrodes .............................................................................. 35
9.5 Cable Arm ............................................................................... 35
9.6 Safety Standards ................................................................... 35
10 EMC information..................................................................... 36
10.1 Table1: Immunity (all devices):
electromagnetic emissions ................................................... 37
10.2 Table 2: Immunity: electromagnetic immunity..................... 38
10.3 Table 3: electromagnetic immunity....................................... 39

Seite 4
ergo vac compact User Guide
1 Safety Notes
1.1 Responsibility of the User
The device must be used only by qualified physicians or trained medical professionals.
The responsibilities of the staff for operating and maintaining the device must be speci-
fied by the operator.
Ensure that the staff has read and understood the user guide. This applies in particular
to this section Safety notes.
The device must not be stacked at any moment.
Damaged or missing parts must be replaced immediately.
The safety, reliability and performance of the device can only be guaranteed when the
maintenance intervals as stated in Chapter 7: “Maintenance and Care” are observed.
Do not modify this equipment without authorization of the manufacturer.
1.2 Organisational Measures
Keep this user guide in an accessible place for reference purposes.
Make sure that it is always complete and legible.
Observe the operating and maintenance instructions.
1.3 Indications for Use
The device is an ECG vacuum and is operated in combination with normal ECG
devices. The device is suitable for both recording resting as well as exercise ECG and
is used for patients of both genders as well as all ancestries and age groups (preferably
as of the age of seven, also dependent on body size).
The device is only to be operated in a professional healthcare environment.
The device is suitable for use inside hospitals, cardiology centres,
outpatient clinics and medical practices.
The device can safely be used with pacemaker patients.
Always operate the device in line with the technical data indicated.
The device is not intended for sterile use or use outdoors.
This is a device of type BF. It is not defibrillation protected. As a safety precaution,
remove the electrodes before defibrillation!
1.4 Contra-indication
The device is not intended for sterile use.
The device must not be used in potentially explosive areas or in the presence of flam-
mable gases such as anaesthetic agents.
The device is not for use in an MRI suite.

Seite 5
User guide ergo vac compact
1.5 Safety-conscious Operation
Make sure that the staff has read and understood the operating instructions, in par-
ticular this section Safety Notes.
Do not touch the housing of the device during defibrillation.
To ensure patient safety, none of the electrodes, including the neutral electrode, nor the
patient or any person with simultaneous patient contact, must come in contact with
conductive parts, even when these are earthed.
Immediately report any changes that impair safety (including operating behaviour) to the
responsible person.
Only use accessories and disposables recommended or supplied by mbnet
Engineering GmbH. The use of accessories or disposables from other manufacturers
may result in injury, inaccurate information and/or damage to the unit.
1.6 Safe Use with Electronics
Operating the device without the correctly rated fuse or with defective cables
constitutes a danger to the life and limb of the patient or the operator!
Therefore take note of the following:
The device must not be used if the power cable is damaged or
suspected of being damaged.
Damaged cable connections and connectors must be replaced imme-
diately.
Electrical safety devices, such as fuses, must not be modified.
1.7 Operation with other Devices
If the device is part of a medical system, only the original suction hoses from
mbnet Engineering GmbH must be connected to the device.
Portable communication devices, HF radios and devices labelled with the symbol:
(non-ionic electromagnetic radiation) can affect the operation of this device.
1.8 Maintenance
Danger of electric shock - do not open the device! It contains no parts, which can be
repaired by the user. Servicing must only be performed by qualified technicians
authorised by mbnet Engineering GmbH.
Switch off the device before cleaning and disconnect it from the mains.
Do not use high-temperature sterilisation processes (such as autoclaving). Do not use e-beam
or gamma radiation sterilisation.
Do not use aggressive or abrasive cleaners.
Do not, under any circumstances, immerse the device or cable assemblies in cleaning
liquid.

Seite 6
ergo vac compact User Guide
1.9 Terms of Warranty
Your device is warranted against defects in material and manufacture, as stated in the Terms
and Conditions. Excluded from this warranty is damage resulting from negligence or improper
use. The warranty covers the free replacement of the defective part. Any liability for subsequent
damage is excluded. The warranty is void if unauthorised or unqualified persons attempt to make
repairs.
In case the device is defective, send it to your local mbnet Engineering GmbH representative
or directly to the manufacturer. The manufacturer can only be held responsible for the safety,
reliability and performance of the apparatus if:
assembly operations, extensions, readjustments or repairs are carried out by persons
authorized by the manufacturer, and
the device and approved attached equipment is used in accordance
with the manufacturer’s instructions, and
the maintenance intervals as stated in Chapter 7: “Maintenance and Care” have been complied
with.
No further guarantees are assumed. mbnet Engineering GmbH makes no warranty of mer-
chantability or fitness for a particular purpose with respect to the product or parts thereof.

Seite 7
User guide ergo vac compact
1.10 Symbols and Pictograms
1.10.1 Symbols Used in this Document
The safety level is classified according to ISO 3864-2. The following overview shows the safety
symbols and pictograms used in this user guide.
For general safety notes as listed in this section.
For electrical hazards, warnings or precautionary measures when dealing with electricity.
For possibly dangerous situations which could lead to damage to property or system failure.
Important or helpful user information.
For a possibly dangerous situation which could lead to severe personal injury or to death.
For a direct danger which could lead to severe personal injury or to death.
For a possibly dangerous situation which could lead to slight personal injuries. This symbol is also
used to indicate possible damage to property.
DANGER
Warning
Caution

Seite 8
ergo vac compact User Guide
1.10.2 Symbols Used on the Device
BF-symbol, no protection against defibrillation current
Dispose of as electronic waste
Manufacturer
Date of manufacture
CE label
Refer to instruction manual
Serial number
Catalogue number

Seite 9
User guide ergo vac compact
2 Introduction
The ergo vac compact is an ECG suction device for recording heart potentials during
resting and stress ECGs and sending the data to the ECG device. The built-in control panel allows
for easy operation and efficient configuration of the device.
2.1 Elements of the Suction Device
Joint
Suction Leads
Height-adjustable
Telescope Cable Arm
Distributor with Keyboard
Trolley optional
Suspension
for Suction Leads

Seite 10
ergo vac compact User Guide
Patient Module
ON/OFF
Regulation of Suction Power
Stop /Clean ECG
(blow out function)
Suction Power Display
(5 levels: 100, 130, 170, 210, 250 mbar)
Suction Leads
2.2 Patient module with Control Panel
What makes the patient module stand out is its optimal user ergonomics. It consists of a
control panel, control electronics and defibrillation protection. The control panel features white
and green backlighting as well as push buttons. The control panel is easy to operate and to clean.
The joint is set from factory! Adjust only when necessary!
2.3 Joint
The joint has a locking screw.
Caution

Seite 11
User guide ergo vac compact
2.4 Cable Arm
The cable arm has a special feature on a hidden cable management as well as a movable and
horizontal telescopic arm.
Telescopic arm Closure
2.5 Suction Electrode Leads
The ten shielded, interference-free electrode lines are trouble-free and stand out by virtue of their
low abrasion and high flexibility.
Caution Please pay attention on the careful handling of suction leads (see 7.2.3 page 29)
Opening and closing to insert and remove the telescopic arm.
Telescopic ArmTelescopic Arm Closure
Jjoint
Patient Module

Seite 12
ergo vac compact User Guide
2.6 Fixation of Cable Arm
2.7 Label
Standard-Fixation ITD (accessory option, must be ordered separately)
Cable arm with patient module
Electrode suction hose (6 x 1.10 m / 4 x 1.30 m)
Spacers (2 pcs with 3 rows / 2 pcs with 2 rows)
Medical grade power supply
ECG connection cable 3.7m (15-pin D-Sub)
ECG Spray 250 ml
Standard bracket
Screw set consisting of:
2 x cable ties 200 mm
1 x D-sub connection kit
1 x cable clip, small
1 x 5 mm and 1 x 2.5 mm Allen key
4 x each of M6x12 / M6x16 / M6x20 Allen screw
4 x each of M6 nut / M6 self-locking / M6 square nut
4 x 6.3 washer / 4 x 6.37 spring washer / 4 x rubber feet
Operation manual
2.8 Scope of Delivery
2021-05

Seite 13
User guide ergo vac compact
ON/OFF
Device is switched on
(lit of three green Lights)
Turn off the unit when not in use for a longer time.
Never apply suction when the electrodes are in a cleaning fluid.
3 Operation
3.1 Getting Started
Electric shock hazard. The device must not be used if it is not properly grounded or the pow-
er cable is damaged or suspected to be damaged.
The device must not be stored or operated in a wet, humid or dusty area.
It must also not be exposed to direct sunlight or heat from other sources.
The device must not come into contact with acids or acidic fumes.
The device should not be placed in the vicinity of X-ray, hf surgical equipment,
diathermy units, large transformers or electric motors.
Location
3.2 On / O
The unit is switched on and off with the button. When pressing the ON button,
the electrode can be sucked to the skin of the patient by applying light pressure with
the fingers.
HAZARD
Caution

Seite 14
ergo vac compact User Guide
3.3 Power Supply
3.3.1 Power Supply and Battery Level Indicators
The device can either receive power from the mains or via the integrated rechargeable battery.
Use only the power supply provided by mbnet Engineering GmbH to power and charge the
device, don‘t plug the device to other power supplies or USB ports!
Battery capacity
The integrated battery provides power for up to 2.5 hours of continuous ope-
ration
Charging the battery:
A completely discharged battery takes about 2 hours to fully charge
(with the device turned off). If the device is switched on during charging
(medium suction level), this can increase the charging time to approx.
4.5 hours.
The battery will charge once the device has been connected to the mains. The
device can remain connected to the mains without damaging the device or
the battery.
Keeping the device connected to the mains will not damage the battery.
Battery charging times:
Charging time from deep discharge: approximately 2 hours (provided that the
device is not in operation)
Charging time during operation: approximately 4.5 hours
(at medium suction level)
Battery level indicator:
Press and hold the ON/OFF button to check the battery level
High battery level:
5 green LEDs will light up
Warning

Seite 15
User guide ergo vac compact
Low battery level:
1 green LED will light up
Once the minimum battery level has been reached, the device will automatically switch to battery
protection mode (to avoid damage to the battery)! It will then no longer be possible to switch on the device!
Battery protection mode:
Pressing the ON/OFF button will cause a green LED to flash 3 times before
turning off again. It will no longer be possible to switch on the device.
As soon as the device has been reconnected to the mains, the suction system
can be switched on again.
Battery level indicator:
If the device is switched off: the green LEDs will light up from left to right.
Critical battery level (max. remaining operating time:
10 minutes): green LED will start to flash!

Seite 16
ergo vac compact User Guide
To isolate the device and the power adapter from the mains, simply pull out the adapter plug.
3.3.2 Isolating the device from the mains
4 Controls
The controls are located on the front of the distributor housing. Thus, the entire intake system is
controllable.
Regulate Suction Power
Clean/Blow out Air
Suction Levels
ON/OFF
Batterylevel Indicator
(Press and Hold the ON/OFF Button)
If the device is in operation: during operation, the LEDs will not light up to
indicate the battery level.

Seite 17
User guide ergo vac compact
4.1 Suction Levels
The system‘s suction lines can be individually adjusted for each patient using 5 suction
levels. When the unit is turned on, it activates an average default level (about -170 mbar). The
current suction level is indicated by the green LEDs on the control panel. The highest level is about
-250 mbar and should only be used in extreme cases (a lot of body hair).
The suction level must in each case be adjusted to the patient‘s skin type!
The device must not be used in case of injured skin. Strong suction or long-term
exposure to suction may result in hematomas! Particular caution is especially required
with older patients. The operator of the unit should ask the patient how he or she feels!
The electrodes should not be applied to the skin of the patient for more than
25 minutes.
4.2 Blowing out Air
When pressing the button, the suction unit will be blown out with compressed air for about 5
seconds and then turned off automatically.
There are two types of blow out functionality – short and long blow out
Short blow out lasts 5 seconds and is indicated by leds, 1,3,5 shining
Long blow out lasts 15 minutes and is indicated by leds 1,3,5 blinking
Blowing out can be stopped by pressing power button
Functionality goes like this:
If „clean/blow out“ button is pressed while device is off, long blow out is started
If „clean/blow out“ button is pressed while device is in suction mode, a *short* blow out is star-
ted (5 seconds) it is indicated by 1,3,5 leds being steady on
If „clean/blow out“ button is pressed and held for 2 seconds while device is in suction mode, a
*long* blow out is started
Long blow out function is started automatically when charger is connected in any mode
4.3 Cleaning
If the system is in standby mode, it can blow out of the suction lines by pressing the cleaning button.
The cleaning is ended by pressing the button . The system is then in standby mode again.
Never apply suction when the electrodes are in a cleaning fluid.
Warning
Warning

Seite 18
ergo vac compact User Guide
5 Possible Errors during the Suction
Ensure that neither the patient nor the leading parts of the patient connection nor
the electrodes (including the neutral electrodes) come in contact with other persons or con-
ductive objects (even when these are earthed.).
Careful application of the electrodes and good electrode contact is important for a
good transmission of the electrical potentials.
Therefore, please note the following points:
1
Only use electrodes that are recommended by mbnet Engineering GmbH.
2
To increase the electrode's conductivity and adherence:
Shave the areas where the electrodes are to be placed, if necessary.
Thoroughly clean the areas with alcohol or soapy water
(skin cream is often applied above all during the winter as this will increase
electrode resistance enormously(!) – Always COMPLETELY remove skin cream
at the application sites!)
Let the skin dry thoroughly before you apply the electrodes.
3 Check the electrode resistance.
4 If the electrode resistance is higher than the acceptable level:
Remove the electrode and use an abrasive cleaning pad or abrasive
cleaning gel to remove the uppermost layer of epidermis.
Apply the electrode.
5 After the recording, remove the electrodes by pressing on the cleaning button.
Clean the suction or vacuum electrodes according to the manufacturer's instructions.
* Dedicated abrasive cleaning gel gives very good results in reducing the skin-electrode resistance.
5.1 Placement of Electrodes
Process
Warning

Seite 19
User guide ergo vac compact
5.2.3 During the Recording
Suction hoses must under no circumstances pull/tear/stretch the electrodes, but must hang freely!
Under no circumstances must the electrodes be applied on the patient's skin for longer than 25
minutes (risk of blisters forming)!
5.2.4 Removal of Electrodes from the Skin
Do not pull on the electrode cables, but touch the electrode carefully at the edge or activate the
blow-out function at the suction unit ( The electrodes will then fall off on their own accord)!
5.3 Electrode Identication and Colour Code
The electrode colour codes in this section correspond to Code 1 (IEC).
Below you will find the corresponding colour codes in accordance with Code 2 (AHA).
IEC AHA
IEC
label Colour AHA
label Colour
Extremity R
L
F
red
yellow
green
RA
LA
LL
white
black
red
Chest
according to
Wilson
C1
C2
C3
C4
C5
C6
white/red
white/yellow
white/green
white/brown
white/ black
white/purple
V1
V2
V3
V4
V5
V6
brown/red
brown/yellow
brown/green
brown/brown
brown/black
brown/purple
Neutral N black RL green
5.2 Possible Sources of Errors during the Suction Process
5.2.2 Application of Electrodes
The areas of skin to which the electrodes will be applied must be clean and dry. Use an electrolyte
ECG spray, which contains soluble chloride.
Do not use ECG gel! Only ECG spray!
Remove any skin cream!
5.2.1 Preparation
If you are using new electrodes or those, which have not been used for a long time and have there-
fore dried out, first stabilise the electrodes by placing them for at least three hours in a 1% salt
solution (NaCl solution).
IMPORTANT: Use only pure NaCl and distilled or deionised water for this. No tap water! Do not
use physiological salt solution from a pharmacy! This contains additives, which can damage the
electrodes!

Seite 20
ergo vac compact User Guide
6 Application
Do use this device until you have read and understood the safety instructions at the beginning of
these instructions for use.
The device is a BF type device.
During operation, make sure that neither the patient- nor the conductive parts of the patient connec-
tion or the electrodes (including the neutral ones) come into contact with other persons or conducti-
ve parts (even if they are grounded).
The device must not be used if the mains connection cable is damaged or there is a
suspicion of damage.
6.1 Operating Conditions
The device is not suitable for continuous operation; switch off again after use.
High-frequency fields and radiation can influence the quality of ECG leads.
6.2 Starting a Recording
Caution
Caution
4
6, 8
1 Preparing the patient
2 Switch on device and apply electrodes
3 Ask the patient about their well-being (note the suction strength of the electrodes)
4 Determine and adjust suction strength /
The lower the pressure level, the better the skin tolerance!
Level 1 & 2: for smooth skin Level 4: for medium-hairy skin
Level 3: for lightly-hairy skin Level 5: for very hairy skin
5 Performing a measurement
6 Switch off the vacuum pump with the button, the electrodes detach from the patient.
7 The system switches off automatically after 5 seconds.
8 (Optional) After long periods of use and/or heavy perspiration by patients, the system can blow out air by
the pressing of the cleaning button
After long periods of use and/or heavy perspiration by patients, the system can blow out moisture ingress
by the pressing of the cleaning button for 2 seconds
9 Cleaning the electrodes (See chapter 7.2.1, page 23)
This manual suits for next models
1
Table of contents
Other mbnet Engineering Medical Equipment manuals
Popular Medical Equipment manuals by other brands

Zoetis
Zoetis stablelab EQ-1 user manual

Kegel8
Kegel8 Tight & Ton user guide

Sunrise Medical
Sunrise Medical Guardian IC-5307 User instructions and warranty

Planmeca
Planmeca ProMax 3D Mid user manual

Medistore
Medistore ProCair Digital 5000 Quick setup guide

Pro-tec
Pro-tec 7073-9-000 Series Instructions for use

HeartSine
HeartSine samaritan SAM 350P user manual

Hoffrichter
Hoffrichter VECTOR et Cpap user manual

Zimmer Biomet
Zimmer Biomet Arcos Modular FemoralRevision System SURGICAL TECHNIQUE

Rossmax
Rossmax SA210 user manual

EchoNous
EchoNous Kosmos AI Station 2 user guide

Vapotherm
Vapotherm precision flow Instructions for use