McIntire DH-10 Manual instruction

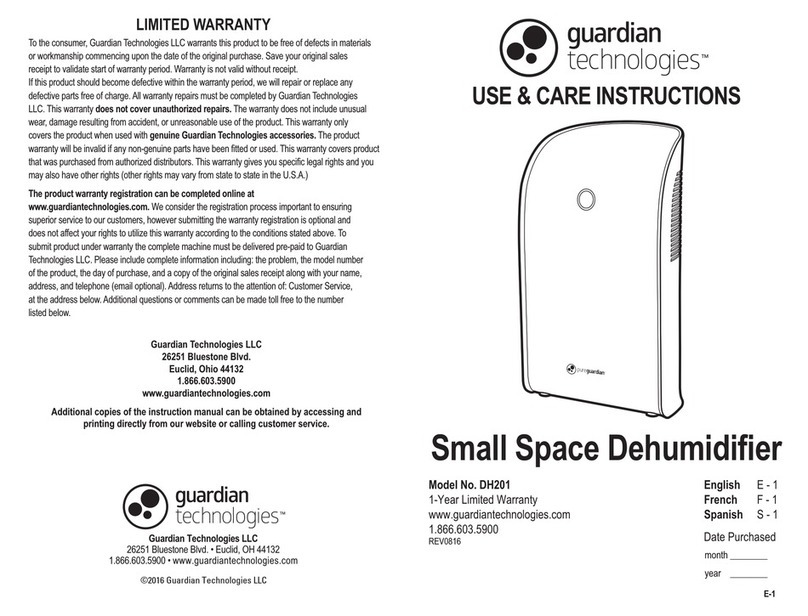
Model DH-10
Dehumidifier
For Your Records:
Serial Number:
Date of Purchase:
Purchased From:
In the Box:
1. DH-10-1 Dehumidifier
2. 6 ft x 5/8” ID hose for drain attachment
3. Warranty Card (Fill out and send back)
4. Instruction Manual
Note: It is normal to hear a rattle or feel the compressor shake
Important: Check the dehumidifier for damage caused during ship-
ment. If damaged, DO NOT OPERATE. Do not return to McIntire with-
out prior authorization.
Benefits
Improves Personal Comfort
Improves Air Quality
Inhibits Mold and Mildew Growth
Helps Eliminate Musty Odors
Reduces Condensation
Features
Lightweight, Steel Cabinet
Lowest Power Consumption
Continuous Drain
Convenient Carrying Handles
Automatic Humidistat
Compact and Portable Design
ULApproved
Specifications
Weight - 38 Lbs
Dimensions (LxWxH) - 15.5” x 12” x 12.5”
Energy Use - 150 Watts at 115 VAC
Starting Current - 194.4 Watts
Humidistat - 20-80% Relative Humidity
Ambient Temp Range - 50F - 120F
Compressor - 1/12 HP
Refrigerant - R134a (cfc free)
Designed Load - 1000 sq. ft or less
Capacity - 10 pints/day
Carrying Handle
(2)
Drain
Powder Coated
Steel Cabinet
On/Off Indicator
& Humidistat
Stainless Steel
Coil
McIntire
745 Clark Avenue • Bristol, CT 06010 • Phone: (860)-585-0050 • Fax: (860)-314-4500

Contents
Important Safety Instructions Pg 2
Setup and Operation Pg 3
Cleaning and Maintenance Pg 4
Troubleshooting Pg 5
Humidity Levels Pg 6
Frequently Asked Questions Pg 7
Warranty Pg 8
Service Pg 8
Important Safety Instructions
This symbol means warnings and safety precautions should be adhered to
This symbol means risk of electrical shock
This symbol means risk of explosion
1. All warnings and safety precautions should be adhered to.
2. Do not submerge unit in water.
3. Locate the unit on a flat, level, solid surface where the unit won’t fall.
4. When the unit is in operation, do not place the unit inside an enclosed cabi-
net or bookcase that will interfere with the airflow and the proper operation of
the unit.
5. The unit is designed to be portable, however, if you desire a more perma-
nent location for your unit such as a wall or ceiling mount, ensure that the unit
is mounted securely and remains level.
6. Do not store or use flammable chemicals, gases or liquids such as gasoline or
diesel fuel in the vicinity of this unit or any other electrical appliances.
7. If used on a boat, do not operate the dehumidifier or other electrical appli-
ance in the bilge or engine room where gasoline, diesel fuel or other combus-
tible vapors may accumulate which could result in an explosion.
8. Do not store or use flammable chemicals in rooms with an RH below 30% .
Static discharge may ignite combustible vapors and result in an explosion.
9. The DH-10 dehumidifier runs on 115VAC/1ph/60hz power. Be sure to plug
the unit into an acceptable 3 prong, grounded receptacle that has a properly
rated and protected AC power source such as shore power or an inverter (if
used for marine applications).
10. Always turn off and disconnect the unit before moving, cleaning or servic-
ing the unit.
11. Only qualified technicians should perform repairs and servicing of this unit.
Pg. 2

Pg. 3
Setup and Operation
Setup
Check the dehumidifier for damage caused during shipment. If damaged, do not operate.
1. Unpack the unit on a countertop or other flat surface.
2. Attach the hose to the metal drain elbow (bottom of unit). The unit ships with a 6-foot
length of 5/8 inner diameter (ID) vinyl hose. The hose may be cut to length for your appli-
cation. If a longer length of hose is required, it can be found at a local hardware store.
3. Install the dehumidifier in a position that is higher than the drain. The unit uses gravity
to drain the condensed moisture from the unit. Never position the dehumidifier lower than
its intended drain.
4. When routing the drain hose, be sure to not cause any kinks or other sharp bends in the
hose.
Do NOT drink the water that collects in the drain pan.
Operation
Be sure to plug the unit into a 3 prong, grounded receptacle that has a properly rated
and protected AC power source such as shore power or an inverter.
1. The dehumidifier runs on normal AC only (115 VAC) household or shore power. Make
sure it is connected to a grounded, 3 prong, 115 VAC receptacle. Plug in the power
cord to a suiteable AC power supply as described above.
2. Turn the rotary control knob (humidistat) clockwise to turn the unit on. Turning the
unit fully clockwise will condition the air to 20% Relative Humidity (RH) while turning
fully counter clockwise will product RH levels of 80% in the conditioned space.
3. Set the humidistat to the desired level which is suitable for your application. Set-
tings below 50% may over-dry woodwork.

Locating the Unit
1. On a boat, locate the unit in the galley, berth, head or wherever a moisture prob-
lem exsists.
2. In a home, locate the unit in a bathroom, laundry room, crawlspace, or other mois-
ture-prone area.
3. Direct the exhaust airflow toward moisture problem areas. For best results, close
outside doors, hatches, portholes, etc.
3. Store and operate the unit on a level, upright position. Normal roll of a boat or mo-
tion of an RV won’t effect the unit. Rough handling or dropping the unit will cause it to
malfunction.
1. Do not store or use flammable chemicals, gases or liquids such as gasoline or diesel fuel
in the vicinity of this unit or other electrical appliances.
2. On a boat, do not operate the dehumidifier or other electrical appliances in the bilge
or engine room where gasoline, diesel fuel or other combustible vapors may accumulate
which could result in an explosion.
3. Do not store or use flammable chemicals, gases or liquids such as gasoline or diesel fuel
in rooms with an RH below 30% since in a very dry room, static electricity discharge may
ignite combustible vapors which may result in an explosion.
Cleaning and Maintenance
Use a non-abrasive cleanser on the cabinet and wipe off with a clean rag to keep the
cabinet looking new and clean. Occasionally, check the evaporator (condensation coil
at the air intake) and the condenser. If either is contaminated with dust, dirt or debris
have the unit serviced by a qualified technician.
Clean and dry out the drain base and hose occasionally to avoid mold, mildew or bacte-
ria buildup. Inspect the hose for blockages caused by kinks, dirt, mold and/or mildew.
Clean and straighten as necessary.
Always unplug the dehumidifier before cleaning or servicing the unit.
Only a qualified technician should perform repairs or the servicing of this unit
Pg. 4
Note: Cleaning of Condenser and Evaporator Coil can be performed by the end user.

Problem Possible Cause Solution
Dehumidifier does not run Unit is not plugged in
Unit is not connected to a
properly rated AC power source
Plug in the unit
Check that the unit is prop-
erly connected to an AC power
source. Also check that the
circuit protector for the recep-
tacle is on.
If properly connected, turn the
humidistat knob all the way to
the “on” position. If the unit
still doesn’t run, contact Arrow
Dryers’ technical support.
The unit doesn’t perform opti-
mally Airflow is restricted
Too much airflow from the
outside
Evaporator coils are dirty
Low humidity and temperature
Check that there is adequate
airflow toward and around the
unit. Consider using an external
fan to move the air around and
toward the unit. Check that
nothing is blocking the unit.
Close all outside doors, hatch-
es, portholes, etc.
Dirty coils interfere with the
dehumidifier’s ability to re-
move moisture from the ambi-
ent air. Have the evaporator
coils properly cleaned.
Check the humidity first. At a
low humidity level and temper-
ature below 65F, the amount of
moisture that can be collected
is greatly reduced. Set the
humidistat to 60% RH. If the
temperature and humidity are
high, call Arrow Dryers’ techni-
cal support.
There is a rattling sound and
the compressor shakes when
the unit is moved.
The compressor is built and
mounted in the chassis in such
a way as to absorb movement.
It is perfectly normal to hear
the compressor rattle and feel
it shake.
Caution: Do not rapidly cycle the unit on and off. Allow a few minutes before restarting to pro-
tect the overload circuit.
Troubleshooting
Pg. 5

Humidity Levels
Below are the optimum humidity ranges for various materials as recommended by the National Park
Service (NPS). Please note that humidity is not the only agent of deterioration and other factors
may need to be addressed when storing your equipment. These agents may include visible light, ul-
traviolet radiation, tempurature, dirt, etc. which may effect your environment. These ranges only
address relative humidity levels as recommended by the NPS.
Paintings................................................. 40% - 65%
Paper..................................................... 45% - 55%
Photographs/Film/Negatives......................... 30% - 40%
Other Organics (wood, leather, textiles, etc.).... 45% - 60%
Metals.................................................... <35%
Pg. 6

Frequently Asked Questions
1. Where can I find support and warranty information?
Support and warranty information is found on the warranty card. Warranty is limited to
original owner.
2. What is the recommended setting for the dehumidifier?
The recommended Relative Humidity (RH) setting for the DH-10 is 60%.
3. Where is the best place to locate the dehumidifier?
Locate the unit in the galley, berth, head or where the air is stagnant and may cause mold
or mildew to form (on a boat). Direct the exhaust of the unit toward the problem area is. DO NOT
operate the dehumidifier or other electrical appliances in the bilge, engine room, or fuel storage
rooms where gasoline, deisel or other combustible vapors may accumulate. If using in a home,
bathrooms, laundry rooms, and basement crawl spaces are ideal locations for the dehumidifier.
4. Who is the manufacturer?
DH-10 Dehumidifiers are manufactured in the USA by McIntire Company, in Bristol, CT.
5. What kind of maintenance is required on the unit?
The DH-10 was designed to be maintenance free under normal operating conditions.
Occasionally, check the drain hose, drain base and evaporator coils as described in the cleaning
and maintenance section of this manual.
Pg. 7

Calling For Service
Note: Support and Warranty information can be found on the warranty card
DO NOT return to McIntire Company without prior authorization and an RGA number
To contact McIntire Company for repair or warranty service:
745 Clark Ave.
Bristol, CT 06010
Toll Free: 800-437-9247
Fax: 860-314-4500
This warranty is good only in the continental boundary of the United States. For export, consult
factory.
Pg. 8
Table of contents
