MD SPORTS 1651901 User manual

MODEL: 1651901
Blain's
ASSEMBLY INSTRUCTIONS
TM
ATTENTION
DO NOT RETURN
TO THE STORE
Contact
MD Sports
Customer Service
* For additional resources and Frequently
Ask Questions, please visit us at
themdsports.com

www.themdsports.com
1651901 1
(Continued on the next page.)
This product is covered by a limited warranty that is effective for 90 days from the date of purchase. If, during
the limited warranty period, a part is found to be defective or breaks, we will offer replacement parts at no
cost to you, the customer. The only exceptions to the warranty include mainframes, table tops,
playing surfaces, batteries or tools.
The above warranty will not apply in cases of damages due to improper usage, alteration, misuse, abuse,
accidental damage or neglect.
This Limited Warranty gives you specific legal rights and you may also have other rights which vary from one
State (province) to another.
A PURCHASE RECEIPT (or other proof of purchase) will be required before any warranty service is initiated.
For all requests for warranty service, please feel free to contact our Consumer Service
Department at :
Please be aware of your product’s Limited Warranty for the return/refund policy from the store, We, at Medal
Sports, can not handle the product which is out of product’s limited warranty since we only provide available
parts. Thank you!
PLEASE CONTACT US BEFORE RETURNING
THE PRODUCT TO THE STORE.
WEBSITE:www.themdsports.com
NOTICE!
STAPLE YOUR RECEIPT HERE
1 - Please leave your name, address, phone number, model number, parts needed on the answering
machine if there is no attendance. Failure to do so will result in a delay in shipping parts to you.
LIMITED 90 DAYS WARRANTY

ASSEMBLY TIPS
TOOLS REQUIRED
Phillips Screwdriver - Not Included
IMPORTANT NOTICE!
Power Tools
-Set Low Torque
High Torque
over tightened
1 - Please read the instructions carefully, and follow all assembly, operation and safety instructions properly in order to avoid damage
or injury.
2 - Some figures or drawings may not look exactly like your product. Please read and understand the text before beginning each
assembly step.
CAUTION !
Electric Screwdrivers may be helpful during assembly; however, please set a low torque and use extreme caution.
CAUTION!
Changes or modifications not expressly approved by the party responsible for compliance could void the user’s authority to operate
the equipment.
WARNING:
WARNING:
WARNING:
’
www.themdsports.com
1651901 2
(Continued on the next page.)

1651901 PARTS LIST
ASSEMBLY INSTRUCTIONS:
1. Find a clean, level place to begin the assembly of your Skeet Shooting Game
.
2. Remove all the parts from the box and verify that you have all of the listed parts as shown on the parts list page.
Carefully cut or tear the four corners of the box so that the bottom of the box can be used as your work surface.
2 3 41
x1 x1 x2 x1
1x x10
65
1651901 PRE-INSTALLED PARTS
P1
x2
Target - A Target - B
P2
x1
Target Board
BoltMainframe Hanger
Blaster Dart
ON/OFF
START
PLAYER
PLAYER1 TIME PLAYER2
Note: Mainframe (#1) and Darts (#6) is not available as a replacement part.
www.themdsports.com
1651901 3
(Continued on the next page.)

www.themdsports.com
1651901 4
(Continued on the next page.)
FIG.2
4. Attach the Hanger (#2) to the Mainframe (#1) using two Bolts (#4) as shown in FIG. 2.
FIG.1
3. Attach the Target Board (#4) to the Mainframe (#1) as shown in FIG. 1.
FIG. 1
X 1
X 1
1
4
6
ON/OFF
START
PLAYER
PLAYER1 TIMEPLAYER2
FIG. 2
X 2
X 1
2
4
X 10
6
X 1
5
5
4
1
1
2
4
Phillips Screwdriver
- Not Included
6

www.themdsports.com
1651901 5
(Continued on the next page.)
FIG.3
5. Hang the Skeet Shooting set on the door, press the spring lock and pull the support of the Hanger (#2) to adjust the
height as shown in FIG. 3A.
FIG. 3A
FIG. 3
X 1
X 1
P1
P2
ON/OFF
START
PLAYER
PLAYER1 TIME PLAYER2
Spring Lock
P1
P2
P1

www.themdsports.com
1651901 6
(The last page)
ELECTRONIC SCORER OPERATION
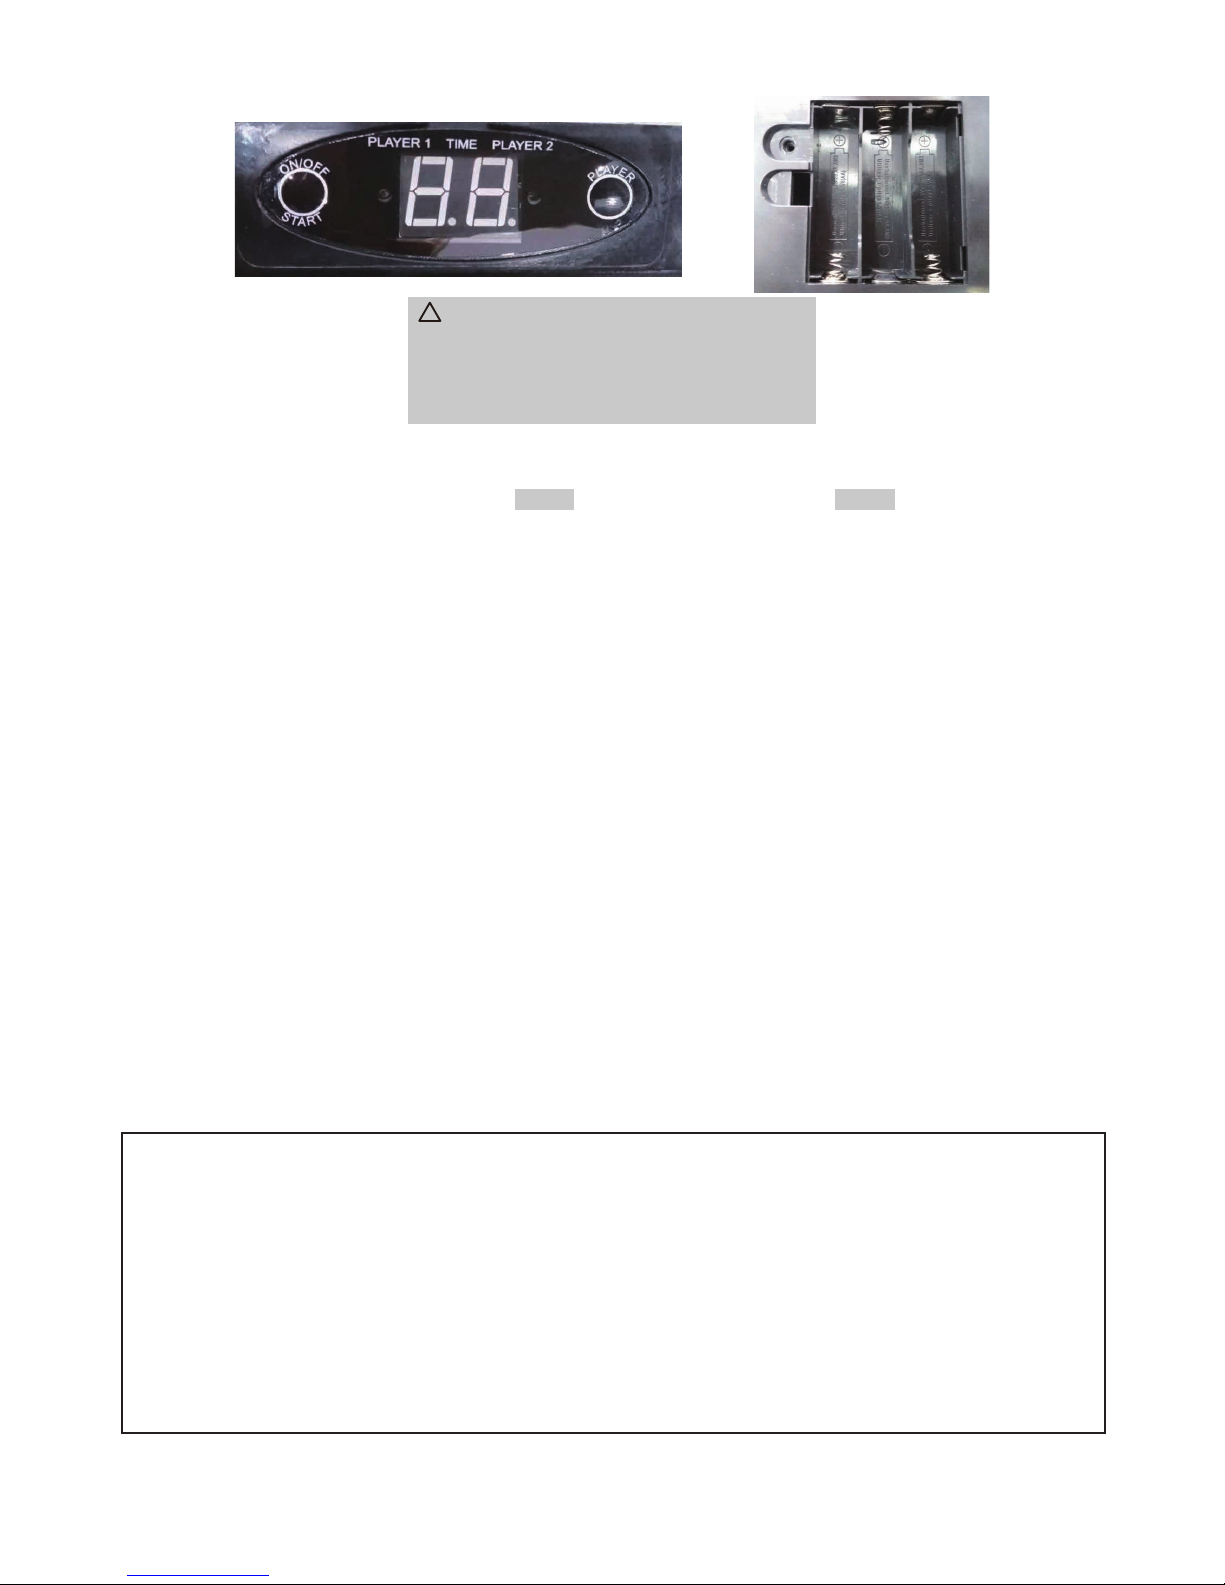
Battery Installation
Battery Box: Remove the battery cover and insert 3 “AA” Batteries into the battery box. ( 3 “AA” Batteries not included.)
Reminder:
a. Batteries must be installed according to the correct polarization (+ and -) required.
b. Please clean the battery contacts and also those of the device prior to battery installation.
c. If the game will not be used for a long period of time, we recommend that the batteries should be removed.
How to play?
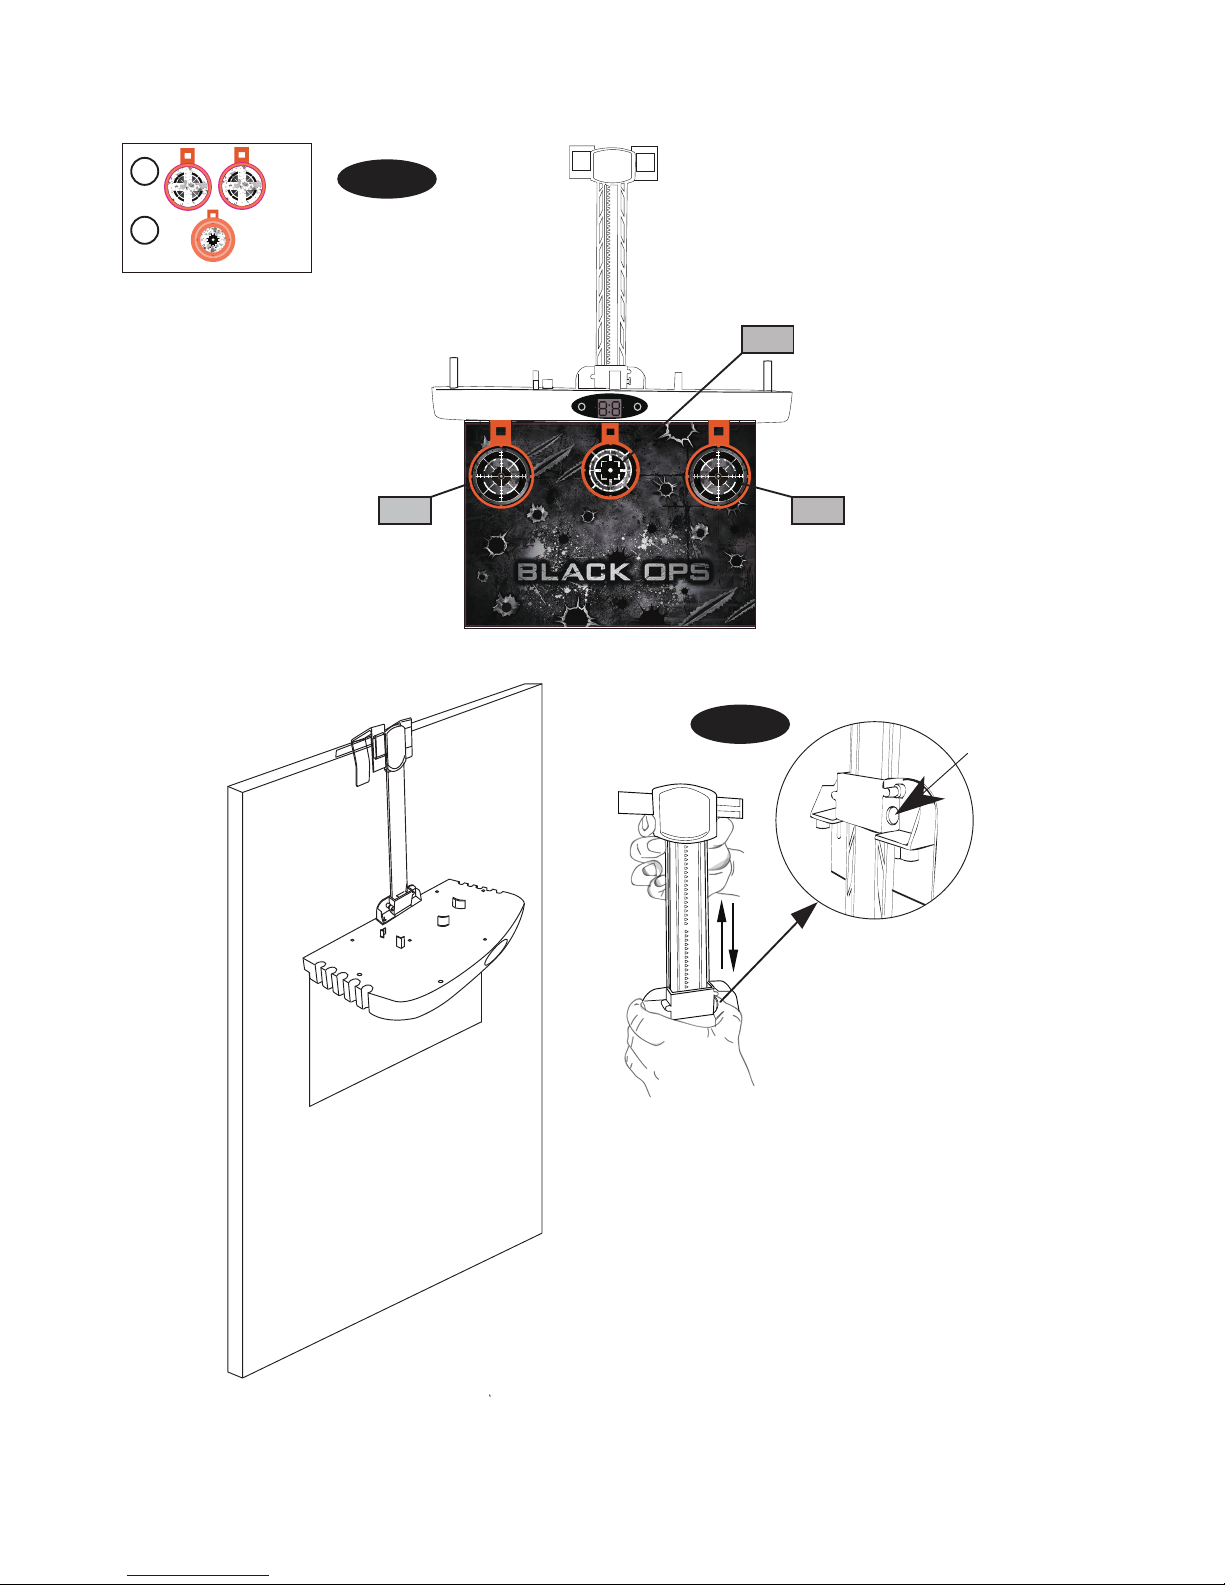
1. Press “ON/OFF START” to turn the game on. The LED will display “2P”. Press “PLAYER” to choose between 1 or 2
players.
2. In the 2 Player mode, after pressing “ON/OFF START” the LED will display a 5 second countdown. The indicator light
will show against PLAYER 1 and the target will move into position. After the sound finishes, the LED will countdown from
60 seconds. Each time the target is shot successfully, a sound is heard. PLAYER 1’s turn ends after the target has been
shot 3 times, or the 60 seconds have elapsed.
3. For PLAYER 2’s turn, the LED will display a 5 second countdown. The indicator light will show against PLAYER 2 and
the target will move into position. After the sound finishes, the LED will countdown from 60 seconds. Each time the
target is shot successfully, a sound is heard. PLAYER 2’s turn ends after the target has been shot 3 times, or the 60
seconds have elapsed. The time of the fastest player will blink and that player’s indicator light will turn on. If the times
are equal, the times will blink and both player indicator lights will turn on. If neither player has successfully completed
the shots, then the display will show “00”.
4. In the one player mode, after pressing “ON/OFF START” the LED will display a 5 second countdown. The indicator light
will show against PLAYER 1 and the target will move into position. After the sound finishes, the LED will countdown from
60 seconds. Each time the target is shot successfully, a sound is heard. PLAYER 1’s turn ends after the target has been
shot 3 times, or the 60 seconds have elapsed. Then the LED displays a 5 second countdown, the target moves into
position and the game begins again. If the target is not shot within 2 minutes then the game turns off.
5. Press and hold “ON/OFF START” for 2 seconds to turn the game off.
6. If the game is inactive for a period of 5 minutes then it will turn off. There is no sleep mode.
WARNING:
!
1) Require 3 pcs “AA” Batteries (Not included).
2) Do not mix old and new batteries.
3) Do not mix alkaline, standard (carbon zinc), or
rechargeable (nickel - cadmium) batteries.
YOU ARE NOW READY TO PLAY!
WARNING: Changes or modifications not expressly approved by the party responsible for compliance could void the user’s
authority to operate the equipment.
NOTE: This equipment has been tested and found to comply with the limits for a Class B digital device, pursuant to Part 15 of the
FCC Rules. These limits are designed to provide reasonable protection against harmful interference in a residential installation.
This equipment generates, uses and can radiate radio frequency energy and, if not installed and used in accordance with the
instructions, may cause harmful interference to radio communications. However, there is no guarantee that interference will not
occur in a particular installation. If this equipment does cause harmful interference to radio or television reception, which can be
determined by turning the equipment off and on, the user is encouraged to try to correct the interference by one or more of the
following measures:
-- Reorient or relocate the receiving antenna.
-- Increase the separation between the equipment and receiver.
-- Connect the equipment into an outlet on a circuit different from that to which the receiver is connected.
-- Consult the dealer or an experienced radio/TV technician for help.
Table of contents
Other MD SPORTS Toy manuals
Popular Toy manuals by other brands

LEGO
LEGO 75911 SPEED Champions Assembly manual

Hasbro
Hasbro Tiger Electronics Robo-Chi Pets Meow-Chi instruction manual

LeapFrog
LeapFrog 100 Things That Go instruction manual

Conrad Electronic
Conrad Electronic 2347229 operating instructions

Fisher-Price
Fisher-Price L5198 Bubble Mower instructions

Model Engines
Model Engines MIG-15 instruction manual

Plum
Plum peppermint townhouse 41071 Assembly instructions

Circuit Cubes
Circuit Cubes STEM STARTER KIT instructions

Fisher-Price
Fisher-Price HEAD SPINNERTAIL W1392 quick start guide

Connoisseur Models
Connoisseur Models GWR Loriot M instructions

V-tech
V-tech 61623 user manual

Hasbro
Hasbro Transformers Energon Six Shot 80450 instruction manual