Med-E-Lert 1.0PREMIUM User manual

Med-E-Lert™ Locking
Automatic Pill Dispenser
Easy Set-up Guide
MODELS
1.0PREMIUM / 1.0PREMIUM-C / 1.0PREMIUM-W
ENGLISH
06146-1

3| USER MANUAL- ENGLISH
Electronic
Medication
Dispenser
Pill Tray Clear and/
or Solid
White Lids
The Med-E-Lert™ Automatic Pill Dispenser is
designed to assist you with the organization of
your medications, along with reminding you when
to take them. This pill dispenser is designed to
assist with medication adherence, offering you and
your loved one additional peace of mind.
Six
Dosage
Rings
Metal
Locking Key
Four AA
Batteries
Set-up
Guide
01 WHAT’S IN THE BOX?
02 INTENDED USE
4
| USER MANUAL- ENGLISH
03 SET-UP INSTRUCTIONS
Turning the Unit on
1.Remove the four AA batteries
from packaging.
2.Remove the battery panel on the
underside of the unit.
3. Insert the four AA batteries properly into the
device and replace the battery panel.
4. Flip the unit over and the display should be
functional.
Unlocking/Locking the Device
The Med-E-Lert™ has a safety
feature to reduce the chances of
theft and/or tampering. It comes
with a custom barrel key that allows
you to lock and unlock the device, allowing
access to the pill tray and controls.
06146-2

06146-3
5
| USER MANUAL- ENGLISH
Opening the Lid
Now that the device isonand
unlocked, you will need to gain
access to the controls on the
interface through opening the lid.
1. Ensure that your device is unlocked.
2. Press inward on the tab on the front of the
machine (it is part of the lid).
3. Making a pinching motion with your thumb
and index finger, grasp the lid through the
dispensing window and pull upward.
1. On the bottom of the device, align and insert
the barrel key into its lock.
2. Turn the key a quarter turn to the right to
unlock the device.
3. Turn the key a quarter turn to the left to lock
the device.
6
| USER MANUAL- ENGLISH
Display Layout
This diagram describes the meanings of symbols/
icons founds on the display:
12/24-Hour Formats
The Med-E-Lert™ defaults to a
24-hour format, also commonly
referred to as military time. The
“AM” or “PM” symbol will appear to
the right of the time when the clockisin12-hour
format.
1. Press and hold buttons 2 and 3
simultaneously to switch between formats.

06146-4
7
| USER MANUAL- ENGLISH
Setting the Time
Now that you have selected the
time format, it is time to set the
clock onyour Med-E-Lert™.
1. Press and hold down button 1 until the hour
digits blink.
»Go down by one hour: press and quickly
release button.
»Scroll down hours quickly: press and hold
down button 2.
»Go up by one hour: press and quickly
release button 3.
»Scroll up hours quickly: press and hold
down button 3.
2. Once the hour is selected, press and quickly
release button 1 to finalize the hour and move
to set the minutes.
»Go down by one minute: press and quickly
release button 2.
»Scroll down minutes quickly: press and hold
down button 2.
8
| USER MANUAL- ENGLISH
»Go up by one minute: press and quickly
release button 3.
»Scroll up minutes quickly: press and hold
down button 3.
3. Press and hold button 1 for several seconds
to finalize the time and return to the main
Setting the Alarm(s)
Now that your time is set, you need
to set your alarm(s). You can set up
to six alarms to meet your needs.
1. Press and quickly release button 1 and four
hyphens should start blinking on thescreen,
along with “A1” at the top left of thescreen.
»Go down by one hour: press and quickly
release button 2.
»Scroll down hours quickly: press and hold
down button 2.
»Go up by one hour: press and quickly
release button 3.

06146-5
9
| USER MANUAL- ENGLISH
»Scroll up hours quickly: press and hold down
button 3.
2. Oncethe hour is selected, press button 1
again to finalize and move to set the minutes.
»Go down by one minute: press and quickly
release button 2.
»Scroll down minutes quickly: press and hold
down button 2.
»Go up by one minute: press and quickly
release button 3.
»Scroll up minutes quickly: press and hold
down button 3.
3. Once the hours and minutes have been
selected for scheduled event(s), press and
quickly release button 1 to move the next
alarm.
4. Repeat steps one and two through the
remaining five alarms if necessary.
»If you do not need additional alarms, press
and quickly release button 1 through each
10
| USER MANUAL- ENGLISH
Setting the Alarm Tone
You can choose between three
alarm tones or a silent mode. The
silent mode does not allow an
audible alarm to trigger, but still
allows the light to flash during the scheduled
alarms.
1. Press and hold down button 3.
2. To move between alarm tones, while holding
down button 3, press button 1.
remaining alarm to skip them (2-6).
»After you press button 1 after the sixth alarm,
you will return to the main screen.
»If you need to remove alarms, simply go to
the alarm that you would like to remove and
take the hours back until you only see four

06146-6
11
| USER MANUAL- ENGLISH
Loading Your Medication
Now that we have set up the time
and alarms, it is time to select
the appropriate dosage ring to
guide you where to place your
medication(s).
(Tip: group yourmedications/supplements by the
time of day that you take them; this will assist you
when it comes time to place them into the pill tray.)
On the display, you will see the
letter “a” in a circle. This is the first
alarm tone. There are three alarms
tones, which are displayed on the
screen with letters “a,” “b,” or“c” within a circle,
indicating which tone ischosen.
3. Each time you press button 1 while holding
down button 3 will cycle you to the next alarm
tone.If you do not see a letter within a circle,
that means the audible alarm is turned off and
the visual alarm is on.
12
| USER MANUAL- ENGLISH
Note: some dosage rings
have a red portion;do
not place medication
into the corresponding
compartments, as those
slots should remain empty.
(Tip: the amount of days that is repeated consecutively
on any given dosage ring is the medications dosages
per day. For example, if the maximum times a day you
take any given medication is twice per day, you want
to select the dosage ring that repeats each day of the
week twice: Mon Morn/Mon Eve; Tue Morn/Tue Eve,
etc.)
1x/day ring 2x/day ring

06146-7
13
| USER MANUAL- ENGLISH
1. Choose the appropriate dosage ring to meet
your medication taking needs and tear it from
its perforations.
2. Fold the tabs downon the dosage ring.
3. Place the dosage ring on the pill tray. (Note:
it should circle around the interface in the
center.)
»(Tip: to further
secure thedosage
ring onto the
Med-E-Lert™, you
may use double-
sided adhesive tape
“underneath the
selected dosage
ring’s tabs.)
»One dosage a day refillsevery 28 days.
»Two dosages a day refills every 14 days.
»Three dosages a day refills every 9 days.
»Four dosages a day refills every 7 days.
»Five dosages a day refills every 5 days.
»Six dosages a day refills every 4 days.
14
| USER MANUAL- ENGLISH
4. Wipe down the pill tray with a warm damp
cloth/sponge to clean it, then dry it before
inserting medications into compartments.
5. Place your
medication into the
compartments, and
use the dosage ring
as a guide as to
where toplace each
medication.
Turning off the Alarm
Pick up the unit and tilt it to
dispense contents out of the
window on the lid.

06146-8
15
| USER MANUAL- ENGLISH
LowBattery Alert and Standby Mode
When the batteries are lower than 4.0V, both
the red light and low battery icon that appears
at the top right of the screen will begin to blink,
alerting you to change the batteries.
»(Note:this icon will only displayonce it is
time to replace your batteries; all four AA
batteries must be replaced with new ones
and oriented in the correct direction.)
»If there is no operation performed for one
minute, the Med-E-Lert™ willgo into
standby/sleep mode to save battery life.
To wake up your unit before a scheduled
event, either pick it up and tilt it as if you
were dispensing medication or press and
quickly release button 3 on the interface.
16
| USER MANUAL- ENGLISH
04 GENERAL INFORMATION
Model -
1.0PREMIUM-CM1.0PREMIUM-W 1.0PREMIUM
M
UPC
860001703436 860001703443 860001703405
Lid
Type
Clear White Clear and
White
Programmmable
Alarms
6
Contents
Capacity
Up tp 18 baby aspirin-sized pills
FSA Eligible
Yes
HCPCS
Code
A9270

06146-9
17
| USER MANUAL- ENGLISH
05 QUICK Q & A
S
Q: What do I do
if I see “ERR” on
my screen?
A: This can be caused by three
instances:
1) The pill tray has become
jammed. Open the device
to check the pill tray for
obstructions and remove them
if found;
2) There may be an issue with
the batteries, either needing to
be replaced or came loose in
their compartment;
3) The tray has become askew
from the rotation gear. Check
to see if the tray seems loose
and does not feel af ed to the
unit. It always helps to take
it out and put it back in and
check if it feels secure in place;
do not use too much force
when checking or you may
damage the rotation gear.
18
| USER MANUAL- ENGLISH
Q: What do I
do ifmy pill tray
rotates and skips
compartments?
A: Check your alarms’
settings. If there are two or
more alarms scheduled for the
same time, the compartment
will skip that quantity of
compartments during a
scheduled event.
Q: What do I do
if my screen will
not turn on?
A: Ensure that all batteries
are secure inside the battery
compartment and oriented
correctly. If your device
still does not turn on after
checking these, remove all four
batteries from thedevice and
replace them with four brand
new batteries.
06146-10
19
| USER MANUAL- ENGLISH
Q: What do I do
if the alarm will
not turn off?
A: Remove all four batteries
and leave them outside of the
device for one to two hours;
afterwards, make sure to
replace them with four brand
new batteries. If this does not
work, gently tap theunderside
of the device, as the motion
switch may get have gotten
stuck when tipping the unit to
dispense medications.
Q: Whydoes
the week start
on Monday after
the red slot on
dosage rings?
A: The week starts on Monday
internationally.
20
| USER MANUAL- ENGLISH
06

06146-11
21
| USER MANUAL- ENGLISH
22
| USER MANUAL- ENGLISH

06146-12
help@mededispenser.com
+1 (801) 285-8011
9265 South Highland Dr., #900250, Sandy,
UT 84093, United States
www.medelert.com
ENGLISH
06146-13
2
|MANUAL DE USUARIO- ESPAÑOL
01
02
03
04
05
06
07
08
MODELOS
1.0PREMIUM / 1.0PREMIUM-C / 1.0PREMIUM-W
ESPAÑOL
Med-E-Lert™ Guía
de Configuración Sencilla

3
|MANUAL DE USUARIO- ESPAÑOL
Dispensador de
Medicamentos
Bandeja
de
Pastillas
Tapas Blancas
y Transparentes
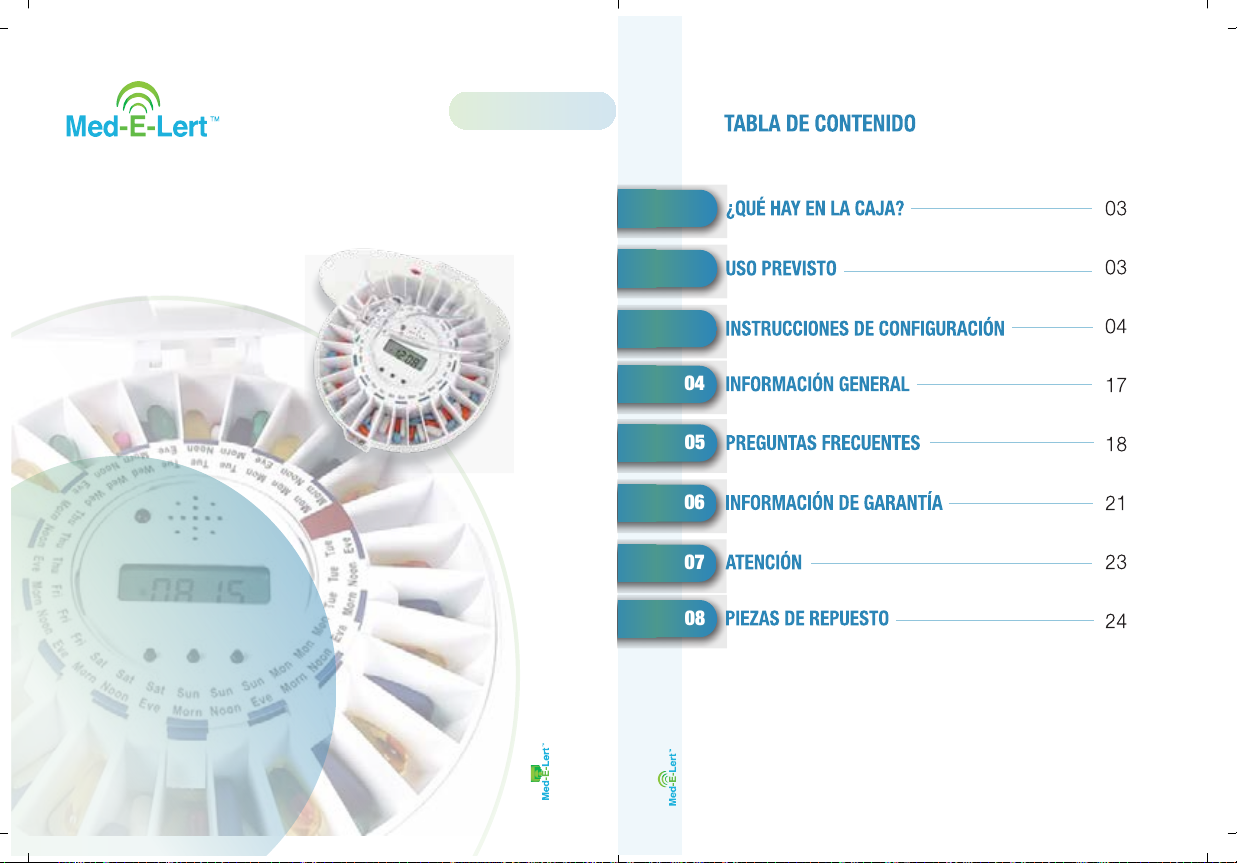
El Dispensador de píldoras automático Med-E-Lert
™ está diseñado para ayudarlo con la organización
de sus medicamentos, además de recordarle
cuándo debe tomarlos. Este dispensador de
píldoras está diseñado para ayudar con la
adherencia a la medicación, ofreciéndole a usted
y a su ser querido una tranquilidad adicional.
Seis Anillos
de
ación
Llave de
Bloqueo
Cuatro
Baterías
AA
Manual
de
Usuario
01 ¿QUÉ HAY EN LA CAJA?
02 USO PREVISTO
4
|MANUAL DE USUARIO- ESPAÑOL
03 INSTRUCCIONES DE CONFIGURACIÓN
Encender la Unidad
1.Saque las cuatro pilas AA de su
embalaje.
2.Retire el panel de la batería en la
parte inferior de la unidad.
3. Inserte las cuatro baterías AA correctamente
en el dispositivo y reemplace el panel de la
batería.
4. De le vuelta a la unidad y la pantalla debería
estar operativa.
Desbloqueo / Bloqueo del Aparato
El Med-E-Lert™ tiene una función
de seguridad para reducir las
posibilidades de robo y / o
manipulación. Viene con una llave
de barril personalizada que le permite bloquear
y desbloquear el dispositivo, lo que permite el
acceso a la bandeja de pastillas y los controles.
4
|MANUAL DE USUARIO- ESPAÑOL
06146-14

5
|MANUAL DE USUARIO- ESPAÑOL
Abrir la Tapa
Ahora que el dispositivo está
encendido y desbloqueado, tendrá
acceso a los controles de la
interfaz abriendo la tapa.
1. Asegúrese de que su dispositivo esté
desbloqueado.
2. Presione hacia adentro en la pestaña en el
frente de la máquina (es parte de la tapa).
3. Con un movimiento de pellizco con el pulgar y
el índice, agarre la tapa a través de la ventana
dispensadora y tire hacia arriba.
1. En la parte inferior del dispositivo, alinee e
inserte la llave cilíndrica en su cerradura.
2. Gire la llave un cuarto de vuelta hacia la
derecha para desbloquear el dispositivo.
3. Gire la llave un cuarto de vuelta hacia la
izquierda para bloquear el dispositivo.
6
|MANUAL DE USUARIO- ESPAÑOL
Diseño de Pantalla
Este diagrama describe el sig ado de los
símbolos/iconos que se encuentran en la pantalla.
Formatos de 12 / 24 Horas
El Med-E-Lert™ tiene guración
predeterminada un formato de 24
horas, también conocido como
hora militar. El símbolo AM o PM
aparecerá a la derecha de la hora cuando el reloj
esté en formato de 12 horas.
1. Mantenga presionados los botones 2 y 3
simultáneamente para cambiar entre formatos.
6
|MANUAL DE USUARIO- ESPAÑOL
06146-15

7
|MANUAL DE USUARIO- ESPAÑOL
Programar la Hora
Ahora que ha seleccionado el
formato de hora, es tiempo de
co reloj de su
Med-E-Lert™.
1. Mantenga presionado el botón 1 hasta que
los dígitos de la hora parpadeen.
»Bajar una hora: presione y suelte
rápidamente el botón 2.
»Desplazarse rápidamente hacia abajo en las
horas: mantenga pulsado el botón 2.
»Subir una hora: presione y suelte
rápidamente el botón 3.
»Desplazarse rápidamente hacia arriba en las
horas: mantenga pulsado el botón 3.
2. Una vez seleccionada la hora, presione y
suelte rápidamente el botón1 para nalizar la
hora y seguir para con urar los minutos.
»Bajar un minuto: presione y suelte
rápidamente el botón 2.
»Desplácese hacia abajo en minutos
rápidamente: presione y mantenga
presionado el botón 2.
8
|MANUAL DE USUARIO- ESPAÑOL
»Subir un minuto: presione y suelte
rápidamente el botón 3.
»Desplazarse hacia arriba en minutos
rápidamente: mantenga presionado el botón 3.
3. Mantenga presionado el botón 1 durante varios
segundos para nalizar el tiempo y regresar al
menú principal.
Configurar la Alarmas
Ahora que su hora está co ,
necesita con gurar su alarma(s).
Puede co asta seis alarmas
para satisfacer sus necesidades.
1. Presione y suelte rápidamente el botón
1 y cuatro guiones deberán comenzar a
parpadear en la pantalla, junto con “A1” en la
parte superior izquierda de la pantalla.
»Bajar un minuto: presione y suelte
rápidamente el botón 2.
»Desplazarse rápidamente hacia abajo en las
horas: mantenga pulsado el botón 2.
»Subir una hora: presione y suelte
8
|MANUAL DE USUARIO- ESPAÑOL
06146-16

9
|MANUAL DE USUARIO- ESPAÑOL
rápidamente el botón 3.
»Desplazarse rápidamente hacia arriba en las
horas: mantenga pulsado el botón 3.
2. Una vez seleccionada la hora, presione el
botón 1 nuevamente para alizar y mover para
co los minutos.
»Bajar un minuto: presione y suelte rápidamente
el botón 2.
»Desplácese hacia abajo en minutos
rápidamente: presione y mantenga
presionado el botón 2.
»Subir un minuto: presione y suelte
rápidamente el botón 3.
»Desplazarse hacia arriba en minutos
rápidamente: mantenga presionado el botón 3.
3. Una vez que se hayan seleccionado las horas
y los minutos para los eventos programados,
presione y suelte rápidamente el botón 1 para
pasar a la siguiente alarma.
4. Repita los pasos uno y dos con las alarmas
10
|MANUAL DE USUARIO- ESPAÑOL
Configuración del Tono de Alarma
Puede seleccionar entre tres tonos
de alarma o un modo silencioso.
El modo silencioso no permite que
se active una alarma audible, pero
aún permite que la luz parpadee durante las
alarmas programadas.
1. 1. Primero presione y mantenga presionado
el botón 3.
2. Para moverse entre los tonos de alarma,
restantes, hasta seis veces.
»Si no necesita ninguna alarma adicional,
presione y suelte rápidamente el botón 1 a
través de las alarmas restantes para omitirlas
(2-6).
»Después de presionar el botón 1 después de
la sexta alarma, volverá a la pantalla principal.
»Si necesita eliminar las alarmas, simplemente
vaya a la alarma que desea eliminar y
retroceda el tiempo hasta que solo vea cuatro
guiones (--:--).
10
|MANUAL DE USUARIO- ESPAÑOL
06146-17

11
|MANUAL DE USUARIO- ESPAÑOL
Cargar Su Medicamento
Ahora que hemos con gurado
la hora y las alarmas, es hora de
seleccionar el anillo de cación
apropiado para ayudar guiar donde
colocar su(s) medicamento(s).
(Consejo: agrupe sus medicamentos /
suplementos por la hora del día en que los toma;
mientras mantiene presionado el botón 3,
presione el botón 1.
En la pantalla, verá la letra “a” en un
círculo. Este es el primer tono de
alarma. Hay tres tonos de alarma, lo
que que verá las letras “a”,
“b” o “c” dentro de un círculo, lo que indica qué
tono se elige.
3. Cada vez que presione el botón 1 mientras
mantiene presionado el botón 3, pasará por
cada tono de alarma. Si no ve una letra con
un círculo alrededor, signi ca que la alarma
audible está apagada y la alarma visual está
encendida.
12
|MANUAL DE USUARIO- ESPAÑOL
esto le ayudará cuando llega el momento de
colocarlos en la bandeja de pastillas.)
(Consejo: agrupe sus medicamentos / suplementos
por hora del día en que los toma; esto te ayudará
cuando llega el momento de colocarlos en la
bandejade pastillas.)
Nota: algunos anillos
de dosi ción tienen
una parte roja; no
coloque medicamentos
en los compartimentos
correspondientes, ya
que esas ranuras deben
permanecer vacías.
(Consejo: la cantidad de días que se repite
consecutivamente en cualquier anillo de dosificación
es la dosis de medicamento por día. Por ejemplo,
si el número máximo de veces que toma cualquier
medicamento / suplemento es dos veces al día, desea
seleccionar la dosis anillo que se repite dos veces cada
día de la semana: lunes por la mañana / lunes por la
noche; martes por la mañana; martes por la noche,
etc.)
12
|MANUAL DE USUARIO- ESPAÑOL
06146-18

13
|MANUAL DE USUARIO- ESPAÑOL
1x / anillo de
día
2x / anillo de
día
»Una dosis de medicamento al día se repone
cada 28 días.
»Dos dosis de medicamentos al día,
reposición cada 14 días.
»Resurtidos de tres dosis de medicamentos
al día cada 9 días.
»Reabastecimiento de cuatro dosis de
medicamentos al día cada 7 días.
»Resurtidos de cinco dosis de medicamentos
al día cada 5 días.
»Seis dosis de mediación al día se repiten
cada 4 días.
06146-19
14
|MANUAL DE USUARIO- ESPAÑOL
1. Elija el anillo de dosi ación adecuado
para satisfacer sus necesidades de toma
de medicamentos y sáquelo de sus
perforaciones.
2. Doble las pestañas del anillo de dosi cación
hacia abajo.
3. Coloque el anillo de dosi cación en la
bandeja de pastillas. (Nota: debe rodear la
interfaz en el centro).
»(Consejo: para
asegurar aún más el
anillo ación
en el Med-E-Lert
™, puede usar cinta
adhesiva de doble
cara debajo de las
pestañas del anillo
de do ación.)
4. Limpie la bandeja de pastillas con un paño
húmedo tibio para limpiarla, luego séquela
antes de insertar los medicamentos.
14
|MANUAL DE USUARIO- ESPAÑOL

06146-20
15
|MANUAL DE USUARIO- ESPAÑOL
5. Coloque su
medicamento enlos
compartimentos y use
el anillo ación
como guía sobre
dónde colocar cada
medicamento.
Apagar la Alarma
Levante la unidad e inclínela para
dispensar el contenido por la
ventana de la tapa en su mano o
en un recipiente adecuado.
16
|MANUAL DE USUARIO- ESPAÑOL
Alerta de Batería y Modo de Espera
Cuando las baterías tienen menos de 4.0V, el
icono de batería baja aparecerá en la parte
superior derecha de la pantalla.
»(Nota: este icono solo se mostrará una
vez que sea el momento de reemplazar
las baterías; las cuatro baterías AA deben
reemplazarse por otras nuevas y orientarse
en la dirección correcta.)
»Si no se realiza ninguna operación durante
un minuto, el Med-E-Lert ™ entrará en
modo de espera / suspensión para ahorrar
batería. Para reactivar su unidad, recójala
e inclínela como si estuviera dispensando
medicamento o presione y suelte
rápidamente el botón 3 en la interfaz.
16
|MANUAL DE USUARIO- ESPAÑOL
This manual suits for next models
2
Table of contents
Languages:
Popular Dispenser manuals by other brands


Perrin & Rowe
Perrin & Rowe Country 6695 Installation & user guide

WAXIE
WAXIE SOLSTA PDC instruction sheet

Bunn
Bunn JDF-2S Service & repair manual

Wellsys
Wellsys WS 15000 user manual

Stern Engineering
Stern Engineering TRENDY FOAM Installation and maintenance guide

ophardt
ophardt ingo-man plus IMP XLS E/30 ST liquid manual


