Medela Sonata User manual

SonataTM
Instructions for use
PLEASE SAVE THESE INSTRUCTIONS

Questions? Visit www.medela.com or call us at 1-800-435-8316.
2
1. Important Safeguards
WARNING: To avoid fire, electrocution, or serious burns:
• This is a single-user product. Use by more than one person may present a health risk and voids the
warranty.
• Always unplug electrical product immediately after use except for when charging.
• Do not place or store product where it can fall or be pulled into a tub or sink.
• The breast pump and accessories are not heat-resistant: keep away from heated surfaces or open
flames.
• Do not use near flammable materials.
• The breast pump should never be left unattended when plugged into a power source.
• Never operate an electrical device if it has a damaged cord or plug, is not working properly, or if it
has been dropped or damaged. If damage is found, immediately discontinue use and call Medela
Customer Service at 1-800-435-8316.
• Do not use an electrical outlet device that has been exposed to water or other liquids including:
- Do not use while bathing or showering.
- Never place or drop into water or other liquids.
- Do not run water over breast pump.
- If a device has been exposed to water or other liquids, do not touch, unplug the device from
electrical outlet, turn off and contact manufacturer.
T
The defined signal words identify all instructions that are important to safety. Failure to observe
these instructions can lead to injury or damage to the breast pump or yourself. When used in
conjunction with the following words, the defined signal words stand for:
WARNING Can lead to serious injury or death.
CAUTION Can lead to minor injury.
NOTE Can lead to material damage.
TIP Useful or important information that is not related to safety.
When using electrical products, especially when children are present, basic safety
precautions should always be followed.
READ ALL INSTRUCTIONS BEFORE USING THIS PRODUCT.

Questions? Visit www.medela.com or call us at 1-800-435-8316. 3
WARNING: To avoid health risk and reduce the risk of injury:
• This device cannot be serviced or repaired. Do not repair yourself. Do not modify the device.
• Never use a damaged device. Replace damaged or worn parts.
• Use only the power adaptor that comes with the breast pump.
• Use the breast pump only for its intended use as described in this manual.
• Do not use the breast pump while sleeping or overly drowsy.
• Do not use Sonata breast pump while operating a moving vehicle.
• Inspect all appropriate pump components before each use.
• If tubing becomes moldy, discontinue use and replace tubing.
• Pumping can induce labor. Do not pump until after giving birth. If you become pregnant while
breastfeeding or breast pumping, consult with a licensed healthcare professional before continuing.
• If infected with Hepatitis B, Hepatitis C, or Human Immunodeficiency Virus (HIV), pumping
breast milk will not reduce or remove the risk of transmitting the virus to your baby through
your breast milk.
• Do not microwave or boil breast milk. Microwaving can cause severe burns to baby’s mouth
from hot spots that develop in the milk during microwaving. (Microwaving can also change the
composition of breast milk.)
• Clean and sanitize all parts that come into contact with your breast and breast milk prior to
first use.
• Wash all parts that come into contact with your breast and breast milk after every use.
• Only use Medela recommended parts with your SonataTM Breast Pump.
• Close supervision is necessary when the breast pump or accessories are used in the
vicinity of children.

Questions? Visit www.medela.com or call us at 1-800-435-8316.
4
CAUTION: Can lead to minor injury:
• Portable and mobile radio frequency communications equipment can affect the breast pump.
• Make sure the voltage of the power adaptor is compatible with the power source. See Section 23
for technical specifications.
• Wash hands thoroughly with soap and water before touching breast pump, kit and breasts, and
avoid touching the inside of bottles or lids.
• Separate and wash all parts that are exposed to breast milk immediately after use. This will help
remove breast milk residue and prevent growth of bacteria.
• Always inspect breast shields, connectors, valves, membranes, bottles, lids, and tubing prior to
use for cleanliness. Contact Medela Customer Service if cleaning does not resolve the issue.
• Only use drinking-quality tap or bottled water for cleaning your breast pump and parts.
• Do not store wet or damp parts as mold may develop.
• Do not run pump with wet tubing. Doing so may damage the breast pump.
• If you are experiencing discomfort at the base of the nipple due to rubbing of your breast
tissue against the breast shield tunnel, use of a lubricant such as Tender CareTM Lanolin may be
beneficial. For assistance with correct breast shield sizing and comfort please visit
www.MedelaBreastshields.com or see a lactation consultant/breastfeeding specialist.
• If pumping is uncomfortable or causing pain, turn the unit off, break the seal between the breast
and the breast shield with your finger and remove the breast shield from your breast.
• Contact your health care professional or breastfeeding specialist if you can express only minimal
or no milk or if expression is painful. See Section 7 & 8 for more information.
• While some discomfort may be felt when first using a breast pump, using a breast pump
should not cause pain. For assistance with correct breast shield sizing and comfort please visit
www.MedelaBreastshields.com or see a lactation consultant / breastfeeding specialist.
• Do not try to express with vacuum that is too high and uncomfortable (painful). The pain, along
with potential breast and nipple trauma, may decrease milk output.
• Make sure tubing is not kinked or pinched while pumping.
• Do not hold the pump kit by the bottle. This can lead to blockage of the milk ducts and
engorgement. See Section 11 for more information.
• The breast pump uses Bluetooth®technology. Please follow your air carrier rules for the use of
Portable Electronic Devices when flying with your breast pump.
• Using a breast pump on an aircraft is not recommended. The cabin pressure may affect the breast
pumps performance.
Note
• Plastic bottles and parts become brittle when frozen and may break when dropped.
• Bottles and parts may become damaged if mishandled (e.g., dropped, over-tightened,
or knocked over).
• Take appropriate care in handling bottles and components.
• Do not use the breast milk if bottles or components become damaged.
1. Important Safeguards (cont.)

Questions? Visit www.medela.com or call us at 1-800-435-8316. 5
PLEASE SAVE THESE INSTRUCTIONS.
THIS IS A SINGLE-USER PRODUCT.
Indications for use
The SonataTM breast pump is a powered breast pump to be used by lactating women to
express and collect milk from their breast. The Sonata Breast Pump is a single
user device.
Tip
It is best to wait until your breast milk routine is established (approximately 4 weeks)
before expressing breast milk, unless otherwise advised by your healthcare professional.
If you have medical reasons or other needs for exclusively pumping, it is recommended
that you use a hospital-grade (multi-user) breast pump such as the Medela Symphony®
Breast Pump. To learn more, visit www.medelabreastfeedingus.com.
Contraindications for use
Product Description
This breast pump is a personal-use electric breast pump that includes 2-Phase
Expression®technology and is capable of single and double pumping.
The operating life of this breast pump is defined to be approximately three 15-minute
sessions per day, for one year. The operating life for the breast pump kit is 6 months.
There are no known contraindications for use with this product.
T

Questions? Visit www.medela.com or call us at 1-800-435-8316.
6

Questions? Visit www.medela.com or call us at 1-800-435-8316. 7
1. Important Safeguards ................................................................................................2-5
2. Product Description ................................................................................................... 8-9
3. Getting Started............................................................................................................. 10
4. Cleaning Overview....................................................................................................... 11
5. Cleaning Instructions .............................................................................................12-13
6. Breast Pump & Tubing Care...................................................................................14-15
6A Cleaning the breast pump ......................................................................................... 14
6B Tubing care ............................................................................................................... 15
7. Breastfeeding Information.......................................................................................... 16
8. Breast Shield Sizing..................................................................................................... 17
9. Assembling Your Breast Pump..............................................................................18-19
10. Powering Your Breast Pump..................................................................................20-22
10A Charging your breast pump..................................................................................... 20
10B Battery care & status codes ............................................................................... 20-21
10C Power adaptor care................................................................................................. 22
10D Traveling outside the U.S......................................................................................... 22
11. Operating Your Breast Pump.................................................................................23-26
11A Glossary, controls & icons........................................................................................ 23
11B Single pumping ....................................................................................................... 24
11C Double pumping...................................................................................................... 24
11D Pumping steps................................................................................................... 25-26
12. Finding Your Maximum Comfort VacuumTM ............................................................... 27
13. Features................................................................................................................... 28-33
Breast Pump Connectivity.......................................................................................... 28-29
Selecting a rhythm.......................................................................................................... 30
Setting the timer ............................................................................................................. 31
Pausing your breast pump.............................................................................................. 32
Silencing your breast pump chimes ................................................................................ 33
14. Storing Breast Milk...................................................................................................... 34
15. Preparing & Feeding Breast Milk ............................................................................... 35
16. Troubleshooting ......................................................................................................36-41
Air leak alert.................................................................................................................... 36
Battery drained ............................................................................................................... 37
Battery broken................................................................................................................ 38
Bluetooth broken ............................................................................................................ 39
General alert ................................................................................................................... 40
Additional troubleshooting............................................................................................... 41
17. Long-term Storage ...................................................................................................... 42
18. Disposal........................................................................................................................ 43
19. Supplemental Information .......................................................................................... 44
20. Warranty ....................................................................................................................... 45
21. Meaning of Symbols.................................................................................................... 46
22. EMC/Technical Description ...................................................................................47-53
23. Technical Specifications ............................................................................................. 54
Table of Contents
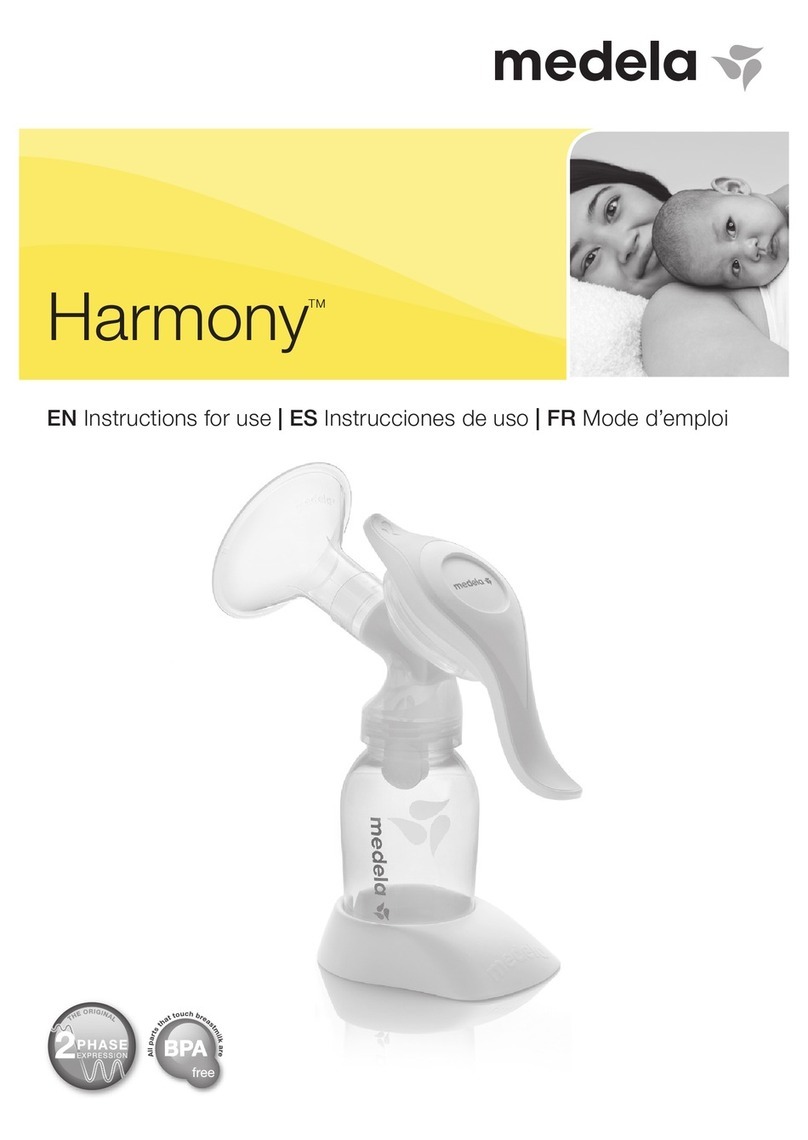
AUTHENTIC
medela spare parts
Quality &performance
you can trust Questions? Visit www.medela.com or call us at 1-800-435-8316.
8
2x PersonalFit™
Breast Shields
(24 mm)
Applied Part
2x PersonalFit™
Breast Shields
(27 mm)
Applied Part
For other breast shield sizes,
see Section 8
Replacement 87073 (24 mm)
Replacement 87274 (27 mm)
4x Bottles
Item 6007135
4x Lids
Item 8107183
2x Bottle stands
Item 8107322
2x Membranes
Item 8207086
Replacement 68055
2x Connector caps
Item 8007282
2x Valves
Item 6007151
2x Connector
bodies
Item 101033253
2. Product Description
2x Breast shield
assemblies
Replacement 68054
Your breast pump system includes
Medela reserves the right to substitute any component or
accessory with a replacement of equivalent performance.
(1x) Power adaptor
Item 9007068
Replacement 68050
1x Ice pack
Ite m 8117010
Replacement 87092
1x Cooler bag
Item 3007304
Replacement 67068
(replacement includes ice
pack & 4 bottles with lids)
1x Bag
Item 3007396
Replacement 68052

Questions? Visit www.medela.com or call us at 1-800-435-8316. 9
Rhythm
(1x) Power adaptor
Item 9007068
Replacement 68050
1x Tubing
Item 8007278
Replacement 68053
Speed/Vacuum
level
Rhythm selection
Decrease vacuum
Programmable
timer
Start/Stop
Stimulation phase
Expression phase
One-touch letdown
Increase vacuum
Silence control
Status icon light
sonata
Display Icons
Controls
Air leak alert Battery status
External power connected
Chimes “off”
Timer “on”
Bluetooth®
connectivity
sonata
Tubing
port
sonata
Power adaptor
port
Power button
Handle
1x Breast pump
Short Tubing
(connects to breast
shield assemblies)
Tubing
Holder
Long Tubing
(connects to
breast pump)

Questions? Visit www.medela.com or call us at 1-800-435-8316.
10
3. Getting Started
Note
It is important for you to do the following before using your breast pump for the first time:
1. Plug the Sonata into an external power source. Charge the battery for 12 hours.
(See Section 10, Powering Your Pump).
2. Separate all parts that are exposed to the breast or breast milk prior to cleaning.
3. Clean - see Section 5.
Use your thumb to
separate the connector
cap and body.
Pull down on valve
to remove from
connector body.
Do not rotate.
Parts to clean
Separate all parts that are exposed to
the breast and breast milk prior to cleaning.

Questions? Visit www.medela.com or call us at 1-800-435-8316. 11
When to Wash Breast
Shields
Breast
Pump
Kit
Bottles
& Lids
Before 1st use 3 wash
3 sanitize
3 wash
3 sanitize
3 wash
3 sanitize
After each use 3 wash 3 wash 3 wash
Once per day 3 sanitize 3 sanitize 3 sanitize
4. Cleaning Overview
sonata
Washing and sanitizing are two different activities. They must be done separately to protect
you, your baby and the performance of your breast pump.
Wash – To clean the surfaces of the parts by physically removing contamination.
Sanitize – To kill living organisms, such as bacteria or viruses, that may be present on the
surfaces of the parts.
Detailed cleaning instructions on pages 12-15:
• Wash – Section 5
• Sanitize – Section 5
• Breast Pump and Tubing Care – Section 6
When to Wash Tubing Breast
Pump
Carry
Bag
As needed 3 See tubing care -
Section 6
3 wipe with clean,
damp cloth
3 wipe with clean,
damp cloth

Questions? Visit www.medela.com or call us at 1-800-435-8316.
12
Supplies needed:
• Mild dish soap or Medela Quick
Clean™Breastmilk Removal Soap
• Clean dish towel or soft brush
• Clean sink or bowl
• Drinking-quality water
• Tongs
• Clean pot for boiling water
Parts to wash or sanitize:
• Breast shields
•Breast milk bottles
•Lids
•Connector bodies
•Valves
•Membranes
•Connector caps
5. Cleaning Instructions
1. Disassemble
Separate parts
for washing.
• If using the dishwasher, parts may
become discolored. This will not impact
part function.
• Tubing should only be washed if dirty or
milk is present.
See Section 6 for more details.
Tip
T
Note
• Take care not to damage parts of the
breast pump kit during cleaning.
• Store the dry breast pump kit in a clean
bag/container until next use.
• Wash hands thoroughly.
• If you notice a white residue on your
breast pump parts after boiling, your
water may have a high mineral content.
Remove residue by wiping parts with a
clean cloth and allow to air dry.
• Distilled water is recommended when
boiling parts to prevent substantial
mineral build-up over time, which may
compromise your parts.
• Separate and wash all parts that are
exposed to breast milk immediately after
use. This will help to remove breast milk
residue and prevent growth of bacteria.
• Only use drinking-quality tap or bottled
water for cleaning.
• When cleaning the valves do not use small
objects such as brushes. Be careful not to
puncture.
Caution

Questions? Visit www.medela.com or call us at 1-800-435-8316. 13
2. Wash
Before first use and after each use
OR
quick clean
micro-steam bag
STEAM CLEAN YOUR
ACCESSORIES AFTER EVERY USE
steam vent / pour spout
thoroughly disinfects most breastpump
accessories, bottles, nipples, paciers,
and cups
steam cleaning kills 99.9% of most
harmful bacteria and germs
works in approximately 3 minutes
20 uses per bag
This bag will hold:
-2 breastshields and valve membranes or
-2 5oz (150ml) breastmilk bottles and caps, or
-2 - 8oz (250ml) breastmilk bottles and caps
quick clean
micro-steambag
quickclean
micro-steambag
3. Sanitize
Before first use and once per day
OR
Step 1 – Fill pot with water to cover all
parts. Bring to a boil.
Step 2 – Place parts in boiling water for
10 minutes.
Step 3 – Allow parts to air dry. Store
dry parts in a cool place
when not in use. Do not
store wet or damp parts.
Step 1 – Use Medela's Quick Clean™
Micro-Steam™bags.
Sold separately (Follow
instructions as provided on bag)
Step 2 – Place parts on a clean surface
and/or towel. Allow parts to air
dry. Store dry parts in a cool
place when not in use. Do not
store wet or damp parts.
Microwave
StovetopSink
Dishwasher
Step 1 – Rinse all separated parts that
touch the breast and breast
milk in cool water to remove
breast milk residue.
Step 2 – Soak in warm soapy water for
5 minutes, then wash and rinse.
Step 3 – Allow parts to air dry. Store
dry parts in a cool place
when not in use. Do not
store wet or damp parts.
Step 1 – Wash all separated parts by
using the top rack of your
dishwasher.
Step 2 – Place parts on a clean surface
and/or towel. Allow parts to air
dry. Store dry parts in a cool
place when not in use. Do not
store wet or damp parts.
10
minutes
5
minutes

Questions? Visit www.medela.com or call us at 1-800-435-8316.
14
sonata
1
6. Breast Pump & Tubing Care
Warning
• Do not immerse the
breast pump in water;
do not run water over
the breast pump.
• When cleaning the
breast pump display,
only use a damp, soft
cloth with mild dish
soap. Other cleaners or abrasive cloths
may degrade the display performance.
Wipe pump unit with a clean,
damp cloth.
6A. Cleaning the breast pump
Supplies needed:
• Mild dish soap
• Clean dish towel
• Clean sink or bowl
• Drinking-quality water
Parts needed:
• Tubing
• Breast pump
sonata
Tip
T
• Tubing should only be washed
if dirty or milk is present. Follow
instructions in Section 6B.
• There is no need to clean tubing
if condensation inside the tube
is from previous washings or
atmospheric conditions. Follow
drying instructions in Section 6B.

Questions? Visit www.medela.com or call us at 1-800-435-8316. 15
sonata
2
43
Caution
• Do not store wet or damp parts as mold may
develop.
• If tubing becomes moldy, discontinue use and
replace tubing. To find replacement parts visit
www.ShopMedela.com.
• Do not use breast pump with wet tubing;
doing so will cause damage to your breast
pump.
6B. Tubing care
To properly clean your tubing
Washing tubing
• Rinse tubing in cool water.
• Wash tubing in warm, soapy water.
• Rinse tubing with clear water.
• Shake out water droplets.
• Hang to air dry.
• Tubing does not need to be washed
before first use.
• Inspect tubing after each pumping
session.
Turn off breast pump and unplug
from power source.
To remove tubing from the breast
pump, grab the tube adaptor and pull
directly from the tubing port. Do not
wiggle or pull tubing at an angle.
Remove tubing from breast shield.
1

Questions? Visit www.medela.com or call us at 1-800-435-8316.
16
Common pumping questions & answers
How often should you breast pump?
A breast pump is a replacement for when you are separated from your baby. It is important to
pump when the baby would normally be breastfeeding. For example, a working mother may
pump 2-3 times during an 8-hour work day.
How long should your pumping session last?
Pumping times can vary from mother to mother. Pumping sessions usually last from
15 to 30 minutes.
How should your breasts feel before and after pumping?
Before pumping, your breasts will have a firm, heavy feeling. After pumping, your breasts should
feel soft with no firm areas. Firm areas could indicate that the breast is not completely drained.
7. Breastfeeding Information

Questions? Visit www.medela.com or call us at 1-800-435-8316. 17
8. Breast Shield Sizing
Caution
• While some discomfort may be felt when first using a breast pump, using a breast pump
should not cause pain. If you are unsure about breast shield sizing, please contact a health
care professional or breastfeeding specialist who can help you get a proper fit.
• If you are experiencing discomfort at the base of the nipple due to rubbing of your breast
tissue against the breast shield tunnel, use of a lubricant such as Tender CareTM Lanolin
may be beneficial.
1. Medela’s PersonalFit™sizing
Pumping should not hurt. For maximum comfort and pumping efficiency, Medela offers five breast
shield sizes.
Visit MedelaBreastshields.com to view the full guide to help you determine your optimal size based
on your nipple diameter.
2. Test your breast shield size
1. Start with the 24 mm that came with your pump, or the size determined by measuring.
2. Center nipple and gently hold breast shield against your breast.
3. Adjust for Maximum Comfort Vacuum™, to achieve optimum suction level.
4. Refer to images while pumping in expression.
3. Should you try a new size?
• Does your nipple rub sides of tunnel, to the point of causing discomfort?
• Do you see excessive areola being pulled into tunnel?
• Do you see any redness?
• Is your nipple or areola turning white?
• Do you feel unexpressed milk after pumping?
If you answered “YES” to any of these questions, consider trying a new size by following the
measuring instructions above.
If you are still unsure if you selected the correct size, see a lactation consultant, breastfeeding
specialist, or visit MedelaBreastshields.com for assistance in choosing the right size breast shield.
36
mm
27
mm 30
mm
24
mm
21
mm
Too Small
Nipple
Areola
Nipple
Areola
Nipple
Areola
Correct Fit
Nipple
Areola
Nipple
Areola
Nipple
Areola
Too Large
Nipple
Areola
Nipple
Areola
Nipple
Areola
• Nipple rubs along
side of tunnel
• Try a larger size • Nipple is centered
and moves freely
• Nipple and excessive
areola are pulled into
the tunnel
• Try a smaller size

Questions? Visit www.medela.com or call us at 1-800-435-8316.
18
Tip
T
Tip
T
• Only use Authentic Medela Spare
Parts. See Section 2 for details.
• Check breast pump kit components
for wear or damage before use.
Replace if necessary.
• Always inspect all parts prior to use
for cleanliness. If dirty, see
Section 4.
• To prevent damage to the breast
pump all components must be
completely dry before use.
Parts Needed:
• Tubing
• Breast pump
• Breast shields
• Breast milk bottles
• Lids
• Connector bodies
• Valves
• Membranes
• Connector caps
Using the two legs as guides, insert the
connector body onto the valve.
Insert short tubing into the
connector cap until snug.
9. Assembling Your Breast Pump
Wash hands thoroughly with soap
and water before touching breast pump,
breast pump kit and breasts. Avoid
touching the inside of containers
and lids.
4
7
1

Questions? Visit www.medela.com or call us at 1-800-435-8316. 19
sonata
• Carefully insert the (dark yellow)
membrane into the top of the
connector body.
• The membrane must be secure for
correct assembly.
Press the connector cap onto the
connector body. It will snap closed.
Fasten the bottle onto the complete
breast shield assembly.
Insert the long tubing end into the
breast pump as far as it will go.
Push breast shield onto the
connector body.
Accurately assembled system.
65
sonata
8
Snap
32

Questions? Visit www.medela.com or call us at 1-800-435-8316.
20
Power AdaptorRechargeable Battery
10B. Battery Care
10A. There are Two Ways to Power Your Breast Pump for Your
Pumping Session:
• Plug power cord into the power
adaptor port on the back of the
breast pump. Plug power cord
into power source.
• Proceed to Section 11, Operating
Your Breast Pump to begin your
pumping session.
Your breast pump contains a Lithium ION rechargeable battery.
10. Powering Your Breast Pump
2
sonata
1
• Before first use, charge the breast
pump battery for 12 hours with the
power adaptor. The battery icon
will appear fully charged on the
display when charging is complete.
• Proceed to Section 11, Operating
Your Breast Pump, to begin your
pumping session.
• Before using on battery power for the first time, fully charge your breast pump for
12 hours.
• You can use your breast pump while charging the battery. The battery will charge as soon as
the breast pump is connected to a power source. It will not charge while the pump is running.
• Keep your pump in a cool place.
• Keep your battery charged.
• Fully charge the battery before storing your pump for an extended period of time.
• Recharge the battery before it completely drains. This is better for the lifecycle of
the battery.
• If your breast pump has been stored in a hot location, it may not run on battery power
right away. To resume normal battery function, allow the breast pump to cool for one hour.
During this time, you can use your breast pump when plugged into external wall power.
Tip
T
OR
Table of contents
Other Medela Breast Pump manuals

Medela
Medela Symphony User manual

Medela
Medela Symphony User manual

Medela
Medela Pump In Style User manual

Medela
Medela Swing User manual

Medela
Medela Symphony User manual

Medela
Medela 57018W User manual

Medela
Medela Symphony User manual

Medela
Medela Harmony Assembly instructions

Medela
Medela Swing User manual

Medela
Medela PersonalFit PLUS User manual

Medela
Medela Symphony User manual

Medela
Medela Mini Electric User manual

Medela
Medela Symphony User manual

Medela
Medela Symphony User manual

Medela
Medela Solo User manual

Medela
Medela Symphony User manual

Medela
Medela Symphony User manual

Medela
Medela Freestyle User manual

Medela
Medela Mini Electric User manual

Medela
Medela Lactina User manual